Articles
How To Wire A 220 Volt Electric Motor
Modified: August 27, 2024
Learn how to wire a 220 volt electric motor with this helpful guide. Our articles provide step-by-step instructions for proper installation and safety precautions.
(Many of the links in this article redirect to a specific reviewed product. Your purchase of these products through affiliate links helps to generate commission for Storables.com, at no extra cost. Learn more)
Introduction
Welcome to the world of electrical motors! If you are looking to wire a 220-volt electric motor, you’ve come to the right place. Whether you are setting up a new motor or replacing an existing one, understanding the proper wiring procedures is essential for safe and efficient operation. This comprehensive guide will walk you through the steps to wire a 220-volt electric motor, ensuring that you get the job done correctly.
Before we dive into the details, it’s crucial to prioritize safety. Working with electricity can be dangerous, so make sure to follow safety precautions at all times. Always turn off the power supply and use proper protective equipment, such as gloves and safety goggles. If you are unsure about any aspect of the wiring process, consult a licensed electrician.
To wire a 220-volt electric motor, you will need a few tools and materials. These include:
- Wire strippers
- Wire nuts
- Electrical tape
- Phillips and flathead screwdrivers
- Wire cutters
- Voltage tester
Now that we have the necessary safety precautions in mind and the tools at our disposal, let’s move on to the step-by-step process of wiring a 220-volt electric motor.
Key Takeaways:
- Prioritize safety by turning off the power supply, using protective equipment, and seeking professional assistance if unsure. Double-check connections to ensure secure wiring for a 220-volt electric motor.
- Familiarize yourself with the motor’s specifications, prepare the power supply, and follow step-by-step instructions to wire a 220-volt electric motor safely and efficiently. Always prioritize safety and seek professional assistance if needed.
Safety Precautions
Working with electricity can be hazardous, so it is crucial to follow proper safety precautions when wiring a 220-volt electric motor. Here are a few essential safety tips to keep in mind:
- Turn off the power supply: Before starting any electrical work, ensure that the power supply is turned off. This can be done by shutting off the circuit breaker or unplugging the motor from the power source. Taking this step will protect you from accidental electric shock.
- Use proper protective equipment: Always wear appropriate protective gear when working with electricity. This includes safety goggles to protect your eyes from potential sparks or debris, and insulated gloves to prevent electric shocks. Additionally, wearing non-conductive footwear and clothing can further minimize the risk of electrical accidents.
- Inspect the wiring: Before proceeding with any wiring work, inspect the motor and surrounding wiring for any signs of damage or wear. Look for frayed or exposed wires, loose connections, or any other potential hazards. If you notice any issues, repair or replace the damaged components before proceeding.
- Avoid working in wet conditions: Moisture and electricity do not mix. Make sure to perform the wiring in dry conditions to minimize the risk of electrical shock. If you must work in a damp environment, use insulated tools and ensure your hands are dry before handling any electrical components.
- Double-check connections: After completing the wiring, always double-check the connections to ensure they are secure. Loose connections can lead to overheating, sparking, or failure of the motor. Use wire nuts or suitable connectors, and tighten any screws or terminals to ensure a secure connection.
- Seek professional assistance if needed: If you are unsure about any aspect of the wiring process or encounter any complications, do not hesitate to seek the help of a licensed electrician. They have the expertise to handle electrical work safely and can ensure that the motor is wired correctly.
Remember, safety should always be your top priority when working with electricity. By following these precautions, you can minimize the risk of accidents and ensure a safe wiring process for your 220-volt electric motor.
Tools and Materials
Before we begin wiring a 220-volt electric motor, let’s make sure we have all the necessary tools and materials on hand. Here’s a list of items you’ll need:
- Wire strippers: These tools are essential for removing insulation from the wires, allowing you to make proper connections.
- Wire nuts: Wire nuts are used to secure and insulate connections between wires.
- Electrical tape: Electrical tape provides an additional layer of insulation and helps secure wire connections.
- Phillips and flathead screwdrivers: These screwdrivers will be used to loosen or tighten screws on wire terminals.
- Wire cutters: Wire cutters are necessary for cutting wires to the appropriate length.
- Voltage tester: A voltage tester is crucial for verifying if there is any electrical current present before starting any work.
In addition to these tools, you’ll also need the following materials:
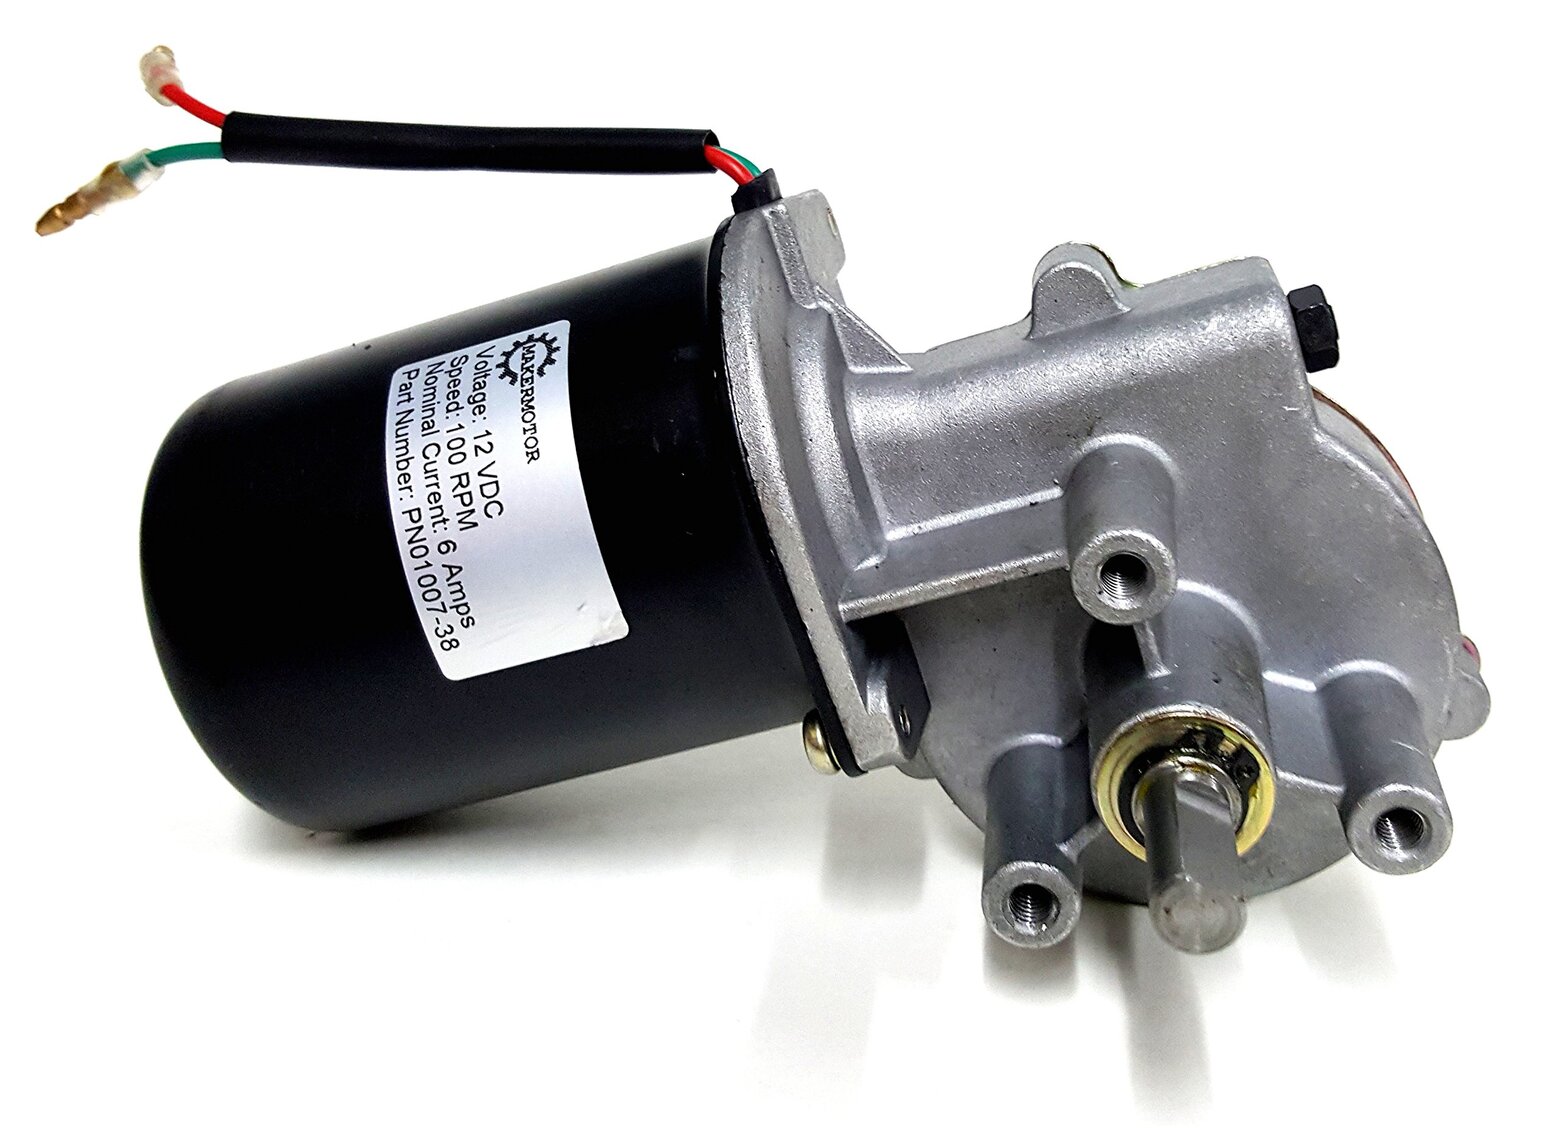
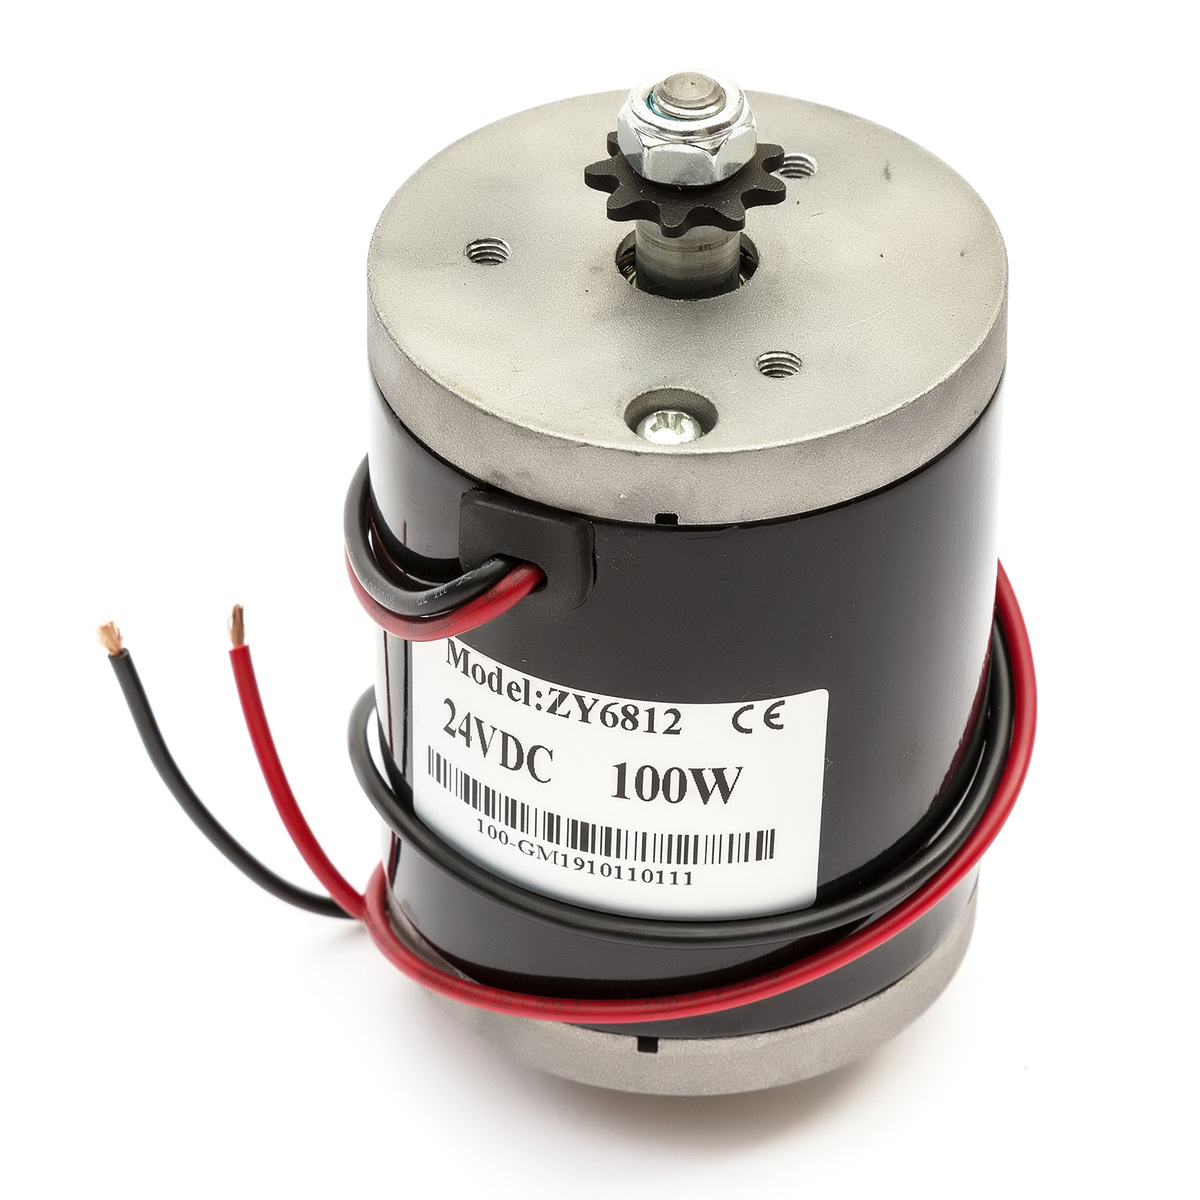
- 220-volt electric motor: Ensure that you have the correct motor for your specific application. Refer to the motor’s specifications to determine if it is compatible with your power supply.
- Electrical wires: Use wires that are rated for 220 volts and are appropriate for the motor’s current rating. Consult the motor’s manual or an electrician for guidance.
- Wire connectors: These connectors help create secure and reliable connections between the wires.
- Mounting hardware: Depending on the motor’s design and installation requirements, you may need screws or brackets for mounting the motor securely.
- Protective equipment: Safety goggles, insulated gloves, and non-conductive footwear are essential to protect yourself when working with electricity.
Having these tools and materials ready will ensure a smooth and efficient wiring process. Always use high-quality materials to ensure the safety and longevity of your motor.
Step 1: Read the Motor Specifications
Before diving into the wiring process, it is crucial to thoroughly read and understand the motor’s specifications. These specifications provide important information about the motor’s voltage, current rating, and wiring requirements. Here are the key details to look out for:
- Voltage: Determine if the motor operates on a 220-volt power supply. If not, make sure you have the correct motor for your specific voltage requirements.
- Current rating: The current rating indicates the amount of electrical current the motor requires to operate properly. Ensure that the power supply can meet the motor’s current demands.
- Wiring configuration: The motor’s wiring configuration will determine how the wires need to be connected. Note whether it requires a single-phase or three-phase wiring setup.
- Wire color code: Check if the motor has a specific wire color code to follow. This helps ensure the correct connections are made.
- Terminal types: Identify the types of terminals on the motor, such as screw terminals or spade terminals. Understand how to properly connect wires to these terminals.
By familiarizing yourself with the motor’s specifications, you can ensure that you wire it correctly and avoid any potential issues. If you are unsure about any aspect of the specifications or need additional guidance, consult the motor’s manual or seek the assistance of a licensed electrician.
Once you have a clear understanding of the motor’s specifications, you can move on to the next step of preparing the power supply for wiring the 220-volt electric motor.
Step 2: Prepare the Power Supply
Now that you have familiarized yourself with the motor’s specifications, it’s time to prepare the power supply for wiring the 220-volt electric motor. Follow these steps to ensure a proper and safe setup:
- Turn off the power: Before working with any electrical components, make sure to turn off the power supply by switching off the appropriate circuit breaker or unplugging the power source.
- Locate the power source: Identify the power source that will be providing the 220-volt supply for the motor. This could be a dedicated circuit or a power outlet with the correct voltage rating.
- Inspect the power source: Examine the power source and its wiring for any signs of damage or wear. Ensure that the wiring is in good condition with no exposed wires or loose connections. If any issues are found, consult a licensed electrician to address them before proceeding.
- Verify the voltage: Use a voltage tester to verify that the power source is indeed providing a 220-volt supply. Simply touch the voltage tester to the power source terminals or wires to confirm the voltage reading. Safety should always be a priority when working with electricity, so take precautions to prevent electrical shock.
- Install a disconnect switch: For added safety and convenience, consider installing a disconnect switch near the power source. This switch allows you to easily disconnect the power supply to the motor in case of emergencies or maintenance.
- Label the power supply: It is essential to label the power supply, clearly indicating that it is a 220-volt source. This will help others identify the correct voltage and prevent accidental connection of incompatible devices.
By carefully preparing the power supply, you are taking the necessary steps to ensure a safe and reliable connection for your 220-volt electric motor. Once the power supply is ready, you can proceed to the next step of connecting the ground wire.
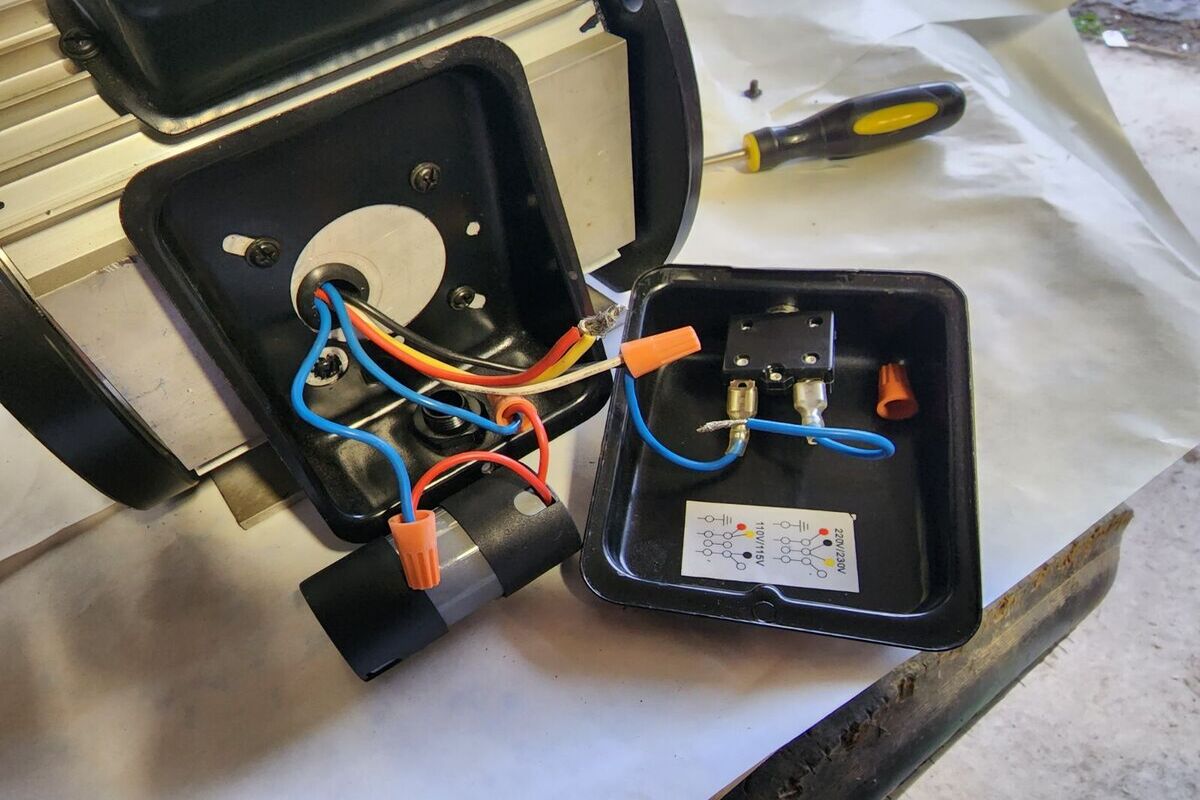
Step 3: Connect the Ground Wire
Grounding is an essential safety measure when wiring an electrical motor. The ground wire provides a path for electric current to safely discharge in the event of a fault or electrical malfunction. Follow these steps to connect the ground wire:
- Locate the ground terminal: Identify the ground terminal on the motor. This is often marked with the symbol for ground (a horizontal line intersecting three vertical lines) or the letter “G.”
- Prepare the ground wire: Cut a length of green or bare copper wire that is long enough to reach from the motor’s ground terminal to the ground connection point. Remove about half an inch of insulation from each end of the wire using wire strippers.
- Connect the ground wire: Attach one end of the ground wire to the ground terminal of the motor. Depending on the type of terminal, you may need to tighten a screw or use an appropriate connector. Ensure that the connection is secure.
- Find the ground connection point: Locate the ground connection point near the power source. This is usually a metal rod driven into the ground or a metal grounding busbar connected to the electrical system’s grounding circuit.
- Connect the other end of the ground wire: Attach the other end of the ground wire to the ground connection point. Again, tighten any screws or use appropriate connectors to ensure a secure connection.
- Test the ground connection: After completing the ground connection, use a continuity tester or a multimeter to verify that there is a proper electrical connection between the motor’s ground terminal and the ground connection point.
By connecting the ground wire, you are providing an important safety feature that helps protect against electrical shocks and potential electrical hazards. Ensure that the ground wire is securely connected and functioning properly before proceeding to the next step of connecting the hot wires.
When wiring a 220 volt electric motor, always use the proper gauge wire and a dedicated circuit with the correct amperage for the motor’s requirements. Be sure to follow the manufacturer’s wiring diagram for proper connections.
Step 4: Connect the Hot Wires
Connecting the hot wires is the next step in wiring a 220-volt electric motor. The hot wires are responsible for carrying the electrical current from the power source to the motor. Follow these steps to properly connect the hot wires:
- Identify the hot terminals: Locate the hot terminals on the motor. These terminals are typically labeled L1 and L2, or may be marked with “+” and “-” symbols.
- Prepare the hot wires: Cut two lengths of wire, one for each hot wire, that are long enough to reach from the power source to the motor. Use wire strippers to remove about half an inch of insulation from each end of the wires.
- Connect the hot wires to the motor: Attach one end of each hot wire to the respective hot terminal on the motor. Follow the wiring diagram provided in the motor’s specifications to ensure the correct connections. Tighten any screws or use appropriate connectors to ensure a secure connection.
- Trace the hot wires to the power source: Trace each hot wire back to the power source. It is important to keep the hot wires separated and insulated from each other to avoid electrical shorts or hazards.
- Connect the hot wires to the power source: Attach the free ends of the hot wires to the corresponding hot terminals in the power source. This could be a circuit breaker panel, an electrical outlet, or a junction box. Again, follow the proper wiring practices and regulations to ensure a secure and reliable connection.
- Double-check the connections: After connecting the hot wires, double-check that all the connections are secure and properly tightened. Inspect the wiring for any signs of damage or loose connections.
Always adhere to the motor’s specifications and wiring diagram when connecting the hot wires. This will ensure that the correct voltage is supplied to the motor and prevent any potential electrical issues. Once the hot wires are connected, proceed to the next step of connecting the neutral wires.
Step 5: Connect the Neutral Wires
Connecting the neutral wires is an important step in wiring a 220-volt electric motor. The neutral wires complete the circuit and provide a return path for the electrical current. Follow these steps to properly connect the neutral wires:
- Identify the neutral terminals: Locate the neutral terminals on the motor. These terminals are typically labeled N or may be marked with the symbol “N” or “N1”.
- Prepare the neutral wires: Cut two lengths of wire, one for each neutral wire, that are long enough to reach from the power source to the motor. Use wire strippers to remove about half an inch of insulation from each end of the wires.
- Connect the neutral wires to the motor: Attach one end of each neutral wire to the respective neutral terminal on the motor. Refer to the motor’s wiring diagram or specifications to ensure the correct connections. Secure the wires using screws or appropriate connectors.
- Trace the neutral wires to the power source: Trace each neutral wire back to the power source. Ensure that the neutral wires are separated and insulated from the hot wires to avoid any electrical shorts or hazards.
- Connect the neutral wires to the power source: Attach the free ends of the neutral wires to the corresponding neutral terminals in the power source. Again, follow proper wiring practices and regulations to ensure a secure and reliable connection.
- Double-check the connections: Once all the neutral wires are connected, double-check that all the connections are secure and properly tightened. Inspect the wiring for any signs of damage or loose connections.
By connecting the neutral wires, you are ensuring that the electrical current has a proper return path. This helps maintain the balance of the electrical system and promotes safe and efficient operation. After connecting the neutral wires, proceed to the next step of testing the wiring connections.
Step 6: Test the Wiring Connection
After completing the wiring process for your 220-volt electric motor, it is crucial to test the wiring connection to ensure that everything is functioning correctly. Testing the wiring connection guarantees that the motor is properly connected to the power supply and that all the connections are secure. Follow these steps to test the wiring connection:
- Double-check all connections: Before testing, visually inspect all the wiring connections. Ensure that all connections are secure, properly tightened, and free from any signs of damage or exposed wires.
- Turn on the power supply: Switch on the power supply and ensure that electricity is flowing to the motor.
- Verify motor operation: Activate the motor and observe its operation. Listen for any unusual noises or vibrations that could indicate a wiring issue.
- Check for proper rotation: Ensure that the motor is rotating in the correct direction. Incorrect rotation can be corrected by swapping the positions of any two hot wires.
- Use a voltage tester: With the motor powered on, use a voltage tester to confirm that electricity is flowing correctly. Test between each hot wire and the neutral wire to ensure that the voltage readings are within the motor’s specifications. Additionally, check for voltage between each hot wire and ground to verify proper grounding.
- Perform a functionality test: Operate the motor under the load or conditions for which it is intended. Observe its performance and ensure that it is operating smoothly without any issues.
By testing the wiring connection, you can identify any potential issues or discrepancies and address them before using the motor in its intended application. If you notice any problems during the testing phase, disconnect the power immediately and consult a licensed electrician to rectify the situation.
Once you have confirmed that the wiring connection is working properly and the motor is functioning as expected, you can proceed to the final step of securing the connections.
Read more: How To Wire Up Electric Motor
Step 7: Secure the Connections
Securing the connections is the final step in wiring a 220-volt electric motor. Properly securing the connections ensures that they remain stable and reliable, preventing any potential risks or issues down the line. Follow these steps to secure the connections:
- Tighten terminal screws: Check all terminal screws and ensure they are tightened securely. Use a screwdriver to tighten any loose screws, making sure not to over-tighten them.
- Insulate the connections: Once the terminal screws are tightened, wrap electrical tape tightly around the exposed wires and terminal connections. This provides an added layer of insulation and protects against accidental contact or short circuits.
- Secure the wires: Use wire clamps or zip ties to secure the wires coming from the motor. This helps prevent strain on the connections and keeps them in place, minimizing the risk of accidental damage or disconnection.
- Protect the wiring: Make sure the wiring is protected from potential hazards. Use conduit or wire channels to enclose the wiring and shield it from physical damage or exposure to moisture or extreme temperatures.
- Label the connections: Properly label each connection to ensure clear identification in the future. This can be as simple as using a permanent marker or label maker to mark the wires and terminals with their corresponding labels.
- Perform a final inspection: Once all the connections are secured, perform a final visual inspection to ensure everything is in order. Check for any loose wires, exposed connections, or signs of damage. Rectify any issues before operating the motor.
By securing the connections, you are ensuring that they remain reliable and protected against potential hazards. This final step helps promote the longevity and safe operation of your 220-volt electric motor.
With the connections secured, you have successfully wired your 220-volt electric motor. Double-check all the steps and consult the motor’s specifications or a licensed electrician if you have any lingering doubts. Now, you are ready to enjoy the reliable and efficient operation of your electric motor in your desired application.
Remember, if you are unsure about any aspect of the wiring process or encounter any complications, it is always best to consult a licensed electrician for professional assistance.
Conclusion
Wiring a 220-volt electric motor may seem like a daunting task, but by following the proper steps and safety precautions, you can successfully complete the process. In this comprehensive guide, we have walked you through each step, from reading the motor specifications to securing the connections.
Remember, safety should always be your top priority when working with electricity. Make sure to turn off the power supply, use protective equipment, and seek professional assistance if needed. Additionally, always double-check your connections and ensure that they are secure before powering on the motor.
By properly wiring your 220-volt electric motor, you can enjoy the benefits of a reliable and efficient electrical motor in your desired application. Whether you are setting up a new motor or replacing an existing one, understanding the wiring process is crucial for safe and optimal performance.
If at any point in this process you are unsure or encounter difficulties, don’t hesitate to consult a licensed electrician. They have the expertise and knowledge to handle electrical work safely and efficiently.
Now that you have completed the wiring process for your 220-volt electric motor, take a moment to appreciate your accomplishment. With proper maintenance and periodic inspections, your motor should provide you with reliable service for years to come.
Remember, always prioritize safety and refer to the motor’s specifications and the guidance of professionals when in doubt. Enjoy the operation of your newly wired 220-volt electric motor!
Frequently Asked Questions about How To Wire A 220 Volt Electric Motor
Was this page helpful?
At Storables.com, we guarantee accurate and reliable information. Our content, validated by Expert Board Contributors, is crafted following stringent Editorial Policies. We're committed to providing you with well-researched, expert-backed insights for all your informational needs.


0 thoughts on “How To Wire A 220 Volt Electric Motor”