Home>Home Maintenance>How To Wire A 220-Volt Outlet For Air Conditioner
Home Maintenance
How To Wire A 220-Volt Outlet For Air Conditioner
Modified: October 20, 2024
Learn how to wire a 220 outlet for your air conditioner with our easy step-by-step guide. Ensure proper home maintenance for efficient cooling.
(Many of the links in this article redirect to a specific reviewed product. Your purchase of these products through affiliate links helps to generate commission for Storables.com, at no extra cost. Learn more)
Introduction
Installing a 220 outlet for an air conditioner may seem like a daunting task, but with the right tools and a little knowledge, it can be a straightforward process. A 220 outlet, also known as a 240-volt outlet, is required to power larger appliances like air conditioners, electric stoves, and dryers. This type of outlet provides the necessary voltage and amperage to handle the high power demands of these appliances.
In this article, we will guide you through the step-by-step process of wiring a 220 outlet for an air conditioner. We will cover the tools and materials needed, as well as the proper techniques for safely installing the outlet. Whether you are a seasoned DIY enthusiast or a beginner, you can successfully complete this project with a little patience and attention to detail.
Before we begin, it is important to note that working with electricity can be dangerous. If you are not confident in your electrical skills, it is always best to hire a licensed electrician to perform the installation for you. Safety should always be your top priority when working with electricity.
Now, let’s dive into the step-by-step process of how to wire a 220 outlet for an air conditioner!
Key Takeaways:
- Wiring a 220 outlet for an air conditioner requires the right tools, materials, and knowledge. Safety is crucial, and if unsure, it’s best to hire a licensed electrician to ensure a safe and reliable installation.
- Understanding the electrical requirements, disconnecting the power, choosing the right cable, and proper wire connections are essential steps in wiring a 220 outlet for an air conditioner. Following these steps ensures a safe and efficient electrical connection.
Tools and Materials Required
Before you start the process of wiring a 220 outlet for your air conditioner, you will need to gather the necessary tools and materials. Having everything prepared and readily available will help you complete the project efficiently. Here is a list of the tools and materials you will need:
Tools:
- Wire cutter/stripper
- Phillips and flathead screwdrivers
- Needle-nose pliers
- Voltage tester
- Drill with various drill bits
- Fish tape (optional)
Materials:
- 220-volt circuit breaker
- 220-volt outlet and cover plate
- Flexible metal conduit or PVC conduit
- Wire – the gauge and type will depend on the amperage requirements of your air conditioner (check the manufacturer’s specifications)
- Outlet box
- Wire connectors
- Mounting screws
- Cable staples
It is essential to ensure that all tools and materials you use are suitable for electrical work and are in good condition. Additionally, you may need additional tools specific to your home’s electrical setup, such as a circuit tracer or wire fish tape, depending on the complexity of the installation.
Prior to starting the project, always check your local building codes and regulations to ensure you are compliant with the guidelines in your area. It is crucial to adhere to these regulations to guarantee the safety and functionality of your electrical installation.
Once you have gathered all the necessary tools and materials, you are ready to move on to the next step: determining the electrical requirements for your air conditioner.
Step 1: Determine the Electrical Requirements
Before you begin wiring a 220 outlet for your air conditioner, you need to determine the electrical requirements of your unit. This information can usually be found in the manufacturer’s specifications or on the air conditioner itself. It is important to understand the voltage, amperage, and phase requirements of your air conditioner to ensure that the wiring and circuitry can handle the power demand.
Typically, air conditioners require a 220-volt electrical supply. This differs from standard household outlets, which are typically 110 or 120 volts. Additionally, you will need to determine the amperage rating of your air conditioner. This information is crucial in selecting the appropriate wire size and circuit breaker to prevent overload and potential electrical hazards.
Once you have gathered the necessary information, calculate the power requirements of your air conditioner by multiplying the voltage (220 volts) by the amperage rating. For example, if your air conditioner requires 20 amps, the power requirement would be 220 volts x 20 amps = 4,400 watts.
Understanding the electrical requirements of your air conditioner will help you select the appropriate wire size, circuit breaker, and outlet to support the power demand. It is essential not to cut corners or exceed the recommended electrical specifications, as this can lead to safety hazards, equipment damage, and even fires.
If you are unsure about the electrical requirements or need assistance, consult the manufacturer’s documentation or contact a qualified electrician who can provide guidance based on your specific air conditioner model.
Once you have determined the electrical requirements of your air conditioner, you are ready to move on to the next step: disconnecting the power.
Read more: How To Wire A 220 Volt Electric Motor
Step 2: Disconnect the Power
Before you begin working on installing a 220 outlet for your air conditioner, it is crucial to disconnect the power to ensure your safety. Dealing with live electrical currents can be extremely dangerous and can result in severe injury or even death. Follow these steps to disconnect the power:
- Locate the main electrical panel in your home. This is typically located in the basement, utility room, or garage.
- Open the panel cover using a screwdriver or any appropriate tool.
- Locate the breaker that supplies power to the area where you will be working. If you are unsure which breaker controls the specific area, you can use a circuit tracer or ask someone to help you identify the correct breaker.
- Flip the breaker to the “off” position. You should hear a click, and the corresponding circuit should lose power.
- To ensure that the power to the area is completely shut off, use a voltage tester to check each outlet or switch in the vicinity. This will verify that there is no live electrical current present.
After following these steps, it is important to take precautions to prevent anyone from accidentally turning the power back on while you are working. Place a sturdy piece of tape or a visible warning sign on the breaker panel to alert others that work is being carried out.
Remember, safety should always be the top priority when working with electricity. If you are uncomfortable with disconnecting the power yourself, or if you are unsure about any aspect of the process, it is strongly recommended to hire a licensed electrician to perform this step for you.
Once you have ensured that the power is disconnected, you can proceed to the next step: choosing the right cable for your installation.
Step 3: Choose the Right Cable
Choosing the right cable is crucial when wiring a 220 outlet for your air conditioner. The cable you select will determine the safety and efficiency of the electrical connection. Here are some important considerations when choosing the cable:
1. Gauge: The gauge of the cable refers to its thickness or diameter. The gauge you need will depend on the amperage requirements of your air conditioner. Check the manufacturer’s specifications for this information. Remember, the higher the amperage, the thicker the cable should be to handle the power load. Common cable gauges for air conditioner circuits are 10, 8, and 6 gauge, but be sure to confirm the appropriate gauge based on your specific requirements. 2. Type: There are different types of cables available, such as NM (Non-metallic), THHN (Thermoplastic High-Heat-Resistant Nylon), and MC (Metal-Clad) cables. NM cable is commonly used for residential applications and is suitable for indoor installations. THHN cable is a more versatile option that can be used in both indoor and outdoor installations. MC cable is often used when additional protection is required, such as in exposed areas. Review the local electrical codes to determine which type of cable is approved for use in your area. 3. Length: Measure the distance between the electrical panel and the location where you will install the outlet to determine the length of cable needed. It’s advisable to add a little extra length for flexibility during installation. 4. Conduit: Consider whether you will be running the cable through conduit. Flexible metal conduit or PVC conduit can provide added protection and make it easier to run the cable through walls or ceilings. The conduit should match the size of the cable used. 5. Wire colors: For 220-volt electrical installations, the standard color code is black or red for the hot wire(s), white for the neutral wire, and green or bare copper for the ground wire. Ensure that the chosen cable has wires with the appropriate colors. When selecting the cable, it is crucial to comply with local electrical codes and regulations. It is highly recommended to consult with a licensed electrician or refer to the National Electrical Code (NEC) for guidance on cable selection and installation. Once you have determined the appropriate cable for your air conditioner, you can proceed to the next step: installing the outlet box.
Step 4: Install the Outlet Box
Installing the outlet box is an essential step in wiring a 220 outlet for your air conditioner. The outlet box serves as a secure housing for the electrical connections and provides a mounting point for the outlet itself. Follow these steps to install the outlet box:
- Locate the desired location for the outlet box. It should be easily accessible and within the required proximity to the air conditioner unit.
- Using a stud finder or other appropriate tools, ensure there are no obstructions like studs or pipes behind the chosen location.
- Mark the outline of the outlet box on the wall or surface using a pencil or marker.
- Using a drywall saw or a suitable cutting tool, carefully cut along the marked outline to create a hole for the outlet box.
- Insert the outlet box into the hole and secure it in place. Depending on the box type, you may need to use screws, clamps, or wings to fasten it securely.
- Double-check that the outlet box is level and flush with the wall or surface. Make any necessary adjustments before proceeding.
- Ensure that the knockout holes in the outlet box are removed or punched out for cable entry.
It’s important to note that the specific installation steps may vary depending on the type and design of the outlet box you are using. Always refer to the manufacturer’s instructions for the appropriate installation method for your specific outlet box.
Additionally, it’s crucial to follow the local electrical codes and regulations regarding outlet box installation. These codes ensure proper grounding, protection, and safety for the electrical connections.
Once the outlet box is securely installed, you can proceed to the next step: running the cable for your air conditioner.
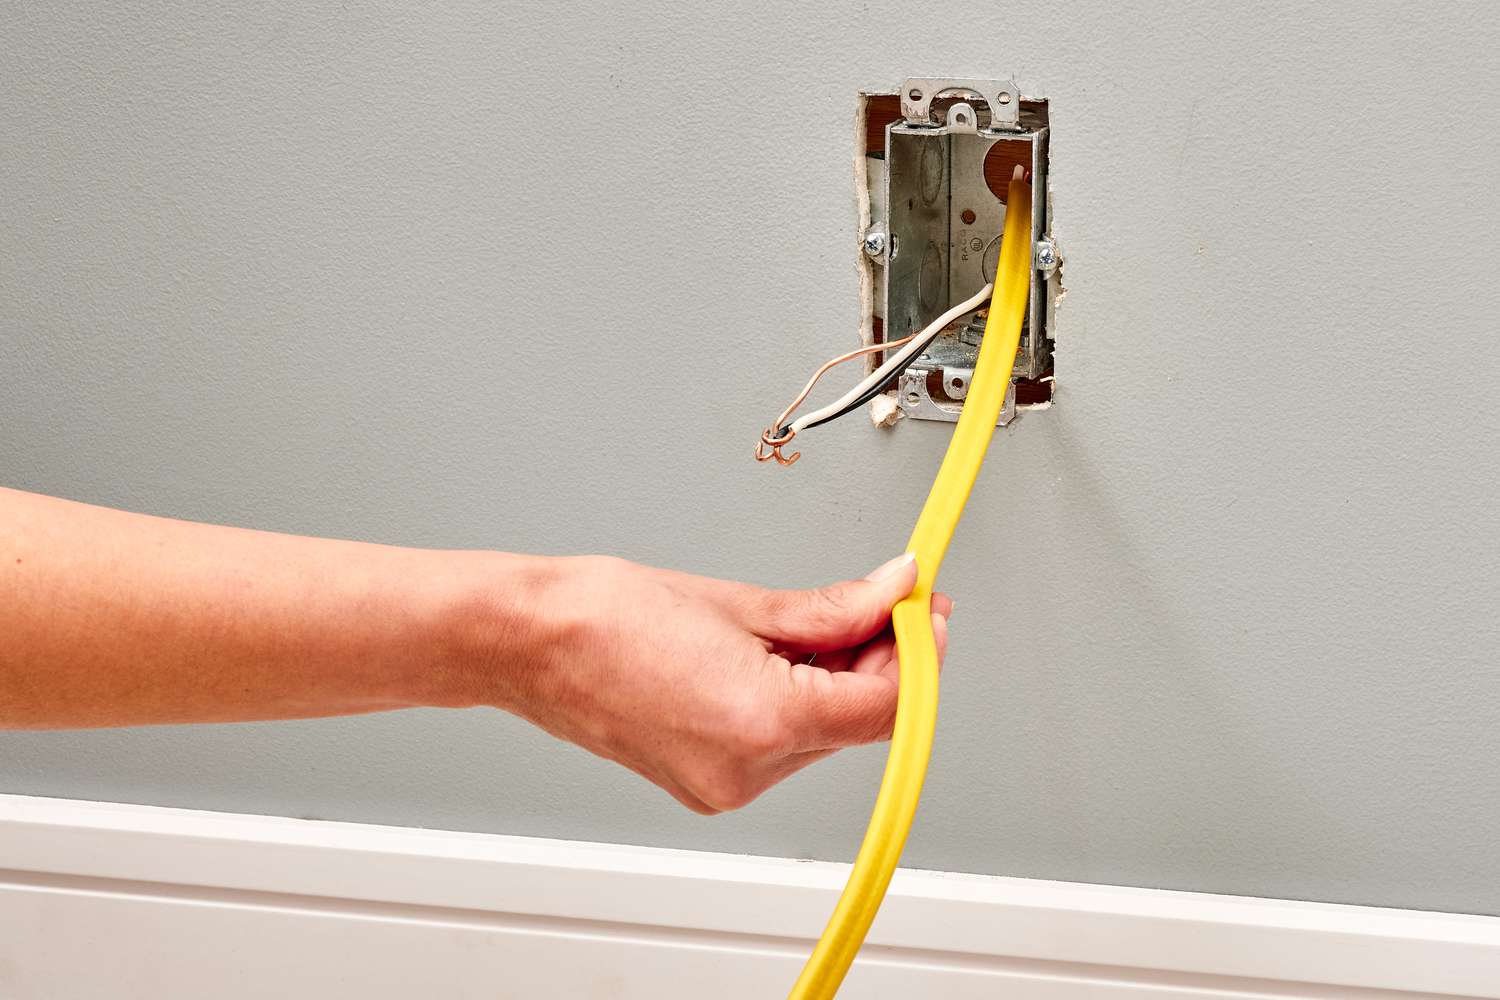
Step 5: Run the Cable
Running the cable is a critical step in wiring a 220 outlet for your air conditioner. Proper cable installation ensures a safe and efficient electrical connection. Follow these steps to run the cable:
- Route the cable from the main electrical panel to the outlet box location. Be sure to follow the designated path and avoid any sharp bends or tight corners that could damage the cable.
- If running the cable through walls or ceilings, use appropriate tools like a drill with a drill bit or a fish tape to create access holes or guide the cable through existing openings.
- Secure the cable to the walls or surfaces using cable staples, spaced at appropriate intervals to prevent sagging or excessive movement.
- Ensure the cable is positioned away from any sharp objects, heat sources, or areas prone to moisture or water leaks.
- If necessary, protect the cable by running it through conduit. This provides an additional layer of shielding and helps prevent damage in high-risk areas.
- Leave enough extra cable at both the outlet box and main panel locations to allow for easy connection.
When running the cable, it is essential to follow local electrical codes and regulations. These codes specify requirements for cable routing, support, and protection, ensuring your installation meets the necessary safety standards.
Remember to take safety precautions such as wearing appropriate protective gear, turning off the power supply, and consulting a licensed electrician if you are unsure about any aspect of cable installation.
Once the cable is properly run and secured, you are ready to move on to the next step: connecting the wires.
Make sure to use the correct gauge wire for the 220 outlet, typically 10 or 8 gauge. Also, install a dedicated circuit breaker for the outlet to ensure safe and efficient operation of the air conditioner.
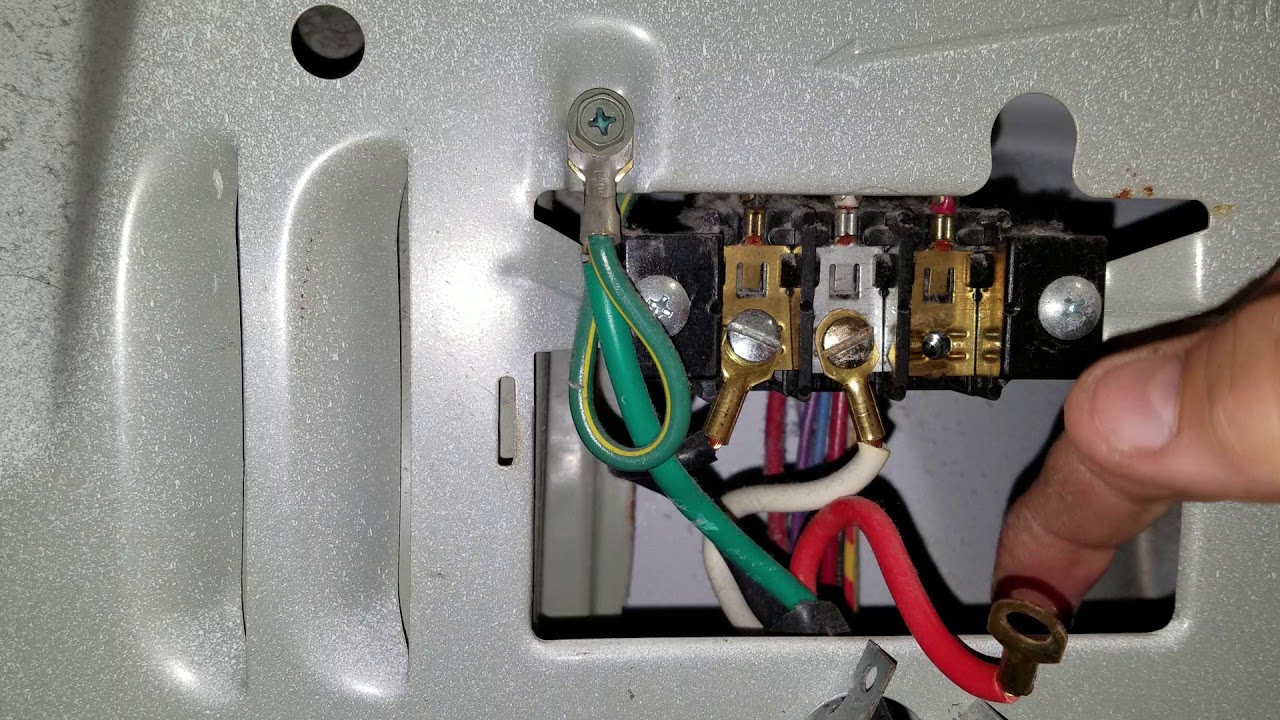
Step 6: Connect the Wires
Connecting the wires is a crucial step in wiring a 220 outlet for your air conditioner. It involves making proper electrical connections to ensure a safe and reliable power supply. Follow these steps to connect the wires:
- Begin by removing approximately 3/4 inch (19mm) of insulation from the end of each wire using a wire cutter/stripper.
- Identify the wires based on their color coding. In a 220-volt electrical connection, typically, the black or red wire is the “hot” wire, the white wire is the neutral wire, and the green or bare copper wire is the ground wire.
- Connect the black or red “hot” wire to the brass-colored screw terminal on the outlet. Loosen the screw, insert the wire into the terminal, and tighten the screw securely. This wire carries the power from the circuit breaker to the air conditioner.
- Connect the white neutral wire to the silver-colored screw terminal on the outlet in a similar manner. This wire provides the return path for the power supply.
- Connect the green or bare copper ground wire to the green screw terminal or ground screw on the outlet. This wire ensures the proper grounding of the electrical circuit and provides protection against electrical faults.
- Double-check that all wire connections are secure and tight.
- If your outlet box includes grounding screws, attach the ground wire to one of these screws as an additional measure for grounding.
It is essential to follow proper electrical wiring practices and comply with local electrical codes and regulations when making the wire connections. Following these standards ensures the safety and functionality of your electrical installation.
Before proceeding to the next step, carefully inspect all wire connections to ensure they are properly secured and there are no exposed wires or loose connections. If you are uncertain about any aspect of the wire connections, consult a licensed electrician to ensure a safe and reliable electrical connection.
With the wires securely connected, you can now proceed to the next step: attaching the outlet itself.
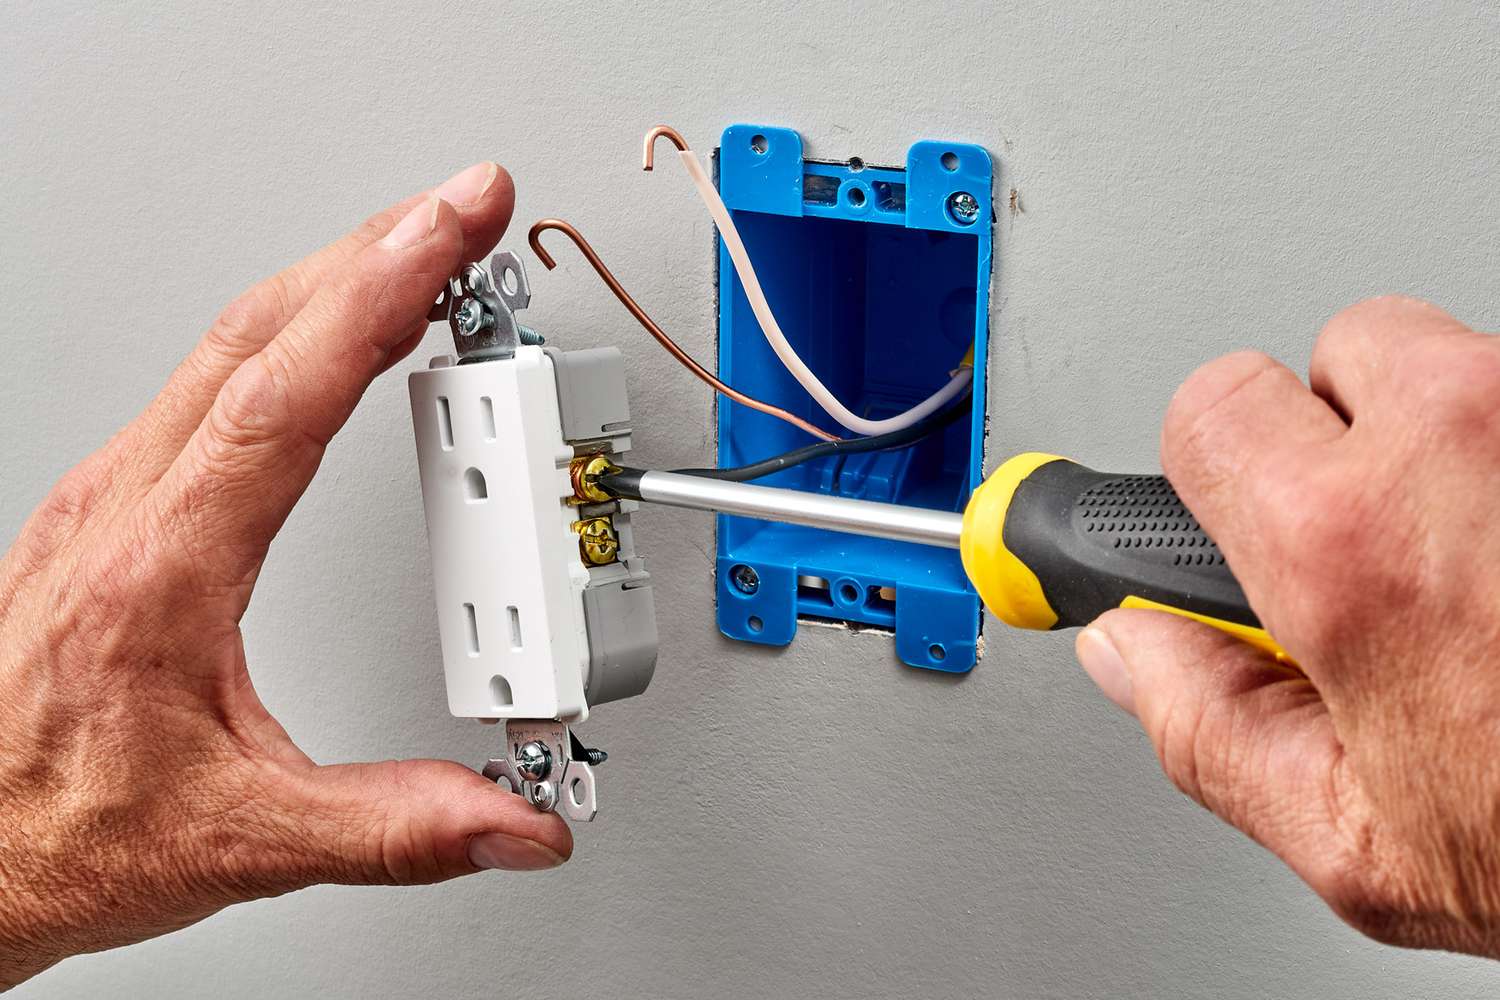
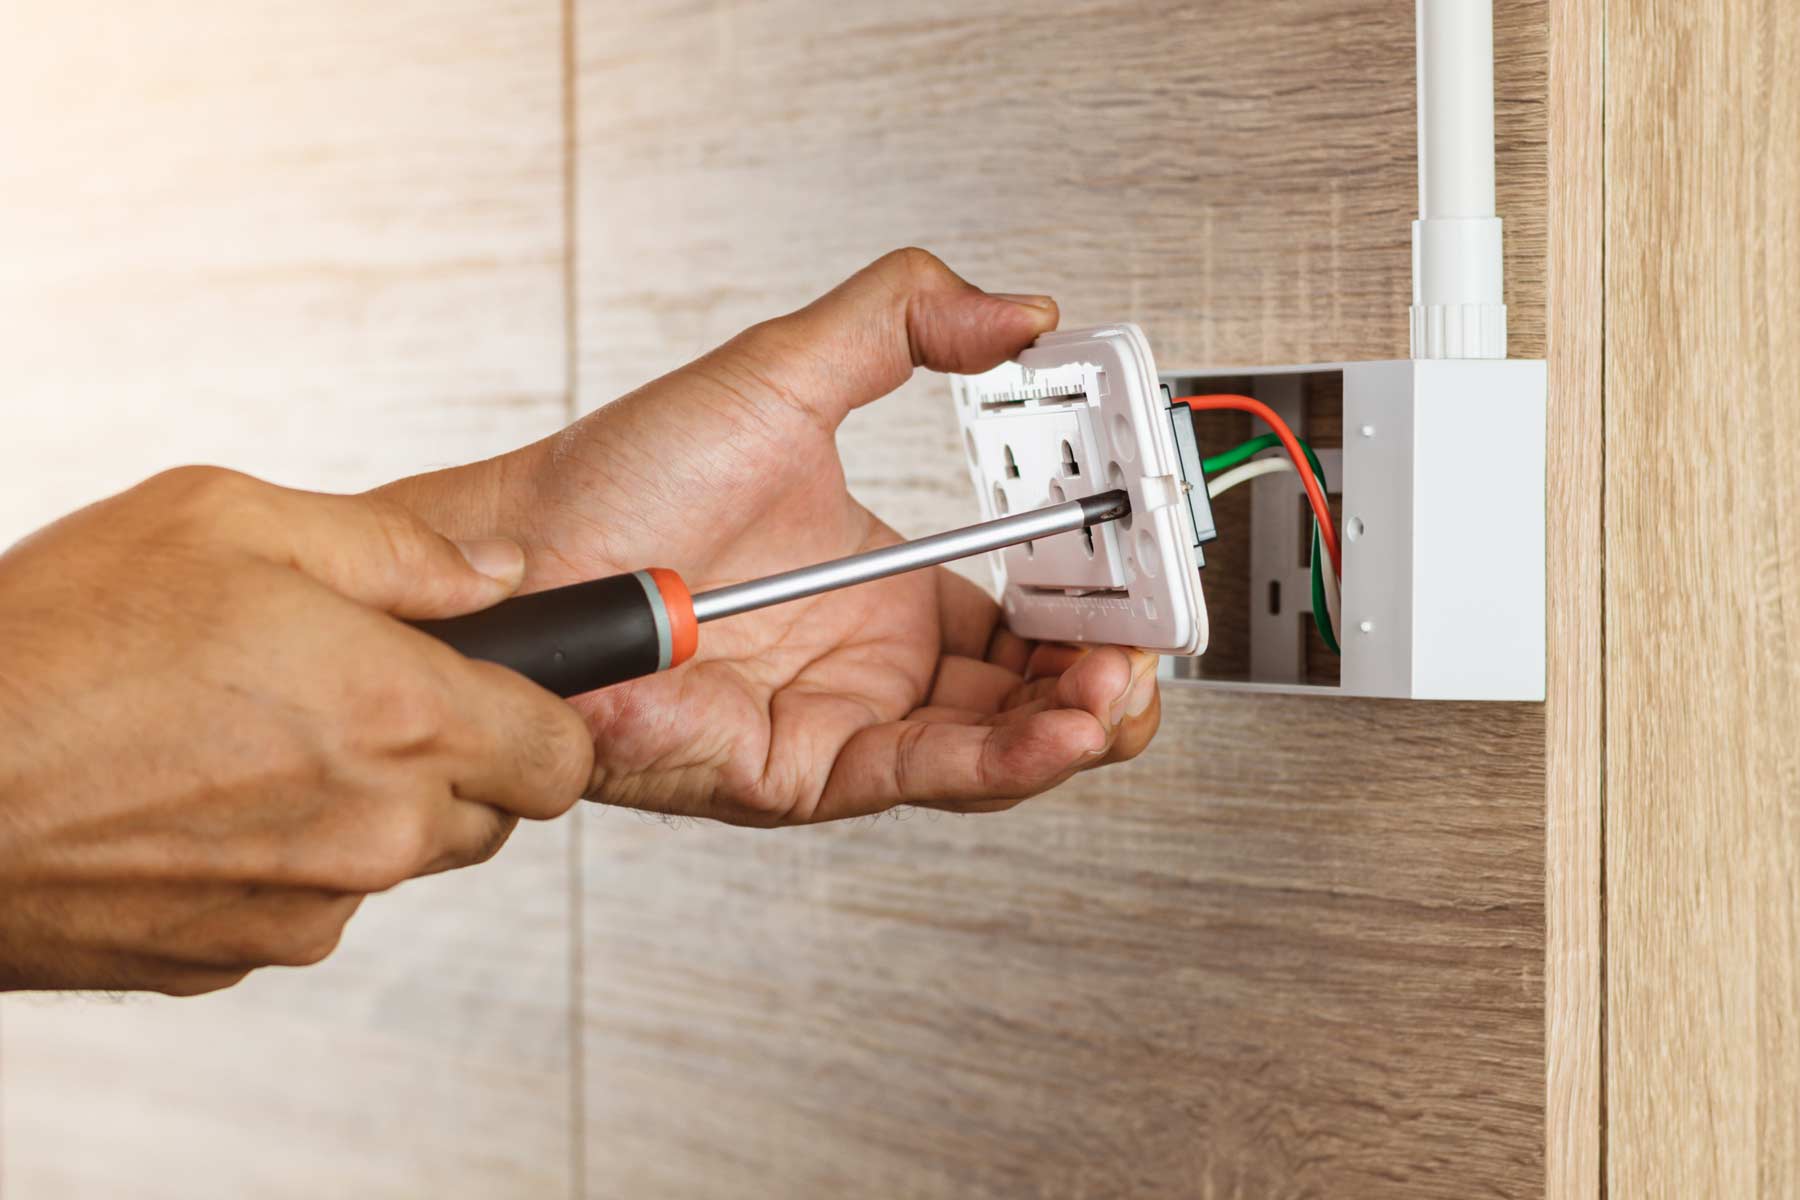
Step 7: Attach the Outlet
Attaching the outlet is a critical step in wiring a 220 outlet for your air conditioner. The outlet serves as the interface between the electrical circuit and the air conditioner unit. Follow these steps to attach the outlet:
- Take the 220-volt outlet and align it with the outlet box, ensuring that the wires pass through the corresponding holes in the back of the outlet.
- Using the provided screws, secure the outlet to the outlet box. Make sure the outlet is flush against the wall or surface and stable.
- Gently tug on the wires to confirm that they are securely attached to the outlet. Double-check that all connections are tight and properly aligned with the appropriate terminals.
- If the outlet has screws or clamps for wire connections, ensure that the wire connections are tightened securely to maintain a solid electrical connection.
- Inspect the outlet to ensure there are no exposed wires or loose connections. Exposed wires can be a safety hazard and should be addressed immediately.
It is essential to follow the manufacturer’s instructions and local electrical codes when attaching the outlet. Some outlets may have specific instructions for wiring and securing the connections.
After attaching the outlet, take a final look at the installation to ensure all components are properly aligned, stable, and safe. Verify that there are no loose screws, damaged wires, or exposed terminals.
Once you are confident that the outlet is securely attached and the connections are properly made, proceed to the final step: testing the connection.
Step 8: Test the Connection
The final step in wiring a 220 outlet for your air conditioner is to test the connection to ensure everything is functioning correctly and safely. Testing the connection will help identify any potential issues or errors before powering on the air conditioner. Follow these steps to test the connection:
- Double-check that the circuit breaker for the air conditioner outlet is in the “off” position.
- Using a voltage tester, carefully test each wire connection to ensure there is no electricity present. The voltage tester should not detect any live current.
- Verify that the wiring connections are secure and properly aligned.
- Turn on the circuit breaker for the air conditioner outlet. This will supply power to the outlet and air conditioner.
- Using the testing capabilities of your air conditioner unit, verify that it is receiving power and functioning correctly.
- Check the functionality of other outlets or devices connected to the same circuit to ensure there are no abnormal power fluctuations or issues.
If during the testing process you encounter any problems or notice issues with the connection, immediately turn off the circuit breaker and seek assistance from a licensed electrician. It is crucial to address any electrical issues promptly to ensure proper functionality and safety.
Once you have confirmed that the connection is working correctly and the air conditioner is receiving power, you can proceed to enjoy the cool and comfortable air provided by your newly installed air conditioner.
It is important to note that regular maintenance and periodic inspections of the electrical system are crucial to ensure continued safe operation. Consider scheduling regular inspections by a qualified electrician to address any potential issues and maintain the longevity of your electrical installation.
Congratulations! You have successfully wired a 220 outlet for your air conditioner. Enjoy the benefits of a properly functioning and energy-efficient cooling system!
Conclusion
Wiring a 220 outlet for your air conditioner may initially seem like a complex task, but with the right tools, materials, and knowledge, it can be accomplished successfully. By following the step-by-step process outlined in this article, you can ensure a safe and reliable electrical connection for your air conditioner.
Remember, safety should always be the top priority when working with electricity. If you are unsure about any aspect of the wiring process or lack the necessary electrical skills, it is strongly recommended to hire a licensed electrician to perform the installation for you.
Throughout the installation process, it is essential to adhere to local electrical codes and regulations, which vary between jurisdictions. These guidelines are in place to guarantee the safety of your electrical installation and to ensure that it complies with industry standards.
Regular maintenance and inspections of your electrical system are crucial. This helps identify and address any potential issues before they escalate, ensuring the longevity and proper functionality of your air conditioner and electrical connections.
By successfully wiring a 220 outlet for your air conditioner, you have taken an important step toward enhancing the comfort of your home. Enjoy the cool and refreshing air provided by your air conditioner, knowing that you have a properly installed and reliable electrical connection.
If you have any doubts or concerns about any aspect of the wiring process, it is always best to consult with a qualified electrician. They can provide expert guidance and ensure that your electrical installation is completed safely and efficiently.
Congratulations on completing the installation of your 220 outlet for your air conditioner. Stay cool!
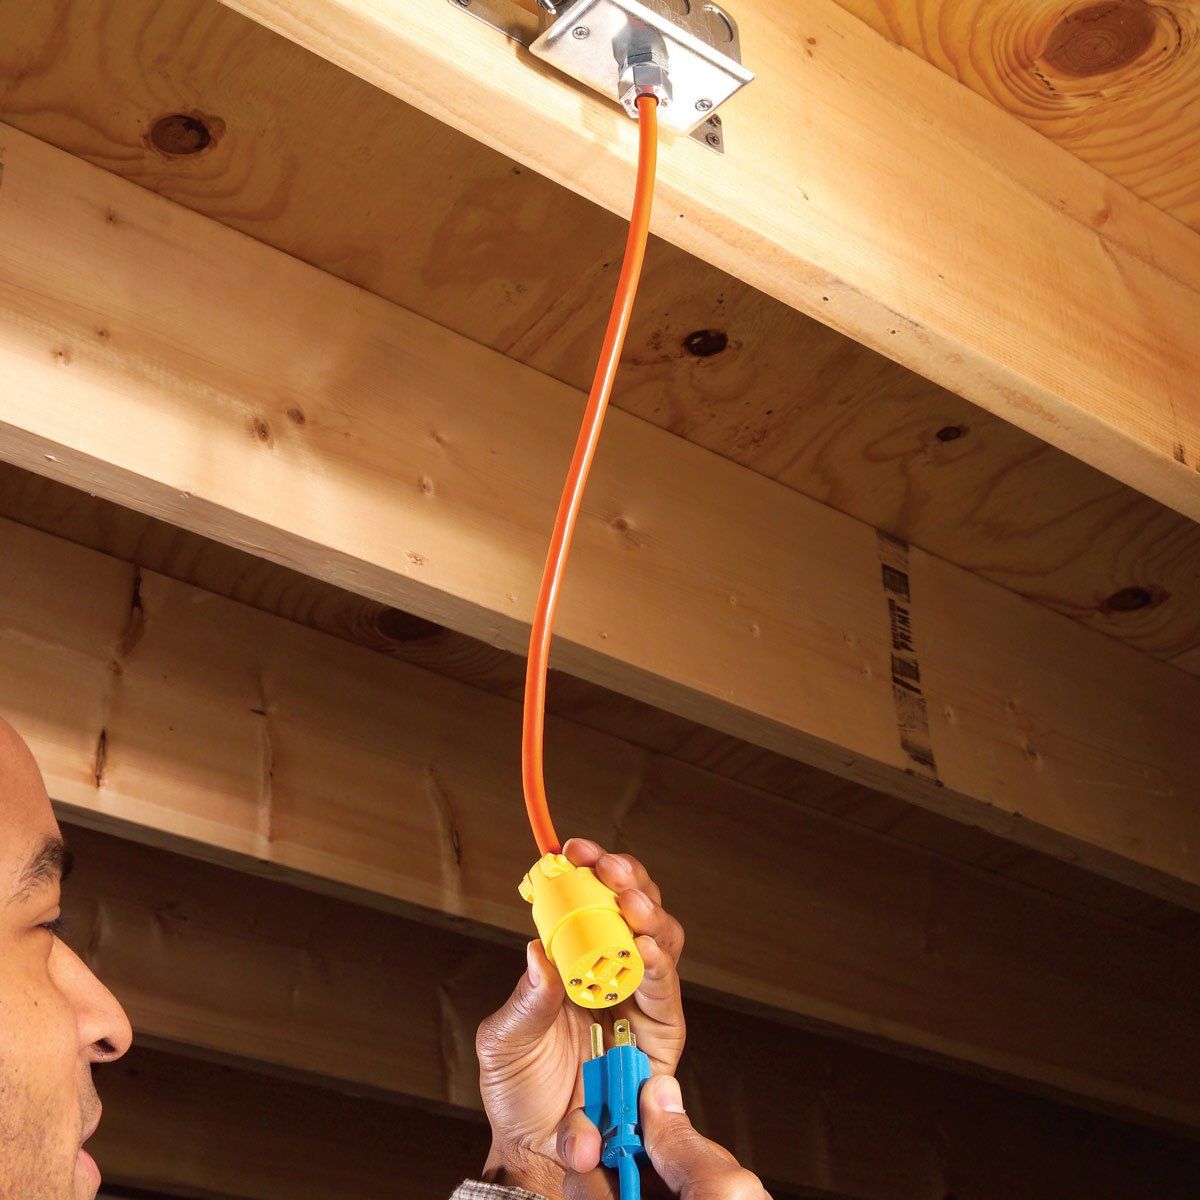
Now that you've mastered wiring a 220-volt outlet for an air conditioner, why stop there? Expand your electrical expertise by learning to run overhead electrical wire to your garage, ensuring all your power needs are met efficiently. Beyond the wires and tools, embrace the spirit of self-reliance with engaging DIY projects. These endeavors not only add personal touches to your space but also empower you with skills to tackle any home improvement challenge. Dive into these articles for more insights and instructions.
Frequently Asked Questions about How To Wire A 220-Volt Outlet For Air Conditioner
Was this page helpful?
At Storables.com, we guarantee accurate and reliable information. Our content, validated by Expert Board Contributors, is crafted following stringent Editorial Policies. We're committed to providing you with well-researched, expert-backed insights for all your informational needs.