Articles
Why Is My Rv Water Pump Not Working
Modified: October 19, 2024
Discover common reasons why your RV water pump is not working and find helpful articles to troubleshoot and fix the issue.
(Many of the links in this article redirect to a specific reviewed product. Your purchase of these products through affiliate links helps to generate commission for Storables.com, at no extra cost. Learn more)
Introduction
Welcome to the world of RV camping, where you can enjoy the freedom of the open road while still having all the comforts of home. One of the essential components of your RV is the water pump, which ensures a steady supply of water for various purposes, such as drinking, cooking, and showering.
But what happens when you turn on the faucet and there’s no water flowing? It can be frustrating and puzzling, especially when you’re in the middle of nowhere with no immediate access to help. In this article, we will explore some common causes of RV water pump issues and provide troubleshooting steps to help you get your water pump back in working order.
Whether you’re a seasoned RV enthusiast or a novice camper, it’s important to familiarize yourself with the possible reasons behind your RV water pump not working correctly. By understanding these causes, you can potentially save time and money by troubleshooting the issue on your own.
Now, let’s dive into the common causes of RV water pump problems and explore how to fix them.
Key Takeaways:
- Don’t let air locks and electrical issues ruin your RV water pump. Follow simple troubleshooting steps to keep the water flowing smoothly and enjoy your camping adventures hassle-free.
- Regularly verify and maintain your RV’s water supply to prevent pump issues. Stay proactive and knowledgeable to ensure a reliable water system for your camping experiences.
Read more: Why Is My Rv Water Pump So Loud
Common Causes of RV Water Pump Issues
When your RV water pump is not working as it should, there are several common causes that you should consider. By identifying the root cause, you can take appropriate actions to resolve the issue. Here are some of the most common causes of RV water pump problems:
- Air Lock: One frequent culprit behind a non-functioning water pump is an air lock. This occurs when air gets trapped in the water lines, preventing water from flowing smoothly. Air locks can happen when the RV water system is not properly primed or when there is a break or leak in the water lines.
- Electrical Issues: Another potential cause of water pump problems is electrical issues. This includes problems with the pump’s power supply, such as a blown fuse, a tripped circuit breaker, or a faulty connection. Insufficient power supply can prevent the pump from operating properly or cause it to stop working altogether.
- Pump Pressure Adjustment: The pressure settings of your RV water pump may need adjustment. If the pressure is set too high, it can put strain on the pump, leading to malfunctions. Conversely, if the pressure is set too low, it may result in weak water flow or complete lack of water delivery.
- Water Supply Problems: Sometimes, the root cause of a water pump issue lies outside the pump itself. It could be a problem with the water supply, such as a closed or clogged valve, a damaged water tank, or low water levels. Insufficient water supply can directly impact the functioning of the water pump.
These are just some of the common causes of RV water pump issues. Now, let’s move on to the troubleshooting steps that can help you diagnose and resolve these problems.
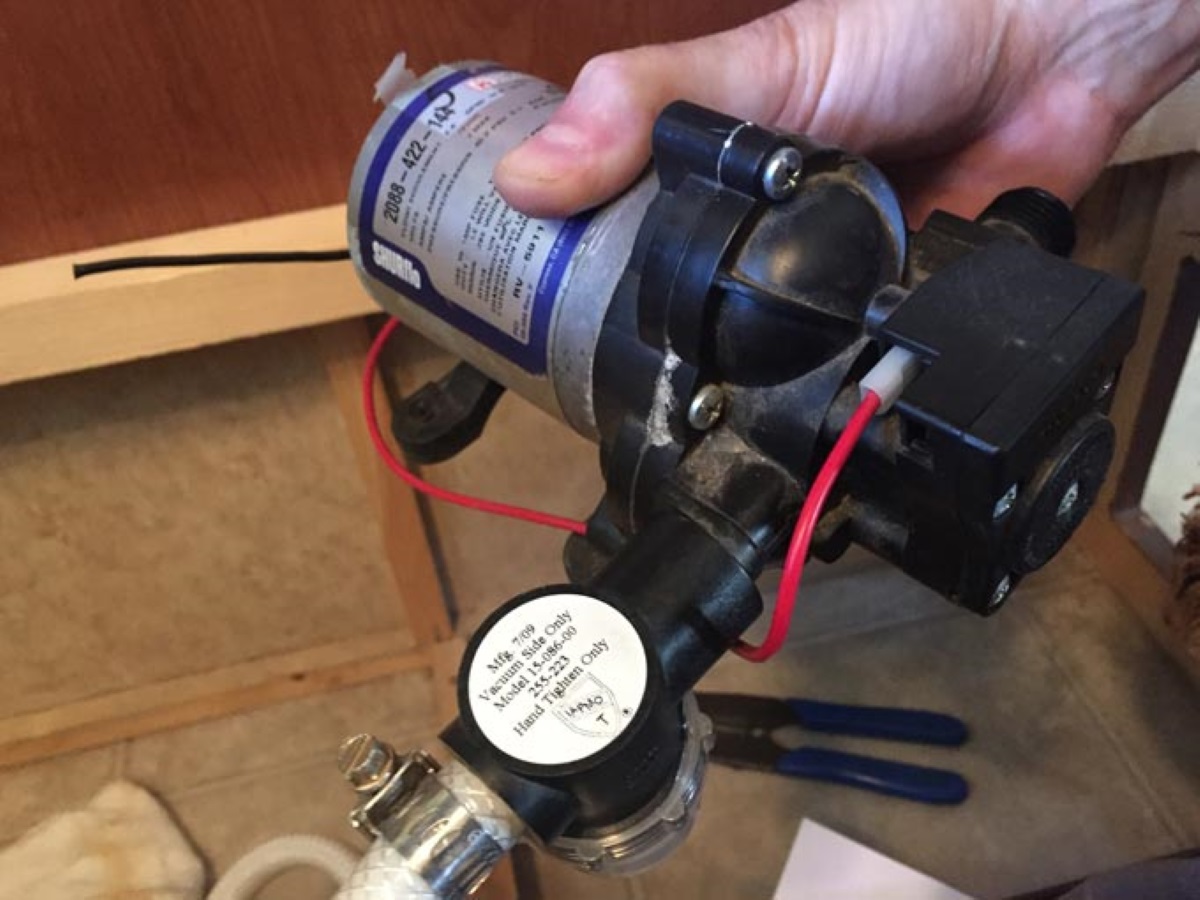
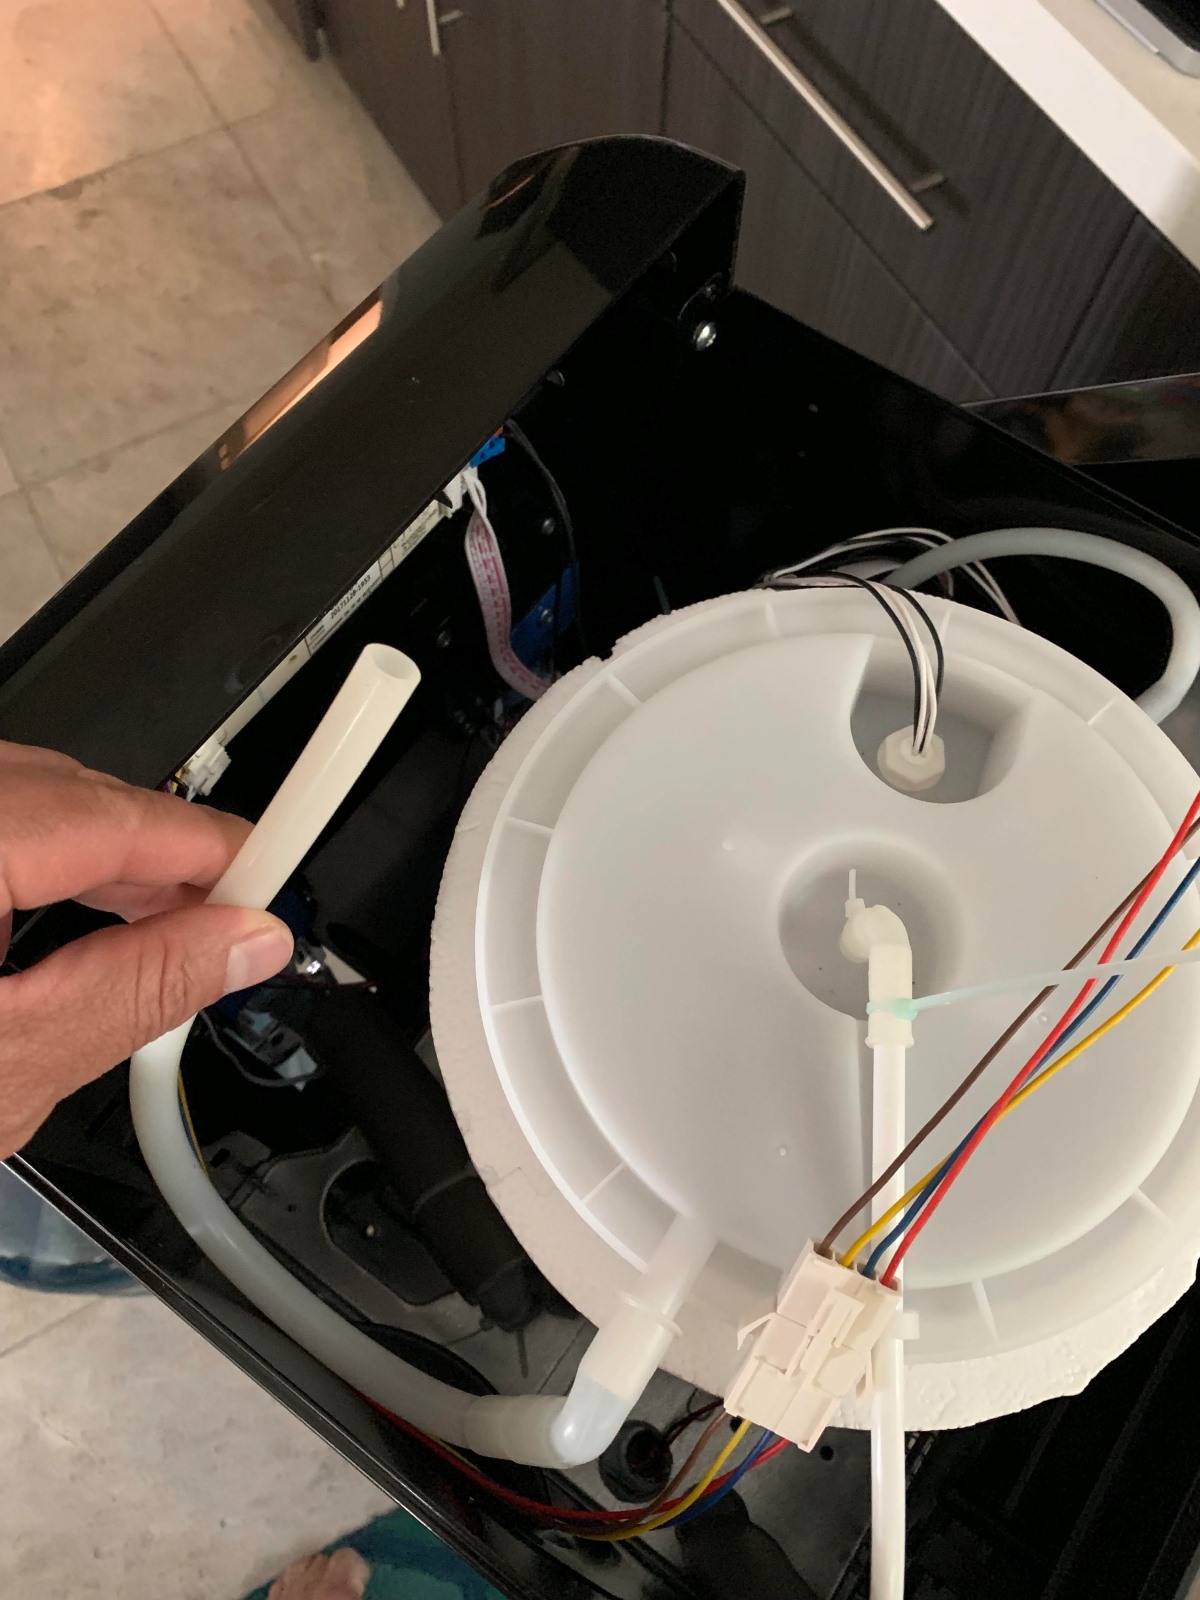
Air Lock
An air lock is a common issue that can prevent your RV water pump from functioning correctly. When air gets trapped in the water lines, it disrupts the flow of water and prevents it from reaching your faucets and shower.
There are a few possible reasons why air may enter your water lines and cause an air lock:
- Improper Priming: If you recently installed a new water pump or replaced any components in your RV’s water system, it’s crucial to prime the pump correctly. Priming ensures that all air is removed from the system and water can flow freely. Refer to your RV’s user manual or consult a professional to ensure you prime the pump correctly.
- Leaks or Breaks: A leak or break in the water lines can introduce air into the system, leading to an air lock. Inspect your RV’s water lines for any visible signs of leaks or breaks. If you find any damage, you may need to repair or replace the affected section of the water lines.
To resolve an air lock in your RV water system, follow these steps:
- Turn off the Water Pump: Begin by turning off the water pump to prevent any further air from entering the system.
- Find the Faucet Farthest from the Water Pump: Locate the faucet or fixture that is farthest away from your water pump.
- Open the Faucet: Fully open the faucet or fixture to allow air to escape from the water lines. You may hear a gurgling sound as the air is released.
- Gradually Turn on the Water Pump: Slowly turn the water pump back on while keeping the faucet open. This will help the air to be forced out of the lines and allow water to flow freely again.
- Close the Faucet: Once you see a steady flow of water coming out of the faucet, close it. This indicates that the air lock has been resolved.
- Check Other Fixtures: Repeat the process for other faucets and fixtures in your RV to ensure that the air has been completely flushed out of the system.
If the air lock issue persists, or if you’re unsure how to properly resolve it, consider seeking assistance from a professional RV technician who can diagnose and address the issue for you.
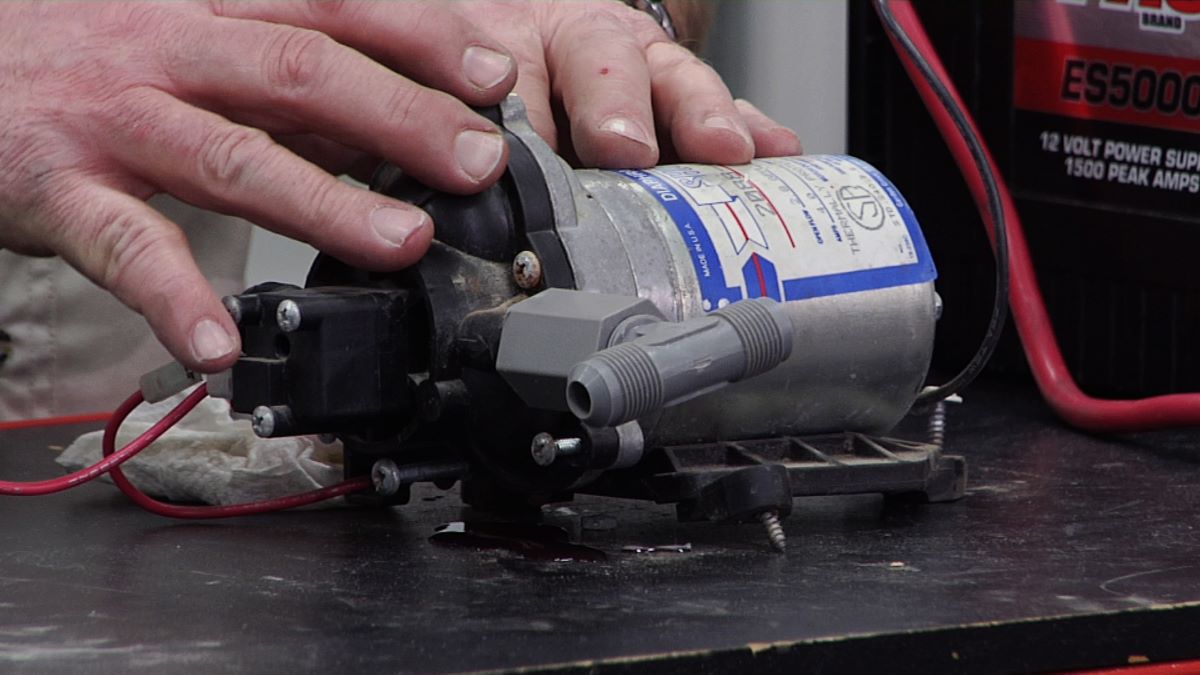
Electrical Issues
Electrical issues can frequently cause problems with your RV water pump, preventing it from functioning as it should. In some cases, the issue may be related to the power supply, while in other instances, it could be due to a faulty connection.
Here are some common electrical issues that can affect the operation of your RV water pump:
- Blown Fuse: The first thing to check when encountering water pump issues is the fuse. A blown fuse can interrupt the power supply to the pump, causing it to stop working. Refer to your RV’s manual to locate the fuse panel and inspect the water pump fuse. If you find a blown fuse, replace it with a new one of the same rating.
- Tripped Circuit Breaker: If your RV’s water pump is connected to a circuit breaker, it’s possible that the breaker has tripped. Locate the breaker panel in your RV, typically found near the electrical control center, and check for any tripped breakers. If you find a tripped breaker, reset it by switching it to the “off” position, then back to the “on” position.
- Faulty Connections: Inspect the electrical connections leading to the water pump for any signs of damage or corrosion. Loose or corroded connections can disrupt the flow of electricity to the pump, resulting in malfunctioning. If you notice any issues, carefully tighten or clean the connections as needed.
- Weak Battery: If your RV is equipped with a battery-operated water pump, a weak or discharged battery can also cause problems. Check the battery voltage using a multimeter or voltmeter to ensure it has sufficient power. If the battery charge is low, recharge it or replace it if necessary.
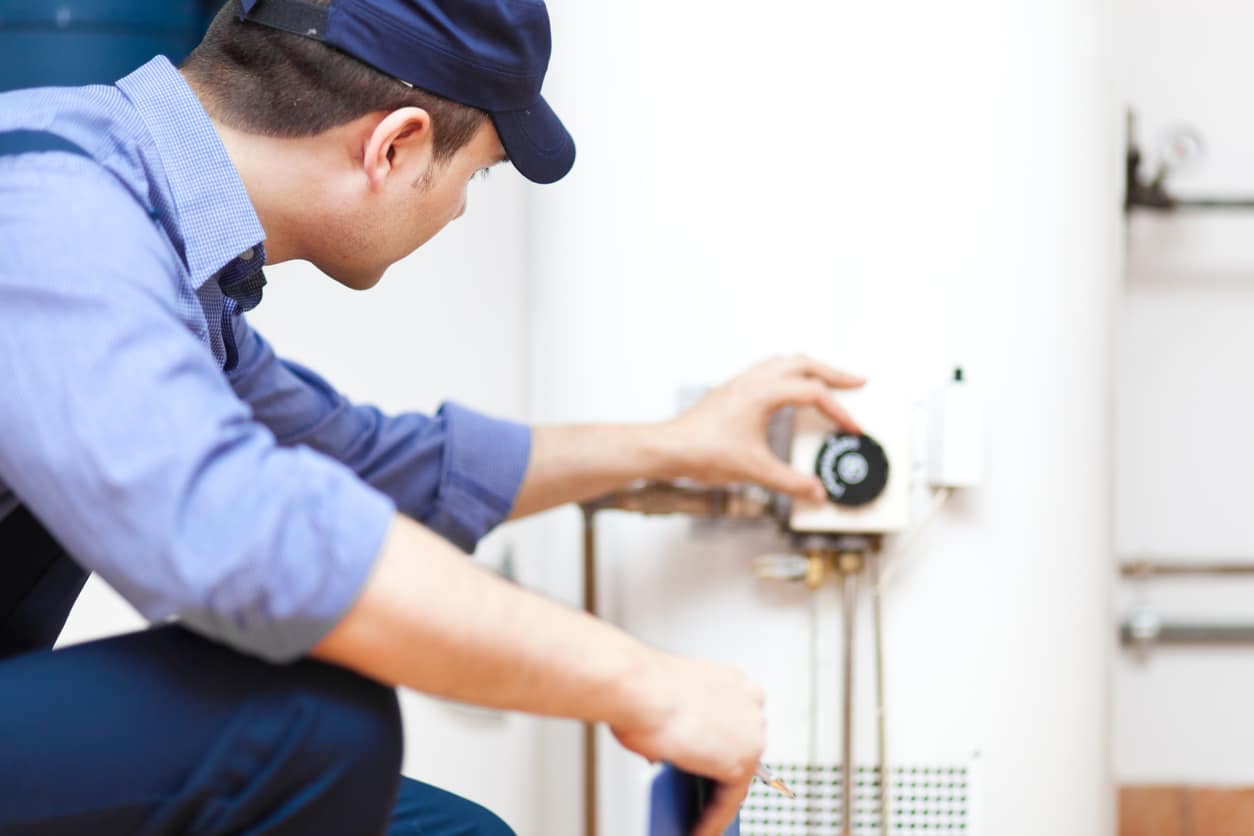
It’s important to note that electrical issues can sometimes be complex and require professional help to diagnose and fix. If you’re not confident in your electrical troubleshooting skills, or if the issue persists after following the steps above, it’s recommended to consult an RV technician or electrician experienced in RV systems.
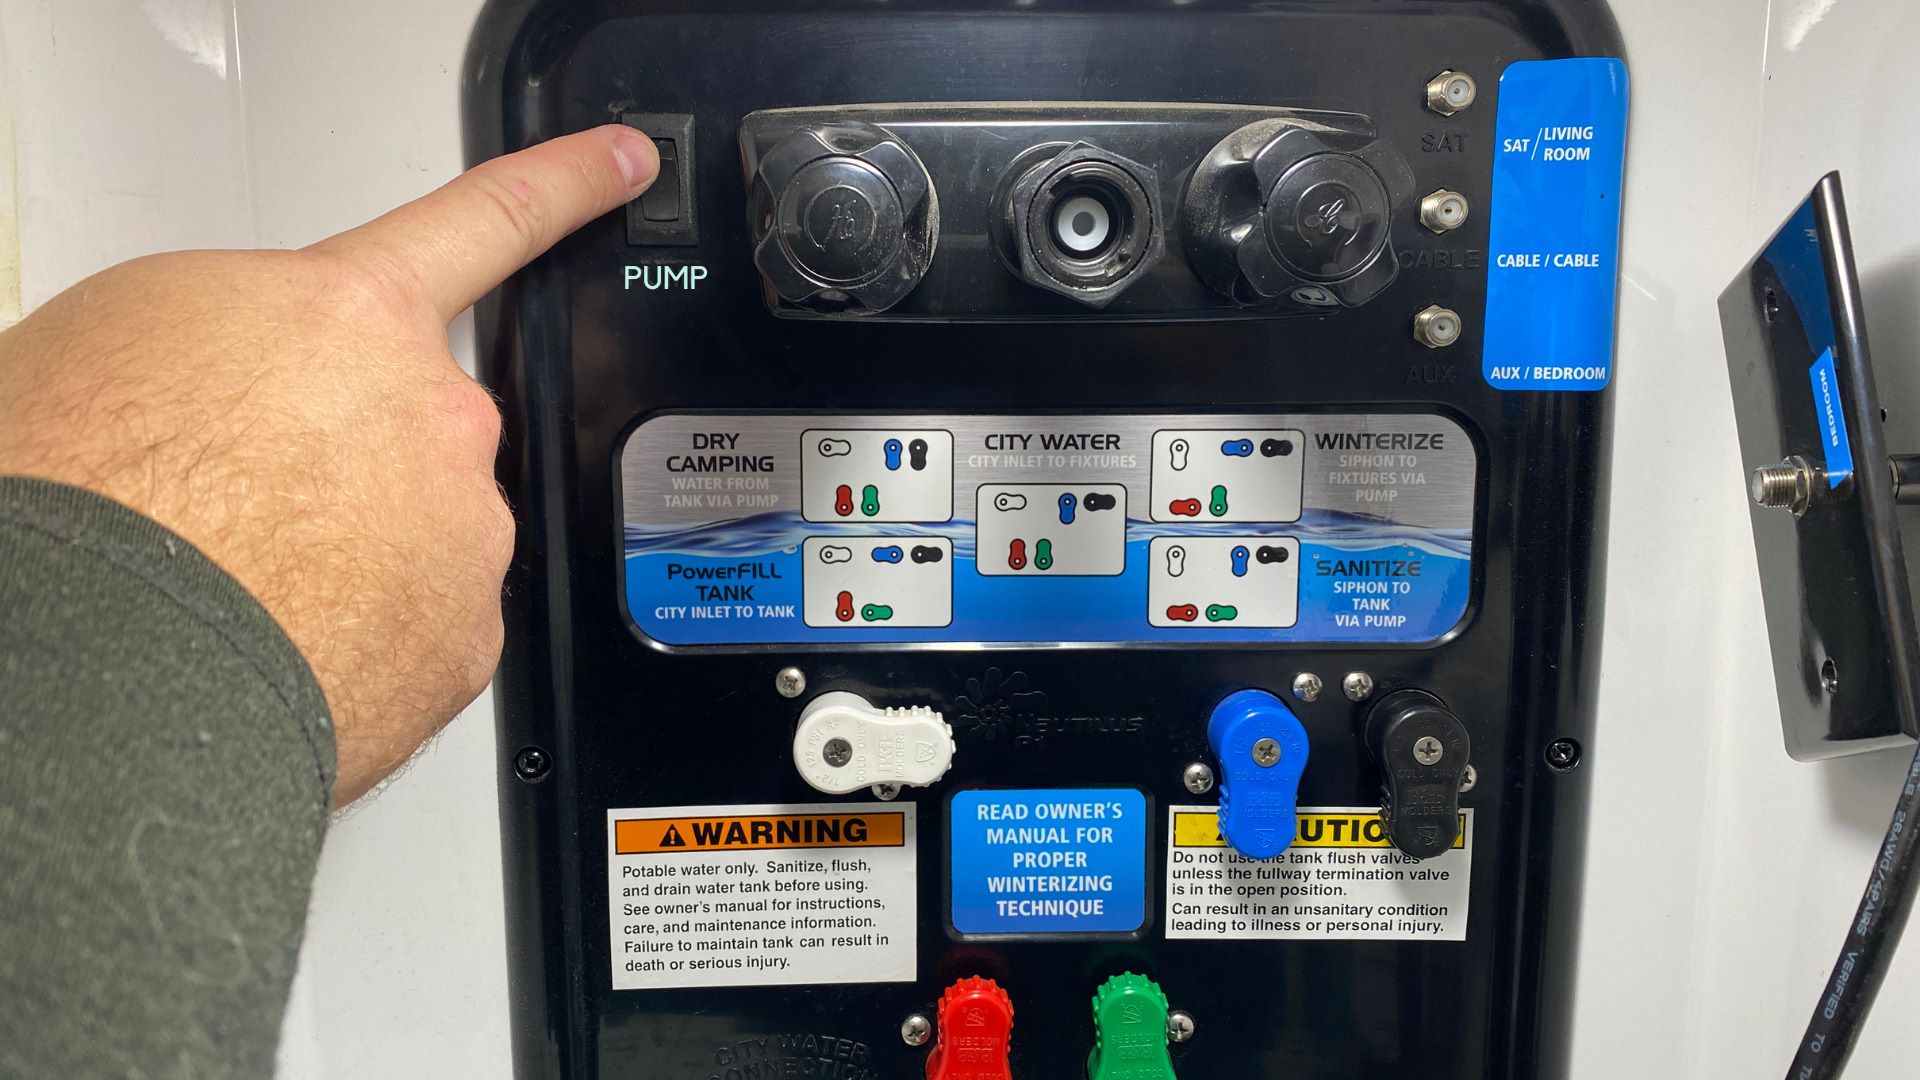
Pump Pressure Adjustment
The pressure settings of your RV water pump play a crucial role in its performance. If the pressure is set too high or too low, it can cause problems with water flow and potentially damage the pump. Adjusting the pump pressure can help resolve issues such as weak water flow or a pump that won’t shut off.
Here’s how you can adjust the pressure settings of your RV water pump:
- Locate the Pressure Switch: The pressure switch is responsible for controlling the pump’s operation and pressure. It is typically located near the pump itself or inside the RV’s control panel.
- Identify the Pressure Adjustment Mechanism: Depending on the make and model of your water pump, the pressure adjustment mechanism may vary. It could be a screw, dial, or other type of control.
- Consult the Pump’s Manual: To properly adjust the pressure, refer to the user manual or documentation provided by the manufacturer. It will provide specific instructions on how to adjust the pressure settings for your particular water pump.
- Gradually Adjust the Pressure: Use the appropriate tool, such as a screwdriver or knob, to make small, incremental adjustments to the pressure. It’s essential to do this gradually and carefully to avoid sudden pressure spikes or drops.
- Test the Water Flow: After each adjustment, turn on the water pump and test the water flow at the faucets and fixtures in your RV. Keep adjusting the pressure until you achieve the desired water flow and overall performance.
It’s important to note that the optimal pressure setting may vary depending on factors such as the specific water system in your RV and the preferences of the occupants. It may require some trial and error to find the ideal pressure setting for your needs.
If you’re uncertain about adjusting the pressure yourself or if the pump continues to exhibit issues after proper adjustment, it’s advisable to seek help from a professional RV technician who can ensure that the pressure is set correctly and address any underlying problems with your water pump.
Water Supply Problems
While issues with your RV water pump are often the primary suspect when there is no water flow, it’s important not to overlook potential problems with the water supply itself. Several factors can contribute to water supply issues in your RV, leading to a non-functioning water pump. Here are some common water supply problems to consider:
- Closed or Clogged Valves: Ensure that all water valves in your RV’s plumbing system are fully open. If a valve is closed or partially closed, it can restrict the flow of water to your water pump. Additionally, valves or faucets may become clogged over time, inhibiting proper water flow. Clean or replace any clogged valves as necessary.
- Damage to Water Tank: A damaged water tank can impede the flow of water to your RV’s water pump. Inspect the tank for any signs of cracks, leaks, or other damage. If you identify any issues, repair or replace the water tank to restore proper water supply to your pump.
- Low Water Levels: Your RV’s water pump requires an adequate supply of water to function properly. If the water tank is empty or the water levels are too low, the pump may not be able to draw in sufficient water. Check the water levels in your tank and refill it if necessary to ensure a consistent water supply for your pump.
- Water System Blockages: Over time, deposits, debris, or sediment can accumulate in your RV’s water system, leading to blockages that restrict water flow. Consider using a water system cleaner or descaler to remove any build-up and improve water flow. Regularly cleaning your water system can help prevent future blockage issues.
By addressing any water supply problems, you can potentially resolve issues with your RV water pump. Be diligent in inspecting and maintaining your water system to ensure consistent and reliable water flow throughout your RV.
If you have checked for these common water supply problems and the issue with your RV water pump persists, it may be necessary to consult a professional RV technician who can further troubleshoot and diagnose the problem.
Check the power supply to the water pump, ensure the pump is not clogged or air-locked, and inspect for any leaks in the system. If the issue persists, consider consulting a professional for further diagnosis.
Troubleshooting Steps for RV Water Pump
When your RV water pump is not functioning correctly, it’s important to go through a series of troubleshooting steps to identify and resolve the issue. Here are some steps you can take to troubleshoot your RV water pump:
- Check for Air Lock: As mentioned earlier, an air lock can hinder the flow of water and cause issues with your water pump. Follow the steps outlined in the “Air Lock” section of this article to release any trapped air in the water lines.
- Inspect Electrical Connections: Ensure all electrical connections to the water pump are secure and free from damage or corrosion. Check for any blown fuses or tripped breakers and replace or reset them as needed. Verify that your RV’s battery has sufficient charge if it powers the water pump.
- Adjust Pump Pressure: If your water pump is not delivering the desired water flow, consider adjusting the pressure settings as outlined in the “Pump Pressure Adjustment” section above. Make small adjustments and test the water flow after each change.
- Verify Water Supply: Check that all water valves in your RV are fully open and not clogged. Inspect the water tank for any damage and ensure it has sufficient water levels. Also, consider performing routine maintenance on your water system to remove any blockages or buildup.
- Listen for Unusual Noises: While the water pump is running, listen for any unusual noises like grinding, squealing, or excessive vibrations. These may indicate mechanical issues with the pump itself, such as a worn-out motor or impeller. If you suspect a mechanical issue, it’s best to consult a professional for further inspection and repair.
- Seek Professional Assistance: If you have gone through the troubleshooting steps outlined above and are still unable to resolve the issue with your water pump, it may be time to seek the help of a professional RV technician. They will have the expertise and tools necessary to diagnose and fix any complex issues with your water pump.
By following these troubleshooting steps, you can increase the chances of identifying and resolving common problems with your RV water pump. Remember to approach any repairs or adjustments with caution, and if you’re unsure or uncomfortable with the process, it’s always best to seek professional assistance.
Check for Air Lock
When your RV water pump is not working correctly, one of the first things to check for is an air lock. An air lock occurs when air becomes trapped in the water lines, preventing water from flowing properly. Fortunately, this issue is relatively easy to diagnose and resolve.
Here are the steps to check for and resolve an air lock in your RV water system:
- Turn off the Water Pump: Start by turning off the water pump to prevent any further air from entering the system.
- Identify the Farthest Faucet: Locate the faucet that is farthest away from the water pump. This will be the faucet where you will start the process of releasing the air lock.
- Open the Faucet Completely: Fully open the faucet that you identified in the previous step. It’s important to open it all the way to allow the air to escape freely.
- Gradually Turn on the Water Pump: Slowly turn on the water pump while keeping the faucet open. As the pump starts running, you will hear air and water sputtering out of the faucet.
- Wait for a Steady Stream of Water: Continue running the water pump and wait for a steady stream of water to flow out of the faucet. The steady stream indicates that the air lock has been released successfully.
- Repeat for Other Faucets: After resolving the air lock in the farthest faucet, repeat the process for other faucets and fixtures in your RV. This ensures that any remaining air is released from the system.
If the air lock issue persists, there may be a more complex problem with the water system. In such cases, it’s recommended to seek the assistance of a professional RV technician who can diagnose and address the issue effectively.
By checking for and resolving air locks in your RV water system, you can restore proper water flow and ensure that your water pump operates smoothly.
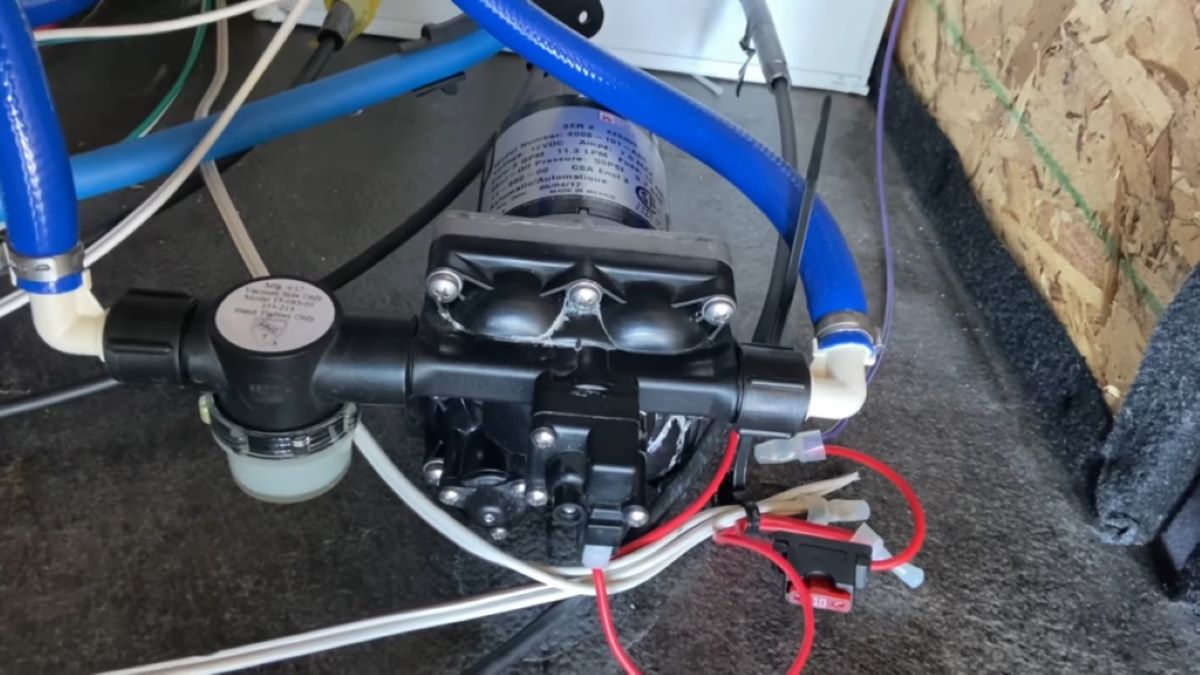
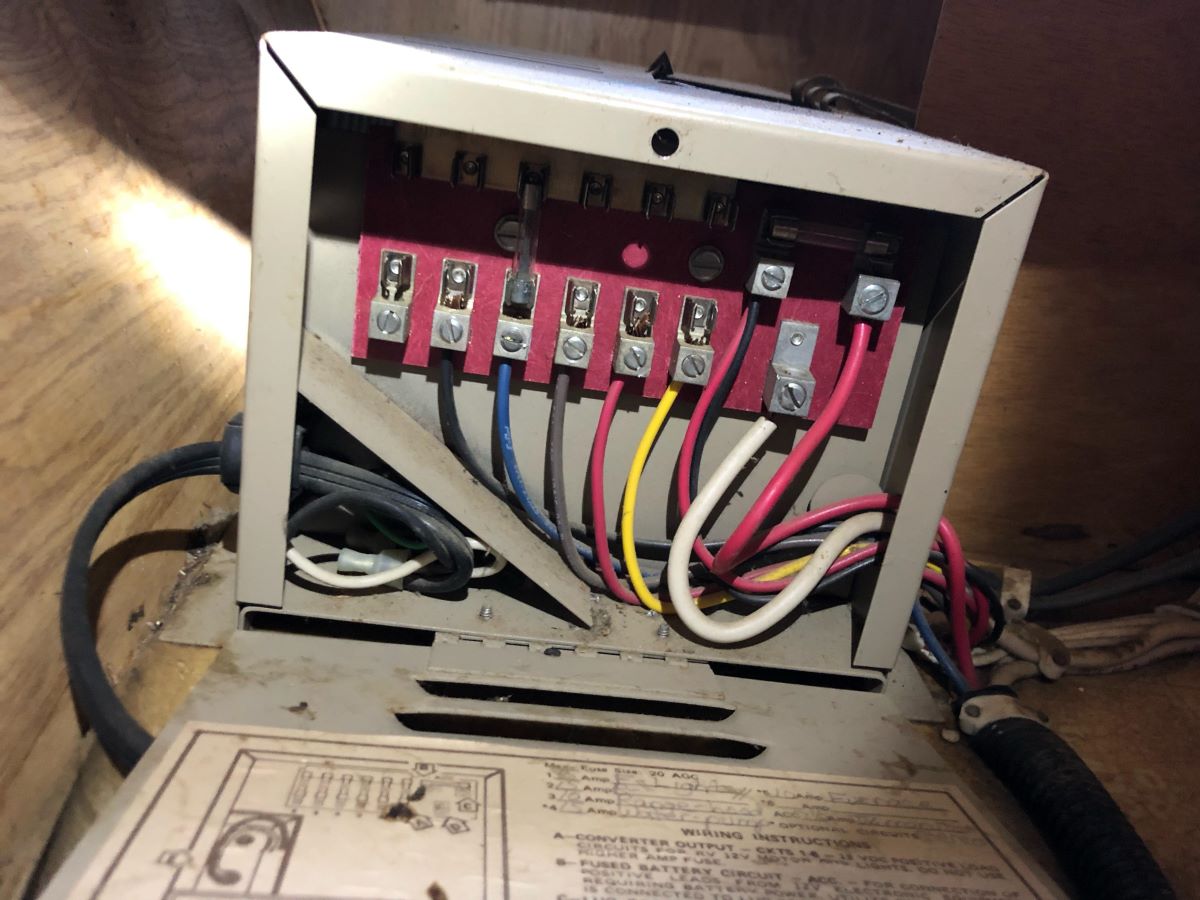
Inspect Electrical Connections
When troubleshooting your RV water pump, it’s essential to inspect the electrical connections to ensure they are secure and free from any issues. Electrical problems can often cause the water pump to malfunction or not work at all. Here are the steps to inspect the electrical connections:
- Turn off the Power: Before inspecting any electrical connections, make sure to turn off the power to your RV or disconnect it from any external power source. This step is crucial for your safety and to prevent any electrical accidents.
- Locate the Water Pump: Find the location of your RV water pump. It is typically located near the water tank or in an accessible compartment in your RV.
- Check the Wiring: Examine the wiring connected to the water pump. Look for any loose, frayed, or damaged wires. If you come across any damaged wires, they will need to be repaired or replaced.
- Inspect the Power Supply: Ensure that the power supply to the water pump is functioning correctly. This includes checking the fuses and circuit breakers related to the pump. If you find a blown fuse or a tripped breaker, replace the fuse or reset the breaker, respectively.
- Clean the Connections: Over time, dirt, corrosion, or rust can accumulate on the electrical connections. Clean the connections using a wire brush or a contact cleaner spray to remove any debris or oxidation. This will help improve the conductivity of the connections.
- Tighten the Connections: Check the tightness of all the electrical connections. If you find any loose connections, use a screwdriver or appropriate tool to tighten them securely.
- Test the Water Pump: After you have inspected and cleaned the electrical connections, turn the power back on and test the water pump. Verify that the pump is receiving power and operating correctly by running water through your faucets and checking for proper water flow.
If you have followed these steps and the water pump still isn’t working properly, it may be necessary to consult a professional RV technician. They will have the expertise and knowledge to troubleshoot and repair any complex electrical issues with your water pump.
By inspecting the electrical connections, you can identify and resolve any issues that may be affecting the performance of your RV water pump, ensuring a reliable water supply during your travels.
Read more: Why Is My RV Air Conditioner Not Working
Adjust Pump Pressure
The pressure settings of your RV water pump play a crucial role in its performance and the overall water flow in your RV. If you’re experiencing weak water flow or inconsistent pressure, adjusting the pump’s pressure settings may help resolve the issue. Here’s how you can adjust the pump pressure:
- Locate the Pressure Switch: The pressure switch is responsible for controlling the operation and pressure of the water pump. It is usually located near the pump itself or in the RV’s control panel.
- Identify the Pressure Adjustment Mechanism: Depending on the make and model of your water pump, the pressure adjustment mechanism may differ. It can be a screw, a dial, or another type of control.
- Refer to the Manufacturer’s Instructions: To adjust the pressure settings correctly, consult the user manual or documentation provided by the pump’s manufacturer. This will provide you with specific instructions and recommended pressure ranges for your particular water pump.
- Make Small Adjustments: Using the appropriate tool, such as a screwdriver or knob, make small and incremental adjustments to the pressure setting. Start by making slight adjustments and test the water flow after each change.
- Observe the Water Flow: As you adjust the pressure, pay attention to the water flow at your faucets and fixtures. The goal is to achieve a consistent and satisfactory flow without putting excessive strain on the pump.
- Continue Adjustment if Needed: If you’re not satisfied with the water flow or pressure after the initial adjustment, you can continue making small adjustments until you find the desired balance.
It’s important to note that the optimal pressure setting may vary depending on your RV’s water system and personal preferences. Keep in mind that setting the pressure too high can strain the pump and potentially lead to damage, while setting it too low may result in insufficient water flow.
If you’re uncertain about adjusting the pressure on your own or if the issue persists even after adjustment, it’s advisable to consult an RV technician. They can offer expert guidance, ensure the pressure is set correctly, and address any underlying problems with your water pump if necessary.
By adjusting the pressure settings of your RV water pump, you can optimize the water flow and enhance your overall water system performance while on the road.
Verify Water Supply
When troubleshooting your RV water pump, it’s important to consider the water supply itself as a potential source of problems. Sometimes, issues with the water supply can directly impact the functioning of the water pump. Here are the steps to verify the water supply and address any related problems:
- Check Water Valves: Ensure that all water valves in your RV’s plumbing system are fully open. It’s possible that a valve may have been accidentally closed, restricting the flow of water to the water pump.
- Inspect the Water Tank: Examine the water tank in your RV for any signs of damage or leaks. A damaged water tank can impede the flow of water to the water pump. If you notice any issues, repair or replace the water tank accordingly.
- Verify Water Levels: Check the water levels in your RV’s water tank. If the tank is empty or the water levels are too low, there may not be enough water for the water pump to draw from. Refill the water tank as needed to ensure a sufficient water supply.
- Examine Water Filters: If your RV is equipped with water filters, check if they are clogged or in need of replacement. Clogged filters can restrict water flow and affect the performance of the water pump. Clean or replace the filters if necessary.
- Inquire About Campground Water Issues: If you’re staying at a campground or RV park, it’s possible that there may be water supply issues beyond your control. Inquire with the campground management or your neighbors to determine if there are any known problems with the water supply.
- Flush the Water System: Over time, sediment, debris, or deposits can accumulate in your RV’s water system, resulting in blockages that restrict water flow. Consider flushing your water system using a built-in or external system flusher to remove any buildup and improve water flow.
By verifying the water supply and addressing any related problems, you can ensure that your RV water pump has a sufficient and uninterrupted flow of water. Taking these steps can help prevent or resolve issues with your water pump and improve the overall performance of your water system.
If you have completed these steps and the water pump is still not functioning properly, it may be necessary to consult a professional RV technician for further assistance in diagnosing and resolving the issue.
Conclusion
Your RV water pump is a vital component of your camping experience, providing you with a steady supply of water for various activities. When the water pump is not working as it should, it can be frustrating and hinder your ability to enjoy your trip.
In this article, we have explored some common causes of RV water pump issues and provided troubleshooting steps to help you diagnose and resolve the problems. We discussed checking for air locks, inspecting electrical connections, adjusting pump pressure, and verifying the water supply. These steps can help you identify and address many of the common issues that may arise with your RV water pump.
It’s important to approach troubleshooting with a systematic mindset, going through each step carefully and methodically. Sometimes, the issue can be resolved with a simple adjustment or cleaning, while other times, it may require professional assistance.
If you find that the troubleshooting steps outlined in this article do not resolve the issue or if you are uncomfortable performing the tasks yourself, it is recommended to consult an experienced RV technician. They have the expertise and knowledge to diagnose and repair complex problems with your water pump and water system.
Remember to prioritize regular maintenance of your RV’s water system to prevent issues before they occur. This includes inspecting and cleaning connections, checking the water tank for damage, and maintaining proper water levels.
By being proactive and knowledgeable about common RV water pump issues, you can ensure a smooth and enjoyable camping experience with a reliable water supply. Stay prepared, and don’t let water pump problems dampen your adventures on the road!
Frequently Asked Questions about Why Is My Rv Water Pump Not Working
Was this page helpful?
At Storables.com, we guarantee accurate and reliable information. Our content, validated by Expert Board Contributors, is crafted following stringent Editorial Policies. We're committed to providing you with well-researched, expert-backed insights for all your informational needs.


0 thoughts on “Why Is My Rv Water Pump Not Working”