Articles
How To Sharpen Ryobi Hedge Trimmer
Modified: October 19, 2024
Learn how to sharpen your Ryobi hedge trimmer blades with these easy-to-follow articles. Keep your trimmer in top shape for a perfectly manicured lawn.
(Many of the links in this article redirect to a specific reviewed product. Your purchase of these products through affiliate links helps to generate commission for Storables.com, at no extra cost. Learn more)
Introduction
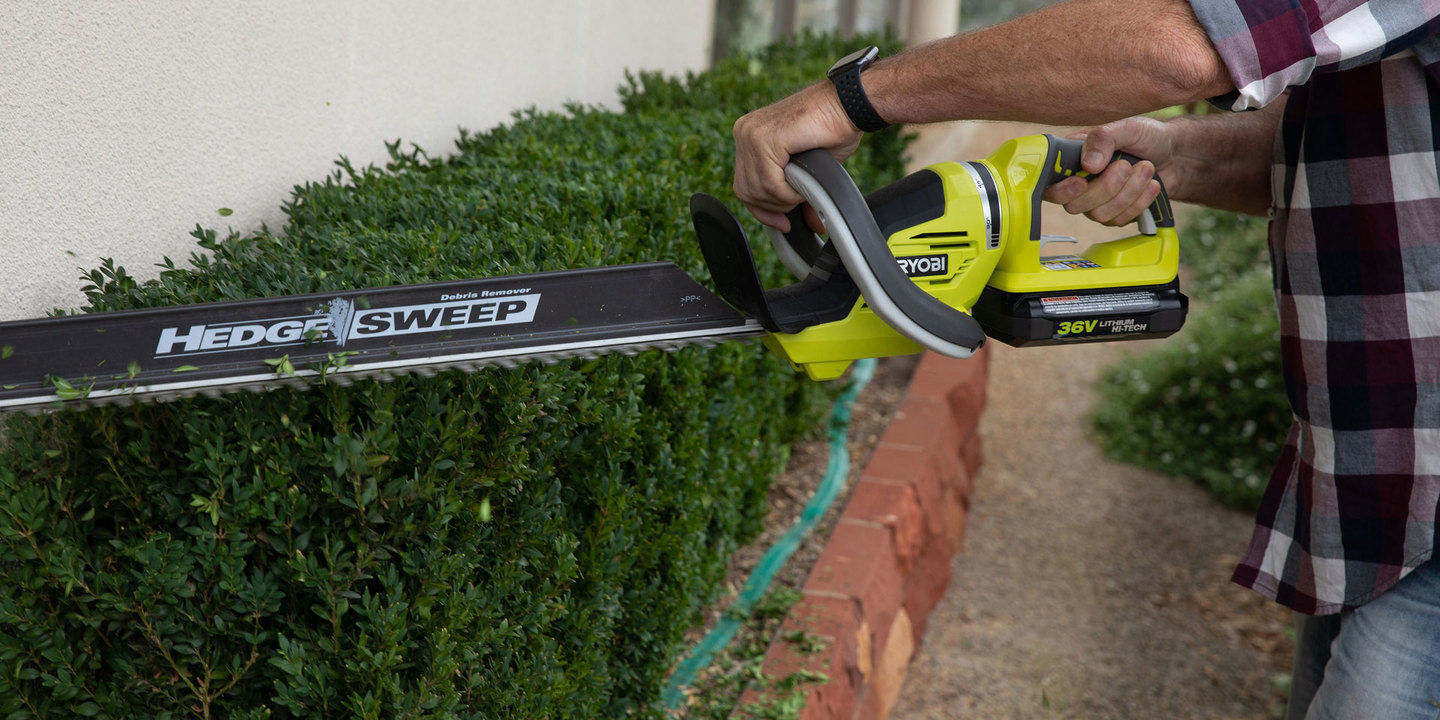
Welcome to our comprehensive guide on how to sharpen a Ryobi hedge trimmer. Keeping your hedge trimmer blades sharp is crucial for maintaining their cutting performance. Dull blades can lead to inefficient trimming, making your yard work more time-consuming and less effective. By following these step-by-step instructions, you can ensure that your Ryobi hedge trimmer is always ready to tackle overgrown hedges and shrubs with ease.
Before we dive into the process, it’s important to note that safety should always be a top priority. Make sure to wear protective gloves and safety glasses throughout the sharpening process. Additionally, ensure that the trimmer is unplugged or the battery is removed to prevent accidental start-up.
To sharpen your Ryobi hedge trimmer, you’ll need a few tools and materials. Here’s a list of what you’ll need:
Key Takeaways:
- Keep your Ryobi hedge trimmer in top condition by following safety tips, preparing the trimmer, inspecting and cleaning the blades, and sharpening them with the right tools and techniques.
- Regular maintenance, including cleaning, rust removal, sharpening, and lubricating, ensures efficient and precise cutting, making your hedge trimming tasks easier and more effective.
Read more: How To Advance String On Ryobi Trimmer
Safety Tips
- Wear protective gloves and safety glasses to protect your hands and eyes from any potential injury.
- Make sure the hedge trimmer is unplugged or the battery is removed before starting any sharpening or maintenance work.
- Work in a well-ventilated area to prevent inhalation of any fumes produced during the cleaning or sharpening process.
- Keep a first aid kit nearby in case of any accidents or injuries.
Tools and Materials Needed
- Ryobi hedge trimmer
- Protective gloves
- Safety glasses
- Bristle brush or toothbrush
- Steel wool or sandpaper (if rust is present)
- Honing stone or sharpening file
- Lubricating oil
Key Takeaways:
- Keep your Ryobi hedge trimmer in top condition by following safety tips, preparing the trimmer, inspecting and cleaning the blades, and sharpening them with the right tools and techniques.
- Regular maintenance, including cleaning, rust removal, sharpening, and lubricating, ensures efficient and precise cutting, making your hedge trimming tasks easier and more effective.
Read more: How To Advance String On Ryobi Trimmer
Safety Tips
When it comes to sharpening your Ryobi hedge trimmer, safety should always be your top priority. Here are some important safety tips to keep in mind:
- Wear protective gloves and safety glasses: Before you begin any sharpening or maintenance work on your hedge trimmer, make sure to protect your hands and eyes by wearing gloves and safety glasses. This will help prevent any potential injuries from sharp blades or flying debris.
- Unplug or remove the battery: Always disconnect the power source before working on your hedge trimmer. Unplug the trimmer from the power outlet or remove the battery to prevent accidental start-up during the sharpening process.
- Work in a well-ventilated area: When cleaning or sharpening your hedge trimmer, it’s important to work in a well-ventilated area. This will help prevent the inhalation of any fumes produced by cleaning solvents or lubricating oils.
- Use proper technique: Follow the manufacturer’s instructions for sharpening your specific Ryobi hedge trimmer model. Improper sharpening techniques can not only damage the blades but also pose a risk to your safety.
- Keep a first aid kit nearby: Accidents can happen, even with the utmost precautions. It’s always a good idea to have a first aid kit on hand, equipped with bandages, antiseptic, and other essentials, in case of any injuries.
By following these safety tips, you can ensure a safe sharpening experience for yourself and maintain the longevity of your Ryobi hedge trimmer.
Tools and Materials Needed
Before you get started with sharpening your Ryobi hedge trimmer, gather the following tools and materials:
- Ryobi hedge trimmer: Make sure you have your Ryobi hedge trimmer, as this is the equipment you will be working on. It’s important to have the right model and size for a successful sharpening process.
- Protective gloves: Wear protective gloves to safeguard your hands from any sharp edges or potential injuries. Choose gloves that provide a good grip and allow for dexterity.
- Safety glasses: Protect your eyes from flying debris by wearing safety glasses during the sharpening process. This will prevent any particles or small metal fragments from causing injury.
- Bristle brush or toothbrush: Use a bristle brush or a toothbrush to remove any debris, dirt, or grass clippings from the blades. This will help you get a clearer view of the condition of the blades before sharpening.
- Steel wool or sandpaper (if rust is present): If there is rust on the blades, you’ll need either steel wool or sandpaper to remove it. Choose a fine-grade steel wool or sandpaper to gently scrub away the rust without damaging the blade surface.
- Honing stone or sharpening file: A honing stone or sharpening file is essential for sharpening the blades. These tools help remove any nicks or dullness, restoring the sharp cutting edges.
- Lubricating oil: After sharpening, lubricating the blades is crucial to prevent any premature wear and tear. Choose a lubricating oil specifically designed for hedge trimmers to ensure smooth operation.
Gathering these tools and materials before you begin will ensure a smooth and efficient sharpening process for your Ryobi hedge trimmer. Remember to always follow safety precautions and consult the manufacturer’s instructions for your specific model.
Read more: How To Use Ryobi Trimmer As Edger
Step 1: Preparing the Hedge Trimmer
Before you start sharpening your Ryobi hedge trimmer, it’s important to prepare the tool for the process. Follow these steps to ensure that the trimmer is ready:
- Turn off the trimmer: If your Ryobi hedge trimmer is corded, unplug it from the power source. If it’s battery-powered, remove the battery to prevent any accidental start-up during the sharpening process.
- Clean the trimmer: Use a bristle brush or toothbrush to remove any debris, grass clippings, or dirt from the blades. Cleaning the trimmer will provide a clear view of the condition of the blades and prevent any contaminants from interfering with the sharpening process.
- Inspect the trimmer: Carefully examine the blades for any signs of damage, such as chips, cracks, or excessive wear. If you notice any significant damage, it may be necessary to replace the blades or seek professional assistance.
- Secure the trimmer: Place the hedge trimmer on a stable surface or use a vice to securely hold it in place. This will prevent it from moving or slipping during the sharpening process, ensuring your safety and accuracy.
By properly preparing your Ryobi hedge trimmer, you create a solid foundation for the sharpening process. Taking these precautions will help you achieve optimal results and maintain the efficiency of your trimmer’s blades.
Step 2: Inspecting the Blades
Once you’ve prepared your Ryobi hedge trimmer, it’s time to inspect the blades for any damage or signs of wear. This step is crucial in determining the extent of sharpening required and ensuring that the blades are in good condition. Follow these steps to inspect the blades:
- Visually examine the blades: Carefully observe the blade edges for any chips, dents, or nicks. These imperfections can affect the cutting performance and should be addressed during the sharpening process.
- Check for excessive wear: Look for any signs of excessive wear on the blades. If the cutting edge appears significantly worn down, it may be time to consider replacing the blades for optimal trimming results.
- Inspect the blade alignment: Ensure that the blades are properly aligned and not bent. Misaligned or bent blades can cause uneven cutting and potential damage to the trimmer.
- Verify the blade condition: Make sure there are no cracks or breaks in the blades. Damaged blades should not be sharpened and should be replaced to ensure safe and effective operation.
If you notice any significant damage or excessive wear during the blade inspection, consult the manufacturer’s guidelines for your specific Ryobi hedge trimmer model. They may recommend blade replacement or provide instructions for professional repair. Addressing any blade issues before proceeding with sharpening will help ensure optimal results and prolong the life of your hedge trimmer.
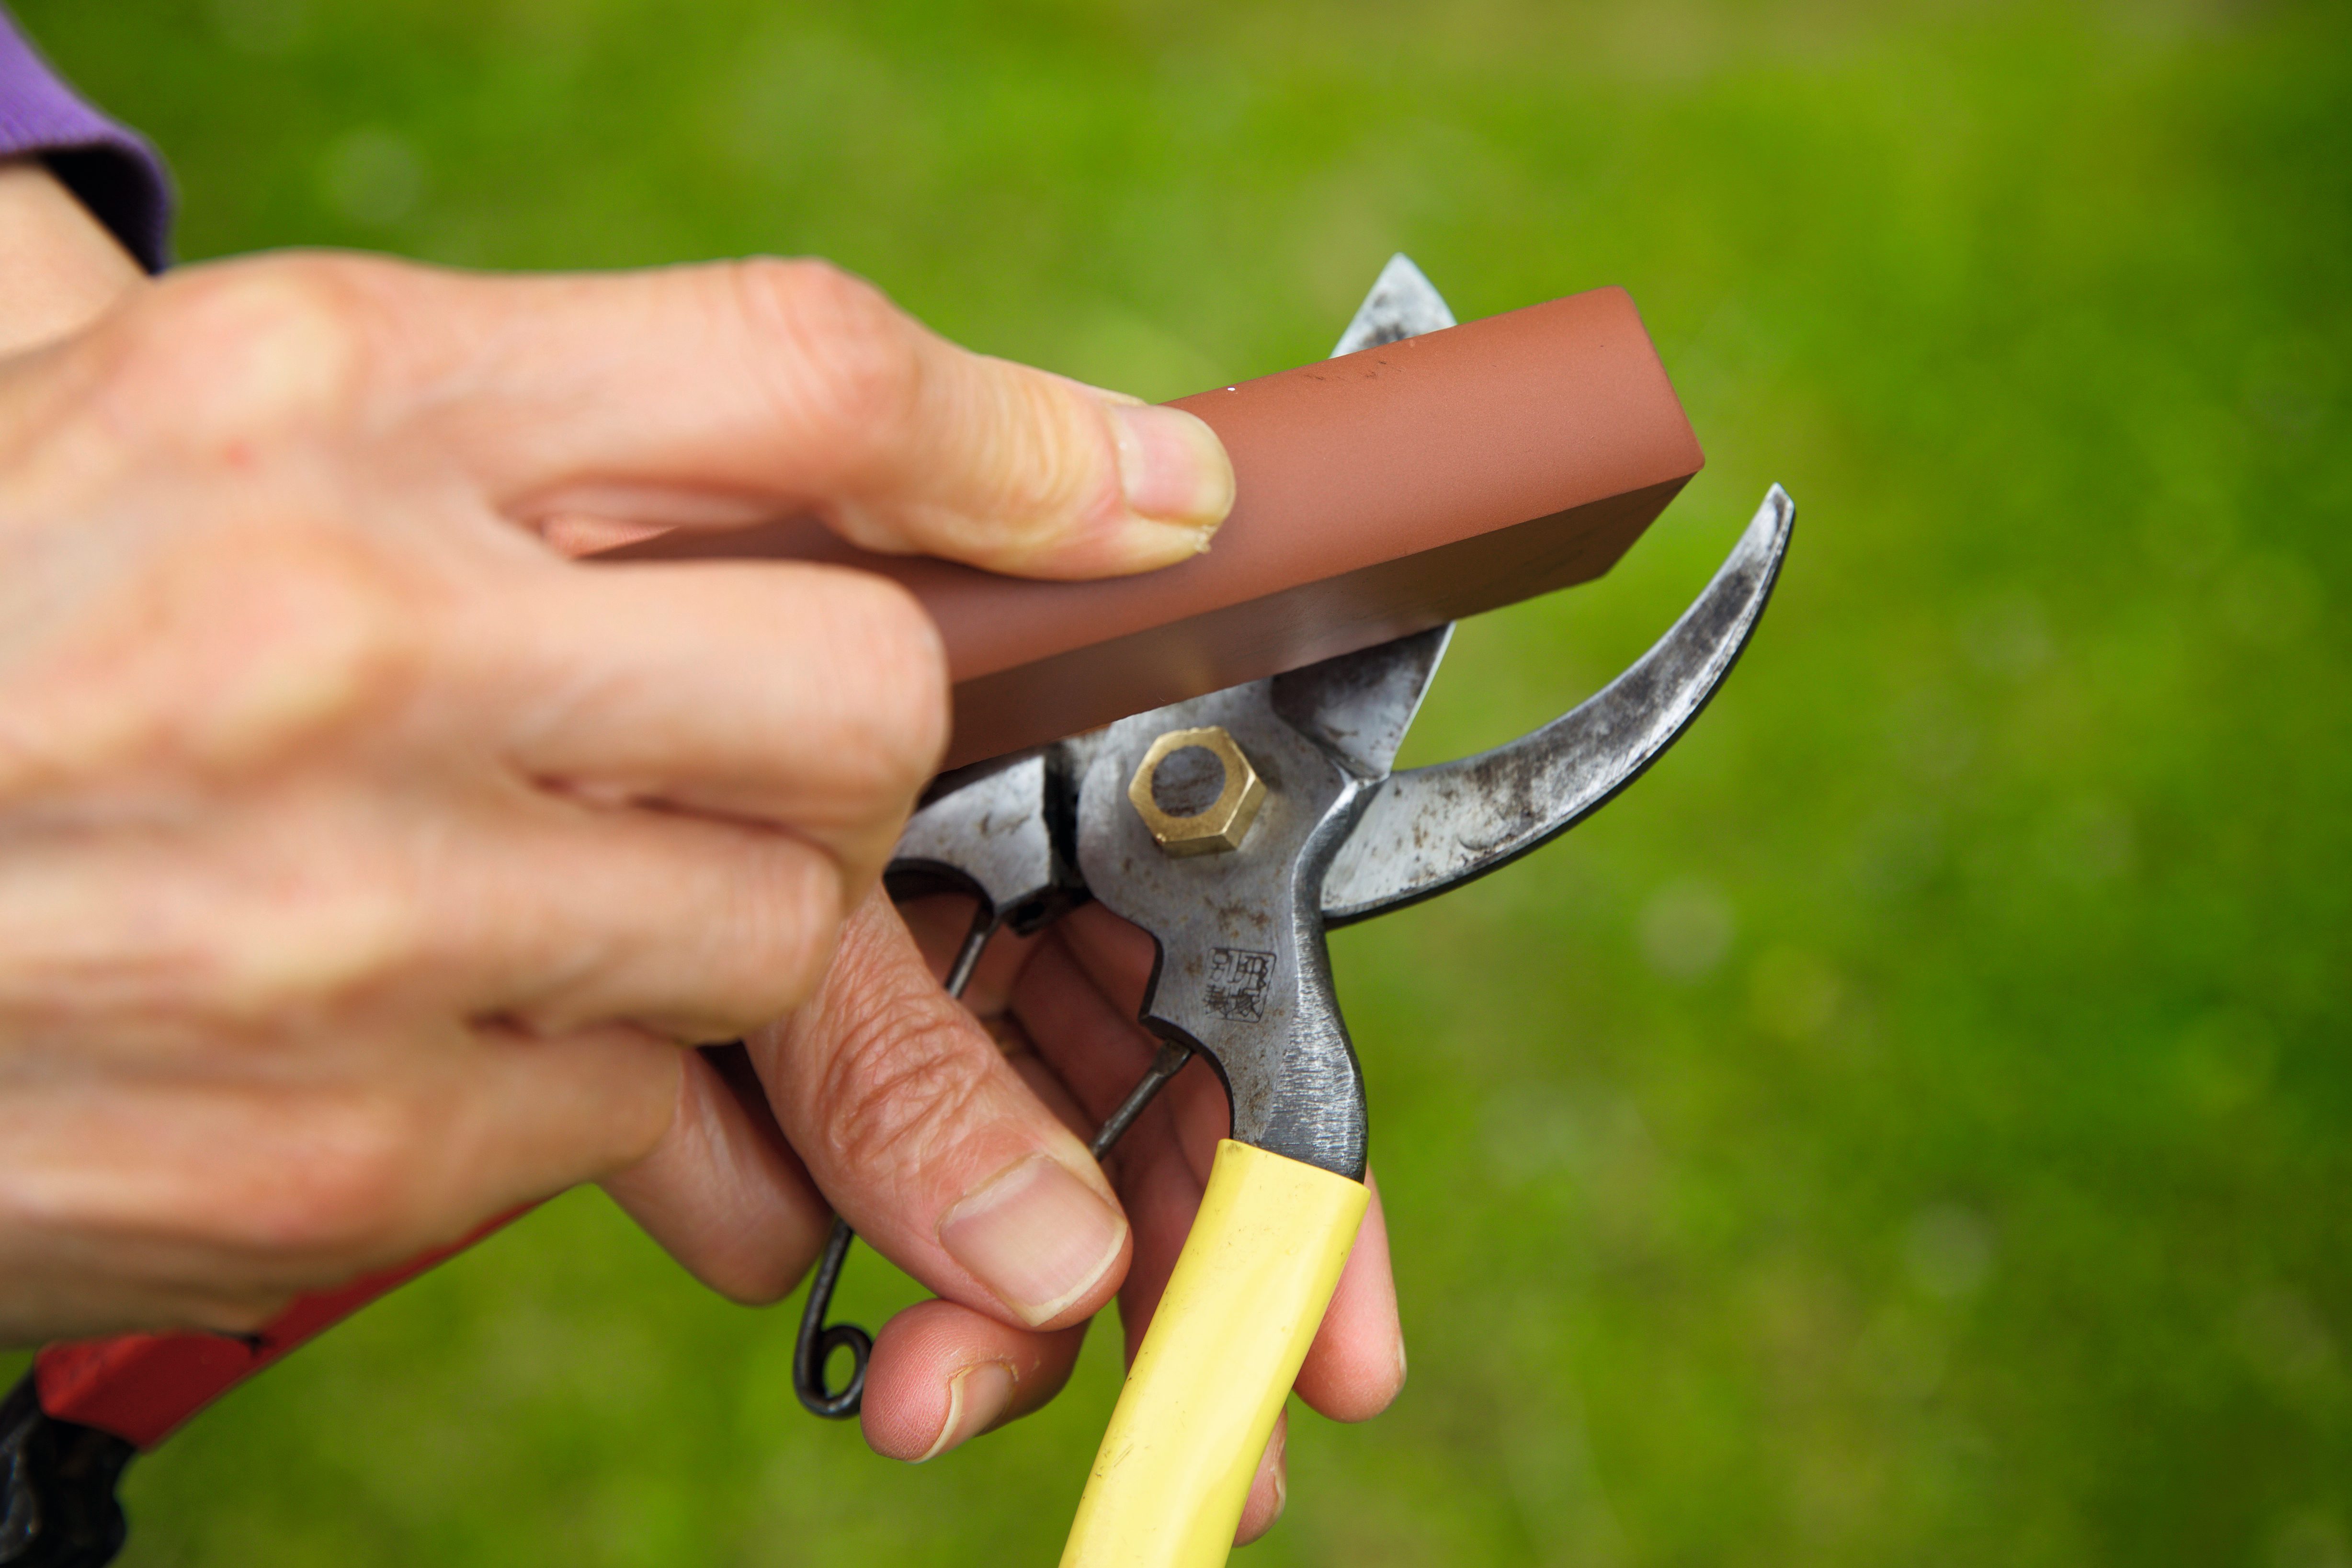
When sharpening a Ryobi hedge trimmer, use a flat file to sharpen the cutting edges at a 20-degree angle. Make sure to wear gloves and eye protection while sharpening.
Step 3: Cleaning the Blades
After inspecting the blades of your Ryobi hedge trimmer, it’s time to clean them to remove any debris, sap, or built-up residue. Cleaning the blades will not only improve their efficiency but also provide a better surface for sharpening. Follow these steps to clean the blades:
- Prepare a cleaning solution: Fill a bucket or container with warm water and add a small amount of mild dish soap. Stir the solution to create a soapy mixture.
- Dampen a cloth or sponge: Moisten a soft cloth or sponge with the soapy water solution. Make sure it’s not dripping wet, as excess water can damage the trimmer and its electrical components.
- Wipe the blades: Gently wipe both sides of the blades with the damp cloth or sponge. Pay close attention to removing any dirt, sap, or residue that may have accumulated during use.
- Use a toothbrush for stubborn residue: For stubborn or hard-to-reach areas, use a toothbrush to scrub away the residue. The bristles can effectively loosen and remove dirt or sap from the blades.
- Rinse the blades: Rinse the blades with clean water to remove any remaining soapy residue. Ensure that no water splashes onto the motor or other electrical components of the trimmer.
- Dry the blades: Thoroughly dry the blades using a clean, dry cloth. Make sure there is no moisture left on the blades as it can contribute to rust or corrosion.
By cleaning the blades of your hedge trimmer, you remove any hindrances to a smooth sharpening process. It also helps maintain the performance and longevity of the blades. Now that the blades are clean and ready, you can proceed to the next step: removing any rust (if applicable).
Step 4: Removing Rust (if applicable)
If you notice any rust on the blades of your Ryobi hedge trimmer during the inspection, it’s essential to remove it before proceeding with sharpening. Rust can hinder the effectiveness of the sharpening process and compromise the longevity of the blades. Follow these steps to remove rust from your hedge trimmer blades:
- Gather the necessary materials: You will need steel wool or fine-grade sandpaper to remove the rust. Choose a fine-grade steel wool or sandpaper to avoid scratching or damaging the blades.
- Protective measures: Put on your protective gloves and safety glasses to ensure your safety during the rust removal process.
- Start scrubbing: Use the steel wool or sandpaper to scrub the rusted areas of the blades gently. Apply light to medium pressure and work in small, circular motions.
- Remove all rust: Continue scrubbing until all traces of rust have been removed. Make sure to cover all the rusted areas on both sides of the blades.
- Clean the blades: After removing the rust, clean the blades with a cloth or sponge dampened with clean water. This will remove any residues from the rust removal process and prevent further corrosion.
- Dry the blades: Thoroughly dry the blades with a clean, dry cloth, ensuring that no moisture is left on the surface. Moisture can lead to future rusting if not properly dried.
Removing rust from your hedge trimmer blades is an important step in restoring their cutting effectiveness. By taking the time to eliminate rust, you ensure a smoother sharpening process and extend the life of your Ryobi hedge trimmer.
Once you have successfully removed any rust and the blades are clean and dry, you can proceed to the next step: sharpening the blades.
Read more: How To Rotate Ryobi Trimmer Head
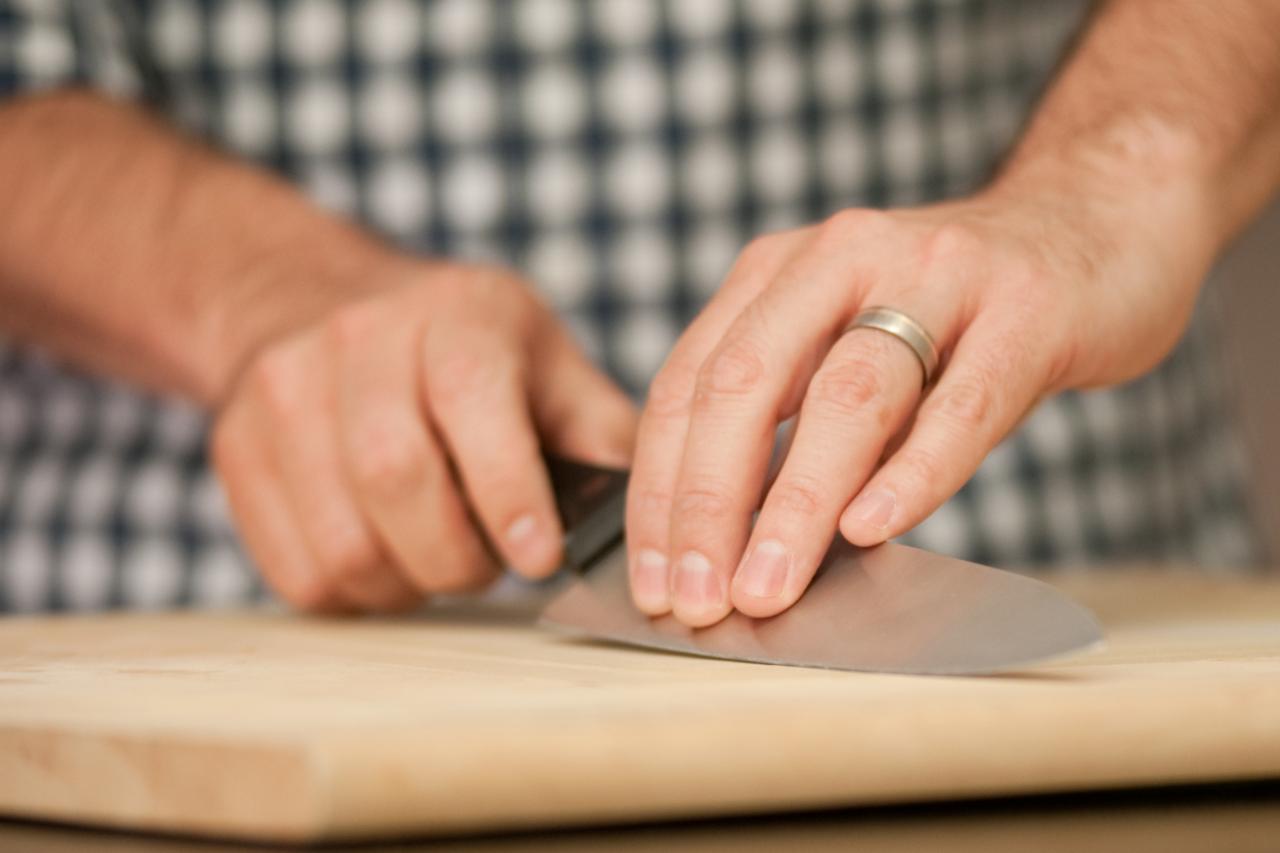
Step 5: Sharpening the Blades
Now that your Ryobi hedge trimmer blades are clean and free from rust, it’s time to sharpen them. Sharpening the blades will restore their sharp cutting edges, ensuring efficient and precise trimming. Follow these steps to sharpen your hedge trimmer blades:
- Secure the trimmer: Place the hedge trimmer on a stable surface or use a vice to securely hold it in place. This will provide stability and prevent any accidents during the sharpening process.
- Choose your sharpening tool: Depending on your preference and the condition of the blades, you can use either a honing stone or a sharpening file. Both tools are effective in sharpening hedge trimmer blades.
- Select the correct angle: Refer to the manufacturer’s guidelines or the blade’s original angle to determine the correct angle for sharpening. Maintaining the original angle will ensure optimal cutting performance.
- Sharpen one blade at a time: Focus on sharpening one blade at a time. Use smooth and consistent strokes with the sharpening tool along the cutting edge of the blade, following the predetermined angle.
- Even out any imperfections: Pay special attention to any nicks or dents on the blade edges. Use the sharpening tool to smooth out these imperfections, ensuring a uniform cutting edge.
- Alternate sides: After sharpening one blade, switch to the other blade and repeat the sharpening process. It’s crucial to maintain balanced sharpness on both sides for optimal cutting performance.
- Check for sharpness: After sharpening, carefully run your finger along the cutting edge to check for sharpness. Be cautious as the blades may still be sharp. If needed, continue sharpening until the desired sharpness is achieved.
Remember to take your time and apply even pressure while sharpening the blades. It’s better to make several light passes than to apply too much pressure at once. Once you are satisfied with the sharpness, move on to the next step: testing the sharpness of the blades.
Step 6: Testing the Sharpness
After sharpening your Ryobi hedge trimmer blades, it’s important to test their sharpness before proceeding further. Testing the sharpness will ensure that the blades are ready to deliver optimal cutting performance. Follow these steps to test the sharpness of your blades:
- Disconnect the power source: If your hedge trimmer is corded, unplug it from the power source. If it’s battery-powered, remove the battery to prevent accidental start-up.
- Hold the trimmer at a safe distance: Hold the trimmer at a safe distance from your body, ensuring that the blades are clear of any obstructions.
- Find a test material: Choose a small branch or shrub to test the sharpness of the blades. Make sure the test material is similar to what you regularly trim in your yard.
- Trim the test material: Lightly trim the test material with the hedge trimmer, paying attention to how easily it cuts through. Sharp blades will make clean and effortless cuts.
- Inspect the results: Examine the cut edges of the test material. If the blades are sharp, the cuts will be clean and precise. If there are signs of tearing or unevenness, the blades may still require additional sharpening.
- Repeat the process if necessary: If the test results indicate that further sharpening is required, go back to Step 5 and sharpen the blades again until the desired sharpness is achieved.
By testing the sharpness of your hedge trimmer blades, you can ensure that they are ready to tackle your trimming tasks effectively. If the blades pass the sharpness test, proceed to the next step: lubricating the blades.
Note: Always exercise caution when handling sharp blades and perform the sharpness test in a safe and controlled manner to avoid injury.
Step 7: Lubricating the Blades
After sharpening and testing the sharpness of your Ryobi hedge trimmer blades, it’s essential to lubricate them. Lubricating the blades will reduce friction, prevent rusting, and ensure smooth operation. Follow these steps to properly lubricate your hedge trimmer blades:
- Choose the right lubricating oil: Select a lubricating oil specifically designed for hedge trimmers. Check the manufacturer’s recommendations for the type of oil to use.
- Apply the lubricating oil: Using a small brush or oil applicator, apply a few drops of the lubricating oil to the blades. Make sure to cover the entire cutting surface and pay extra attention to the areas where the blades meet.
- Spread the oil: Use a clean cloth or paper towel to evenly spread the lubricating oil across the blades. This will ensure that the oil penetrates and coats the entire surface.
- Wipe off excess oil: After spreading the oil, gently wipe off any excess oil from the blades. Leaving excess oil can attract dust and debris, which can affect the trimmer’s performance.
- Check for smooth movement: Move the blades back and forth to ensure they move smoothly. The lubricant should facilitate effortless movement, indicating proper oiling.
Lubricating the blades of your hedge trimmer helps to prolong their lifespan and maintain their cutting efficiency. It’s recommended to lubricate the blades periodically, especially after sharpening or prolonged use, to keep them in optimal condition.
Once the blades are properly lubricated, you can proceed to the final step: reassembling the hedge trimmer.
Step 8: Reassembling the Hedge Trimmer
After sharpening, testing, and lubricating the blades of your Ryobi hedge trimmer, it’s time to reassemble the trimmer for future use. Properly reassembling the trimmer ensures that all components are securely in place, allowing for safe and effective operation. Follow these steps to reassemble your hedge trimmer:
- Clean the trimmer: Before reassembling, ensure that all parts of the trimmer are clean and free from debris. Wipe down the body of the trimmer with a cloth or sponge to remove any dirt or dust.
- Reinsert the blades: Carefully align the blades with the guide bars and slide them back into their designated slots. Ensure that they are properly seated and securely in place.
- Tighten any fasteners: Check for any fasteners, such as screws or bolts, that may need to be tightened. Using the appropriate tools, securely tighten any loose fasteners to ensure the trimmer’s stability.
- Reattach any safety guards or covers: If you removed any safety guards or covers during the sharpening process, make sure to reattach them to their original positions. These guards provide added protection during operation.
- Connect the power source: If your hedge trimmer is corded, plug it back into the power source. If it’s battery-powered, insert the battery into the trimmer. Ensure that the power connection is secure.
Once you have completed these steps, your Ryobi hedge trimmer should be fully reassembled and ready for use. Before operating the trimmer, double-check all the components to verify that everything is properly secured. Now you can confidently tackle your hedge trimming tasks with a sharp and well-maintained trimmer.
Remember, always follow the manufacturer’s instructions for your specific model, and prioritize safety when using power tools.
Note: It’s important to periodically maintain and sharpen your hedge trimmer blades to ensure optimum performance. Following these steps regularly will help prolong the life of your trimmer and ensure professional-looking results.
Read more: How To Remove Ryobi Trimmer Head
Conclusion
Congratulations! You have successfully learned how to sharpen your Ryobi hedge trimmer blades. By following the step-by-step instructions in this guide, you can maintain the cutting efficiency and prolong the lifespan of your trimmer.
Throughout the process, we emphasized the importance of safety and provided tips to protect yourself while working on your hedge trimmer. Remember to always wear protective gloves and safety glasses, disconnect the power source, and work in a well-ventilated area.
We started by preparing the hedge trimmer, inspecting the blades for damage, and cleaning them to remove debris and residue. If rust was present, we guided you on how to remove it effectively.
Then, we moved on to the crucial step of sharpening the blades using either a honing stone or a sharpening file. We reminded you to maintain the correct angle and focus on sharpening one blade at a time.
Afterwards, we tested the sharpness of the blades using a suitable test material and made adjustments if necessary. Finally, we highlighted the significance of lubricating the blades to reduce friction, prevent rust, and ensure smooth operation.
We concluded by discussing the importance of reassembling the hedge trimmer correctly, ensuring that all components are secure and the power source is properly connected.
Regular maintenance, including sharpening and lubricating the blades, will result in efficient and precise cutting, making your hedge trimming tasks easier and more effective.
Remember to consult the manufacturer’s guidelines specific to your Ryobi hedge trimmer model for any additional recommendations or instructions.
Thank you for following this comprehensive guide. We hope it has empowered you to confidently sharpen and maintain your Ryobi hedge trimmer for years to come!
Now that you've mastered sharpening your Ryobi hedge trimmer, why not widen your tool savvy? Our next feature delves into what makes certain power tools stand out from the rest. Whether you're sprucing up your workshop or just starting your collection, knowing which tools deliver the best performance helps ensure your projects turn out great. Ready to expand your toolkit with some reliable gear? Check out our detailed guide.
Frequently Asked Questions about How To Sharpen Ryobi Hedge Trimmer
Was this page helpful?
At Storables.com, we guarantee accurate and reliable information. Our content, validated by Expert Board Contributors, is crafted following stringent Editorial Policies. We're committed to providing you with well-researched, expert-backed insights for all your informational needs.


0 thoughts on “How To Sharpen Ryobi Hedge Trimmer”