Home>Construction & Tools>Building Materials>How To Acid Wash Brick


Building Materials
How To Acid Wash Brick
Modified: September 2, 2024
Learn how to acid wash brick and revitalize your building materials. Discover step-by-step instructions for a successful brick acid wash.
(Many of the links in this article redirect to a specific reviewed product. Your purchase of these products through affiliate links helps to generate commission for Storables.com, at no extra cost. Learn more)
Introduction
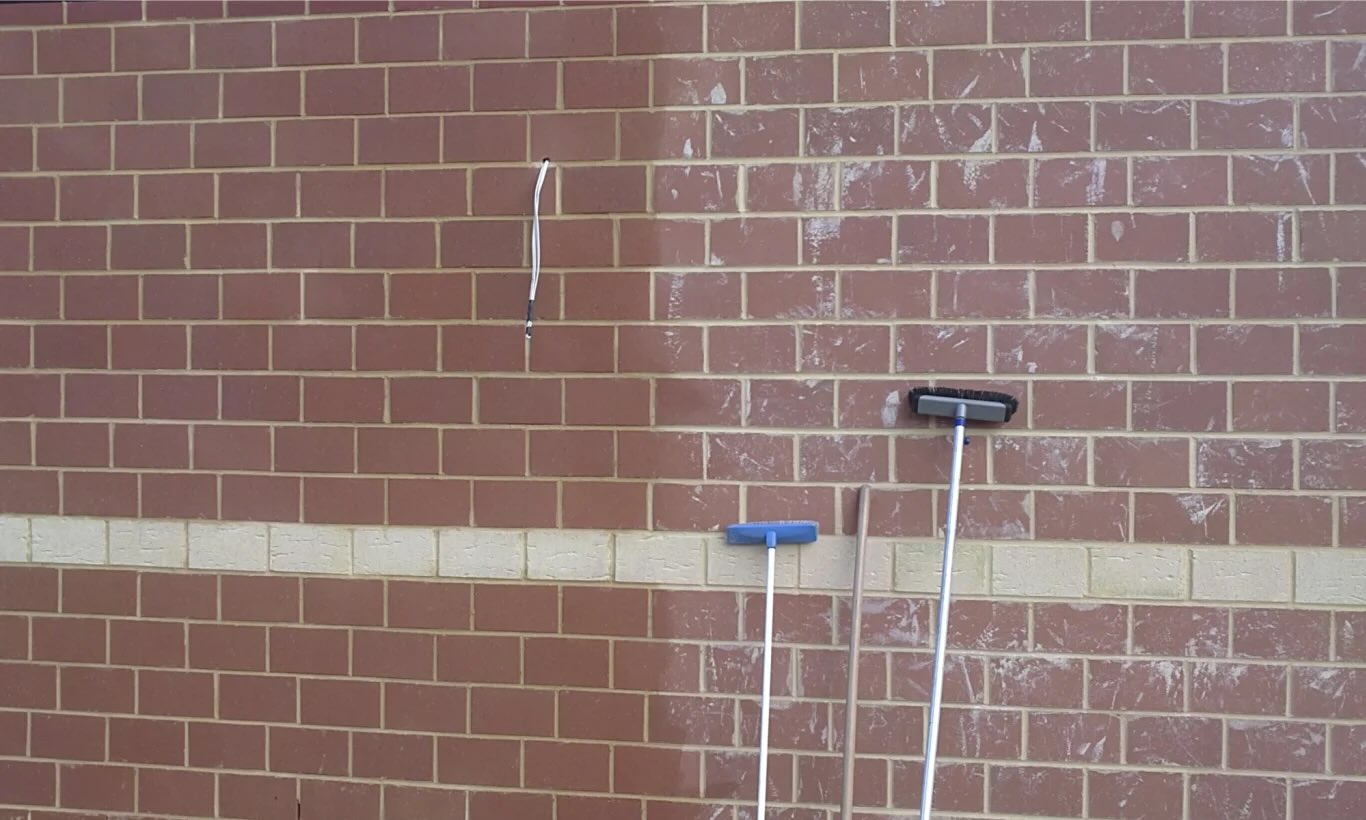
Welcome to the world of home improvement, where the charm of exposed brick walls is timeless. Whether you’re renovating an older property or simply seeking to add a touch of character to your living space, acid washing brick can be a transformative process. This method not only cleans the brick but also enhances its natural beauty by bringing out its unique texture and color variations. In this guide, we’ll explore the step-by-step process of acid washing brick, ensuring that you’re equipped with the knowledge and confidence to tackle this project with finesse.
Before delving into the nitty-gritty details, it’s essential to understand that acid washing brick requires careful preparation, the right materials, and a cautious approach. By following the proper techniques and safety measures, you can achieve stunning results while preserving the integrity of the brick surface. So, roll up your sleeves, put on your safety goggles, and let’s embark on this journey to rejuvenate your brickwork.
Key Takeaways:
- Transform your home with acid-washed brick, but remember to prioritize safety and meticulous preparation for stunning results and preserved integrity.
- Embrace the transformative potential of acid washing brick while honing your skills as a safety-conscious homeowner, elevating your living space with timeless allure.
Read more: How To Use Brick Acid
Materials Needed
Before commencing the acid washing process, it’s crucial to gather the necessary materials and equipment. Here’s a comprehensive list of what you’ll need:
Protective Gear:
- Safety goggles
- Rubber gloves
- Respirator mask
- Protective clothing
Cleaning Supplies:
- Stiff-bristled brush
- Pressure washer or garden hose with spray nozzle
- Bucket
Acid Solution Components:
- Muriatic acid (hydrochloric acid)
- Water
- Plastic watering can or chemical-resistant sprayer
Read more: How To Store Oxalic Acid Powder
Neutralizing Agent:
- Baking soda or ammonia
- Water
Additional Supplies:
- Plastic sheeting or tarps
- Duct tape or heavy-duty tape
- Drop cloths
- Plastic or nylon scrubbing pads
- Bucket or container for neutralizing solution
- pH test strips
- Long-handled squeegee or mop
- Old towels or rags
By ensuring that you have all these materials on hand, you’ll be well-prepared to tackle the acid washing process effectively and safely. Additionally, it’s advisable to work in a well-ventilated area and to have access to a water source for rinsing and neutralizing the acid solution.
Preparing the Area
Proper preparation of the work area is essential before undertaking the acid washing process. This not only ensures safety but also facilitates a smoother and more efficient workflow. Here’s a step-by-step guide to preparing the area:
Clear the Surrounding Space:
Begin by removing any obstacles or objects near the brick surface that could impede your work or be damaged by the acid solution. This includes outdoor furniture, potted plants, and decorative items.
Read more: How To Store Sulfuric Acid
Protective Measures:
Cover any adjacent surfaces, such as windows, doors, and metal fixtures, with plastic sheeting or tarps. Secure the protective coverings in place using duct tape or heavy-duty tape to prevent any accidental contact with the acid solution.
Prep the Ground:
Lay down drop cloths to safeguard the ground or flooring beneath the brickwork. This will help prevent any accidental spills or splashes from coming into contact with surfaces that could be damaged by the acid.
Establish a Rinse Zone:
Position the pressure washer or connect the garden hose with a spray nozzle to a nearby water source. Ensuring easy access to water for rinsing the acid solution is crucial for effectively neutralizing the surface and preventing any residual acid from causing damage.
Secure Ventilation:
If working in an enclosed or semi-enclosed space, such as a garage or covered patio, ensure proper ventilation by opening windows and doors. This helps disperse any fumes and vapors generated during the acid washing process.
By meticulously preparing the area, you’ll create a safe and controlled environment for carrying out the subsequent steps of acid washing the brick. This proactive approach minimizes potential hazards and sets the stage for a successful and satisfying outcome.
Read more: How To Store Hydrofluoric Acid
Mixing the Acid Solution
Creating the acid solution for washing the brick requires precision and caution. It’s essential to follow the correct dilution ratios and safety guidelines to ensure optimal results and minimize risks. Here’s a detailed guide to mixing the acid solution:
Gather the Required Materials:
Before proceeding, ensure that you have the necessary protective gear, including safety goggles, rubber gloves, and a respirator mask. Additionally, have the muriatic acid, water, and a plastic watering can or chemical-resistant sprayer at the ready.
Prepare the Work Area:
Double-check that the surrounding area is adequately protected with plastic sheeting or tarps, and that the ground is covered with drop cloths. This precautionary measure helps contain any potential spills and protects adjacent surfaces from accidental exposure to the acid solution.
Measure the Muriatic Acid:
When handling muriatic acid, it’s crucial to prioritize safety. With the appropriate protective gear in place, carefully measure the required amount of muriatic acid according to the dilution ratio specified on the product label or in the manufacturer’s instructions.
Read more: How To Store Nitric Acid
Dilute with Water:
Fill the plastic watering can or chemical-resistant sprayer with the precise amount of water as directed for diluting the muriatic acid. It’s imperative to add the acid to the water and not the other way around to prevent splashing or violent reactions. Slowly pour the measured muriatic acid into the water, stirring gently to facilitate thorough mixing.
Exercise Caution:
Throughout the mixing process, maintain a safe distance from the acid solution and avoid inhaling any fumes. Be mindful of the potential hazards associated with muriatic acid and handle the solution with care to prevent accidental exposure or spills.
Label and Store:
Once the acid solution is prepared, clearly label the container with its contents and store it in a secure location away from children and pets. Properly disposing of any remaining solution after the acid washing process is essential for safety and environmental considerations.
By meticulously following these steps, you’ll effectively prepare the acid solution for washing the brick, setting the stage for the subsequent application process. Remember, prioritizing safety and adhering to the recommended guidelines are paramount when working with muriatic acid.
Applying the Acid Wash
With the acid solution meticulously prepared and safety measures in place, it’s time to apply the acid wash to the brick surface. This step demands a methodical approach and attention to detail to achieve the desired results while ensuring safety. Here’s a comprehensive guide to applying the acid wash:
Read more: How To Store Hydrochloric Acid
Begin with a Test Patch:
Prior to treating the entire brick surface, it’s advisable to conduct a small-scale test patch in an inconspicuous area. This allows you to assess the impact of the acid wash on the brick and determine the ideal dwell time for achieving the desired level of cleaning and etching.
Even Application:
Pour the acid solution into the plastic watering can or chemical-resistant sprayer, ensuring that it is securely sealed to prevent leaks or spills. Starting from the top of the brickwork, apply the acid wash evenly in a methodical manner, working in manageable sections to maintain control and consistency.
Brushing for Uniform Coverage:
Using a stiff-bristled brush, gently scrub the acid solution into the brick surface. This brushing action facilitates the penetration of the acid, ensuring uniform coverage and enhancing its cleaning and etching effects. Exercise caution to avoid splashing or spreading the solution onto unintended areas.
Monitor Dwell Time:
As the acid wash interacts with the brick, it’s essential to monitor the dwell time closely. The duration will vary based on factors such as the condition of the brick, the desired level of cleaning, and the manufacturer’s recommendations. Avoid allowing the acid solution to remain on the surface for an extended period beyond what is necessary.
Read more: How To Store Muriatic Acid
Visual Assessment:
Periodically inspect the treated sections to gauge the progress and determine when the desired effects have been achieved. This visual assessment enables you to make informed decisions about the duration of the acid exposure and whether additional applications or adjustments are required.
Rinsing Protocol:
Once the desired dwell time has been reached, promptly proceed to the rinsing phase to halt the acid’s action and prevent over-etching. Thoroughly rinse the treated areas with a pressure washer or garden hose equipped with a spray nozzle, ensuring complete removal of the acid solution.
By following these meticulous steps, you’ll effectively apply the acid wash to the brick surface, harnessing its transformative potential while maintaining a vigilant approach to safety. This methodical process sets the stage for the subsequent steps of rinsing and neutralizing, crucial for preserving the integrity of the brickwork.
Rinsing and Neutralizing
Following the application of the acid wash, the rinsing and neutralizing phase is pivotal for halting the acid’s action and safeguarding the structural integrity of the brick. This critical step requires precision and thoroughness to ensure that the residual acid is effectively neutralized and the brick surface is left pristine. Here’s a comprehensive guide to rinsing and neutralizing the treated brickwork:
Thorough Rinsing:
Immediately after the appropriate dwell time has elapsed, initiate the rinsing process to remove the acid solution from the brick surface. Utilize a pressure washer or garden hose with a spray nozzle to thoroughly rinse the treated areas, working from top to bottom to ensure comprehensive coverage.
Read more: What Acid Is In Toilet Bowl Cleaner
Visual Confirmation:
As you rinse, visually inspect the brick surface to confirm that all traces of the acid solution have been effectively removed. Pay close attention to any recessed or textured areas where residual acid may accumulate, ensuring that these areas receive adequate rinsing.
Prepare the Neutralizing Solution:
In a separate container, prepare a neutralizing solution by diluting baking soda or ammonia in water. The precise ratio may vary based on the specific product instructions or industry recommendations, and it’s essential to follow these guidelines meticulously.
Apply the Neutralizing Solution:
Using a plastic or nylon scrubbing pad, apply the neutralizing solution to the rinsed brick surface. Work methodically, ensuring even coverage and focusing on areas that may have been more heavily exposed to the acid wash. This proactive approach facilitates thorough neutralization and mitigates any residual acidity.
Rinse Again:
Following the application of the neutralizing solution, proceed to thoroughly rinse the brick surface once more with clean water. This final rinsing step serves to remove any traces of the neutralizing agent and confirm that the acid’s effects have been effectively counteracted.
Visual and pH Verification:
Conduct a visual inspection of the brickwork to confirm that it appears clean and free from any residual acid or neutralizing solution. Additionally, consider utilizing pH test strips to verify that the surface has achieved a neutral pH level, indicating the successful completion of the neutralization process.
By diligently adhering to these steps, you’ll effectively rinse and neutralize the brick surface following the acid wash, ensuring that the structural integrity is preserved and the surface is left in an optimal condition. This meticulous approach sets the stage for the subsequent cleaning up phase, marking significant progress in the overall acid washing process.
Cleaning Up
Once the acid washing process and the subsequent rinsing and neutralizing phases have been successfully completed, it’s essential to focus on the cleanup to restore the work area and ensure that any residual materials are managed responsibly. This final stage of the process demands meticulous attention to detail and a proactive approach to tidying the surroundings. Here’s a comprehensive guide to cleaning up after acid washing brick:
Dispose of Protective Coverings:
Begin by carefully removing the plastic sheeting or tarps that were used to protect adjacent surfaces and the ground. Exercise caution to prevent any debris or residual solution from spreading, and promptly dispose of the coverings in accordance with local waste disposal regulations.
Collect and Store Equipment:
Gather all the equipment and tools used during the acid washing process, including the plastic watering can or sprayer, brushes, scrubbing pads, and any remaining cleaning supplies. Rinse these items thoroughly and store them in a designated area, ensuring that they are properly cleaned and secured for future use.
Read more: How To Store Polylactic Acid (PLA)
Clean Up Residual Debris:
Inspect the surrounding area for any residual debris, such as dirt, sediment, or discarded materials. Utilize a broom, dustpan, or vacuum to remove these remnants, restoring the area to its pre-project condition and minimizing the risk of potential hazards or environmental impact.
Dispose of Waste Responsibly:
If any waste materials, such as used cleaning cloths or disposable protective gear, have accumulated during the process, ensure that they are disposed of responsibly. Follow local guidelines for waste disposal, segregating any hazardous materials and recycling where applicable.
Restore Order and Clean Surfaces:
Thoroughly clean and rinse any surfaces that may have come into contact with the acid solution or other cleaning materials. This includes adjacent walls, floors, and outdoor fixtures, ensuring that any residual traces of the acid wash are effectively removed and the area is left clean and presentable.
Secure Chemicals and Supplies:
Properly seal and store any remaining chemicals and supplies in a secure location, taking care to label them accurately and ensure that they are out of reach of children and pets. Adhering to safety protocols for chemical storage is crucial for preventing accidents and minimizing environmental impact.
By conscientiously addressing the cleanup process, you’ll effectively restore the work area to its pre-project state, mitigating any potential environmental impact and ensuring that all materials and equipment are managed responsibly. This marks the culmination of the acid washing process, signifying the successful transformation of the brickwork and the conscientious completion of the project.
Read more: How To Store Lead Acid Batteries
Safety Precautions
When undertaking the process of acid washing brick, prioritizing safety is paramount to safeguarding both personal well-being and the surrounding environment. This phase of the project demands a comprehensive understanding of potential hazards and the implementation of proactive measures to mitigate risks. Here’s an in-depth guide to the safety precautions to be observed during acid washing:
Protective Gear:
Prior to commencing the project, ensure that you are equipped with the appropriate protective gear, including safety goggles, rubber gloves, a respirator mask, and protective clothing. These items serve as essential barriers against potential exposure to muriatic acid and its fumes, safeguarding your eyes, skin, and respiratory system.
Ventilation:
Work in a well-ventilated area to disperse any fumes or vapors generated during the acid washing process. If operating in an enclosed or semi-enclosed space, such as a garage or covered patio, open windows and doors to facilitate adequate airflow and minimize the concentration of airborne contaminants.
Handling Muriatic Acid:
Exercise extreme caution when handling muriatic acid, ensuring that it is stored securely and handled with care to prevent spills or accidental exposure. Always follow the manufacturer’s instructions and industry guidelines for the safe storage, handling, and disposal of muriatic acid and related materials.
Read also: 8 Amazing Humic Acid For Lawns For 2025
Dilution and Mixing:
When diluting muriatic acid to create the acid solution, adhere strictly to the specified ratios and guidelines. Always add the acid to the water and not the other way around to prevent splashing or violent reactions. Maintain a safe distance from the acid solution during the mixing process and avoid inhaling any fumes.
Application and Brushing:
While applying the acid wash and brushing it into the brick surface, take care to prevent splashing and minimize direct contact with the solution. Use a methodical approach to ensure even coverage and avoid inadvertently exposing unintended surfaces to the acid. Keep a safe distance from the treated areas to minimize exposure to fumes.
Rinsing and Neutralizing:
During the rinsing and neutralizing phase, thoroughly flush the treated areas with water to remove residual acid and apply the neutralizing solution as directed. Exercise caution when working with the neutralizing agent, and ensure that the surface is effectively neutralized to avert potential hazards.
Disposal and Cleanup:
After completing the acid washing process, dispose of waste materials and residual solutions responsibly, following local guidelines for waste disposal. Thoroughly clean and rinse any equipment, tools, and surfaces that may have come into contact with the acid solution, ensuring that the area is left free from potential hazards.
By meticulously observing these safety precautions throughout the acid washing process, you’ll not only protect yourself and others from potential hazards but also contribute to the responsible and conscientious execution of the project. Prioritizing safety at every stage is fundamental to achieving successful and gratifying outcomes while upholding the well-being of all involved.
Read more: How To Acid Stain Outdoor Concrete Patio
Conclusion
Congratulations on successfully navigating the intricate process of acid washing brick, a transformative endeavor that rejuvenates the aesthetic appeal of your living space. By embracing the meticulous steps outlined in this guide and prioritizing safety at every stage, you’ve embarked on a journey that not only revitalizes the brickwork but also underscores the value of conscientious home improvement practices.
From the meticulous preparation of the work area to the precise mixing and application of the acid solution, you’ve demonstrated a keen understanding of the intricacies involved in this process. Your commitment to safety, evidenced through the meticulous use of protective gear and the responsible handling of muriatic acid, reflects a dedication to both personal well-being and environmental stewardship.
As you meticulously rinsed and neutralized the treated brickwork, and subsequently embarked on the thorough cleanup, you showcased a steadfast commitment to achieving a transformative outcome while mitigating potential environmental impact. Your proactive approach to responsible waste disposal and the restoration of the work area exemplifies the conscientious ethos that underpins successful home improvement projects.
Throughout this journey, you’ve not only revitalized the brick surface but also honed your skills as a discerning and safety-conscious homeowner. By embracing the transformative potential of acid washing brick and approaching the process with a meticulous and safety-focused mindset, you’ve elevated the aesthetic allure of your living space while setting a commendable standard for conscientious home improvement practices.
As you reflect on this enriching experience, may the revitalized brickwork stand as a testament to your dedication and discernment, embodying the timeless allure of exposed brick walls. Whether you’ve undertaken this project to restore an older property to its former glory or to infuse character into a modern space, the results of your efforts are sure to captivate and inspire.
As you bask in the satisfaction of a job well done, may the knowledge and skills you’ve acquired continue to enrich your journey as a discerning homeowner, empowering you to embark on future projects with confidence and finesse. The enduring charm of the revitalized brickwork serves as a testament to your commitment to excellence and the transformative power of conscientious home improvement.
Frequently Asked Questions about How To Acid Wash Brick
Was this page helpful?
At Storables.com, we guarantee accurate and reliable information. Our content, validated by Expert Board Contributors, is crafted following stringent Editorial Policies. We're committed to providing you with well-researched, expert-backed insights for all your informational needs.


0 thoughts on “How To Acid Wash Brick”