Tableware
How To Craft A Live Edge Dining Table
Modified: August 28, 2024
Discover how to create a stunning live edge dining table with our comprehensive guide. Get inspired by unique tableware designs and learn step-by-step techniques to craft your own masterpiece.
(Many of the links in this article redirect to a specific reviewed product. Your purchase of these products through affiliate links helps to generate commission for Storables.com, at no extra cost. Learn more)
Introduction
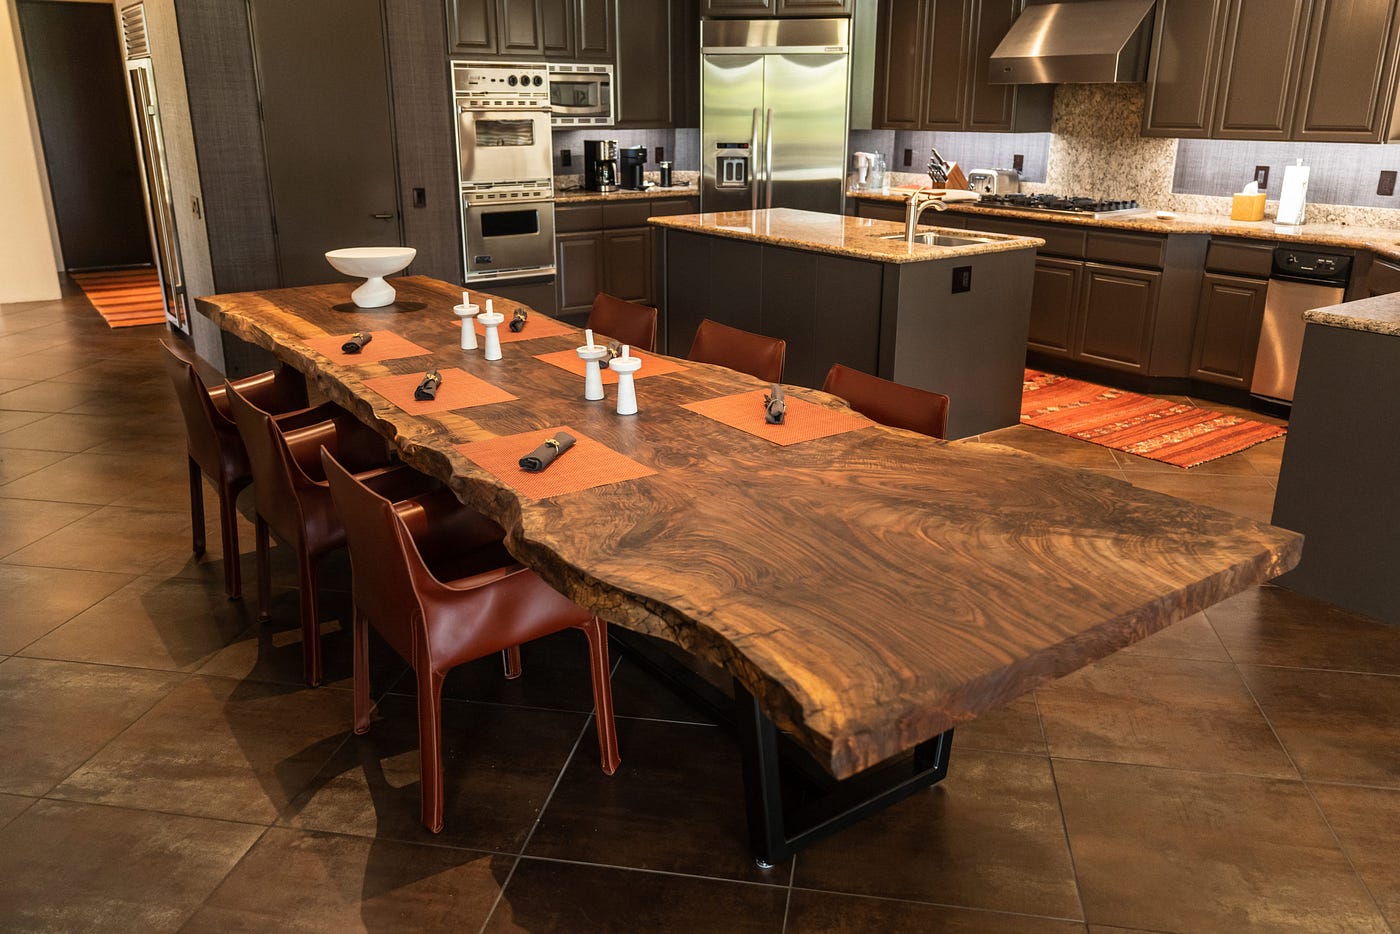
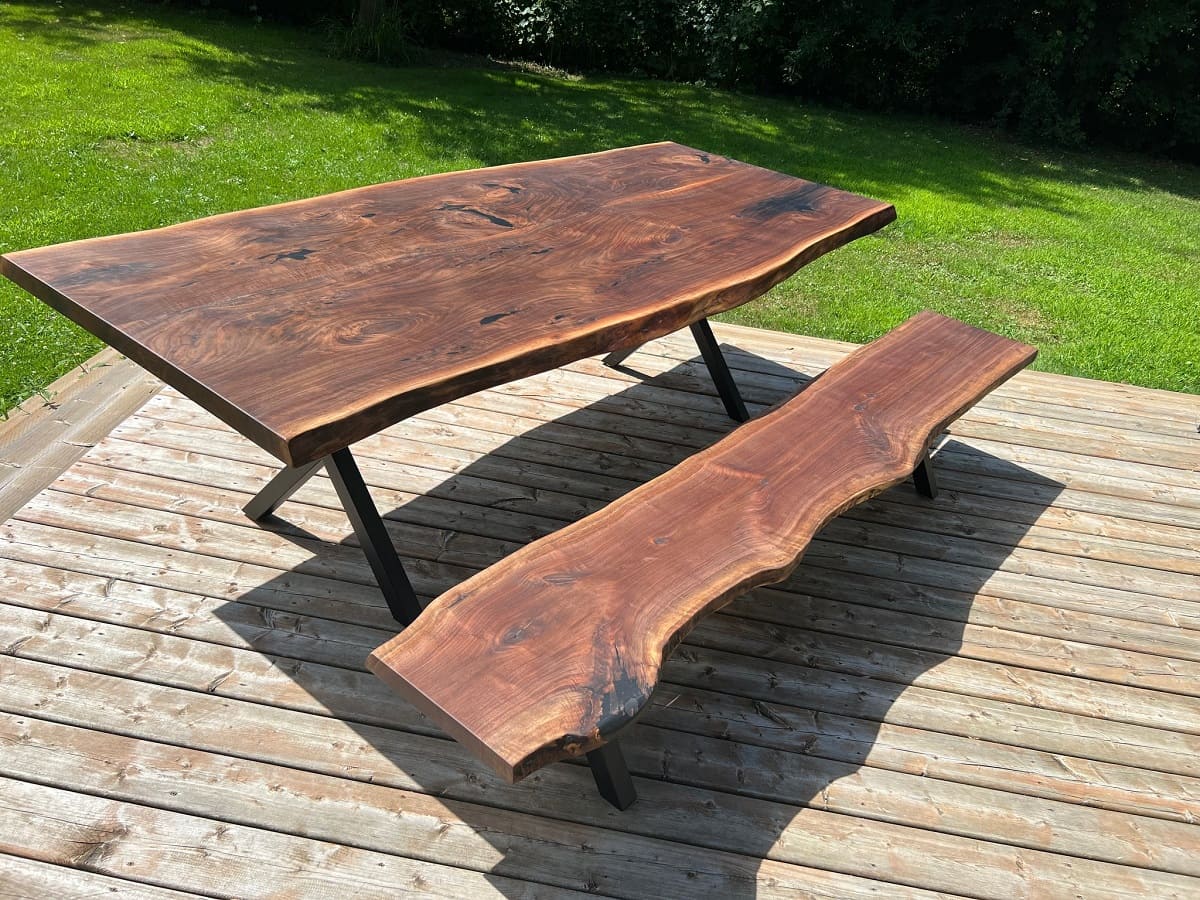
Welcome to the world of live edge dining tables! If you’re looking to add a touch of rustic charm and natural beauty to your dining space, then crafting a live edge dining table could be just the project for you. Live edge tables are known for their unique design, featuring the natural edge of the wood slab, which adds a distinct and organic feel to any room.
In this article, we will guide you through the step-by-step process of creating your own live edge dining table. From selecting the right wood to building the base and attaching the slab, we will cover all the essential aspects to ensure a successful and stunning end result.
Before we dive into the details, it’s important to note that crafting a live edge dining table requires some woodworking skills and tools. It can be a labor-intensive project, but the satisfaction of creating a one-of-a-kind piece of furniture is well worth the effort.
So, if you’re ready to unleash your creativity and embark on a woodworking adventure, let’s get started on crafting your very own live edge dining table!
Key Takeaways:
- Craft a unique live edge dining table by carefully selecting the right wood, preparing the slab, and building a stable base. Showcase your creativity and craftsmanship with this stunning centerpiece for your dining area.
- Preserve the natural beauty of your live edge dining table with regular maintenance. From applying protective finishes to monitoring humidity levels, ensure your masterpiece remains a focal point for memorable meals and gatherings.
Read more: How To Make A Live Edge Dining Table
Step 1: Choosing the Right Wood
The first and most crucial step in crafting a live edge dining table is selecting the right wood. The choice of wood will determine the overall look, durability, and character of your finished table. Here are a few things to consider when choosing the wood for your project:
- Wood Species: Different wood species have different characteristics, such as color, grain pattern, and hardness. Some popular choices for live edge dining tables include oak, walnut, maple, and cherry. Research the unique properties of each species to find one that suits your aesthetic preferences and functional needs.
- Size and Shape: Determine the desired size and shape of your table. Measure the available space in your dining area to ensure that the dimensions of the wood slab will fit comfortably. Pay attention to the width, length, and thickness of the slab, as well as the shape of the live edge.
- Drying Time: It’s important to use properly dried wood for your live edge dining table to prevent warping and cracking. Green or freshly cut wood will need to be carefully dried over several months or even years, depending on the thickness of the slab. Alternatively, you can choose to purchase kiln-dried wood, which has undergone a controlled drying process.
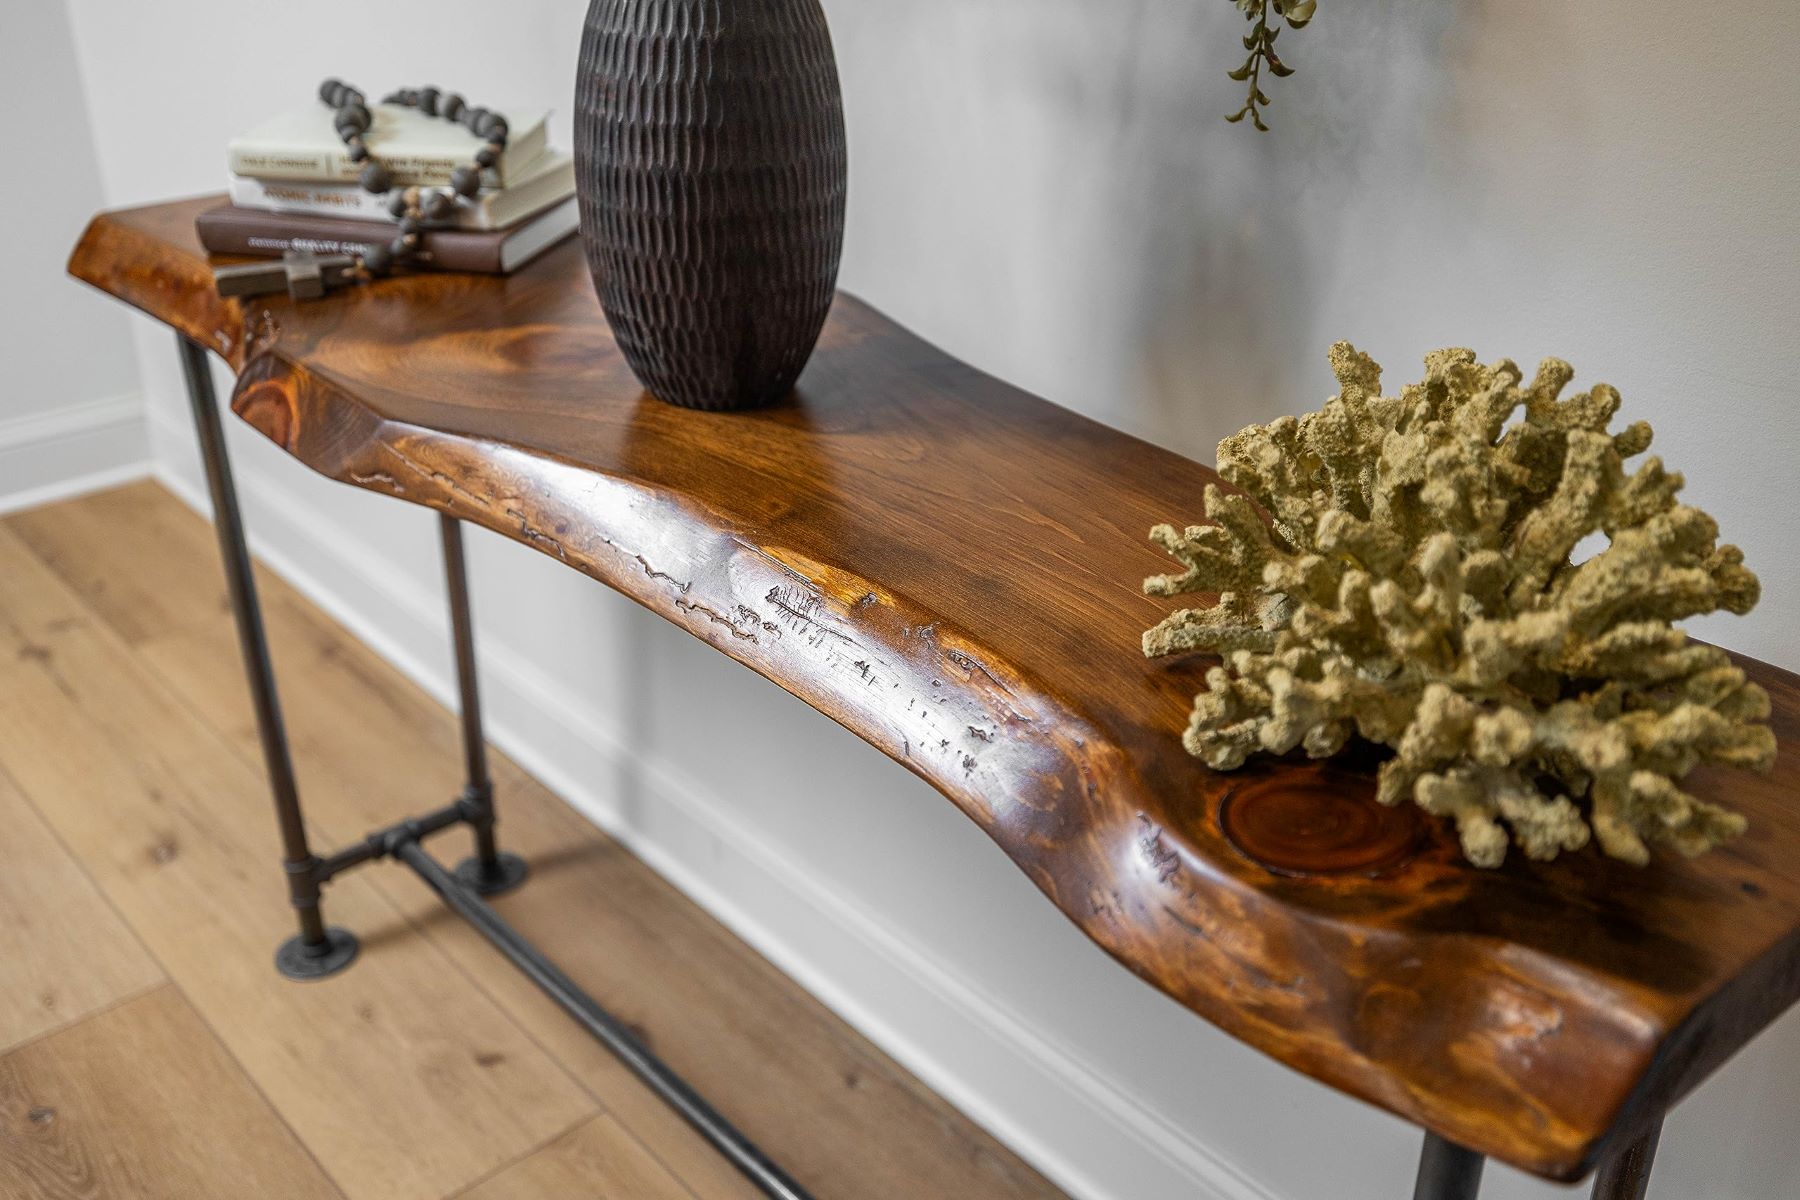
- Characteristics: Live edge dining tables often showcase the natural imperfections and unique features of the wood, such as knots, cracks, and grain patterns. Consider these characteristics as desirable elements that add character and charm to your table.
- Sustainability: If environmental sustainability is a concern for you, opt for wood that is responsibly sourced. Look for suppliers who follow sustainable practices and offer FSC-certified or reclaimed wood options.
Once you have considered these factors, visit local lumberyards or specialty suppliers to explore your options. Take the time to examine the slabs in person, paying attention to their appearance, quality, and suitability for your project. Choose a wood slab that not only meets your aesthetic preferences but also aligns with your skills and tools for working with that particular type of wood.
Remember, choosing the right wood is the foundation of a successful live edge dining table project. So take your time, ask for advice from professionals if needed, and select a wood slab that inspires you and fits your vision.
Step 2: Preparing the Slab
Once you have chosen the perfect wood slab for your live edge dining table, it’s time to prepare it for the next stages of the crafting process. Preparing the slab involves a few essential steps to ensure the wood is properly cleaned, stabilized, and ready for further work:
- Trimming: Begin by trimming the ends of the wood slab to create clean and straight edges. Use a circular saw or a track saw for this task, ensuring that the cuts are perpendicular to the length of the slab.
- Planing: Use a planer to level the surface of the wood slab. This step is crucial for creating a flat and even tabletop. Pay attention to any high spots or uneven areas and use the planer to gradually remove material until the surface is smooth and even.
- Routing: If your wood slab has bark remaining on the live edge, you can use a router to remove it. Attach a straight bit to the router and carefully run it along the bark line, ensuring a clean and smooth edge.
- Fill Cracks and Knots: Live edge dining tables often feature cracks and knots, which add to their natural beauty. However, larger cracks or voids should be filled to prevent further splitting or instability. Use epoxy resin or wood filler to fill these areas, following the manufacturer’s instructions.
- Drying Time: After applying any fillers or epoxy, allow sufficient drying time to ensure they have fully cured before proceeding to the next steps.
During the preparation process, it’s important to regularly check the slab for any potential issues such as hidden cracks or stability concerns. Address these issues promptly to prevent any problems later during construction.
Remember, proper preparation of the wood slab sets the foundation for a beautiful and long-lasting live edge dining table. Take your time during this step, ensuring that the surface is flat, the edges are clean, and any necessary repairs have been made.
Step 3: Removing Bark and Debris
Now that you have prepared the wood slab for your live edge dining table, it’s time to focus on removing the bark and any debris that may be present. This step is essential for achieving a clean and polished look for your table’s live edge.
Here are the steps to follow when removing bark and debris:
- Inspect the Bark: Begin by inspecting the bark of the slab. Look for areas where the bark is loose or hanging, as these sections will need to be removed.
- Loosen the Bark: Use a chisel or a flathead screwdriver to carefully loosen the bark along the live edge. Gently insert the tool underneath the bark and apply light pressure to pry it away from the wood.
- Peel off the Bark: Once the bark is loosened, continue to peel it away from the wood, working your way along the live edge. Take your time and be cautious not to damage the wood surface underneath.
- Remove Debris: After removing the bark, inspect the wood surface for any remaining debris. Use a wire brush or a soft-bristle brush to gently remove any loose bark fibers, dirt, or other particles from the live edge.
- Sand the Edge: To achieve a smooth and finished look, use sandpaper or a sanding block to sand the entire live edge. Start with a coarse grit to remove any rough patches or irregularities, and gradually move to finer grits to achieve a polished finish.
While removing the bark, be mindful of the natural contours and shape of the live edge. Preserve the unique character of the wood by following its natural curves and avoiding excessive trimming.
Once you have removed the bark and debris, take a moment to admire the natural beauty of the live edge. The clean and smooth surface will serve as a stunning focal point for your live edge dining table.
Remember, take your time during this step and handle the wood slab with care to achieve the best results. Removing the bark and debris adds a touch of refinement and showcases the true beauty of the live edge.
Step 4: Sanding and Smoothing the Surface
Now that you have removed the bark and debris from the live edge of your wood slab, it’s time to focus on sanding and smoothing the surface. This step is crucial for creating a tabletop that is not only visually appealing, but also smooth to the touch.
Follow these steps to sand and smooth the surface of your wood slab:
- Start with Coarse Grits: Begin by using a coarse grit sandpaper, such as 80 or 120 grit, to remove any rough spots, tool marks, or imperfections on the surface. Sand in a consistent motion, following the grain of the wood.
- Progress to Medium Grits: Once the initial rough sanding is complete, switch to a medium grit sandpaper, such as 180 or 220 grit. Continue sanding the surface in the same consistent motion, this time focusing on smoothing out the roughness left by the coarse grit.
- Move to Finer Grits: After the medium grit sanding, move on to finer grit sandpapers, such as 320 or 400 grit. This step further refines the surface and prepares it for the final finish. Sanding with finer grits will help to eliminate any remaining scratches or marks left by the previous sanding stages.
- Hand Sanding: For intricate areas or curves on the live edge, you may need to do some hand sanding. Fold a small piece of sandpaper and carefully sand these areas by hand, ensuring a consistent and smooth surface.
- Remove Dust: After sanding, wipe the entire surface of the wood slab with a clean cloth or a tack cloth to remove any sanding dust. This step ensures that the surface is clean and ready for the next stage of the process.
As you sand the surface, always remember to follow the direction of the wood grain. Sanding against the grain can lead to scratches and uneven results.
Throughout the sanding process, be sure to periodically inspect the surface for any remaining imperfections or rough areas. If necessary, repeat the sanding steps with the appropriate grits until you achieve a smooth and uniform surface.
Once the sanding process is complete, you will have a beautifully smooth and refined tabletop ready for the next stage of finishing.
Remember, take your time and approach sanding with patience and precision. A well-sanded surface will enhance the overall look and feel of your live edge dining table.
When selecting a live edge slab for your dining table, look for one with a straight edge for stability and consider the wood’s natural characteristics for a unique look.
Read more: How To Make A Live Edge Coffee Table
Step 5: Applying a Finish
With the wood slab sanded and smoothed, it’s time to apply a finish to protect and enhance the natural beauty of your live edge dining table. Applying a finish not only adds a layer of protection against wear and tear but also enhances the color and grain of the wood.
Here are the steps to follow when applying a finish to your live edge dining table:
- Choose a Suitable Finish: There are various finishes available, each with its own characteristics and application methods. Common options for live edge tables include oil-based finishes, water-based finishes, and polyurethane. Consider factors such as durability, ease of application, and the desired look when choosing a finish.
- Prepare the Surface: Ensure that the surface of the wood slab is clean and dust-free before applying the finish. Use a clean cloth or a tack cloth to wipe away any remaining dust or debris.
- Apply the Finish: Follow the instructions provided by the manufacturer of the finish you chose. Using a brush, rag, or sprayer, apply an even coat of finish to the entire surface of the wood slab. Work with the grain and take care to avoid drips or puddles.
- Allow Drying Time: Once you have applied the first coat, allow it to dry according to the manufacturer’s instructions. This typically involves letting the finish cure for several hours or overnight.
- Sand Between Coats: For a smooth and professional finish, lightly sand the surface between each coat. Use a fine-grit sandpaper or a sanding pad to remove any imperfections or raised grain. Be sure to remove any sanding dust before applying subsequent coats.
- Apply Multiple Coats: Depending on the desired finish and the type of wood, you may need to apply multiple coats of finish to achieve the desired look, depth, and protection. Follow the manufacturer’s instructions for the recommended number of coats.
- Final Sanding and Buffing: Once the final coat has cured, lightly sand the surface one last time to ensure any rough spots or imperfections are smoothed out. Then, use a soft cloth or buffing pad to gently buff the surface, giving it a smooth and polished appearance.
Remember to work in a well-ventilated area when applying the finish and follow all safety precautions mentioned on the product label.
By applying a finish, you will bring out the natural beauty of the wood and provide a protective layer that will keep your live edge dining table looking its best for years to come.
Take your time during this step, ensuring each coat is applied evenly and that the finish is allowed to fully dry between coats. The result will be a stunning and durable finish that highlights the unique characteristics of your live edge dining table.
Step 6: Building the Base
Now that your live edge wood slab is prepared and finished, it’s time to focus on building the base of your dining table. The base provides stability and support to the table, while also contributing to its overall design and aesthetic appeal.
Here are the steps to follow when building the base of your live edge dining table:
- Determine the Design: Decide on the design of the base that best complements your live edge wood slab and matches your personal style. Common base designs include trestle, pedestal, or four-leg options. Consider factors such as the size and weight of the table and the overall visual balance.
- Gather the Materials: Collect the necessary materials and tools for building the base. This may include wood, screws, brackets, dowels, or any other components required for your chosen design. Measure and cut the materials according to your desired dimensions.
- Assemble the Base: Follow the design plan or instructions to assemble the base components. Use clamps or braces to hold the pieces together temporarily while you attach them permanently with screws or other fasteners. Double-check the stability and alignment as you go.
- Ensure Leveling: Place the base on a flat and level surface to ensure stability. Use a level to check if the base is perfectly horizontal. Make any necessary adjustments by sanding or adding shims to ensure the base is level and doesn’t wobble.
- Secure the Base to the Wood Slab: Once the base is assembled and leveled, it’s time to attach it to the wood slab. Position the base beneath the slab, aligning it with the desired overhang on each side. Use brackets or mounting plates to secure the base to the underside of the wood slab.
- Test for Stability: After attaching the base, test the stability of the table by gently applying pressure and ensuring that it doesn’t wobble or shift. Make any necessary adjustments or additional reinforcements to ensure a stable and sturdy base.
Building the base allows you to customize your live edge dining table and create a unique piece of furniture that reflects your personal style. Whether you choose a simple and minimalist design or an intricate and ornate base, the end result will be a table that perfectly complements the natural beauty of the wood slab.
Throughout this step, take your time and follow the design plan or instructions carefully. The base plays a crucial role in the overall stability and aesthetics of your live edge dining table, so ensuring its construction is done accurately and with attention to detail is essential.
With the base completed, your live edge dining table is starting to take shape and become a functional piece of furniture that will surely be the centerpiece of your dining area!
Step 7: Attaching the Slab to the Base
With the base of your live edge dining table complete, the next step is to securely attach the wood slab to the base. This step is vital to ensure stability, balance, and longevity of your table.
Follow these steps to properly attach the slab to the base:
- Align the Slab: Position the wood slab on top of the base, ensuring it is centered and aligned properly. Take time to adjust the position until you are satisfied with its placement.
- Mark Attachment Points: Use a pencil or markers to mark the attachment points where the wood slab and the base meet. This will help ensure that you drill the holes in the correct locations.
- Pre-drill Holes: With the attachment points marked, use a drill and an appropriate-sized drill bit to pre-drill holes into both the wood slab and the base. Be sure to use a drill bit that is slightly smaller than the screws or bolts you will be using to attach the slab.
- Attach the Slab: Place the wood slab back onto the base and align the pre-drilled holes. Then, use screws, bolts, or other appropriate fasteners to secure the slab to the base. Start by loosely attaching the fasteners, and then tighten them gradually, alternating between attachment points, to ensure an even and secure fit.
- Check Stability: After attaching the slab, check the stability of the table by gently applying pressure from different angles. Ensure that the wood slab is securely attached to the base and that there is no wobbling or movement. Make any necessary adjustments or additional fastenings to ensure a stable and sturdy connection.
- Trim Excess Fasteners: If necessary, trim any excess screws or bolts that may protrude from the base or the wood slab. This step helps maintain a clean and finished look for your dining table.
Attaching the wood slab to the base is a crucial step in completing your live edge dining table. Take your time with the alignment and attachment process, ensuring that the wood slab is securely fastened to the base.
Once the slab is securely attached, your live edge dining table is essentially complete, and you can move on to adding the finishing touches and preparing it for use.
Remember, attention to detail and proper attachment of the slab to the base is key to ensuring a stable and long-lasting dining table that can be enjoyed for years to come.
Step 8: Final Touches and Maintenance Tips
Congratulations! You have successfully crafted your own live edge dining table. Now it’s time to add the final touches and learn how to properly maintain your masterpiece for years of enjoyment.
Here are some final touches and maintenance tips to consider:
- Seal the Wood: To protect the wood and enhance its beauty, consider applying a final coat of sealant. This will provide an additional layer of protection against spills, stains, and general wear and tear. Follow the manufacturer’s instructions for the specific sealant you choose.
- Add Table Legs or Leveling Feet: Depending on the design of your base, you may want to attach table legs or leveling feet to ensure stability and eliminate any wobbling. This step will help to keep your table balanced and prevent damage to the wood slab.
- Apply Protective Pads: To prevent scratches and damage to your floor, attach felt or rubber pads to the bottom of the table legs. This will also make it easier to move the table without causing any marks or scuffs.
- Regularly Clean and Dust: Keep your live edge dining table looking its best by regularly cleaning and dusting the surface. Use a soft, lint-free cloth or a feather duster to gently remove dust and debris. Avoid using harsh chemicals or abrasive cleaners that can damage the finish or the wood.
- Use Coasters and Trivets: To protect the wood surface from heat, moisture, and spills, use coasters for beverages and trivets for hot dishes. This will help maintain the beauty of the live edge and prevent any potential damage.
- Avoid Direct Sunlight: Over time, direct sunlight can cause the wood to fade or change in color. Avoid placing your live edge dining table in direct sunlight or use window treatments to protect it from prolonged exposure to UV rays.
- Monitor Humidity Levels: Wood is sensitive to changes in humidity, which can cause it to expand or contract. Maintain a stable humidity level in your home to minimize the risk of cracks or warping in the wood slab. Use a humidifier or dehumidifier if necessary.
- Refinish as Needed: Over time, the finish on your live edge dining table may show signs of wear. If necessary, you can refinish the table by following the same steps for applying a finish. This will restore its luster and provide added protection.
By following these final touches and maintenance tips, you can preserve the beauty and longevity of your live edge dining table. Regular care and attention will ensure that your table continues to be a stunning centerpiece in your dining area for many years.
Now, it’s time to gather family and friends, gather around your masterpiece, and enjoy memorable meals and gatherings around your one-of-a-kind live edge dining table!
Read more: Where To Place Dining Table In Living Room
Conclusion
Congratulations on completing your journey of crafting a beautiful live edge dining table! Through the careful selection of wood, preparation of the slab, building the base, and attaching the slab, you have created a unique and stunning piece of furniture that will undoubtedly be the centerpiece of your dining area. The natural beauty of the live edge, combined with the craftsmanship and creativity you put into the project, makes this table truly special.
As you enjoy your new live edge dining table, remember to take care of it to ensure its longevity. Dust and clean it regularly, use protective pads, and avoid direct sunlight and extreme humidity. By following these simple maintenance tips, you can preserve the beauty of the wood and enjoy your table for years to come.
Not only does your live edge dining table serve a functional purpose in your home, but it also tells a unique story. The natural imperfections, knots, and grain patterns of the wood are reminders of its journey from tree to table, making each piece truly one-of-a-kind. Your table will be a conversation starter, capturing the attention and admiration of guests who gather around it.
But beyond its visual appeal, your live edge dining table represents your creativity, craftsmanship, and the fulfillment that comes from completing a woodworking project. You have acquired valuable skills and knowledge along the way, and this experience can pave the way for future woodworking adventures.
So be proud of your accomplishment and take a moment to admire the work of your hands. Your live edge dining table is a testament to your passion, dedication, and ability to transform raw materials into a functional work of art.
Now, gather your loved ones, share a delicious meal, and create lasting memories around your one-of-a-kind live edge dining table. Enjoy the warmth and beauty it brings to your home, knowing that you have crafted something truly remarkable.
Frequently Asked Questions about How To Craft A Live Edge Dining Table
Was this page helpful?
At Storables.com, we guarantee accurate and reliable information. Our content, validated by Expert Board Contributors, is crafted following stringent Editorial Policies. We're committed to providing you with well-researched, expert-backed insights for all your informational needs.


0 thoughts on “How To Craft A Live Edge Dining Table”