Home>Furniture>Living Room Furniture>How To Make A Live Edge Coffee Table

Living Room Furniture
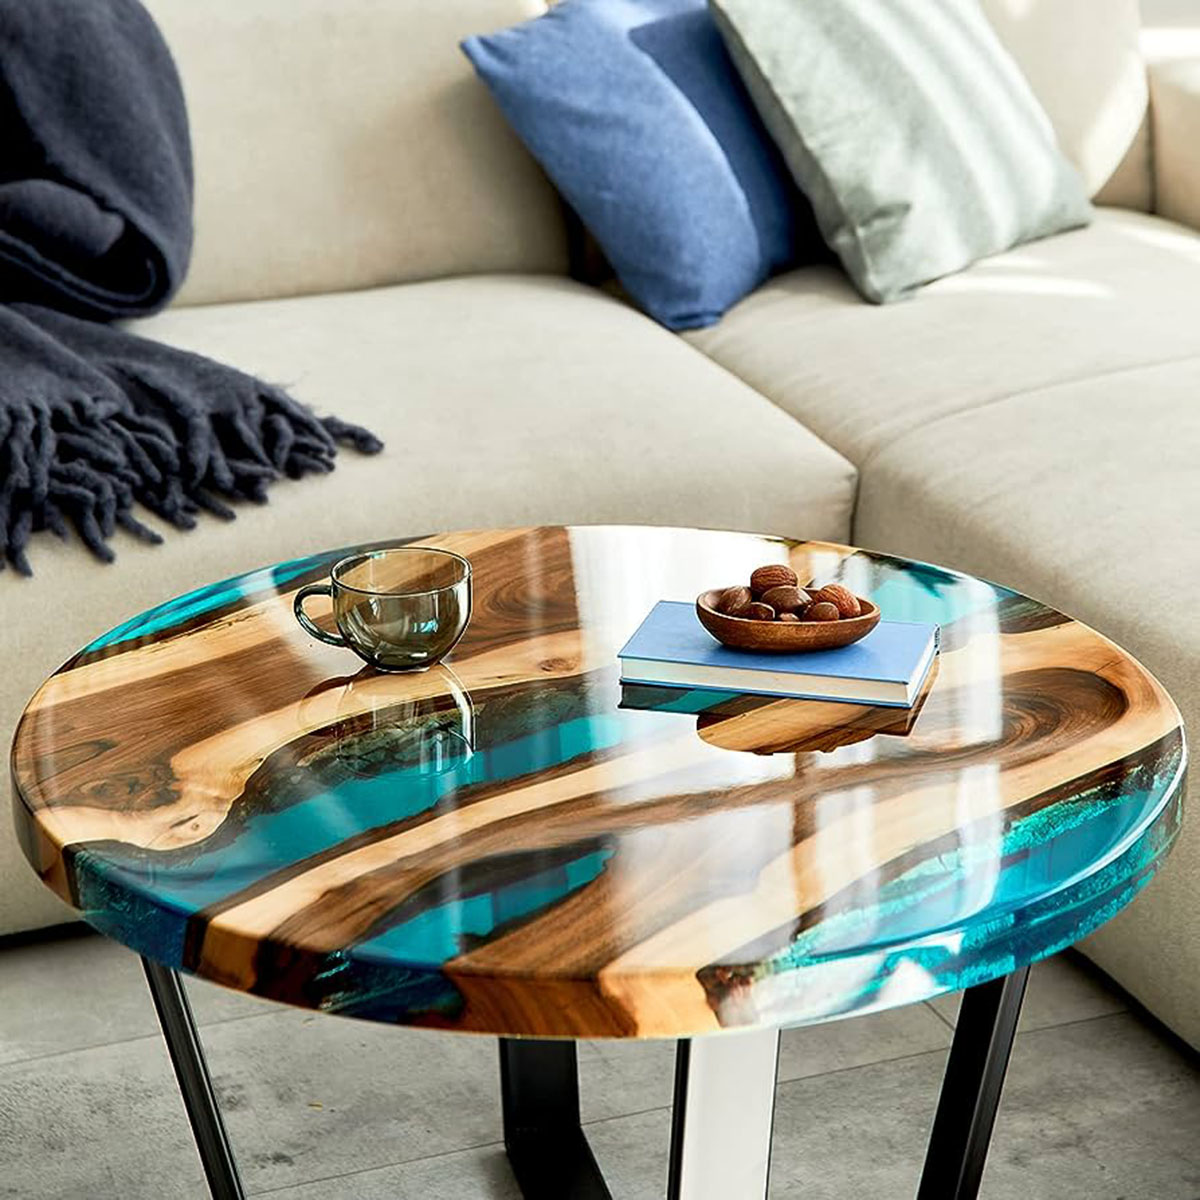
How To Make A Live Edge Coffee Table
Modified: March 16, 2024
Learn how to make a stunning live edge coffee table for your living room with our step-by-step guide. Create the perfect centerpiece with this DIY project.
(Many of the links in this article redirect to a specific reviewed product. Your purchase of these products through affiliate links helps to generate commission for Storables.com, at no extra cost. Learn more)
Materials Needed
Before you embark on the journey of creating your own live edge coffee table, it is important to gather all the necessary materials. Here is a list of items you will need:
- 1. Live edge slab: Look for a high-quality slab of wood with an interesting grain pattern and natural edges. Common options include walnut, oak, maple, and cherry.
- 2. Power tools: Depending on the thickness and hardness of your chosen slab, you may require tools such as a circular saw, jigsaw, or chainsaw for cutting.
- 3. Sandpaper and sanding tools: Invest in a variety of grits ranging from coarse to fine to achieve a smooth and polished finish.
- 4. Safety equipment: Protect yourself with safety goggles, gloves, and a dust mask to minimize the risk of injuries and inhaling harmful particles.
- 5. Epoxy resin: This will be used to fill any cracks or voids in the slab and provide a glossy, durable finish.
- 6. Wood finish: Choose a finish that suits your style, such as oil-based polyurethane, tung oil, or a natural wax.
- 7. Legs or base: Depending on your preference, select legs or a base that complements the design of your coffee table. Options include metal hairpin legs, wooden pegs, or even repurposed materials.
- 8. Measuring tape, pencil, and level: These basic tools will help ensure accurate measurements and a level tabletop.
- 9. Clamps: Use sturdy clamps to hold the slab in place during the cutting and assembly process.
- 10. Wood glue and screws: These will be essential for securing the legs or base to the tabletop.
- 11. Optional: Stain or dye: If you want to add color to the wood, consider using a stain or dye before applying the finish.
Having these materials on hand will make the process of creating a live edge coffee table much smoother and enjoyable. Now that you have everything you need, it’s time to move on to the next step: choosing the perfect wood slab for your project.
Key Takeaways:
- Gather high-quality wood, power tools, safety equipment, epoxy resin, and a wood finish to create a stunning live edge coffee table. Choose a wood species, consider size and shape, and inspect imperfections for a unique and personalized piece.
- Prepare, cut, sand, and finish the wood slab, then attach the legs and add final touches for a stable and beautiful coffee table. Embrace creativity, prioritize safety, and enjoy the satisfaction of building your own unique furniture.
Read more: How To Make A Live Edge Dining Table
Step 1: Choosing the Wood
The first step in creating a stunning live edge coffee table is selecting the right wood slab. This is a crucial decision as it will determine the overall look and feel of your table. Here are some factors to consider when choosing the wood:
- Species: Different wood species offer unique characteristics and aesthetics. Popular choices for live edge coffee tables include walnut, oak, maple, and cherry. Each species has its own color variations, grain patterns, and hardness levels.
- Size: Determine the desired dimensions of your coffee table. Measure the space where it will be placed to ensure it fits appropriately. Keep in mind that the width, length, and thickness of the slab will affect the overall look and stability of the table.
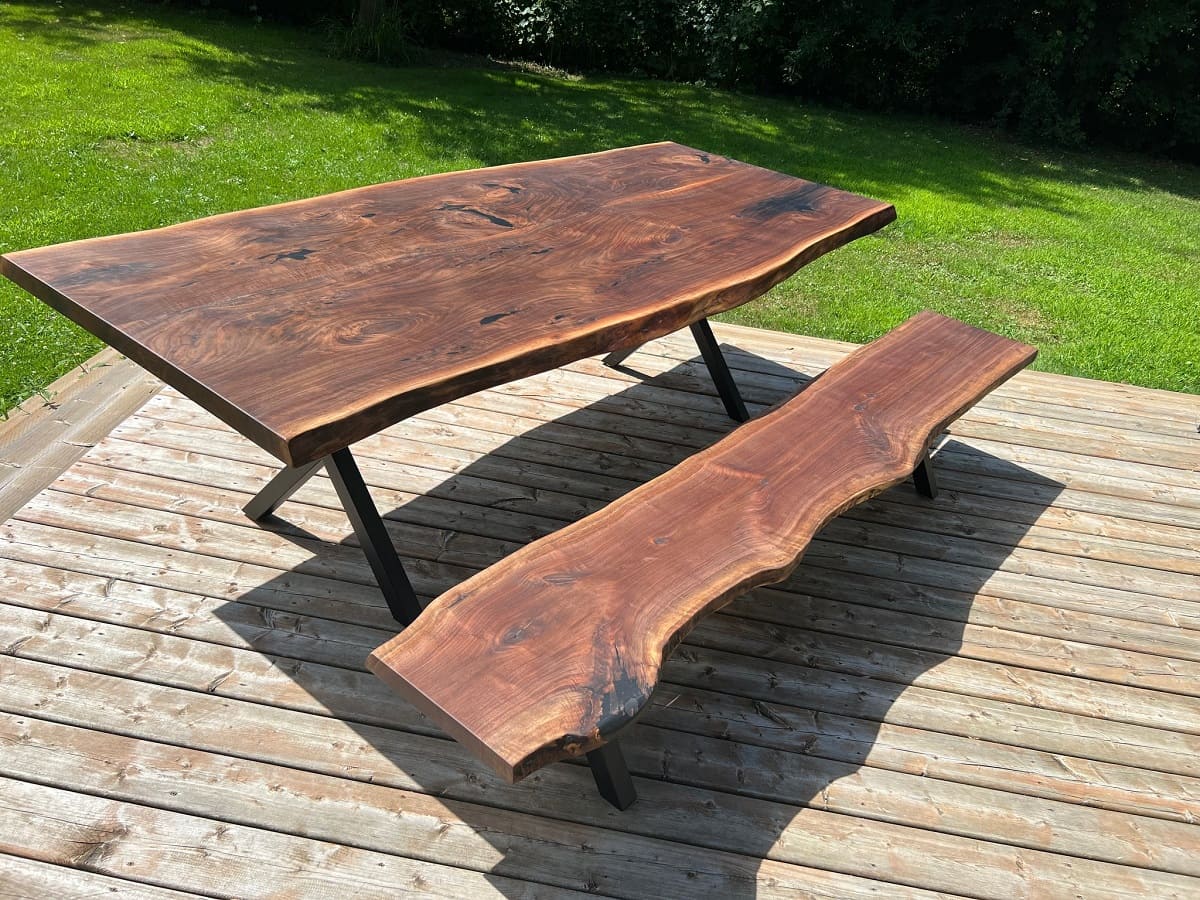
- Shape and natural edges: Live edge slabs feature the natural outer edge of the tree trunk, adding a rustic and organic touch to the table. Consider whether you prefer a straight edge or a more irregular shape to complement your décor style.
- Grain pattern: Examine the grain pattern of the wood. Some slabs may feature tight, straight grain lines, while others may have more pronounced swirls and knots. Choose a grain pattern that appeals to your personal taste.
- Knots and imperfections: Live edge slabs often have knots, cracks, and other imperfections that add character to the piece. Carefully assess the slab’s imperfections to ensure they align with your desired aesthetic. Keep in mind that some imperfections can be filled with epoxy resin during the finishing process.
- Budget: Determine your budget for the project. The cost of live edge slabs can vary depending on the species, size, and quality. Consider your budget and look for options that offer a balance between price and quality.
Once you have a clear idea of the type of wood you want for your coffee table, you can start exploring local suppliers, online marketplaces, or even salvage yards for the perfect slab. Remember to take your time during this stage as finding the right wood is essential for a beautiful end result.
Now that you have chosen your wood slab, it’s time to move on to the next step: preparing the wood for the construction process.
Step 2: Preparing the Wood
Once you have chosen the perfect wood slab for your live edge coffee table, it’s time to prepare the wood for the construction process. Proper preparation will ensure that your table is both stable and durable. Follow these steps to prepare the wood:
- Clean the slab: Start by thoroughly cleaning the wood slab. Remove any dirt, dust, or debris using a soft-bristle brush or a vacuum cleaner.
- Inspect for damage: Carefully examine the slab for any cracks, splits, or other damage that could affect the stability of the table. If you find any major issues, consider consulting a professional to determine if the slab can still be used or if repairs are necessary.
- Stabilize the wood: If the slab has any loose or weak areas, you may need to stabilize it. This can be done by injecting epoxy resin or wood stabilizer into the affected areas to strengthen the wood and prevent further damage.
- Remove bark: If your slab still has bark attached to the live edge, you have the option to remove it or keep it intact for a more natural look. Use a chisel or a scraper to carefully remove the bark if desired.
- Acclimate the wood: Wood slabs need time to adjust to the temperature and humidity of their final location. Let the slab sit in the room where the coffee table will be placed for a few days to allow it to acclimate to the environment.
By properly preparing the wood slab, you are setting the foundation for a stable and long-lasting coffee table. Taking the time to inspect, clean, and stabilize the wood ensures that any potential issues are addressed before moving on to the next steps in the construction process.
With the wood slab prepared, it’s time to move on to the exciting stage of cutting the slab to create the desired shape for your live edge coffee table.
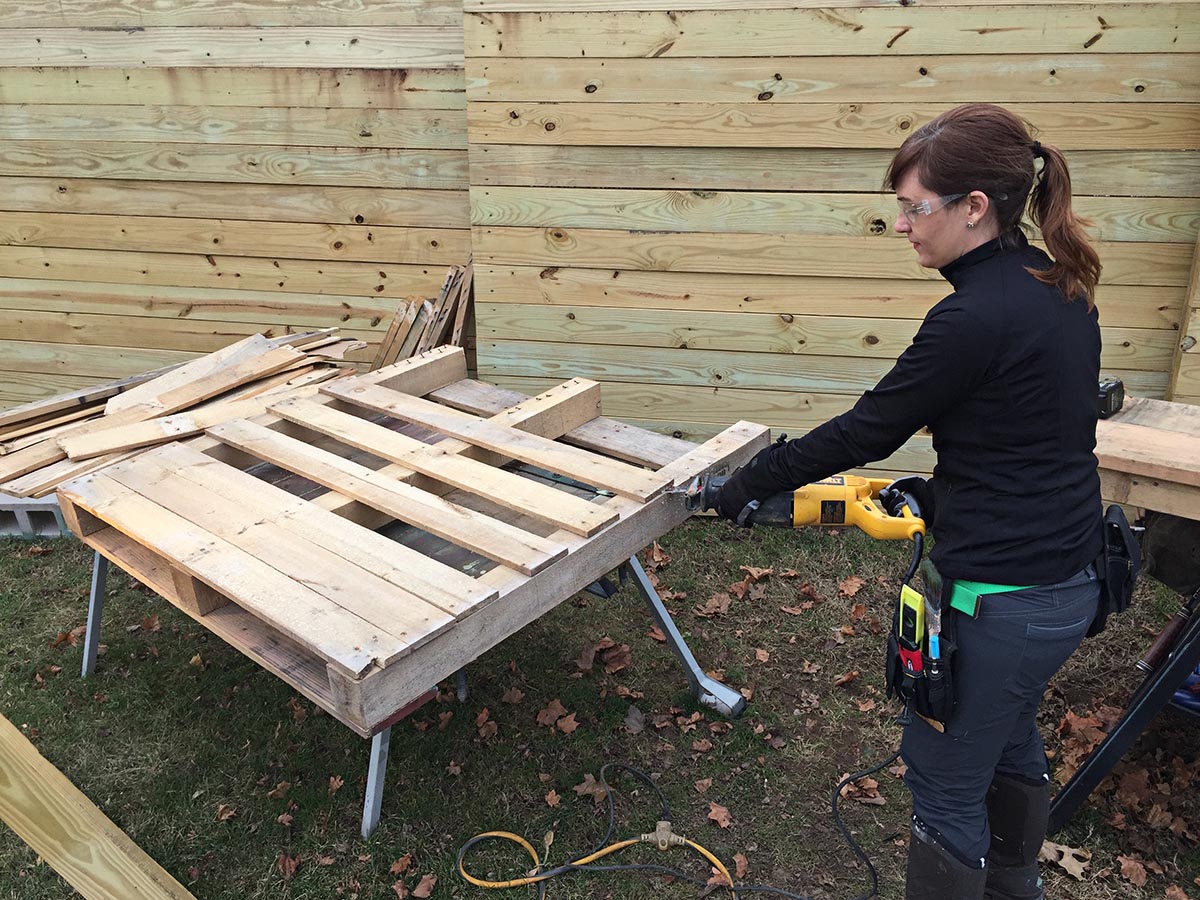
Step 3: Cutting the Slab
Now that you have prepared the wood slab, it’s time to bring your live edge coffee table to life by cutting the slab into the desired shape. Follow these step-by-step instructions to ensure a precise and accurate cut:
- Measure and mark: Measure and mark the dimensions of your coffee table on the wood slab. Use a measuring tape, pencil, and level to ensure accurate measurements. Take into account the desired height, width, and length of the table.
- Secure the slab: Using sturdy clamps, secure the wood slab to a workbench or sawhorses to prevent movement during the cutting process. This will ensure clean and straight cuts.
- Select the cutting tool: Depending on the thickness and hardness of the wood, choose the appropriate cutting tool. A circular saw with a fine-toothed blade or a jigsaw can be used for most slabs. If the slab is particularly thick or dense, a chainsaw or a band saw might be necessary.
- Follow the marked lines: Carefully align the blade of your chosen cutting tool with the marked lines on the wood slab and slowly guide it along the desired path. Take your time to ensure a smooth and accurate cut.
- Double-check measurements: Once the initial cuts are made, double-check the measurements of each piece to ensure they align with your desired dimensions.
- Trim and refine: If necessary, make any additional trimming or refinements to the cut pieces. This may involve smoothing rough edges with sandpaper or making slight adjustments to ensure a perfect fit for assembly.
Remember to prioritize safety during the cutting process by wearing protective goggles, gloves, and following proper handling techniques for the cutting tools. Take your time and be patient, as precision is key to achieving the desired shape for your live edge coffee table.
Once the wood slab is cut into the desired shape, you’re ready to move on to the next step: sanding the slab to create a smooth and polished surface.
Step 4: Sanding the Slab
After cutting the wood slab to the desired shape for your live edge coffee table, the next step is sanding. Sanding will not only remove any rough edges and imperfections but also give the wood a smooth and polished surface. Follow these steps to effectively sand the slab:
- Select the right sandpaper: Choose sandpaper with varying grits, ranging from coarse to fine. Start with a lower grit (around 80 or 100) to remove any rough spots and gradually move to higher grits (such as 150, 220, or 320) for a smoother finish.
- Sand the larger surfaces: Begin by sanding the larger, flat surfaces of the slab using a sanding block or an orbital sander. Move the sandpaper in a back-and-forth motion along the grain, applying even pressure to ensure uniform sanding.
- Sand the edges: Use folded sandpaper or a small sanding block to sand the live edges and curved areas of the slab. Pay attention to maintaining the natural shape and contours of the wood.
- Remove dust: Regularly clean the wood surface during sanding to remove dust and debris. This will help you identify any uneven spots that need further sanding.
- Progress to finer grits: As you progress with sanding, switch to higher grit sandpaper to achieve a finer and smoother finish. Repeat the sanding process with each higher grit, ensuring that you remove all visible scratches and achieve a consistent surface.
- Smooth the entire slab: To achieve an even finish, make sure to sand the entire slab, including the undersides and any exposed edges.
- Clean and inspect the surface: After sanding, clean the slab with a soft cloth to remove any lingering dust. Inspect the surface closely to ensure all imperfections have been addressed.
Take your time while sanding to achieve a professional-looking result. Remember to wear a dust mask and eye protection to avoid inhaling harmful particles. The sanding process is a crucial step in bringing out the natural beauty of the wood slab, preparing it for the next stage: applying the finish.
Now that the wood slab is smooth and polished, it’s time to move on to the next step: applying the finish to protect and enhance the beauty of the coffee table.
When selecting a live edge slab for your coffee table, look for one with interesting grain patterns and natural edges that will add character to your finished piece.
Read more: How To Craft A Live Edge Dining Table
Step 5: Applying the Finish
After sanding the wood slab to a smooth and polished surface, it’s time to apply a finish that will protect and enhance the natural beauty of the live edge coffee table. Follow these steps to effectively apply the finish:
- Choose the right finish: Consider the look you want to achieve and the level of protection required for your coffee table. Common finishes for live edge tables include oil-based polyurethane, tung oil, or a natural wax. Each finish has its own advantages, so choose one that suits your preferences and the wood species.
- Prepare the workspace: Find a well-ventilated area and cover the working surface with a drop cloth or newspaper to protect it from any drips or spills.
- Apply the first coat: Using a brush, apply a thin, even coat of the chosen finish to the entire wood slab. Follow the direction of the wood grain for a smooth and consistent coating. Allow the first coat to dry completely as per the manufacturer’s instructions.
- Sand between coats: For a smooth and flawless finish, lightly sand the surface between coats using fine-grit sandpaper or a sanding block. This will help remove any imperfections and create a good surface for subsequent coats to adhere to.
- Apply additional coats: Repeat the process of applying thin and even coats of finish, allowing each coat to dry and sanding between coats, until you achieve the desired depth and level of protection for your coffee table.
- Finalize the finish: Once the desired number of coats has been applied, let the final coat dry completely. Inspect the surface for any smudges or imperfections and sand if necessary. Wipe down the surface with a clean cloth to remove any dust or residue.
Applying a finish not only protects the wood from moisture, stains, and scratches but also enhances its natural grain and beauty. The type and number of coats you apply will depend on the look you want to achieve and the level of durability required for your coffee table.
With the finish applied, it’s time to move on to the next step: attaching the legs to complete the construction of your live edge coffee table.
Step 6: Attaching the Legs
With the wood slab sanded and finished, it’s time to give your live edge coffee table stability and functionality by attaching the legs. Follow these steps to securely attach the legs:
- Position the table: Flip the wood slab upside down and determine the desired placement of the legs. Consider the overall balance and proportions of the table.
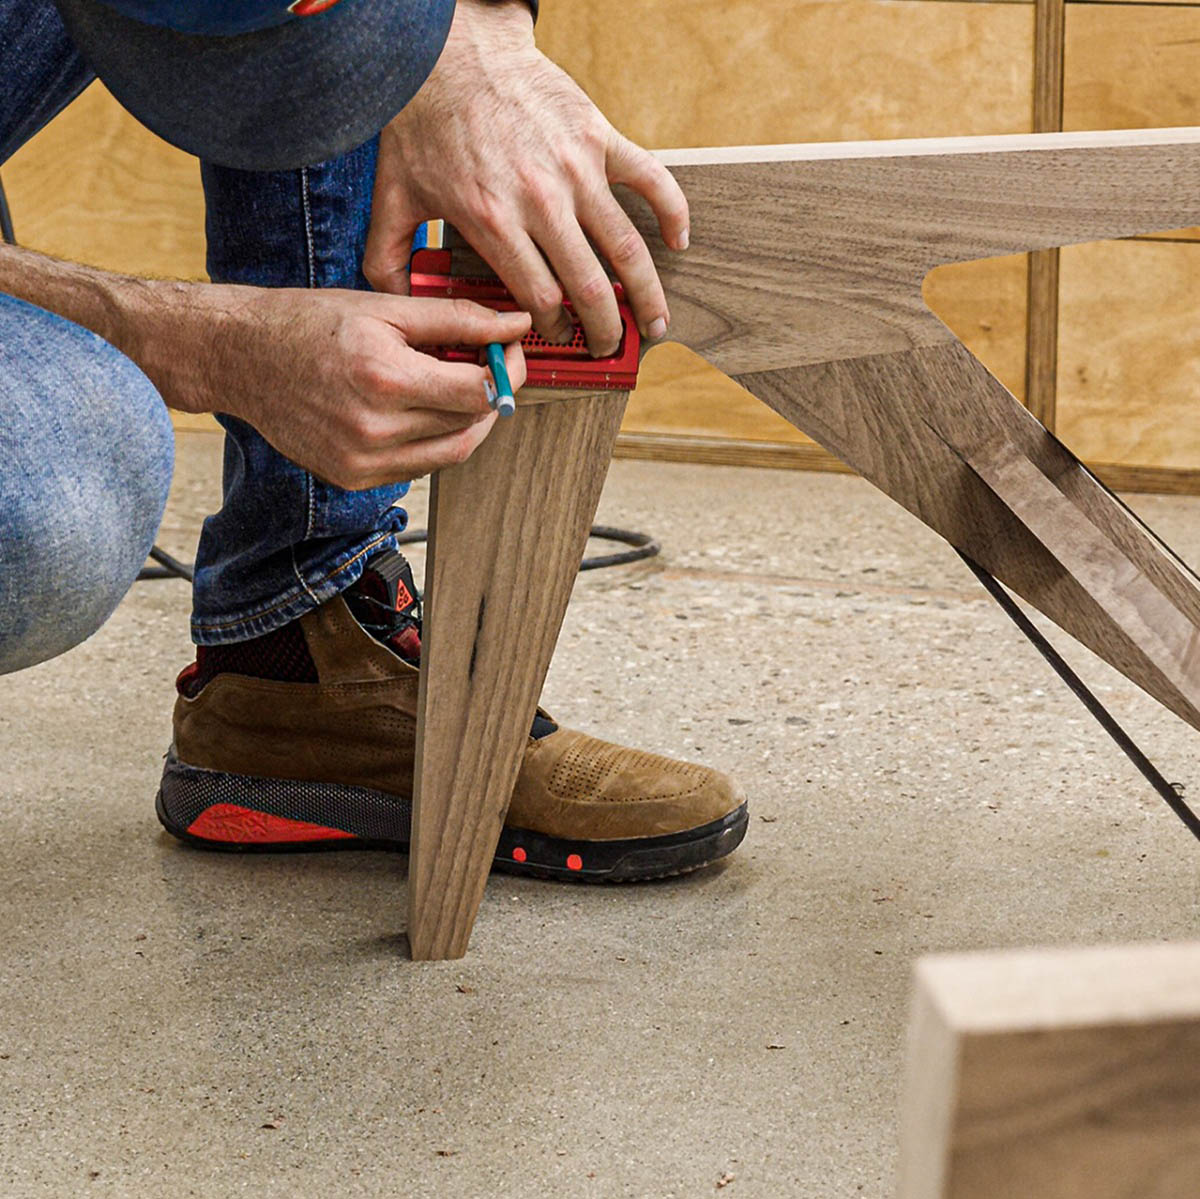
- Mark the leg placement: Use a measuring tape, pencil, and level to mark the exact position where each leg will be attached. Double-check the measurements to ensure accuracy.
- Prepare the legs: If the legs require any assembly, follow the manufacturer’s instructions. This may involve attaching metal brackets, inserting screws, or mounting hardware.
- Attach the legs: Depending on the type of legs you have chosen, use appropriate screws or mounting hardware to securely attach each leg to the marked position on the underside of the wood slab. Use a drill or screwdriver to tighten the screws, ensuring the legs are firmly attached.
- Test for stability: Once all the legs are attached, carefully flip the table right-side up and test its stability. Give it a gentle shake to ensure the legs are secure and the table stands level.
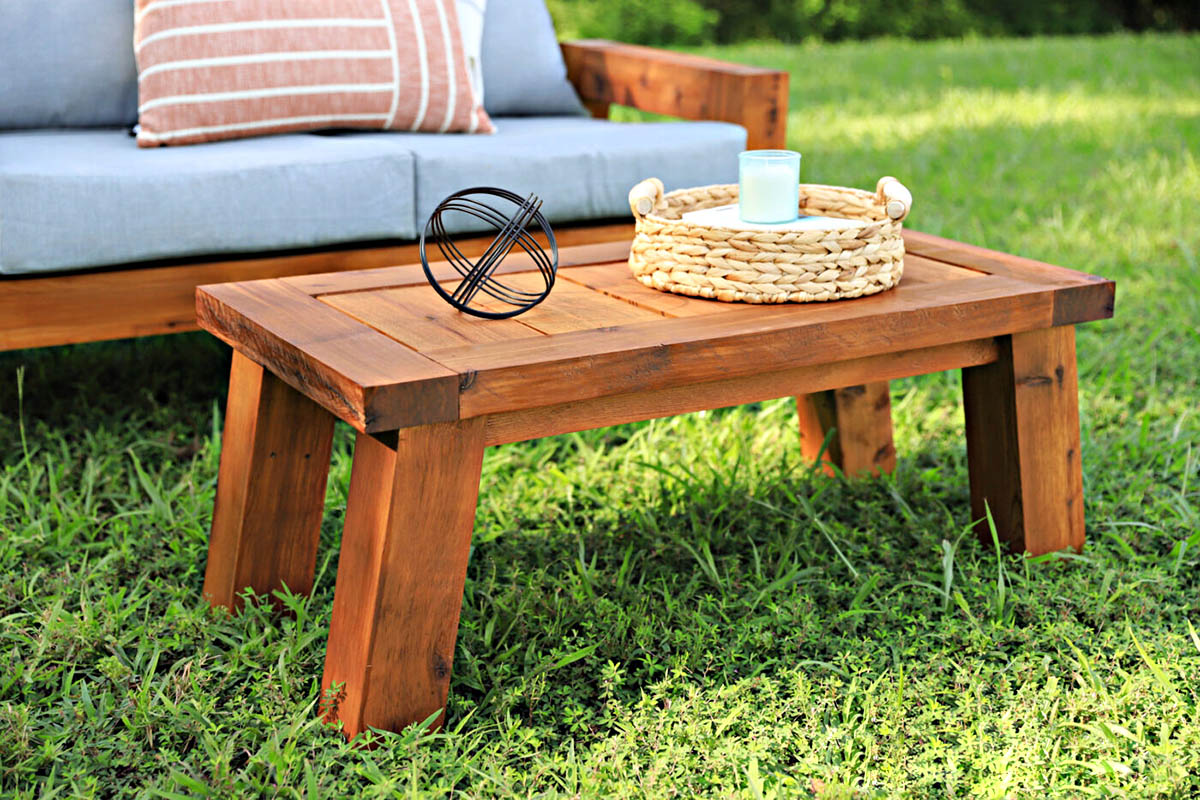
When choosing the legs for your live edge coffee table, consider the design and style you desire. Options include metal hairpin legs for a modern look, wooden legs for a natural aesthetic, or repurposed materials for a unique and upcycled appearance.
Attaching the legs will transform the slab into a functional and aesthetically pleasing coffee table. Take your time during this step to ensure proper alignment and stability. Once the legs are securely attached, it’s time to move on to the final step: adding the finishing touches and assembling your live edge coffee table.
Step 7: Final Touches and Assembly
With the legs securely attached to the wood slab, it’s time to add the final touches and assemble your live edge coffee table. Follow these steps to complete the construction process:
- Inspect for any imperfections: Take a close look at the table and make any final adjustments. Sand any rough edges or spots that may have been missed during the earlier sanding process.
- Repair any flaws: Use wood filler or epoxy resin to fill any cracks, voids, or knots in the wood slab. Allow it to dry completely before sanding the filled areas to a smooth finish.
- Apply a final coat of finish: If desired, apply an additional coat of finish to seal the repairs and create a uniform appearance.
- Assemble the table: If your coffee table consists of multiple pieces, carefully align and join them together using wood glue, screws, or other appropriate connectors. Follow any instructions provided with the table legs or base.
- Check for stability: Once the table is assembled, double-check its stability. Ensure that all joints are tight, and there is no wobbling or unevenness. Make any necessary adjustments to achieve a sturdy and level surface.
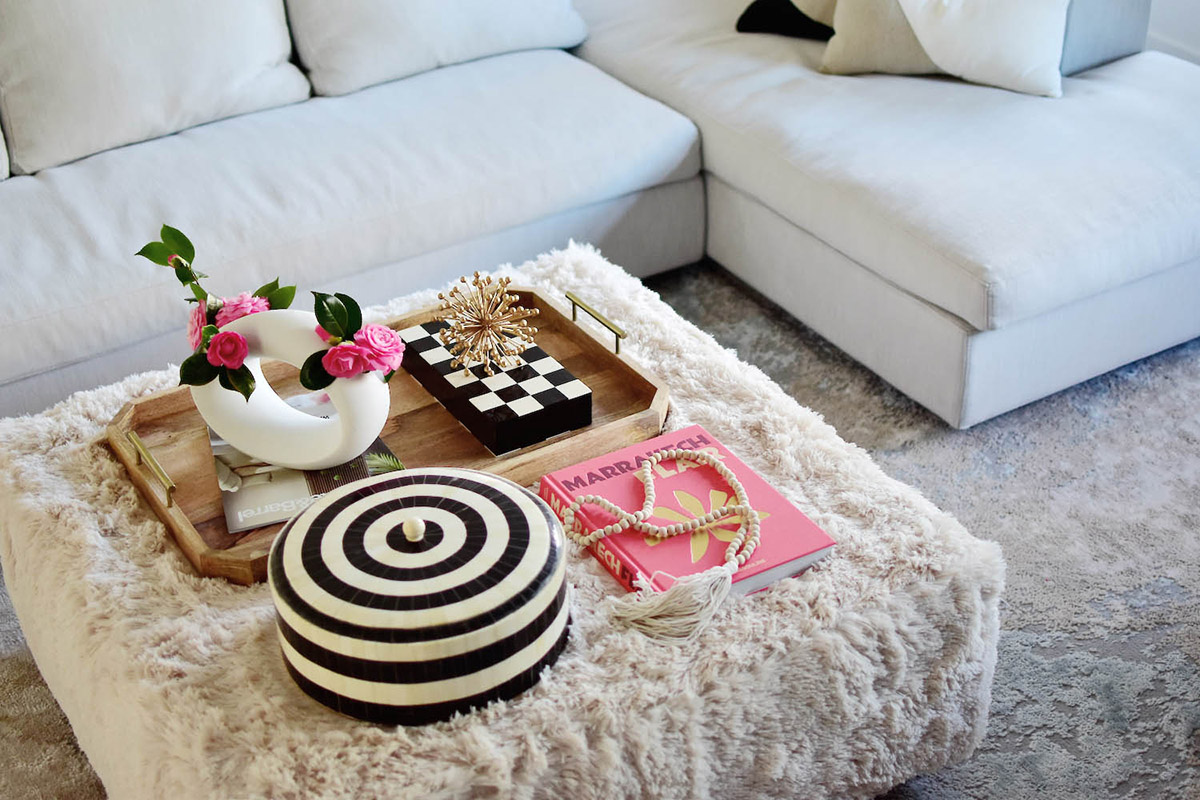
- Add optional features: Consider adding any optional features such as a glass top to protect the wood surface, additional shelving for storage, or decorative elements to personalize your coffee table.
- Clean and polish: Wipe down the entire table with a soft cloth to remove any dust or debris. Use a wood polish or wax to enhance the shine and protect the finish.
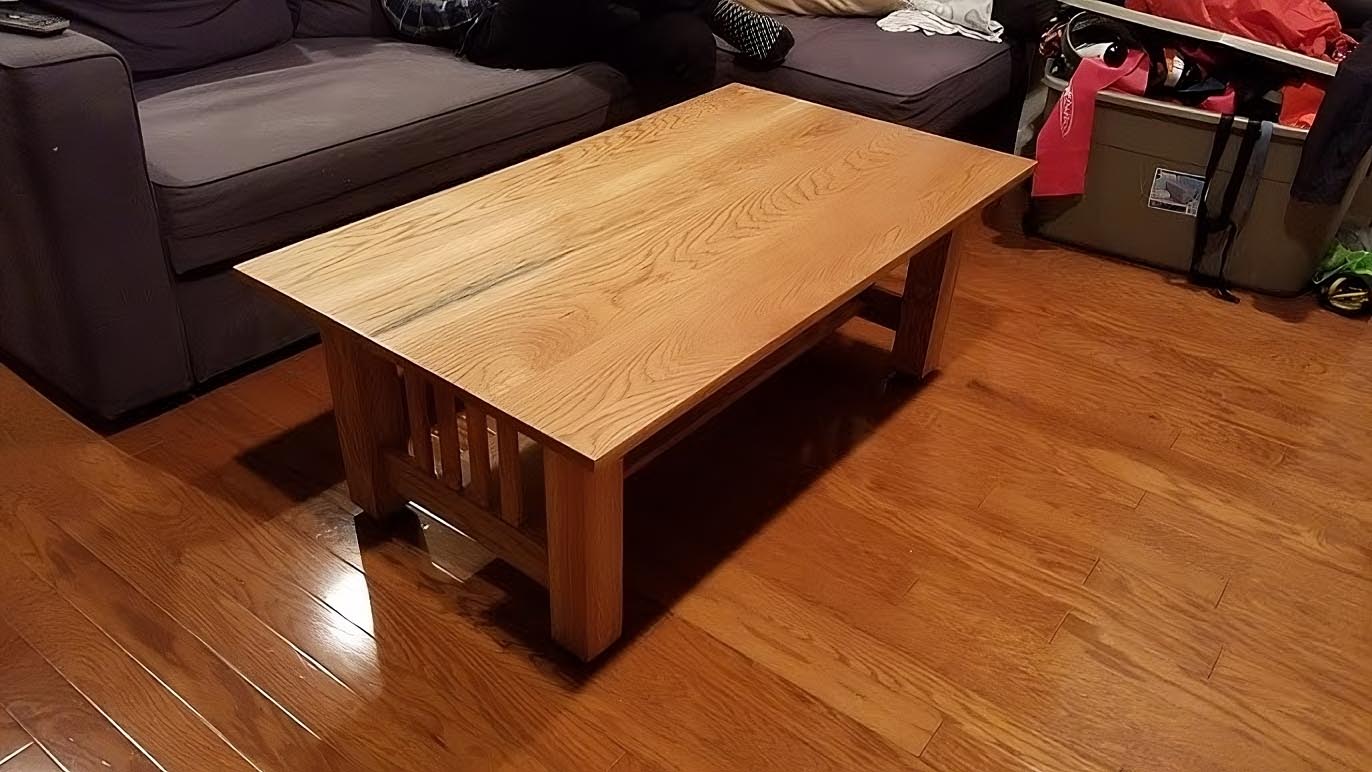
Once you have completed these final touches, your live edge coffee table is ready to take its place in your living room or any desired space. Admire and enjoy the unique beauty of the natural wood and the craftsmanship of your own creation.
Congratulations on successfully building your very own live edge coffee table! It’s a stunning addition to any living room, providing both functionality and a touch of natural beauty.
Remember, the process of building furniture allows for creativity and personalization. Feel free to bring your own ideas and adjustments to the construction process to create a coffee table that truly reflects your style and taste.
Disclaimer: Woodworking can involve inherent risks. Please ensure you are familiar with woodworking safety practices and always take precautions while using power tools, sharp objects, and chemicals.
Now that you have completed all the steps, sit back, relax, and enjoy your one-of-a-kind live edge coffee table that you built with your own hands.
Conclusion
Creating a live edge coffee table is a rewarding and fulfilling woodworking project that allows you to showcase the beauty of nature in your living room. From choosing the perfect wood slab to adding the final touches, each step in the process contributes to the creation of a unique and personalized piece of furniture.
Throughout this journey, we have explored the materials needed, the importance of selecting the right wood slab, the process of preparing and cutting the slab, and the essential techniques of sanding, applying a finish, attaching the legs, and completing the final assembly. By following these steps and considering your personal style, preferences, and available resources, you can create a live edge coffee table that is not only functional but also an eye-catching centerpiece in your living space.
Remember, safety should always be a priority when working with power tools and chemicals. Take the necessary precautions and equip yourself with proper safety gear to avoid accidents or injuries.
Whether you choose a sleek and modern design or a rustic and natural look, your live edge coffee table will surely become a conversation starter and a cherished piece of furniture in your home. The unique characteristics of the wood, including its grain patterns, natural edges, and imperfections, bring a sense of authenticity and natural beauty to your living room.
Building your own live edge coffee table allows you to exercise your creativity, showcase your craftsmanship, and create a piece that is truly tailored to your taste. So, gather your materials, set up your workspace, and embark on this exciting woodworking journey. Enjoy the satisfaction of seeing your ideas transform into a tangible and functional piece of furniture that will be enjoyed for years to come.
Now, it’s time to roll up your sleeves, grab your tools, and start creating your own spectacular live edge coffee table!
Frequently Asked Questions about How To Make A Live Edge Coffee Table
Was this page helpful?
At Storables.com, we guarantee accurate and reliable information. Our content, validated by Expert Board Contributors, is crafted following stringent Editorial Policies. We're committed to providing you with well-researched, expert-backed insights for all your informational needs.
0 thoughts on “How To Make A Live Edge Coffee Table”