Tableware
How To Upgrade An Old Dining Table
Modified: January 23, 2024
Discover the secrets of transforming your old dining table into a stunning piece of tableware with our step-by-step guide. Upgrade your dining experience today!
(Many of the links in this article redirect to a specific reviewed product. Your purchase of these products through affiliate links helps to generate commission for Storables.com, at no extra cost. Learn more)
Introduction
Welcome to this comprehensive guide on how to renovate an old dining table. Your dining table is not just a piece of furniture; it’s the centerpiece of your dining room, where cherished memories are made and shared. Over time, however, your once beautiful table may start showing signs of wear and tear. Rather than buying a new one, why not give your old dining table a fresh lease of life by renovating it?
In this article, we will walk you through the process of assessing the condition of your table, choosing a renovation approach, preparing the necessary tools and materials, and carrying out the renovation with step-by-step instructions. Whether you want to restore its original beauty or give it a completely new look, we’ve got you covered.
Before we get started, it’s important to mention that renovating an old dining table requires time, patience, and a bit of elbow grease. However, the end result will be well worth the effort. So, roll up your sleeves, and let’s begin the journey of transforming your dining table into a stunning focal point.
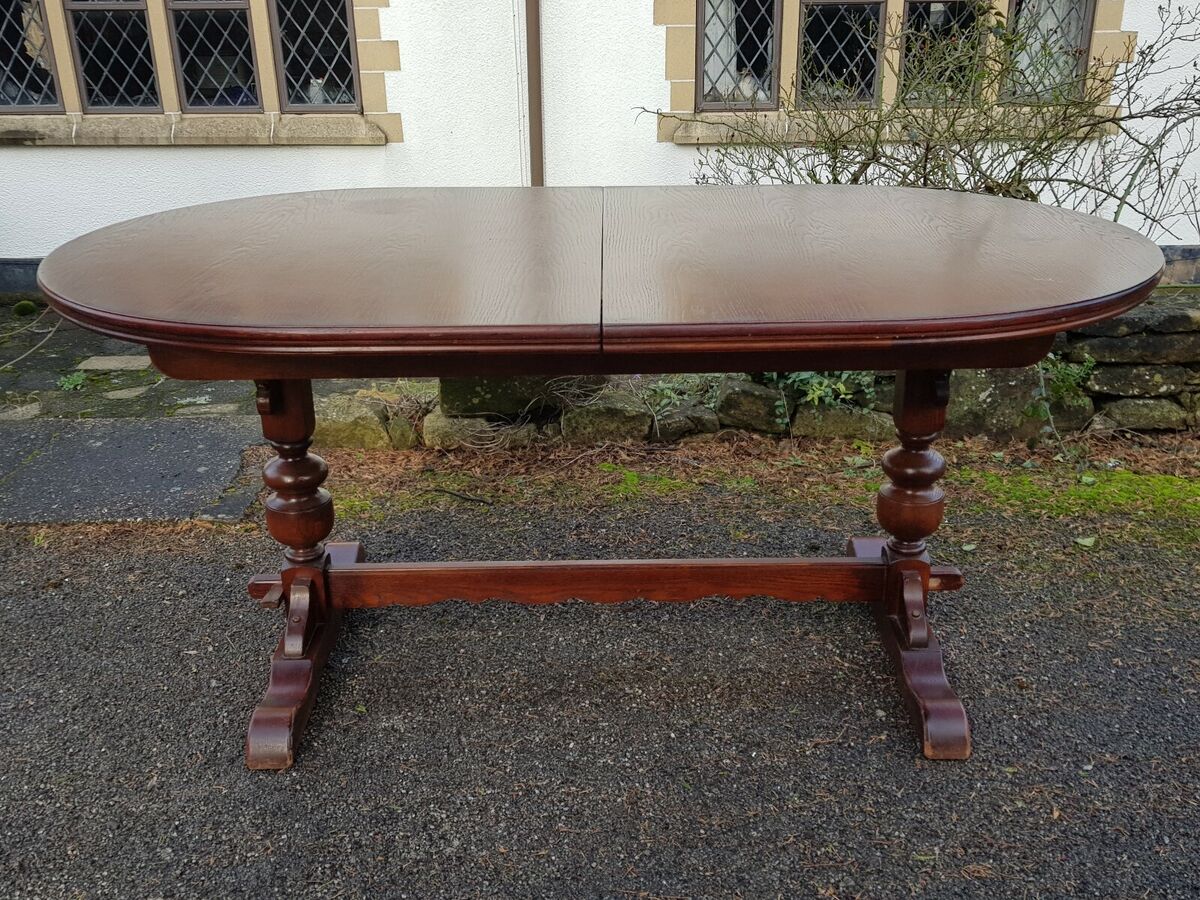
Assessing the Condition of the Dining Table
The first step in renovating your dining table is to assess its condition. Take a close look at the entire piece, paying attention to any visible damage or issues. Is the surface scratched, stained, or damaged? Are there any loose or wobbly legs? Evaluating the overall state of the table will help you determine the extent of renovation required and the best approach to take.
Once you’ve assessed the condition, you can decide whether a simple touch-up or a complete restoration is needed. If your table only requires minor repairs and a fresh coat of paint or stain, a touch-up might be sufficient. However, if it has significant damage or you want to change its style completely, a more involved restoration process might be necessary.
Choosing a Renovation Approach
Now that you’ve assessed the condition of your dining table, it’s time to decide on the renovation approach. There are various options to consider, depending on your desired outcome and level of expertise.
Refinishing: If you want to restore your table to its original glory, refinishing is the way to go. This involves stripping off the old finish, repairing any damages, sanding the surface, and applying a new finish. Refinishing allows you to showcase the natural beauty of the wood or change the color completely by staining or painting.
Repainting: If you want to give your dining table a completely new look, repainting is a great option. It allows you to experiment with different colors and finishes to match your existing decor or create a bold statement piece. The process involves cleaning the table, sanding it to create a smooth surface, applying a primer, and then painting with your chosen color.
Resurfacing: If you’re looking for a quick and easy way to refresh your dining table, resurfacing might be the solution. This involves covering the existing surface with a new material, such as laminate or veneer, to create a clean and updated look. Resurfacing is ideal if your table has extensive damage or if you want a modern and durable finish.
Before finalizing your renovation approach, consider factors such as your desired outcome, budget, and personal skill level. It’s always a good idea to research different techniques and seek inspiration to determine the best approach for your specific situation.
In the next section, we will discuss the tools and materials you’ll need to successfully renovate your old dining table.
Key Takeaways:
- Revitalize your old dining table by assessing its condition, choosing the right approach, and executing the necessary steps for a stunning transformation. Embrace the process and create a cherished centerpiece for your home.
- Save money and retain sentimental value by renovating your dining table. Whether restoring the wood’s natural beauty, adding a fresh coat of paint, or resurfacing with modern materials, the possibilities for customization are endless. Enjoy the process and create a beautiful gathering place for cherished memories.
Read more: What To Do With An Old Dining Table
Assessing the Condition of the Dining Table
Before you embark on renovating your old dining table, it’s crucial to assess its condition thoroughly. By carefully examining the table, you’ll be able to determine the necessary repairs and understand the scope of the renovation process.
Start by inspecting the surface of the table. Look for any scratches, dents, or stains. Are there any areas where the finish has worn off or become discolored? Take note of these imperfections as they will guide you in deciding whether a simple touch-up or a more extensive restoration is required.
Next, check the stability of the table. Is it wobbly? Do the legs need tightening? Examine each leg to ensure that it is securely attached and doesn’t sway when pressure is applied. Loose or unstable legs can be a safety hazard and should be addressed before proceeding with the renovation.
Take a close look at the joints and seams of the table. Are they intact or showing signs of separation? Look for any cracks or gaps that might need to be filled or repaired. Loose joints can affect the stability and longevity of the table, so it’s essential to address these issues during the renovation process.
If your dining table has any intricate details or carvings, inspect them for damage or wear. Are there any missing or broken pieces? Consider whether you want to restore these decorative elements or modify them during the renovation.
Consider the overall aesthetic appeal of the table. Does it match your current decor or style preferences? If you’re looking for a dramatic change, decide if you want to maintain the table’s original charm or if you’re open to more significant alterations.
Remember to take measurements of the table’s dimensions, especially if you plan on making any changes or additions during the renovation. This will help you ensure that all new components, such as legs or extensions, are compatible and fit seamlessly with the existing structure.
Based on your assessment, you can make an informed decision about the level of renovation needed. If the table only suffers from minor scratches or wear, a simple touch-up may suffice. This could involve sanding the surface, cleaning the finish, and applying a fresh coat of varnish or paint.
However, if your dining table has extensive damage or you desire a complete transformation, a more involved restoration process will be necessary. This might involve stripping the old finish, repairing and restoring damaged areas, and applying a new finish or different materials.
By conducting a thorough assessment of the condition of your dining table, you’ll have a clear understanding of the necessary repairs and renovations. This knowledge will allow you to plan and execute the renovation process efficiently, resulting in a beautifully transformed dining table that will breathe new life into your space.
Choosing a Renovation Approach
Now that you have assessed the condition of your old dining table, it’s time to decide on the renovation approach. Your choice will depend on factors such as your desired outcome, personal preferences, and the level of expertise you possess.
Refinishing: Refinishing is a popular approach for restoring the natural beauty of a dining table. This method involves stripping off the old finish, repairing any damages, and applying a new finish to enhance the wood’s aesthetic appeal.
If you appreciate the natural grain and color of the wood, refinishing allows you to showcase its inherent beauty. Start by removing the existing finish using a chemical stripper or sanding. Once the surface is clean and bare, you can repair any scratches, dents, or gouges with wood filler or epoxy. Sand the entire surface to create a smooth and even finish. Finally, apply your choice of stain or paint, followed by a protective topcoat to seal and preserve the wood.
Repainting: If you prefer a more dramatic transformation, repainting your dining table can breathe new life into its appearance. This approach allows you to choose from a wide range of colors and finishes to suit your personal style or match your existing decor.
Begin by thoroughly cleaning the table to remove any dirt, grime, or residue. Next, use sandpaper to create a smooth surface by removing the old paint or varnish. Apply a primer to provide a suitable base for the paint and enhance its adhesion. Finally, paint the table with your chosen color, ensuring even coverage and allowing each coat to dry before applying the next. Finish with a clear topcoat to protect the paint and give it a professional, long-lasting finish.
Resurfacing: If your dining table has significant damage or you want to give it a completely new look, resurfacing is a viable option. This involves covering the existing surface with a new material, such as laminate or veneer, to create a clean and updated appearance.
Start by thoroughly cleaning and sanding the table to create a smooth and even surface. Measure and cut the laminate or veneer to fit the table’s dimensions, ensuring precise edges and corners. Apply a strong adhesive to the table’s surface and carefully place the new material, ensuring proper alignment. Use a roller or a laminate roller to press out any air bubbles and ensure a secure bond. Trim the excess material and finish the edges with edge banding or a router for a polished look.
When choosing a renovation approach, consider factors such as the level of difficulty, your available time, and your budget. Additionally, think about the overall style and aesthetic you want to achieve for your dining room. Whether you decide to restore the natural beauty of the wood, make a bold statement with paint, or opt for a modern resurfacing option, the renovation process will breathe new life into your old dining table and transform it into a stunning focal point for your home.
Preparing the Necessary Tools and Materials
Before you begin renovating your old dining table, it’s essential to gather all the necessary tools and materials. Having everything you need at hand will ensure a smooth and efficient renovation process. Here is a list of common tools and materials you might need:
Tools:
- Sanding block or electric sander
- Paint scraper or putty knife
- Quality paintbrushes or foam rollers
- Paint sprayer (optional)
- Drill or screwdriver
- Clamps
- Saw (if modifications or repairs are needed)
- Wood chisels (if intricate carving or detail repairs are required)
- Safety goggles and gloves
- Dust mask or respirator
Materials:
- Chemical stripper or paint remover (if refinishing the table)
- Sandpaper in various grits (80, 120, 220) or sanding discs for an electric sander
- Wood filler or epoxy (for repairing scratches or dents)
- Primer (if repainting the table)
- Premium quality paint or stain
- Clear topcoat (varnish, polyurethane, or lacquer)
- Laminate, veneer, or resurfacing material (if resurfacing the table)
- Adhesive suitable for the chosen resurfacing material
- Edge banding or router (for finishing edges during resurfacing)
- Drop cloths or plastic sheets to protect the surrounding area
In addition to these tools and materials, it’s also helpful to have a designated workspace that provides enough room to safely and comfortably work on your dining table. Consider setting up a workstation in a well-ventilated area, preferably with good lighting.
Remember to read the manufacturer’s instructions on any chemicals or adhesives you use and follow safety guidelines. Always wear personal protective equipment, such as safety goggles, gloves, and a dust mask or respirator, when working with chemicals or creating dust during sanding.
By preparing all the necessary tools and materials beforehand, you’ll be equipped to tackle the renovation process smoothly and efficiently. This will ensure that you can achieve your desired results while avoiding unnecessary delays or interruptions. With everything ready, you’re now ready to embark on the exciting journey of renovating your old dining table.
Stripping the Old Finish
One of the first steps in renovating an old dining table is to strip off the old finish. Stripping the table allows you to start with a clean slate and prepare the surface for the next steps in the renovation process. Here’s a step-by-step guide on how to strip the old finish from your dining table:
Step 1: Prepare the Workspace
Start by setting up your workspace in a well-ventilated area. Lay down drop cloths or plastic sheets to protect the surrounding floor or furniture. It’s important to ensure proper ventilation while working with chemical strippers, so open windows or use fans to maintain airflow.
Step 2: Wear Protective Gear
Before you begin working with the chemical stripper, make sure to wear appropriate personal protective equipment. This includes safety goggles to protect your eyes, gloves to shield your hands, and a dust mask or respirator to prevent inhaling any harmful fumes or dust particles.
Step 3: Apply the Chemical Stripper
Using a paintbrush or foam brush, apply a generous coat of the chemical stripper to the surface of the dining table. Ensure that the stripper is spread evenly and covers the entire area you wish to strip.
Please note that different chemical strippers may have varying application instructions, so be sure to carefully read and follow the manufacturer’s guidelines provided on the product packaging.
Step 4: Let the Stripper Work
Allow the chemical stripper to penetrate the old finish as specified in the manufacturer’s instructions. This usually takes around 15-30 minutes, but it may vary depending on the brand and type of stripper you’re using. During this time, the stripper will start to dissolve the old finish and make it easier to remove.
Step 5: Remove the Old Finish
Once the chemical stripper has had sufficient time to work, use a paint scraper or putty knife to gently scrape off the softened finish. Begin at one edge of the table and work your way across, applying light pressure to minimize any damage to the wood surface.
As you scrape away the old finish, have a disposable container nearby to collect the scraped-off residue. This will help keep your workspace clean and prevent the finish from settling back onto the table.
Step 6: Repeat if Necessary
If there are stubborn layers of the old finish that remain after the initial stripping, you may need to repeat the process. Apply another coat of the chemical stripper, let it sit according to the instructions, and then scrape off the softened finish again. Repeat this step until you have removed all traces of the old finish.
Step 7: Clean the Surface
After removing the old finish, use a clean cloth or rag soaked in mineral spirits or denatured alcohol to wipe down the table’s surface. This will help remove any remaining residue or stripper. Allow the table to dry completely before proceeding to the next steps of the renovation process.
Stripping the old finish is a crucial step in renovating an old dining table. By carefully following these steps, you’ll be able to remove the old finish effectively, preparing the surface for the next stages of the renovation process. With the old finish stripped away, you’re one step closer to transforming your dining table into a stunning piece that will bring new life and charm to your home.
Read more: What To Do With An Old Dining Table
Repairing any Damages
Once you have stripped the old finish from your dining table, it’s time to assess the condition of the wood and address any damages. Repairing these issues will ensure that your renovated table is not only beautiful but also structurally sound. Here’s a step-by-step guide on how to repair common damages:
Step 1: Inspect the Table
Closely examine the table to identify any damages that need to be repaired. Look for scratches, dents, cracks, loose joints, or other issues that may affect the functionality or aesthetics of the table.
Step 2: Repair Scratches and Dents
If your table has minor scratches or dents, you can easily fix them using wood filler or epoxy. Begin by cleaning the damaged area and removing any debris or loose wood particles. Then, follow the manufacturer’s instructions to mix and apply the filler or epoxy to fill in the scratches or dents. Smooth the surface using a putty knife or sandpaper and allow it to dry completely before moving to the next step.
Step 3: Fix Loose Joints
If you notice any loose joints on the table, it’s important to secure them to ensure the table’s stability. Apply a suitable wood glue to the loose joint and carefully reassemble the parts. Use clamps to hold the joint firmly in place while the glue dries. Wipe off any excess glue with a damp cloth and allow the joint to dry completely before continuing the renovation process.
Step 4: Address Structural Issues
If there are more significant structural issues, such as cracks or deep damage, you may need to employ more advanced repair techniques. Depending on the severity of the damage, you can use wood dowels, splines, or even replacement parts to reinforce or replace damaged sections. Consult with a professional if necessary to ensure proper repair methods are used to maintain the table’s integrity.
Step 5: Sand the Repaired Areas
After the repairs have dried and the joints are secured, sand the repaired areas using fine-grit sandpaper. This will help smooth the surface and blend the repaired sections with the surrounding wood. Keep sanding until the repaired areas are flush with the rest of the table.
Step 6: Clean the Table
Once the repairs have been made and sanded, clean the entire surface of the table to remove any dust or debris. This will ensure a smooth and clean foundation for the upcoming finishing steps.
By taking the time to repair any damages, you’ll not only improve the appearance of your renovated table but also ensure its long-lasting durability. Whether you’re fixing scratches and dents, securing loose joints, or addressing more significant structural issues, these repair steps will help transform your dining table into a beautiful and functional piece of furniture.
Consider sanding down the old finish to reveal the natural wood, then apply a fresh coat of stain or paint for a new look. Finish with a protective sealant for durability.
Sanding the Surface
After repairing any damages to your dining table, the next step in the renovation process is sanding the surface. Sanding is crucial to achieve a smooth and even finish, as well as to prepare the wood for staining, painting, or applying a new finish. Follow these steps to properly sand the surface of your table:
Step 1: Choose the Right Sandpaper Grit
Start by selecting the appropriate grit sandpaper for the initial sanding. For removing any rough surfaces or previous finishes, use coarse-grit sandpaper, such as 80 or 100 grit. As you progress through the sanding process, switch to finer-grit sandpaper, such as 120 and 220 grit, for achieving a smoother surface.
Step 2: Sand With the Grain
Always sand in the direction of the wood grain to avoid creating visible scratches or marks. Use a sanding block or an electric sander (with proper attachments) for larger surfaces to ensure an even and consistent sanding.
Step 3: Start Sanding
Begin sanding the surface of the table with steady and even pressure. Move the sandpaper back and forth in long, smooth strokes along the grain of the wood. Avoid applying excessive pressure or sanding in one spot for too long, as it can result in uneven surfaces.
Step 4: Switch to Finer Grits
Once you have sanded the entire surface with the initial coarse-grit sandpaper, progress to finer-grit sandpapers. This will help remove any remaining imperfections and create a smoother surface. Repeat the sanding process with each finer grit, working your way up to the finest-grit sandpaper.
Step 5: Sand the Edges and Corners
Pay attention to the edges and corners of the table as well. Use sandpaper wrapped around a small block or folded into a manageable shape to access these areas. Be careful not to round the edges excessively; aim to maintain the table’s original shape while achieving a smooth finish.
Step 6: Remove Dust
After sanding, use a clean cloth or a vacuum with a soft brush attachment to remove all the sanding dust from the surface. It’s crucial to have a clean working area before applying any finish or protective coating.
Sanding the surface of your dining table is essential for achieving a professional and polished look. It helps to create a smooth canvas for the next steps in the renovation process, such as staining or painting. By carefully sanding the table’s surface in the right direction and gradually progressing through finer grits, you’ll be able to transform your old table into a beautifully refreshed piece that will delight for years to come.
Staining or Painting the Dining Table
Once you have sanded the surface of your dining table, it’s time to decide whether you want to stain or paint it. Both options offer different aesthetic results, so choose the one that aligns with your desired look and the overall style of your dining room. Follow these steps to successfully stain or paint your dining table:
Step 1: Prepare the Work Area
Lay down drop cloths or plastic sheets to protect the surrounding area from any potential spills or drips. Ensure that the workspace is well-ventilated and that there is sufficient lighting for optimal visibility.
Step 2: Choose a Stain or Paint
If you prefer the natural beauty of the wood grain to shine through, staining is a great option. Select a stain color that complements your existing decor or desired aesthetic. Alternatively, if you want to create a bold statement or match the table to specific colors in your dining room, painting is an excellent choice. Pick a high-quality paint that is suitable for wooden surfaces and desired finish.
Step 3: Test the Stain or Paint
Before applying the stain or paint to the entire table, it’s always recommended to do a small test area to ensure you are satisfied with the color and finish. Apply the stain or paint to a hidden or inconspicuous spot and evaluate the result once it dries. Adjust the color or technique as desired to achieve the desired outcome.
Step 4: Apply the Stain or Paint
If you’ve chosen to stain the table, use a clean brush or cloth to apply the stain evenly along the grain of the wood. Wipe off any excess stain with a clean cloth, following the manufacturer’s instructions for the recommended duration of the stain to penetrate the wood. For a deeper color, apply additional coats, allowing sufficient drying time between coats.
If you’ve chosen to paint the table, begin by applying a primer. This will ensure better adhesion and a smooth finish. Once the primer is dry, use a brush, foam roller, or a paint sprayer to apply an even layer of paint. Apply multiple thin coats rather than one thick coat to avoid drips or uneven coverage. Allow each coat to dry completely before applying the next one.
Step 5: Sand Between Coats (Optional)
If you want an ultra-smooth finish, sand the table lightly with a fine-grit sandpaper between coats of stain or paint. This will help to create a smoother surface and remove any raised grain or imperfections. Remember to remove all sanding dust before applying the next coat.
Step 6: Apply a Protective Finish
To preserve and protect the stained or painted surface, apply a clear protective finish such as varnish, polyurethane, or lacquer. Follow the manufacturer’s instructions for application, and apply multiple coats as recommended, allowing each coat to dry before applying the next one. This protective coating will enhance the durability of your dining table, making it resistant to spills, scratches, and general wear and tear.
By staining or painting your dining table, you can completely transform its look and customize it to match your personal style. Whether you choose the warmth and character of a stain or the vibrancy and versatility of paint, following these steps will make the process straightforward and enjoyable. Once you’ve completed this stage, you’re ready to move on to the final step – applying a protective finish.
Applying a Protective Finish
After staining or painting your dining table, it’s essential to apply a protective finish to ensure its longevity and durability. A protective finish will safeguard the surface from spills, scratches, and daily wear and tear, while also enhancing the overall appearance. Here’s a step-by-step guide on how to apply a protective finish to your renovated dining table:
Step 1: Choose the Right Finish
There are several options for protective finishes, such as varnish, polyurethane, or lacquer. Consider factors such as the desired level of sheen, ease of application, and durability when choosing the appropriate finish for your table. Read the manufacturer’s instructions carefully to ensure you have the necessary tools and follow the recommended application process.
Step 2: Prepare the Work Area
As with previous steps, prepare your work area by covering it with drop cloths or plastic sheets to protect surrounding surfaces. Ensure proper ventilation in the workspace to aid in the drying process.
Step 3: Stir and Strain the Finish (If Required)
If the protective finish you’ve chosen requires stirring or straining, carefully follow the manufacturer’s instructions. Stir the finish gently but thoroughly to ensure any settled particles are well mixed. If straining is necessary, strain the finish through a fine-mesh strainer to remove any impurities or lumps.
Step 4: Apply the Protective Finish
Using a quality brush or a foam brush, apply a thin and even layer of the protective finish to the surface of the table. Start at one end and work your way across, following the wood grain to achieve a smoother finish. Be mindful of drips or pooling and smooth them out as you go.
Step 5: Allow for Drying and Sand in Between Coats
Follow the manufacturer’s instructions for the recommended drying time before applying subsequent coats of the protective finish. Additionally, some finishes may require sanding between coats to achieve a smoother and more professional result. Use a fine-grit sandpaper to sand the surface lightly, ensuring all dust is removed before applying the next coat.
Step 6: Apply Multiple Coats
Apply multiple thin coats of the protective finish, allowing each coat to dry completely before applying the next one. The number of coats may vary depending on the product and the desired level of protection. Be patient and take your time to build up the finish gradually, ensuring a beautiful and long-lasting result.
Step 7: Final Inspection and Cure Time
Once you have applied the recommended number of coats, inspect the table for any imperfections or unevenness. If necessary, lightly sand any rough areas and reapply a final coat to achieve a smooth, flawless surface.
After the final coat, allow the table ample curing time as specified by the manufacturer. This curing time ensures that the finish fully hardens and becomes resistant to everyday use and cleaning. It’s important to follow these guidelines to prevent any premature damage or compromise to the protective finish.
By completing this final step of applying a protective finish, you’re ensuring the longevity and beauty of your renovated dining table. With a well-executed protective finish, your table will be both visually appealing and resistant to the rigors of everyday use, making it a centerpiece that will be enjoyed for years to come.
Read more: How To Update An Old Dining Room Set?
Reassembling and Finishing Touches
After completing the previous steps of renovating your dining table, it’s time to reassemble the pieces and add the finishing touches. This final stage will ensure that your table is not only aesthetically pleasing but also functional and ready to be enjoyed. Follow these steps to reassemble your table and add those final special touches:
Step 1: Gather All Pieces
Before reassembling the table, gather all the necessary pieces, including the tabletop, legs, and any additional components like extensions or braces. Make sure you have everything in proper working order and that any modifications you made during the renovation process are ready to be installed.
Step 2: Reattach the Legs
If you had to remove the legs during the renovation, reattach them securely to the tabletop. Follow the manufacturer’s instructions or use the appropriate tools, such as screws or bolts, to ensure a stable and sturdy connection. Check the stability of the table and make any necessary adjustments to level the legs, if required.
Step 3: Install Any Extensions or Braces
If your dining table has extensions or additional braces, now is the time to install them. Ensure they fit properly and align with the rest of the table. Double-check that any locking mechanisms or sliding mechanisms are functioning correctly. This will allow you to easily extend or collapse the table as needed.
Step 4: Check for Stability and Leveling
Once all the components are reassembled, check the stability and leveling of the table. Ensure it stands firmly on the ground without any wobbling or rocking. If necessary, adjust the legs or braces to achieve a stable and level surface.
Step 5: Add Finishing Touches
Now that the table is assembled, it’s time to add some finishing touches to enhance its overall appearance. Consider adding felt pads to the bottom of the legs to protect your floors from scratches. You can also apply decorative elements such as table runners, placemats, or a centerpiece to complement your dining room decor and create a welcoming ambiance.
Step 6: Clean and Protect the Surface
Before using your renovated dining table, give it a final cleaning to remove any dust or debris that may have accumulated during the reassembly process. Use a mild cleaning solution and a soft cloth to gently wipe down the surface. If you’ve applied a protective finish, ensure that it has fully cured according to the manufacturer’s guidelines before placing any objects on the table.
With the reassembling complete and the finishing touches applied, your renovated dining table is now ready to be enjoyed. Whether it’s hosting family gatherings, sharing meals with loved ones, or simply providing a beautiful space for daily activities, your revitalized dining table will be a cherished centerpiece in your home.
Conclusion
Congratulations on successfully renovating your old dining table! Through careful assessment, choosing the right renovation approach, and executing the necessary steps, you have transformed an outdated piece into a beautiful and functional centerpiece for your dining room. By following this comprehensive guide, you have learned how to assess the condition of the table, choose the appropriate renovation approach, prepare the necessary tools and materials, strip the old finish, repair any damages, sand the surface, and apply a protective finish. The reassembling and finishing touches have added those final special details to make your table truly shine.
Renovating your dining table not only saves you money but also allows you to retain a sentimental and cherished piece in your home. Whether it’s restoring the natural beauty of the wood, adding a fresh coat of paint, or resurfacing the table with a modern material, the possibilities for customization are endless.
Remember, the key to a successful renovation is to take your time, follow the appropriate steps, and pay attention to detail. Embrace the process, from the initial assessment to the final touch-ups. Each step contributes to the transformation of your dining table and reflects your style and creativity.
With your rejuvenated dining table, you can now create countless memories and enjoy shared meals with your loved ones. Solid and visually appealing, your renovated dining table will serve as the gathering place for laughter, conversation, and connection.
Don’t be afraid to showcase your newfound skills and share your renovation journey with others. Inspire them to bring life back into their furniture and make their house a home.
Again, congratulations on your successful dining table renovation! May your revamped table bring joy and beauty to your dining room for many years to come.
Frequently Asked Questions about How To Upgrade An Old Dining Table
Was this page helpful?
At Storables.com, we guarantee accurate and reliable information. Our content, validated by Expert Board Contributors, is crafted following stringent Editorial Policies. We're committed to providing you with well-researched, expert-backed insights for all your informational needs.


0 thoughts on “How To Upgrade An Old Dining Table”