Home>diy>Building & Construction>How To Plan For Pole Barn Construction
Building & Construction
How To Plan For Pole Barn Construction
Modified: January 20, 2024
Learn how to pole barn in construction with our expert tips and techniques. Discover the essential steps and materials for building construction.
(Many of the links in this article redirect to a specific reviewed product. Your purchase of these products through affiliate links helps to generate commission for Storables.com, at no extra cost. Learn more)
Introduction
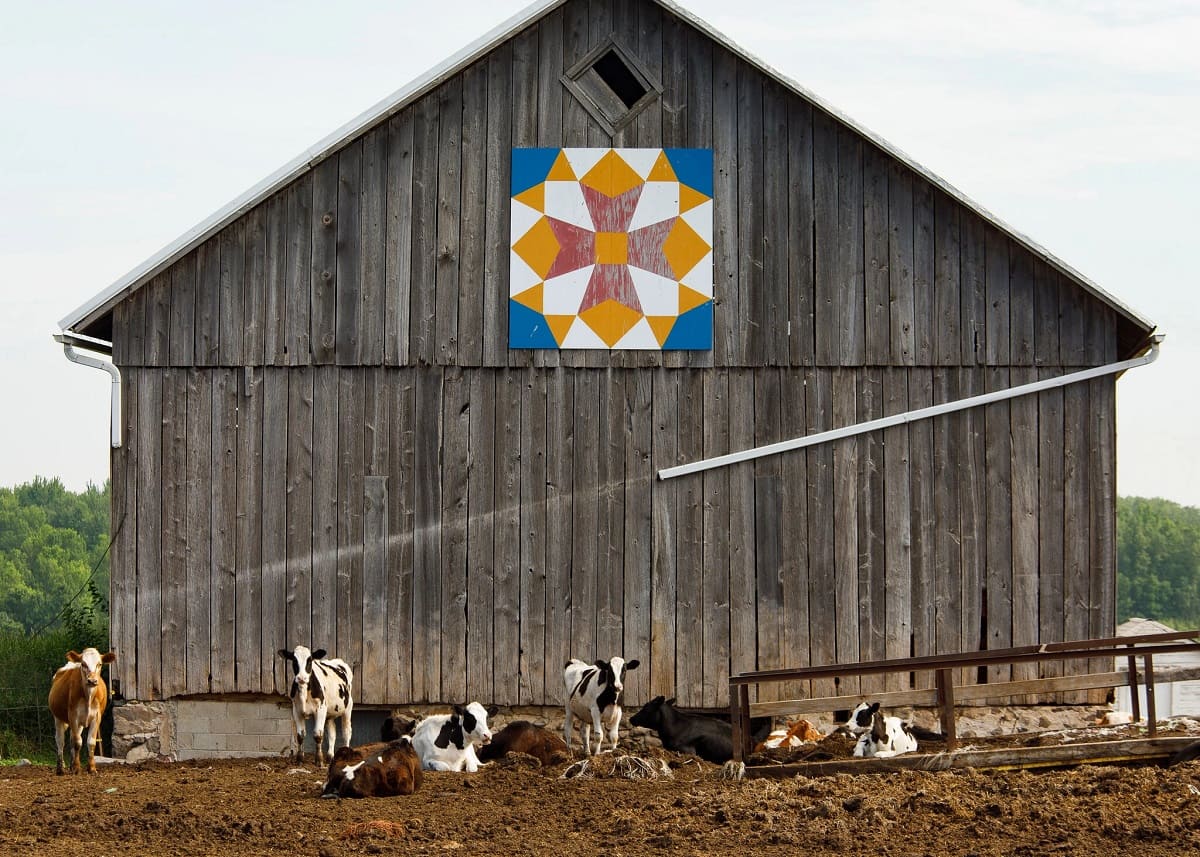
Welcome to the world of pole barn construction! Whether you’re a homeowner looking for additional storage space or a farmer in need of a sturdy barn for your livestock, pole barns can be a practical and cost-effective solution. In this comprehensive guide, we will explore the ins and outs of pole barn construction, from planning and designing to the finishing touches and maintenance.
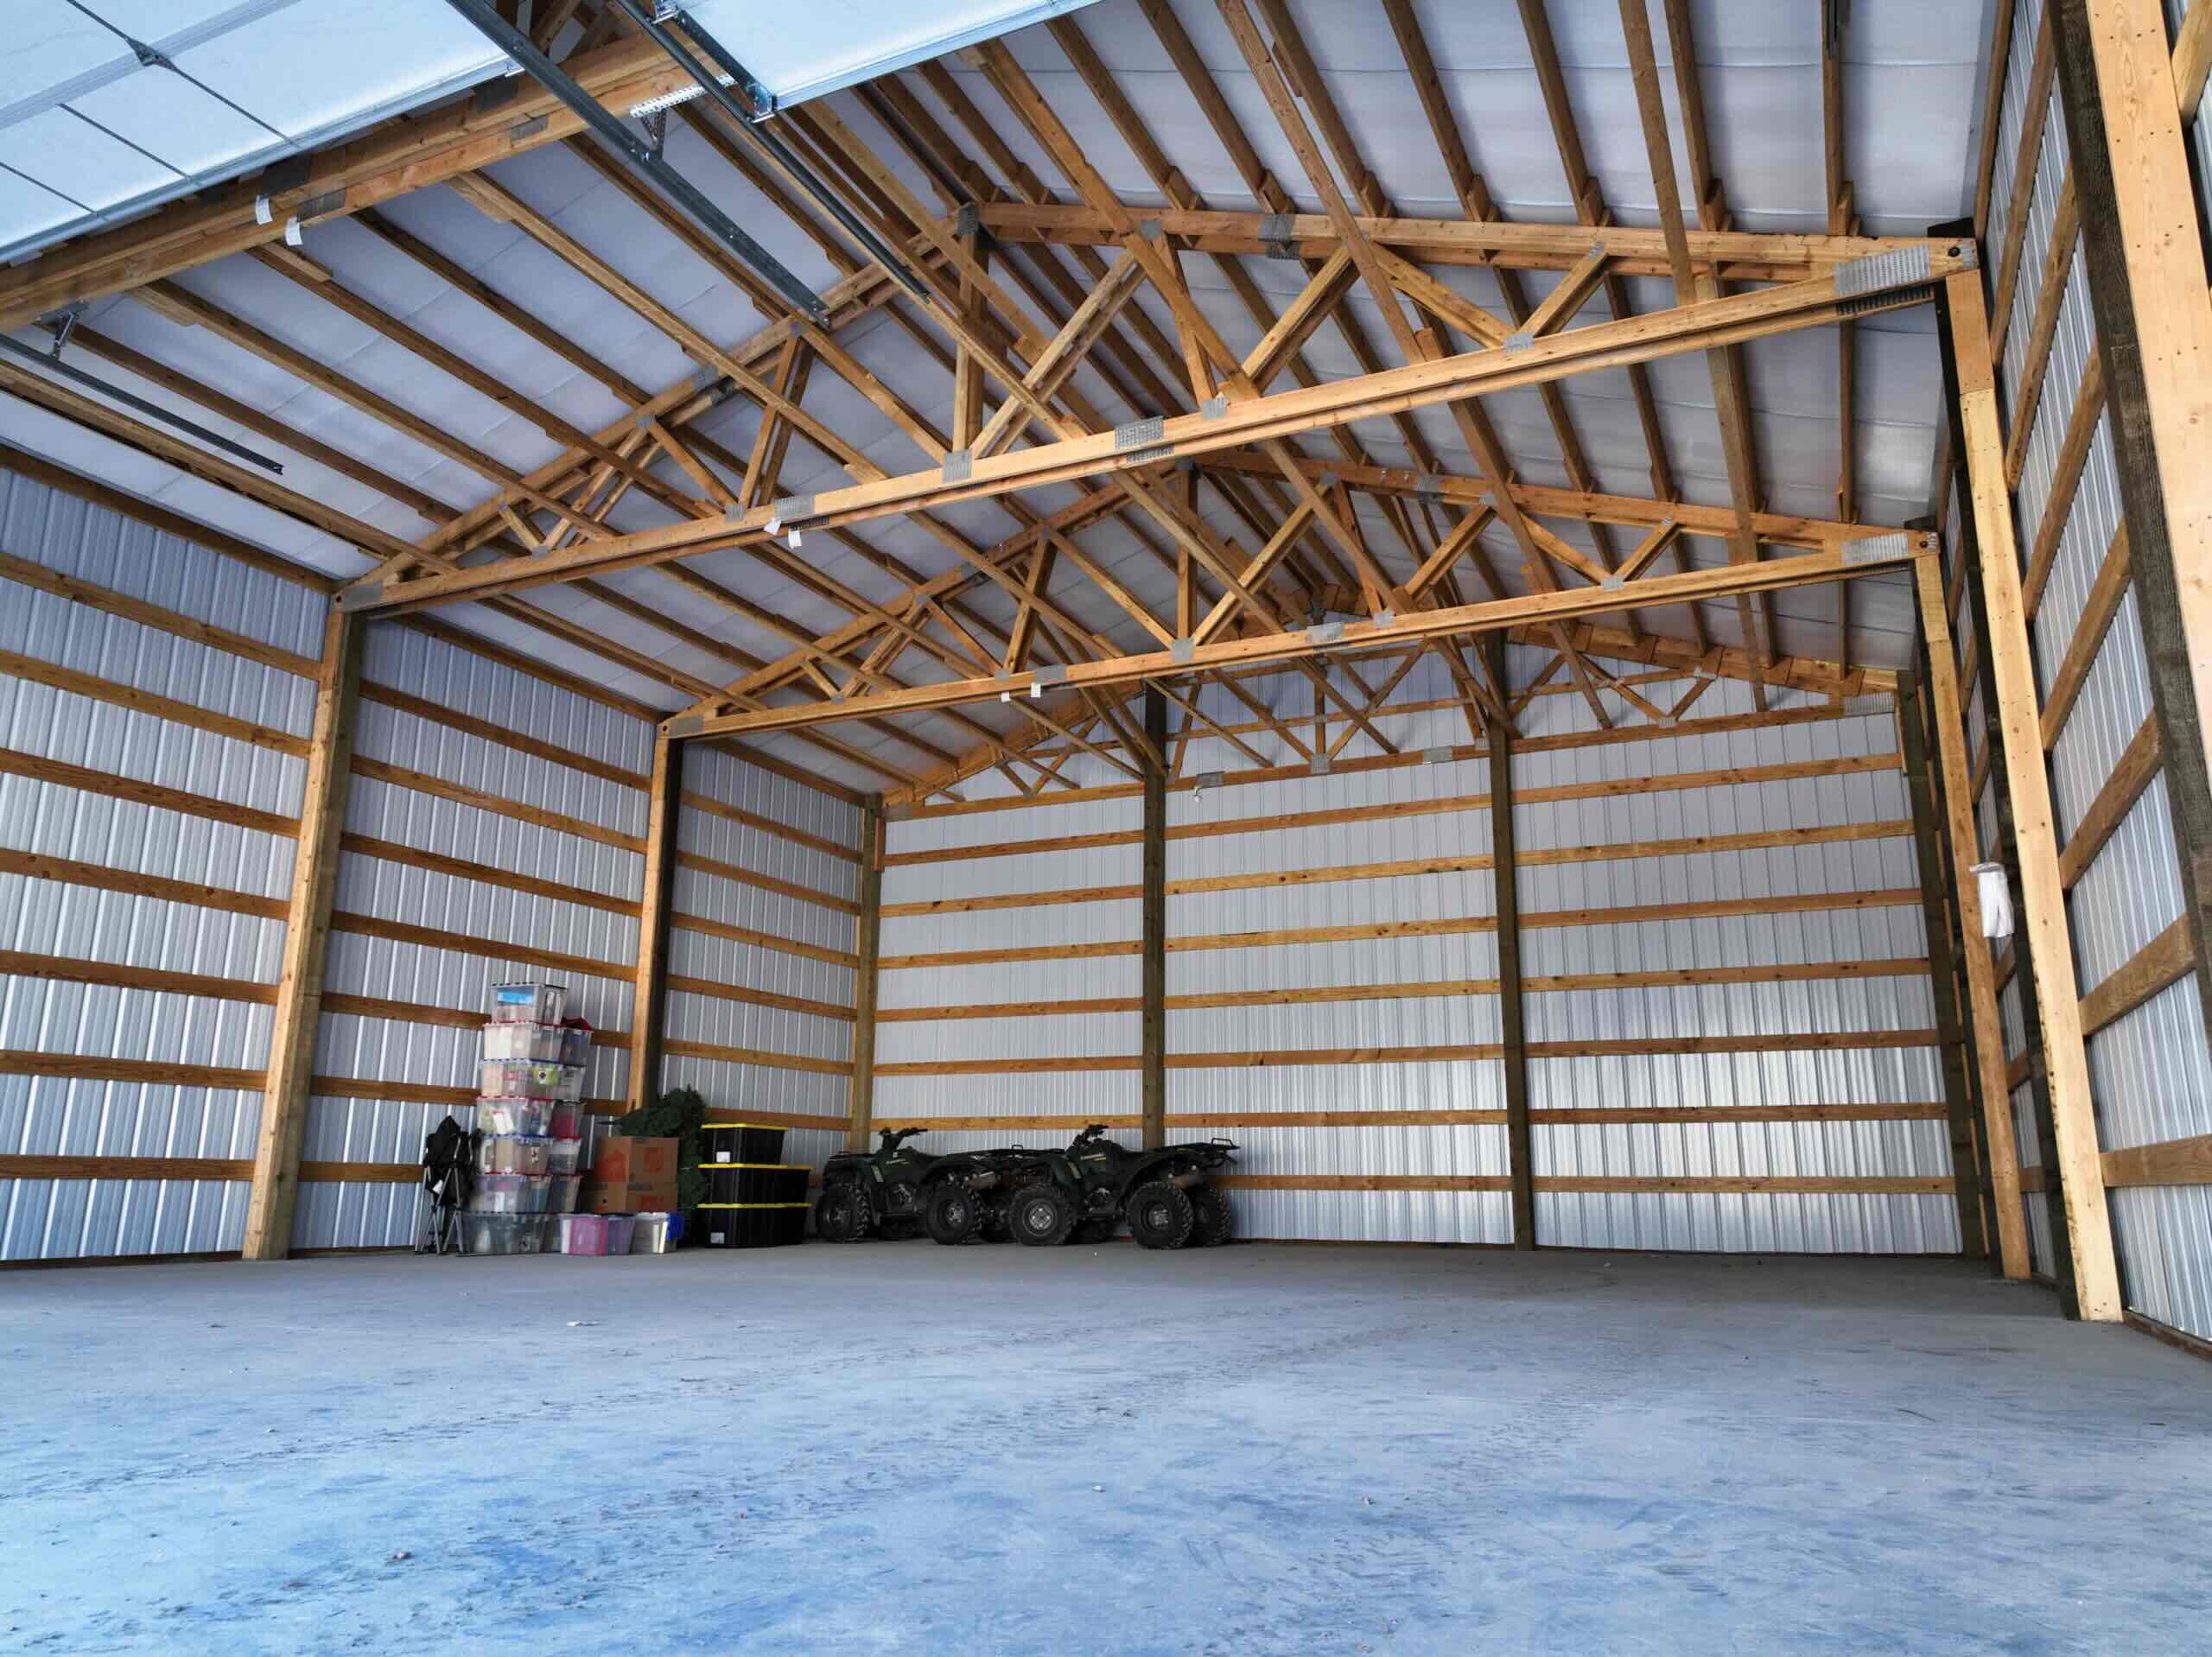
So, what exactly is a pole barn? At its core, a pole barn is a type of building construction that utilizes wooden poles or posts to support the weight of the structure. Unlike traditional stick-frame buildings, which rely on a complex network of studs and joists, pole barns are built with simplicity and efficiency in mind. This construction method not only speeds up the building process but also reduces the overall cost.
One of the main advantages of pole barn construction is its versatility. Whether you’re building a small shed or a large agricultural facility, the design options are virtually limitless. Concrete floors, insulation, electricity, plumbing – you can customize your pole barn to suit your specific needs. Additionally, pole barns are known for their durability and ability to withstand harsh weather conditions, making them a popular choice in areas with extreme climates.
In this guide, we’ll take you step by step through the process of constructing a pole barn. Starting with the planning and design phase, we’ll discuss the key considerations, such as size, layout, and materials. We’ll guide you through the site preparation process, including clearing the area, leveling the ground, and addressing any drainage issues.
Next, we’ll dive into the construction itself. You’ll learn how to properly set the poles in the ground, ensuring a sturdy and secure foundation. We’ll talk about the different options for roof and siding materials, as well as the importance of proper insulation to maintain a comfortable interior temperature.
No barn is complete without doors, windows, and other accessories. We’ll cover the various types of doors and windows available and how to install them correctly. We’ll also discuss additional features, such as ventilation, lighting, and security, to make your pole barn functional and convenient.
Lastly, we’ll touch on the important topic of maintenance and inspection. Regular upkeep is vital to ensure the longevity and safety of your pole barn. We’ll provide you with helpful tips and guidelines for keeping your structure in top shape for years to come.
So, whether you’re a seasoned DIY enthusiast or a first-time builder, this guide is here to empower you with the knowledge and confidence to tackle your pole barn construction project. Let’s get started!
Key Takeaways:
- Pole barn construction offers cost-effective, versatile, and durable building solutions. Proper planning, site preparation, and maintenance are crucial for creating a functional and long-lasting structure.
- From setting the frame to adding finishing touches, pole barn construction requires attention to detail and regular maintenance to ensure longevity and safety. Prioritize inspections, address moisture issues, and personalize the space for a rewarding building experience.
Read more: How To Insulate A Pole Barn Ceiling
Understanding Pole Barn Construction
Before diving into the details of how to construct a pole barn, it’s essential to have a clear understanding of its core construction principles. Pole barns, also known as post-frame buildings, are built using a simple yet effective method that offers several advantages over traditional building techniques.
The main feature of pole barn construction is the use of wooden poles or posts as the primary structural support. These poles are typically set into the ground, anchored by a concrete footing, and spaced evenly along the perimeter of the building. They serve as the framework for the entire structure, providing stability and strength.
One of the significant benefits of this construction method is its cost-effectiveness. The simplicity of pole barn construction eliminates the need for extensive foundation work and complex framing systems, reducing both labor and material expenses. Additionally, the design flexibility of pole barns allows for easy customization, making them suitable for a wide range of applications.
Another advantage of pole barns is the speed of construction. With traditional construction methods, building a structure can be a time-consuming process, involving multiple stages and specialized trades. In contrast, pole barns can be erected quickly, thanks to their straightforward design and fewer required materials.
While pole barns are known for their simplicity, it’s important to note that they can still incorporate various features to enhance their functionality and aesthetics. From insulation and interior finishes to doors, windows, and electrical systems, pole barns can be customized to meet specific needs and preferences.
Pole barns are also known for their durability. The combination of sturdy wooden poles, reinforced with concrete footings, and a properly installed roof and siding, ensures the structure can withstand heavy loads, strong winds, and even earthquakes. This makes pole barns a reliable choice for areas prone to severe weather conditions.
Additionally, pole barns offer excellent energy efficiency. With the proper insulation, these structures can maintain a comfortable temperature year-round. This not only creates a more pleasant environment but also helps to reduce energy costs.
Now that you have a solid grasp of the fundamental concepts, you’re ready to embark on your pole barn construction journey. In the next section, we’ll delve into the crucial steps involved in planning and designing your pole barn.
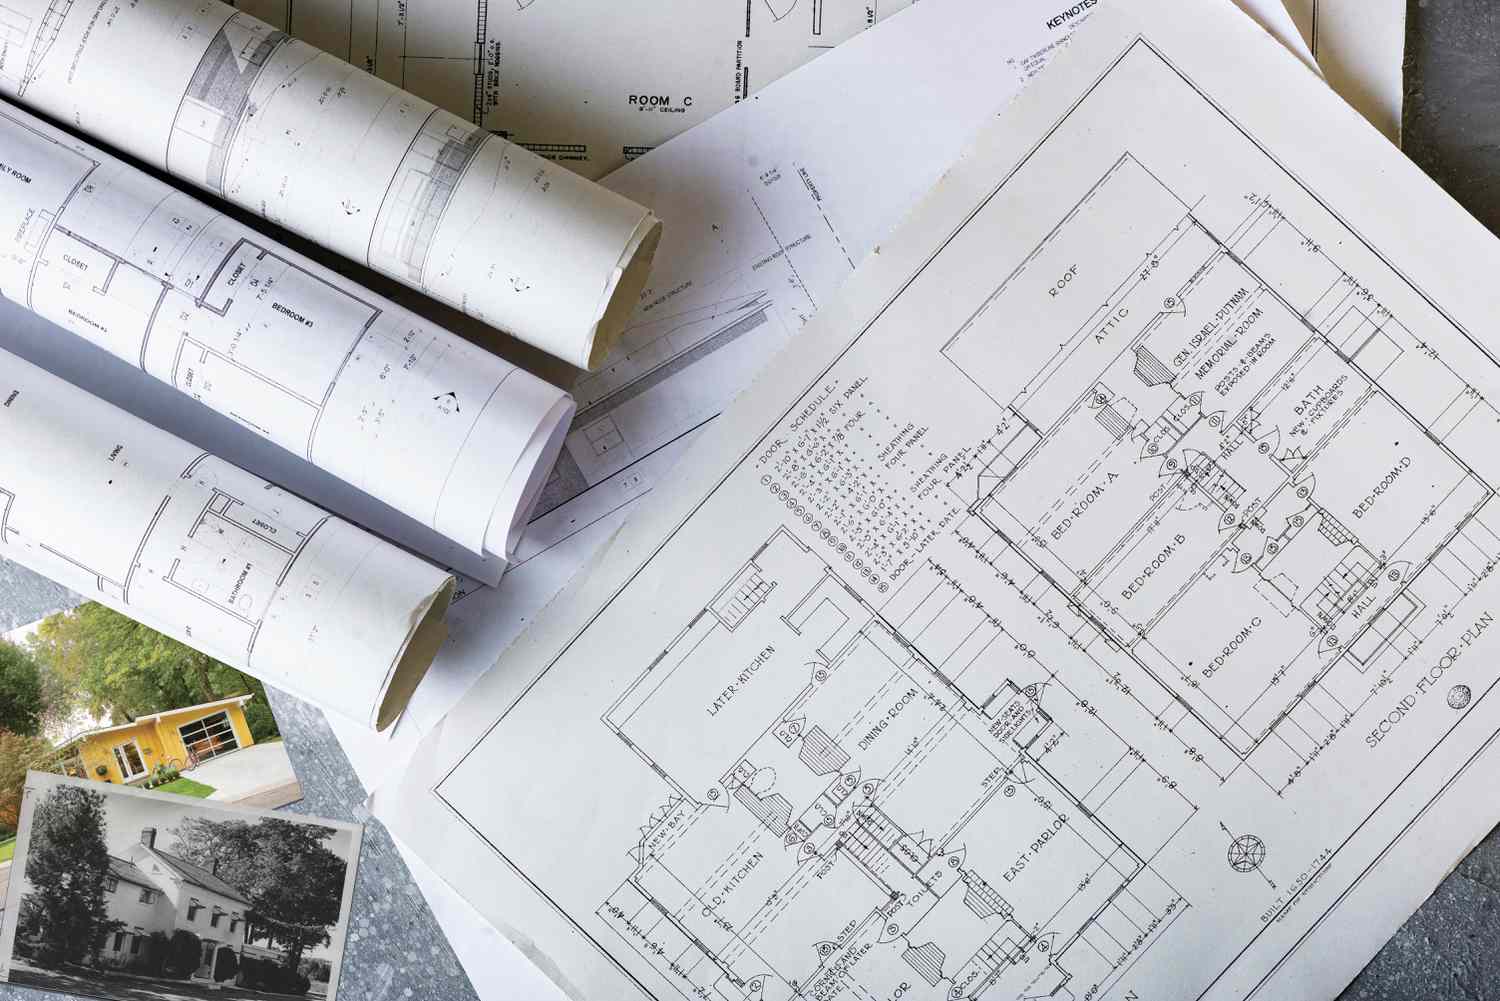
Planning and Designing Your Pole Barn
When it comes to constructing a pole barn, proper planning and designing are key to a successful project. Taking the time to carefully consider your needs and preferences will ensure that you create a functional and efficient space that meets your requirements. Here are the essential steps to follow in the planning and design phase:
1. Determine the Purpose: Start by clarifying the purpose of your pole barn. Are you building a storage shed, a workshop, or an agricultural facility? Understanding the primary function of your pole barn will help you determine the size, layout, and necessary features.
2. Assess Your Space: Evaluate the available space on your property where you plan to construct the pole barn. Take into account any restrictions or setbacks dictated by local building codes and regulations. Consider the location in terms of accessibility, proximity to other structures, and natural light exposure.
3. Size and Layout: Determine the required size of your pole barn based on your intended use. Consider factors such as the storage capacity, workspace requirements, and any additional areas you may need, such as offices or livestock stalls. Sketch out a layout that maximizes the use of space and ensures smooth workflow.
4. Door and Window Placement: Decide on the number, size, and placement of doors and windows in your pole barn. These elements are essential for ventilation, natural light, and ease of access. Consider the size of the items that need to move in and out of the structure when positioning doors.
5. Material Selection: Choose the materials for your pole barn carefully. While wooden poles are the primary structural elements, there are various options for siding, roofing, and insulation. Factors to consider include durability, maintenance requirements, budget, and aesthetic appeal.
6. Electrical and Plumbing Needs: If you plan to use your pole barn as a workshop or an agricultural facility, you may need to include electrical and plumbing systems. Consider the location of power outlets, lighting fixtures, and plumbing connections to optimize functionality and convenience.
7. Permits and Regulations: Check with your local building authorities to determine if any permits or approvals are required for your pole barn construction. Ensure that you adhere to all zoning and building code requirements to avoid any potential issues during or after construction.
8. Consultation and Expertise: If you’re new to pole barn construction or have specific requirements that need professional input, consider consulting with experts in the field. Architects, engineers, and experienced contractors can provide valuable insights and advice to ensure your design is structurally sound and aligns with your goals.
Remember, taking the time to plan and design your pole barn thoroughly will set the foundation for a successful construction project. It will also minimize potential issues and changes during the building process, saving you time, money, and headaches. With a well-thought-out plan in hand, you’re ready to move on to the next phase – preparing the site for construction.
Preparing the Site for Construction
Preparing the site for your pole barn construction is a crucial step that sets the stage for a smooth and successful building process. Proper site preparation ensures a stable foundation, optimal drainage, and a safe working environment. Here are the key steps to follow when preparing your site:
1. Clearing the Area: Start by clearing the site of any vegetation, debris, or obstructions. This includes removing trees, shrubs, rocks, and any other objects that may interfere with the construction process. Clearing the area provides a clean slate for building and helps prevent potential hazards or obstructions in the future.
2. Leveling the Ground: Ensure that the ground where your pole barn will be constructed is level. This is important for the stability and proper alignment of the structure. Use a laser level or a transit to check the ground’s elevation and make necessary adjustments by adding or removing soil as needed. Keep in mind that it’s crucial to create a level surface for accurate pole installation.
3. Addressing Drainage: Evaluate the site’s natural drainage patterns and make any necessary adjustments to ensure proper water flow away from the pole barn. It’s important to avoid water pooling around the structure, as this can lead to damage and structural issues over time. Consider installing French drains or grading the ground away from the building to promote adequate drainage.
4. Utility Considerations: Take into account any utility lines or services that may be present on your property. Identify the location of underground utility lines, such as water, gas, and electrical lines, and mark them to prevent accidental damage during the construction process. Contact your utility providers if you have any concerns or need assistance with locating these lines.
5. Perimeter Marking: Once the area is clear and leveled, mark the perimeter of your pole barn. This will help you visualize the layout and dimensions of the structure. Use stakes and string to outline the shape of the building, ensuring that it aligns with your design and meets any setback requirements dictated by local building codes.
6. Site Access: Consider the accessibility of the site during and after construction. Ensure that there is adequate space for construction machinery, delivery trucks, and any other vehicles that may be required during the building process. If necessary, create temporary access roads or parking areas.
7. Safety Measures: Prioritize safety throughout the site preparation process. Wear appropriate personal protective equipment (PPE), such as gloves and protective eyewear, when clearing the area or using heavy machinery. Secure the site with caution tape or fencing to prevent unauthorized access. Keep the site clean and organized to minimize the risk of accidents.
By carefully preparing the site for construction, you set the foundation for a successful pole barn project. Taking the time to clear the area, level the ground, address drainage, consider utility lines, mark the perimeter, ensure site access, and prioritize safety will help create a favorable environment for the upcoming tasks. With the site prepared, you’re now ready to move on to the exciting part – building the pole barn frame.
Building the Pole Barn Frame
Building the pole barn frame is a critical phase of the construction process that involves setting and securing the wooden poles in the ground. This step creates the structural framework that will support the entire pole barn. Follow these steps to ensure a sturdy and durable pole barn frame:
1. Install the Perimeter Poles: Begin by setting the corner poles and then place the intermediate poles along the perimeter at regular intervals. Make sure the poles are straight and plumb before securing them in the ground. Use a post hole digger or an auger to create holes deep enough to accommodate the length of the poles, typically around 1/3 of the total pole length.
2. Secure the Poles: Once the poles are in position, pour concrete footings in each hole to provide stability and anchorage. Ensure that the concrete footings are level and flush with the ground. Allow the concrete to cure according to the manufacturer’s instructions before proceeding.
3. Connect the Poles: After the concrete has cured, connect the poles using horizontal girts. These are horizontal boards that run along the length of the poles, providing additional strength and stability to the frame. Attach the girts securely to the poles using nails, screws, or through-bolts, depending on the design and building requirements.
4. Check Alignment and Level: Throughout the process of installing and connecting the poles and girts, continually check the alignment and level of the frame. Use a level and string lines to ensure that the poles are vertical and the girts are straight. Adjust as necessary to maintain the structural integrity of the pole barn frame.
5. Install the Bracing: To further reinforce the pole barn frame, install diagonal bracing. Bracing helps distribute the horizontal forces that the structure may experience, enhancing its stability. Typically, braces are installed from the top of each corner pole to the bottom of the opposite corner pole. Secure the braces firmly to prevent movement or shifting of the frame.
6. Roof Trusses and Purlins: Once the pole barn frame is complete, it’s time to install the roof trusses and purlins. Roof trusses are the supporting structures that hold the roof in place, while purlins are horizontal boards that run from truss to truss and provide support to the roof panels. Carefully follow the manufacturer’s instructions for installing the trusses and purlins to ensure proper alignment and stability.
7. Insulation: Depending on your climate and intended use of the pole barn, you may want to consider insulating the frame. Insulation helps regulate the temperature inside the pole barn and improve energy efficiency. There are various insulation materials available, such as fiberglass batts or spray foam, that can be installed between the girts and roof purlins.
Building a sturdy and reliable pole barn frame requires precision and attention to detail. By following these steps and ensuring proper alignment, securing the poles and girts, installing diagonal bracing, and properly attaching the roof trusses and purlins, you’ll create a solid foundation for the rest of your pole barn construction project. Once the frame is in place, you can move on to installing the roofing and siding materials to protect the structure from the elements.
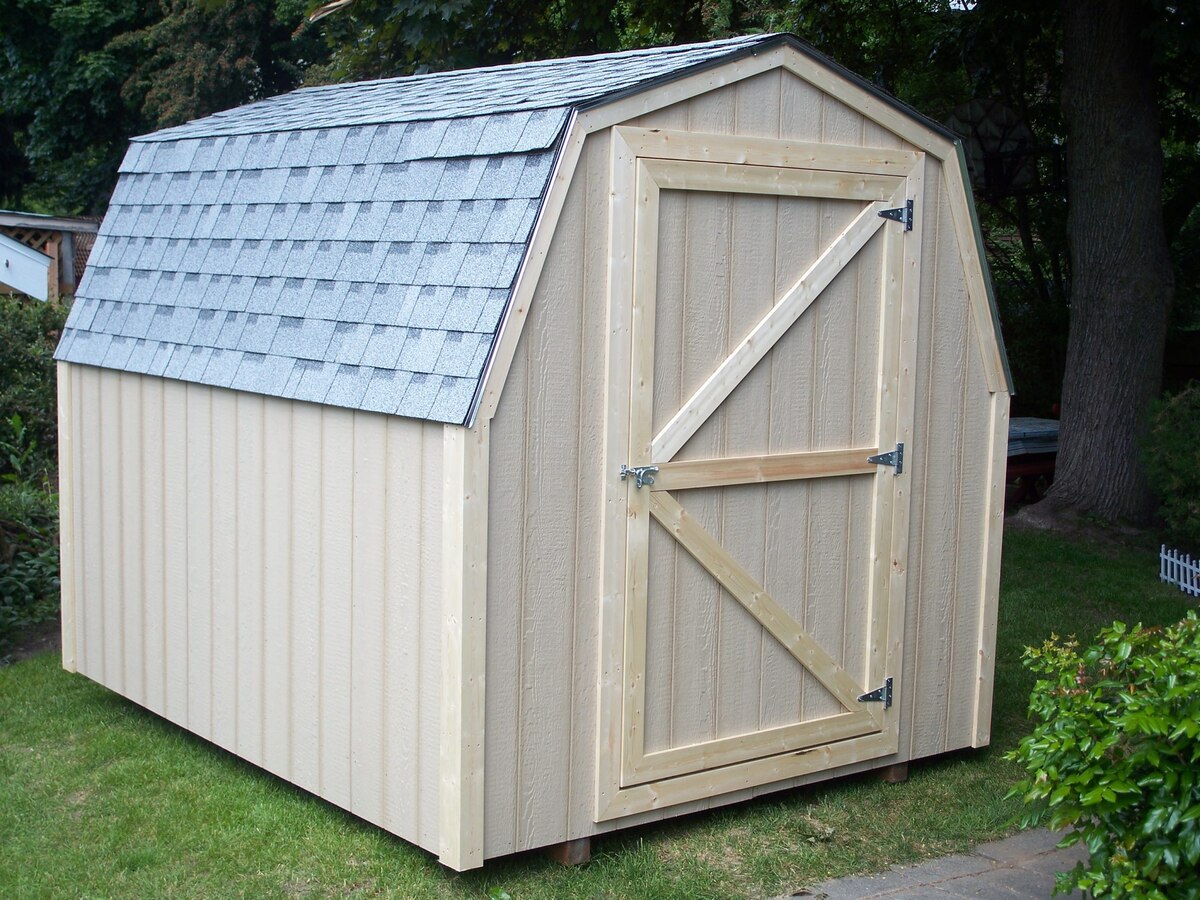
When constructing a pole barn, make sure to properly prepare the site by leveling the ground and removing any obstacles. This will ensure a stable and durable foundation for your pole barn.
Read more: How To Build Pole Shed Plans
Installing Roofing and Siding
Installing roofing and siding is a crucial step in completing the construction of your pole barn. The choice of roofing and siding materials will not only impact the aesthetic appeal of your structure but also determine its durability and resistance to the elements. Follow these steps for a successful installation:
1. Choose Roofing Materials: Select a roofing material that suits your climate, budget, and desired aesthetic. Common options include metal panels, asphalt shingles, or corrugated fiberglass. Consider factors such as durability, maintenance, and energy efficiency when making your decision. Consult with local experts or suppliers to ensure you choose the appropriate material for your region.
2. Prepare the Roof: Make sure the roof surface is clean, dry, and free of any debris before installing the roofing material. Remove any protruding nails or screws and repair any damaged sections. It’s recommended to install an underlayment, such as building paper or synthetic roofing felt, to provide an additional layer of protection against moisture.
3. Install the Roofing Material: Carefully follow the manufacturer’s instructions for installing the roofing material of your choice. Start at one end of the roof and work your way to the other, ensuring each panel or shingle overlaps the previous one to prevent water infiltration. Secure the roofing material using appropriate fasteners, such as roofing nails or screws, as specified by the manufacturer.
4. Consider Roof Accessories: Depending on your needs and preferences, you may want to install additional roof accessories. These can include ridge vents for proper ventilation, skylights for natural light, or gutter systems for effective rainwater management. Ensure you take appropriate measures to seal any penetrations in the roof to maintain its integrity.
5. Select Siding Materials: Choose a siding material that complements the overall design and provides adequate protection against the elements. Popular options include wood, metal, vinyl, or fiber cement siding. Consider factors such as durability, low maintenance, and visual appeal when making your selection.
6. Prepare the Walls: Similar to the roof, it’s important to ensure that the walls are clean, dry, and properly prepared before installing the siding. Repair any damaged sections and consider installing a vapor barrier or insulation if desired or required by local building codes.
7. Install the Siding: Follow the manufacturer’s instructions for installing the chosen siding material. Begin at one corner of the structure and work your way horizontally or vertically, depending on the siding type. Secure the siding using appropriate nails, screws, or clips, ensuring proper overlap and alignment. Pay attention to any specific instructions regarding corner pieces or trim for a professional-looking finish.
8. Finish with Trim and Flashing: Complete the installation by adding trim pieces and flashing to the edges, corners, and openings of your pole barn. These components not only provide a finished appearance but also serve as a protective barrier against moisture and pests. Use appropriate techniques and materials to ensure a secure and watertight seal.
Proper installation of roofing and siding is crucial to ensure the longevity and functionality of your pole barn. By carefully selecting materials, following manufacturer’s instructions, and paying attention to details, you’ll create a visually appealing and durable structure that will withstand the test of time. With the roofing and siding in place, your pole barn is now ready for the next step – adding doors, windows, and other accessories.
Adding Doors, Windows, and Accessories
As you near the completion of your pole barn construction, it’s time to focus on adding doors, windows, and other accessories that will enhance the functionality and aesthetics of the structure. These elements provide essential access, ventilation, and natural light. Here are the steps to follow when adding doors, windows, and accessories to your pole barn:
1. Plan Access Points: Determine the number, size, and location of doors that your pole barn requires. Consider factors such as workflow, ease of movement, and the size of machinery or equipment that needs to pass through. Common door options include sliding doors, overhead doors, or traditional hinged doors. Measure and mark the locations for the door openings.
2. Install Doors: Follow the manufacturer’s instructions to install the doors properly. Ensure that the door frames are square and plumb, and adjust as needed for a proper fit. Secure the doors to the framing using suitable hinges, brackets, or tracks, depending on the type of door. Check the operation of the doors and make any necessary adjustments for smooth movement.
3. Determine Window Placement: Decide on the number, size, and positioning of windows in your pole barn. Windows provide natural light, ventilation, and visibility. Consider factors such as the orientation of the structure, the desired amount of daylight, and the overall aesthetics. Mark the locations of the windows on the walls.
4. Install Windows: Carefully follow the manufacturer’s instructions to install the windows securely. Ensure that the window frames are level and properly sealed against moisture. Use appropriate fasteners and window flashing to create a watertight seal. Test the windows to ensure they open and close smoothly and that the locking mechanisms work correctly.
5. Enhance Ventilation: Evaluate your ventilation needs and consider additional accessories to improve airflow in your pole barn. This can include installing vents, louvers, or exhaust fans. Proper ventilation helps control temperature, remove excess moisture, and maintain a healthy environment inside the structure.
6. Consider Lighting Options: Determine the type of lighting you’ll need in your pole barn. This may include overhead lights, task lighting, or exterior lighting for safety and security. Ensure that electrical outlets and wiring are properly installed in accordance with building codes. Consider energy-efficient lighting options to reduce operational costs.
7. Incorporate Shelving and Storage: Assess your storage needs and add shelves, hooks, or storage solutions to keep your pole barn organized and clutter-free. Installing sturdy and adjustable shelves will allow you to optimize the space and safely store tools, equipment, and other items.
8. Customize with Additional Accessories: Depending on your specific needs, you may want to add additional accessories to further personalize your pole barn. This could include insulation for temperature control, workbenches or cabinets for workspace efficiency, or security systems for protection.
When adding doors, windows, and accessories, it’s crucial to ensure that they are installed properly for functionality, security, and weather resistance. By following the manufacturer’s instructions, paying attention to details, and using suitable materials and fasteners, you’ll create a finished pole barn that meets your needs and exceeds your expectations. The final step in the construction process is to apply the finishing touches and explore interior options for your pole barn.
Finishing Touches and Interior Options
As you approach the final stages of your pole barn construction, it’s time to focus on the finishing touches and interior options that will make your space functional, comfortable, and visually appealing. These details will add the final polish to your pole barn project. Here are some key considerations:
1. Interior Walls: Determine if you want to finish the interior walls of your pole barn. This can be done using materials such as drywall, plywood, or metal panels. Finishing the walls provides a clean, polished look and helps with insulation and soundproofing. Ensure that the wall materials are properly secured and meet fire safety requirements.
2. Paint or Stain: Consider painting or staining the interior and exterior of your pole barn to protect the surfaces and add a personalized touch. Choose a paint or stain that is suitable for the material you’re working with, such as wood or metal. Use colors that complement the overall style and purpose of your pole barn.
3. Flooring Options: Determine the type of flooring that best suits your needs and budget. Common options for pole barn flooring include concrete, epoxy coatings, gravel, or even wood. Choose a flooring material that is durable, easy to clean, and appropriate for the intended use of the space.
4. Electrical and Plumbing: If your pole barn will be used as a functional workspace or living space, consider installing electrical wiring and plumbing infrastructure. Consult with professionals to ensure that the installation is done safely and in compliance with local codes. Plan the placement of outlets, switches, and fixtures to optimize functionality and convenience.
5. Insulation: Insulating your pole barn can significantly improve its energy efficiency and thermal comfort. Consider adding insulation to the walls, roof, and even the floor if necessary. Select insulation materials that are appropriate for your climate and follow proper installation techniques to ensure maximum effectiveness.
6. Storage Solutions: Implementing appropriate storage solutions will help you keep your pole barn organized and efficient. Consider installing wall-mounted racks, cabinets, shelves, or pegboards to store tools, equipment, and other items. Customizing storage options based on your specific needs and workflow will help optimize the functionality of your space.
7. Lighting Fixtures: Ensure that your pole barn is well lit by installing appropriate lighting fixtures. This could include overhead lights, task lighting for workstations, or exterior lights for safety and security. LED lighting is a popular choice due to its energy efficiency and durability.
8. Personalize the Space: Add personal touches and decorative elements that reflect your style and make the pole barn feel like your own. This might include artwork, signage, or landscaping around the exterior. Incorporate elements that align with the purpose of your pole barn, whether it’s a workshop, storage space, or a functional living area.
By paying attention to the finishing touches and interior options, you can transform your pole barn into a space that not only meets your practical needs but also reflects your personal style. Take the time to consider each aspect carefully, ensuring that it aligns with your vision for the space. With the finishing touches complete, step back and admire the fruits of your hard work and dedication.
Maintaining and Inspecting Your Pole Barn
Once your pole barn construction is complete, it’s important to prioritize regular maintenance and inspections to ensure the longevity and safety of your structure. By taking proactive measures, you can identify and address any issues before they become major problems. Here are some key steps to follow when maintaining and inspecting your pole barn:
1. Regular Cleaning: Keep your pole barn clean by regularly sweeping or vacuuming the floors, removing any debris, and dusting surfaces. This will help prevent the build-up of dirt, dust, and potential contaminants that can lead to damage or deterioration over time.
2. Exterior Inspections: Conduct thorough inspections of the exterior of your pole barn at least once a year. Look for signs of wear and tear, such as loose or damaged siding, roof leaks, or deterioration of the structural components. Check for any potential entry points for pests and make necessary repairs or reinforcements to keep your pole barn secure.
3. Roof and Gutter Maintenance: Inspect the roof regularly for any signs of damage, such as missing or damaged shingles, or loose roofing materials. Clean out gutters and downspouts to ensure proper water drainage and prevent water from pooling around the foundation. Address any roof or gutter issues promptly to prevent water infiltration and potential structural damage.
4. Pest Control: Take proactive measures to prevent pests from entering your pole barn. Seal any cracks, gaps, or openings that could serve as entry points for rodents, insects, or other pests. Consider using pest repellents or traps as necessary. Regularly inspect the interior and exterior for signs of pest activity and address any infestations promptly.
5. Maintenance of Doors and Windows: Inspect doors and windows regularly for proper functionality, including smooth operation and weather-tight seals. Lubricate hinges, locks, and sliding mechanisms as needed. Replace worn-out weatherstripping or seals to ensure energy efficiency and prevent drafts or water infiltration.
6. Address Moisture Issues: Moisture can be a common issue in pole barns, leading to rot, mold, and other damage. Regularly check for signs of moisture, such as water stains, condensation, or excessive humidity. Address any leaks or sources of moisture promptly, whether it’s from the roof, plumbing, or inadequate ventilation.
7. Check Insulation: If your pole barn is insulated, inspect the insulation regularly for any signs of damage or deterioration. Ensure that it is properly installed and maintained to provide adequate thermal efficiency and moisture control throughout the year. Replace insulation as needed to maintain its effectiveness.
8. Structural Integrity Inspections: Periodically inspect the structural components of your pole barn, including the poles, girts, trusses, and braces. Look for signs of damage, such as cracks, warping, or shifting. Address any structural issues immediately to prevent further damage and ensure the safety of the building.
9. Routine Maintenance: Perform routine maintenance tasks, such as painting or staining wood elements, maintaining electrical and plumbing systems, and ensuring proper functioning of mechanical systems. Follow manufacturer recommendations for regular service and maintenance of equipment, such as HVAC systems or electrical panels.
By consistently maintaining and inspecting your pole barn, you can extend its lifespan, reduce the risk of unexpected issues, and ensure a safe and functional space. Regular cleaning, exterior inspections, roof and gutter maintenance, pest control, door and window maintenance, addressing moisture issues, checking insulation, and structural integrity inspections are all essential steps to keep your pole barn in optimal condition. Prioritize these tasks to protect your investment and enjoy your pole barn for years to come.
Read more: What Is A Construction Plan
Conclusion
Congratulations on completing your pole barn construction project! Building a pole barn is a rewarding endeavor that provides you with a functional and versatile space for various purposes. Throughout this guide, we have covered the essential steps, from understanding pole barn construction to the finishing touches and maintenance.
A pole barn offers numerous advantages, including cost-effectiveness, versatility in design, and durability. By following proper planning and design principles, preparing the site, constructing the frame, installing roofing and siding, and adding doors, windows, and accessories, you have created a structure that suits your specific needs.
Remember to prioritize regular maintenance and inspections to ensure the longevity and safety of your pole barn. Keep the exterior well-maintained, check for any signs of damage or wear, and address them promptly. Maintain the roof and gutter systems to prevent water infiltration, and take measures to control pests and moisture. Regularly inspect the doors, windows, and insulation to ensure proper functionality and energy efficiency. By following these steps, you can enjoy your pole barn for years to come.
Finally, consider how to personalize your pole barn to make it truly your own. Add your personal touches, such as paint or stain, storage solutions, lighting fixtures, and other interior options that reflect your style and enhance the functionality of the space.
We hope that this guide has provided you with valuable insights and guidance throughout your pole barn construction journey. Remember to consult with professionals when needed, follow local building codes and regulations, and take safety precautions to ensure a successful and enjoyable building experience. Now, it’s time to enjoy your new pole barn and embrace the endless possibilities it offers!
Frequently Asked Questions about How To Plan For Pole Barn Construction
Was this page helpful?
At Storables.com, we guarantee accurate and reliable information. Our content, validated by Expert Board Contributors, is crafted following stringent Editorial Policies. We're committed to providing you with well-researched, expert-backed insights for all your informational needs.


0 thoughts on “How To Plan For Pole Barn Construction”