Home>diy>Home Improvement>How To Plan A Bathroom Renovation
Home Improvement
How To Plan A Bathroom Renovation
Modified: October 21, 2024
Looking to give your bathroom a makeover? Learn how to plan a successful home improvement project with our step-by-step guide for bathroom renovations.
(Many of the links in this article redirect to a specific reviewed product. Your purchase of these products through affiliate links helps to generate commission for Storables.com, at no extra cost. Learn more)
Introduction
A bathroom renovation is an exciting project that can breathe new life into your home and enhance its value. Whether you are looking to update the aesthetics, improve functionality, or create a spa-like retreat, careful planning is essential for a successful outcome. From evaluating your current bathroom to selecting the right fixtures and materials, each step requires thoughtful consideration. In this article, we will guide you through the process of planning a bathroom renovation, helping you achieve the bathroom of your dreams.
Key Takeaways:
- Thoroughly evaluate your current bathroom, set a realistic budget, and prioritize your needs and preferences to ensure a successful and personalized renovation journey.
- Whether hiring professionals or taking a DIY approach, attention to detail and careful planning are essential for creating a beautiful, functional, and inviting newly renovated bathroom.
Read more: How To Plan For Home Renovation
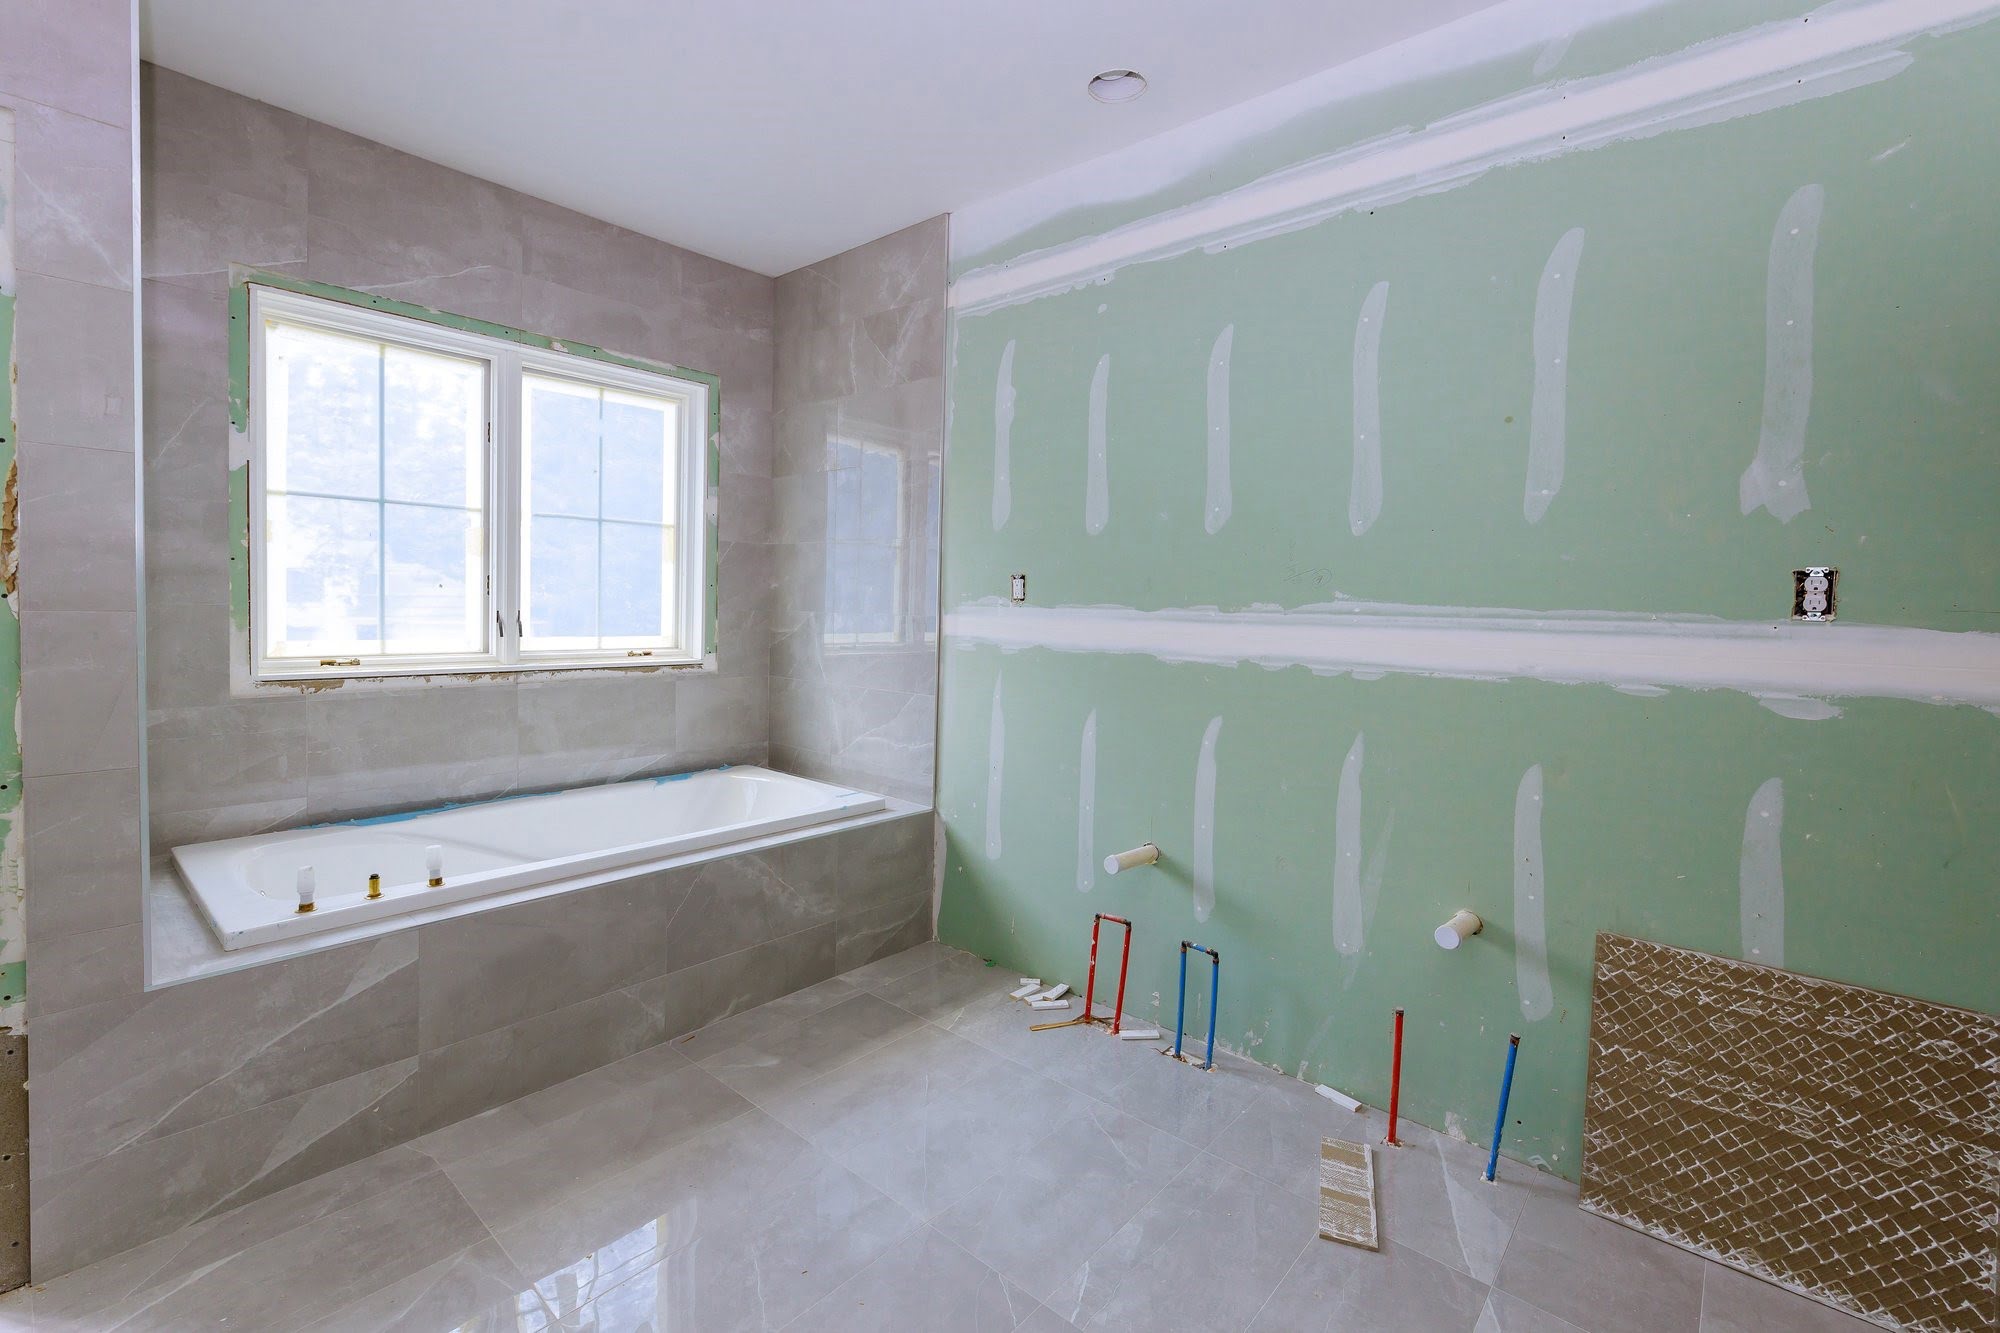
Step 1: Evaluate Your Current Bathroom
Before diving into a bathroom renovation project, it’s crucial to assess the current state of your bathroom. Take a close look at the layout, fixtures, and overall functionality. Consider what you like and dislike about the space and identify the specific areas that need improvement.
Start by examining the plumbing system. Check for any leaks, water damage, or signs of mold or mildew. Evaluate the condition of your faucets, showerheads, and toilet to see if they are in good working order. If there are any issues with the plumbing or fixtures, it’s important to address them during the renovation process.
Next, assess the overall layout of your bathroom. Consider whether it effectively utilizes the available space or if there are any limitations that need to be addressed. Determine if the existing layout is functional for your needs or if it would benefit from a redesign.
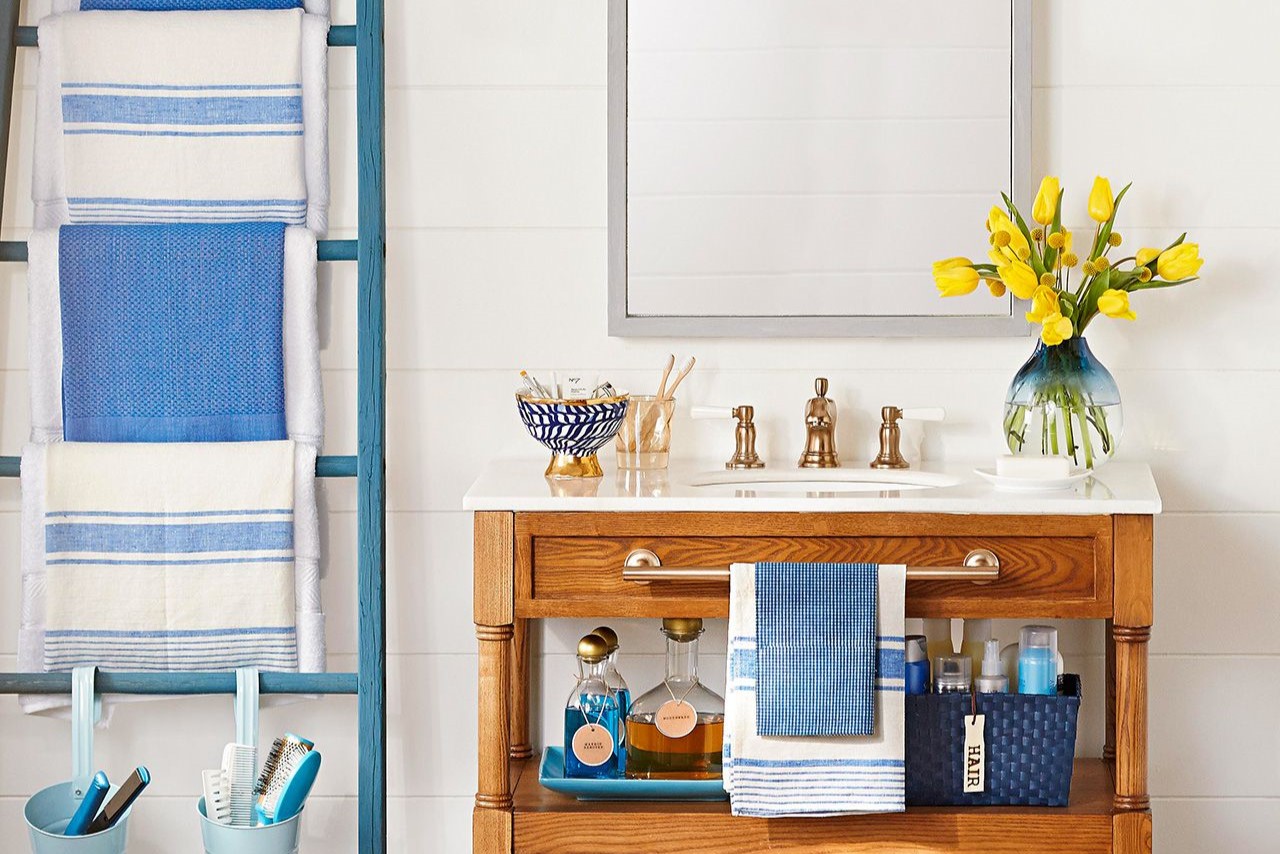
Pay attention to the storage options in your bathroom. Are there enough cabinets or drawers to store your toiletries and linens? Consider if additional storage solutions, such as wall-mounted shelves or a vanity with more storage space, would be beneficial.
Evaluate the lighting in your bathroom. Adequate lighting is essential for a functional and visually appealing space. Determine if the current lighting fixtures provide enough light and consider if additional lighting sources, such as recessed lighting or wall sconces, would enhance the overall ambiance.
Lastly, consider the overall aesthetic of your bathroom. Take note of the color scheme, wall finishes, and flooring materials. Determine if they align with your personal style and if they need updating to achieve the desired look for your new bathroom.
By thoroughly evaluating your current bathroom, you will have a clear understanding of its strengths and weaknesses. This information will serve as a valuable foundation for your renovation project, allowing you to address key areas and make informed decisions moving forward.
Step 2: Set Your Budget
Setting a budget is a crucial step in any home renovation project, including a bathroom renovation. It helps you determine how much you can afford to spend and ensures that you stay on track throughout the process. Here are some key considerations when setting a budget for your bathroom renovation:
- Research and estimates: Start by researching the average cost of a bathroom renovation in your area. This will give you a general idea of what to expect and help you set a realistic budget. Additionally, obtaining quotes from contractors or professionals can provide more accurate estimates based on your specific requirements.
- Consider your priorities: Before allocating funds to different aspects of the renovation, determine your priorities. What are the must-haves for your new bathroom? Focus on allocating a larger portion of your budget to essentials such as plumbing, electrical work, and quality fixtures.
- Contingency fund: It’s always wise to set aside a contingency fund for unexpected expenses that may arise during the renovation process. Aim to reserve at least 10% of your total budget for potential unforeseen costs.
- DIY versus hiring professionals: Decide whether you will be taking on the renovation as a DIY project or hiring professionals for certain tasks. Taking on some of the work yourself can save money, but be realistic about your skills and time availability. Hiring professionals ensures quality and efficiency but will require a higher budget.
- Material and fixture costs: Research the costs of the materials and fixtures you plan to use in your new bathroom. Consider factors such as the quality, durability, and maintenance requirements of each item. Allocate a portion of your budget for these purchases, keeping in mind that higher-end materials may come with a higher price tag.
By setting a budget early on in the planning process, you can make informed decisions and avoid exceeding your financial limits. Remember to consider both the short-term costs of the renovation and the long-term value it will bring to your home. A well-planned and executed bathroom renovation can be a worthwhile investment that enhances your living space and increases the value of your property.
Step 3: Determine Your Needs and Priorities
As you embark on your bathroom renovation journey, it’s important to determine your needs and priorities to create a space that caters to your specific requirements. Consider the following aspects when determining what you want to achieve with your bathroom renovation:
- Functionality: Think about how you use your bathroom on a daily basis. Are there specific features or fixtures that would improve its functionality? For example, if you have a large family, you may want to prioritize having multiple sinks or a separate shower and bathtub.
- Storage: Assess your storage needs. Do you require more storage space for toiletries, towels, or cleaning supplies? Consider adding cabinets, shelves, or built-in storage solutions to maximize your bathroom’s storage capacity.
- Accessibility: If you have any specific accessibility needs, such as grab bars or a walk-in shower, now is the time to plan for them. Incorporating universal design principles into your bathroom renovation ensures that it will remain functional and comfortable for all users, regardless of age or mobility.
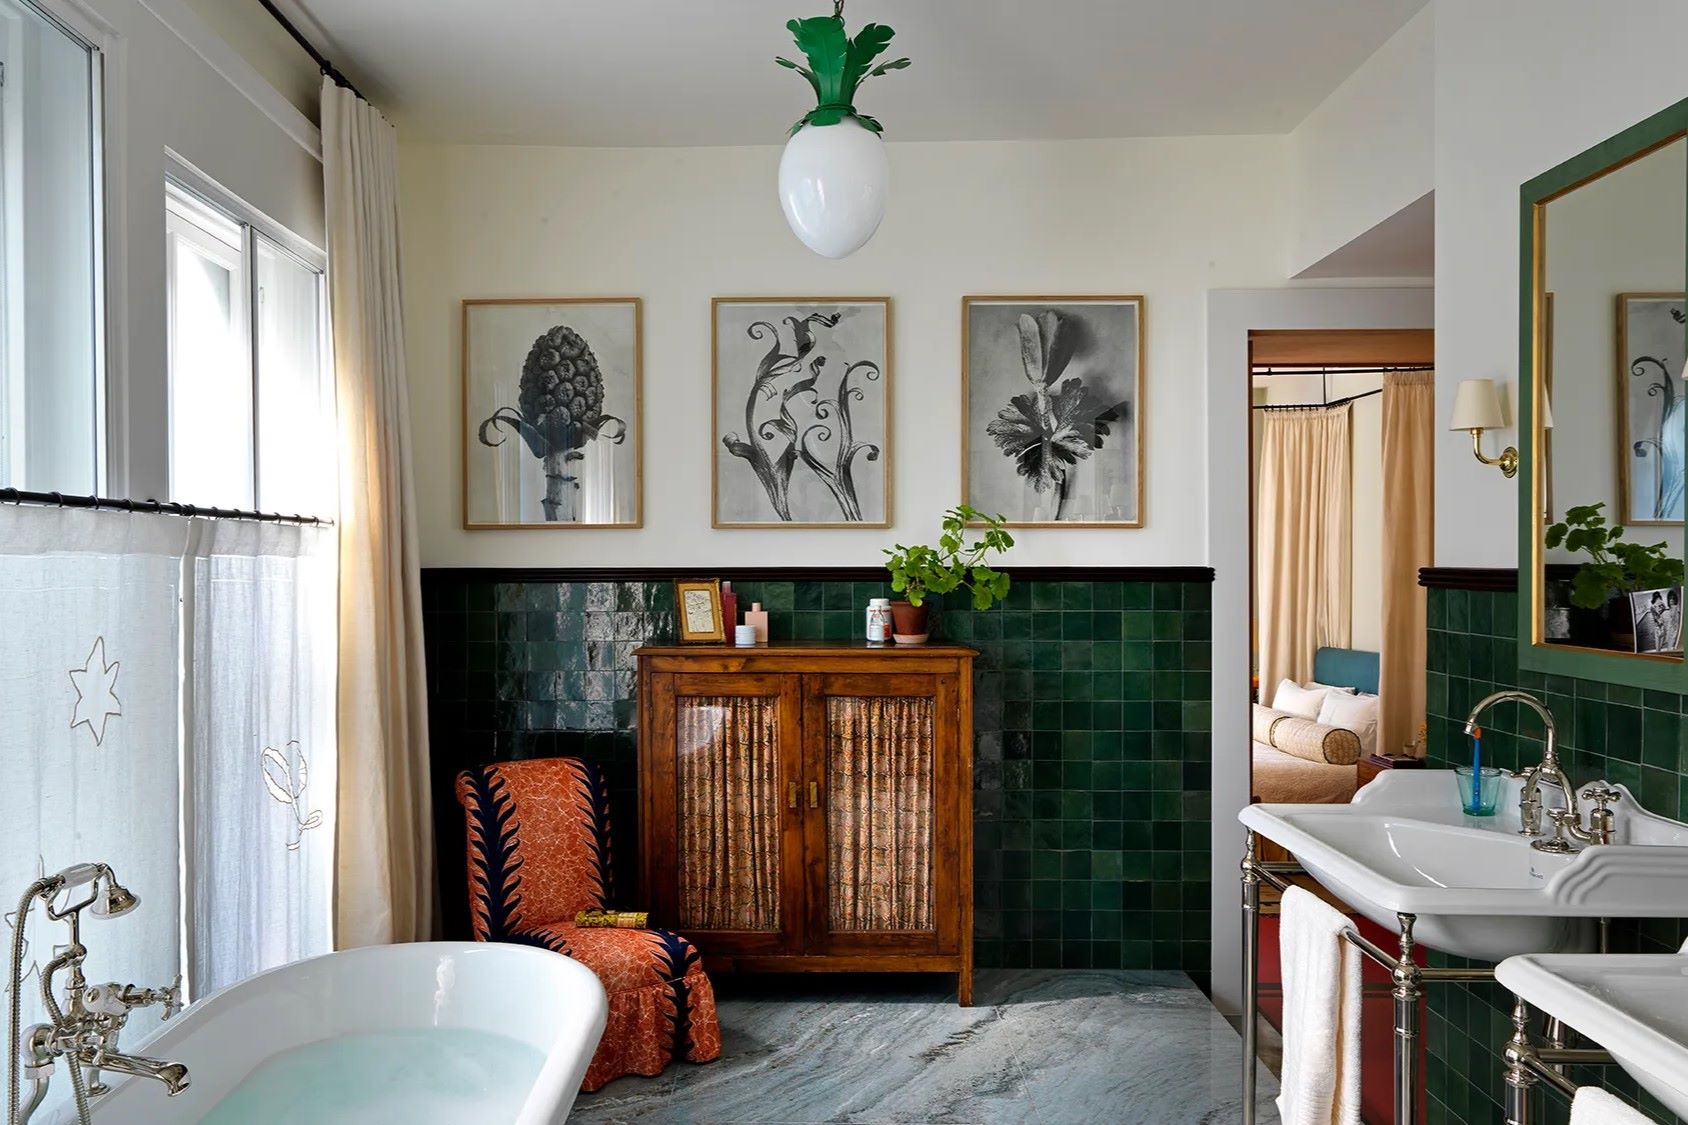
- Aesthetics: Consider your personal style and the overall look you want to achieve in your bathroom. Think about color schemes, tile choices, and other design elements that will create a cohesive and visually appealing space. Look for inspiration from home improvement magazines, websites, or social media platforms to help refine your vision.
- Eco-friendliness: If environmental sustainability is a priority, explore options for energy-efficient fixtures, such as low-flow toilets and LED lighting. Additionally, choose materials that are environmentally friendly, such as recycled or sustainable materials for countertops and flooring.
- Budget considerations: Ensure that your needs align with your budget. Prioritize essential features and items before considering more luxurious or costly upgrades. It’s important to strike a balance between functionality, aesthetics, and financial feasibility.
By determining your needs and priorities, you can create a clear vision for your renovated bathroom. This will guide your decision-making process and ensure that you stay on track with your goals throughout the renovation.
Step 4: Create a Design Plan
A well-executed design plan is essential for a successful bathroom renovation. It allows you to visually conceptualize your ideas and ensure that all aspects of the project come together harmoniously. Follow these steps to create an effective design plan for your bathroom renovation:
- Gather inspiration: Start by collecting inspiration from various sources, such as home improvement magazines, Pinterest, or design websites. Look for images and designs that align with your desired aesthetic and incorporate elements that you want to include in your own bathroom.
- Assess the layout: Take precise measurements of your bathroom and create a scale plan on graph paper or using online design tools. Consider the location of existing plumbing lines, windows, and doors when determining the best layout for your new bathroom. Experiment with different configurations to optimize space and functionality.
- Select fixtures and materials: Choose the fixtures and materials that will shape the overall style and functionality of your bathroom. Decide on features such as the type of sink, bathtub or shower, toilet, and vanity. Consider factors such as durability, maintenance requirements, and your personal preferences.
- Coordinate colors and finishes: Create a cohesive and visually pleasing color scheme by selecting paint colors, tiles, and other finishes that complement each other. Consider the atmosphere you want to create in your bathroom, whether it’s serene and spa-like or vibrant and energizing.
- Consider lighting: Plan your lighting scheme carefully to ensure adequate illumination throughout the space. Use a combination of general ambient lighting, task lighting for specific areas, and accent lighting to enhance the aesthetics. Consult with a lighting professional to determine the best fixtures and placement for optimal lighting.
- Seek professional advice: If you’re unsure about any aspect of your design plan or need assistance in creating a cohesive look, consider consulting with an interior designer or working closely with a bathroom remodeling contractor. Their expertise can help you streamline the design process and make informed decisions.
A well-thought-out design plan will streamline your bathroom renovation process and ensure that all elements come together seamlessly. Take the time to create a detailed plan, as it will serve as a roadmap for the remaining steps of your renovation.
Step 5: Hire Professionals or DIY
Deciding whether to hire professionals or take on a DIY approach for your bathroom renovation is an important consideration. While DIY projects can be rewarding and cost-saving, certain aspects of a bathroom renovation may require the expertise of professionals. Consider the following factors when making your decision:
- Scope of the project: Assess the complexity and scale of your bathroom renovation project. If it involves major structural changes, plumbing or electrical work, or requires permits and inspections, it is advisable to hire professionals. They have the experience and knowledge to handle these aspects safely and in compliance with building codes.
- Your skill level: Be realistic about your own skills and capabilities. If you have experience with plumbing, carpentry, tiling, and other essential renovation tasks, you may be able to tackle some or all of the project yourself. However, if you lack the necessary skills or confidence, hiring professionals ensures quality results and saves you from potential costly mistakes.
- Time constraints: Consider the time you have available to dedicate to the renovation. DIY projects often take longer than anticipated, especially if you have limited time to work on it. Hiring professionals can expedite the process and ensure timely completion, allowing you to enjoy your newly renovated bathroom sooner.
- Budget: Determine your budget and compare the costs of hiring professionals versus doing it yourself. While DIY projects can save money on labor costs, keep in mind that mistakes or rework can lead to additional expenses. Consider getting quotes from professionals to make an informed decision based on your budget.
- Peace of mind: Hiring professionals provides peace of mind knowing that the renovation is being done by experts. They have the necessary tools, skills, and knowledge to overcome challenges and ensure a successful outcome. This can alleviate stress and give you confidence in the final result.
Ultimately, the decision to hire professionals or take a DIY approach depends on your comfort level, resources, and the specific requirements of your bathroom renovation project. Assess your abilities and the needs of the project, and don’t hesitate to seek professional help when necessary. A well-executed bathroom renovation, whether done by professionals or DIY, will transform your space and provide years of enjoyment.
Step 6: Gather Necessary Permits and Approvals
Before starting any construction or major renovations in your bathroom, it’s crucial to check local building codes and obtain the necessary permits and approvals. This step ensures that your project is compliant with safety standards and regulations. Follow these guidelines to gather the required permits and approvals:
- Research local regulations: Research the building codes and regulations specific to your area. Contact your local building department or visit their website to obtain the necessary information. Familiarize yourself with the requirements for plumbing, electrical work, structural changes, and other aspects relevant to your bathroom renovation.
- Determine the permits required: Based on your research, determine which permits are necessary for your bathroom renovation project. Common permits may include plumbing permits, electrical permits, and building permits for structural changes or additions. If you’re unsure about the specific permits needed, consult with a professional or reach out to your local building department for guidance.
- Submit permit applications: Fill out the appropriate permit applications, providing all the requested information. Include any required plans, drawings, or documentation to support your application. Pay the necessary fees associated with the permits. Make sure you submit the applications well in advance to allow sufficient processing time.
- Address any additional requirements: Depending on your location, there may be additional requirements such as inspections during different stages of the renovation process. Familiarize yourself with these requirements and make sure you comply with them to avoid any delays or penalties.
- Receive approvals: Once your permit applications are processed, you will receive approvals or permits that allow you to proceed with your bathroom renovation. Keep these documents easily accessible as they may be required during inspections or future property transactions.
Gathering the necessary permits and approvals may seem daunting, but it is a critical step to ensure the safety and compliance of your bathroom renovation. Failing to obtain the proper permits can lead to fines, delays, or even having to undo the work done. It’s essential to take the time to research, apply for permits, and comply with all requirements to have a successful and hassle-free renovation experience.
Step 7: Purchase Materials and Products
Now that you have a clear plan for your bathroom renovation, it’s time to start purchasing the necessary materials and products. This step requires careful consideration to ensure you select the right items that align with your design, functionality, and budget. Follow these guidelines when purchasing materials and products for your bathroom renovation:
- Create a shopping list: Review your design plan and make a comprehensive list of all the materials and products you will need for your renovation. This may include tiles, fixtures, lighting, countertops, cabinetry, paint, and accessories. Having a detailed shopping list will help you stay organized and ensure you don’t forget any essential items.
- Research suppliers and retailers: Do thorough research on suppliers and retailers, both online and in-store, to find the best options for your needs. Compare prices, quality, and customer reviews to make informed decisions. Look for promotions, sales, or discounts that can help you save money on your purchases.
- Visit showrooms: If possible, visit showrooms or home improvement stores to see the materials and products in person. This allows you to assess the quality, finish, and functionality firsthand. It also gives you the opportunity to speak with experts and get advice on the best options for your specific renovation.
- Consider eco-friendly options: If sustainability is a priority for you, consider purchasing eco-friendly materials and products. Look for products that are made from recycled or sustainable materials, have low VOC (volatile organic compound) emissions, or are energy-efficient. This allows you to create a more environmentally conscious bathroom.
- Order and schedule deliveries: Once you have finalized your choices, place your orders for the materials and products. Confirm delivery dates and make sure they align with your renovation schedule. Keep all receipts and documentation for warranty purposes and future reference.
- Consider hiring a contractor or designer: If you’re unsure about purchasing the right materials or need guidance, consider engaging the services of a contractor or designer. They can assist you in selecting appropriate materials, ensuring you choose products that are of good quality and suitable for your design and budget.
Remember to be mindful of your budget throughout the purchasing process. Stick to your predetermined budget and make choices that align with your overall vision for the renovated bathroom. By considering these factors and making informed decisions, you can ensure that the materials and products you purchase contribute to a successful and satisfying bathroom renovation.
When planning a bathroom renovation, make sure to set a realistic budget and prioritize your must-have features to ensure a successful and cost-effective project.
Step 8: Demolition and Removal
Once you have gathered all the necessary materials and products for your bathroom renovation, it’s time to begin the demolition and removal process. This step involves carefully dismantling and removing the existing fixtures, surfaces, and elements of your old bathroom to prepare for the installation of new features. Follow these guidelines for a smooth demolition and removal process:
- Prepare the workspace: Before beginning any demolition work, ensure that you have prepared the workspace properly. Remove any personal items, cover nearby furniture and fixtures with protective sheets, and ensure the area is well-lit and ventilated.
- Turn off utilities: Turn off the water supply and shut off electricity to the bathroom. This is crucial to ensure safety during the demolition process. If necessary, consult an electrician or plumber to assist with disconnecting and capping off any electrical or plumbing lines.
- Start with surface removal: Begin the demolition process by removing any surface materials such as tiles, wallpaper, cabinets, and fixtures. Use appropriate tools such as a crowbar, sledgehammer, or utility knife to carefully remove these items. Take caution not to damage any underlying structures or plumbing.
- Address plumbing and electrical lines: Once the surface materials are removed, inspect the plumbing and electrical lines. Assess whether any adjustments, repairs, or updates need to be made before proceeding with the installation of new fixtures. Consult with professionals if necessary.
- Dispose of materials responsibly: As you dismantle and remove the old bathroom materials, be mindful of proper disposal. Separate recyclable materials such as metal, glass, and plastic from general waste. Hire a waste removal service or rent a dumpster to ensure proper disposal of the debris.
- Protect adjacent areas: During the demolition process, take precautions to protect adjacent areas in your home. Hang plastic sheeting or use temporary walls to minimize the spread of dust and debris. Cover floors and other surfaces to prevent damage.
- Work systematically: Approach the demolition and removal process systematically, working from top to bottom and from the inside out. This helps maintain order and makes the cleanup process more efficient.
Demolition and removal are critical steps in your bathroom renovation journey. Take your time to ensure proper removal of old materials and fixtures, and be cautious of any potential hazards. By following these guidelines, you can prepare a clean and clear workspace for the installation of your new bathroom features.
Step 9: Plumbing and Electrical Work
Once the demolition and removal process is complete, it’s time to move on to the plumbing and electrical work for your bathroom renovation. These tasks require careful planning and expert knowledge to ensure proper installation and functionality. Follow these guidelines to successfully complete the plumbing and electrical work:
- Hire licensed professionals: Plumbing and electrical work are best handled by licensed professionals who have the expertise and knowledge of local building codes. Hiring professionals ensures that the work is done safely and in compliance with regulations.
- Consult with a plumber: Work closely with a plumber to discuss your new bathroom layout and any changes or additions you plan to make. They will assess the existing plumbing lines, advise on any necessary modifications, and ensure that the plumbing fixtures are installed correctly and functioning properly.
- Work with an electrician: Collaborate with an electrician to plan the electrical layout, including outlets, switches, and lighting fixtures. They will make sure that the electrical wiring is installed safely and in compliance with building codes. Additionally, they can assist you in selecting energy-efficient fixtures and recommend proper lighting solutions.
- Ensure proper permits and inspections: Be mindful to obtain the necessary permits and schedule inspections for the plumbing and electrical work. This ensures that the work is done according to local regulations and will pass inspection, giving you peace of mind and ensuring the safety of your bathroom.
- Consider safety measures: Safety is paramount when dealing with plumbing and electrical work. Make sure the water and electricity are turned off before any work begins. Take extra precautions with wiring, use proper grounding techniques, and install GFCI outlets near water sources for added safety.
- Test for leaks and faults: After the plumbing and electrical work is completed, perform thorough tests to check for any leaks, faults, or malfunctions. This includes running water through the pipes, testing all plumbing fixtures, and checking the functionality of electrical outlets and switches.
Plumbing and electrical work are intricate tasks that require professional expertise. By working with licensed plumbers and electricians, you can ensure that your bathroom renovation meets safety standards, functions properly, and provides reliable utility connections. Remember to comply with all necessary permits and inspections to guarantee a smooth and successful renovation process.
Step 10: Installation of Fixtures and Features
With the plumbing and electrical work completed, it’s time to move on to the installation of fixtures and features in your bathroom renovation. This step involves carefully installing and connecting various elements to bring your new bathroom to life. Follow these guidelines for a successful installation process:
- Start with the major fixtures: Begin by installing the major fixtures such as the bathtub, shower, toilet, and vanity. Follow the manufacturer’s instructions and ensure that they are properly secured and level. Seek professional assistance if needed, especially when dealing with heavy fixtures or complex installations.
- Connect plumbing fixtures: Install faucets, showerheads, and other plumbing fixtures according to the manufacturer’s guidelines. Use the appropriate plumbing connections and ensure proper sealing to prevent any leaks. Test the water flow and functionality of each fixture to ensure they are working as intended.
- Install lighting fixtures: Mount and connect lighting fixtures in your bathroom. Pay attention to proper placement, ensuring that they provide adequate illumination throughout the space. Consult with an electrician if you encounter any electrical wiring or installation complications.
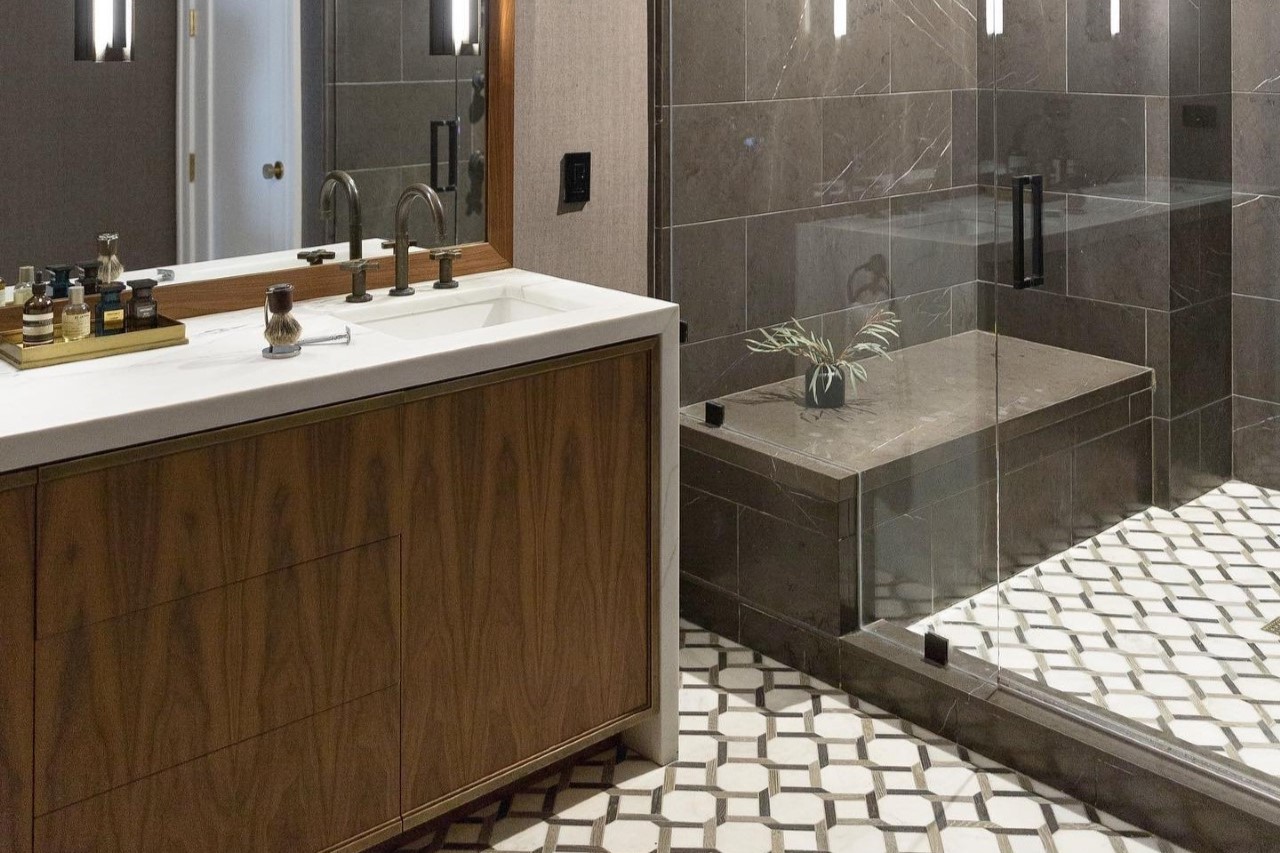
- Apply wall finishes: Install wall finishes such as tiles, wallpaper, or paint according to your design plan. Take care to evenly and accurately install the chosen materials, ensuring a seamless and visually appealing result. Properly seal grout lines for tiled surfaces to prevent moisture penetration and mold growth.
- Install flooring: Lay down the selected flooring material, whether it’s tiles, vinyl, laminate, or hardwood. Follow the manufacturer’s instructions for proper installation and consider using appropriate underlayment to provide stability and moisture protection. Make sure the flooring is level and secure.
- Mount accessories: Install towel bars, toilet paper holder, shelves, mirrors, and other accessories as per your design plan. Ensure they are securely fastened and properly aligned. Pay attention to detail, as these finishing touches can greatly enhance the functionality and aesthetics of your newly renovated bathroom.
During the installation process, attention to detail is key. Take your time to ensure that all fixtures and features are properly installed, aligned, and connected. If you encounter any challenges or are unsure about the installation process, consult with professionals or refer to manufacturer’s guidelines. By following these guidelines, you will bring your bathroom renovation closer to completion and create a functional and visually pleasing space.
Step 11: Flooring and Wall Finishes
As your bathroom renovation progresses, it’s time to focus on the flooring and wall finishes. These elements play a crucial role in the overall aesthetics and functionality of your bathroom. Follow these guidelines to ensure a successful installation of flooring and wall finishes:
- Select suitable materials: Choose flooring materials and wall finishes that are suitable for the bathroom environment. Consider factors such as water resistance, durability, and ease of maintenance. Popular options for bathroom flooring include tiles, vinyl, laminate, and waterproof engineered wood, while common wall finishes include tiles, paint, wallpaper, and wainscoting.
- Prepare the surfaces: Ensure that the subfloor or existing flooring is clean, level, and free from any damage or debris. If needed, make necessary repairs or adjustments before proceeding with the installation. Similarly, inspect the walls and address any issues like cracks or holes, ensuring a smooth and solid surface for the wall finishes.
- Follow manufacturer’s guidelines: Adhere to the manufacturer’s instructions when installing flooring materials and wall finishes. This includes using the recommended adhesives, grout, and tools. Improper installation techniques can result in uneven surfaces, loose tiles, or compromised water resistance.
- Start with the flooring: Begin by laying the flooring material of your choice. Depending on your selection, this may involve cutting tiles, leveling the subfloor, or installing floating flooring systems. Take care to ensure proper spacing, alignment, and seamless transitions between different areas like the shower, vanity, and toilet.
- Fit and finish: As you install the flooring, pay attention to the finer details. Trim pieces around edges, doorways, and fixtures may be necessary to achieve a polished look. Use transition strips or profiles for smooth transitions between different flooring materials or between rooms.
- Proceed with wall finishes: Once the flooring is complete, move on to the wall finishes. Whether you choose to tile the walls, apply paint, or install wallpaper, carefully follow the installation guidelines. Take care to measure and cut the materials accurately, ensuring a professional and visually appealing finish.
- Seal and grout: For tiled surfaces, apply an appropriate sealer to protect the tiles and grout from moisture and stains. Properly grout the tile joints, ensuring full coverage and smooth lines. Clean off any excess grout and allow it to cure before proceeding with the next steps.
By following these guidelines, you can achieve a beautiful and functional flooring and wall finishes in your renovated bathroom. Take your time in this step, as attention to detail and proper installation techniques will go a long way in creating a stunning end result.
Step 12: Paint and Decorate
As your bathroom renovation nears completion, it’s time to add the finishing touches with paint and decorations. This step allows you to infuse your personal style and create a cohesive and inviting atmosphere in your newly renovated bathroom. Follow these guidelines to successfully paint and decorate your space:
- Select appropriate paint: Choose a high-quality paint that is specifically formulated for bathrooms. Look for options that offer resistance to moisture, humidity, and mold. Consider your color palette and select a paint color that complements the overall design of your bathroom.
- Prepare the surfaces: Ensure that all surfaces to be painted are clean, dry, and prepared. Sand any rough areas, patch holes or imperfections, and apply primer if necessary. Proper surface preparation will ensure a smooth and long-lasting paint finish.
- Paint the walls: Start by cutting in and painting the edges and corners with a brush. Then, use a roller to apply paint to larger wall surfaces, working in sections. Apply two coats of paint, allowing sufficient drying time between each coat. Take care to minimize drips, brush strokes, or uneven coverage.
- Consider decorative techniques: Explore decorative techniques to enhance your bathroom’s appearance. Consider options such as using stencils to create patterns, applying faux finishes, or adding texture with wallpapers. Be creative and experiment with different techniques that align with your desired style.
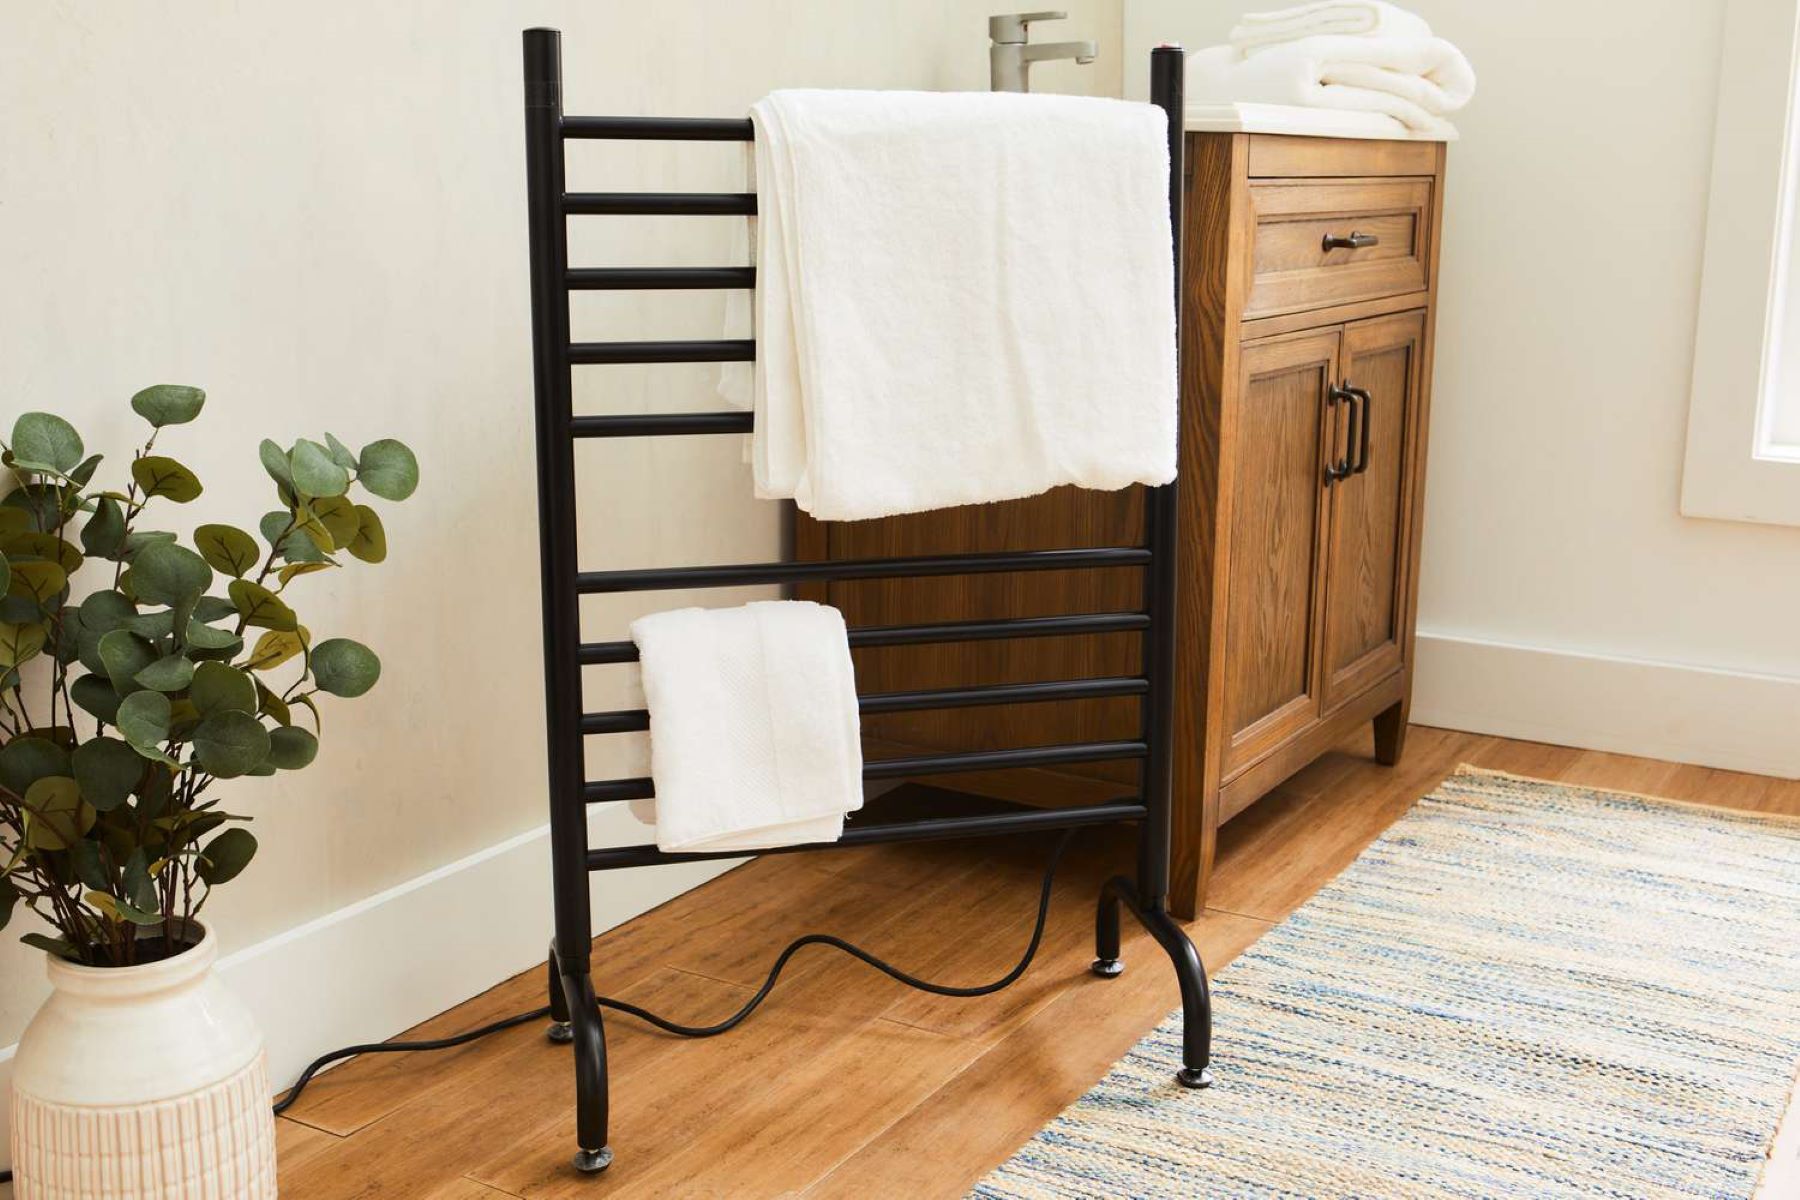
- Add accessories: Turn your attention to accessories that will enhance the functionality and aesthetics of your bathroom. Install towel racks, hooks, and shelves for storage and organization. Integrate mirrors, artwork, and plants to add visual interest and reflect natural light. Choose stylish and functional bathroom fixtures, such as faucets, towel bars, and shower curtains.
- Accessorize with textiles: Soften the look of your bathroom by incorporating textiles such as towels, bath mats, and shower curtains. Choose textiles that complement your color scheme and add texture or patterns to create visual interest. Coordinate these elements with the overall design of your bathroom.
- Consider lighting: Lighting plays a crucial role in creating the right ambiance in your bathroom. Choose appropriate light fixtures that provide optimal illumination for different tasks such as grooming, relaxation, or ambience. Install dimmer switches or use layered lighting to create various lighting settings.
The painting and decorating phase of your bathroom renovation adds the final touches to your space, allowing you to create a cohesive and visually pleasing environment. Take your time to ensure a professional finish and consider the small details that will make your bathroom feel inviting and functional. By following these guidelines, you will achieve a beautiful and personalized result.
Step 13: Final Touches and Clean-Up
Congratulations! You are in the final stage of your bathroom renovation project. This step involves adding the finishing touches and performing a thorough clean-up to complete the transformation of your bathroom. Follow these guidelines to ensure that every detail is in place and your newly renovated space is ready to be enjoyed:
- Install hardware and fixtures: Install any remaining hardware and fixtures such as towel bars, toilet paper holders, and robe hooks. Secure them firmly to the walls or vanity, following the manufacturer’s instructions.
- Check for functionality: Test all the features and fixtures in your bathroom to ensure that they are functioning properly. Check for any leaks, drips, or malfunctions. Adjust or tighten any loose connections or hardware as needed.
- Clean and polish: Give your newly renovated bathroom a thorough cleaning. Wipe down all surfaces, including countertops, fixtures, and mirrors. Vacuum or mop the floors to remove any dust or debris. Polish any glass surfaces to a sparkling shine.
- Inspect for any imperfections: Take a careful look around your bathroom and inspect for any imperfections or touch-ups that may be needed. Address any paint chips, scratches, or areas where the finish may need to be touched up. Take care of these small details to ensure a flawless final result.
- Organize and declutter: Organize your bathroom by arranging toiletries, towels, and other essentials in a neat and functional manner. Consider storage solutions such as baskets or organizers to keep items tidy and easily accessible. Declutter any unnecessary items to create a clean and serene space.
- Add personal touches: Inject your personal style by adding some final decorative touches. Display artwork, photographs, or plants to bring your personality into the space. Consider adding scented candles or diffusers for a pleasant aroma.
- Final inspection: Take a step back and give your newly renovated bathroom a final inspection. Ensure that everything is to your satisfaction and meets your initial vision. Make any minor adjustments or additions as necessary.
Completing the final touches and clean-up is an exciting milestone in your bathroom renovation journey. By attending to the small details and ensuring everything is clean and in working order, you can fully appreciate the transformation of your space. Take the time to appreciate your hard work and enjoy your newly renovated bathroom!
Conclusion
Congratulations on successfully completing your bathroom renovation journey! You have transformed your outdated or dysfunctional bathroom into a beautiful, functional, and inviting space. By following the steps outlined in this guide, you have taken a methodical approach to planning, executing, and completing your renovation project.
Throughout the process, you evaluated your current bathroom, set a budget, determined your needs and priorities, created a design plan, and decided whether to hire professionals or take a DIY approach. You gathered necessary permits and approvals, purchased materials and products, demolished and removed the old fixtures, and performed plumbing and electrical work. You installed new fixtures and features, completed flooring and wall finishes, and took care of the final touches and cleaning.
Your bathroom renovation is not only aesthetically pleasing but also a reflection of your personal style and preferences. It enhances the functionality of the space and adds value to your home. Whether you embarked on this project to create a luxurious spa-like retreat or simply to update the outdated features, your efforts have paid off, and you can now enjoy a rejuvenating and functional bathroom.
Remember to maintain your newly renovated bathroom by keeping it clean, addressing any issues promptly, and regularly inspecting and maintaining fixtures and surfaces. This will ensure that your investment remains in top condition and continues to provide you with comfort and enjoyment for years to come.
We hope this comprehensive guide has provided you with valuable insights and guidance throughout your bathroom renovation journey. Remember to customize the steps to fit your specific needs, preferences, and budget. By carefully planning, executing, and completing each step, you have successfully transformed your bathroom into a space that combines beauty, functionality, and your own personal touch.
Enjoy your new bathroom and embrace the refreshed and revitalized space you have created!
Frequently Asked Questions about How To Plan A Bathroom Renovation
Was this page helpful?
At Storables.com, we guarantee accurate and reliable information. Our content, validated by Expert Board Contributors, is crafted following stringent Editorial Policies. We're committed to providing you with well-researched, expert-backed insights for all your informational needs.


0 thoughts on “How To Plan A Bathroom Renovation”