Home>Furniture & Design>Bathroom Accessories>How To Get Silicone Off A Bathtub
Bathroom Accessories
How To Get Silicone Off A Bathtub
Modified: April 22, 2024
Learn effective methods for removing silicone from your bathtub with our expert tips and tricks. Keep your bathroom accessories looking clean and pristine.
(Many of the links in this article redirect to a specific reviewed product. Your purchase of these products through affiliate links helps to generate commission for Storables.com, at no extra cost. Learn more)
Introduction
Removing silicone from a bathtub can be a daunting task, but with the right tools and techniques, it can be accomplished effectively and efficiently. Over time, silicone sealant can become discolored, cracked, or simply outdated, prompting the need for removal and replacement. Whether you're preparing to reapply silicone sealant or seeking to refresh the appearance of your bathtub, understanding the process of removing silicone is crucial.
Silicone is a versatile and durable material commonly used in bathrooms for sealing joints and seams. It provides a watertight and flexible seal, making it ideal for areas prone to moisture and humidity, such as bathtubs and showers. However, due to its adhesive properties, removing silicone can be a challenging task without the proper knowledge and tools.
In this comprehensive guide, we will delve into the intricacies of removing silicone from a bathtub, providing you with a step-by-step approach, essential tools and materials, as well as valuable tips and tricks to ensure a successful outcome. By following these instructions, you can restore the pristine appearance of your bathtub and prepare it for a fresh application of silicone sealant.
Understanding the nature of silicone and the techniques involved in its removal is essential for achieving optimal results. With the right approach and a bit of patience, you can effectively remove silicone from your bathtub, paving the way for a rejuvenated and polished bathroom space.
Key Takeaways:
- Say goodbye to old silicone on your bathtub by using heat, a utility knife, and solvent. With patience and precision, you can restore your bathtub to its pristine condition.
- Gather the right tools and materials, take your time, and prioritize safety when removing silicone from your bathtub. Follow the step-by-step guide and helpful tips for a successful outcome.
Read more: How To Get Silicone Off Of Glass
Understanding Silicone
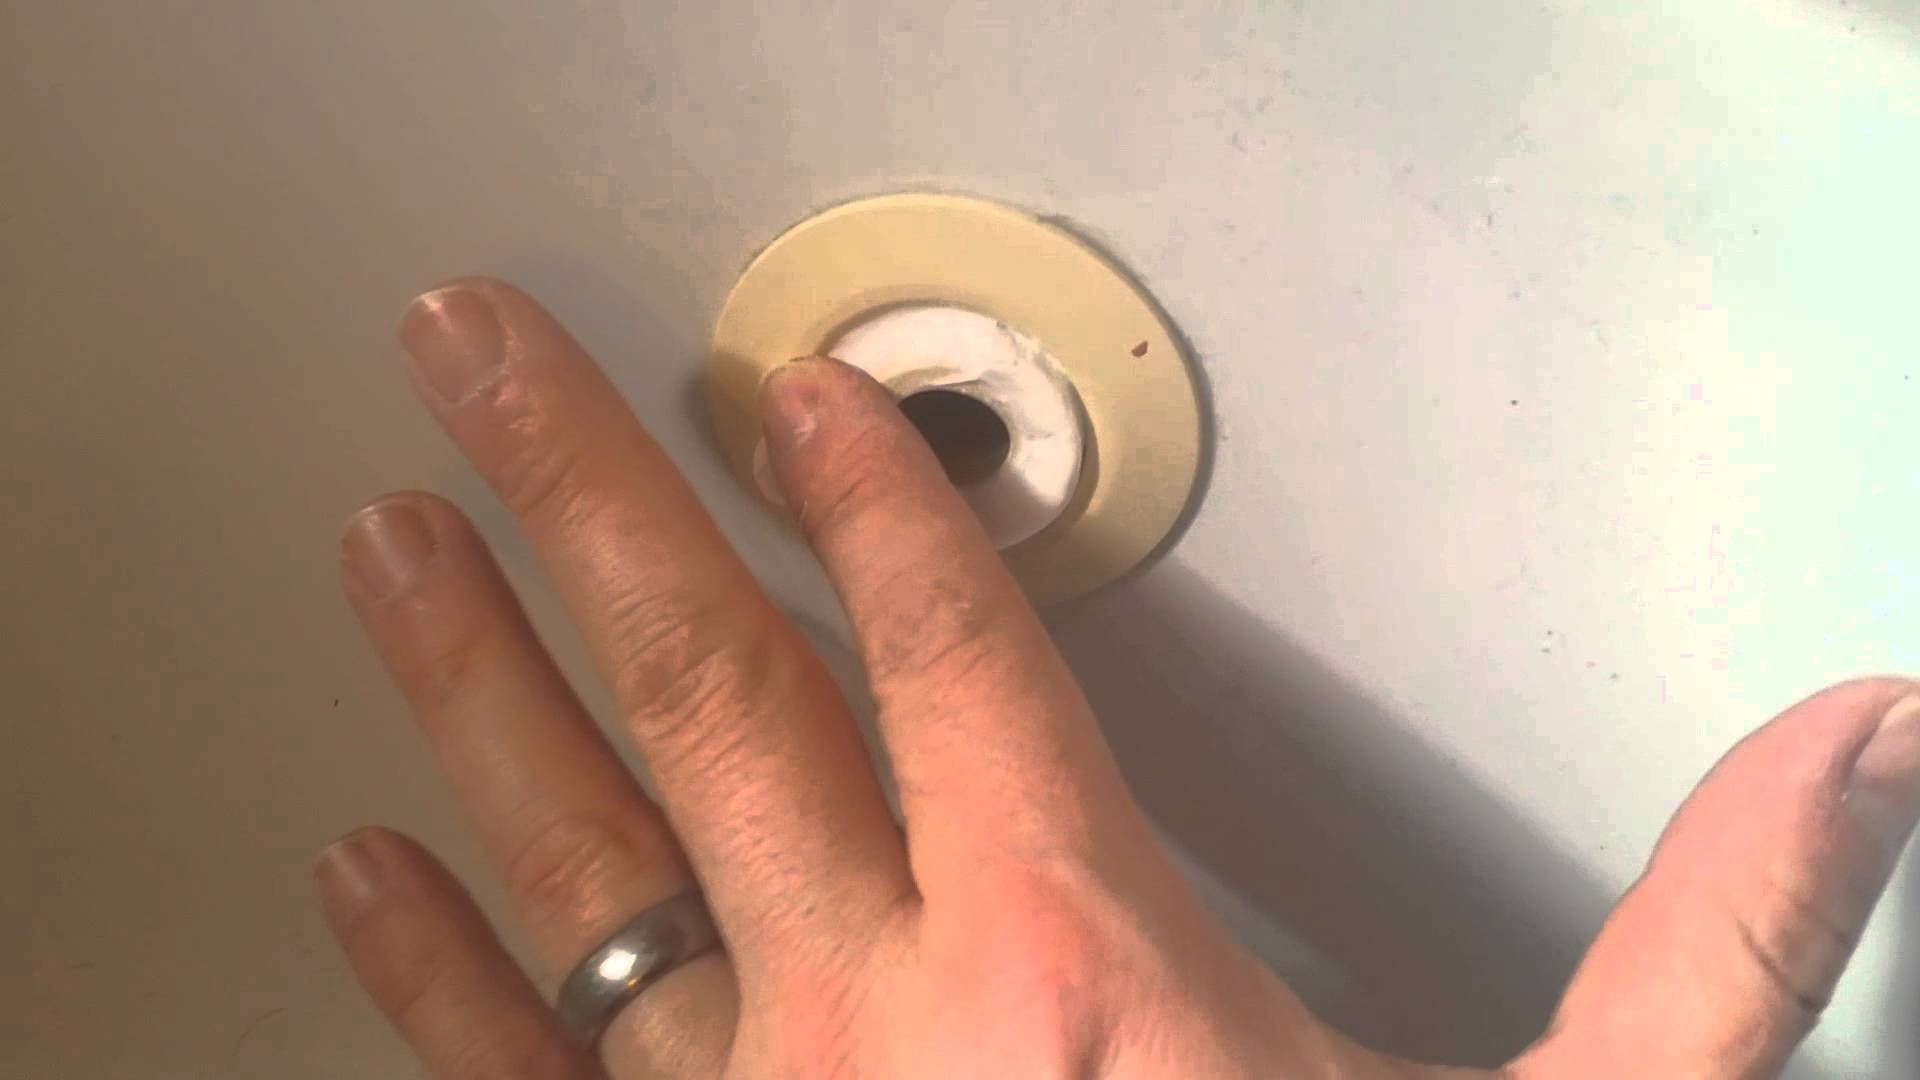
Silicone is a versatile and widely used material in the realm of bathroom accessories, renowned for its exceptional sealing properties and durability. In the context of a bathtub, silicone sealant is commonly employed to create a watertight barrier around joints, seams, and fixtures, effectively preventing water leakage and moisture infiltration. This makes it an indispensable component in maintaining the integrity and longevity of bathroom fixtures.
Silicone sealant is composed of a silicone-based polymer, which exhibits remarkable flexibility and resistance to various environmental factors. Its ability to withstand extreme temperatures, moisture, and UV exposure makes it an ideal choice for sealing applications in wet environments. When applied to a bathtub, silicone forms a resilient and impermeable seal, effectively preventing water from seeping into crevices and causing damage.
Understanding the properties of silicone is crucial when it comes to its removal. Silicone sealant is inherently adhesive, allowing it to firmly bond with various surfaces, including ceramic, porcelain, and fiberglass commonly found in bathtubs. This adhesive quality, while beneficial for sealing purposes, presents a challenge when attempting to remove old or deteriorated silicone.
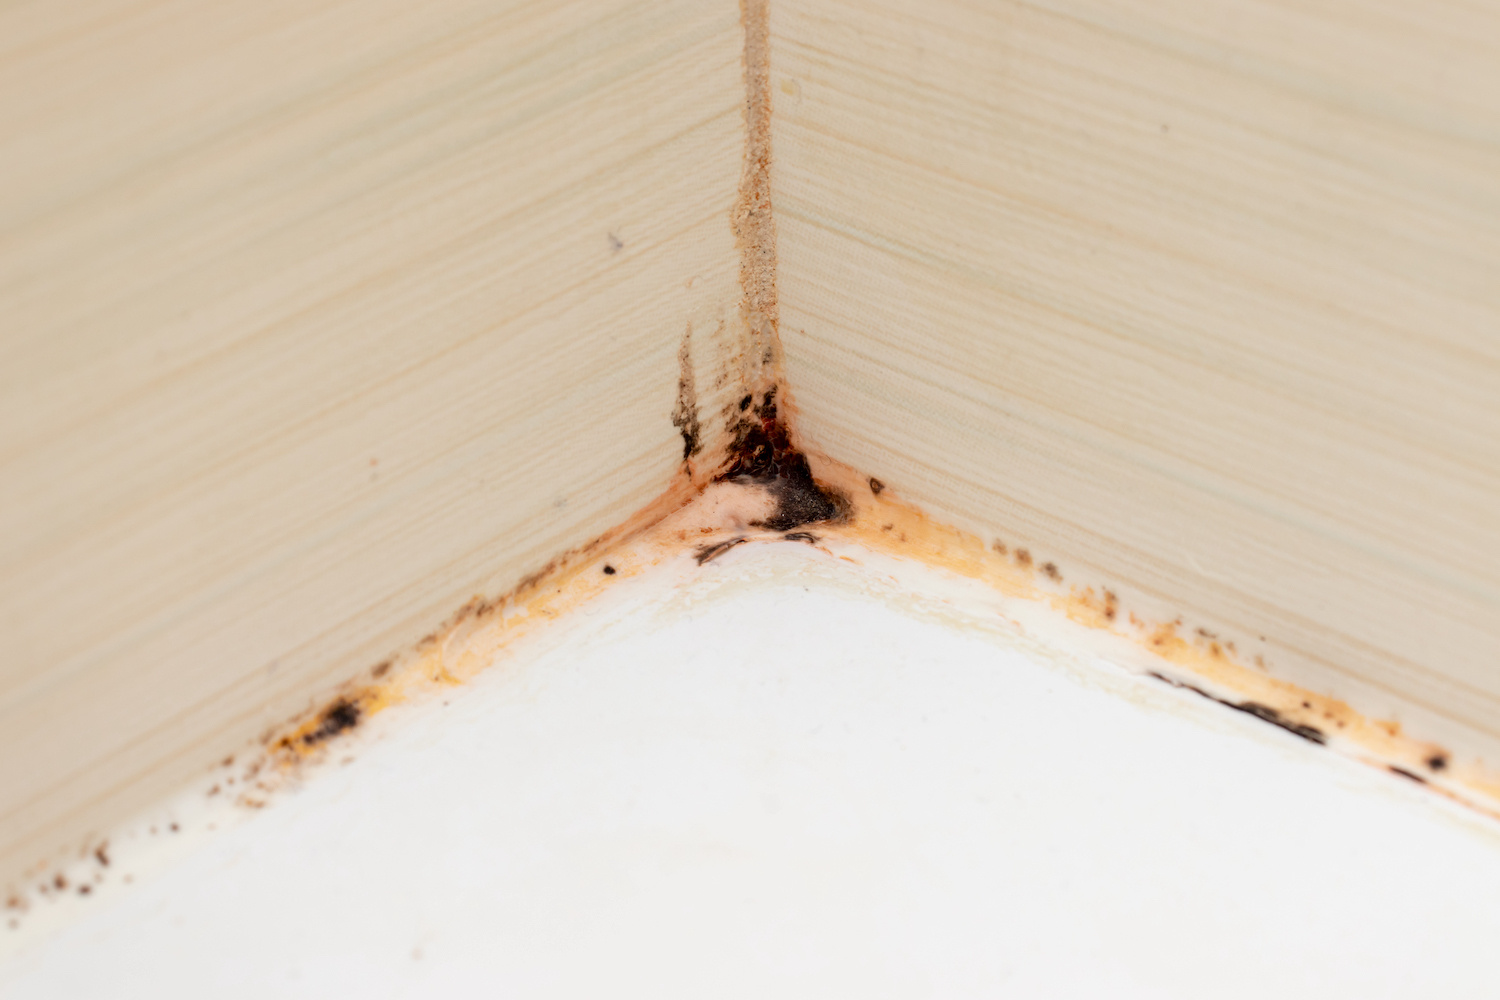
Moreover, silicone sealant is prone to discoloration and degradation over time, especially when exposed to moisture, cleaning agents, and prolonged use. This can result in an unsightly appearance and compromised functionality, necessitating the removal and replacement of the silicone sealant.
In the process of removing silicone from a bathtub, it is important to recognize the resilient nature of this material. Its adhesive strength and resistance to solvents and water necessitate a methodical approach and the use of appropriate tools to ensure effective removal without damaging the underlying surfaces.
By gaining a deeper understanding of silicone and its characteristics, you can approach the task of removing silicone from a bathtub with confidence and precision. Armed with this knowledge, you will be better equipped to navigate the intricacies of silicone removal, ultimately achieving a successful outcome and preparing the bathtub for a fresh application of silicone sealant.
Tools and Materials Needed
When embarking on the task of removing silicone from a bathtub, having the right tools and materials at your disposal is essential for a successful and efficient process. Here's a comprehensive list of the items you'll need to effectively tackle the removal of silicone sealant:
Tools:
-
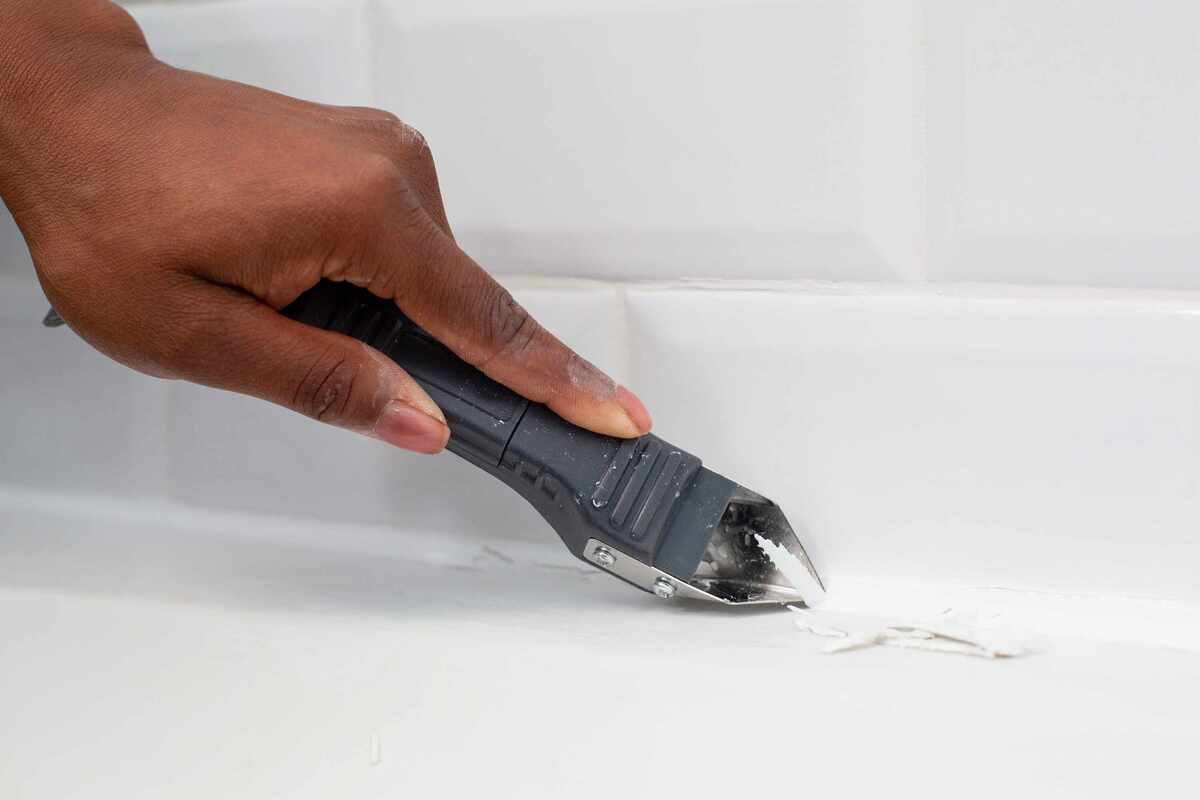
Utility Knife: A sharp utility knife with a retractable blade is indispensable for cutting through and carefully removing the silicone sealant from the bathtub's surfaces. Opt for a knife with a comfortable grip and a sharp, replaceable blade to facilitate precise cutting.
-
Caulk Removal Tool: This specialized tool, also known as a caulk scraper or caulk removal tool, is designed to assist in the removal of old caulk and silicone sealant. It features a V-shaped tip and a flat edge, enabling you to effectively scrape and lift the silicone from the seams and edges of the bathtub.
-
Heat Gun or Hair Dryer: Applying heat to the silicone sealant can soften it, making it easier to remove. A heat gun or a high-temperature hair dryer can be used to gently warm the silicone, loosening its grip on the bathtub's surfaces and facilitating smoother removal.
-
Pliers: A pair of pliers can be useful for gripping and pulling out larger sections of silicone sealant, especially in areas where it may be more stubborn or deeply embedded.
-
Scrubbing Pad or Abrasive Sponge: After the bulk of the silicone has been removed, a scrubbing pad or abrasive sponge can be employed to eliminate any residual traces and prepare the surface for resealing. Choose a non-metallic scrubbing pad to avoid scratching the bathtub's surface.
Materials:
-
Solvent or Silicone Remover: Investing in a high-quality silicone remover or solvent can significantly expedite the removal process. Look for a solvent specifically formulated for dissolving silicone sealant, as it can effectively weaken the bond between the silicone and the bathtub, making it easier to remove.
-
Rubbing Alcohol: Rubbing alcohol is an effective solvent for cleaning and degreasing surfaces, and it can aid in the removal of silicone residue and adhesive remnants. It also helps prepare the bathtub surface for the application of new silicone sealant.
-
Protective Gloves: When working with solvents and sharp tools, it's crucial to prioritize safety. Wear protective gloves to shield your hands from potential cuts, chemical exposure, and abrasive surfaces during the silicone removal process.
-
Clean Cloths and Paper Towels: Keep a supply of clean, lint-free cloths and paper towels on hand to wipe away excess silicone, solvent, and debris as you work. These materials are essential for maintaining a tidy work area and ensuring thorough cleaning.
By assembling these essential tools and materials, you can approach the task of removing silicone from your bathtub with confidence and precision. Each item serves a specific purpose in the removal process, contributing to a streamlined and effective approach to restoring your bathtub to its pristine condition.
Read more: How To Get Silicon Off Glass
Step-by-Step Guide to Removing Silicone
-
Assess the Condition: Begin by carefully examining the existing silicone sealant on your bathtub. Identify areas where the sealant is discolored, cracked, or showing signs of deterioration. This assessment will help you determine the extent of removal required and plan your approach accordingly.
-
Prepare the Work Area: Clear the surrounding area of any personal items, bath accessories, or obstacles that may hinder the removal process. Ensure proper ventilation in the bathroom to minimize exposure to solvents and facilitate drying.
-
Apply Heat: If the silicone sealant is particularly stubborn or aged, use a heat gun or a high-temperature hair dryer to gently warm the sealant. Apply the heat evenly along the length of the silicone to soften it, making it more pliable and easier to remove.
-
Cut and Remove: Utilize a sharp utility knife to carefully cut along the edges of the silicone sealant, creating clean incisions that separate it from the bathtub surfaces. Exercise caution to avoid damaging the underlying materials. Use a caulk removal tool to lift and scrape away the softened silicone, working methodically along the seams and edges.
-
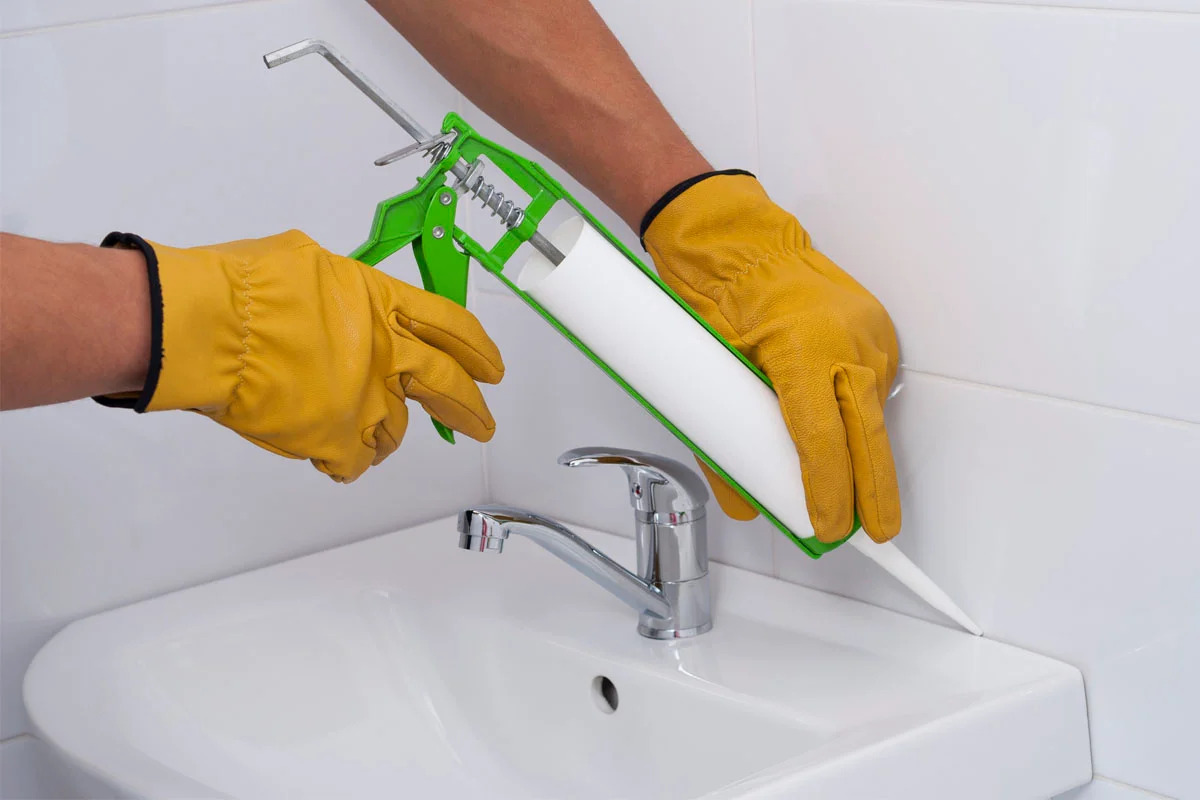
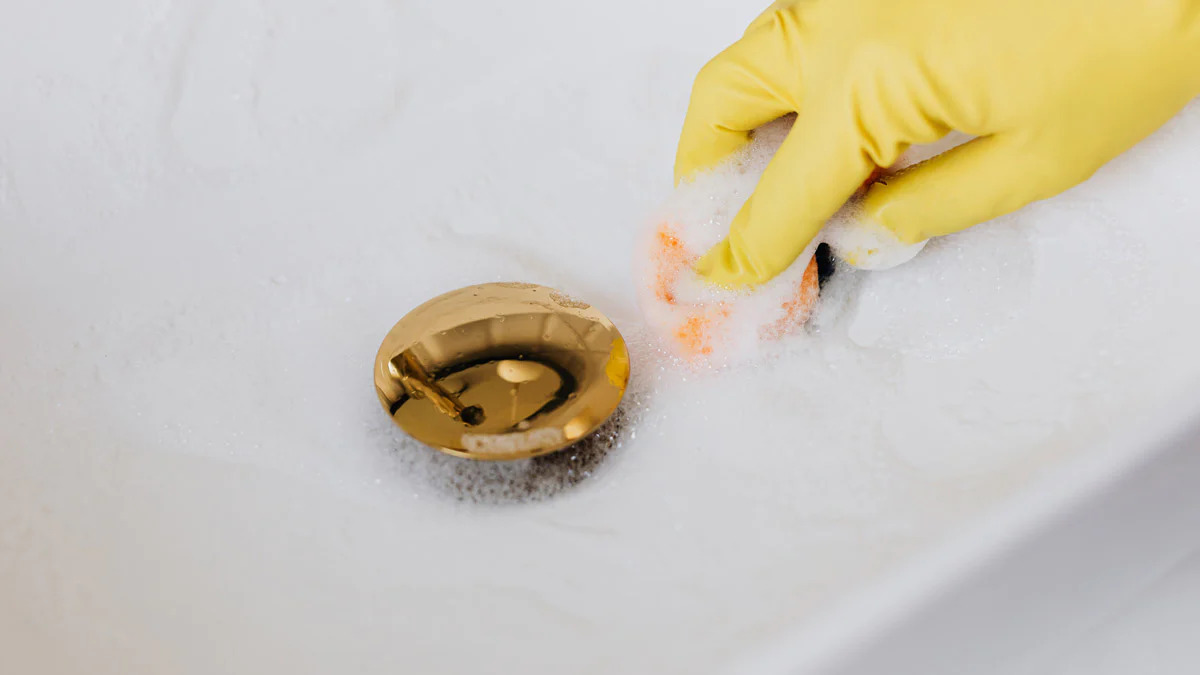
Use Solvent: Apply a high-quality silicone remover or solvent to the remaining silicone residue. Follow the manufacturer's instructions for application and dwell time. The solvent will help weaken the bond between the silicone and the bathtub, making it easier to remove. Use a clean cloth or paper towel to wipe away the dissolved silicone and residue.
-
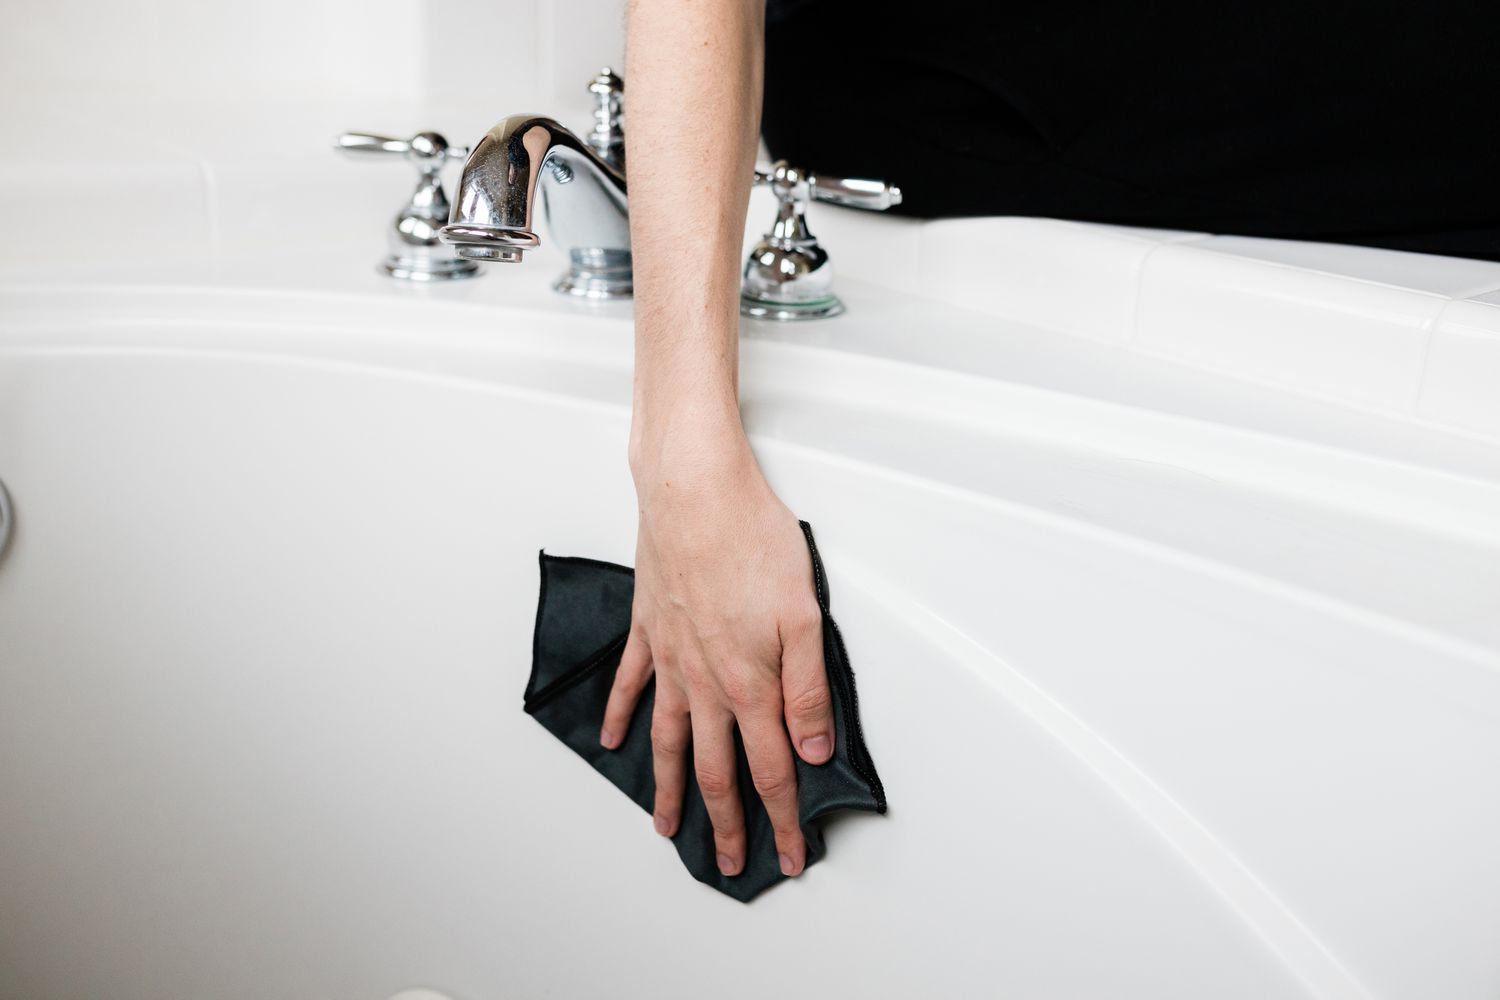
Clean and Degrease: After the bulk of the silicone has been removed, use rubbing alcohol and a clean cloth to thoroughly clean and degrease the bathtub surfaces. This step is crucial for preparing the area for the application of new silicone sealant, ensuring optimal adhesion and a clean, uniform finish.
-
Final Inspection: Once the silicone sealant has been removed and the bathtub surfaces are clean and dry, conduct a final inspection to ensure that all traces of silicone and residue have been effectively eliminated. Use a scrubbing pad or abrasive sponge to gently polish the surfaces and remove any remaining stubborn remnants.
-
Dispose of Waste: Properly dispose of the removed silicone sealant and any used materials in accordance with local waste disposal regulations. Maintain a clean and organized work area throughout the process.
By following this step-by-step guide, you can effectively remove silicone from your bathtub, preparing it for a fresh application of silicone sealant. This meticulous approach ensures that the removal process is conducted with precision and care, resulting in a clean and rejuvenated bathtub ready to withstand the rigors of daily use.
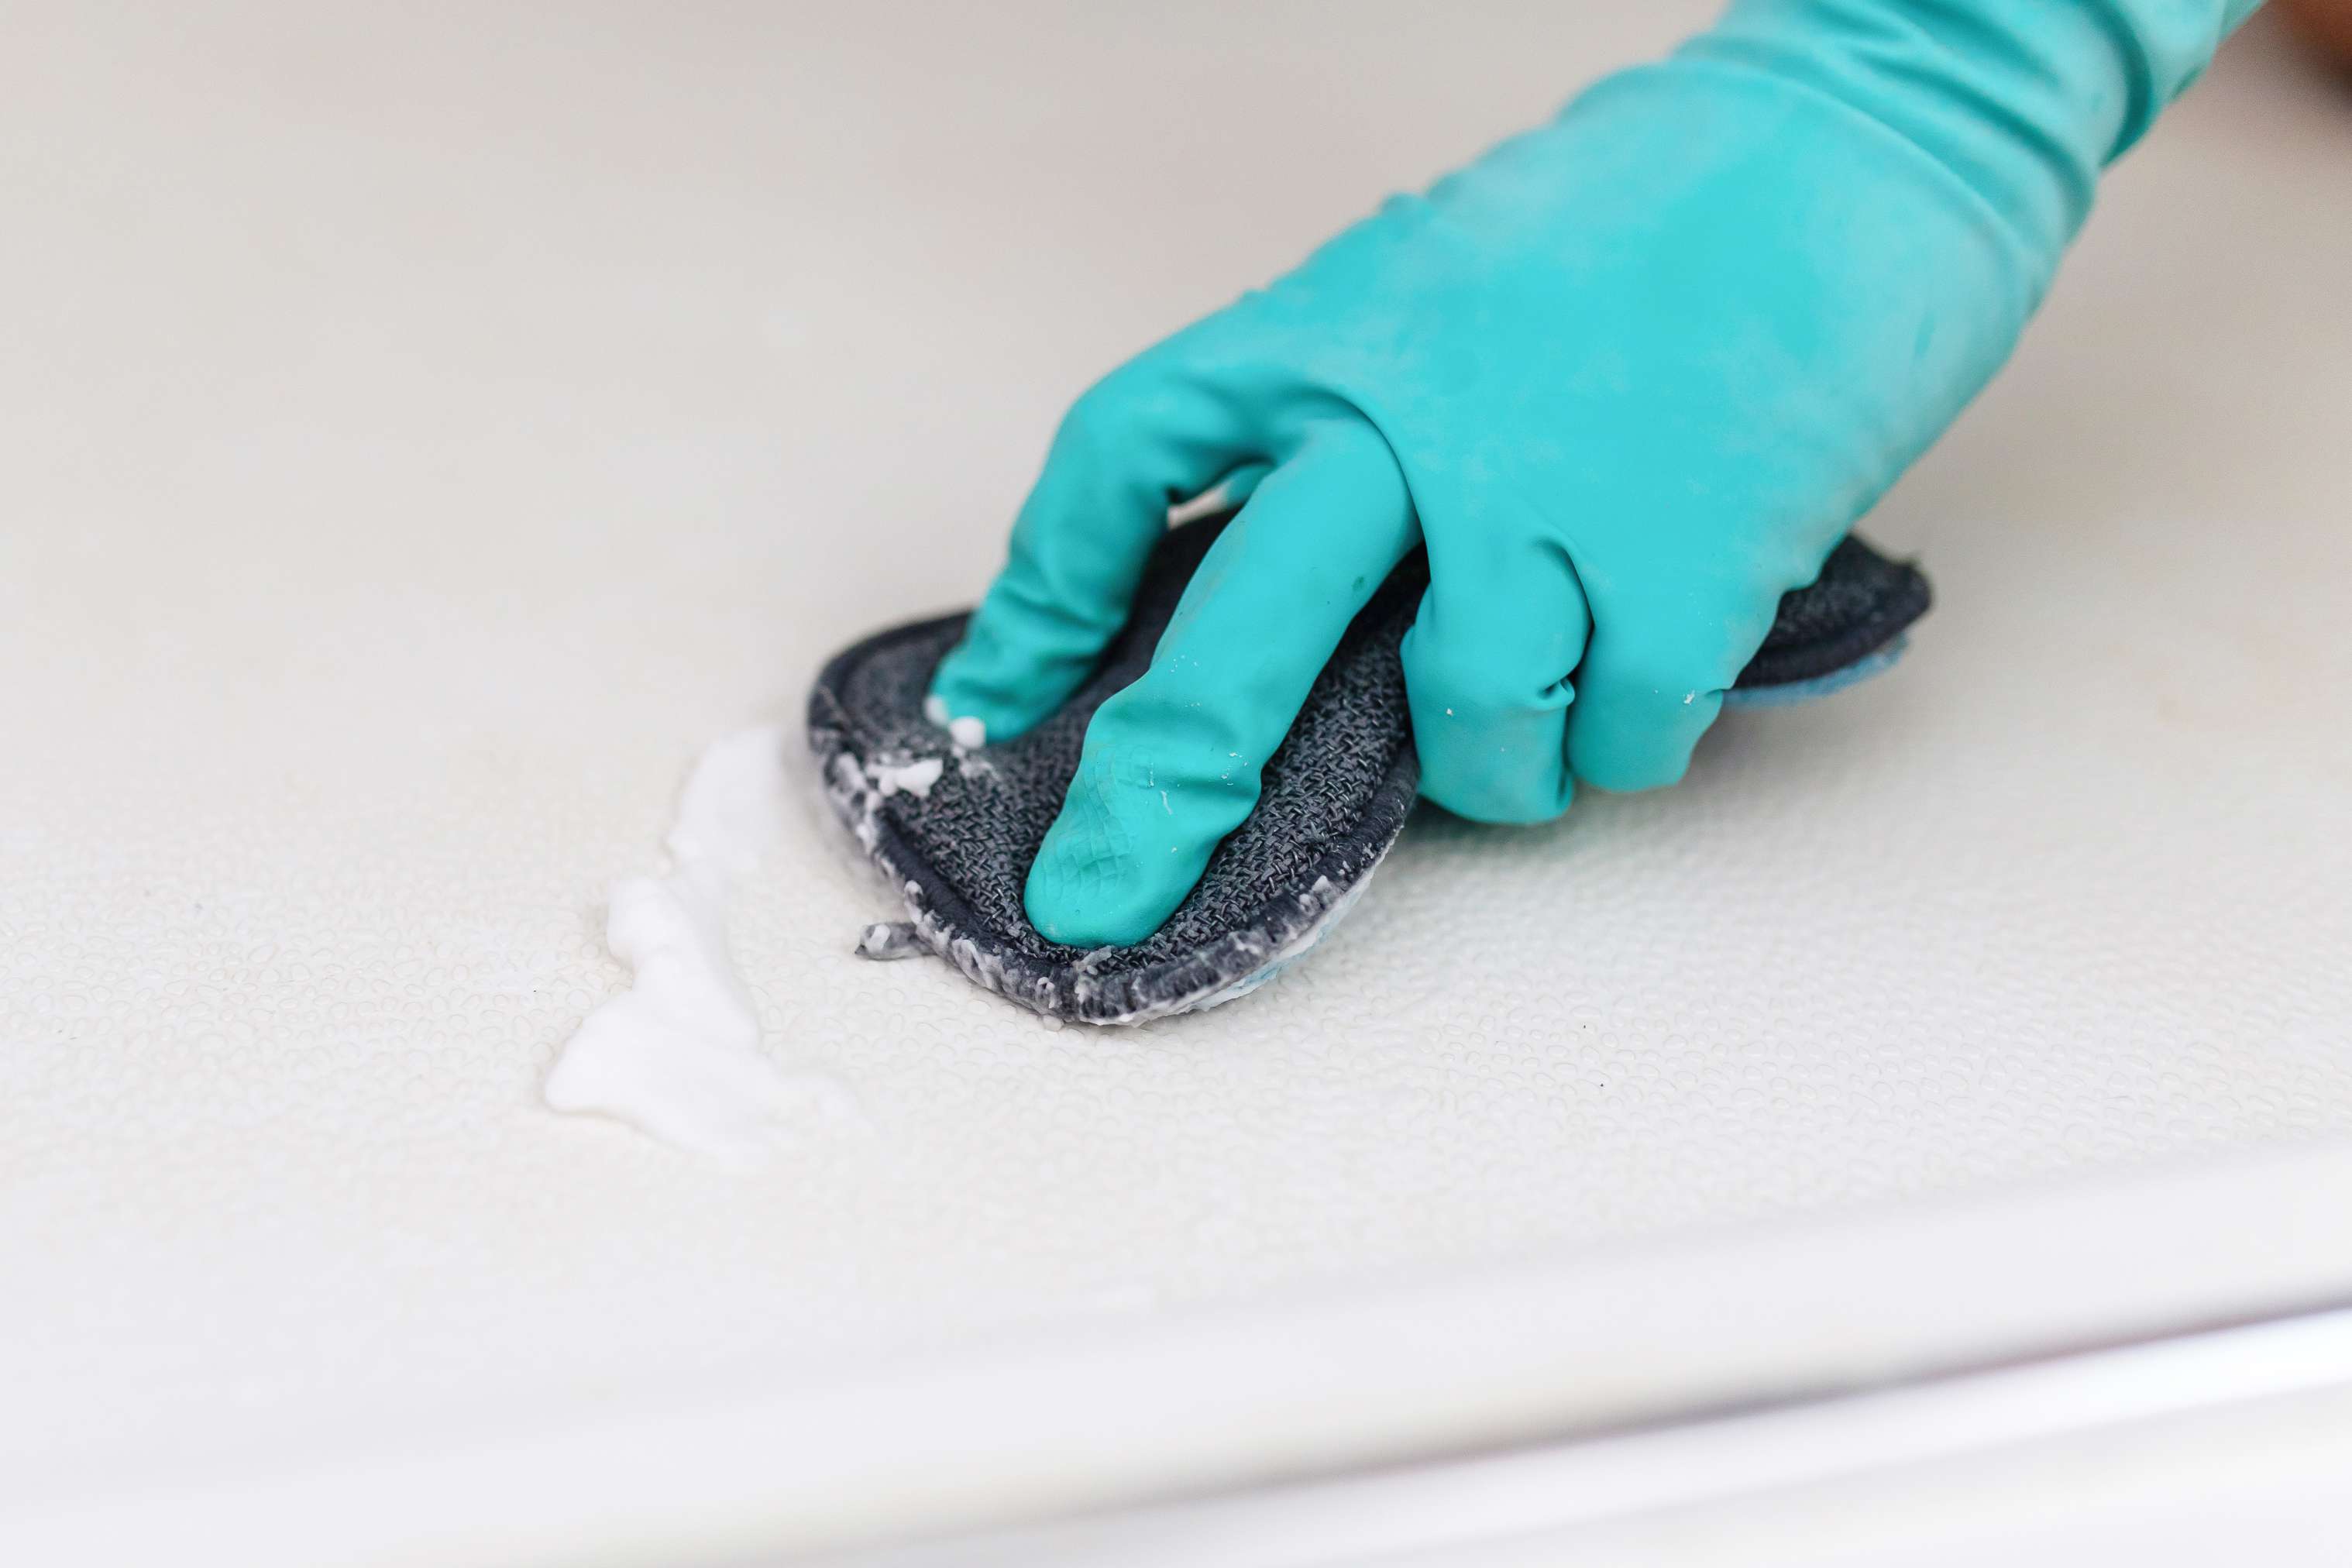
Use a plastic putty knife to gently scrape off as much silicone as possible. Then, apply a silicone remover or rubbing alcohol to soften the remaining residue before wiping it away with a cloth.
Tips and Tricks
Removing silicone from a bathtub requires attention to detail and strategic approaches to ensure a successful outcome. Here are some valuable tips and tricks to enhance the effectiveness of the silicone removal process:
-
Patience is Key: Removing silicone from a bathtub is a meticulous task that requires patience. Rushing through the process can lead to accidental damage to the bathtub surfaces. Take your time to carefully cut, lift, and dissolve the silicone, ensuring thorough removal without causing harm.
-
Preparation is Essential: Before initiating the silicone removal process, gather all the necessary tools and materials. Having everything at hand will streamline the process and prevent interruptions, allowing you to focus on the task at hand.
-
Protective Gear: Prioritize safety by wearing protective gloves throughout the silicone removal process. This will shield your hands from sharp tools, solvents, and abrasive surfaces, minimizing the risk of injuries and chemical exposure.
-
Test Solvents on a Small Area: When using silicone removers or solvents, it's advisable to test them on a small, inconspicuous area of the bathtub first. This helps ensure compatibility with the bathtub material and allows you to assess the effectiveness of the solvent before widespread application.
-
Consistent Heat Application: If employing a heat gun or hair dryer to soften the silicone, maintain consistent heat application and avoid overheating the sealant. Gradually warming the silicone will make it more pliable and easier to remove without causing damage to the bathtub surfaces.
-
Precision Cutting: When using a utility knife to cut through the silicone, exercise precision and caution to create clean incisions. This will facilitate the subsequent removal process and minimize the risk of accidental scratches or damage to the bathtub.
-
Thorough Cleaning: After removing the bulk of the silicone, thoroughly clean and degrease the bathtub surfaces using rubbing alcohol. This step is crucial for eliminating residual silicone residue and preparing the area for resealing, ensuring optimal adhesion of the new silicone sealant.
-
Dispose of Waste Responsibly: Properly dispose of the removed silicone sealant and any used materials in accordance with local waste disposal regulations. This includes disposing of used blades, cloths, and any waste generated during the removal process in an environmentally responsible manner.
-
Inspect for Residual Traces: After completing the removal process, conduct a meticulous inspection to ensure that all traces of silicone and residue have been effectively eliminated. Address any remaining stubborn remnants using a scrubbing pad or abrasive sponge to achieve a pristine surface.
By incorporating these tips and tricks into your silicone removal process, you can navigate the intricacies of the task with confidence and precision, ultimately achieving a clean and rejuvenated bathtub ready for the application of new silicone sealant.
Conclusion
In conclusion, the process of removing silicone from a bathtub is a task that demands attention to detail, patience, and the utilization of appropriate tools and techniques. By understanding the nature of silicone and its adhesive properties, individuals can approach the removal process with confidence, knowing that a meticulous approach will yield optimal results.
The comprehensive guide provided in this article equips individuals with the knowledge and step-by-step instructions necessary to effectively remove silicone sealant from their bathtubs. From assessing the condition of the existing silicone to preparing the work area and employing heat, cutting, and solvent application, each step is designed to facilitate a thorough and efficient removal process.
Furthermore, the inclusion of essential tools and materials, such as utility knives, caulk removal tools, solvents, and protective gear, ensures that individuals are well-prepared to tackle the task with precision and safety in mind. The emphasis on patience, preparation, and protective measures underscores the importance of approaching silicone removal as a meticulous endeavor that requires careful attention and adherence to best practices.
The tips and tricks provided offer valuable insights into optimizing the silicone removal process, emphasizing the significance of consistent heat application, precision cutting, thorough cleaning, and responsible waste disposal. These practical recommendations serve to enhance the overall effectiveness of the removal process, empowering individuals to navigate the intricacies of silicone removal with confidence and proficiency.
Ultimately, the successful removal of silicone from a bathtub paves the way for a rejuvenated and polished bathroom space, ready for the application of new silicone sealant. By following the guidance outlined in this article, individuals can achieve a clean and pristine bathtub surface, free from the unsightly remnants of old silicone sealant.
In essence, the process of removing silicone from a bathtub is not merely a maintenance task, but an opportunity to restore the functionality and aesthetic appeal of the bathroom environment. With the right approach and a commitment to precision, individuals can transform the removal process into a rewarding endeavor, culminating in a revitalized bathtub that is prepared to withstand the demands of daily use.
By leveraging the insights and techniques presented in this guide, individuals can embark on the journey of silicone removal with confidence, knowing that they are equipped with the knowledge and resources to achieve a successful outcome.
Frequently Asked Questions about How To Get Silicone Off A Bathtub
Was this page helpful?
At Storables.com, we guarantee accurate and reliable information. Our content, validated by Expert Board Contributors, is crafted following stringent Editorial Policies. We're committed to providing you with well-researched, expert-backed insights for all your informational needs.
0 thoughts on “How To Get Silicone Off A Bathtub”