Home>Furniture & Design>Bathroom Accessories>How To Replace Bathtub Caulking
Bathroom Accessories
How To Replace Bathtub Caulking
Modified: April 22, 2024
Learn how to replace bathtub caulking with our step-by-step guide. Keep your bathroom accessories in top condition with this easy DIY project.
(Many of the links in this article redirect to a specific reviewed product. Your purchase of these products through affiliate links helps to generate commission for Storables.com, at no extra cost. Learn more)
Introduction
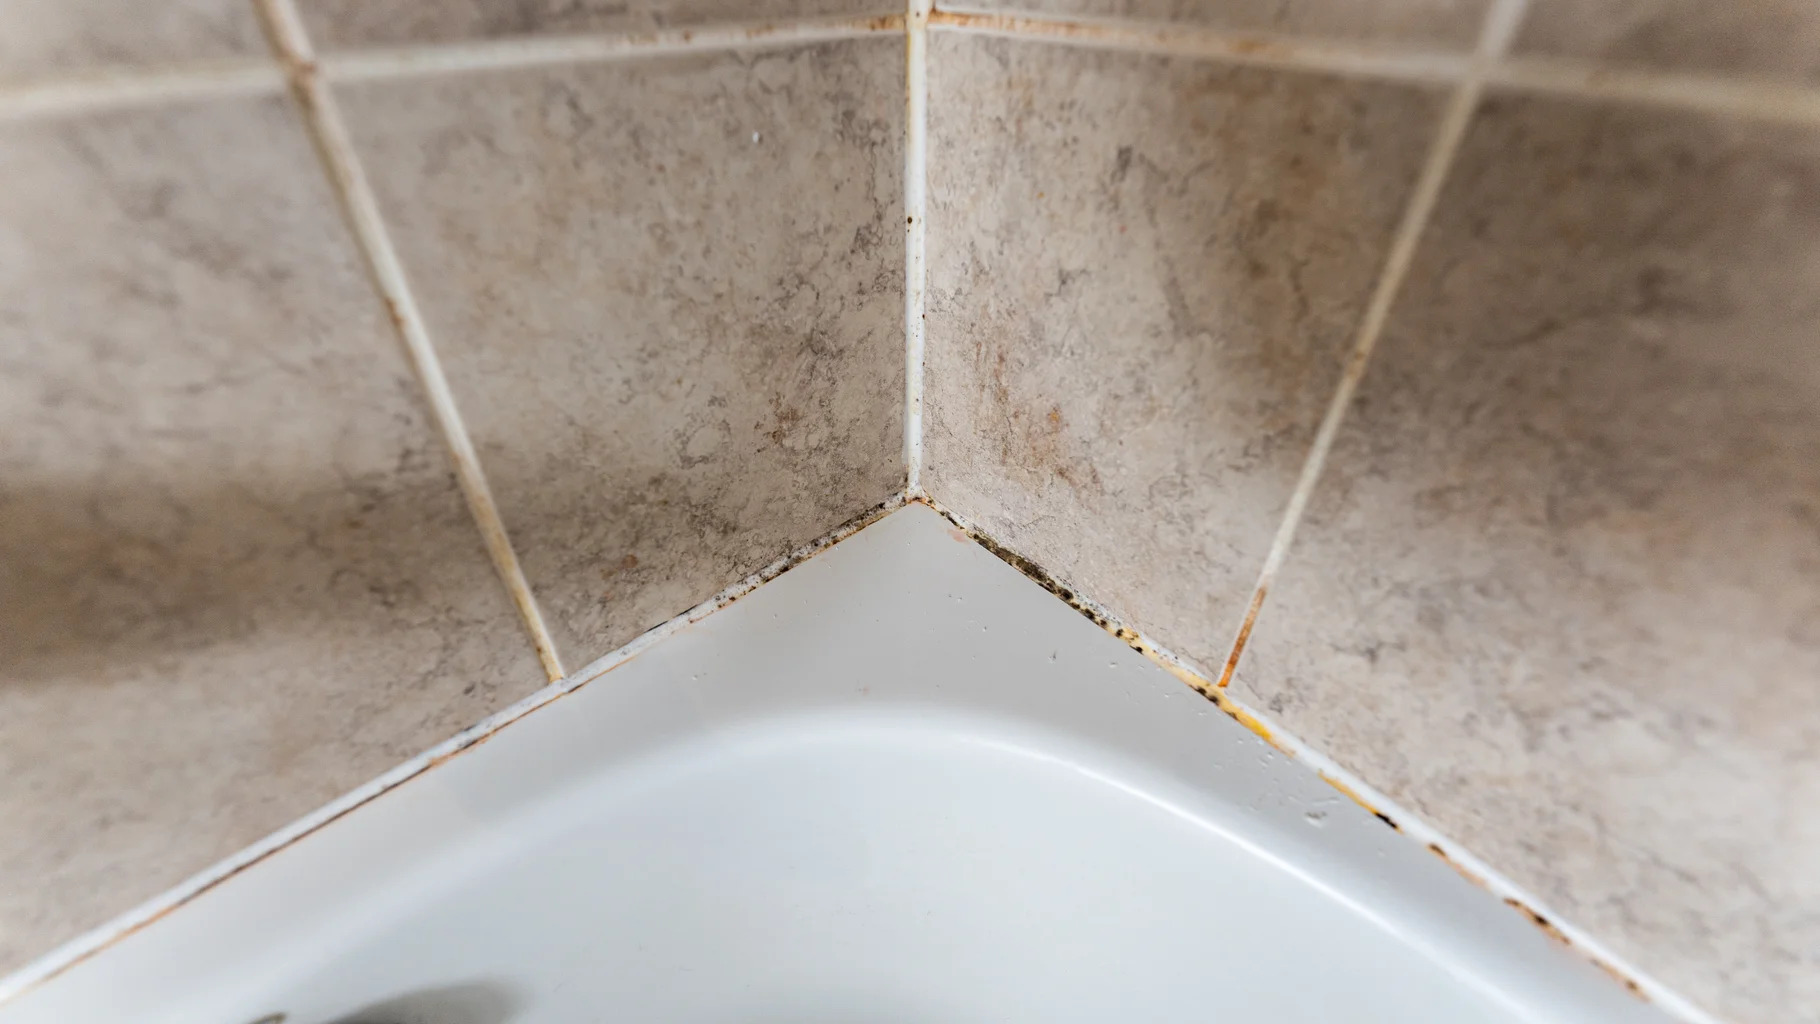
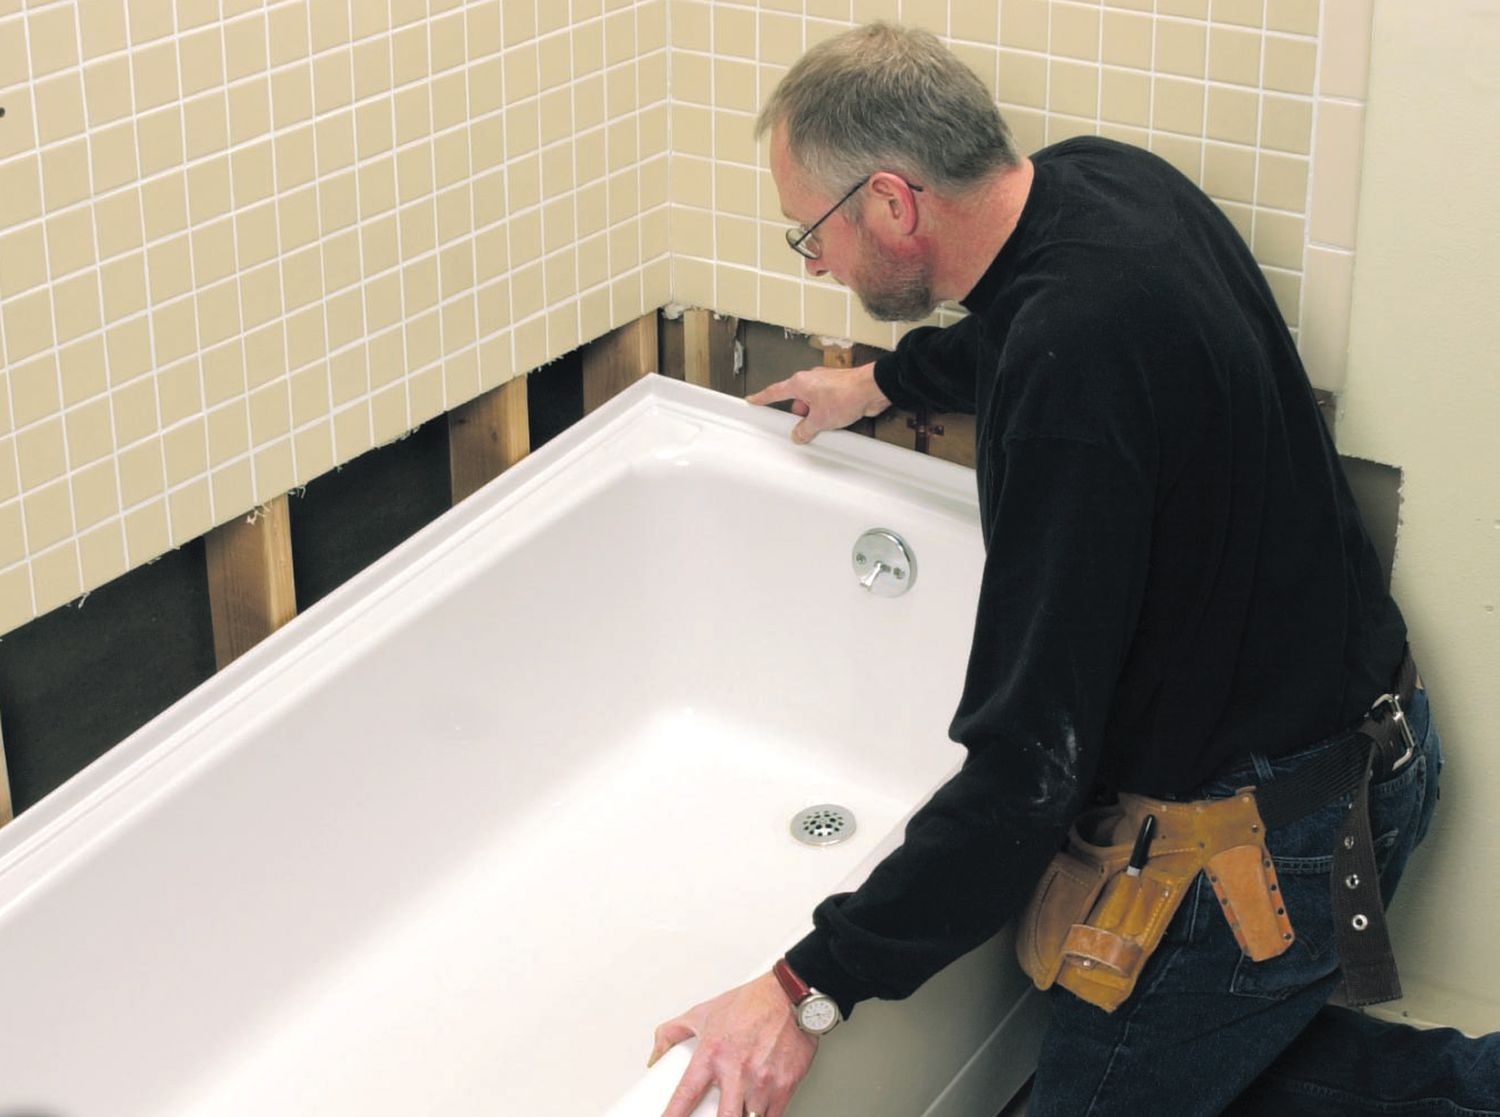
Replacing bathtub caulking is an essential maintenance task that can help prevent water damage and mold growth in your bathroom. Over time, the caulking around your bathtub can deteriorate, leading to leaks and unsightly discoloration. By learning how to replace bathtub caulking, you can maintain a clean and watertight seal, ensuring the longevity of your bathtub and the surrounding areas.
In this comprehensive guide, we will walk you through the step-by-step process of replacing bathtub caulking. Whether you're a seasoned DIY enthusiast or a novice homeowner, this guide will equip you with the knowledge and confidence to tackle this project effectively.
Properly replacing bathtub caulking involves several key steps, including removing the old caulking, thoroughly cleaning the area, applying new caulking, and ensuring a smooth finish. By following these steps, you can achieve a professional-looking result and safeguard your bathroom against water damage.
Now, let's dive into the detailed process of replacing bathtub caulking, empowering you to maintain a clean, functional, and visually appealing bathroom space.
Key Takeaways:
- Don’t let old caulking ruin your bathroom! Learn to remove and replace it for a clean, watertight seal that keeps your bathtub and surrounding areas in top shape.
- Applying new caulking and letting it dry is key to a professional finish. Take your time and follow the steps to safeguard your bathroom against water damage.
Read more: How To Caulk Around Bathtub
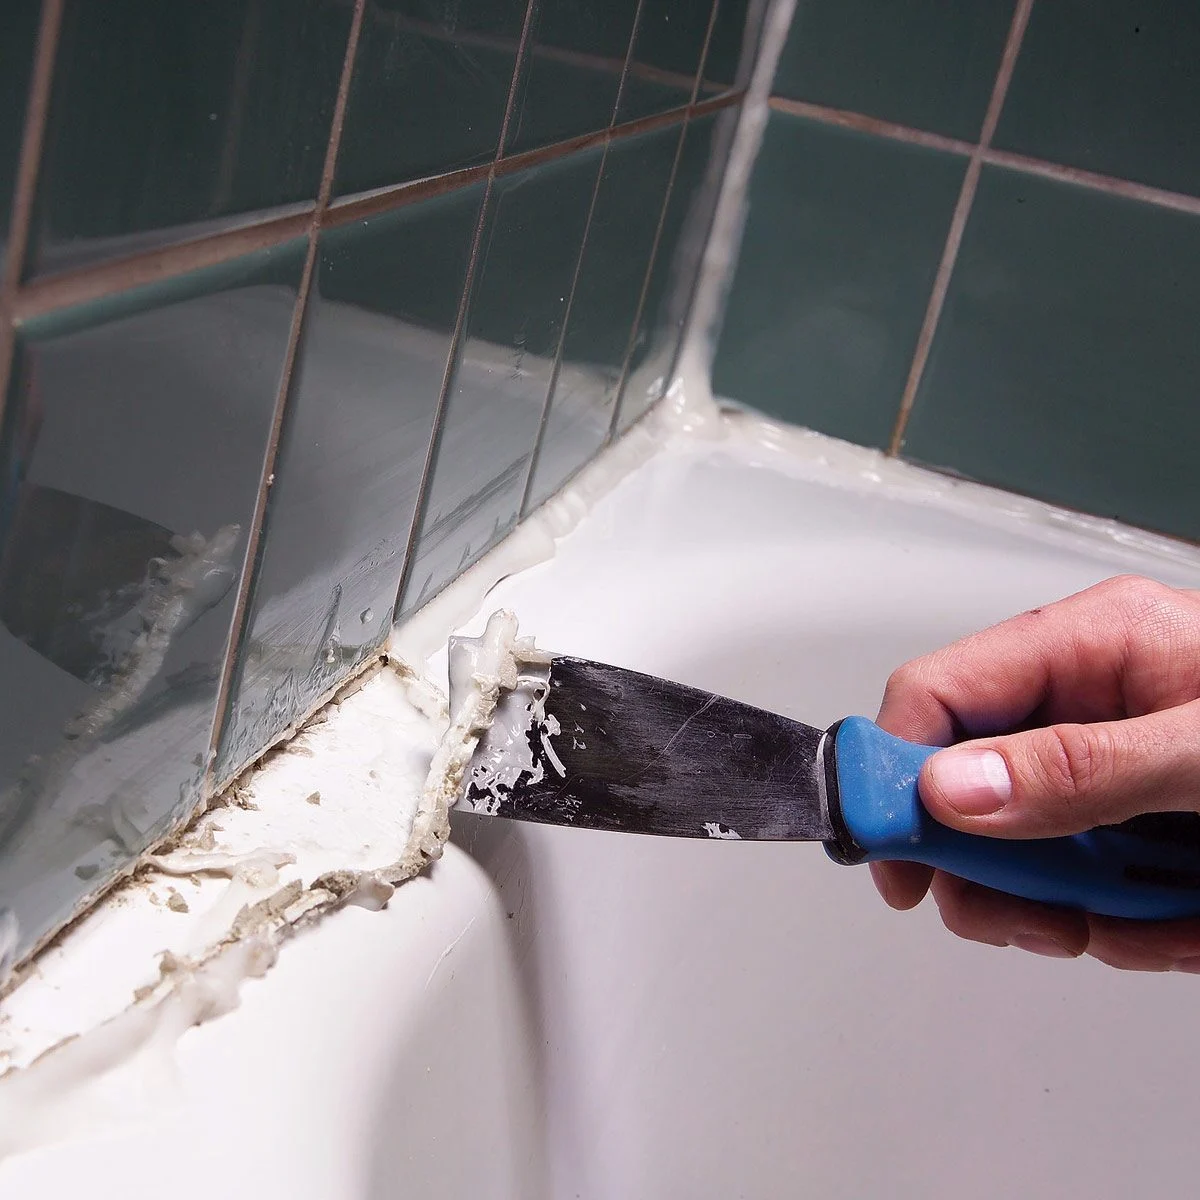
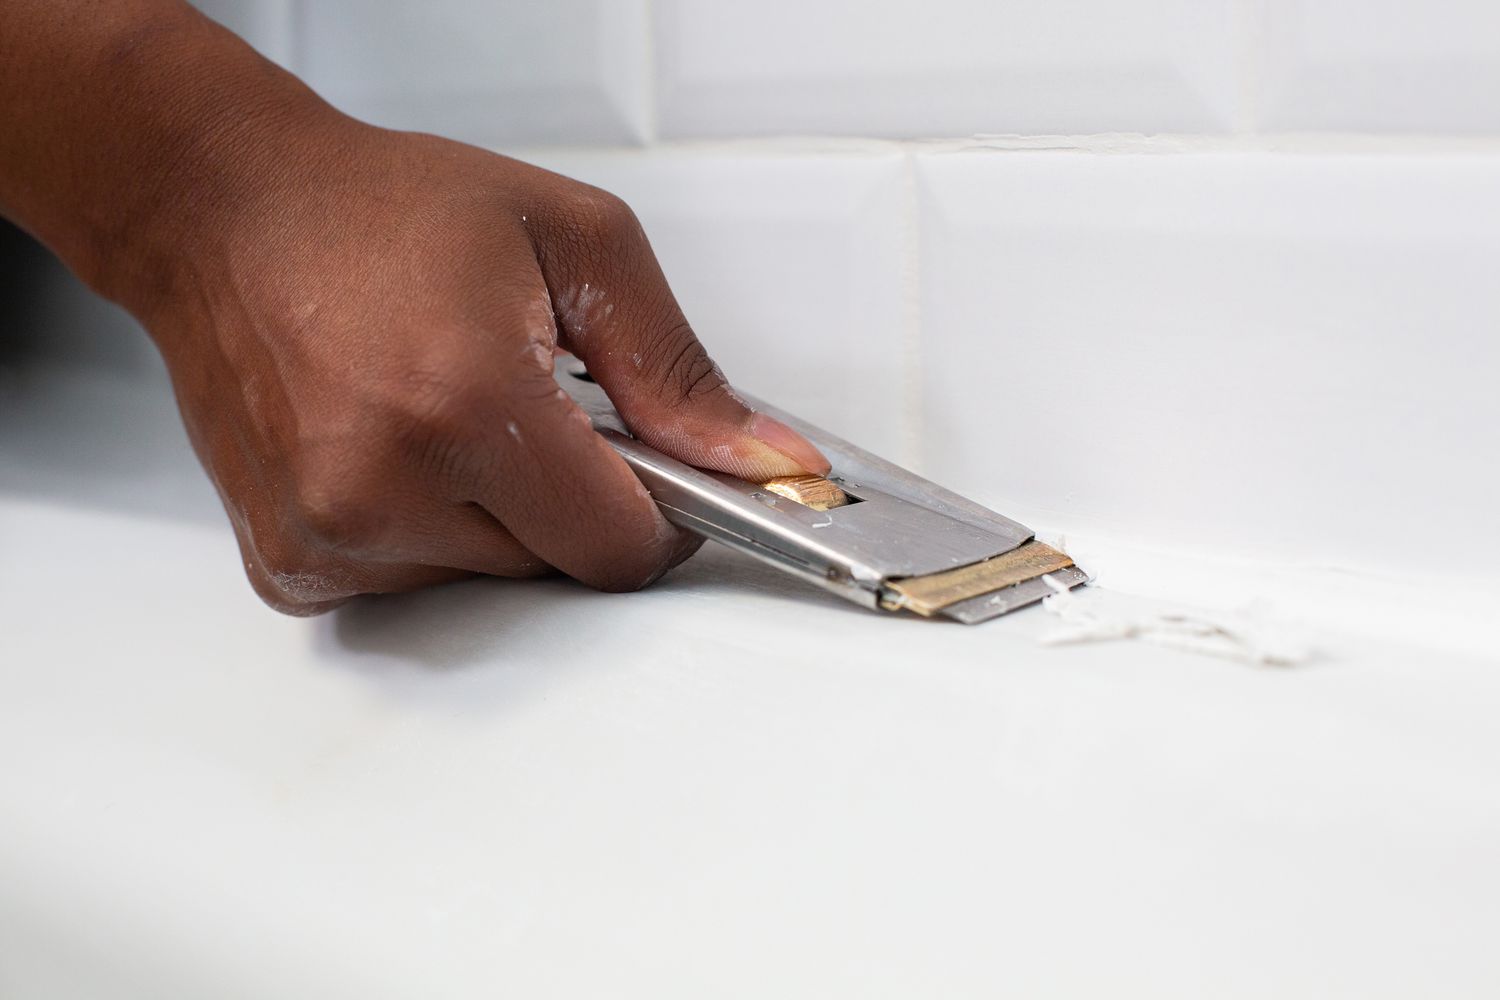
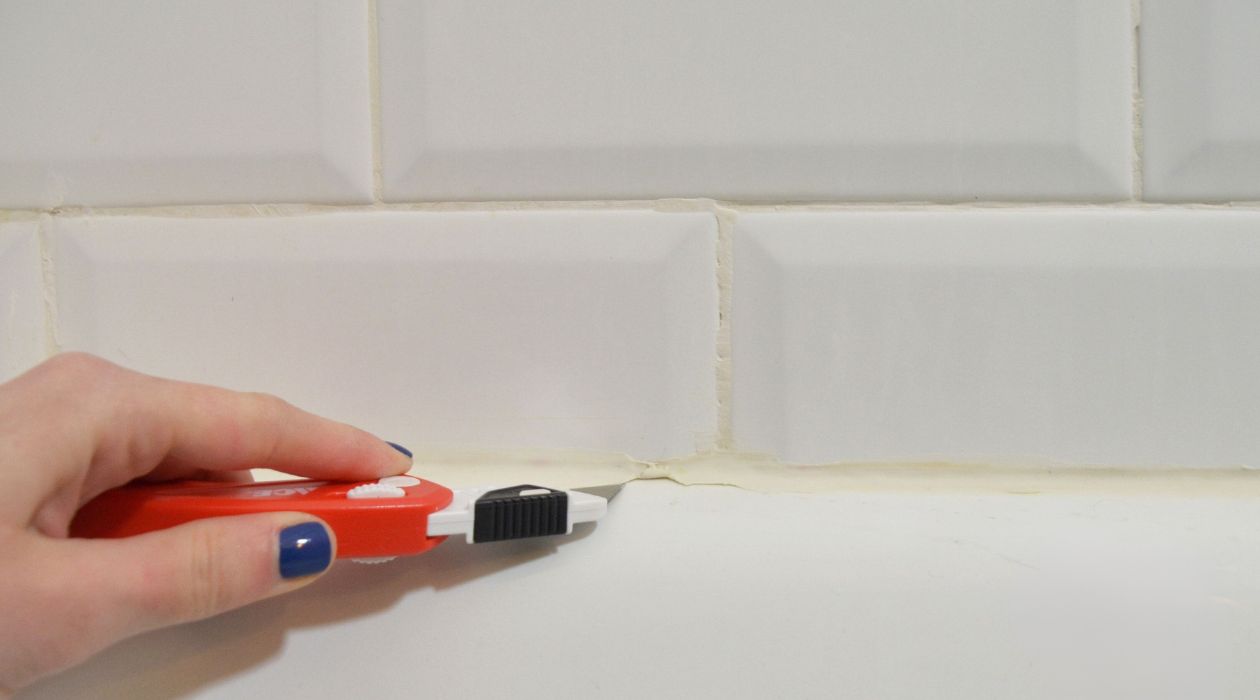
Step 1: Remove Old Caulking
Removing old caulking is the crucial first step in the process of replacing bathtub caulking. Over time, caulking can become discolored, cracked, or moldy, compromising its effectiveness and aesthetic appeal. To ensure a successful caulking replacement, it's essential to thoroughly remove the old caulking before proceeding with the application of new sealant.
Tools and Materials
Before starting the removal process, gather the necessary tools and materials. You will need a utility knife or a specialized caulk removal tool, a putty knife, and a cleaning solution such as rubbing alcohol or a commercial caulk remover. Additionally, have a rag or paper towels on hand to wipe away debris.
Step-by-Step Process
-
Prepare the Area: Clear the surrounding area of any personal items, bath products, or accessories to create a clean and unobstructed workspace.
-
Softening the Caulking: If the old caulking is particularly stubborn, consider softening it with a commercial caulk remover. Follow the manufacturer's instructions for application and dwell time to effectively loosen the caulking.
-
Cutting and Peeling: Use a utility knife or caulk removal tool to carefully cut and peel away the old caulking. Exercise caution to avoid damaging the bathtub or surrounding surfaces during this process. A putty knife can be helpful for gently prying up stubborn sections of caulking.
-
Thorough Cleaning: Once the majority of the old caulking has been removed, thoroughly clean the area with rubbing alcohol or a designated cleaning solution. This step is crucial for ensuring proper adhesion of the new caulking.
-
Inspect for Residue: After cleaning, inspect the area for any remaining traces of old caulking or debris. Use a rag or paper towels to wipe away any lingering residue, leaving the surface clean and ready for the application of new caulking.
By diligently following these steps, you can effectively remove the old caulking from your bathtub, setting the stage for the subsequent phases of the caulking replacement process. With the old caulking successfully removed, you are now ready to move on to the next step of cleaning the area in preparation for the application of new caulking.
Step 2: Clean the Area
Once the old caulking has been meticulously removed, the next critical step in replacing bathtub caulking is to thoroughly clean the area surrounding the bathtub. Proper cleaning is essential for ensuring optimal adhesion and longevity of the new caulking. By diligently preparing the surface, you can create an ideal environment for the application of the fresh sealant, ultimately contributing to a professional and long-lasting result.
Tools and Materials
Before initiating the cleaning process, gather the necessary tools and materials. You will need a clean rag or paper towels, rubbing alcohol or a designated cleaning solution, and possibly a scrubbing pad or brush for stubborn residue. Additionally, ensure proper ventilation in the bathroom to expedite the drying process after cleaning.
Step-by-Step Process
-
Remove Loose Debris: Begin by using a clean rag or paper towels to wipe away any loose debris, dust, or particles from the area. This initial step sets the foundation for a thorough cleaning process.
-
Apply Cleaning Solution: Dampen a clean rag with rubbing alcohol or the designated cleaning solution. Gently wipe the entire area where the old caulking was removed, ensuring that any remaining residue or adhesive is effectively dissolved and removed. For particularly stubborn residue, a scrubbing pad or brush can be used to assist in the cleaning process.
-
Rinse and Dry: After applying the cleaning solution, rinse the area with clean water to remove any residual cleaning agent. Thoroughly dry the surface with a clean, dry rag to eliminate any moisture, ensuring that the area is completely clean and ready for the application of new caulking.
-
Inspect for Cleanliness: Take a moment to inspect the cleaned area, ensuring that it is free from any remaining debris, residue, or moisture. A clean and dry surface is essential for promoting strong adhesion and a professional finish when applying the new caulking.
By diligently following these cleaning steps, you can effectively prepare the area for the application of new caulking, setting the stage for the subsequent phase of the caulking replacement process. With the area meticulously cleaned and free from debris, you are now ready to proceed with the application of new caulking, ensuring a professional and durable seal around your bathtub.
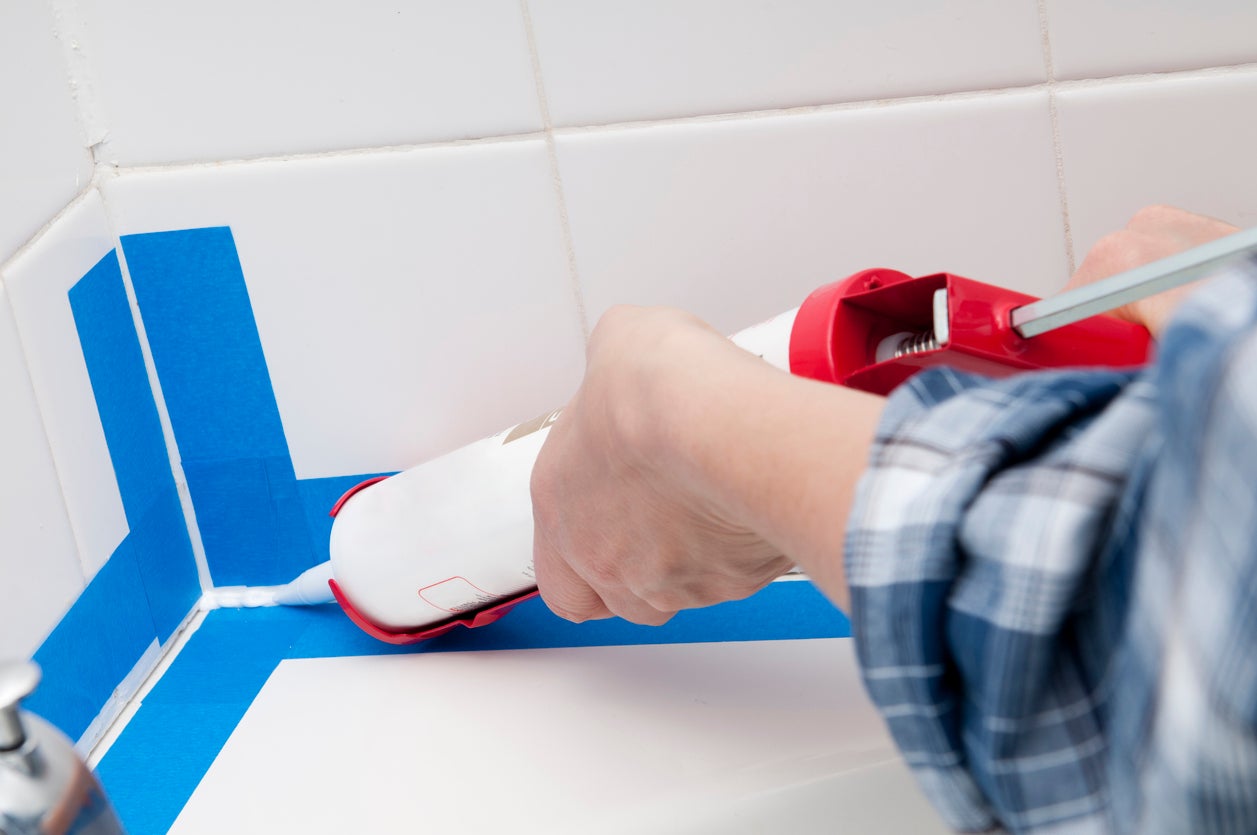
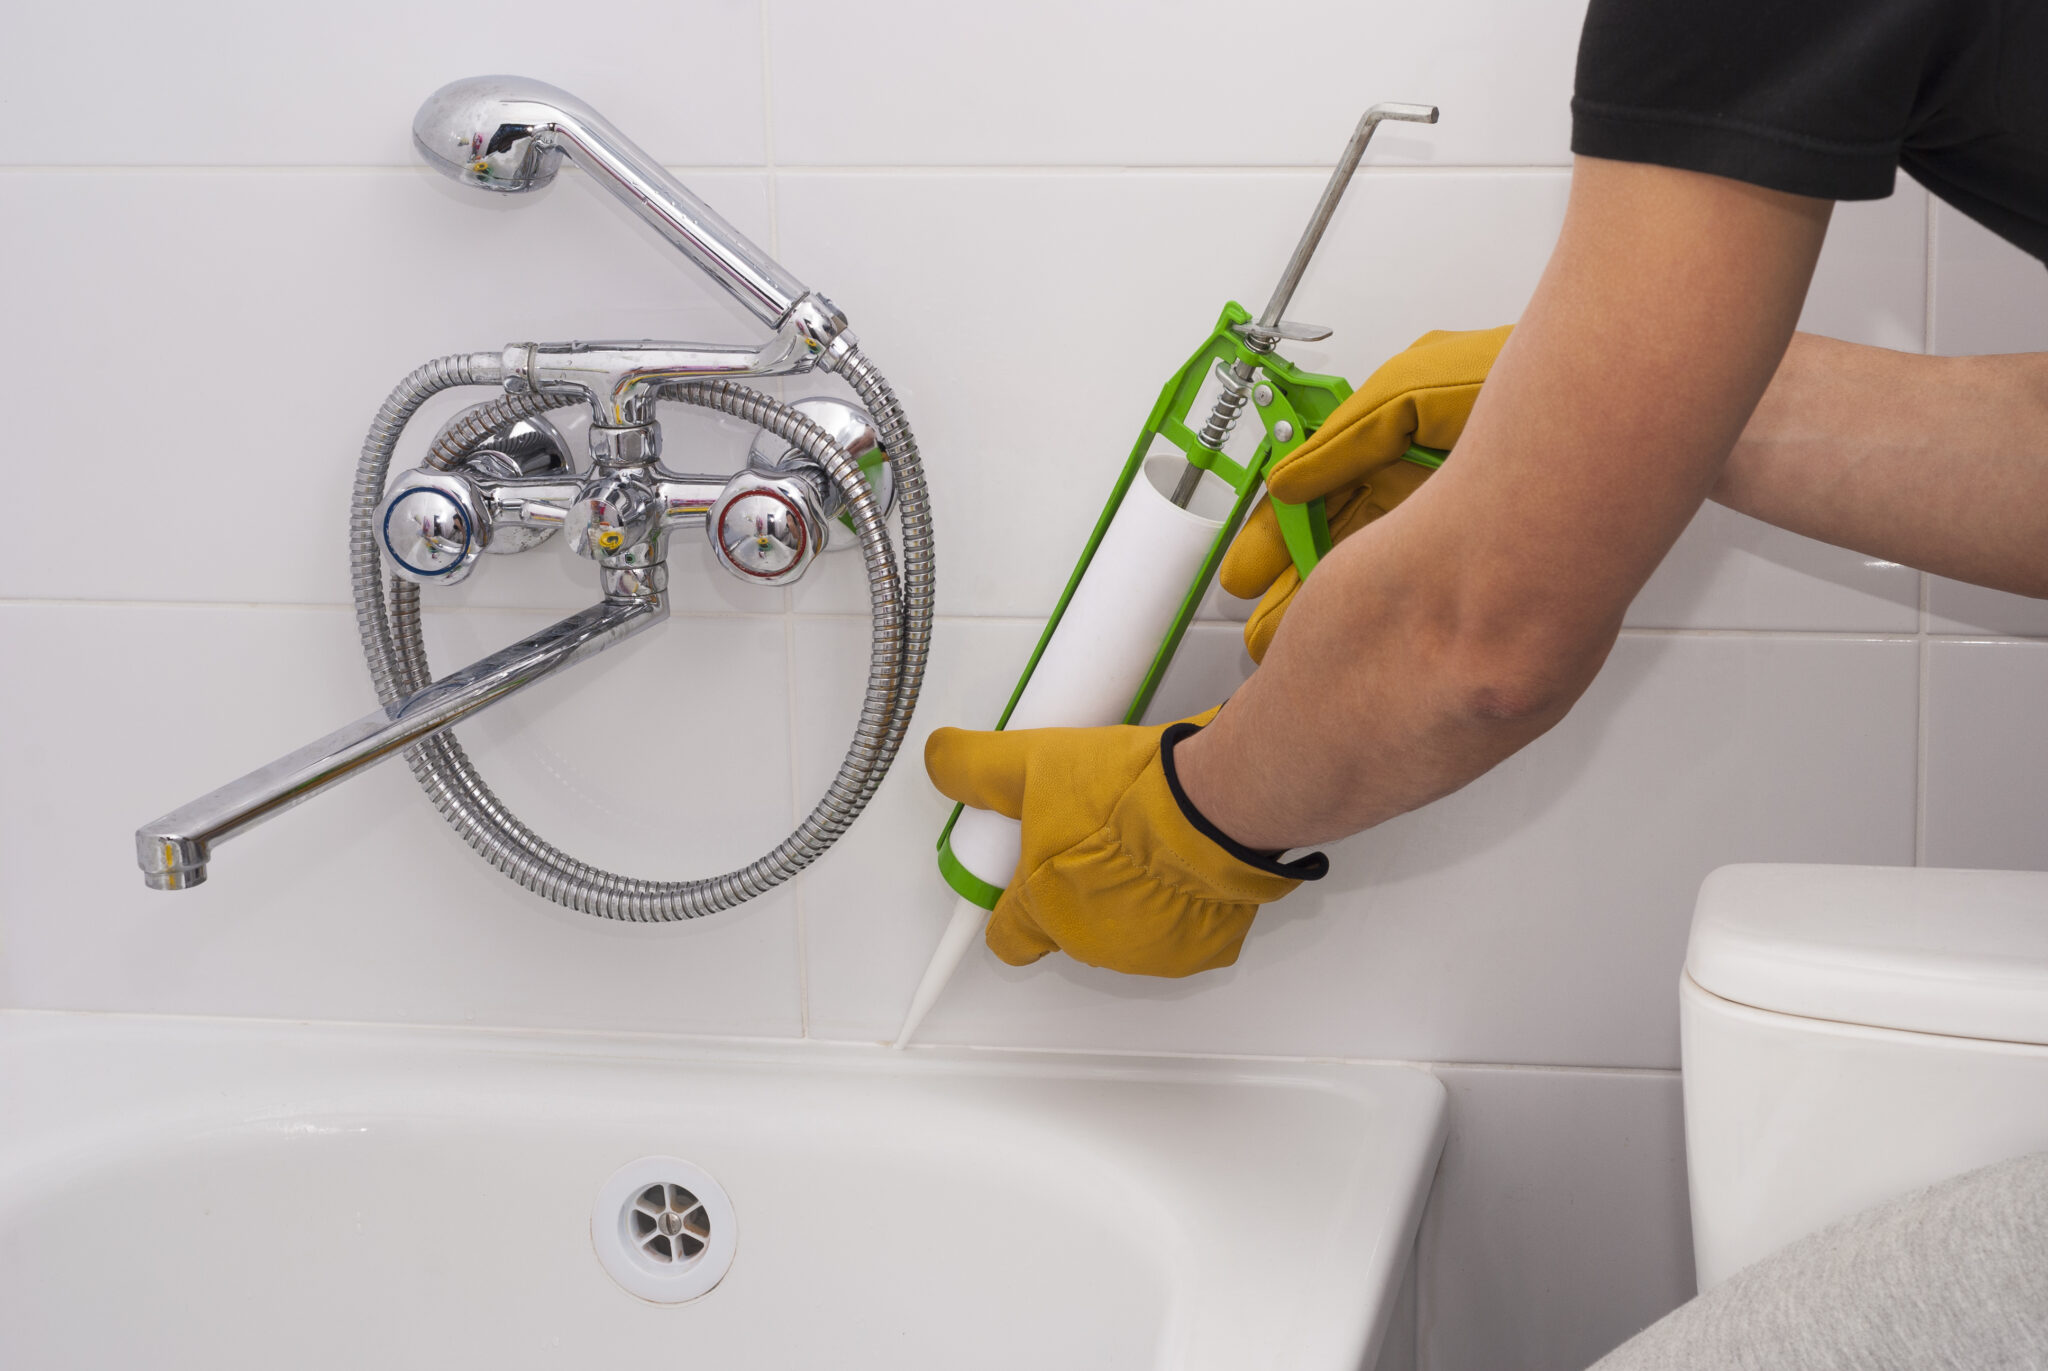
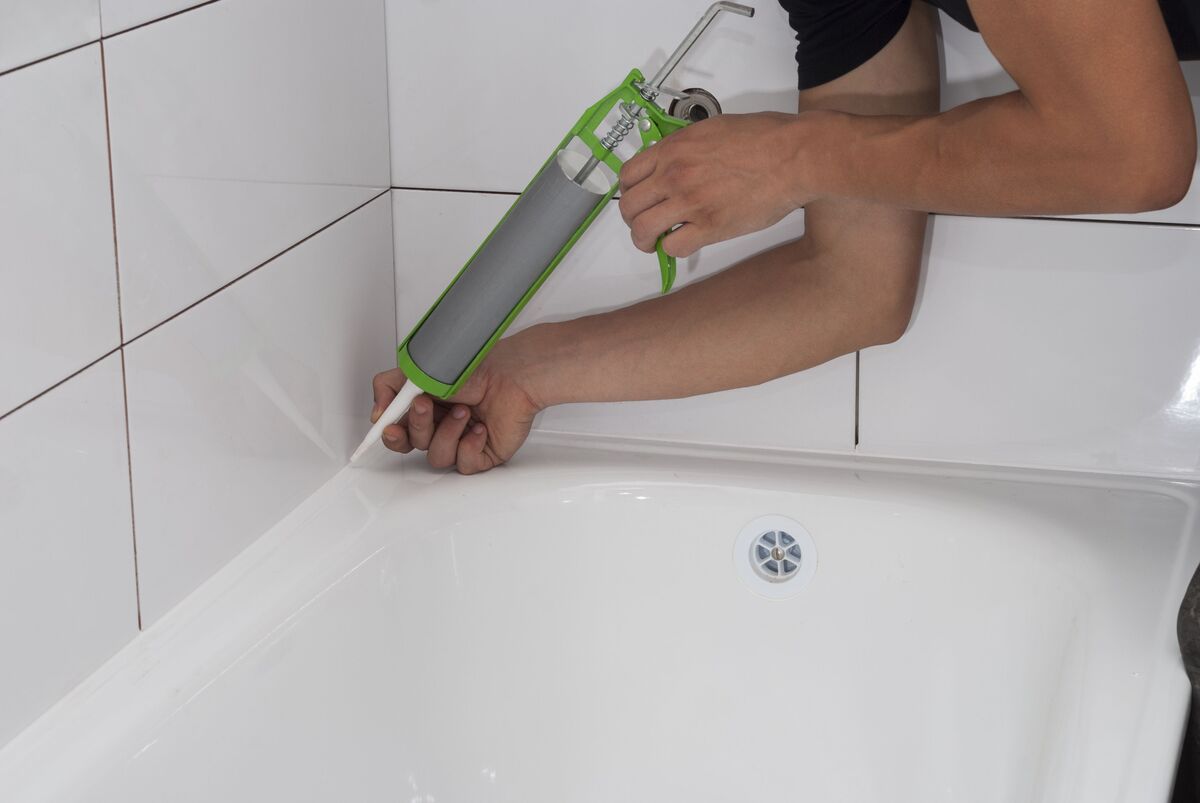
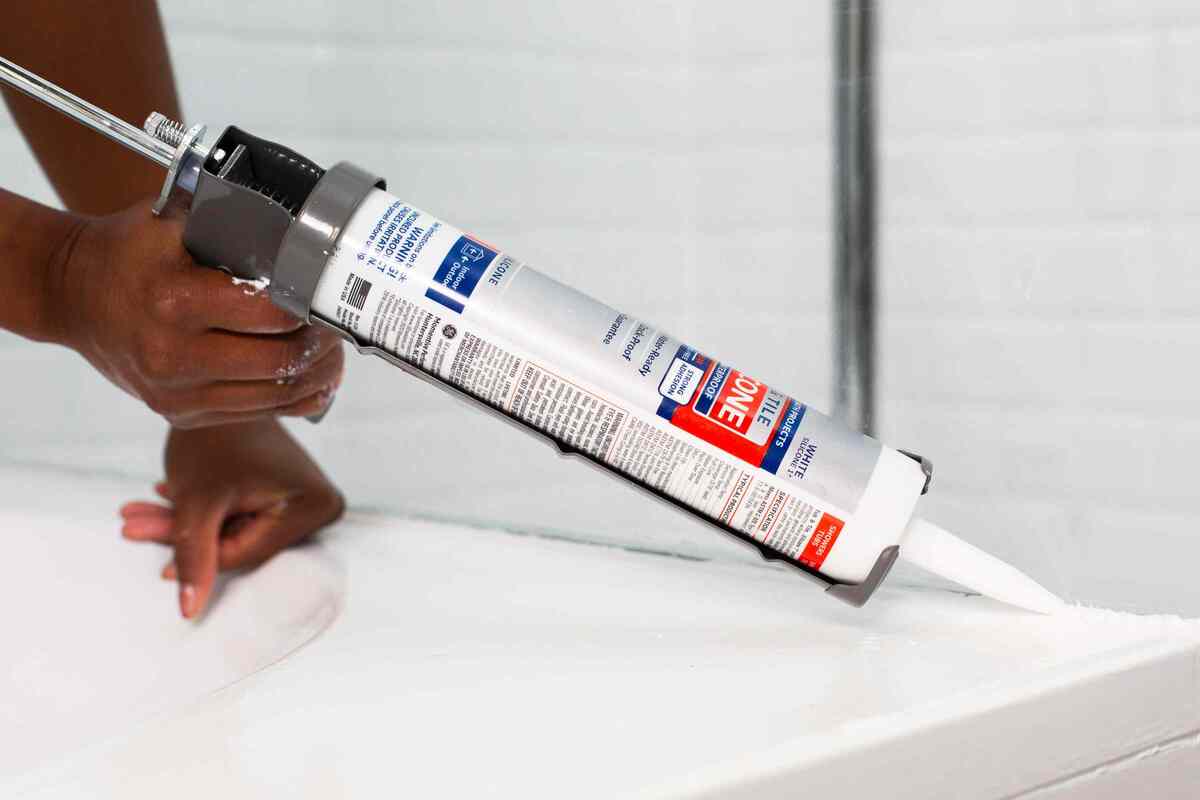
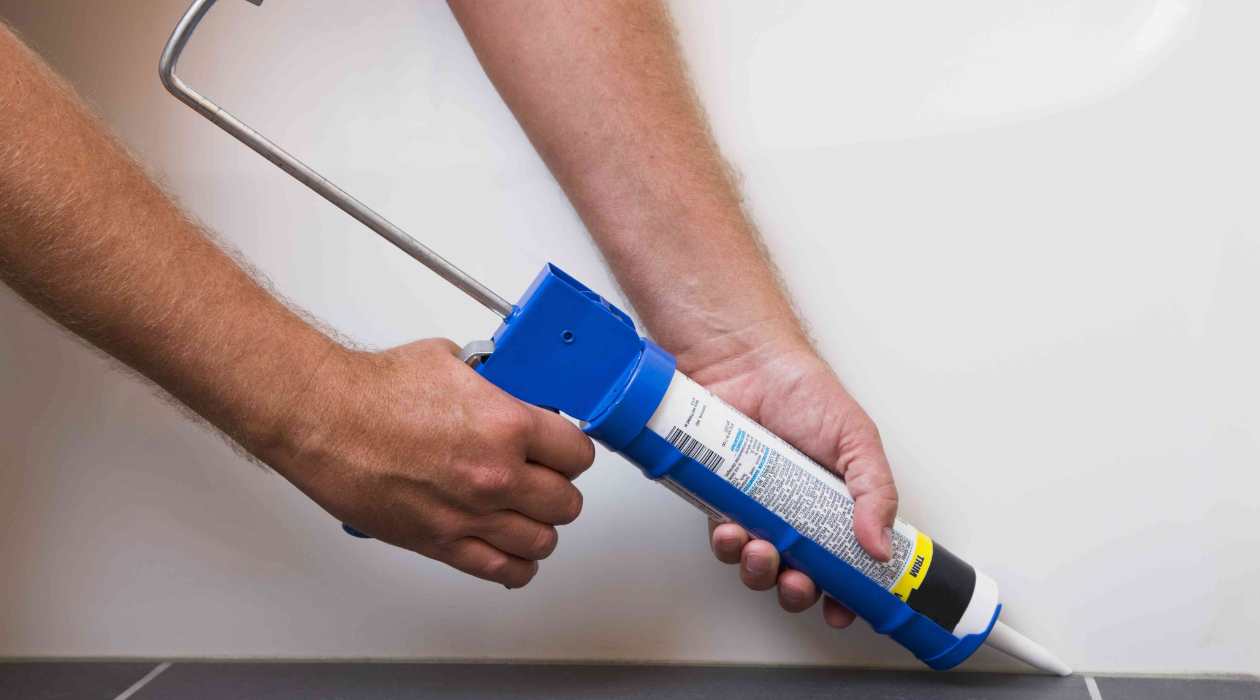
Step 3: Apply New Caulking
Applying new caulking is a pivotal step in the process of replacing bathtub caulking, as it directly contributes to the functionality and aesthetic appeal of the seal around the bathtub. By carefully applying the new caulking, you can create a watertight barrier that enhances the overall cleanliness and longevity of your bathroom space. This step requires attention to detail and precision to ensure a professional and durable result.
Tools and Materials
Before commencing the application of new caulking, gather the necessary tools and materials. You will need a high-quality silicone or acrylic-based caulking product, a caulking gun, a utility knife, and painter's tape. Additionally, have a damp cloth or sponge on hand for any potential cleanup during the application process.
Step-by-Step Process
-
Prepare the Caulking: Cut the tip of the caulking tube at a 45-degree angle to create a small opening. Ensure that the opening is sized to deliver a controlled flow of caulking, allowing for precise application.
-
Apply Painter's Tape: To achieve clean and straight caulking lines, apply painter's tape along the edges of the area where the caulking will be applied. This step helps to prevent excess caulking from spreading onto adjacent surfaces, resulting in a professional and polished finish.
-
Load the Caulking Gun: Insert the caulking tube into the caulking gun and ensure that it is securely in place. Squeeze the trigger of the caulking gun to initiate the flow of caulking, testing the consistency and adjusting the pressure as needed.
-
Apply the Caulking: With the caulking gun loaded and ready, carefully apply a steady and even bead of caulking along the seam between the bathtub and the surrounding surface. Maintain a consistent pace and pressure to achieve a uniform application, ensuring that the entire seam is adequately covered.
-
Smooth the Caulking: After applying the caulking, use a damp cloth or sponge to smooth out the bead of caulking, creating a seamless and professional finish. This step helps to eliminate any excess caulking and refine the appearance of the seal.
-
Remove Painter's Tape: Once the caulking is applied and smoothed, gently remove the painter's tape to reveal clean and precise caulking lines. This reveals the professional result of the caulking application, showcasing a neat and polished seal around the bathtub.
By meticulously following these steps, you can effectively apply new caulking around your bathtub, contributing to a clean, watertight, and visually appealing seal. With the new caulking successfully applied, you are now ready to proceed with the final phase of the caulking replacement process, ensuring a professional and durable finish that enhances the overall integrity of your bathroom space.
Step 4: Smooth Out Caulking
After applying the bead of caulking along the seam between the bathtub and the surrounding surface, the next crucial step is to smooth out the caulking to achieve a seamless and professional finish. This process not only enhances the visual appeal of the seal but also ensures that the caulking effectively seals the joint, contributing to the overall integrity of the bathtub area.
To smooth out the caulking, begin by preparing a damp cloth or sponge. It's essential to use a clean and dampened cloth to avoid leaving any residue or marks on the freshly applied caulking. Gently dampen the cloth, ensuring that it is not overly saturated, as excessive moisture can affect the consistency of the caulking.
With the damp cloth or sponge in hand, carefully run it along the bead of caulking, applying gentle and consistent pressure. The goal is to create a smooth and uniform surface, eliminating any excess caulking and refining the appearance of the seal. As you glide the cloth or sponge along the caulking, periodically rinse it to remove accumulated caulking residue, ensuring that the smoothing process remains effective.
During this step, pay close attention to the consistency of the caulking, ensuring that it adheres uniformly to the seam without any gaps or inconsistencies. By smoothing out the caulking, you can achieve a professional and polished finish, elevating the overall aesthetic of the bathtub area.
It's important to exercise patience and precision during the caulking smoothing process, as it directly impacts the final appearance of the seal. By diligently smoothing out the caulking, you can eliminate any irregularities and create a visually appealing result that complements the cleanliness and functionality of your bathroom space.
Upon completing the caulking smoothing process, take a moment to inspect the seal, ensuring that it exhibits a consistent and refined appearance. Any remaining imperfections or excess caulking can be gently addressed with the damp cloth or sponge, further refining the seal and enhancing its overall quality.
By effectively smoothing out the caulking, you can achieve a professional and durable finish, elevating the integrity and visual appeal of the bathtub area. With the caulking successfully smoothed, you are now prepared to proceed with the final phase of the caulking replacement process, culminating in a clean, watertight, and visually appealing seal around your bathtub.
Step 5: Let Caulking Dry
Once the new caulking has been meticulously applied and smoothed, it is crucial to allow sufficient time for the caulking to dry and cure effectively. Proper drying and curing are essential for ensuring the longevity and effectiveness of the seal, ultimately contributing to a watertight and durable barrier around the bathtub.
The drying and curing process for caulking typically varies based on the specific product used and environmental conditions. It is important to refer to the manufacturer's instructions for the recommended drying and curing times, as these guidelines are tailored to optimize the performance of the caulking product.
In general, silicone-based caulking products often require 24 to 48 hours to fully dry and cure, while acrylic-based caulking products may have a shorter drying time of approximately 12 to 24 hours. However, environmental factors such as temperature and humidity can influence the drying process, potentially extending the overall drying and curing duration.
During the drying period, it is essential to prevent any moisture or disturbance to the freshly applied caulking. Ensure that the bathroom remains well-ventilated to facilitate the drying process, allowing adequate airflow to promote efficient curing of the caulking. Additionally, refrain from using the bathtub or shower during the drying period to avoid compromising the integrity of the caulking.
As the caulking dries and cures, periodically inspect the seal to ensure that it maintains its integrity and uniform appearance. Any signs of cracking or uneven drying may indicate the need for additional drying time or potential touch-up work to refine the caulking seal.
Upon the completion of the drying and curing period, carefully test the caulking to ensure that it has fully set and formed a resilient seal. Gently press along the caulking line to verify its stability and adherence to the bathtub and surrounding surfaces. A properly dried and cured caulking should exhibit firmness and resilience, indicating its readiness for regular use and exposure to moisture.
By allowing the caulking to thoroughly dry and cure, you can ensure the effectiveness and longevity of the seal, contributing to a clean, watertight, and visually appealing finish around your bathtub. With the caulking successfully dried and cured, you have completed the essential process of replacing bathtub caulking, safeguarding your bathroom against water damage and maintaining a professional and durable seal.
Conclusion
In conclusion, the process of replacing bathtub caulking is a fundamental aspect of maintaining a clean, functional, and visually appealing bathroom space. By following the comprehensive steps outlined in this guide, you can effectively address deteriorating caulking, safeguard against water damage, and elevate the overall integrity of your bathtub area.
The initial step of removing old caulking sets the stage for a successful caulking replacement, allowing you to eliminate discolored, cracked, or moldy sealant and prepare the surface for the application of new caulking. Thoroughly cleaning the area is essential for promoting strong adhesion and ensuring a professional finish, creating an ideal environment for the application of fresh caulking.
Applying new caulking demands attention to detail and precision, as it directly contributes to the functionality and aesthetic appeal of the seal around the bathtub. By carefully applying and smoothing out the caulking, you can achieve a seamless and visually appealing finish, enhancing the overall cleanliness and longevity of your bathroom space.
Allowing the caulking to thoroughly dry and cure is the final crucial step, ensuring the effectiveness and longevity of the seal. By exercising patience and allowing the proper drying time, you can establish a watertight and durable barrier around your bathtub, safeguarding against leaks and mold growth.
In essence, the process of replacing bathtub caulking empowers you to take proactive measures in preserving the cleanliness and structural integrity of your bathroom. By investing time and effort into this maintenance task, you can mitigate potential water damage, enhance the visual appeal of your bathtub area, and contribute to a welcoming and hygienic bathroom environment for yourself and your family.
Ultimately, mastering the art of replacing bathtub caulking equips you with the knowledge and skills to maintain a clean, functional, and visually appealing bathroom space, ensuring that your bathtub area remains a source of comfort and relaxation for years to come.
Frequently Asked Questions about How To Replace Bathtub Caulking
Was this page helpful?
At Storables.com, we guarantee accurate and reliable information. Our content, validated by Expert Board Contributors, is crafted following stringent Editorial Policies. We're committed to providing you with well-researched, expert-backed insights for all your informational needs.

0 thoughts on “How To Replace Bathtub Caulking”