Home>Furniture & Design>Bathroom Accessories>How To Remove Old Caulking From Bathtub
Bathroom Accessories
How To Remove Old Caulking From Bathtub
Modified: August 20, 2024
Learn how to easily remove old caulking from your bathtub and update your bathroom accessories for a fresh, clean look. Follow our step-by-step guide for a hassle-free process.
(Many of the links in this article redirect to a specific reviewed product. Your purchase of these products through affiliate links helps to generate commission for Storables.com, at no extra cost. Learn more)
Introduction
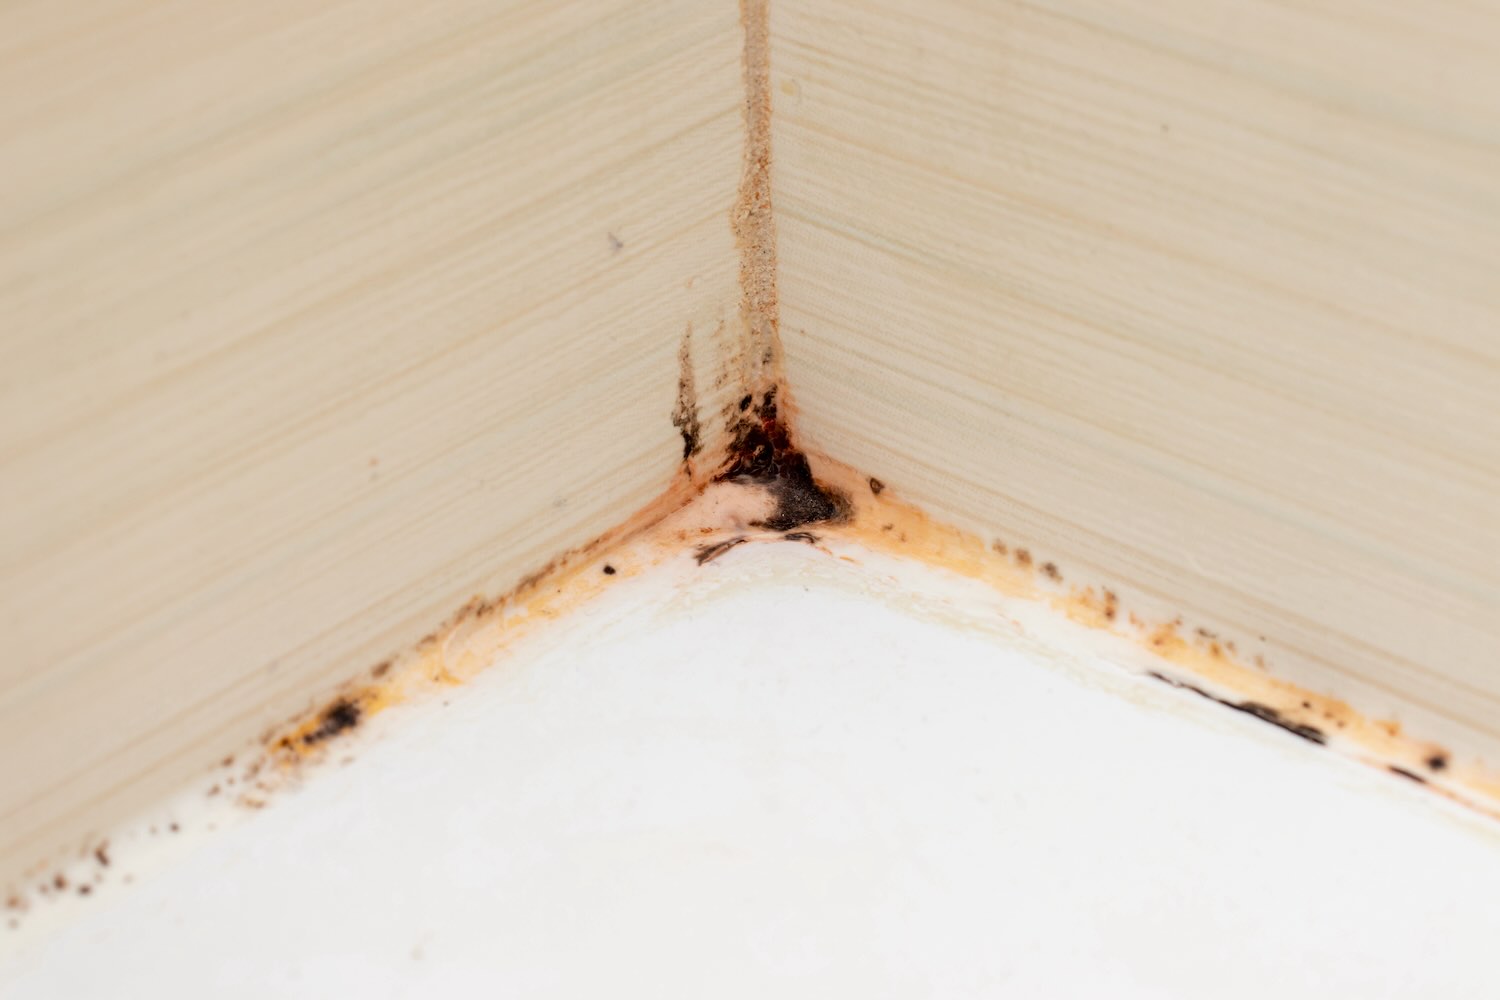
Removing old caulking from a bathtub is a crucial step in maintaining a clean and hygienic bathroom. Over time, caulk can become discolored, cracked, or moldy, detracting from the overall appearance of the bathtub and potentially leading to water damage. By learning how to effectively remove old caulk and apply new caulk, you can restore the aesthetic appeal of your bathtub while preventing potential water leakage issues.
Old caulk can be a stubborn adversary, but with the right tools and techniques, you can successfully remove it without damaging the surrounding surfaces. This process requires patience and attention to detail, but the results are well worth the effort. By following a few simple steps, you can achieve a clean and professional-looking finish that will enhance the overall appearance of your bathroom.
In this comprehensive guide, we will walk you through the step-by-step process of removing old caulk from your bathtub and replacing it with fresh, clean caulk. From gathering the necessary tools to applying the new caulk, each step is essential to achieving a successful outcome. Whether you are a seasoned DIY enthusiast or a novice homeowner looking to tackle a small home improvement project, this guide will equip you with the knowledge and confidence to revitalize your bathtub with a fresh application of caulk.
By the end of this guide, you will have the skills and understanding needed to remove old caulk from your bathtub and replace it with new caulk, leaving your bathroom looking clean, well-maintained, and inviting. Let's dive into the process and transform your bathtub into a pristine and visually appealing focal point of your bathroom.
Key Takeaways:
- Say goodbye to old, moldy caulk! Soften and remove it using tools and heat, then clean the area thoroughly. Apply new, high-quality caulk for a fresh, watertight seal and a polished bathtub.
- Revitalize your bathtub with patience and the right tools. Remove old caulk carefully, clean the area, and apply new caulk for a visually appealing and long-lasting bathroom upgrade.
Read more: How To Remove Old Caulk From Brick
Step 1: Gather the necessary tools
Before embarking on the task of removing old caulk from your bathtub, it's essential to gather the necessary tools to ensure a smooth and efficient process. Having the right tools at your disposal will not only make the job easier but also help you achieve a professional-looking result. Here's a comprehensive list of tools you'll need for this project:
-
Caulk removal tool: This specialized tool, often featuring a sharp edge and a flat surface, is designed to effectively scrape away old caulk without damaging the surrounding surfaces. Look for a caulk removal tool with a comfortable grip to facilitate precise and controlled movements.
-
Utility knife: A sharp utility knife will come in handy for cutting through stubborn or hardened caulk. Opt for a retractable utility knife with a sturdy blade that can be extended to the desired length for precise cutting.
-
Heat gun or hairdryer: Applying heat to the old caulk can soften it, making it easier to remove. A heat gun or a hairdryer can be used to gently warm the caulk, allowing for smoother and more efficient removal.
-
Safety goggles and gloves: Protecting your eyes and hands is crucial when working with caulk removal tools and chemicals. Safety goggles will shield your eyes from any debris or caulk particles, while gloves will safeguard your hands from sharp edges and potential skin irritation.
-
Chemical caulk remover: In some cases, particularly with stubborn or hardened caulk, a chemical caulk remover can be highly effective. Look for a caulk remover specifically designed for the type of caulk you are removing, and follow the manufacturer's instructions for safe and proper usage.
-
Rubbing alcohol or denatured alcohol: After removing the old caulk, it's important to thoroughly clean the area to ensure proper adhesion of the new caulk. Rubbing alcohol or denatured alcohol can be used to clean the surface and remove any residual caulk, dirt, or grease.
-
Rags or paper towels: These will be used for wiping and cleaning the bathtub surface before and after removing the old caulk. Choose lint-free rags or paper towels to avoid leaving behind any fibers or debris.
By ensuring that you have all the necessary tools at your disposal, you can approach the task of removing old caulk from your bathtub with confidence and efficiency. With these tools in hand, you are ready to proceed to the next step of softening the old caulk for effective removal.
Step 2: Soften the old caulk
Softening the old caulk is a crucial step in the process of removing it from your bathtub. Over time, caulk can harden and adhere firmly to the surfaces, making it challenging to remove without causing damage. By softening the old caulk, you can make the removal process significantly easier and reduce the risk of harming the surrounding areas.
There are several methods for softening old caulk, each with its own advantages and considerations. One effective approach is to apply heat to the caulk using a heat gun or a hairdryer. By directing the heat towards the old caulk, you can soften it, making it more pliable and easier to remove. It's important to use caution when applying heat, ensuring that the surrounding surfaces are not damaged or overheated.
Another method for softening old caulk involves using a chemical caulk remover. These products are designed to break down the molecular structure of the caulk, effectively softening it and making it easier to scrape away. When using a chemical caulk remover, it's essential to follow the manufacturer's instructions carefully and take appropriate safety precautions, such as wearing gloves and ensuring adequate ventilation.
In some cases, a combination of heat and a chemical caulk remover may be the most effective approach. By applying heat to the old caulk to soften it and then using a caulk remover to further break down its composition, you can facilitate its removal with greater ease and efficiency.
Before proceeding with the next steps, it's important to ensure that the old caulk has been sufficiently softened to allow for smooth removal. Take the time to assess the condition of the caulk and make adjustments as needed to ensure that it is pliable and ready for extraction.
By softening the old caulk using the appropriate methods, you can set the stage for successful removal without causing damage to the bathtub or surrounding surfaces. This preparatory step is essential for achieving a clean and professional result, laying the groundwork for the subsequent stages of removing the old caulk and preparing the area for the application of new caulk.
Step 3: Remove the old caulk
With the old caulk softened and prepared for removal, the next step is to carefully extract it from the bathtub surfaces. This process requires precision and patience to ensure that the old caulk is completely removed without causing damage to the surrounding areas.
-
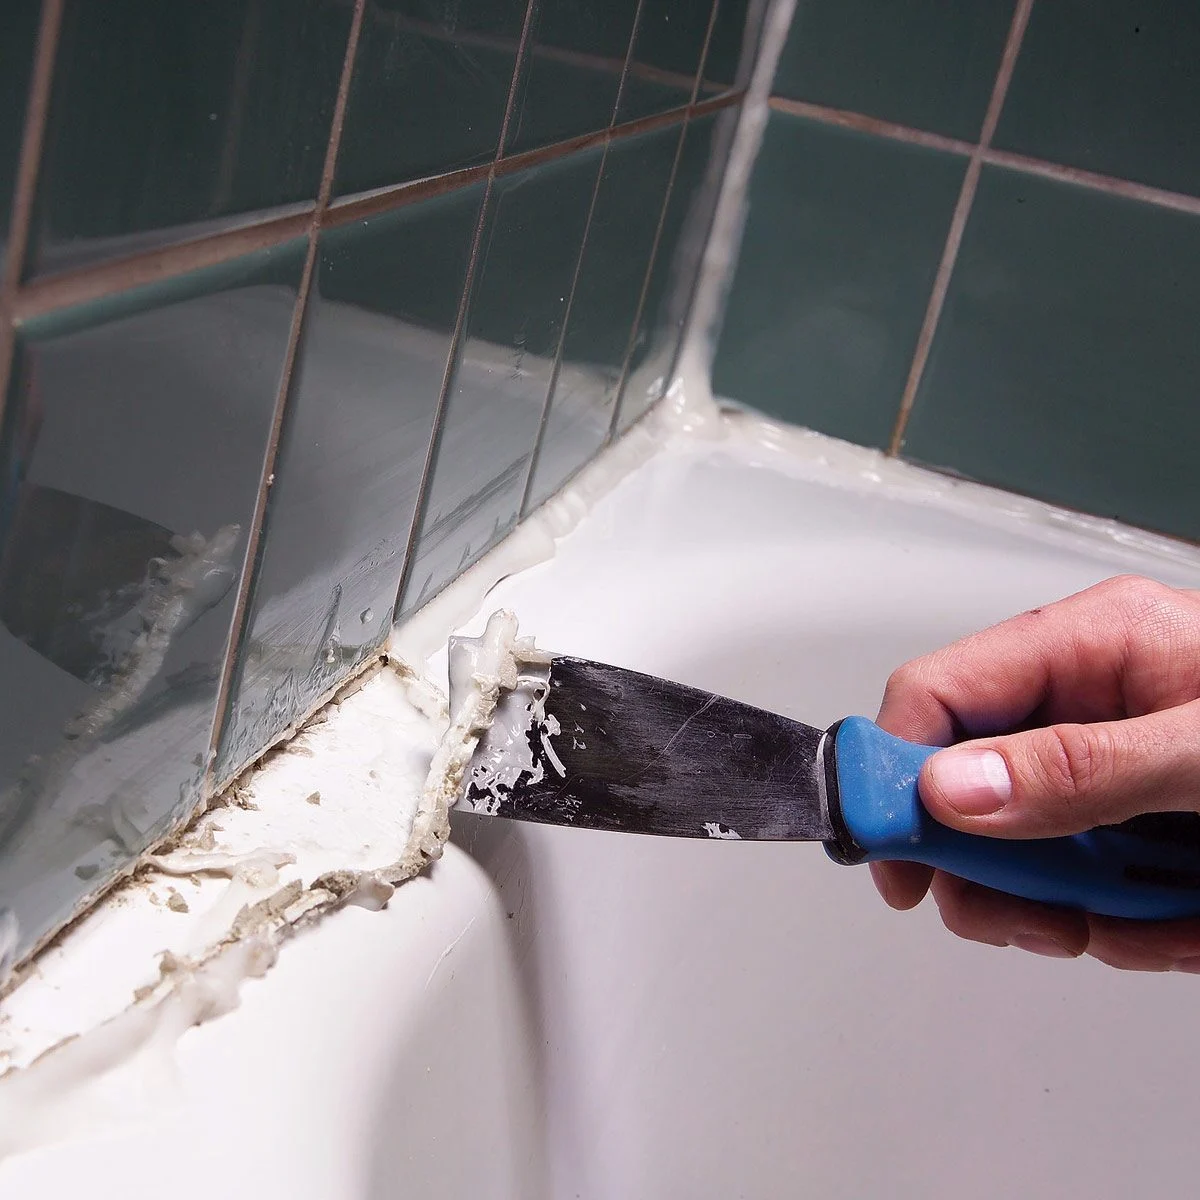
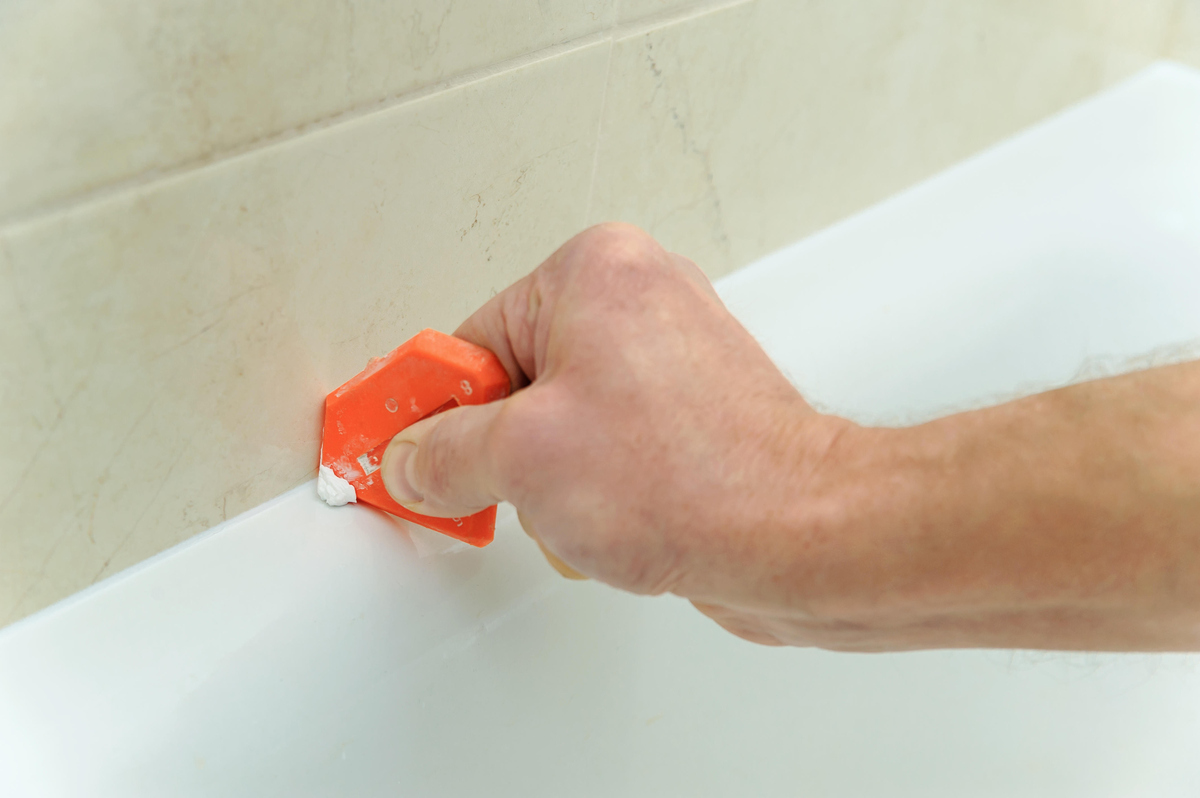
Use the Caulk Removal Tool: Begin by using the caulk removal tool to gently pry and scrape away the softened caulk. Position the tool at a low angle to avoid scratching or gouging the bathtub surface. Apply consistent pressure as you work the tool along the caulk line, gradually loosening and lifting the old caulk from the edges. Take care to remove as much of the old caulk as possible, working methodically to achieve a clean and smooth surface.
-
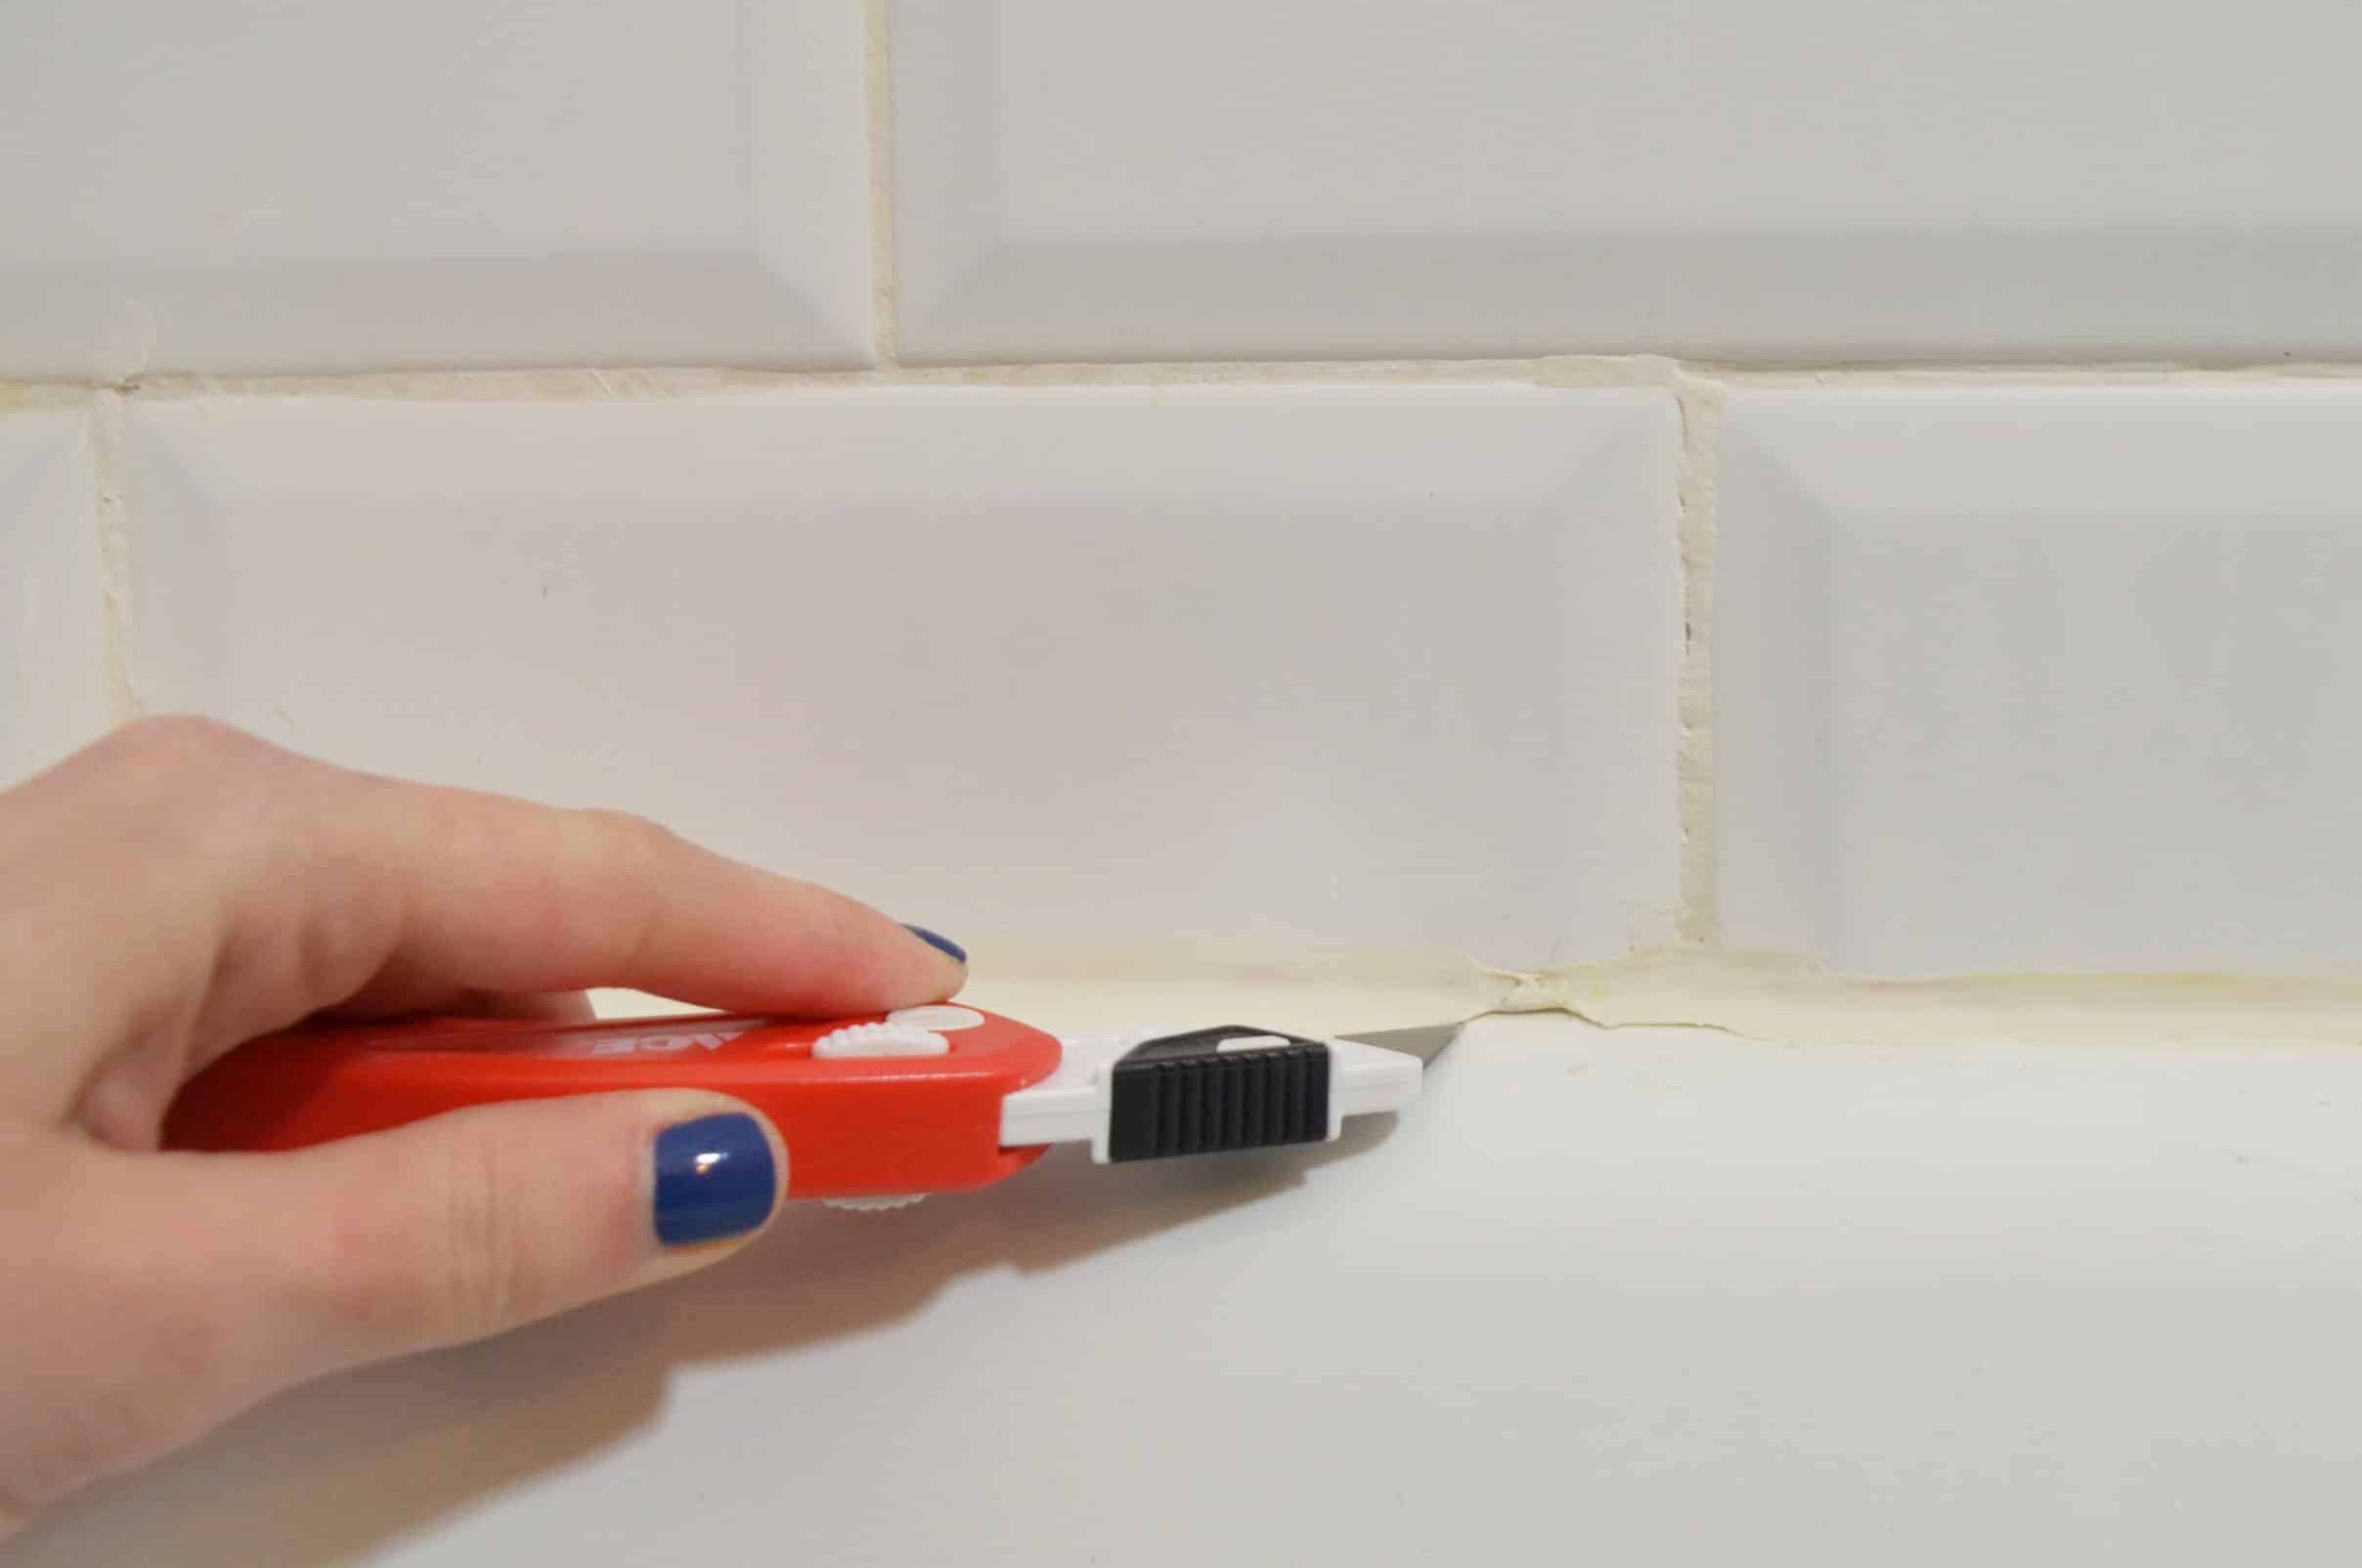
Employ the Utility Knife: In areas where the caulk remains stubborn or adhered tightly, the utility knife can be used to carefully cut through and separate the caulk from the surfaces. Exercise caution when using the utility knife to avoid accidental slips or cuts. By delicately slicing through the remaining caulk, you can further loosen its grip and facilitate its removal.
-
Cleanse the Residual Caulk: After the majority of the old caulk has been removed, use the caulk removal tool or utility knife to scrape away any residual caulk that may be clinging to the bathtub edges. Thoroughly inspect the area to ensure that no remnants of the old caulk remain, as these could hinder the adhesion of the new caulk.
-
Dispose of the Old Caulk: Once the old caulk has been successfully removed, carefully gather and dispose of it in a designated waste receptacle. Properly discarding the old caulk will help maintain a tidy workspace and prevent any potential mess or clutter.
By diligently following these steps, you can effectively remove the old caulk from your bathtub, preparing the surfaces for the next phase of the process. With the old caulk removed, the bathtub is now ready for thorough cleaning and the application of new caulk to achieve a fresh and polished appearance.
Use a utility knife or caulk removal tool to carefully cut and scrape away the old caulk from the bathtub. Be sure to clean the area thoroughly before applying new caulk.
Step 4: Clean the area
After successfully removing the old caulk from your bathtub, it's essential to thoroughly clean the area to ensure that the surfaces are free from any residue, dirt, or debris. A clean and well-prepared surface is crucial for the proper adhesion and longevity of the new caulk, ultimately contributing to a professional and polished finish.
Here's a detailed guide on how to clean the area effectively:
-
Remove Loose Debris: Begin by using a vacuum cleaner or a soft-bristled brush to remove any loose debris, dust, or caulk particles from the bathtub surfaces. Pay close attention to the edges and corners, ensuring that all visible debris is cleared away.
-
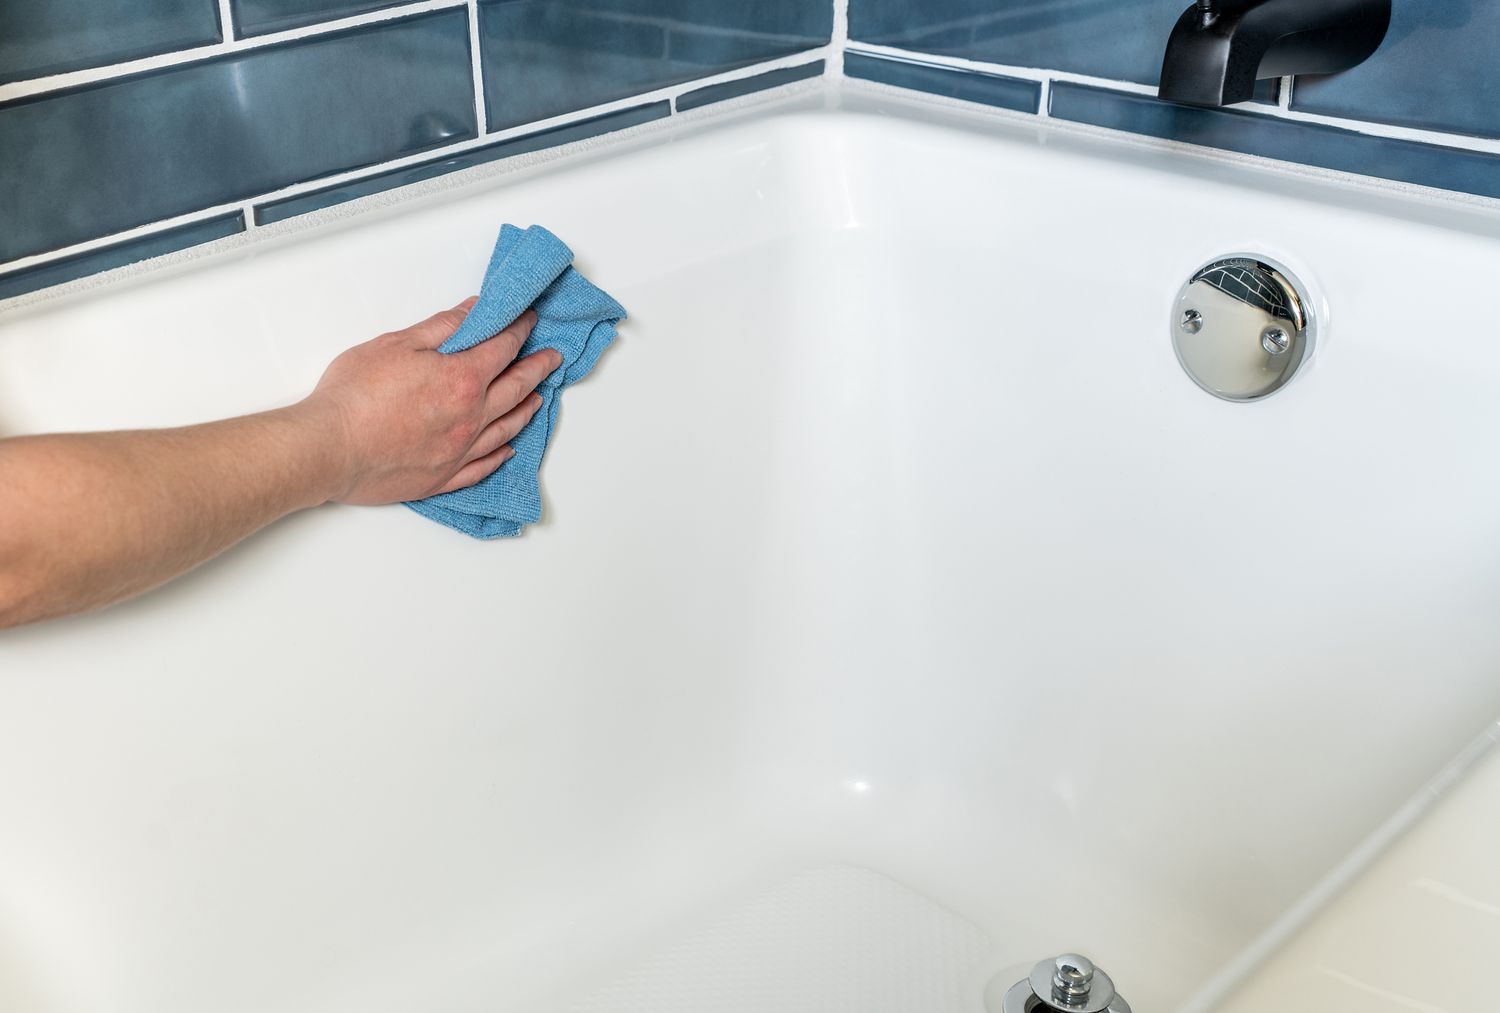
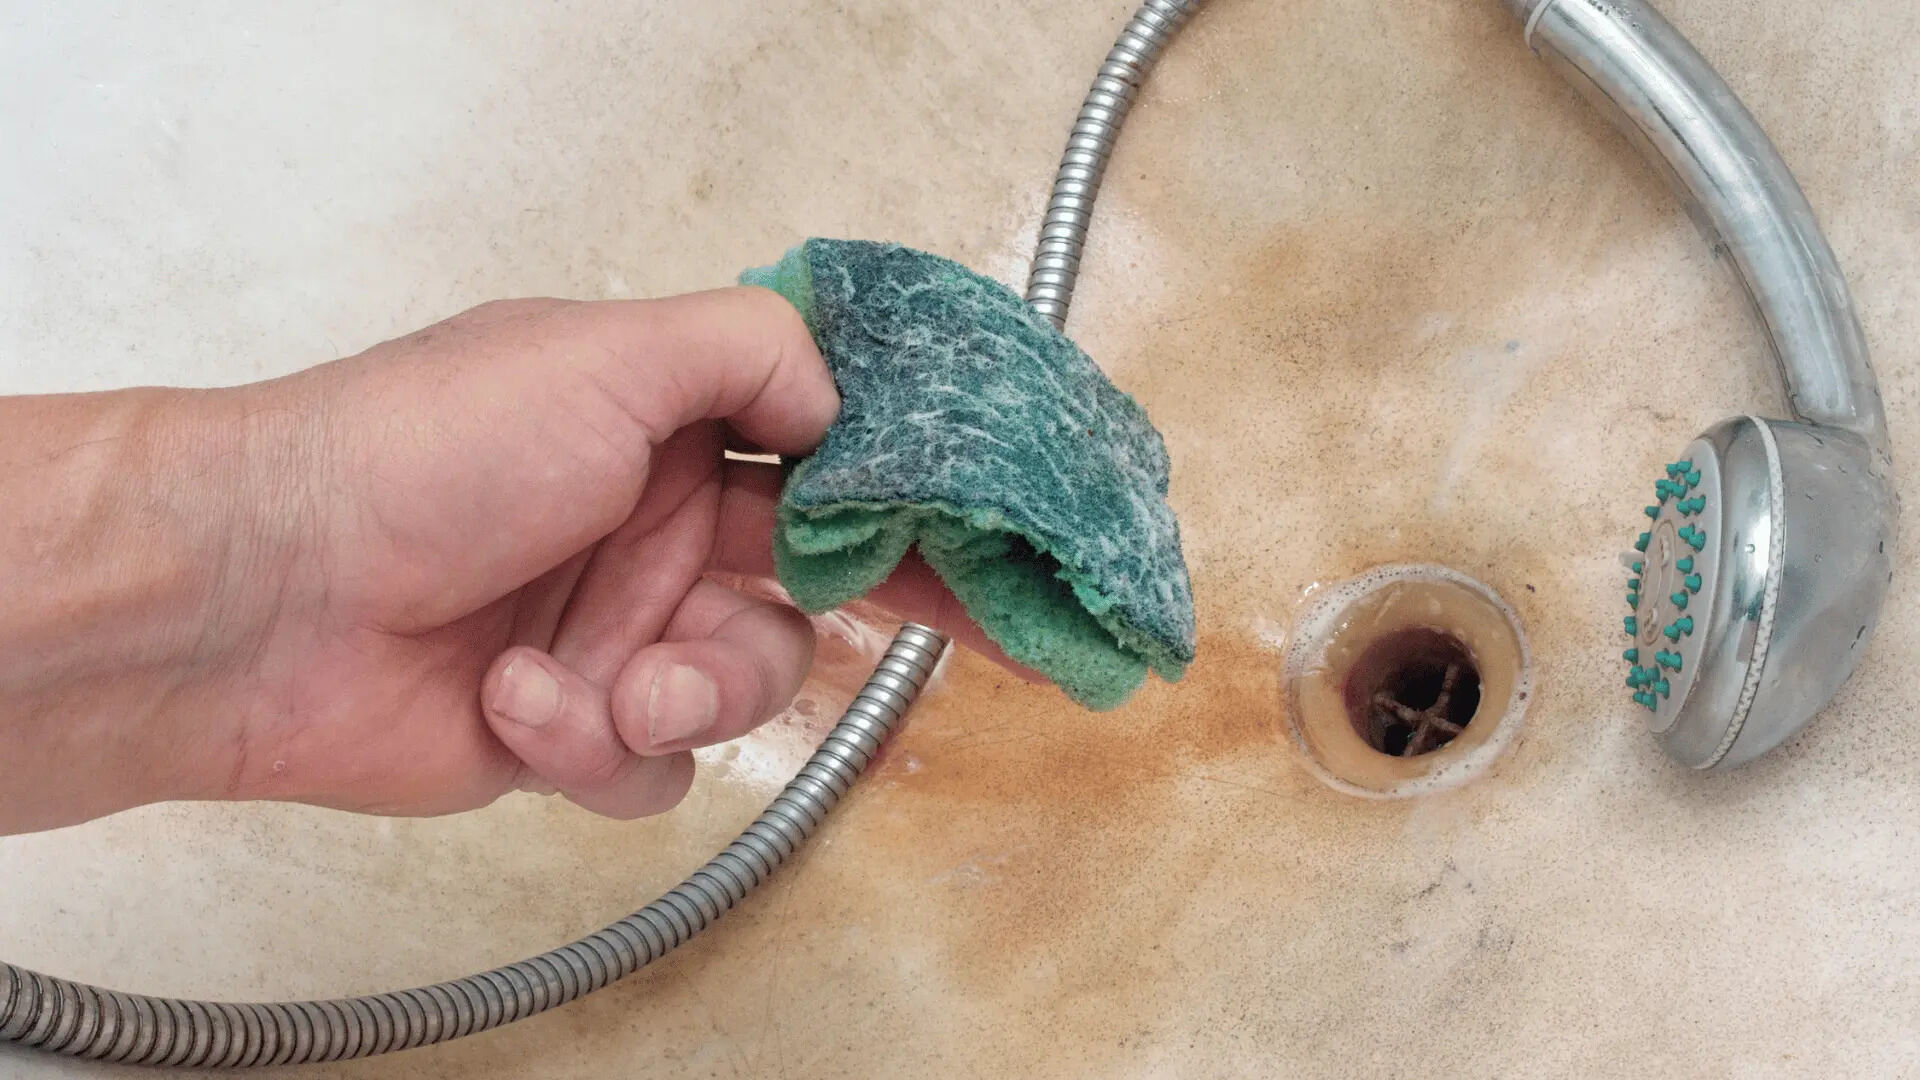
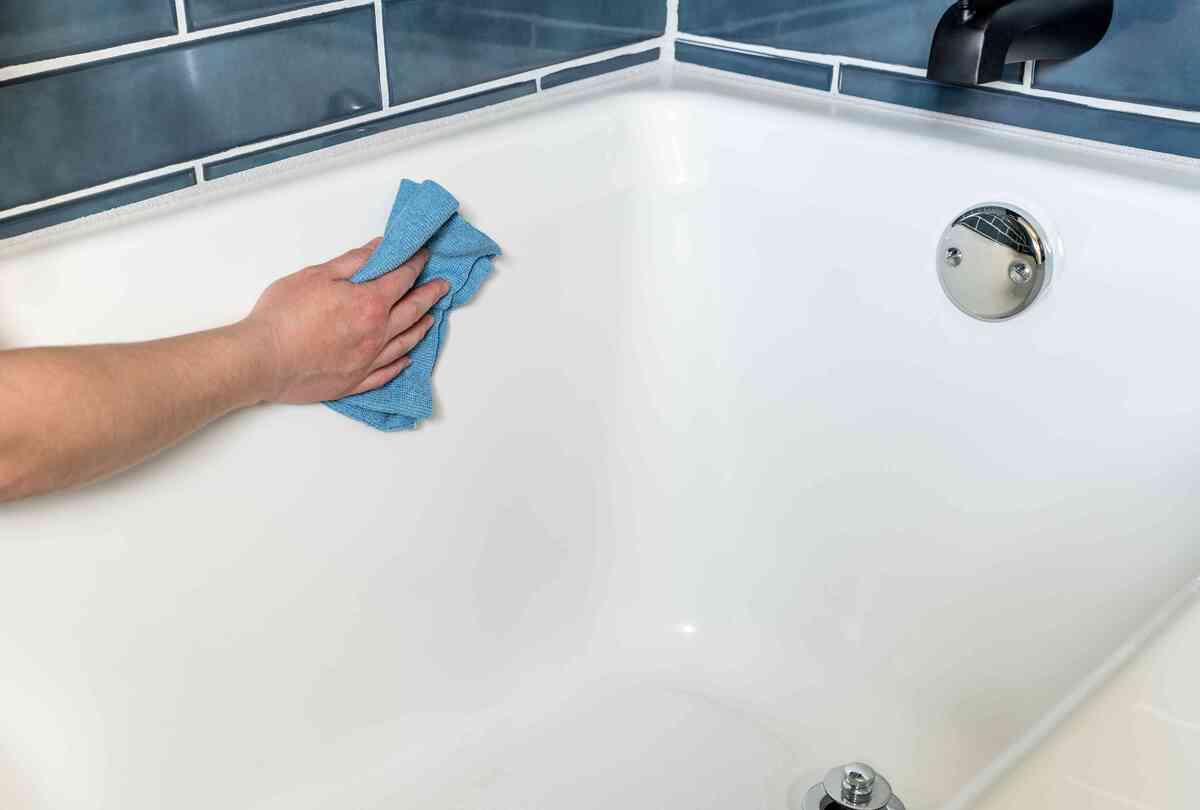
Wipe Down the Surfaces: Use a damp cloth or sponge to wipe down the bathtub surfaces, removing any remaining traces of old caulk, dust, or grime. For stubborn residue, consider using a mild detergent or a solution of water and white vinegar to gently scrub the surfaces, ensuring that they are clean and free from any contaminants.
-
Rinse and Dry: Once the surfaces have been wiped down, thoroughly rinse the bathtub with clean water to remove any cleaning solution or detergent residue. Use a clean towel or cloth to dry the surfaces, ensuring that they are completely free from moisture before proceeding to the next step.
-
Apply Rubbing Alcohol: To further prepare the surfaces for the new caulk, apply rubbing alcohol or denatured alcohol to a clean cloth and wipe down the areas where the old caulk was removed. This step will help to remove any remaining oils, residues, or contaminants, creating an optimal surface for the new caulk to adhere to.
-
Inspect for Cleanliness: Take a moment to inspect the cleaned surfaces, ensuring that they are free from any remaining debris, residue, or moisture. A clean and dry surface is essential for the successful application of the new caulk, so be thorough in your inspection.
By diligently cleaning the area after removing the old caulk, you are setting the stage for a successful application of the new caulk. A clean and well-prepared surface will promote strong adhesion and a professional-looking finish, ensuring that your bathtub maintains its aesthetic appeal and functionality for the long term.
Read more: How To Remove An Old Bathtub Spout
Step 5: Apply new caulk
With the old caulk successfully removed and the bathtub surfaces thoroughly cleaned, the final step in revitalizing your bathtub is to apply new caulk. This crucial stage not only enhances the visual appeal of the bathtub but also plays a significant role in preventing water leakage and maintaining the integrity of the surrounding areas.
Here's a detailed guide on how to apply new caulk effectively:
-
Select the Right Caulk: When choosing a new caulk for your bathtub, opt for a high-quality silicone or acrylic caulk that is specifically formulated for wet environments. Look for a caulk that is mold and mildew resistant, as this will help to prolong the lifespan of the application and maintain a clean appearance over time.
-
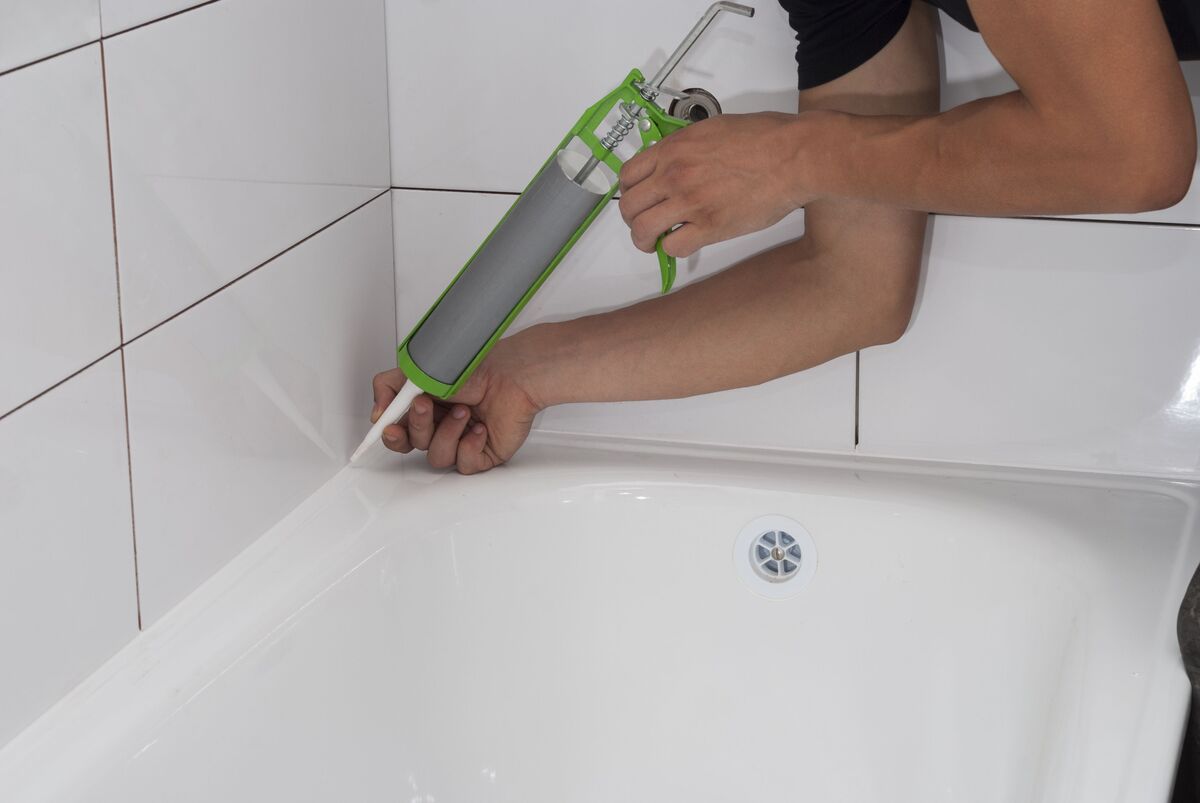
Prepare the Caulk Gun: Load the caulk tube into a caulk gun, ensuring that the nozzle is cut at a 45-degree angle to facilitate smooth and controlled application. If using a squeeze tube, pierce the seal at the tip of the nozzle with a nail or a similar tool, allowing the caulk to flow freely when pressure is applied.
-
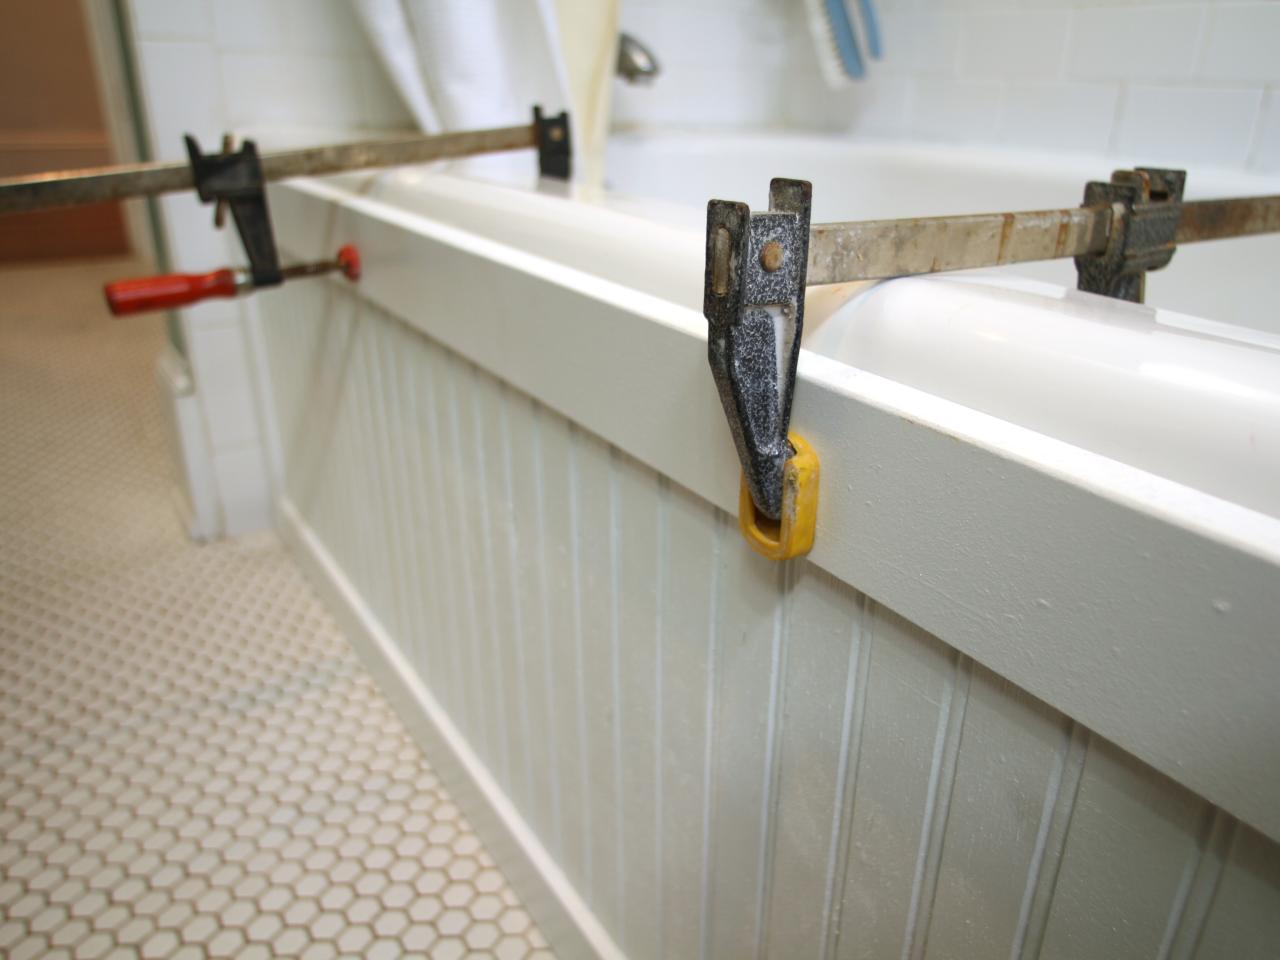
Apply the New Caulk: Starting at one end of the bathtub, carefully apply a steady bead of caulk along the seam where the tub meets the wall or the surrounding tiles. Use consistent pressure on the caulk gun or squeeze tube to ensure an even application, moving steadily along the seam to create a continuous line of caulk.
-
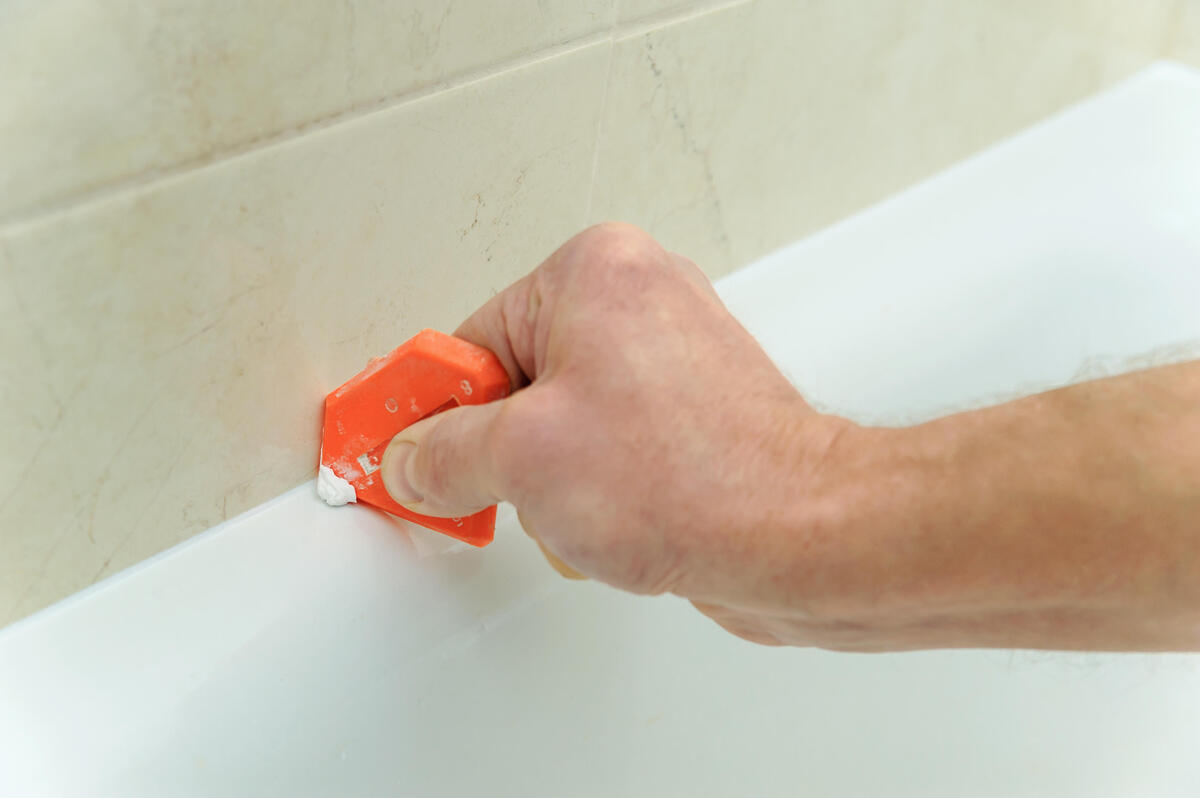
Smooth and Shape the Caulk: Once the caulk has been applied, use a caulk finishing tool or a moistened finger to smooth and shape the bead of caulk. Work in small sections, applying gentle pressure to create a neat and uniform finish. Ensure that the caulk is firmly pressed into the seam, creating a watertight seal.
-
Remove Excess Caulk: After shaping the caulk, use a damp cloth or sponge to remove any excess caulk from the bathtub surfaces and surrounding areas. Wipe away any smudges or stray caulk to achieve a clean and polished appearance.
-
Allow the Caulk to Cure: After applying the new caulk, allow it to cure according to the manufacturer's instructions. This typically involves avoiding water exposure for a specified period, ensuring that the caulk sets and adheres properly to the surfaces.
By following these steps, you can effectively apply new caulk to your bathtub, creating a clean, watertight seal that enhances the overall appearance and functionality of the bathroom. The application of new caulk not only revitalizes the bathtub but also contributes to the long-term maintenance and durability of the surrounding areas, ensuring a visually appealing and well-maintained bathroom space.
Conclusion
In conclusion, the process of removing old caulk from a bathtub and applying new caulk is a transformative and essential aspect of maintaining a clean, hygienic, and visually appealing bathroom. By following the step-by-step guide outlined in this comprehensive tutorial, you have gained the knowledge and skills needed to revitalize your bathtub with a fresh application of caulk. From gathering the necessary tools to applying the new caulk, each stage of the process is crucial to achieving a successful outcome.
Removing old caulk from a bathtub requires patience, precision, and the right tools. By softening the old caulk using heat or a chemical caulk remover, you can facilitate its removal without damaging the surrounding surfaces. The careful extraction of the old caulk, followed by thorough cleaning of the area, sets the stage for the application of new caulk. The final step of applying new caulk not only enhances the visual appeal of the bathtub but also plays a significant role in preventing water leakage and maintaining the integrity of the surrounding areas.
The successful application of new caulk creates a clean, watertight seal that enhances the overall appearance and functionality of the bathroom. Opting for a high-quality silicone or acrylic caulk that is specifically formulated for wet environments ensures long-term durability and resistance to mold and mildew. By following the recommended techniques for applying and shaping the new caulk, you can achieve a professional-looking finish that contributes to the long-term maintenance and durability of the bathroom space.
By investing time and effort into removing old caulk and applying new caulk, you are not only enhancing the aesthetic appeal of your bathtub but also contributing to the overall cleanliness and functionality of your bathroom. The revitalized bathtub will serve as a focal point of your bathroom, exuding a sense of cleanliness and well-maintained hygiene. Additionally, the proper application of new caulk helps prevent potential water damage and ensures the longevity of the surrounding areas.
In essence, the process of removing old caulk from a bathtub and applying new caulk is a valuable skill that empowers you to maintain a clean and visually appealing bathroom space. With the knowledge and techniques acquired from this guide, you are well-equipped to tackle this essential home maintenance task with confidence and achieve professional results. Embrace the opportunity to transform your bathtub into a pristine and visually inviting element of your bathroom, and enjoy the long-lasting benefits of a well-maintained and hygienic living space.
Frequently Asked Questions about How To Remove Old Caulking From Bathtub
Was this page helpful?
At Storables.com, we guarantee accurate and reliable information. Our content, validated by Expert Board Contributors, is crafted following stringent Editorial Policies. We're committed to providing you with well-researched, expert-backed insights for all your informational needs.

0 thoughts on “How To Remove Old Caulking From Bathtub”