Home>Furniture & Design>Bathroom Accessories>How To Make Toilet Seat Covers
Bathroom Accessories
How To Make Toilet Seat Covers
Modified: August 16, 2024
Learn how to make your own toilet seat covers with our easy step-by-step guide. Find out how to personalize your bathroom accessories and add a touch of style. Perfect for DIY enthusiasts and those looking to spruce up their bathroom decor.
(Many of the links in this article redirect to a specific reviewed product. Your purchase of these products through affiliate links helps to generate commission for Storables.com, at no extra cost. Learn more)
Introduction
Are you tired of the plain and uninspiring look of your toilet seat? Do you want to add a touch of style and comfort to your bathroom? Making your own toilet seat cover is a fantastic way to personalize your bathroom space while also adding a practical and cozy element to your toilet. With just a few materials and some basic sewing skills, you can create a custom toilet seat cover that not only fits perfectly but also complements your bathroom decor.
By crafting your own toilet seat cover, you have the freedom to choose the fabric that best suits your style and preferences. Whether you prefer a soft and plush material for a luxurious feel or a durable and easy-to-clean fabric for practicality, the possibilities are endless. Additionally, creating a homemade toilet seat cover allows you to customize the size and shape to perfectly fit your toilet seat, ensuring a snug and secure fit.
Not only does a homemade toilet seat cover add a personal touch to your bathroom, but it also serves a functional purpose. It provides a comfortable and hygienic surface to sit on, especially during the colder months when a chilly toilet seat can be quite unwelcoming. Furthermore, a well-crafted toilet seat cover can help protect the toilet seat from wear and tear, extending its lifespan and maintaining its appearance.
In this comprehensive guide, we will walk you through the step-by-step process of creating your own toilet seat cover. From measuring the toilet seat to sewing the elastic and attaching the fabric, you will learn the essential techniques to bring your vision to life. So, gather your materials and let's embark on this creative and practical journey to make your bathroom a more inviting and personalized space.
Key Takeaways:
- Personalize your bathroom by making a custom toilet seat cover with your favorite fabric. It adds style, comfort, and protection to your toilet while showcasing your creativity and attention to detail.
- Crafting your own toilet seat cover allows you to choose the perfect fabric and create a snug, secure fit. It’s a fun and practical DIY project that adds a personalized touch to your bathroom decor.
Read more: How To Use A Toilet Seat Cover
Materials Needed
To embark on the exciting project of making your own toilet seat cover, you will need a few essential materials to bring your creative vision to life. Here's a detailed list of the items required to craft a custom toilet seat cover:
-
Fabric: Select a fabric that suits your preferences and complements your bathroom decor. Consider factors such as comfort, durability, and ease of maintenance when choosing the fabric. Opt for a soft and plush material for a luxurious feel or a durable, easy-to-clean fabric for practicality.
-
Elastic: Choose a high-quality elastic band that is strong and flexible. The elastic will ensure a snug and secure fit for the toilet seat cover, preventing it from slipping or shifting during use.
-
Measuring Tape: A measuring tape is essential for accurately measuring the dimensions of your toilet seat. This will ensure that the fabric is cut to the correct size for a perfect fit.
-
Scissors: A pair of sharp scissors is necessary for cutting the fabric to the desired dimensions. Ensure that the scissors are suitable for cutting fabric to achieve clean and precise edges.
-
Sewing Machine or Needle and Thread: Depending on your preference and sewing skills, you will need either a sewing machine or a needle and thread to sew the elastic and attach the fabric. A sewing machine can expedite the process, while hand-sewing allows for a more personalized touch.
-
Pins: Sewing pins are useful for securing the fabric and elastic in place before sewing. They help prevent the fabric from shifting during the sewing process, ensuring accurate and neat stitching.
-
Iron and Ironing Board: An iron and ironing board are essential for pressing the fabric and creating crisp, wrinkle-free edges. This step is crucial for achieving a professional-looking finish.
-
Optional Embellishments: If desired, you can consider adding embellishments such as decorative trims, buttons, or embroidery to personalize the toilet seat cover and enhance its aesthetic appeal.
By gathering these materials, you will be well-equipped to embark on the creative and practical journey of making your own custom toilet seat cover. With these essential items at your disposal, you can proceed to the next steps with confidence, knowing that you have everything you need to bring your vision to fruition.
Step 1: Measure the Toilet Seat
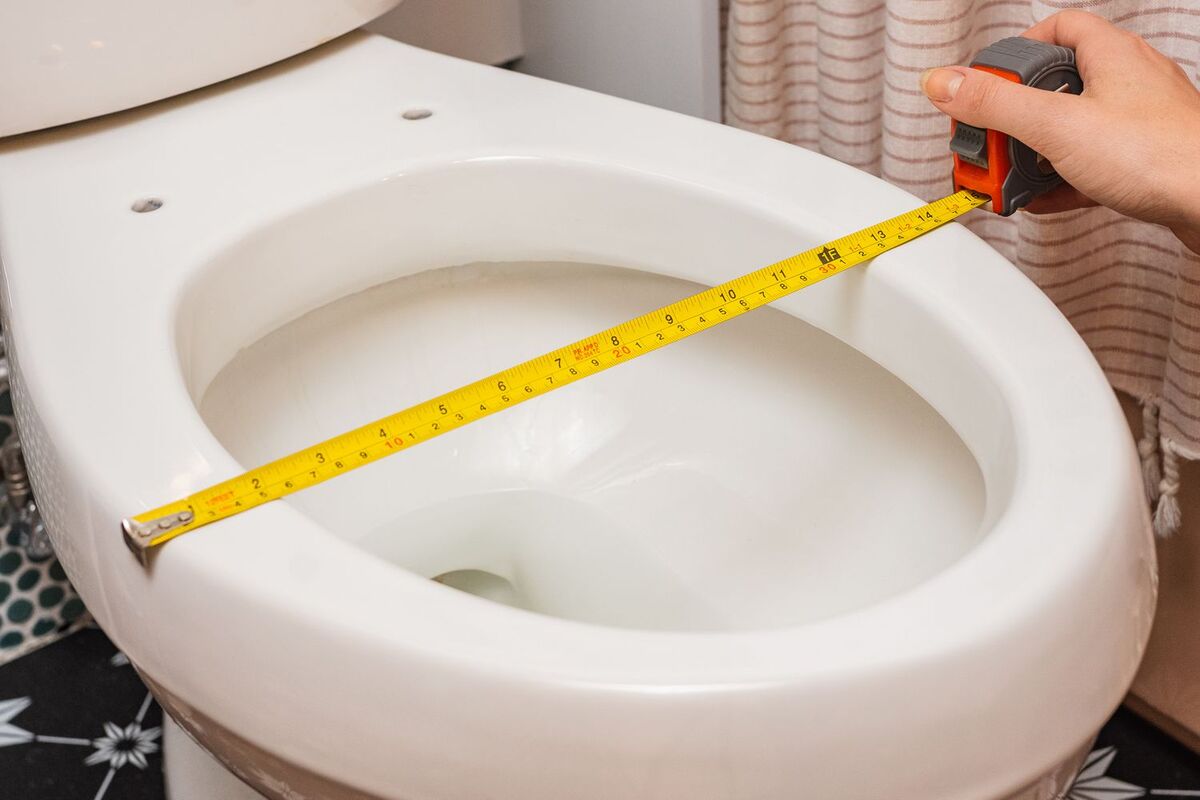
The first crucial step in creating a custom toilet seat cover is to accurately measure the dimensions of your toilet seat. This step ensures that the fabric is cut to the correct size, resulting in a snug and precise fit. To begin, gather your measuring tape and carefully measure the length and width of the toilet seat. Start by measuring the length from the front of the seat to the back, following the curve of the seat to capture its shape accurately. Next, measure the width from one side of the seat to the other, ensuring that the tape is taut but not stretched.
Once you have obtained the measurements, it is essential to add allowances for the fabric. A general rule of thumb is to add an extra 2 inches to both the length and width measurements to accommodate the seam allowance and ensure a comfortable fit. These additional inches will provide room for the fabric to wrap around the edges of the toilet seat, allowing for a neat and secure finish.
After adding the necessary allowances, double-check the measurements to ensure accuracy. It is advisable to measure the toilet seat at least twice to verify the dimensions and avoid any discrepancies. Precision at this stage is key to achieving a well-fitted and professional-looking toilet seat cover.
Upon confirming the measurements, transfer the dimensions onto the chosen fabric using a fabric marker or chalk. Carefully mark the outline of the toilet seat cover, ensuring that the added allowances are accounted for. This step sets the foundation for the subsequent cutting and sewing processes, guiding the precise shaping of the fabric to match the contours of the toilet seat.
By meticulously measuring the toilet seat and adding allowances for the fabric, you are laying the groundwork for a tailored and perfectly fitting toilet seat cover. This attention to detail ensures that the subsequent steps in creating the cover proceed smoothly, resulting in a final product that not only enhances the aesthetics of your bathroom but also provides a comfortable and functional addition to your toilet.
Step 2: Cut the Fabric
With the precise measurements of the toilet seat cover outlined on the chosen fabric, it's time to proceed to the next crucial step: cutting the fabric. Using a pair of sharp scissors, carefully cut along the marked outline, ensuring clean and straight edges. It is essential to exercise caution and precision during this process to achieve accurately shaped fabric pieces that align with the dimensions of the toilet seat.
As you cut the fabric, pay attention to maintaining a consistent distance from the marked outline, incorporating the added allowances for seam allowance and a secure fit. Smooth, even cuts are vital to ensure that the fabric wraps neatly around the edges of the toilet seat, creating a polished and professional finish.
Additionally, consider the fabric's pattern and direction while cutting to achieve a visually appealing result. If the fabric features a specific pattern or grain, ensure that the pieces are cut in alignment with the intended design orientation. This attention to detail contributes to a cohesive and aesthetically pleasing toilet seat cover that seamlessly integrates with your bathroom decor.
Once the fabric pieces are cut to the correct dimensions, take a moment to inspect the edges for any unevenness or irregularities. If necessary, trim any excess fabric to refine the shape and ensure a consistent fit. This meticulous approach to cutting the fabric sets the stage for the subsequent sewing and assembly processes, laying the groundwork for a well-crafted and tailored toilet seat cover.
By carefully cutting the fabric according to the measured dimensions and pattern orientation, you are one step closer to bringing your custom toilet seat cover to fruition. The precision and attention to detail applied during this stage are integral to achieving a high-quality and personalized addition to your bathroom space. With the fabric pieces now prepared, you are ready to progress to the next steps of sewing the elastic and attaching the fabric, further refining the toilet seat cover's fit and appearance.
When making toilet seat covers, be sure to use a durable and water-resistant material to ensure they last longer and are easy to clean. Additionally, consider adding elastic or adjustable straps to ensure a snug fit on the toilet seat.
Step 3: Sew the Elastic
Sewing the elastic is a pivotal step in the process of creating a custom toilet seat cover, as it ensures a snug and secure fit that prevents shifting or slippage during use. To begin, gather the fabric piece cut to the dimensions of the toilet seat and the high-quality elastic selected for the project.
Lay the fabric piece on a flat surface with the wrong side facing up. Position the elastic along the edges of the fabric, aligning it with the outer perimeter. Using sewing pins, secure the elastic in place at intervals, ensuring that it lies flat against the fabric and follows the contours of the toilet seat cover.
Next, set up your sewing machine with a suitable thread color or prepare a needle and thread for hand-sewing, depending on your preferred method. Begin sewing the elastic to the fabric, starting at one end and maintaining a consistent seam allowance. A zigzag stitch is recommended for sewing the elastic to the fabric, as it provides flexibility and durability, allowing the elastic to stretch and retract without compromising the stitching.
As you sew, gently stretch the elastic to match the length of the fabric, ensuring that it is evenly distributed along the edges. This technique creates a gathered effect, allowing the elastic to contract and conform to the shape of the toilet seat when the cover is in place. Continue sewing around the entire perimeter of the fabric, securing the elastic with neat and even stitches.
Once the elastic is securely attached to the fabric, reinforce the stitching at the starting and ending points to ensure durability and longevity. Trim any excess thread and carefully remove the sewing pins. As you complete this step, take a moment to inspect the sewn elastic for consistency and smoothness, ensuring that it is securely fastened to the fabric without any bunching or irregularities.
By sewing the elastic to the fabric with precision and attention to detail, you are establishing the foundation for a well-fitted and functional toilet seat cover. The elastic's secure attachment ensures that the cover remains in place, providing a comfortable and hygienic surface for everyday use. With the elastic sewn in place, you are now prepared to proceed to the next step of attaching the fabric to the elastic, bringing the toilet seat cover closer to completion.
Read more: What Are Toilet Seat Covers For
Step 4: Attach the Fabric to the Elastic
With the elastic securely sewn to the fabric, the next pivotal step in creating a custom toilet seat cover is to attach the fabric to the elastic. This process involves carefully securing the fabric to the gathered elastic, ensuring a snug and tailored fit that conforms to the contours of the toilet seat.
Begin by positioning the fabric piece with the right side facing up, aligning it with the gathered elastic. The elastic, now serving as the foundation for the cover's secure fit, should be evenly distributed along the edges of the fabric. As you align the fabric and elastic, take care to ensure that the edges of the fabric neatly encapsulate the elastic, creating a seamless and polished appearance.
Using sewing pins, carefully secure the fabric to the elastic at intervals, maintaining an even distribution and tautness. This step is crucial for ensuring that the fabric remains aligned with the elastic throughout the attachment process, preventing any shifting or misalignment.
Once the fabric is securely pinned to the elastic, prepare your sewing machine or needle and thread for the attachment process. Begin sewing the fabric to the elastic, starting at one end and maintaining a consistent seam allowance. A zigzag stitch is recommended for this step, as it provides flexibility and durability, allowing the fabric to stretch and retract in unison with the elastic.
As you sew, guide the fabric and elastic through the machine or with your hand-sewing technique, ensuring that the stitches are neat and even. This meticulous approach contributes to a secure and professional attachment, preventing any potential fraying or detachment over time.
Continue sewing around the entire perimeter of the fabric, securing it to the elastic with precision and attention to detail. As you approach the starting point, reinforce the stitching to ensure durability and longevity, and carefully trim any excess thread.
Upon completing the attachment process, remove the sewing pins and inspect the fabric's secure alignment with the elastic. Ensure that the attachment is smooth and consistent, with the fabric neatly encapsulating the elastic for a polished and tailored finish.
By attaching the fabric to the elastic with precision and care, you are one step closer to completing your custom toilet seat cover. The secure and tailored fit achieved through this process ensures that the cover remains in place, providing a comfortable and hygienic surface for everyday use. With the fabric now securely attached to the elastic, your personalized toilet seat cover is nearing completion, ready to add a touch of style and comfort to your bathroom space.
Step 5: Finish the Edges
After attaching the fabric to the elastic, the final step in creating a custom toilet seat cover involves finishing the edges to achieve a polished and professional appearance. This crucial stage adds a refined touch to the cover, ensuring that the fabric edges are neatly sealed and free from fraying, enhancing the overall durability and aesthetics of the cover.
To begin, carefully inspect the edges of the fabric to identify any raw or exposed edges that require finishing. Using a suitable thread color that complements the fabric, set up your sewing machine or prepare a needle and thread for hand-sewing, depending on your preferred method. Select a narrow zigzag stitch on your sewing machine to neatly encase the raw edges, preventing fraying and providing a clean and durable finish.
Starting at one end of the fabric, guide the edges through the machine or with your hand-sewing technique, ensuring that the stitches encapsulate the raw edges securely. Maintain a consistent seam allowance as you work your way around the entire perimeter of the fabric, paying close attention to achieving even and precise stitching.
As you finish the edges, take care to reinforce the stitching at the starting and ending points to ensure durability and longevity. This additional reinforcement contributes to the overall strength of the finished edges, preventing any potential unraveling or fraying over time.
Once the edges are neatly finished, take a moment to inspect the entire perimeter of the fabric for consistency and smoothness. Ensure that the finished edges are uniform and free from any irregularities, contributing to a polished and professional appearance.
Upon completing the edge finishing process, trim any excess thread and carefully remove any remaining sewing pins. Take a final moment to admire your handiwork, appreciating the meticulous attention to detail that has resulted in a well-crafted and personalized toilet seat cover.
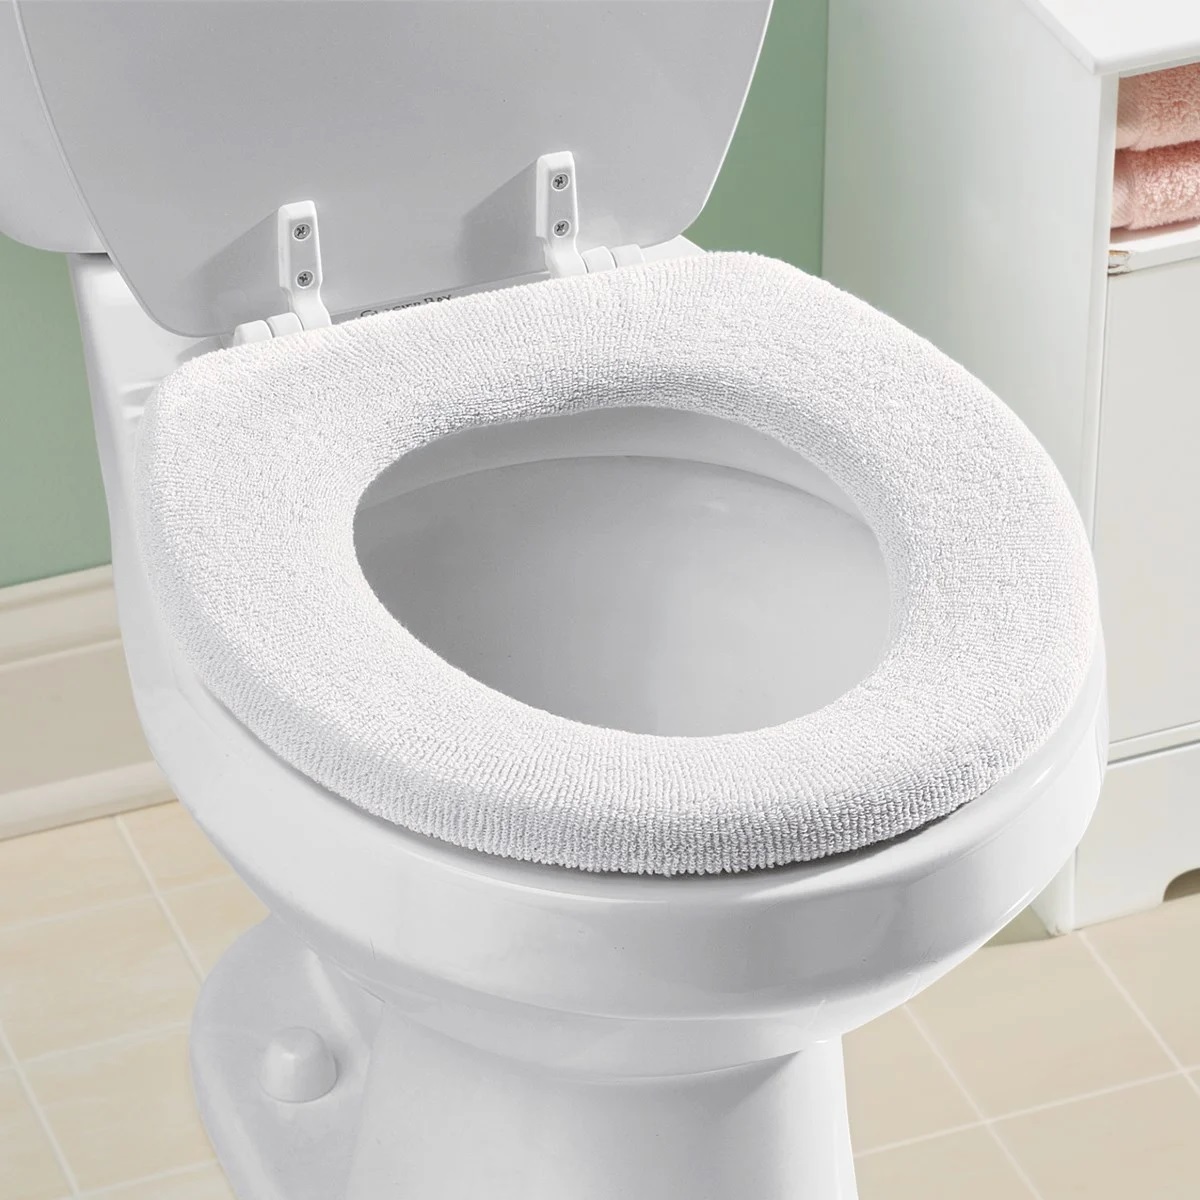
By finishing the edges with precision and care, you have elevated the overall quality and appearance of the custom toilet seat cover. The neatly sealed edges not only enhance the cover's durability but also contribute to its aesthetic appeal, creating a refined and polished addition to your bathroom space. With the edges now expertly finished, your personalized toilet seat cover is ready to be placed on the toilet seat, adding a touch of style and comfort to your bathroom.
Conclusion
In conclusion, creating your own custom toilet seat cover is a rewarding and practical endeavor that allows you to infuse your personal style into your bathroom while enhancing comfort and functionality. By following the step-by-step process outlined in this guide, you have embarked on a creative journey that culminates in a tailored and personalized addition to your bathroom space.
Crafting a homemade toilet seat cover empowers you to select the perfect fabric that aligns with your preferences, whether it's a soft and plush material for a luxurious feel or a durable, easy-to-clean fabric for practicality. The ability to choose the fabric's color, pattern, and texture enables you to harmonize the cover with your bathroom decor, adding a cohesive and personalized touch to the space.
Moreover, the meticulous measurements, precise cutting, and expert sewing techniques employed in this process ensure that the toilet seat cover fits snugly and securely, providing a comfortable and hygienic surface for everyday use. The addition of high-quality elastic and the careful attachment of the fabric contribute to a cover that remains in place, offering both practical functionality and aesthetic appeal.
By finishing the edges with attention to detail, you have elevated the overall quality and appearance of the custom toilet seat cover. The neatly sealed edges not only enhance the cover's durability but also contribute to its aesthetic appeal, creating a refined and polished addition to your bathroom space.
The custom toilet seat cover you have created is a testament to your creativity and craftsmanship, serving as a unique and functional accent in your bathroom. Whether you've chosen a fabric that complements your existing decor or adds a pop of color and personality, your homemade toilet seat cover reflects your individual style and attention to detail.
As you place the finished cover on your toilet seat, take pride in the fact that you have transformed a mundane household item into a personalized and inviting element of your bathroom. Your custom toilet seat cover not only adds a touch of style and comfort but also showcases your ability to craft practical and aesthetically pleasing solutions.
In essence, the process of making a toilet seat cover is not just about creating a functional item; it's about infusing your living space with your unique personality and creativity. Embrace the satisfaction of completing this DIY project and enjoy the comfort and style that your custom toilet seat cover brings to your bathroom.
Frequently Asked Questions about How To Make Toilet Seat Covers
Was this page helpful?
At Storables.com, we guarantee accurate and reliable information. Our content, validated by Expert Board Contributors, is crafted following stringent Editorial Policies. We're committed to providing you with well-researched, expert-backed insights for all your informational needs.


0 thoughts on “How To Make Toilet Seat Covers”