Home>Furniture & Design>Bathroom Accessories>How To Put A New Toilet Seat On
Bathroom Accessories
How To Put A New Toilet Seat On
Modified: October 20, 2024
Learn how to easily install a new toilet seat in your bathroom with our step-by-step guide. Upgrade your bathroom accessories today!
(Many of the links in this article redirect to a specific reviewed product. Your purchase of these products through affiliate links helps to generate commission for Storables.com, at no extra cost. Learn more)
Introduction
Installing a new toilet seat may seem like a daunting task, but with the right tools and a clear set of instructions, it can be a straightforward and rewarding DIY project. Whether you're looking to upgrade your bathroom's aesthetics, replace a worn-out seat, or simply give your toilet a fresh new look, learning how to put a new toilet seat on is a valuable skill for any homeowner or renter.
In this comprehensive guide, we will walk you through the step-by-step process of replacing a toilet seat. From gathering the necessary tools and materials to securing the new seat in place, each stage will be explained in detail to ensure a smooth and successful installation. By following these instructions, you can transform the look and functionality of your bathroom with minimal effort and cost.
So, roll up your sleeves, gather your tools, and let's dive into the process of putting a new toilet seat on. With a little patience and attention to detail, you'll have a brand-new toilet seat installed in no time, bringing a fresh and inviting feel to your bathroom space.
Key Takeaways:
- Replacing a toilet seat is a simple DIY project that can transform your bathroom’s look. Just gather tools, remove the old seat, clean, position the new one, and secure it for a fresh, updated feel.
- Installing a new toilet seat not only improves aesthetics but also reflects your dedication to maintaining a clean and personalized living space. It’s a small change with a big impact on your home.
Read more: Why Put A Red Cup Under A Toilet Seat
Step 1: Gather the necessary tools and materials
Before embarking on the task of replacing a toilet seat, it's essential to gather all the required tools and materials. Having the right equipment at hand will streamline the installation process and ensure a successful outcome. Here's a comprehensive list of items you'll need:
Tools:
- Adjustable Wrench: This versatile tool will be essential for loosening and tightening the nuts securing the toilet seat in place.
- Screwdriver: Depending on the type of fasteners used, you may need a flathead or Phillips head screwdriver to remove the old seat and install the new one.
- Safety Gloves: Protect your hands with a pair of gloves, especially when handling old or potentially dirty components.
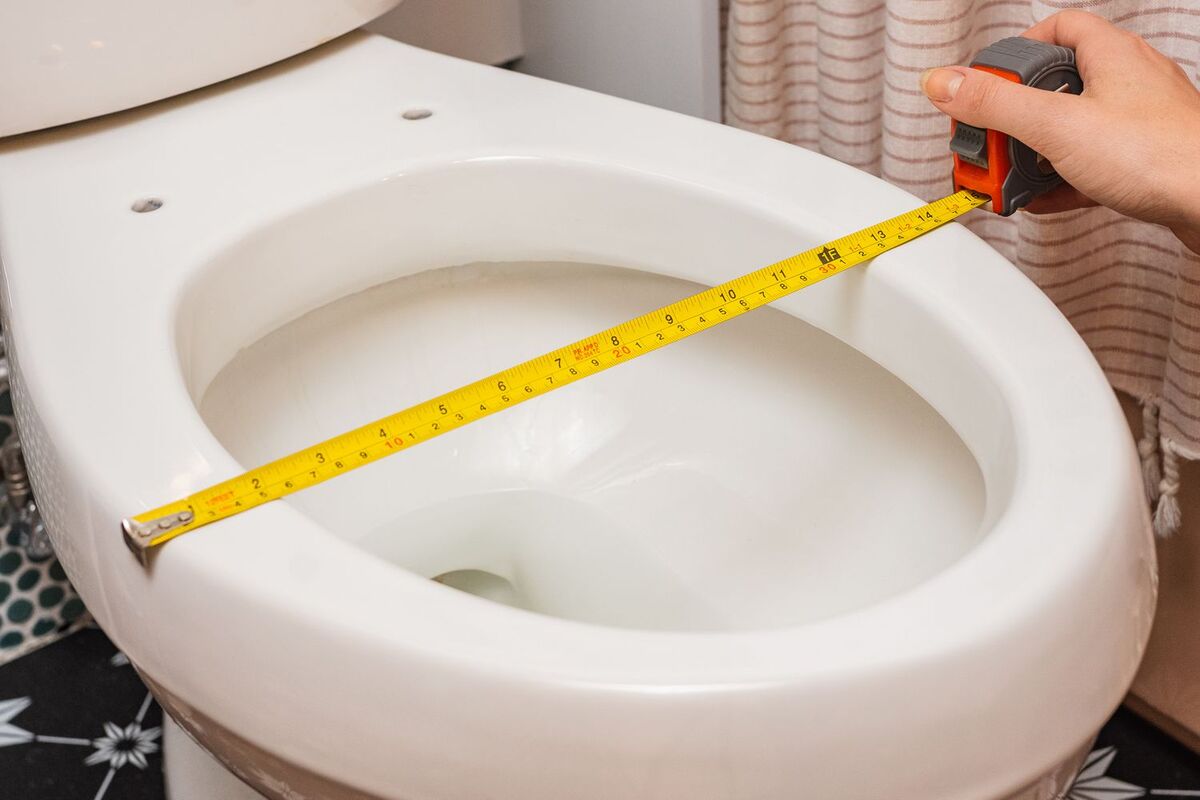
- Measuring Tape: To ensure the new toilet seat aligns properly with the bowl, a measuring tape will come in handy for accurate placement.
Materials:
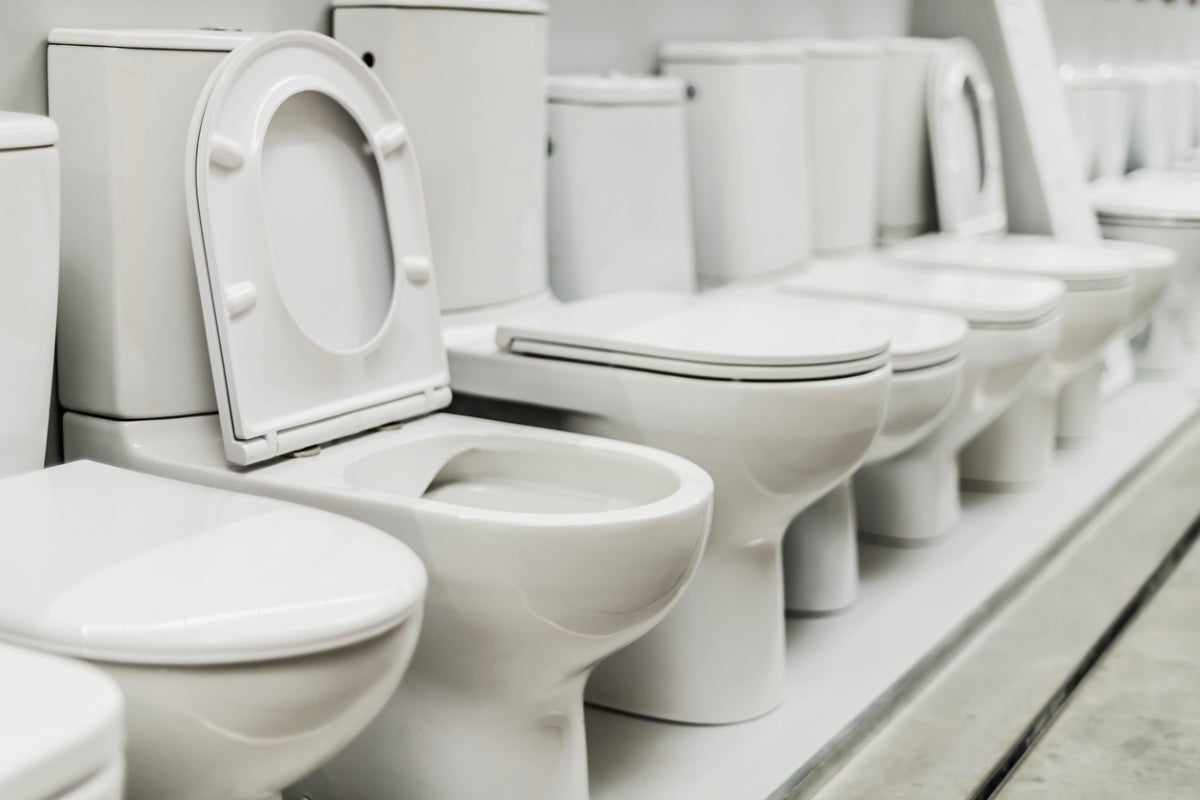
- New Toilet Seat: Select a toilet seat that matches the shape and size of your toilet bowl. Whether you prefer a standard round seat or an elongated one, ensure it's compatible with your toilet model.
- Replacement Fasteners: If the new seat doesn't come with its own set of fasteners, you may need to purchase these separately. Check the packaging to confirm if they are included.
- Cleaning Supplies: Before installing the new seat, it's a good idea to have some disinfectant or bathroom cleaner on hand to thoroughly clean the toilet bowl and surrounding area.
- Optional: Lubricant or Penetrating Oil: If the old seat's bolts are stubborn and difficult to remove, having a lubricant or penetrating oil can make the removal process easier.
By gathering these tools and materials, you'll be well-prepared to tackle the task of replacing your toilet seat. With everything at your disposal, you can proceed to the next steps with confidence, knowing that you have everything needed to complete the installation efficiently and effectively.
Step 2: Remove the old toilet seat
Removing the old toilet seat is the crucial first step in the process of installing a new one. Before you begin, it's a good idea to put on your safety gloves to protect your hands from any dirt or grime that may have accumulated over time. Here's a detailed guide on how to remove the old toilet seat:
-
Locate the Fasteners: Depending on the type of toilet seat, you'll find either plastic caps or visible bolts securing the seat to the toilet bowl. Lift up the seat and inspect the area to identify the fasteners.
-
Unscrew the Fasteners: Using a screwdriver or wrench, carefully unscrew the nuts or bolts holding the seat in place. In some cases, the fasteners may be concealed under plastic caps, which can be pried off with a flathead screwdriver to reveal the securing hardware.
-
Lift and Remove the Seat: Once the fasteners are loosened, gently lift the old seat and carefully remove it from the toilet bowl. Be mindful of any residual adhesive or grime that may be present, and have a cleaning cloth or paper towels on hand to wipe down the area.
-
Dispose of the Old Seat: After successfully removing the old seat, place it aside for disposal. Depending on your local regulations, the old seat may be recyclable or require specific disposal methods. Check with your local waste management guidelines for proper disposal instructions.
-
Clean the Area: With the old seat removed, take this opportunity to thoroughly clean the toilet bowl and surrounding area. Use a disinfectant or bathroom cleaner to ensure that the surface is free from any residue or buildup, creating a clean foundation for the installation of the new seat.
By following these steps, you can safely and effectively remove the old toilet seat, preparing the toilet bowl for the installation of the new seat. With the old seat out of the way and the area cleaned, you're now ready to proceed to the next stage of the installation process.
Step 3: Clean the toilet bowl
After removing the old toilet seat, it's essential to thoroughly clean the toilet bowl to ensure a hygienic and pristine surface for the installation of the new seat. Cleaning the toilet bowl not only enhances the aesthetics of your bathroom but also contributes to a healthier and more pleasant environment. Here's a detailed guide on how to clean the toilet bowl effectively:
-
Gather Cleaning Supplies: Before starting the cleaning process, gather the necessary cleaning supplies. You'll need a toilet bowl cleaner or disinfectant specifically designed for toilet surfaces, a toilet brush, and a pair of rubber gloves to protect your hands.
-
Apply the Cleaner: Squeeze the toilet bowl cleaner around the rim of the bowl, allowing it to flow down the sides and cover the entire interior surface. Ensure that the cleaner reaches under the rim and into the water to target any hidden grime or stains.
-
Scrub the Interior: Using a toilet brush, vigorously scrub the interior of the toilet bowl, focusing on areas with visible stains or discoloration. Pay particular attention to the waterline and the bottom of the bowl, as these areas are prone to buildup and require thorough cleaning.
-
Clean Under the Rim: To effectively clean under the rim, insert the toilet brush and scrub the concealed areas where bacteria and mineral deposits may accumulate. Rotating the brush and applying pressure will help dislodge any stubborn residue.
-
Let the Cleaner Sit: After scrubbing, allow the cleaner to sit in the bowl for the recommended duration as indicated on the product label. This dwell time allows the cleaning solution to effectively break down stains and disinfect the surface.
-
Flush the Toilet: Once the cleaner has had sufficient time to work its magic, flush the toilet to rinse away the cleaning solution and reveal the sparkling clean interior. Repeat the flushing process if necessary to ensure that all traces of the cleaner are removed.
-
Inspect and Touch Up: After flushing, inspect the interior of the toilet bowl to ensure that it's free from any remaining stains or residue. If needed, touch up any areas with a second application of cleaner and scrubbing to achieve a spotless finish.
By following these steps, you can effectively clean the toilet bowl, preparing it for the installation of the new toilet seat. A clean and sanitized toilet bowl not only sets the stage for a successful installation but also contributes to a fresh and inviting bathroom environment. With the toilet bowl cleaned and refreshed, you're now ready to proceed to the next stage of the installation process.
Step 4: Position the new toilet seat
With the old toilet seat removed and the toilet bowl thoroughly cleaned, it's time to position the new toilet seat for installation. Proper positioning is crucial to ensure a secure fit and optimal functionality. Here's a detailed guide on how to position the new toilet seat effectively:
-
Align the Seat: Place the new toilet seat on top of the bowl, aligning it carefully to ensure that it sits evenly and symmetrically. Take note of the alignment of the seat with the front of the bowl, ensuring that it provides a comfortable and balanced seating position.
-
Check the Fit: Verify that the seat aligns properly with the contours of the toilet bowl. For elongated seats, ensure that the front of the seat extends slightly beyond the front edge of the bowl, providing adequate coverage and a comfortable seating area. Similarly, for round seats, confirm that the dimensions match the bowl's shape for a snug fit.
-
Adjust if Necessary: If the seat appears misaligned or doesn't sit flush with the bowl, make minor adjustments as needed. Ensure that the seat's positioning allows for easy access to the fastening points and aligns with the bowl's shape and dimensions.
-
Verify Stability: Test the stability of the seat by gently pressing down on the front and rear sections. A well-positioned seat should feel secure and stable, with minimal movement or rocking. Confirm that the seat remains in place without shifting or sliding during this verification process.
-
Consider Clearance: Check for adequate clearance between the seat and the toilet tank or any surrounding fixtures. Ensure that the seat's positioning allows for unobstructed movement and functionality, without coming into contact with other bathroom elements.
-
Double-Check Alignment: Once the seat is positioned, take a final look to ensure that it aligns symmetrically with the bowl and complements the overall aesthetics of the toilet. Confirm that the seat's shape and size harmonize with the bowl, creating a cohesive and visually appealing appearance.
By following these steps, you can effectively position the new toilet seat, setting the stage for the final stage of securing it in place. A well-aligned seat not only enhances the visual appeal of the toilet but also ensures comfort and functionality for everyday use. With the new seat positioned correctly, you're now ready to proceed to the next crucial step of securing it in place for long-lasting performance.
Before installing a new toilet seat, make sure to measure the distance between the mounting holes on the toilet bowl to ensure the new seat will fit. Then, follow the manufacturer’s instructions for attaching the new seat securely.
Step 5: Secure the new toilet seat in place
Securing the new toilet seat in place is a critical step that ensures stability, longevity, and optimal functionality. Properly fastening the seat to the toilet bowl not only prevents shifting or movement but also contributes to a secure and comfortable seating experience. Here's a detailed guide on how to secure the new toilet seat effectively:
-
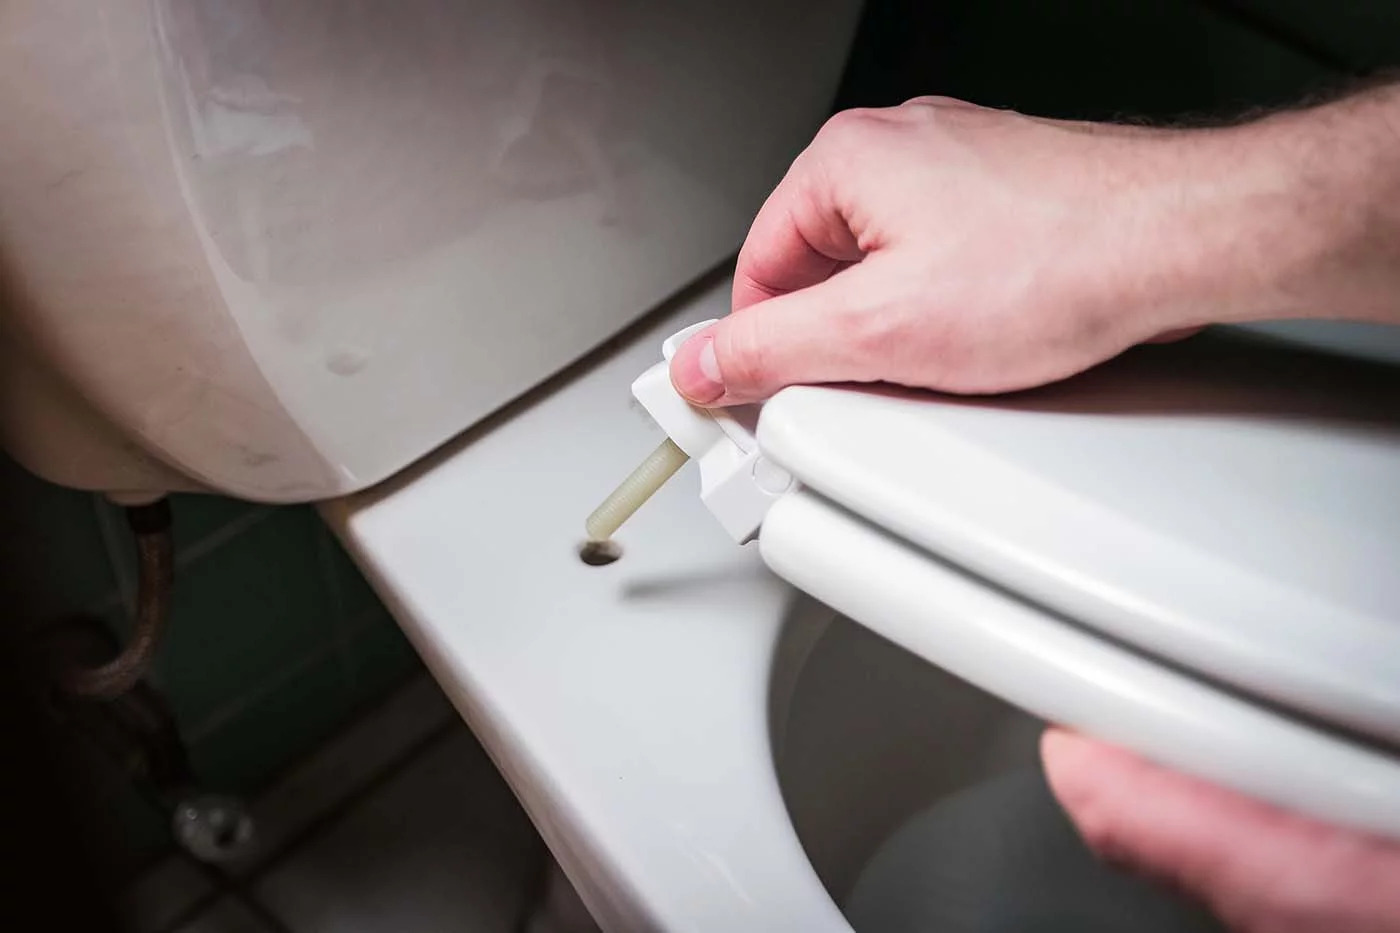
Position the Fasteners: Locate the access points for securing the toilet seat. Depending on the seat's design, you may find pre-installed bolts or access holes for attaching the fasteners. Ensure that the fastening points align with the seat's hinge attachment areas.
-
Insert the Fasteners: If the new seat includes its own set of fasteners, carefully insert them into the designated access points on the toilet bowl. For seats with adjustable hinges, position the fasteners to correspond with the hinge attachment slots.
-
Align the Seat: With the fasteners in place, align the new toilet seat over the bowl, ensuring that the hinge attachment points on the seat align with the inserted fasteners. Verify that the seat sits evenly and symmetrically, providing a comfortable and balanced seating position.
-
Secure the Nuts or Bolts: Using the provided nuts or bolts, fasten the seat to the toilet bowl by securing the fasteners from the underside. Depending on the type of fasteners, use an adjustable wrench or screwdriver to tighten the nuts or bolts, ensuring a snug and secure fit.
-
Adjust for Stability: After securing the fasteners, test the stability of the seat by gently applying pressure to the front and rear sections. Confirm that the seat remains stable and secure, with minimal movement or rocking. Make any necessary adjustments to achieve optimal stability.
-
Check for Leveling: Ensure that the seat sits level and does not tilt to either side. A properly secured seat should maintain a consistent level position, providing a balanced and comfortable seating experience for users.
-
Trim Excess Fastener Length: If the fasteners protrude beyond the nuts or bolts, use a hacksaw or bolt cutter to trim any excess length. This step ensures a clean and tidy appearance while preventing interference with the seat's functionality.
By following these steps, you can effectively secure the new toilet seat in place, ensuring a stable and reliable installation. A securely fastened seat not only enhances the overall functionality of the toilet but also provides peace of mind, knowing that it will withstand daily use with durability and stability. With the new seat securely in place, you've successfully completed the installation process, bringing a fresh and updated look to your bathroom space.
Step 6: Test the new toilet seat
After securing the new toilet seat in place, it's essential to perform a thorough testing process to ensure its functionality, stability, and comfort. Testing the new seat allows you to verify its performance and make any necessary adjustments before finalizing the installation. Here's a detailed guide on how to test the new toilet seat effectively:
-
Stability Assessment: Begin by gently sitting on the newly installed seat to assess its stability. Apply even pressure and check for any movement or shifting. A stable seat should remain firmly in place without wobbling or sliding, providing a secure and reliable seating experience.
-
Lid Functionality: If your toilet seat includes a lid, test its functionality by opening and closing it several times. Verify that the lid operates smoothly without any resistance or misalignment. Confirm that it closes securely and remains in the upright position when lifted.
-
Comfort Evaluation: Sit on the seat for a few moments to evaluate its comfort. Ensure that the seat's contour and dimensions provide a comfortable seating experience. Pay attention to any pressure points or discomfort, as a well-designed seat should offer ergonomic support and a pleasant seating surface.
-
Alignment Confirmation: While seated, visually inspect the alignment of the seat with the toilet bowl. Confirm that the seat sits evenly and symmetrically, aligning with the contours of the bowl. Check for any gaps or misalignments that may indicate an improper fit.
-
Lid and Seat Interaction: If your toilet seat features a slow-close mechanism, test its functionality by gently lowering the lid and seat. Observe the slow-closing action to ensure that it operates smoothly and quietly. Verify that the slow-close feature functions as intended, enhancing safety and convenience.
-
Secure Hinge Assessment: Test the hinges by gently rocking the seat back and forth. Confirm that the hinges provide a secure pivot point without excessive play or looseness. A well-constructed hinge should allow for smooth movement while maintaining stability.
-
Cleaning Accessibility: Consider the ease of cleaning and maintenance. Assess whether the seat's design allows for convenient access to clean the area between the seat and the bowl. A well-designed seat should facilitate easy cleaning and hygiene maintenance.
By following these testing steps, you can ensure that the new toilet seat meets your expectations in terms of stability, comfort, functionality, and ease of maintenance. Address any issues or concerns that arise during the testing process to achieve an optimal seating experience. With the new seat successfully tested and verified, you can enjoy the enhanced comfort and aesthetics it brings to your bathroom space.
Read more: How To Disinfect Toilet Seat
Conclusion
Congratulations on successfully completing the installation of your new toilet seat! By following the step-by-step process outlined in this guide, you've not only transformed the look of your bathroom but also gained valuable DIY skills. As you reflect on the journey from removing the old seat to securing the new one, it's important to appreciate the impact of this seemingly small upgrade.
First and foremost, the process of putting a new toilet seat on is a testament to your ability to take on home improvement projects with confidence and competence. Embracing DIY tasks empowers you to personalize and maintain your living space, fostering a sense of ownership and pride in your home. With the new seat in place, you've made a tangible difference in the functionality and aesthetics of your bathroom, creating a space that reflects your attention to detail and care for your surroundings.
Beyond the practical aspects, the installation of a new toilet seat represents a commitment to cleanliness and hygiene. By thoroughly cleaning the toilet bowl and surrounding area during the process, you've contributed to a healthier and more inviting bathroom environment. The attention to detail and maintenance demonstrated in this project aligns with the broader goal of creating a comfortable and well-maintained living space for yourself and your household.
Furthermore, the successful installation of the new toilet seat serves as a reminder of the transformative power of small changes. While it may seem like a minor upgrade, the impact of a fresh, well-fitted toilet seat extends beyond its utilitarian function. It enhances the overall ambiance of the bathroom, contributing to a sense of renewal and rejuvenation within the space. This serves as a testament to the potential for meaningful improvements through thoughtful and purposeful actions, no matter how seemingly insignificant they may appear.
As you admire the newly installed toilet seat, take a moment to appreciate the sense of accomplishment that comes with completing a home improvement project. Your willingness to engage in hands-on tasks and your commitment to maintaining your living environment are commendable. Whether it's a small upgrade or a larger renovation, each project contributes to the ongoing evolution of your home, reflecting your personal style and care for your living space.
In conclusion, the installation of a new toilet seat is not just a practical task; it's a representation of your dedication to creating a comfortable, clean, and personalized living environment. As you enjoy the refreshed look and functionality of your bathroom, take pride in the skills and attention to detail you've demonstrated throughout this process. Your home is a reflection of your care and creativity, and each improvement, no matter how small, contributes to its overall warmth and welcoming atmosphere.
Frequently Asked Questions about How To Put A New Toilet Seat On
Was this page helpful?
At Storables.com, we guarantee accurate and reliable information. Our content, validated by Expert Board Contributors, is crafted following stringent Editorial Policies. We're committed to providing you with well-researched, expert-backed insights for all your informational needs.


0 thoughts on “How To Put A New Toilet Seat On”