Home>Furniture & Design>Bathroom Accessories>How To Stop Toilet Seat From Coming Loose
Bathroom Accessories
How To Stop Toilet Seat From Coming Loose
Modified: August 30, 2024
Learn how to prevent your toilet seat from becoming loose with our top bathroom accessories. Stop the hassle of constantly tightening the seat and enjoy a secure, stable bathroom experience.
(Many of the links in this article redirect to a specific reviewed product. Your purchase of these products through affiliate links helps to generate commission for Storables.com, at no extra cost. Learn more)
Introduction
A loose toilet seat can be an annoying and frustrating issue that many homeowners encounter. The constant shifting and wobbling can not only be a nuisance but also potentially lead to more serious problems if left unaddressed. Fortunately, with a few simple steps and the right tools, you can easily remedy this common household dilemma. In this comprehensive guide, we will walk you through the process of stopping your toilet seat from coming loose, ensuring a stable and secure fixture in your bathroom.
A loose toilet seat is often caused by wear and tear over time, as well as frequent use. The constant opening and closing of the seat can gradually loosen the hinges and bolts, leading to instability and movement. Additionally, improper installation or inadequate maintenance can contribute to this issue. However, with a proactive approach and the willingness to tackle the problem head-on, you can restore the stability of your toilet seat and prevent further inconvenience.
By following the steps outlined in this guide, you will gain the knowledge and confidence to address the problem effectively. Whether you are a seasoned DIY enthusiast or a novice homeowner looking to take on a simple home improvement task, this guide will equip you with the essential information and techniques to secure your toilet seat firmly in place. With a few basic tools and a systematic approach, you can bid farewell to the frustration of a loose toilet seat and enjoy a stable and reliable fixture in your bathroom.
Now, let's delve into the details of understanding the problem and the tools and materials needed to embark on this practical and rewarding home maintenance project. With a clear understanding of the underlying issues and the necessary resources at your disposal, you will be well-prepared to tackle the task of stopping your toilet seat from coming loose.
Key Takeaways:
- Say goodbye to a wobbly toilet seat by tightening the hinges and bolts with simple tools like a screwdriver and adjustable wrench. Keep your bathroom stable and secure!
- Keep your bathroom comfortable and safe by addressing a loose toilet seat with a few easy steps. Inspect, tighten, and reinstall for a stable fixture.
Read more: How To Stop Rain From Coming In Screen Porch
Understanding the Problem
A loose toilet seat is a common issue that can disrupt the comfort and functionality of your bathroom. When the toilet seat becomes loose, it can shift and wobble, causing inconvenience and potential safety hazards. Understanding the root causes of this problem is crucial in effectively addressing it and preventing its recurrence.
The primary culprits behind a loose toilet seat are often the hinges and bolts that secure it to the toilet bowl. Over time, these components can become worn or loose due to regular use and the natural settling of the toilet fixture. Additionally, if the toilet seat was not installed properly initially, it may be more prone to developing instability over time.
Furthermore, the material of the toilet seat itself can contribute to the problem. Plastic or wooden seats, in particular, may be susceptible to wear and tear, leading to a gradual loosening of the hinges and bolts. Factors such as humidity and temperature fluctuations in the bathroom can also impact the stability of the seat, especially if it is made of a material that is sensitive to environmental conditions.
In some cases, the issue may stem from the toilet bowl itself. If the bowl is not level or if the mounting holes for the seat are not aligned correctly, it can result in an unstable seating surface. Identifying these underlying factors is essential in determining the most effective solution for securing the toilet seat firmly in place.
By gaining a comprehensive understanding of the potential causes of a loose toilet seat, you can approach the problem with clarity and confidence. This knowledge will empower you to take targeted measures to address the specific issues contributing to the instability of the seat. With a clear grasp of the problem at hand, you will be well-equipped to proceed to the next steps of inspecting the hinges and bolts, as well as tightening them to restore the stability of your toilet seat.
Tools and Materials Needed
To effectively address the issue of a loose toilet seat, you will need a few essential tools and materials to facilitate the repair process. By ensuring that you have the following items at your disposal, you can proceed with confidence and efficiency, setting the stage for a successful resolution to the problem.
Tools:
-
Adjustable Wrench: A versatile tool that allows you to tighten bolts and nuts of various sizes, the adjustable wrench is indispensable for securing the hinges and bolts of the toilet seat.
-
Screwdriver: Both a flat-head and a Phillips-head screwdriver may be required, depending on the type of fasteners used to secure the toilet seat. These tools will enable you to remove and reattach the seat with ease.
-
Pliers: Useful for gaining a firm grip on nuts and bolts, pliers can aid in the tightening process, particularly in hard-to-reach areas beneath the toilet bowl.
-
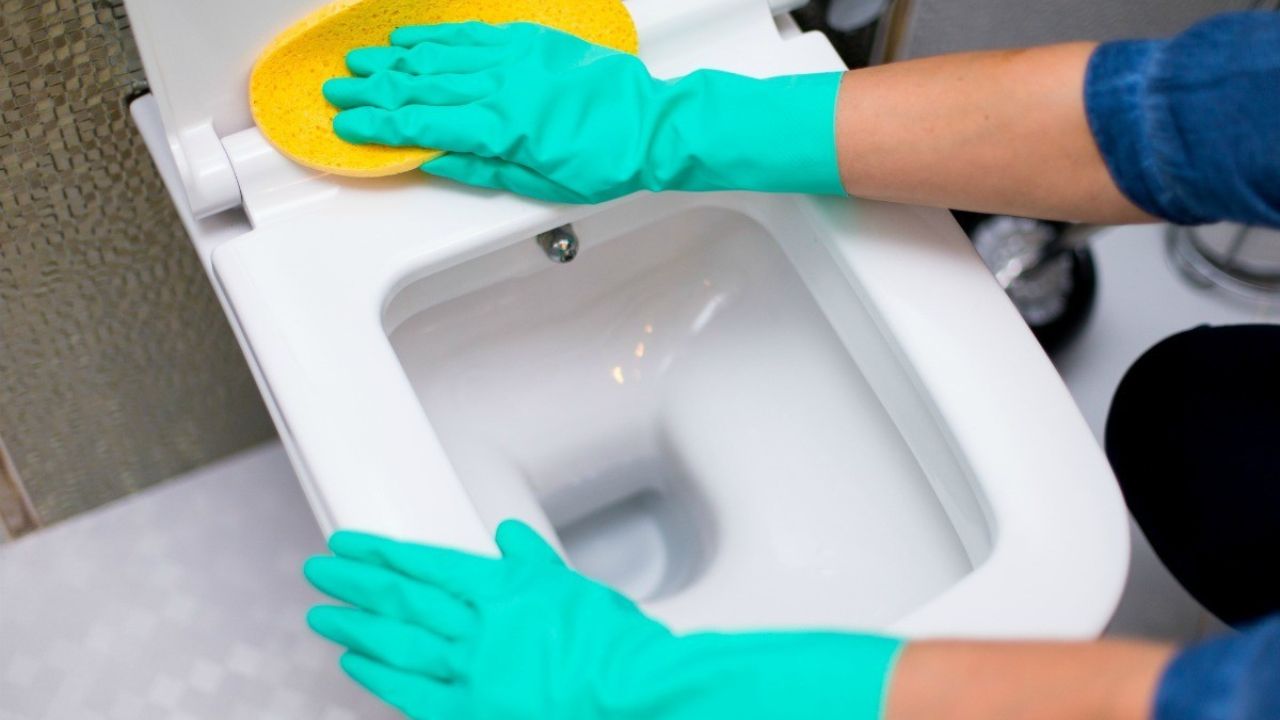
Rubber Gloves: While not a tool in the traditional sense, wearing rubber gloves can protect your hands from dirt, grime, and cleaning agents during the repair process, ensuring a hygienic and comfortable experience.
Materials:
-
Replacement Bolts and Nuts: In some cases, the existing bolts and nuts securing the toilet seat may be worn or damaged. Having replacement hardware on hand will allow you to address any compromised fasteners during the repair.
-
Cleaning Solution: Before reattaching the toilet seat, it is advisable to clean the mounting area and the underside of the seat to ensure a sanitary and secure connection. A mild cleaning solution and a cloth or sponge can be used for this purpose.
-
Lubricant: A silicone-based lubricant can be beneficial for ensuring smooth and secure movement of the hinges. Applying a small amount of lubricant to the hinge mechanisms can help prevent future issues related to friction and stiffness.
-
Safety Glasses: While working with tools and hardware, it is important to prioritize safety. Wearing protective eyewear, such as safety glasses, can shield your eyes from potential debris or splinters during the repair process.
By gathering these tools and materials before embarking on the repair, you will be well-prepared to address the issue of a loose toilet seat effectively. With the necessary resources at your disposal, you can proceed with confidence, knowing that you have everything you need to secure the toilet seat firmly in place.
Step 1: Remove the Toilet Seat
Removing the toilet seat is the initial step in addressing a loose or wobbly fixture. This process allows for a thorough inspection of the hinges and bolts, as well as access to the mounting area on the toilet bowl. By following these steps, you can safely and effectively remove the toilet seat in preparation for the subsequent repair tasks.
-
Gather the Necessary Tools: Before beginning the removal process, ensure that you have the appropriate tools on hand. You will likely need a screwdriver, either flat-head or Phillips-head, depending on the type of fasteners securing the seat. Additionally, having an adjustable wrench or pliers can aid in loosening any stubborn nuts or bolts.
-
Locate the Fasteners: Examine the underside of the toilet seat to locate the fasteners securing it to the toilet bowl. In most cases, these fasteners will be in the form of bolts and nuts, which may be concealed by plastic covers or caps. Use the screwdriver to carefully pry off these covers, revealing the fasteners beneath.
-
Loosen the Fasteners: With the appropriate tool, begin loosening the nuts or screws holding the toilet seat in place. It is advisable to hold the top of the fastener with one hand while turning the nut or screw with the other to prevent the entire fastener from rotating. This will facilitate the controlled removal of the fasteners without causing damage to the toilet bowl or seat.
-
Lift and Remove the Seat: Once the fasteners have been sufficiently loosened, carefully lift the toilet seat away from the toilet bowl. Be mindful of any remaining hardware, such as washers or spacers, that may be present between the seat and the bowl. Set these components aside for inspection and potential replacement.
-
Clean the Mounting Area: With the toilet seat removed, take the opportunity to clean the mounting area on the toilet bowl. Use a mild cleaning solution and a cloth or sponge to remove any accumulated debris or residue. This will ensure a clean and sanitary surface for reinstallation.
By following these steps to remove the toilet seat, you can proceed to the next phase of inspecting the hinges and bolts to identify the underlying causes of the instability. With the seat removed and the mounting area cleaned, you are now ready to address the specific issues contributing to the loose toilet seat and implement targeted solutions for a secure and stable fixture.
Step 2: Inspect the Hinges and Bolts
With the toilet seat successfully removed, the next crucial step in addressing a loose toilet seat is to thoroughly inspect the hinges and bolts. This meticulous examination will provide valuable insights into the underlying causes of the instability, allowing you to identify any worn or damaged components that may be contributing to the problem. By conducting a comprehensive inspection, you can pinpoint the specific areas that require attention and take targeted measures to restore the stability of the toilet seat.
Begin by closely examining the hinges attached to the underside of the toilet seat. Check for any signs of wear, corrosion, or deformation that may compromise the functionality of the hinges. Ensure that the hinge mechanisms move smoothly and without resistance, as stiffness or irregular movement can indicate underlying issues. Additionally, inspect the bolts and nuts that secure the hinges to the toilet seat, paying attention to any looseness or damage that may affect the stability of the connection.
Next, direct your attention to the mounting area on the toilet bowl where the hinges are attached. Assess the condition of the mounting holes and the surrounding surface, looking for any signs of damage, deterioration, or misalignment. It is essential to verify that the mounting area provides a secure and level foundation for reattaching the toilet seat, as any irregularities or instability in this area can contribute to the recurring problem of a loose seat.
During the inspection, take note of any components that show signs of wear or damage, including the hinges, bolts, nuts, and the mounting area. If any hardware appears compromised, consider replacing it with new, high-quality components to ensure a durable and long-lasting repair. Additionally, assess the material of the toilet seat itself, particularly if it is made of plastic or wood, as these materials may be susceptible to wear and deterioration over time.
By meticulously inspecting the hinges, bolts, and the mounting area, you will gain valuable insights into the specific factors contributing to the instability of the toilet seat. This thorough assessment will enable you to proceed with targeted repair measures, addressing the identified issues with precision and effectiveness. With a clear understanding of the condition of the hinges and bolts, you are now prepared to proceed to the next step of tightening these components to restore the stability of the toilet seat securely and reliably.
To stop a toilet seat from coming loose, use a screwdriver to tighten the bolts on the hinges. If the bolts are stripped, replace them with new ones. Apply a thread-locking adhesive to the bolts for extra security.
Step 3: Tighten the Hinges and Bolts
After completing a thorough inspection of the hinges, bolts, and the mounting area, the next critical step in addressing a loose toilet seat is to proceed with tightening the hinges and bolts. This pivotal task involves applying targeted measures to secure the components firmly in place, addressing any looseness or instability that may have been identified during the inspection process.
Begin by using an adjustable wrench or pliers to tighten the nuts and bolts that secure the hinges to the toilet seat. Ensure that the fasteners are snug and secure, providing a firm connection between the hinges and the seat. It is essential to apply even pressure when tightening the fasteners to prevent uneven tension that could contribute to future instability.
As you tighten the hinges, pay close attention to the movement and alignment of the seat. Verify that the seat rests evenly on the toilet bowl and that the hinges facilitate smooth opening and closing without excessive play or wobbling. If necessary, make minor adjustments to the tightness of the fasteners to achieve optimal stability and alignment.
In addition to securing the hinges, it is advisable to inspect the bolts and nuts that attach the hinges to the mounting area on the toilet bowl. Ensure that these fasteners are tightened securely, providing a stable connection between the hinges and the toilet fixture. If any of the bolts or nuts show signs of wear or damage, consider replacing them with new, high-quality hardware to ensure a durable and reliable repair.
During the tightening process, it is important to exercise caution and precision to avoid over-tightening the fasteners, which could potentially damage the components or the toilet bowl. Striking the right balance between firmness and restraint will result in a secure and stable connection that effectively addresses the issue of a loose toilet seat.
By diligently tightening the hinges and bolts, you will implement targeted measures to restore the stability of the toilet seat, mitigating the factors that contribute to wobbling and shifting. This proactive approach will yield a secure and reliable fixture, providing long-term comfort and convenience in your bathroom.
With the hinges and bolts securely tightened, you are now prepared to proceed to the final step of reinstalling the toilet seat, completing the repair process and ensuring a stable and secure fixture in your bathroom.
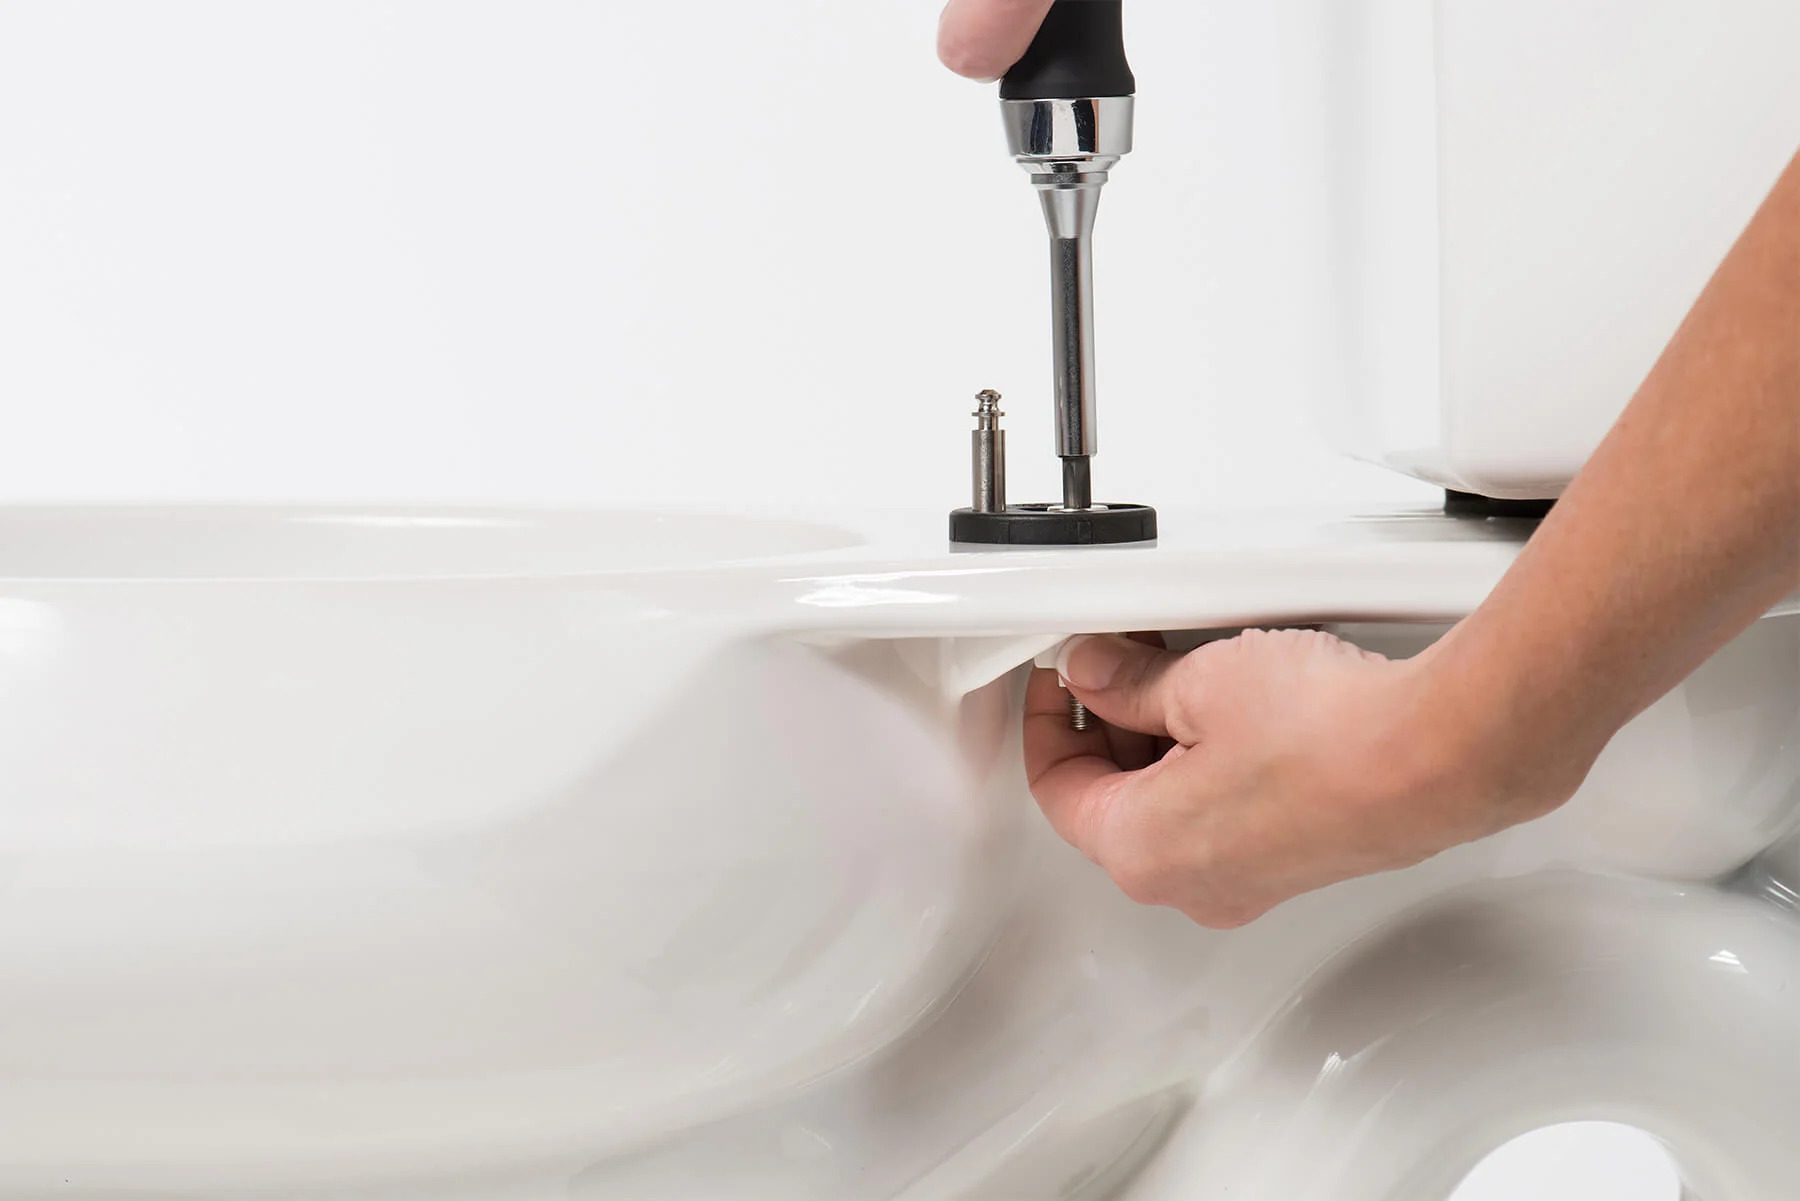
Step 4: Reinstall the Toilet Seat
With the hinges and bolts securely tightened, you are now ready to proceed with the final step of reinstalling the toilet seat. This pivotal task involves carefully positioning the seat on the toilet bowl and securing it firmly in place, ensuring a stable and reliable fixture in your bathroom.
Begin by aligning the hinges on the underside of the toilet seat with the mounting holes on the toilet bowl. Take care to position the seat evenly and squarely, ensuring that it rests securely on the bowl without any tilting or misalignment. Once the hinges are aligned with the mounting holes, gently lower the seat onto the bowl, allowing the fasteners to pass through the holes.
Next, carefully thread the nuts or screws onto the fasteners, securing the hinges to the mounting area on the toilet bowl. Use the appropriate tool, such as an adjustable wrench or screwdriver, to tighten the nuts or screws evenly, ensuring a secure and stable connection. It is important to apply firm but controlled pressure to the fasteners, avoiding over-tightening that could potentially damage the components or the toilet bowl.
As you secure the toilet seat in place, periodically check the alignment and stability of the seat to ensure that it rests evenly on the bowl. Verify that the hinges facilitate smooth movement without any wobbling or shifting, indicating a secure and reliable connection. If necessary, make minor adjustments to the tightness of the fasteners to achieve optimal stability and alignment.
Once the toilet seat is securely reinstalled and properly aligned, give it a gentle test to ensure that it remains stable and firmly in place. Open and close the seat to verify that the hinges function smoothly and that the seat does not shift or wobble during use. This final inspection will confirm that the repair has been successful, providing a stable and reliable fixture in your bathroom.
By completing the process of reinstalling the toilet seat, you have effectively addressed the issue of a loose or wobbly fixture, restoring stability and comfort to your bathroom. With the seat securely in place, you can now enjoy the peace of mind that comes with a well-maintained and reliable toilet fixture, free from the inconvenience of a loose seat.
With the toilet seat reinstalled and the repair process successfully concluded, you can take pride in your proactive approach to addressing a common household issue. By following the steps outlined in this guide and applying targeted repair measures, you have ensured a secure and stable toilet seat, enhancing the comfort and functionality of your bathroom.
Read more: How To Remove Mold From Toilet Seat
Conclusion
In conclusion, addressing a loose toilet seat is a practical and rewarding home maintenance task that can significantly enhance the comfort and functionality of your bathroom. By following the comprehensive steps outlined in this guide, you have gained the knowledge and confidence to effectively stop your toilet seat from coming loose, ensuring a stable and secure fixture in your home.
Through a clear understanding of the underlying causes of a loose toilet seat, you have embarked on a proactive journey to identify and address the specific factors contributing to the instability. By meticulously inspecting the hinges, bolts, and the mounting area, you have gained valuable insights into the condition of the components, enabling you to implement targeted repair measures with precision and effectiveness.
The process of removing the toilet seat, inspecting the hinges and bolts, tightening the components, and reinstalling the seat has equipped you with the essential skills and techniques to address this common household issue. By utilizing the necessary tools and materials, exercising caution and precision, and applying proactive measures, you have successfully restored the stability of your toilet seat, mitigating the inconvenience of a loose or wobbly fixture.
As a result of your proactive approach and diligent efforts, you can now enjoy the peace of mind that comes with a secure and reliable toilet seat. The stable fixture not only enhances the comfort and convenience of your bathroom but also contributes to a well-maintained and functional home environment.
By taking on this practical home improvement task, you have demonstrated your ability to address common household issues with confidence and efficiency. Your proactive approach to maintaining and repairing essential fixtures in your home reflects a commitment to creating a comfortable and functional living space for yourself and your family.
With the knowledge and skills gained from this guide, you are well-prepared to tackle similar home maintenance tasks in the future, empowering you to address household issues with confidence and effectiveness. By applying targeted repair measures and proactive maintenance practices, you can ensure the long-term stability and reliability of essential fixtures in your home, contributing to a comfortable and well-maintained living environment.
In conclusion, by stopping your toilet seat from coming loose, you have not only addressed a common household issue but also demonstrated your proactive approach to maintaining and enhancing your home. With a stable and secure toilet seat, you can now enjoy the comfort and convenience of a well-maintained bathroom, free from the frustration of a loose fixture.
Frequently Asked Questions about How To Stop Toilet Seat From Coming Loose
Was this page helpful?
At Storables.com, we guarantee accurate and reliable information. Our content, validated by Expert Board Contributors, is crafted following stringent Editorial Policies. We're committed to providing you with well-researched, expert-backed insights for all your informational needs.


0 thoughts on “How To Stop Toilet Seat From Coming Loose”