Articles
How To Tighten Toilet To Floor
Modified: October 18, 2024
Learn how to properly tighten a toilet to the floor with these helpful articles. Follow our step-by-step guide for a secure and stable installation.
(Many of the links in this article redirect to a specific reviewed product. Your purchase of these products through affiliate links helps to generate commission for Storables.com, at no extra cost. Learn more)
Introduction
Having a properly secured toilet is essential for a stable and leak-free bathroom. Over time, the bolts that attach the toilet to the floor can become loose, causing the toilet to wobble or leak around the base. This can lead to water damage and unpleasant odors. Fortunately, tightening the toilet to the floor is a relatively simple DIY task that can be easily accomplished with a few basic tools and materials.
In this article, we will guide you through the step-by-step process of tightening your toilet to the floor. By following these instructions, you can ensure that your toilet remains stable and secure, preventing any potential issues down the line.
Before you begin, it is important to gather the necessary tools and materials. This will help facilitate a smooth and efficient process. Here are the required items:
Key Takeaways:
- Ensure a stable and leak-free bathroom by tightening your toilet to the floor using simple DIY steps. Regular maintenance prevents potential water damage and maintains a clean, sanitary environment.
- Gather essential tools and materials such as an adjustable wrench, screwdriver, new wax ring, and silicone caulk to successfully complete the task. Tightening the bolts and testing for stability are crucial steps in creating a secure and watertight connection.
Tools and Materials Needed
- Adjustable wrench
- Screwdriver
- New wax ring
- Rag or towel
- Caulking gun (optional)
- Silicone caulk (optional)
With these tools and materials ready, let’s get started with tightening your toilet to the floor!
Key Takeaways:
- Ensure a stable and leak-free bathroom by tightening your toilet to the floor using simple DIY steps. Regular maintenance prevents potential water damage and maintains a clean, sanitary environment.
- Gather essential tools and materials such as an adjustable wrench, screwdriver, new wax ring, and silicone caulk to successfully complete the task. Tightening the bolts and testing for stability are crucial steps in creating a secure and watertight connection.
Tools and Materials Needed
Before you begin the process of tightening your toilet to the floor, it’s important to gather all the necessary tools and materials. This will help ensure that you have everything you need to successfully complete the task. Here is a list of the items you will need:
1. Adjustable wrench:
An adjustable wrench is a versatile tool that allows you to tighten or loosen bolts of different sizes. It will come in handy when working with the toilet bolts.
2. Screwdriver:
A screwdriver is a basic tool that is used for turning or driving screws. You will need it to remove the screw caps or covers that are hiding the bolts securing the toilet to the floor.
3. New wax ring:
A wax ring is a circular gasket that provides a watertight seal between the toilet and the floor drain. Over time, the wax ring may deteriorate and cause leaks. It’s important to replace it when tightening the toilet to ensure a proper seal.
4. Rag or towel:
Having a rag or towel handy will help keep your work area clean and allow you to wipe away any excess water or debris that may be present during the process.
5. Caulking gun (optional):
If you want to ensure an even more secure and watertight seal, you may choose to use a caulking gun. This tool will help you apply a bead of silicone caulk around the base of the toilet.
6. Silicone caulk (optional):
Silicone caulk is a waterproof sealant that is used to fill gaps and cracks. It can be applied around the base of the toilet to provide an extra layer of protection against leaks and water damage.
By having these tools and materials ready, you’ll be well-equipped to tighten your toilet to the floor smoothly and efficiently. Now that you have everything you need, let’s move on to the step-by-step process of securing your toilet!
Read more: How To Tighten A Soft Close Toilet Seat
Step 1: Remove the Toilet
The first step in tightening your toilet to the floor is to remove it. This will allow you to access the bolts and inspect the wax ring for any damage. Follow the steps below to safely remove the toilet:
1. Shut off the water supply:
Locate the water shut-off valve behind or near the toilet and turn it clockwise to shut off the water flow. Flush the toilet to drain as much water as possible from the tank and bowl.
2. Disconnect the water supply line:
Using an adjustable wrench, loosen the nut connecting the water supply line to the bottom of the toilet tank. Once loosened, gently pull the supply line away from the tank and place a rag or towel underneath to catch any remaining water.
3. Remove the caps covering the bolts:
Locate the plastic caps or covers on each side of the toilet base. They are usually located near the floor and can be pried off with a screwdriver. Set aside the caps for later use.
4. Loosen the nuts:
Using an adjustable wrench, loosen the nuts that secure the toilet bolts to the floor. Loosen them gradually and alternate between the two sides to prevent any uneven pressure.
5. Lift and remove the toilet:
With the nuts loosened, carefully lift the toilet straight up to detach it from the floor. It may be helpful to have a helper assist you in lifting, as toilets can be heavy. Place the toilet on a towel or rag to avoid scratching the floor.
6. Inspect the wax ring:
Once the toilet is removed, inspect the wax ring that sits between the toilet flange and the bottom of the toilet. Look for any signs of damage or wear, such as cracks or sagging. If the wax ring is in poor condition, it’s recommended to replace it with a new one.
By following these steps, you have successfully removed the toilet and are ready to move on to the next phase of tightening and securing it to the floor. Ensure that the area is clean and free from any debris before proceeding.
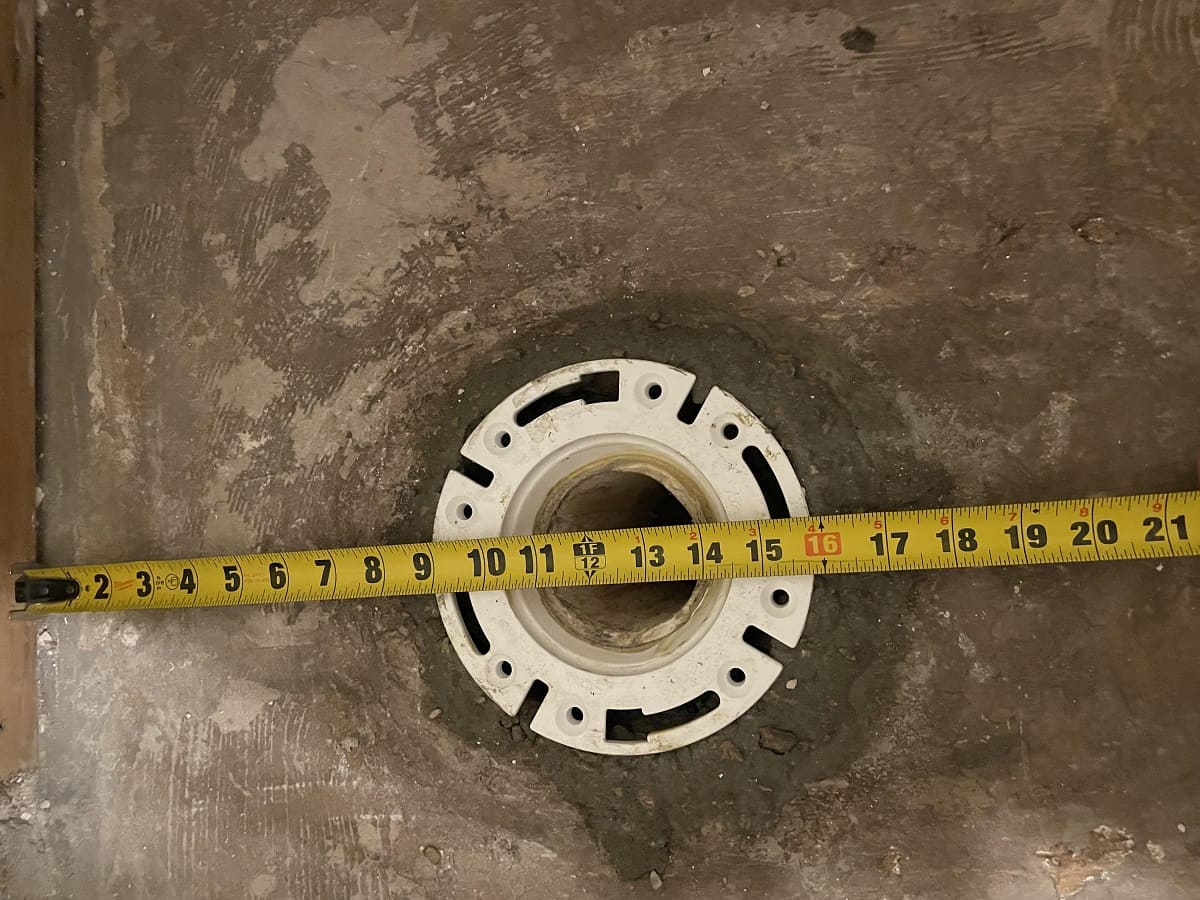
Step 2: Inspect the Wax Ring
After removing the toilet, it’s important to inspect the wax ring. The wax ring is a crucial component that creates a watertight seal between the toilet flange and the base of the toilet. Over time, the wax ring can deteriorate, causing leaks or an unstable toilet. Follow these steps to inspect the wax ring:
Read more: How To Tighten A Kohler Toilet Paper Holder
1. Check for damage:
Examine the wax ring for any signs of damage, such as cracks, breaks, or deformities. If you notice any of these issues, it’s essential to replace the wax ring with a new one. A damaged wax ring can lead to leaks and potential water damage.
2. Assess the condition:
Inspect the wax ring for signs of wear and aging. Over time, the wax ring can become flattened or compressed, compromising its effectiveness. If it appears worn out or flattened, it’s best to replace it even if there are no visible signs of damage.
3. Check the wax ring’s position:
Ensure that the wax ring is properly aligned with the toilet flange. It should be centered and situated evenly around the flange opening. If it has shifted or moved out of position, it will need to be adjusted or replaced to ensure a secure seal.
4. Clean the toilet flange:
While inspecting the wax ring, take the opportunity to clean the toilet flange. Use a rag or towel to wipe away any debris or residue that may be present. This will help ensure a clean and smooth surface for the installation of the new wax ring.
5. Replace the wax ring if necessary:
If you determine that the wax ring is damaged, worn out, or improperly positioned, it’s essential to replace it. Remove the old wax ring and carefully discard it. Replace it with a new wax ring that is compatible with your toilet and follow the manufacturer’s instructions for installation.
By thoroughly inspecting the wax ring, you can identify any issues that may compromise the stability and function of your toilet. Addressing these issues promptly will help prevent leaks and ensure a secure seal when reinstalling the toilet.
Step 3: Reset the Toilet
Once you have inspected the wax ring and ensured that it is in good condition, it’s time to reset the toilet back onto the floor. Follow these steps to properly reset the toilet:
1. Position the new wax ring:
If you replaced the wax ring in the previous step, center the new wax ring on the toilet flange. Ensure that it is aligned properly and sits evenly around the flange opening.
2. Lower the toilet onto the wax ring:
With the wax ring in position, carefully lower the toilet bowl onto the wax ring. Ensure that the toilet aligns with the bolts on the floor and the flange opening. Pay attention to any alignment marks or notches on the toilet base to ensure it is properly oriented.
Read more: How Do You Tighten A Toilet Paper Holder
3. Apply even pressure:
Once the toilet is positioned correctly, apply even pressure on the toilet base. Press down firmly to compress the wax ring and create a tight seal between the toilet and the flange. Ensure that the toilet sits evenly on the floor and is level in all directions.
4. Reinstall the nuts and washers:
Reinstall the nuts and washers onto the bolts that secure the toilet to the floor. Use an adjustable wrench to tighten the nuts, making sure to alternate between the two sides to ensure even pressure. Be careful not to overtighten, as this can cause damage to the toilet or the wax ring.
5. Replace the caps or covers:
Once the nuts are tightened, replace the plastic caps or covers that hide the bolts on each side of the toilet base. These caps provide a clean and finished look to the toilet installation.
6. Secure the water supply line:
Reconnect the water supply line to the bottom of the toilet tank. Use an adjustable wrench to tighten the nut, ensuring a secure connection. Make sure the supply line is not twisted or kinked.
By following these steps, you’ve successfully reset the toilet onto the new or existing wax ring. The toilet should now be firmly in place, ready for the next step of tightening the bolts to secure it to the floor.
Read more: How To Secure Toilet To Floor
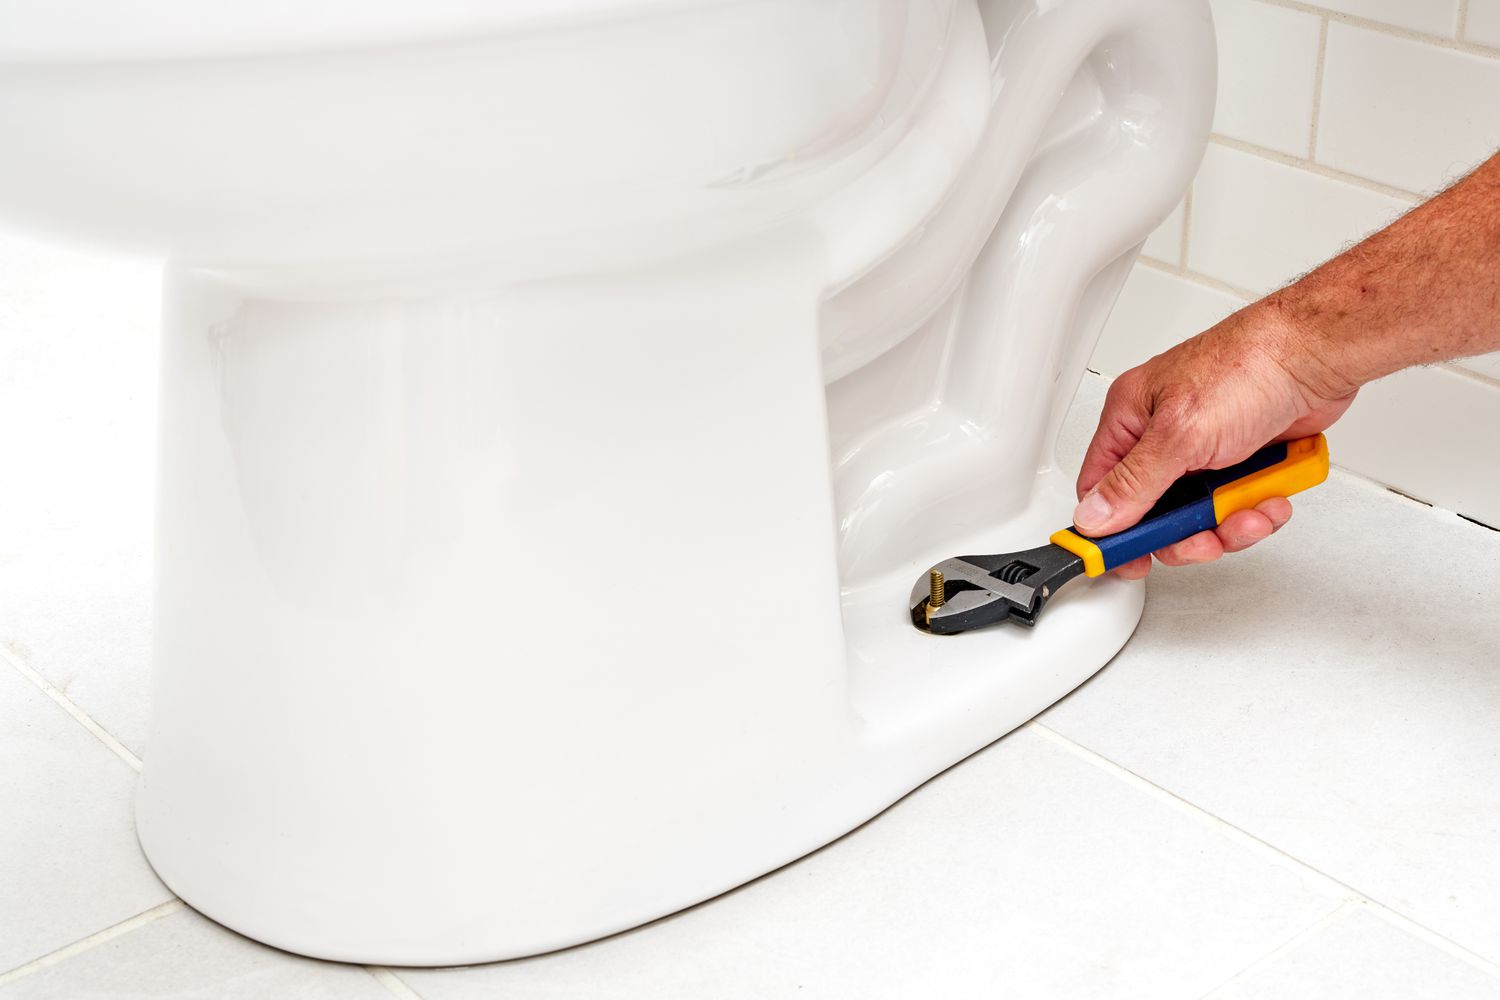
Step 4: Tighten the Bolts
With the toilet properly reset onto the wax ring, the next step is to tighten the bolts that secure the toilet to the floor. Follow these steps to ensure a secure and stable installation:
1. Alternate between the bolts:
Using an adjustable wrench, start by tightening one of the nuts on the toilet bolt. Make sure not to overtighten, as this can crack the toilet base. Then, move to the other side and tighten the nut on the corresponding bolt. Continue alternating between the two bolts until they are snug.
2. Apply even pressure:
As you tighten the bolts, apply even pressure on both sides. This helps to ensure that the toilet is properly aligned and does not wobble. Avoid overtightening, as this can damage the toilet or the flange.
3. Check for levelness:
While tightening the bolts, periodically check the levelness of the toilet using a small carpenter’s level. Place the level across the front, back, and sides of the toilet seat. Adjust the position of the toilet as needed to achieve a level and stable installation.
Read more: How To Bolt A Toilet To The Floor
4. Double-check the tightness:
Once both bolts are snug and the toilet is level, give each nut a final tightening to ensure they are securely fastened. Again, exercise caution not to overtighten.
Properly tightening the bolts is essential for a stable and secure toilet installation. By following these steps, you can ensure that your toilet remains in place and does not wobble or move during use.
Now that the bolts are tightened, move on to the next step to test the stability of the toilet and ensure a watertight seal around the base.
Step 5: Test for Stability
Once you have tightened the bolts that secure the toilet to the floor, it’s important to test the stability of the toilet to ensure a secure and solid installation. Follow these steps to assess the stability:
1. Sit on the toilet:
Carefully sit on the toilet seat to apply weight and pressure evenly. Slowly shift your weight from side to side to determine if the toilet wobbles or feels unstable. Pay attention to any movement or rocking.
2. Check for levelness:
While sitting on the toilet, visually inspect the levelness of the toilet seat. Use a small carpenter’s level if necessary. The toilet should be level in all directions without any noticeable tilting.
Read more: How To Tighten A Towel Ring
3. Listen for leaks:
While seated on the toilet, listen carefully for any water leaks. Flush the toilet and pay attention to any dripping or water sounds near the base. These could indicate an improper seal or installation issues.
4. Inspect the base seals:
Visually inspect the base of the toilet for any signs of water leakage. Look for water pooling, staining, or moisture around the toilet base. This could indicate a faulty wax ring or other sealing issues that require attention.
5. Address any issues:
If you notice any instability, leaks, or other issues during the stability test, it’s important to address them promptly. This may involve retightening the bolts, adjusting the position of the toilet, or replacing the wax ring if necessary.
By testing for stability, you can ensure that your toilet is securely installed and will remain stable during use. Addressing any issues identified during this step will help prevent future problems such as leaks or a loose toilet connection.
Now that you have tested the stability of your toilet, proceed to the final step to seal the base and complete the tightening process.
Step 6: Seal the Base
Sealing the base of the toilet is an important final step in the tightening process. It helps to create an additional barrier against water leaks and prevents any potential damage to the floor. Follow these steps to properly seal the base of the toilet:
Read more: How To Level A Toilet On An Uneven Floor
1. Clean the area:
Before sealing the base, ensure that the area is clean and free from any debris or residue. Use a rag or towel to wipe away any dust or moisture that may be present.
2. Apply silicone caulk (optional):
If you prefer an extra layer of protection, you can apply silicone caulk around the base of the toilet. Load a tube of silicone caulk into a caulking gun and cut off the tip to the desired size. Apply a continuous bead of caulk around the base, ensuring a complete seal between the toilet and the floor.
3. Smooth the caulk:
Use a wet finger, caulking tool, or a damp sponge to smooth out the caulk and create a neat finish. This will also help to ensure that the caulk adheres properly to both the toilet base and the floor.
4. Allow the caulk to cure:
Let the caulk cure according to the manufacturer’s instructions. This usually takes around 24 hours. Avoid using or disturbing the toilet during this time to allow the caulk to fully set and create a strong seal.
Read more: How To Remove A Toilet From The Floor
5. Reinstall the caps or covers:
Once the caulk has cured, reinstall the plastic caps or covers that hide the bolts on each side of the toilet base. This will provide a finished look and complete the sealing process.
By sealing the base of the toilet, you provide an additional layer of protection against water leaks and ensure a secure and watertight connection. This final step helps to maintain the integrity of your bathroom and prevent any potential damage to the flooring.
Congratulations! You have successfully tightened and secured your toilet to the floor. With a stable and leak-free installation, you can now enjoy peace of mind and a properly functioning bathroom.
Conclusion
Tightening your toilet to the floor is a simple yet essential task that can help prevent leaks, instability, and potential damage in your bathroom. By following the step-by-step process outlined in this article, you can ensure a secure and stable installation.
From removing the toilet and inspecting the wax ring to resetting the toilet, tightening the bolts, and testing for stability, each step plays a crucial role in creating a solid connection between the toilet and the floor. Additionally, sealing the base with silicone caulk provides an extra layer of protection against water leaks.
Regularly checking and tightening the bolts of your toilet is recommended as part of routine maintenance. Over time, the bolts may become loose due to usage and natural settling. By addressing any issues promptly, you can prevent further damage and potential water leaks.
Remember, it’s important to gather the necessary tools and materials before starting the process. An adjustable wrench, screwdriver, new wax ring, rag or towel, caulking gun, and silicone caulk are some of the key items that will help you successfully complete the task.
By taking the time to tighten your toilet to the floor, you not only ensure a stable and secure bathroom fixture but also contribute to the overall longevity and functionality of your bathroom. A properly tightened toilet will provide peace of mind, prevent potential water damage, and maintain a clean and sanitary environment.
So, whether you’re experiencing a wobbly toilet or simply want to ensure the stability of your bathroom, don’t hesitate to follow the steps outlined in this article to tighten your toilet to the floor. Your efforts will be rewarded with a reliable and leak-free toilet that you can count on for years to come.
Frequently Asked Questions about How To Tighten Toilet To Floor
Was this page helpful?
At Storables.com, we guarantee accurate and reliable information. Our content, validated by Expert Board Contributors, is crafted following stringent Editorial Policies. We're committed to providing you with well-researched, expert-backed insights for all your informational needs.


0 thoughts on “How To Tighten Toilet To Floor”