Home>Furniture & Design>Bathroom Accessories>How To Remove Scratches From Toilet Seat
Bathroom Accessories
How To Remove Scratches From Toilet Seat
Modified: August 30, 2024
Learn how to easily remove scratches from your toilet seat with our expert tips and tricks. Keep your bathroom accessories looking brand new!
(Many of the links in this article redirect to a specific reviewed product. Your purchase of these products through affiliate links helps to generate commission for Storables.com, at no extra cost. Learn more)
Introduction
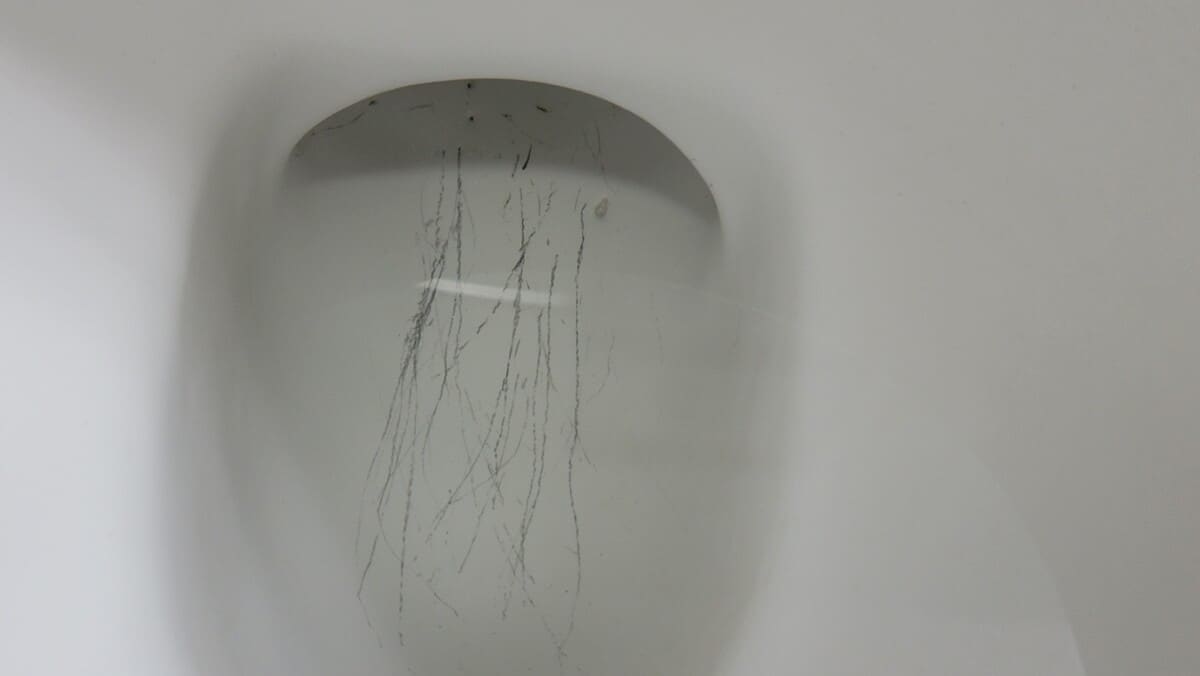
A scratch on a toilet seat can be an unsightly blemish that detracts from the overall appearance of your bathroom. Whether the scratch is a result of accidental damage or normal wear and tear, it's essential to address it promptly to restore the toilet seat's aesthetic appeal. Fortunately, with the right tools and techniques, you can effectively remove scratches from various types of toilet seat materials, such as plastic, wood, or resin.
In this comprehensive guide, we will delve into the process of removing scratches from a toilet seat, providing step-by-step instructions and valuable insights to help you achieve a smooth and flawless finish. By understanding the specific characteristics of different toilet seat materials and employing the appropriate methods, you can restore the pristine look of your toilet seat with confidence.
Whether you're a seasoned DIY enthusiast or a novice in the realm of home maintenance, this guide is designed to equip you with the knowledge and skills necessary to tackle this common household issue. With a few simple tools and a bit of patience, you can revitalize your toilet seat and elevate the overall appearance of your bathroom.
So, let's embark on this journey to discover the art of scratch removal from toilet seats, empowering you to transform an eyesore into a seamless and polished surface. Whether you're dealing with minor blemishes or more noticeable scratches, this guide will walk you through the process, ensuring that you can restore your toilet seat to its former glory. Let's roll up our sleeves and delve into the world of toilet seat restoration, where a few simple steps can make a world of difference in your bathroom's ambiance.
Key Takeaways:
- Say goodbye to unsightly scratches on your toilet seat! With the right tools and techniques, you can restore its pristine appearance and elevate your bathroom’s ambiance. It’s a simple DIY project with big results!
- Whether your toilet seat is plastic, wood, or resin, you can easily remove scratches and revitalize its look. Just clean, sand, and apply a protective finish to achieve a smooth and flawless surface. It’s a fun and rewarding home maintenance project!
Read more: How To Remove Mold From Toilet Seat
Understanding the Types of Toilet Seat Materials
When it comes to toilet seat materials, there are several options available, each with its unique characteristics and maintenance requirements. Understanding the specific properties of different materials is crucial when it comes to addressing scratches and maintaining the overall condition of the toilet seat. Here's a closer look at the most common types of toilet seat materials:
Plastic Toilet Seats
Plastic toilet seats are popular due to their affordability, lightweight nature, and ease of maintenance. They are often made from durable materials such as polypropylene or thermoplastic, which are resistant to moisture and staining. While plastic seats are generally resilient, they can be susceptible to scratches over time, especially in high-traffic bathrooms.
Wood Toilet Seats
Wood toilet seats exude a classic and elegant aesthetic, making them a popular choice for traditional and rustic-themed bathrooms. Oak, maple, and bamboo are common wood varieties used in the manufacturing of toilet seats. Wood seats are known for their natural warmth and durability. However, they require gentle care to prevent scratches and maintain their luster.
Resin Toilet Seats
Resin toilet seats are crafted from a blend of materials, including acrylic, epoxy, and other polymers. This composition results in a smooth and glossy finish that is resistant to chipping and fading. Resin seats are favored for their sleek appearance and durability, making them a stylish addition to modern bathrooms. Despite their resilience, resin seats can still develop scratches that require attention to preserve their visual appeal.
Read more: How To Remove Azo Stains From Toilet Seat
Other Materials
In addition to plastic, wood, and resin, there are toilet seats made from materials such as stainless steel, ceramic, and compressed wood. Each material offers distinct advantages in terms of durability, hygiene, and aesthetics. However, regardless of the material, scratches can diminish the overall appearance of the toilet seat, prompting the need for effective scratch removal techniques.
By familiarizing yourself with the characteristics of different toilet seat materials, you can gain valuable insights into the best practices for scratch removal and maintenance. Whether you're dealing with a plastic, wood, resin, or alternative material toilet seat, understanding the unique properties of each material will empower you to choose the most suitable approach for restoring its pristine condition.
Tools and Materials Needed
To effectively remove scratches from a toilet seat, you will need a set of tools and materials tailored to the specific requirements of the task. By assembling the following items, you can ensure that you are well-equipped to address scratches on various types of toilet seat materials:
Tools:
-
Sandpaper: Select a fine-grit sandpaper, such as 220-grit or higher, to gently sand the surface of the toilet seat and smooth out the scratches. The fine grit will help prevent further damage to the material while effectively addressing the blemishes.
-
Sanding Block: A sanding block provides a stable and even surface for sanding, allowing for greater control and precision. It helps distribute pressure evenly, minimizing the risk of uneven sanding and ensuring a consistent finish.
-
Soft Cloth: Use a soft, lint-free cloth to wipe down the toilet seat and remove any dust or debris before and after the sanding process. This will help maintain cleanliness and prevent particles from interfering with the scratch removal process.
-
Protective Mask and Gloves: Prioritize safety by wearing a protective mask and gloves to shield yourself from dust and potential irritants during the sanding and refinishing stages. This precaution is especially important when working with wood or resin materials.
-
Finish Applicator: Depending on the type of finish you intend to apply, a suitable applicator, such as a brush or cloth, will be necessary to ensure an even and uniform application of the protective finish.
Materials:
-
Wood Filler or Epoxy Putty (for Wood Seats): If you are dealing with scratches on a wood toilet seat, a wood filler or epoxy putty can be used to fill in deeper scratches and restore the smooth surface. Choose a filler that matches the color of the wood for seamless blending.
-
Fine-grit Steel Wool (for Resin Seats): For resin toilet seats, fine-grit steel wool can be employed to gently buff out minor scratches and prepare the surface for refinishing. The steel wool should be of a fine grade to avoid causing abrasions.
-
Protective Finish: Select a suitable protective finish based on the material of the toilet seat. For wood seats, polyurethane or a clear varnish can provide durable protection, while resin seats may benefit from a clear acrylic coating. Ensure that the chosen finish is compatible with the toilet seat material for optimal results.
By gathering these essential tools and materials, you can embark on the scratch removal process with confidence, knowing that you have the necessary resources to restore your toilet seat to its original condition. Whether you are addressing scratches on a plastic, wood, resin, or alternative material toilet seat, the right tools and materials will play a pivotal role in achieving a successful outcome.
Read more: How To Remove Plastic Nut From Toilet Seat?
Step 1: Cleaning the Surface
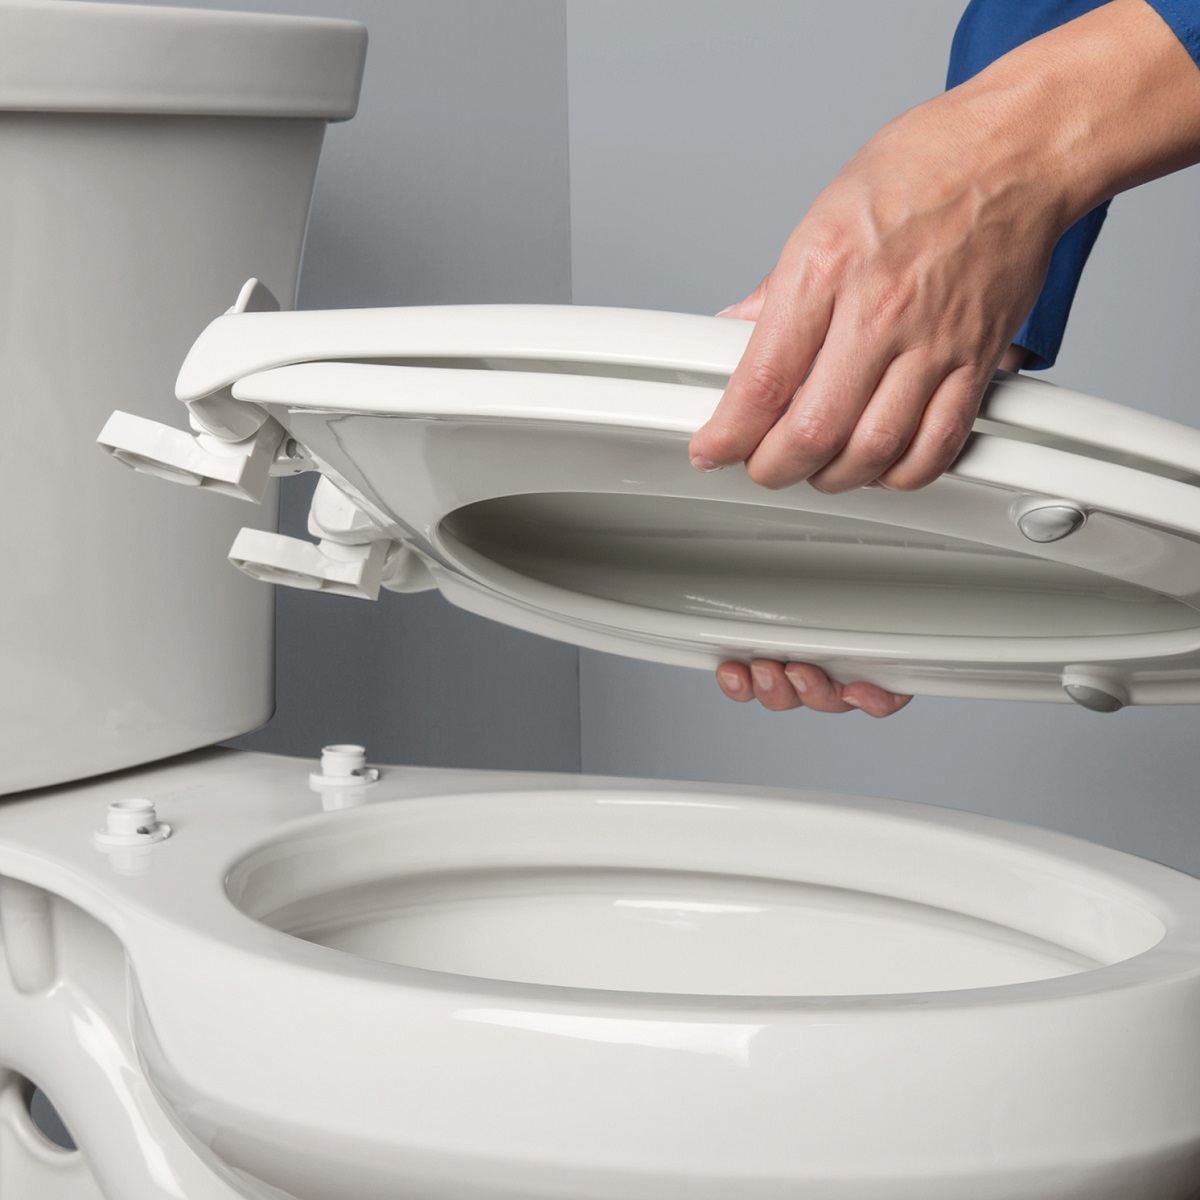
Before embarking on the process of removing scratches from a toilet seat, it is essential to begin with a thorough cleaning of the surface. This initial step serves multiple purposes, including the removal of dirt, grime, and any residual substances that may obscure the scratches or interfere with the subsequent repair and refinishing procedures.
To initiate the cleaning process, start by preparing a mild cleaning solution using a gentle liquid soap or dish detergent diluted in warm water. Avoid using harsh or abrasive cleaners, as they can potentially damage the surface of the toilet seat, exacerbating the existing scratches. Dip a soft cloth or sponge into the cleaning solution and gently wipe down the entire surface of the toilet seat, paying particular attention to the areas with visible scratches.
After effectively removing any surface contaminants, rinse the toilet seat thoroughly with clean water to eliminate any soapy residue. Once rinsed, use a separate clean cloth to dry the surface completely, ensuring that no moisture remains before proceeding to the next step.
In addition to the general cleaning, it is crucial to inspect the toilet seat for any lingering debris or particles that may have accumulated within the scratches. Utilize a soft-bristled brush or compressed air to dislodge and remove any foreign matter lodged within the scratches, as these particles can hinder the subsequent sanding and refinishing processes.
By meticulously cleaning the surface of the toilet seat, you create an optimal foundation for the scratch removal and refinishing procedures. This preparatory step not only enhances the visibility of the scratches but also ensures that the subsequent repair efforts are conducted on a clean and uncontaminated surface, promoting a seamless and effective restoration process.
With the surface of the toilet seat thoroughly cleaned and free from debris, you are now ready to proceed to the next step of the scratch removal process, where the targeted scratches will be skillfully addressed to restore the pristine appearance of the toilet seat.
Step 2: Sanding the Scratches
Sanding the scratches is a critical step in the process of removing blemishes from a toilet seat. This technique involves gently abrading the surface of the material to smooth out the scratches and restore a uniform texture. By employing the appropriate sanding tools and techniques, you can effectively diminish the visibility of the scratches and prepare the surface for the subsequent refinishing stage.
Sandpaper Selection
When selecting sandpaper for this task, opt for a fine-grit variety, such as 220-grit or higher, to ensure that the sanding process is gentle and precise. Coarser grits can be overly abrasive and may exacerbate the scratches, leading to further damage to the material. The goal is to gradually diminish the scratches without compromising the integrity of the toilet seat's surface.
Sanding Technique
Begin the sanding process by affixing the chosen sandpaper to a sanding block, which provides stability and even pressure distribution. With the sandpaper secured, apply light and consistent pressure as you move the sanding block back and forth over the scratched areas. It is crucial to maintain a steady and controlled motion to avoid uneven abrasion and ensure a uniform finish.
Read more: How To Remove Blue Stain From Toilet Seat
Progress Monitoring
As you sand the scratches, periodically pause to assess the progress and determine whether the blemishes are gradually fading. It is essential to exercise patience during this phase, as incremental sanding is key to achieving a smooth and seamless result. By monitoring the diminishing visibility of the scratches, you can gauge the effectiveness of the sanding process and make adjustments as needed.
Wood Filler or Epoxy Putty (for Wood Seats)
For wood toilet seats with deeper scratches, consider using a wood filler or epoxy putty to fill in the damaged areas before sanding. Apply the filler according to the manufacturer's instructions, ensuring that it blends seamlessly with the surrounding wood surface. Once the filler has cured, proceed with gentle sanding to achieve a level and uniform texture.
Fine-grit Steel Wool (for Resin Seats)
In the case of resin toilet seats, fine-grit steel wool can be utilized to buff out minor scratches and prepare the surface for refinishing. Employ a gentle and consistent motion when using the steel wool, focusing on the scratched areas while maintaining an even pressure to avoid creating uneven textures.
By diligently sanding the scratches and employing the appropriate techniques tailored to the specific material of the toilet seat, you can effectively diminish the visibility of blemishes and lay the groundwork for the subsequent refinishing stage. This meticulous approach sets the stage for achieving a flawless and rejuvenated appearance, restoring the toilet seat to its former luster.
Step 3: Applying a Finish
After meticulously sanding the scratches and achieving a smooth and uniform surface, the next crucial step in the scratch removal process involves applying a protective finish to restore the toilet seat's luster and safeguard it against future damage. The chosen finish should be compatible with the material of the toilet seat, ensuring optimal adhesion and durability.
Read more: How To Remove Dye Stains From Toilet Seat
Selecting the Appropriate Finish
For wood toilet seats, polyurethane or a clear varnish is an excellent choice for providing durable protection and enhancing the natural beauty of the wood. These finishes offer resistance to moisture, stains, and abrasions, effectively safeguarding the surface against everyday wear and tear.
In the case of resin toilet seats, a clear acrylic coating can be applied to impart a glossy and protective layer. This finish not only enhances the visual appeal of the resin seat but also fortifies it against scratches and discoloration, prolonging its pristine appearance.
Application Technique
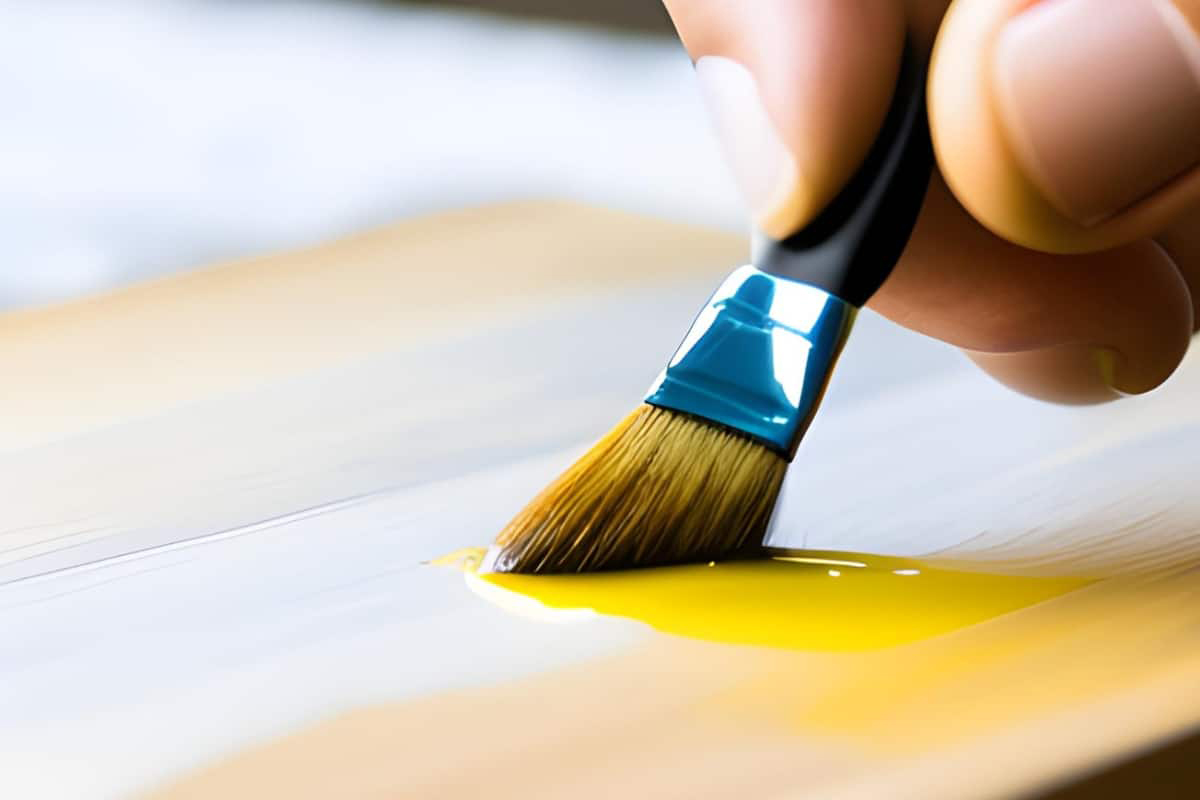
When applying the protective finish, ensure that the surface of the toilet seat is clean and free from any residual dust or debris. Use a high-quality brush or a lint-free cloth to apply the finish evenly, following the manufacturer's recommendations for the specific product being used.
Apply thin and consistent coats of the finish, allowing each layer to dry completely before applying the next. This gradual layering ensures thorough coverage and promotes a smooth and uniform finish. Exercise caution to avoid excessive application, as this can lead to drips, uneven textures, or prolonged drying times.
Drying and Curing
Once the final coat of finish has been applied, allow the toilet seat to dry and cure according to the manufacturer's instructions. This crucial curing period is essential for the finish to bond effectively with the material, forming a resilient barrier that protects the surface from scratches and environmental factors.
During the drying and curing phase, ensure that the toilet seat is placed in a well-ventilated area with minimal dust exposure. This facilitates the proper hardening of the finish, contributing to its longevity and resilience.
Final Inspection
Upon the completion of the finishing process, conduct a thorough inspection of the toilet seat to ensure that the protective finish has been applied uniformly and to the desired effect. Check for any imperfections or inconsistencies, addressing them promptly to achieve a flawless and durable finish.
By skillfully applying a protective finish tailored to the material of the toilet seat, you can effectively seal the surface, mitigate the visibility of scratches, and enhance its overall resilience. This final step culminates in the restoration of the toilet seat's aesthetic appeal, elevating the ambiance of the bathroom and ensuring long-lasting durability.
This meticulous approach to scratch removal and refinishing empowers you to transform a weathered and blemished toilet seat into a rejuvenated and polished fixture, enhancing the overall allure of your bathroom space.
Read more: How To Remove Scratches In Toilet Bowl
Conclusion
In conclusion, the process of removing scratches from a toilet seat encompasses a meticulous and methodical approach aimed at restoring the seat's pristine appearance and durability. By understanding the unique characteristics of different toilet seat materials and employing tailored techniques, you can effectively diminish the visibility of scratches and rejuvenate the overall aesthetic of the seat.
The journey of scratch removal begins with a comprehensive understanding of the specific material of the toilet seat, whether it is plastic, wood, resin, or an alternative material. This knowledge serves as the foundation for selecting the appropriate tools and materials, ensuring that the scratch removal process is tailored to the unique requirements of the seat.
The initial steps of cleaning the surface and inspecting for debris set the stage for the subsequent sanding process. With the careful selection of fine-grit sandpaper and meticulous sanding techniques, the scratches are skillfully diminished, paving the way for a smooth and uniform surface.
The application of a protective finish marks the culmination of the scratch removal process, fortifying the toilet seat against future damage while enhancing its visual appeal. Whether it is a polyurethane finish for wood seats or a clear acrylic coating for resin seats, the chosen finish serves as a resilient shield, safeguarding the seat from scratches and environmental factors.
The restoration of a scratch-ridden toilet seat to its former luster not only elevates the ambiance of the bathroom but also reflects the dedication to meticulous home maintenance. This transformative process empowers individuals to revitalize their living spaces with simple yet impactful measures, enhancing the overall allure and functionality of the bathroom.
By embracing the art of scratch removal from toilet seats, individuals can take pride in the rejuvenation of a commonly overlooked fixture, infusing their bathroom with a renewed sense of elegance and sophistication. With the knowledge and skills acquired through this comprehensive guide, anyone can embark on the journey of scratch removal with confidence, achieving remarkable results and elevating the overall appeal of their bathroom space.
Now that you've mastered removing scratches from your toilet seat, why stop there? Keep your momentum going and tackle another common household annoyance. If your oven's cleanliness leaves much to be desired, don't fret. Our next guide offers some clever cleaning hacks that will make your oven sparkle without breaking a sweat. Dive into our easy-to-follow strategies and transform your kitchen cleaning routine today!
Frequently Asked Questions about How To Remove Scratches From Toilet Seat
Was this page helpful?
At Storables.com, we guarantee accurate and reliable information. Our content, validated by Expert Board Contributors, is crafted following stringent Editorial Policies. We're committed to providing you with well-researched, expert-backed insights for all your informational needs.
0 thoughts on “How To Remove Scratches From Toilet Seat”