Home>Furniture & Design>Bathroom Accessories>How To Unclog A Sink With A Plunger
Bathroom Accessories
How To Unclog A Sink With A Plunger
Modified: February 18, 2024
Learn how to effectively unclog a sink using a plunger with our step-by-step guide. Keep your bathroom accessories in top condition with these simple tips.
(Many of the links in this article redirect to a specific reviewed product. Your purchase of these products through affiliate links helps to generate commission for Storables.com, at no extra cost. Learn more)
Introduction
Dealing with a clogged sink can be a frustrating and inconvenient experience. Whether it's a result of food particles, grease buildup, or foreign objects obstructing the drain, a clogged sink can disrupt your daily routine. However, before you reach for harsh chemicals or consider calling a plumber, there's a simple and effective method you can try first: using a plunger to unclog the sink.
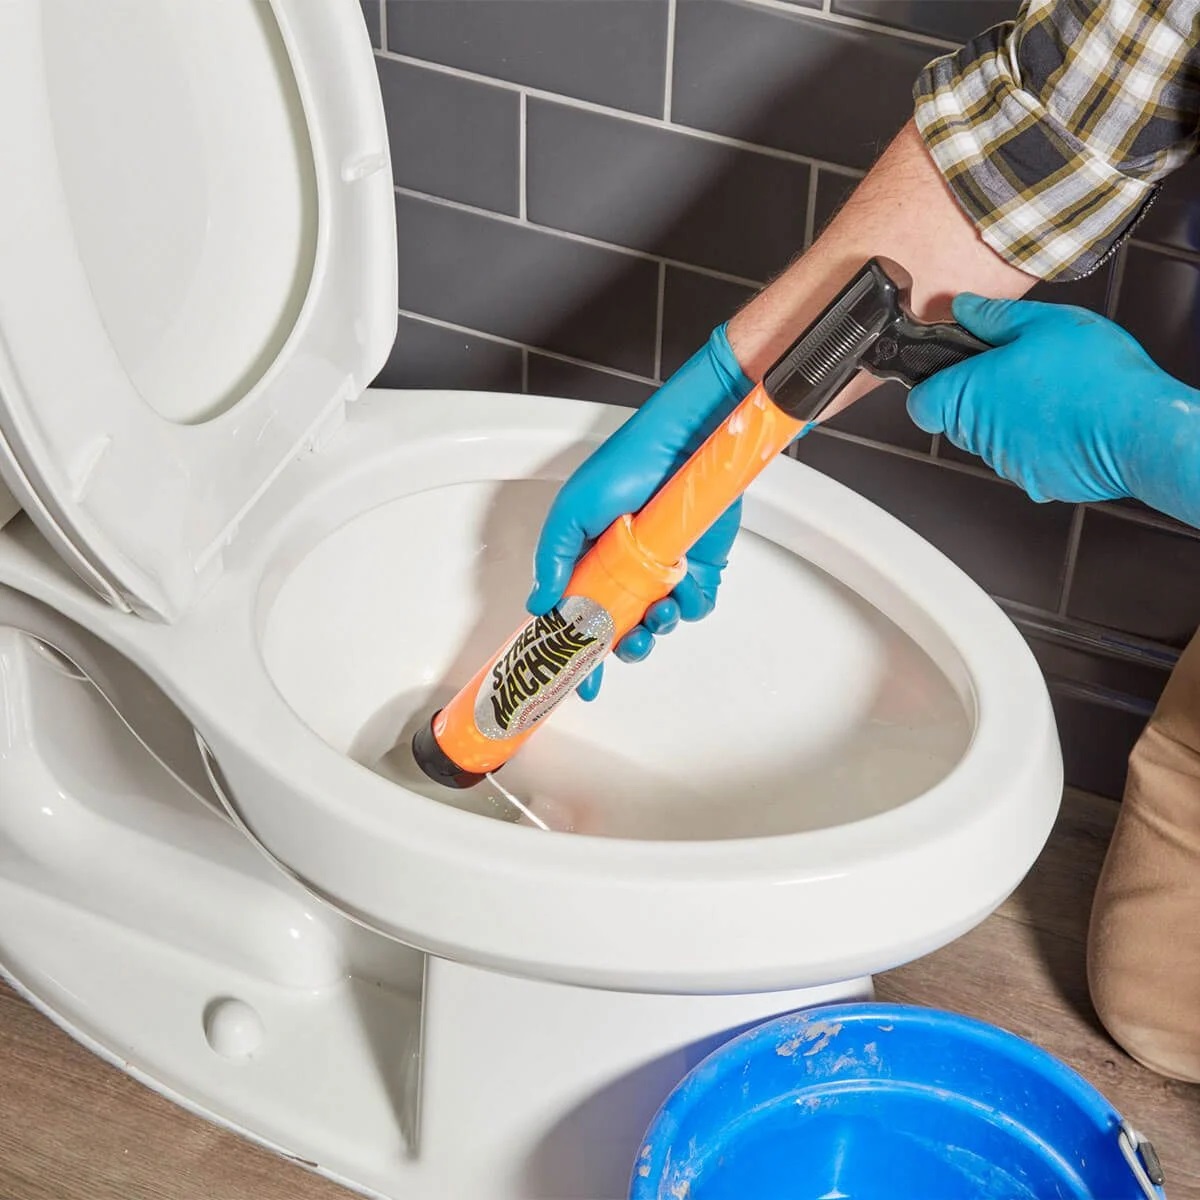
A plunger, a common household tool, is not just for unclogging toilets. It can also be a valuable asset in clearing sink blockages. By creating pressure and suction, a plunger can dislodge the obstruction and restore the flow of water down the drain. This method is not only cost-effective but also environmentally friendly, as it eliminates the need for harsh chemicals that can be damaging to both your pipes and the environment.
In this comprehensive guide, we will walk you through the step-by-step process of using a plunger to unclog a sink. Whether you're dealing with a kitchen sink full of food scraps or a bathroom sink obstructed by hair and soap scum, this method can be applied to various types of sink blockages. By following these simple yet effective steps, you can potentially save time and money while regaining the functionality of your sink.
So, if you're ready to tackle that stubborn sink clog and restore normalcy to your daily routine, grab your plunger and let's get started!
Key Takeaways:
- Plungers are not just for toilets! You can use a plunger to unclog your sink by creating a strong seal, plunging with controlled force, and testing the drain for improved water flow.
- If the clog persists, don’t worry! You can repeat the plunging process and explore alternative solutions like using a drain snake or seeking professional help. Persistence is key!
Read more: How To Unclog Kitchen Sink With Plunger
Step 1: Prepare the Sink and Plunger
Before diving into the unclogging process, it's crucial to prepare both the sink and the plunger to ensure optimal results. Here's how to get started:
Clear the Sink Area
Begin by removing any items from the sink and surrounding area. This includes dishes, utensils, or any other objects that could obstruct your access to the sink. Clearing the area provides you with ample space to maneuver the plunger and prevents any potential messes during the unclogging process.
Inspect the Drain
Take a moment to visually inspect the sink drain. Look for any visible debris, such as food particles, hair, or soap scum, that may be contributing to the clog. Use a flashlight if necessary to get a clear view of the inside of the drain. Removing any visible debris at this stage can make the plunging process more effective.
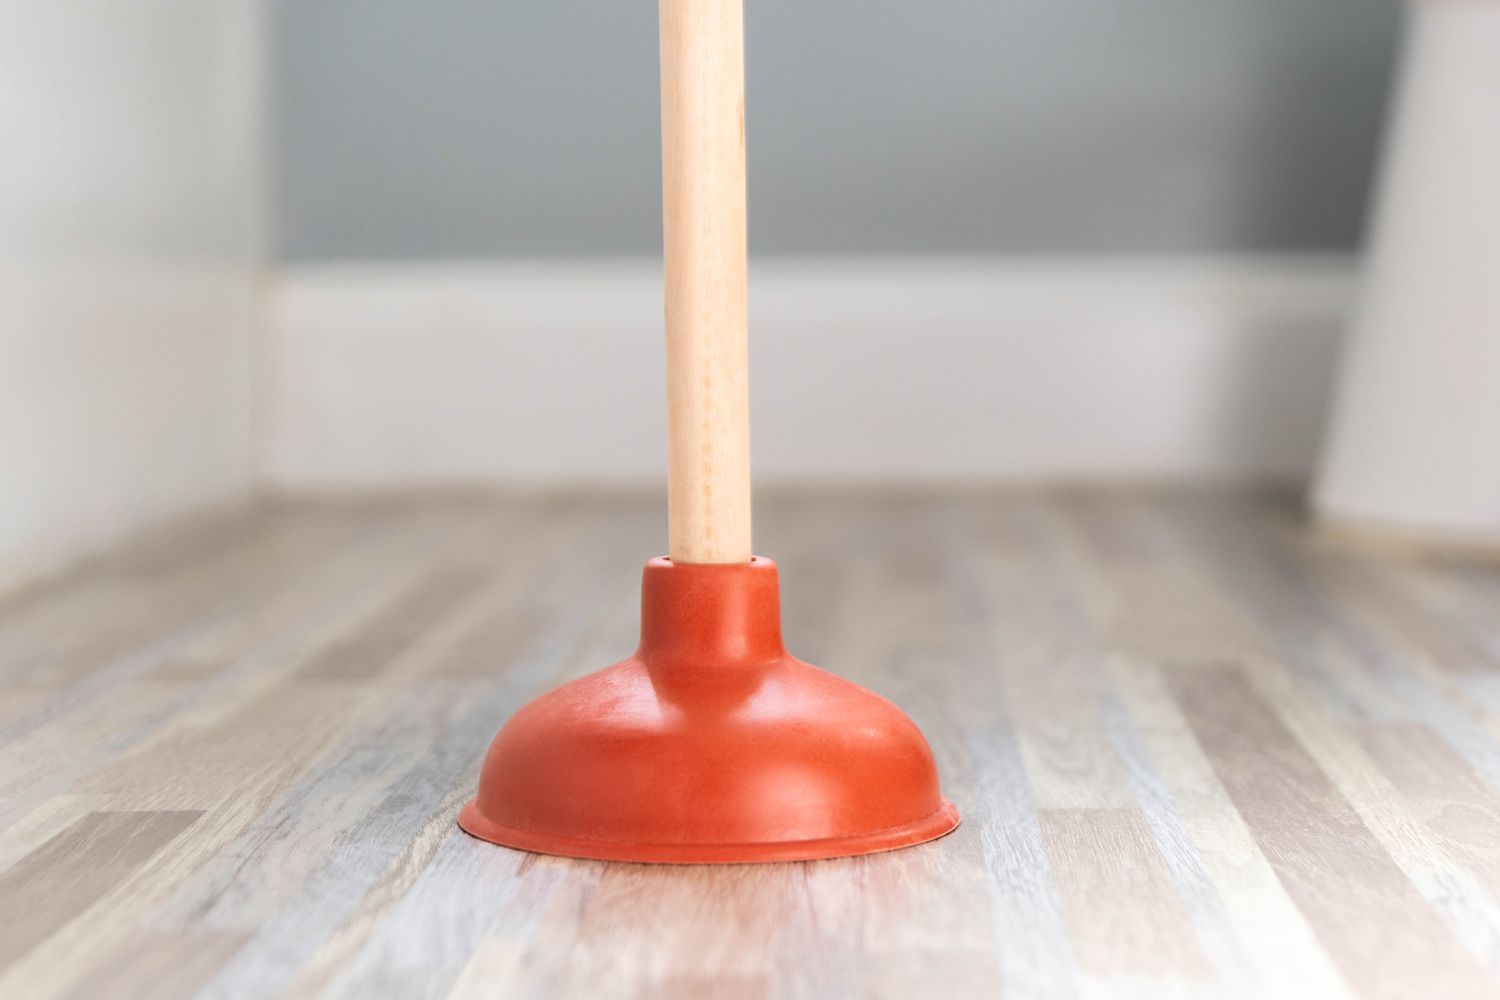
Select the Right Plunger
Not all plungers are created equal. For sink unclogging, it's best to use a flat-bottomed plunger, also known as a cup plunger. This type of plunger is specifically designed for use on flat surfaces, making it ideal for sinks and tubs. Ensure that the plunger's rubber cup is clean and free of any tears or damage that could compromise its suction power.
Read more: How To Unclog A Sink Without A Plunger
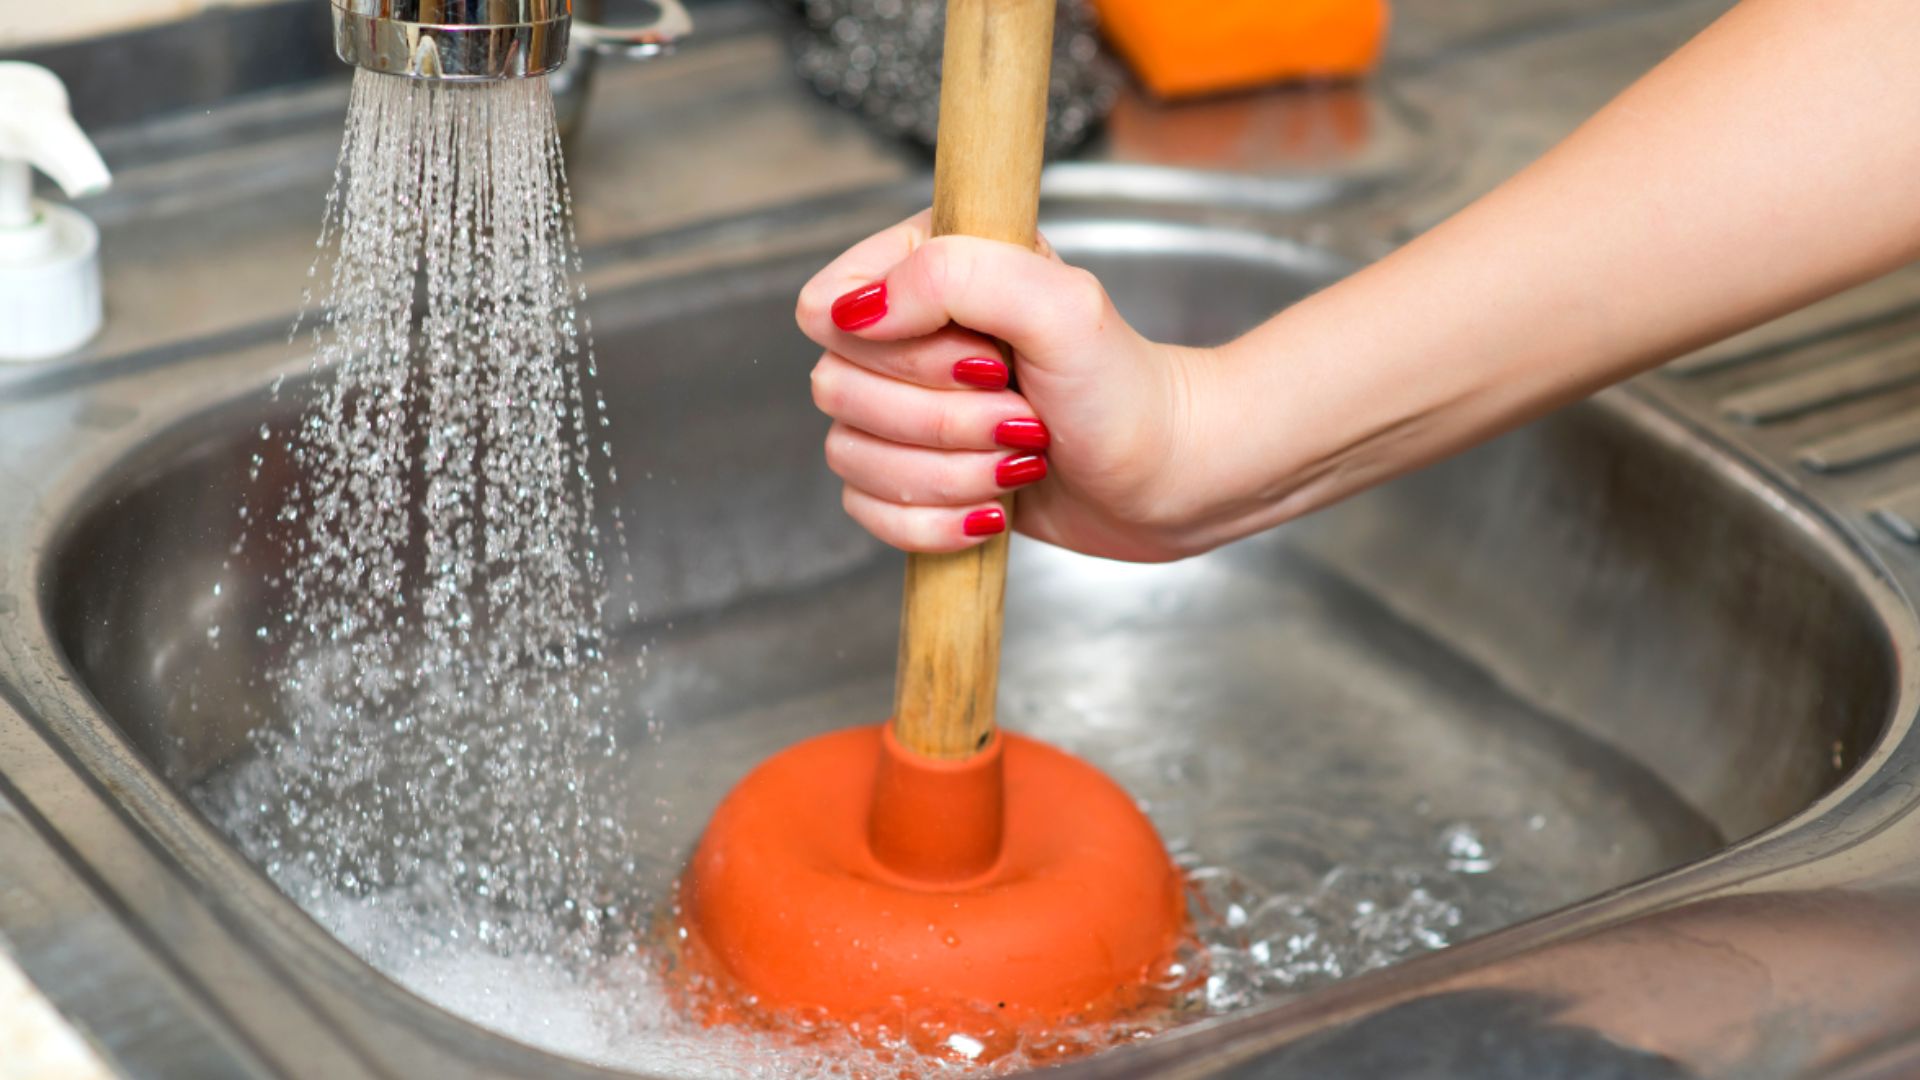
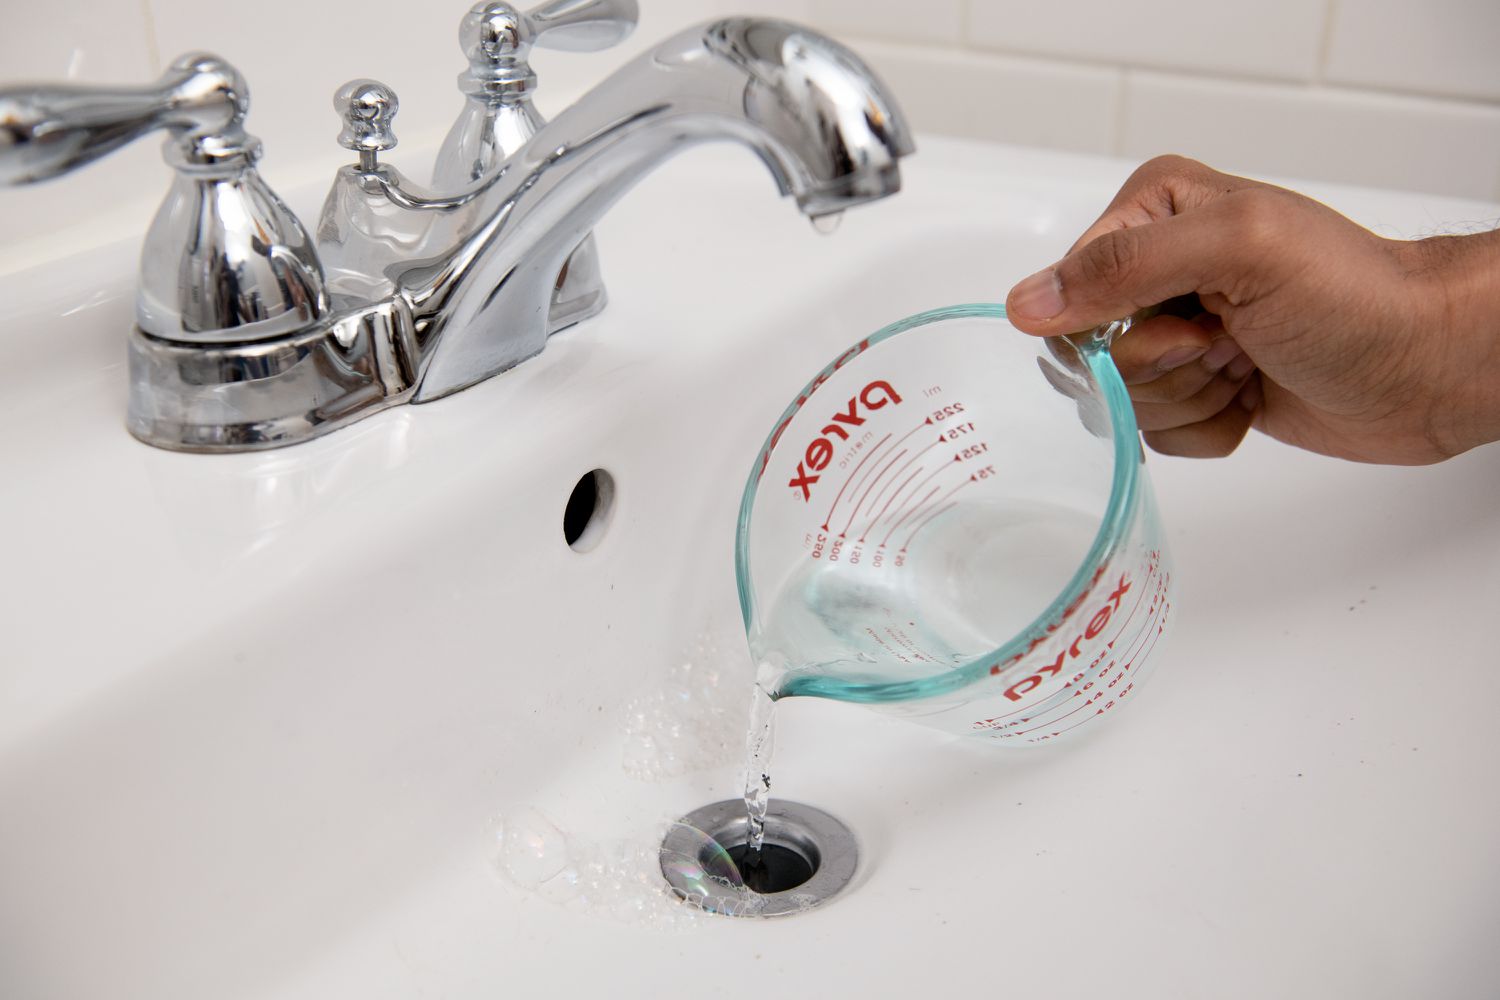
Fill the Sink with Water
Fill the sink with enough water to cover the rubber cup of the plunger. The water helps create a seal between the plunger and the sink, enhancing the plunging action. If you have a double-bowl sink, make sure to seal the drain in the unused bowl to prevent air from escaping during the plunging process.
Position the Plunger
Place the plunger over the drain, ensuring a tight seal between the rubber cup and the sink surface. The plunger should be positioned directly over the drain opening to create a vacuum effect when plunging. If the sink has an overflow opening, use a rag to block it to ensure proper suction.
By taking these preparatory steps, you set the stage for a successful plunging process. With the sink and plunger properly prepared, you're ready to move on to the next step and tackle the clog head-on.
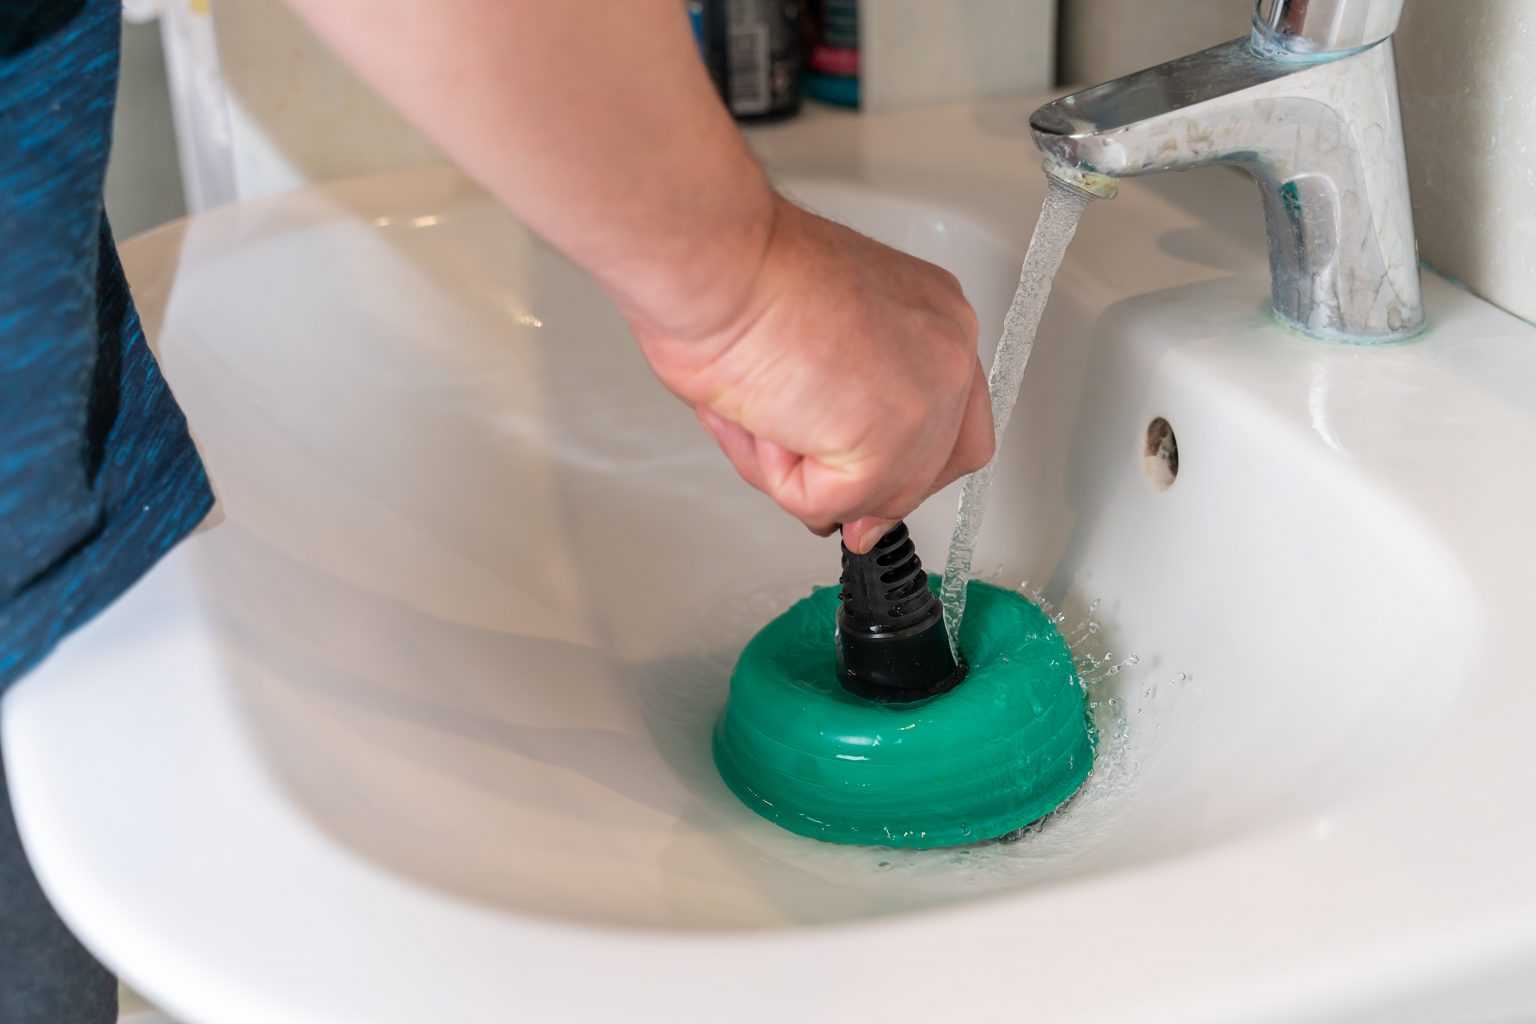
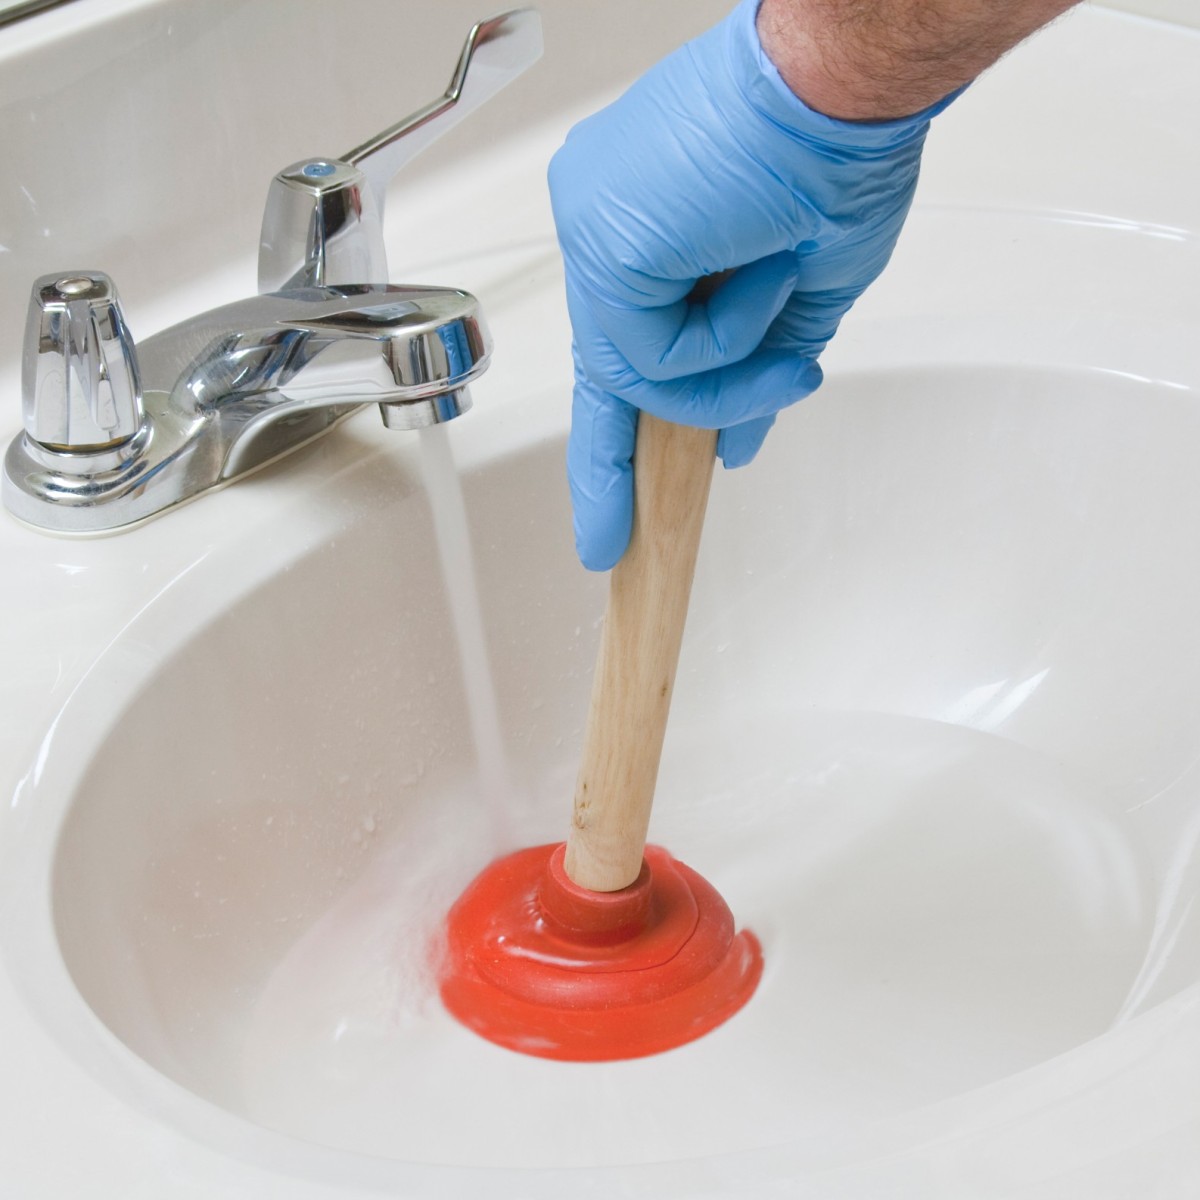
Step 2: Create a Seal
Creating a proper seal between the plunger and the sink surface is crucial for the effectiveness of the plunging process. A tight seal ensures that the pressure and suction generated by the plunger are focused directly on the clog, increasing the likelihood of dislodging it. Here's a detailed look at how to create a strong seal when using a plunger to unclog a sink:
Positioning the Plunger
When positioning the plunger over the drain, it's essential to center it directly over the opening. The rubber cup of the plunger should make full contact with the sink surface to form a tight seal. Ensure that there are no gaps or air pockets between the rubber cup and the sink, as this can diminish the effectiveness of the plunging action.
Read more: How To Unclog A Sink Without A Plunger
Applying Even Pressure
Once the plunger is in position, apply downward pressure to press the rubber cup against the sink surface. The goal is to create a vacuum effect that will be instrumental in dislodging the clog. Use both hands to firmly press down on the plunger while keeping it upright to maintain the seal. Applying even pressure is key to maximizing the suction power of the plunger.
Stabilizing the Plunger
To prevent the plunger from slipping or losing its seal during the plunging process, it's important to stabilize it with steady hands. Hold the plunger firmly in place to ensure that it remains centered over the drain. This stability is essential for maintaining the seal and directing the force of the plunging motion downward into the drain.
Blocking the Overflow Opening
In sinks equipped with an overflow opening, it's necessary to block it to prevent air from escaping during the plunging process. Use a rag or cloth to tightly seal the overflow opening, ensuring that the pressure created by the plunger is fully directed toward the clog. By blocking the overflow, you optimize the effectiveness of the seal and maximize the impact of the plunging action.
By following these steps to create a strong seal with the plunger, you set the stage for a powerful and targeted plunging process. With the seal in place, you're ready to move on to the next step and apply the plunging technique to dislodge the stubborn clog in your sink.
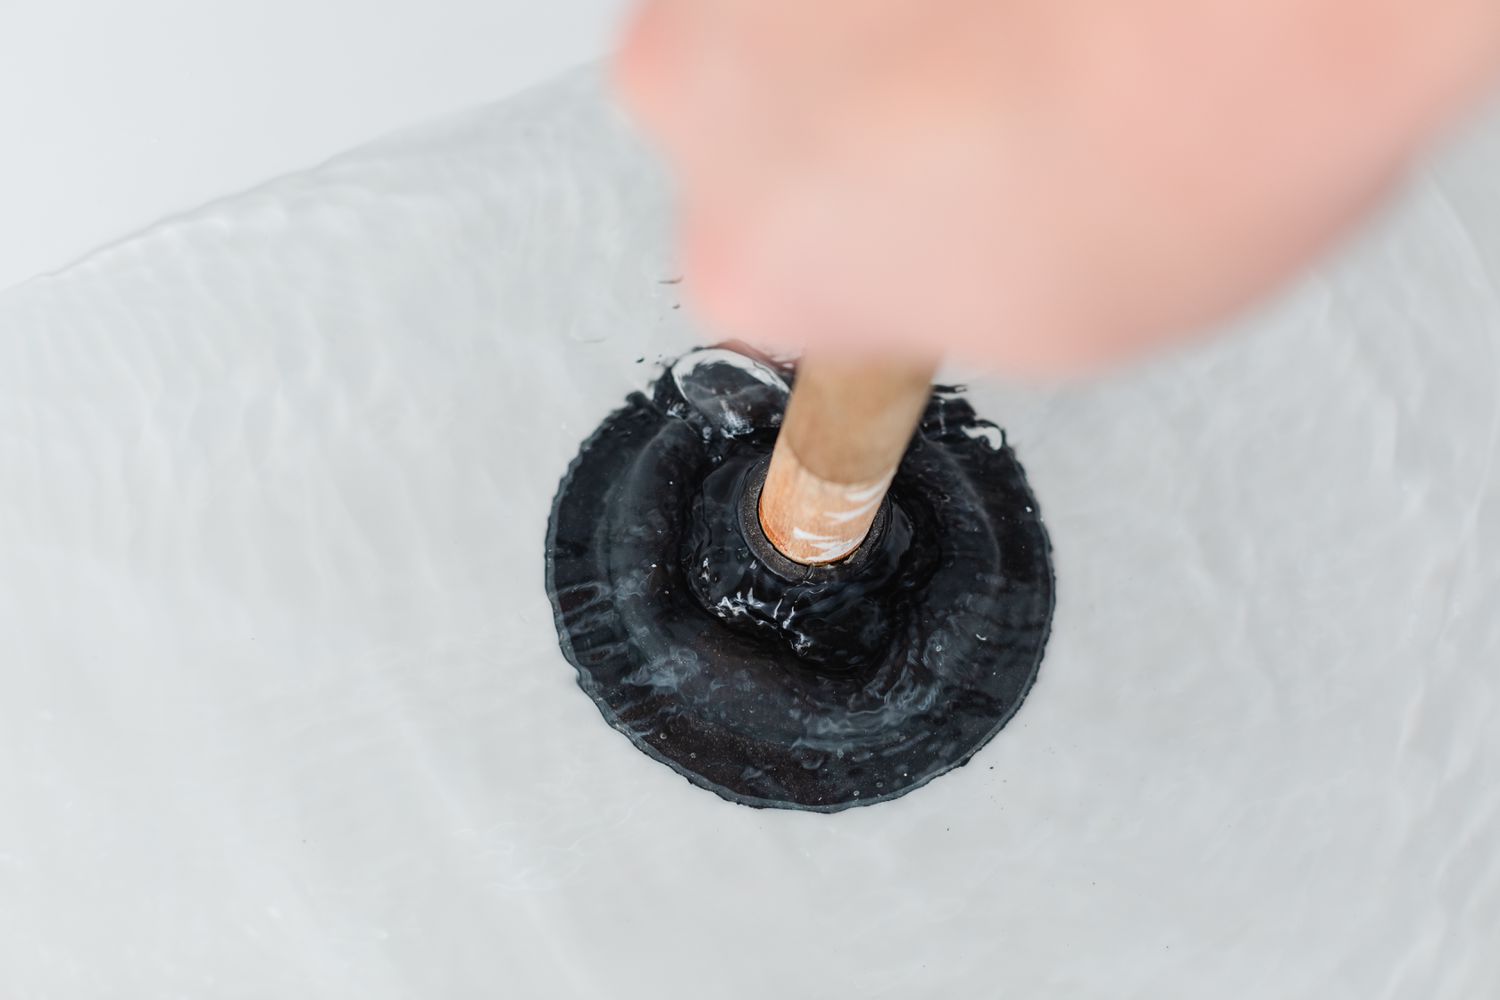
Step 3: Plunge the Sink
With the sink and plunger properly prepared, and a strong seal created, it's time to apply the plunging technique to dislodge the stubborn clog. Plunging is a simple yet effective method for clearing sink blockages, relying on the principles of pressure and suction to break up and remove the obstruction. Here's a detailed look at how to plunge the sink effectively:
Read more: How To Unclog A Tub With A Plunger
Up and Down Motion
Begin by performing a series of rapid up and down plunges with the plunger. The goal is to create a forceful back-and-forth movement that generates pressure and suction in the drain. Use your upper body strength to push and pull the plunger handle, allowing the rubber cup to move up and down over the drain opening. This vigorous motion is instrumental in dislodging the clog and restoring the flow of water down the drain.
Consistent Rhythm
Maintain a consistent and steady rhythm as you plunge the sink. The repetitive motion helps build momentum and increases the pressure within the drain, which can aid in breaking up the clog. Aim for a smooth and continuous plunging action, avoiding abrupt stops or irregular movements that could disrupt the effectiveness of the process.
Controlled Force
Apply controlled force while plunging to avoid causing damage to the sink or the plumbing system. The goal is to exert enough pressure to dislodge the clog without using excessive force that could lead to potential damage. Focus on maintaining a firm grip on the plunger handle and using controlled, deliberate movements to maximize the impact of the plunging action.
Duration of Plunging
Continue plunging for at least 20 to 30 seconds to allow the pressure and suction to work on the clog. It's important to give the plunging technique sufficient time to exert its force on the obstruction. If the clog is particularly stubborn, you may need to extend the duration of the plunging process to effectively dislodge it.
Read more: How To Unclog A Toilet With A Plunger
Adjusting the Seal
If the water in the sink starts to drain during the plunging process, it indicates that the seal may have been compromised. In such cases, readjust the plunger to recreate a tight seal before resuming the plunging motion. A strong seal is essential for maintaining the effectiveness of the plunging technique.
By following these steps and techniques, you can effectively plunge the sink to tackle the clog head-on. The combination of pressure, suction, and controlled movements can significantly improve the chances of clearing the obstruction and restoring proper drainage to your sink. Once you've completed the plunging process, it's time to move on to the next step and test the drain to assess the effectiveness of your efforts.
Step 4: Test the Drain
After completing the plunging process, it's essential to test the drain to assess the effectiveness of your efforts. Testing the drain allows you to determine whether the clog has been successfully dislodged and whether water can flow freely down the sink. Here's a detailed look at how to test the drain and what to observe during this critical step:
Observing Water Flow
Turn on the faucet and allow water to flow into the sink. Observe the rate at which the water drains. If the clog has been successfully cleared, you should notice a significant improvement in the drainage. The water should flow smoothly down the drain without backing up or pooling in the sink.
Checking for Residual Debris
While testing the drain, keep an eye out for any residual debris that may have been dislodged during the plunging process. If the water drains but you notice small particles or remnants of the clog being washed away, it's an indication that the clog has been partially cleared. In such cases, you may need to repeat the plunging process to fully remove the remaining debris.
Read more: How To Unclog A Toilet With Plunger
Assessing Drainage Speed
Pay attention to the speed at which the water drains from the sink. A successfully cleared drain should allow water to evacuate rapidly, indicating that the obstruction has been effectively removed. If the water drains slowly or if you notice any lingering signs of a clog, it may be necessary to repeat the plunging process to achieve optimal results.
Addressing Lingering Issues
If the drain does not demonstrate a noticeable improvement after the initial plunging process, it's important to address any lingering issues promptly. This may involve repeating the plunging technique, using a drain snake to further dislodge the clog, or exploring alternative methods to clear the obstruction. Persistent clogs may require professional intervention to identify and resolve underlying issues within the plumbing system.
Repeating the Plunging Process
In cases where the initial plunging process does not fully clear the clog, it may be necessary to repeat the steps outlined in the previous section. By re-establishing a strong seal with the plunger and applying the plunging technique with persistence, you can increase the likelihood of dislodging the remaining obstruction and achieving a fully functional drain.
By testing the drain and carefully observing the water flow, drainage speed, and any residual debris, you can gain valuable insights into the effectiveness of your plunging efforts. This step allows you to determine whether further action is needed to fully clear the clog and restore optimal functionality to your sink.
Step 5: Repeat if Necessary
In some instances, a single round of plunging may not completely clear the stubborn clog in your sink. If, after testing the drain, you find that the water is still draining slowly or if there are lingering signs of a blockage, it's essential to be prepared to repeat the plunging process. Persistence and patience are key when dealing with persistent sink clogs, and a second round of plunging can often yield the desired results. Here's a detailed look at how to approach the repetition of the plunging process if necessary:
Read more: How To Unclog The Sink
Assessing the Initial Results
Before proceeding with a repeat plunging attempt, take a moment to assess the initial results of the first plunging process. Consider the observations made during the testing of the drain, including the water flow, drainage speed, and any residual debris. This assessment can provide valuable insights into the extent of the remaining clog and guide your approach to the repeat plunging process.
Re-establishing the Seal
To begin the repeat plunging process, re-establish a strong seal between the plunger and the sink surface. Ensure that the rubber cup of the plunger makes full contact with the sink, and there are no gaps or air pockets compromising the seal. If the initial seal was compromised during the first round of plunging, take extra care to create a secure and airtight connection before proceeding.
Applying Controlled Force
As with the initial plunging process, apply controlled force while plunging to avoid causing damage to the sink or the plumbing system. Focus on maintaining a firm grip on the plunger handle and using deliberate, consistent movements to maximize the impact of the plunging action. The goal is to dislodge the remaining obstruction without using excessive force.
Extending the Duration
During the repeat plunging process, consider extending the duration of the plunging to allow for increased pressure and suction to work on the clog. A longer duration of plunging can provide the necessary force to break up and remove the remaining obstruction. Aim for at least 30 seconds of continuous plunging to maximize the effectiveness of the repeat attempt.
Read more: How To Unclog A Bathtub Without A Plunger
Testing the Drain Again
After completing the repeat plunging process, test the drain once more to assess the impact of your efforts. Turn on the faucet and observe the water flow, drainage speed, and any signs of residual debris. If the clog has been successfully dislodged, you should notice a significant improvement in the drainage, indicating that the repeat plunging process has been effective.
Seeking Alternative Solutions
If the repeat plunging process does not yield the desired results, it may be necessary to explore alternative solutions to clear the stubborn clog. This could involve using a drain snake to further dislodge the obstruction, employing natural or chemical-based drain cleaners, or seeking professional assistance to address underlying issues within the plumbing system. Persistent clogs may require a combination of methods to achieve a fully functional drain.
By being prepared to repeat the plunging process if necessary and approaching it with a methodical and persistent mindset, you can increase the likelihood of successfully clearing the stubborn clog in your sink. Remember that dealing with persistent clogs may require a combination of techniques and a willingness to explore alternative solutions to achieve optimal results.
Conclusion
In conclusion, using a plunger to unclog a sink is a practical and environmentally friendly approach that can effectively address common blockages caused by food particles, grease, hair, and soap scum. By following the step-by-step process outlined in this guide, you can confidently tackle stubborn sink clogs and potentially avoid the need for harsh chemical drain cleaners or professional plumbing services.
The preparatory steps of clearing the sink area, inspecting the drain, selecting the right plunger, and creating a tight seal are essential for setting the stage for a successful plunging process. These initial preparations ensure that the plunger can exert maximum pressure and suction on the clog, increasing the likelihood of dislodging the obstruction.
The plunging technique, characterized by rapid up and down motions, consistent rhythm, controlled force, and a focus on maintaining a strong seal, is instrumental in breaking up and removing the clog. By applying these techniques with persistence and patience, you can significantly improve the chances of restoring proper drainage to your sink.
Testing the drain and assessing the water flow, drainage speed, and any residual debris provide valuable insights into the effectiveness of the plunging efforts. This critical step allows you to determine whether further action is needed to fully clear the clog and restore optimal functionality to your sink.
In cases where a single round of plunging may not completely clear the stubborn clog, being prepared to repeat the process with a methodical and persistent mindset can often yield the desired results. Persistence and a willingness to explore alternative solutions, such as using a drain snake or seeking professional assistance, are key to achieving a fully functional drain.
By leveraging the power of a plunger and following the techniques outlined in this guide, you can take proactive steps to address sink clogs and regain the convenience of a smoothly flowing drain. This cost-effective and accessible method empowers homeowners to tackle common plumbing challenges with confidence and minimal environmental impact.
So, the next time you encounter a clogged sink, remember that a plunger can be your first line of defense, offering a practical and effective solution to restore normalcy to your daily routine. With the knowledge and techniques gained from this guide, you can approach sink clogs with confidence, knowing that you have a valuable tool at your disposal to address the issue promptly and effectively.
Frequently Asked Questions about How To Unclog A Sink With A Plunger
Was this page helpful?
At Storables.com, we guarantee accurate and reliable information. Our content, validated by Expert Board Contributors, is crafted following stringent Editorial Policies. We're committed to providing you with well-researched, expert-backed insights for all your informational needs.
0 thoughts on “How To Unclog A Sink With A Plunger”