Home>Furniture & Design>Interior Design Trends>How To Make Glass Look Cracked
Interior Design Trends
How To Make Glass Look Cracked
Modified: February 18, 2024
Learn how to create a stunning cracked glass effect for your interior design projects. Discover the latest interior design trends and techniques.
(Many of the links in this article redirect to a specific reviewed product. Your purchase of these products through affiliate links helps to generate commission for Storables.com, at no extra cost. Learn more)
Introduction
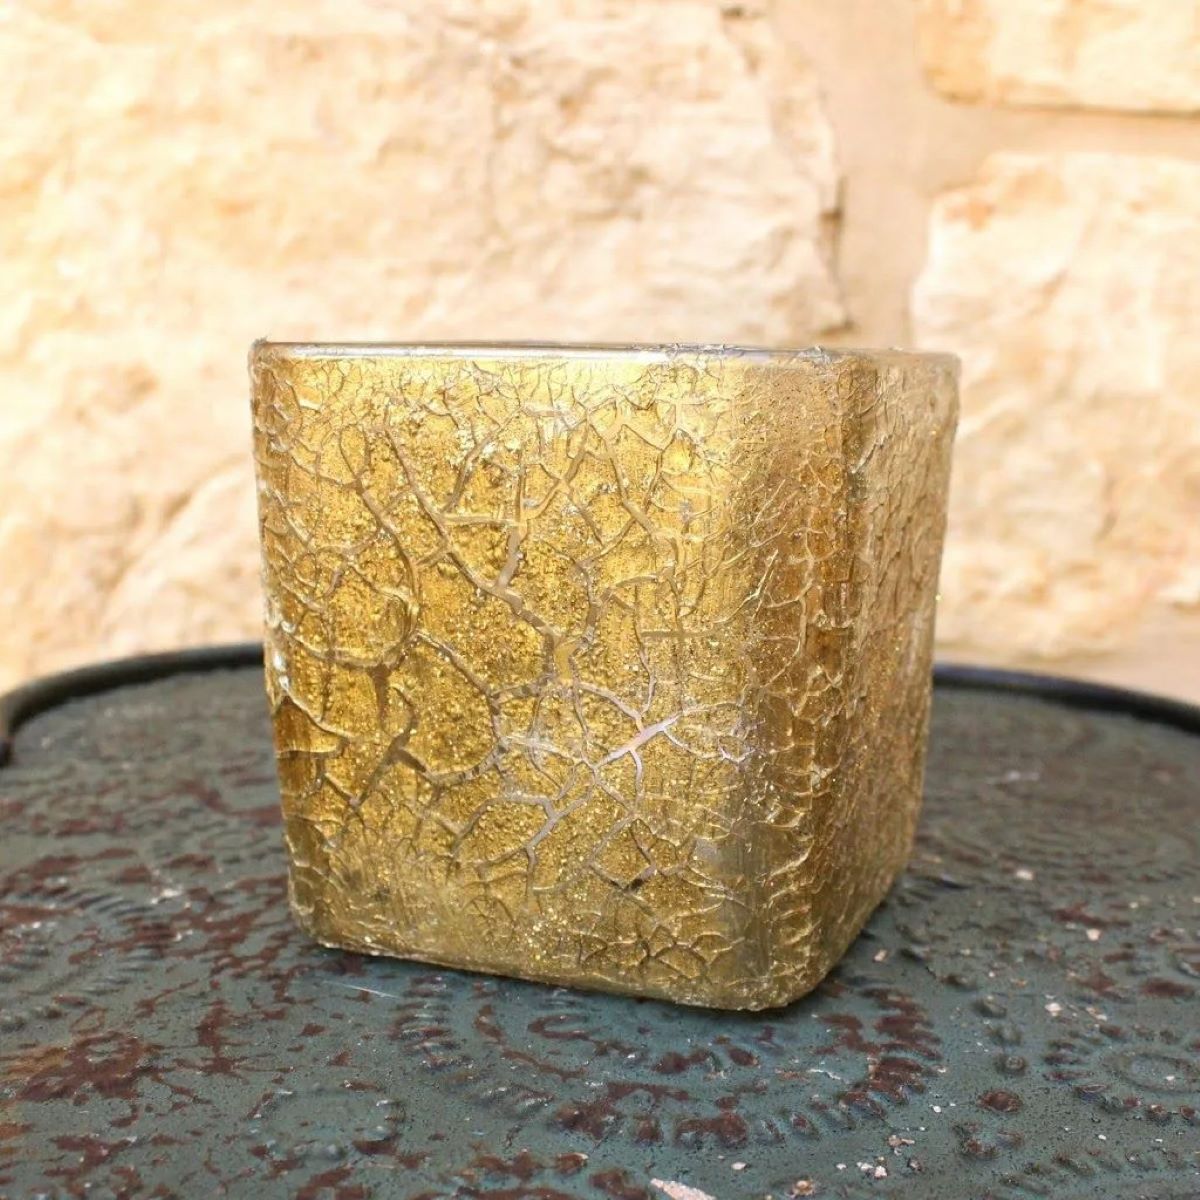
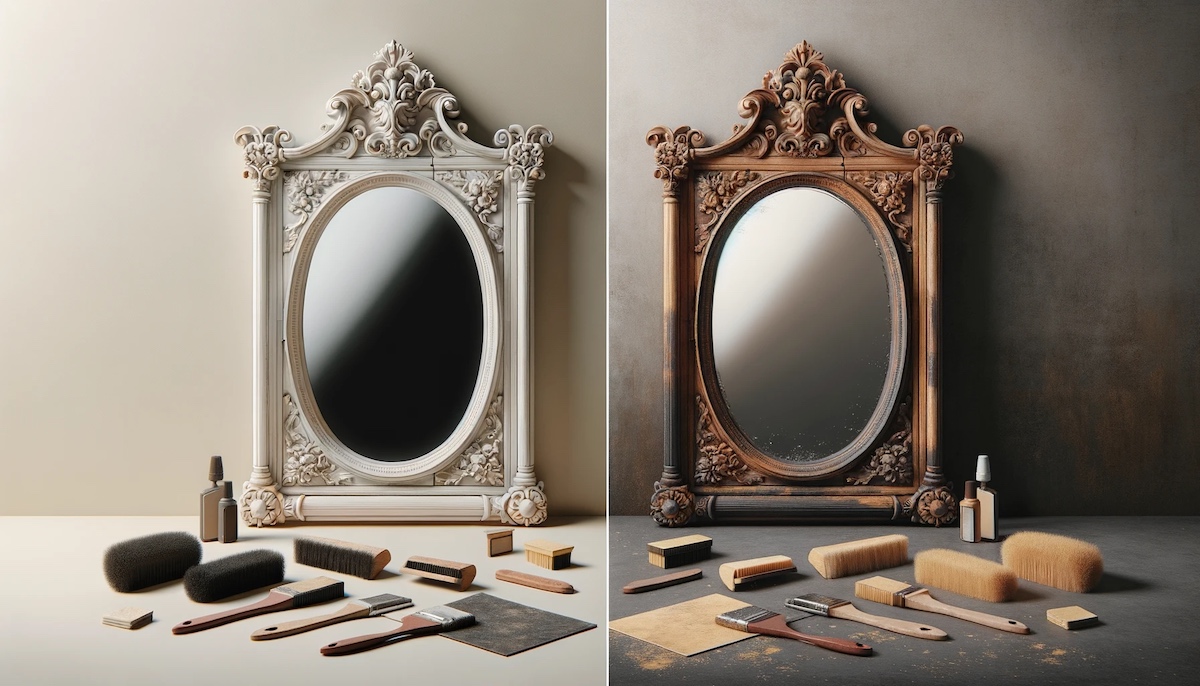
Creating a cracked glass effect can add a touch of vintage charm and intrigue to any glass surface. Whether you want to revamp an old mirror, transform a plain glass vase, or add character to a picture frame, this technique offers a unique way to elevate the aesthetic appeal of your interior decor. By following a few simple steps and using the right materials, you can achieve a stunning cracked glass effect that exudes character and elegance.
The cracked glass look has gained popularity in interior design due to its ability to infuse spaces with a sense of history and artistry. It can complement a variety of design styles, from rustic and shabby chic to modern and eclectic. This versatile technique allows you to customize the level of distress and aging, enabling you to achieve the perfect balance between vintage allure and contemporary sophistication.
In this guide, we will walk through the process of creating a cracked glass effect on any glass surface, providing detailed instructions and tips to help you achieve professional-looking results. From preparing the glass surface to applying the crackle medium and adding finishing touches, each step is crucial in bringing your vision to life. With the right approach and a touch of creativity, you can transform ordinary glass into a captivating focal point that sparks conversation and admiration.
So, gather your materials and prepare to embark on a creative journey that will breathe new life into your decor. Whether you're a seasoned DIY enthusiast or a newcomer to the world of crafting, this technique offers a rewarding and visually stunning way to enhance the ambiance of your living space. Let's dive into the process of making glass look cracked and unleash the artistic potential of this captivating design trend.
Key Takeaways:
- Transform ordinary glass into vintage art with a cracked glass effect. Clean, apply crackle medium, and add finishing touches for a captivating and bespoke interior decor upgrade.
- Create a captivating cracked glass effect by cleaning, applying crackle medium, and adding personalized finishing touches. Elevate your interior decor with vintage charm and artistic allure.
Read more: How To Make A Crack In Glass Disappear
Materials Needed
To embark on the exciting journey of creating a cracked glass effect, you'll need a few essential materials to ensure a successful and visually captivating transformation. Here's a comprehensive list of the items required to bring this unique design trend to life:
-
Glass Surface: Select the glass item you wish to transform, such as a mirror, picture frame, vase, or any other glass object that aligns with your decor vision.
-
Glass Cleaner: Before applying the crackle medium, it's crucial to thoroughly clean the glass surface to remove any dirt, dust, or residue that could affect the adhesion and overall finish of the crackle effect.
-
Lint-Free Cloth or Paper Towels: These will be used to wipe the glass surface after cleaning, ensuring that it is completely free of any particles or streaks.
-
Crackle Medium: This specialized medium is the key ingredient for achieving the cracked glass effect. It creates the appearance of aged, weathered glass by causing controlled cracking and distressing.
-
Paintbrushes: Select a variety of paintbrushes in different sizes to facilitate the application of the crackle medium. A small, fine brush can help with precision, while a larger brush may be used for broader strokes.
-
Acrylic Paint: Choose a base color of acrylic paint that will show through the cracks created by the crackle medium. This color will influence the overall aesthetic of the cracked glass effect.
-
Palette or Mixing Dish: Use a palette or mixing dish to blend and dilute the acrylic paint if necessary, ensuring that it is ready for application.
-
Protective Gloves: It's advisable to wear protective gloves to prevent direct contact with the crackle medium and paint, minimizing the risk of skin irritation.
-
Protective Covering for Workspace: Lay down a protective covering, such as a drop cloth or old newspapers, to safeguard your workspace from any potential spills or splatters during the application process.
-
Ventilation: Ensure that the workspace is well-ventilated to facilitate the drying process and minimize exposure to fumes from the crackle medium and paint.
By gathering these materials, you'll be well-equipped to embark on the exciting process of creating a cracked glass effect that will breathe new life into your interior decor. With careful preparation and attention to detail, you can transform ordinary glass surfaces into captivating focal points that exude vintage charm and artistic allure.
Step 1: Cleaning the Glass Surface
Before embarking on the transformative journey of creating a cracked glass effect, it is essential to begin with a clean and pristine glass surface. This crucial first step sets the foundation for the successful application of the crackle medium and ensures a flawless end result that exudes elegance and sophistication.
To initiate the cleaning process, gather your glass cleaner and a lint-free cloth or paper towels. Begin by applying the glass cleaner generously onto the glass surface, ensuring that it is thoroughly coated. Using gentle, circular motions, carefully wipe the entire surface to remove any accumulated dirt, dust, or residue that may have settled over time. Pay close attention to the edges and corners, as these areas are often overlooked but can significantly impact the overall finish of the cracked glass effect.
After wiping the glass surface with the cleaner, use a lint-free cloth or paper towels to meticulously dry and polish the glass, ensuring that no streaks or particles remain. This step is crucial in preparing the glass for the subsequent application of the crackle medium, as any residual moisture or debris could interfere with the adhesion and overall quality of the crackle effect.
Once the glass surface is impeccably clean and free of any blemishes, take a moment to inspect it from various angles to ensure that it meets your standards of cleanliness. Any overlooked spots or streaks should be promptly addressed to guarantee a flawless foundation for the cracked glass transformation.
By dedicating time and attention to thoroughly cleaning the glass surface, you are laying the groundwork for a successful and visually captivating cracked glass effect. This meticulous approach sets the stage for the subsequent steps, allowing you to achieve professional-looking results that elevate the aesthetic appeal of your interior decor. With the glass surface now immaculately clean and primed for the next phase, you are ready to proceed to the exciting process of applying the crackle medium and bringing your vision to life.
Step 2: Applying the Crackle Medium
With the glass surface meticulously cleaned and prepared, it's time to embark on the transformative process of applying the crackle medium. This pivotal step is where the magic happens, as the crackle medium creates the captivating appearance of aged, weathered glass, infusing the surface with character and allure.
Begin by selecting a high-quality crackle medium that is specifically designed for use on glass surfaces. Ensure that the product is compatible with the type of glass you are working with, as different formulations may be tailored to specific glass compositions. Shake the crackle medium well before use to guarantee a consistent and effective application.
Using a clean and dry paintbrush, carefully apply a generous layer of the crackle medium to the entire glass surface. The thickness of the application will influence the size and intensity of the cracks, so consider the desired level of distress and aging when applying the medium. For finer, more subtle cracks, a thinner layer may be suitable, while a thicker application can result in more pronounced and dramatic cracking.
As you apply the crackle medium, ensure that the brush strokes are even and consistent, covering the entire surface with a smooth and uniform layer. Pay close attention to the edges and corners, as these areas are prone to uneven application and may require additional care to achieve a seamless crackle effect.
Once the crackle medium is applied, allow it to dry according to the manufacturer's instructions. The drying time may vary depending on factors such as humidity and temperature, so be patient and avoid disturbing the surface during this crucial phase. As the crackle medium dries, controlled cracking will begin to emerge, transforming the glass surface into a stunning display of vintage charm and artistry.
After the crackle medium has fully dried and the cracks have formed, take a moment to admire the captivating transformation taking place before your eyes. The glass surface will now exude a sense of history and character, with the crackle effect adding depth and visual interest to the once-ordinary glass.
With the crackle medium successfully applied and dried, you have taken a significant step towards achieving a professional-looking cracked glass effect that will captivate and inspire. The next phase will involve adding finishing touches to enhance the overall aesthetic and ensure that your cracked glass creation becomes a captivating focal point in your interior decor.
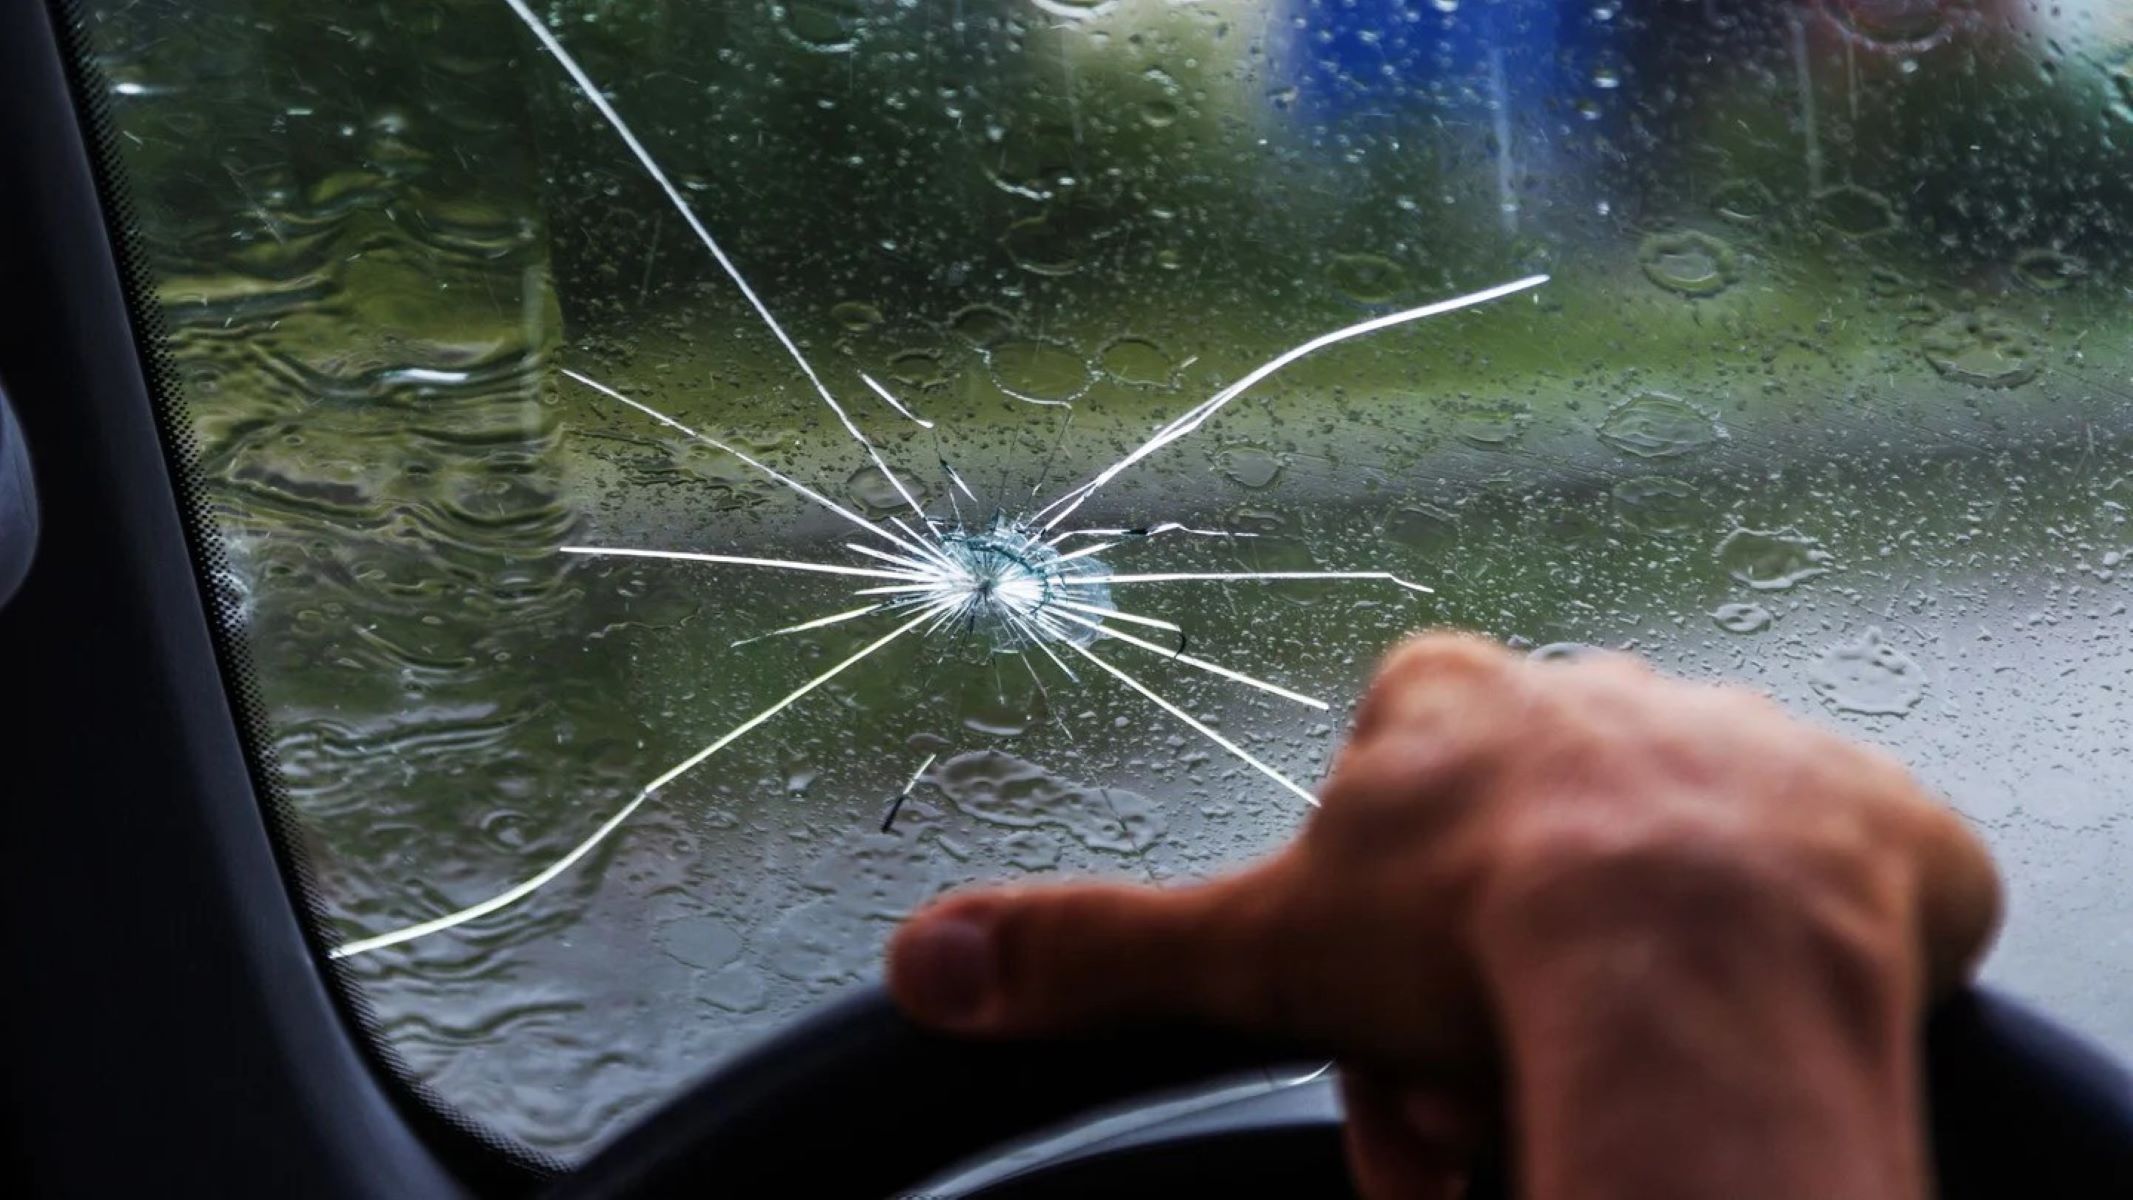
To make glass look cracked, use a glass cutter to create shallow lines on the surface. Then, apply a thin layer of petroleum jelly and gently heat the glass with a blowtorch. The cracks will appear as the glass cools.
Step 3: Drying and Curing
As the crackle medium dries, the glass surface undergoes a remarkable transformation, with controlled cracking and distressing creating a captivating vintage aesthetic. This phase is crucial in allowing the crackle effect to fully develop and achieve its desired appearance.
During the drying process, it is essential to exercise patience and refrain from disturbing the glass surface. The duration of drying time can vary based on factors such as humidity, temperature, and the specific characteristics of the crackle medium used. It is advisable to refer to the manufacturer's instructions for guidance on the optimal drying period.
As the crackle medium dries, the glass surface will gradually reveal the intricate network of cracks and aged textures, adding depth and character to the once-ordinary surface. This visual evolution is a testament to the artistry and craftsmanship involved in creating a cracked glass effect that exudes timeless charm and allure.
In addition to drying, the curing process is equally important in ensuring the longevity and durability of the crackle effect. Curing allows the crackle medium to fully adhere to the glass surface, creating a resilient and enduring finish that withstands the test of time. While the initial drying phase sets the foundation for the crackle effect, curing solidifies and enhances its integrity, resulting in a professional-quality transformation.
Throughout the drying and curing process, it is essential to provide adequate ventilation in the workspace to facilitate the evaporation of any residual moisture and fumes. This promotes a thorough and effective drying and curing process, contributing to the overall quality and longevity of the cracked glass effect.
As the glass surface completes the drying and curing phase, take a moment to appreciate the captivating transformation that has taken place. The once-ordinary glass now exudes a sense of history and artistry, with the crackle effect adding a touch of vintage allure and visual intrigue.
With the glass surface now dried and cured, the stage is set for the final phase of adding finishing touches to enhance the overall aesthetic and ensure that your cracked glass creation becomes a captivating focal point in your interior decor.
Read more: How To Repair Glass Cracks
Step 4: Adding Finishing Touches
With the glass surface now transformed by the captivating crackle effect, the final step involves adding finishing touches to enhance the overall aesthetic and elevate the visual impact of your cracked glass creation. This phase allows you to customize the appearance of the cracked glass surface, infusing it with additional character and charm to align with your interior decor vision.
One of the key considerations in adding finishing touches is the selection of an acrylic paint color that will complement the crackle effect and contribute to the overall ambiance of the space. Choose a hue that harmonizes with your existing decor scheme or introduces a subtle contrast to create visual interest. Using a clean paintbrush, carefully apply the selected acrylic paint over the crackle medium, ensuring even coverage and paying attention to detail in areas where the crackle effect is most pronounced.
As you apply the acrylic paint, consider the level of coverage and intensity that aligns with your design preferences. Whether you opt for a light wash of color to accentuate the cracks or a more substantial application to create a bolder contrast, the acrylic paint serves as a versatile tool for customizing the appearance of the cracked glass surface.
In addition to the acrylic paint, consider incorporating embellishments or decorative elements to further enhance the visual appeal of the cracked glass. This could involve the use of stencils, decals, or metallic accents to introduce intricate patterns or embellishments that complement the crackle effect and add a touch of sophistication to the glass surface.
Once the finishing touches are applied, take a moment to assess the overall impact and visual harmony of the cracked glass surface. Consider the interplay of light and shadow on the textured cracks, as well as the integration of color and embellishments in relation to the surrounding decor. This critical evaluation allows you to make any final adjustments or additions to ensure that the cracked glass creation achieves its full potential as a captivating focal point in your interior space.
By adding thoughtful finishing touches, you have personalized the cracked glass surface to align with your unique design sensibilities, infusing it with character and allure. The result is a visually stunning and bespoke creation that commands attention and admiration, serving as a testament to your creativity and craftsmanship.
As you admire the completed cracked glass creation, revel in the transformative journey that has breathed new life into an ordinary glass surface, elevating it into a captivating work of art that enriches the ambiance of your interior decor.
Conclusion
In conclusion, the process of creating a cracked glass effect offers a captivating and rewarding journey that culminates in the transformation of ordinary glass surfaces into visually stunning focal points. By following the step-by-step guide and utilizing the right materials, you can achieve professional-quality results that exude vintage charm and artistic allure.
The meticulous process of cleaning the glass surface sets the stage for the subsequent application of the crackle medium, ensuring a flawless foundation for the crackle effect. This initial step underscores the importance of attention to detail and preparation, laying the groundwork for a successful transformation.
Applying the crackle medium is where the magic unfolds, as controlled cracking and distressing begin to breathe new life into the glass surface. The emergence of aged textures and captivating visual depth adds a sense of history and character, infusing the glass with a timeless allure that captivates the eye.
As the crackle medium dries and cures, the glass surface undergoes a remarkable evolution, solidifying the integrity and longevity of the crackle effect. This phase highlights the significance of patience and meticulous care, allowing the crackle effect to fully develop and achieve its desired appearance.
Adding finishing touches provides an opportunity for personalization and customization, allowing you to tailor the cracked glass surface to align with your unique design vision. The interplay of acrylic paint, embellishments, and decorative elements enhances the overall aesthetic, resulting in a bespoke creation that commands attention and admiration.
In essence, the process of making glass look cracked transcends mere craftsmanship, offering a creative outlet for self-expression and artistic exploration. The resulting cracked glass surfaces serve as captivating testaments to the transformative power of design, enriching interior spaces with a touch of vintage allure and visual intrigue.
As you embark on your own journey of creating cracked glass effects, may this guide serve as a source of inspiration and guidance, empowering you to unleash your creativity and elevate the ambiance of your living space. Embrace the artistry and craftsmanship inherent in this captivating design trend, and revel in the beauty of cracked glass creations that reflect your unique style and vision.
Frequently Asked Questions about How To Make Glass Look Cracked
Was this page helpful?
At Storables.com, we guarantee accurate and reliable information. Our content, validated by Expert Board Contributors, is crafted following stringent Editorial Policies. We're committed to providing you with well-researched, expert-backed insights for all your informational needs.


0 thoughts on “How To Make Glass Look Cracked”