Home>Furniture & Design>Interior Design Trends>How To Make Glass Waterfall
Interior Design Trends
How To Make Glass Waterfall
Modified: August 20, 2024
Learn how to incorporate the stunning glass waterfall trend into your interior design. Elevate your space with this modern and captivating feature. Discover the latest interior design trends today!
(Many of the links in this article redirect to a specific reviewed product. Your purchase of these products through affiliate links helps to generate commission for Storables.com, at no extra cost. Learn more)
Introduction
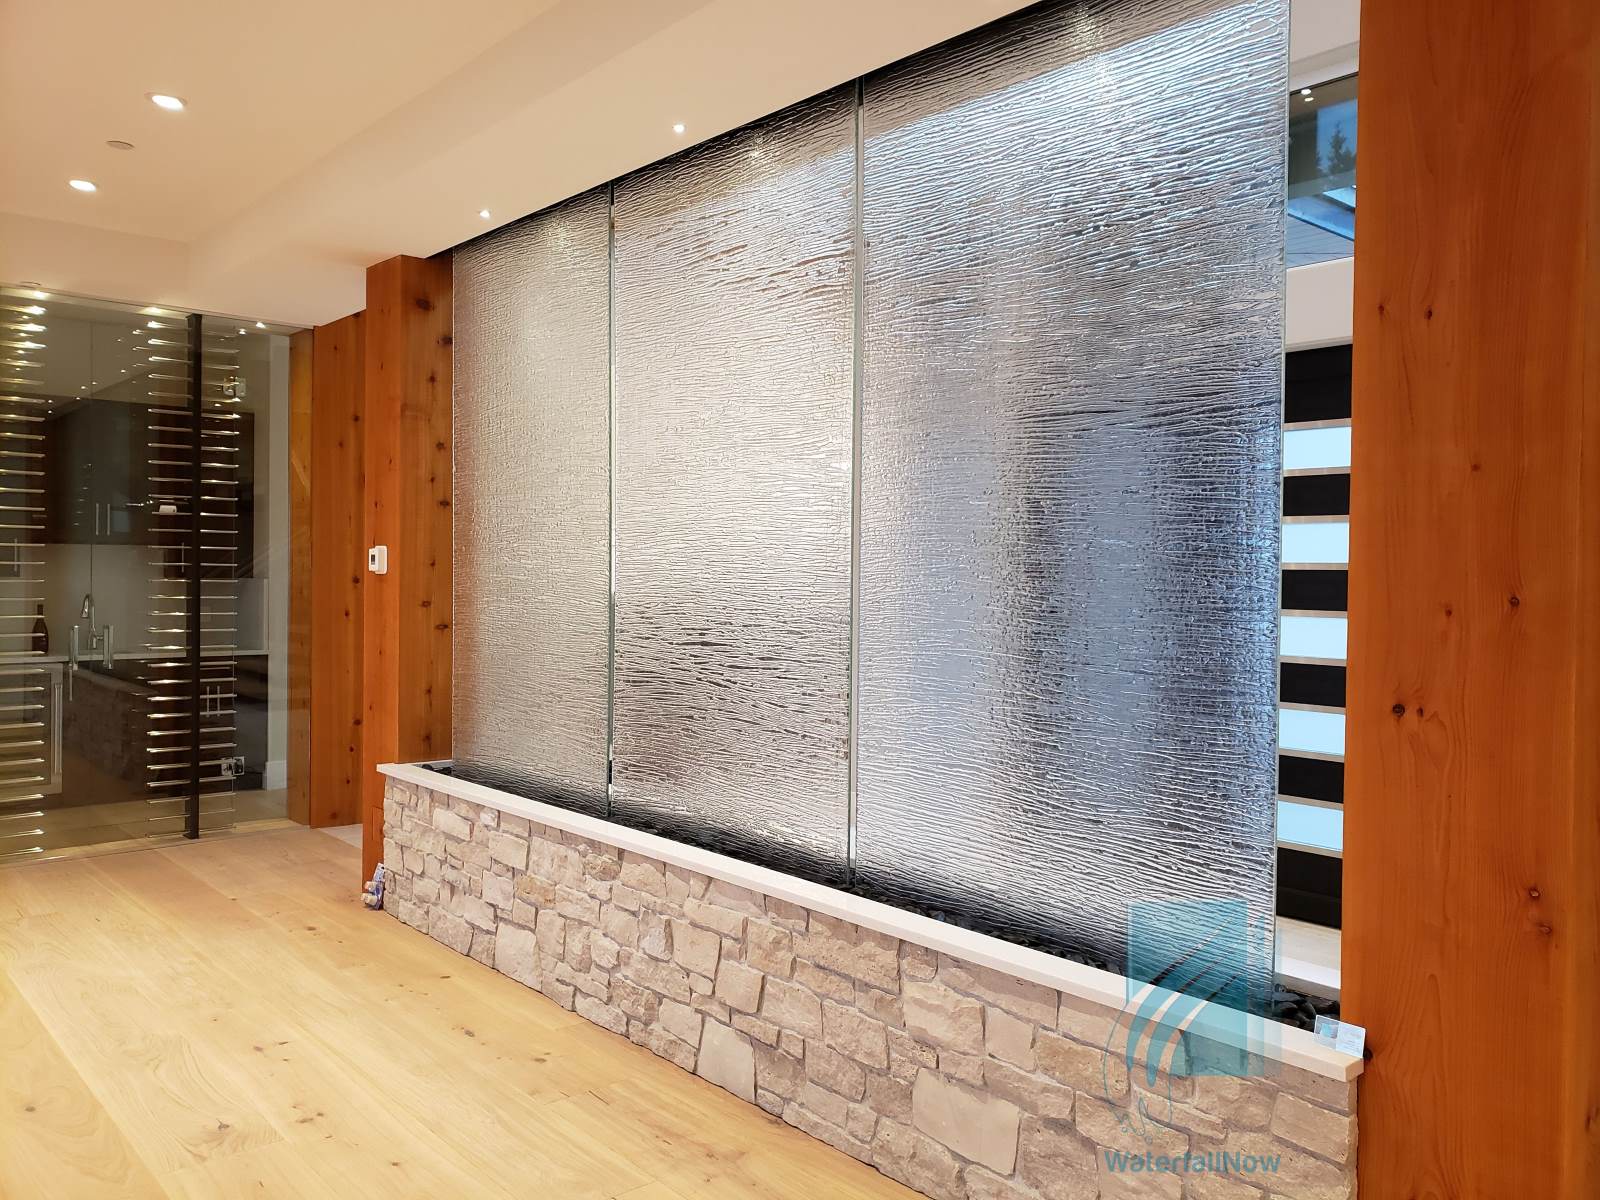
Creating a stunning glass waterfall can bring a touch of elegance and tranquility to any space. Whether you're looking to enhance your home's interior design or add a unique feature to a commercial setting, a glass waterfall can be a captivating focal point that exudes modern sophistication. This DIY project allows you to unleash your creativity and craftsmanship, resulting in a mesmerizing piece of functional art that will undoubtedly impress anyone who encounters it.
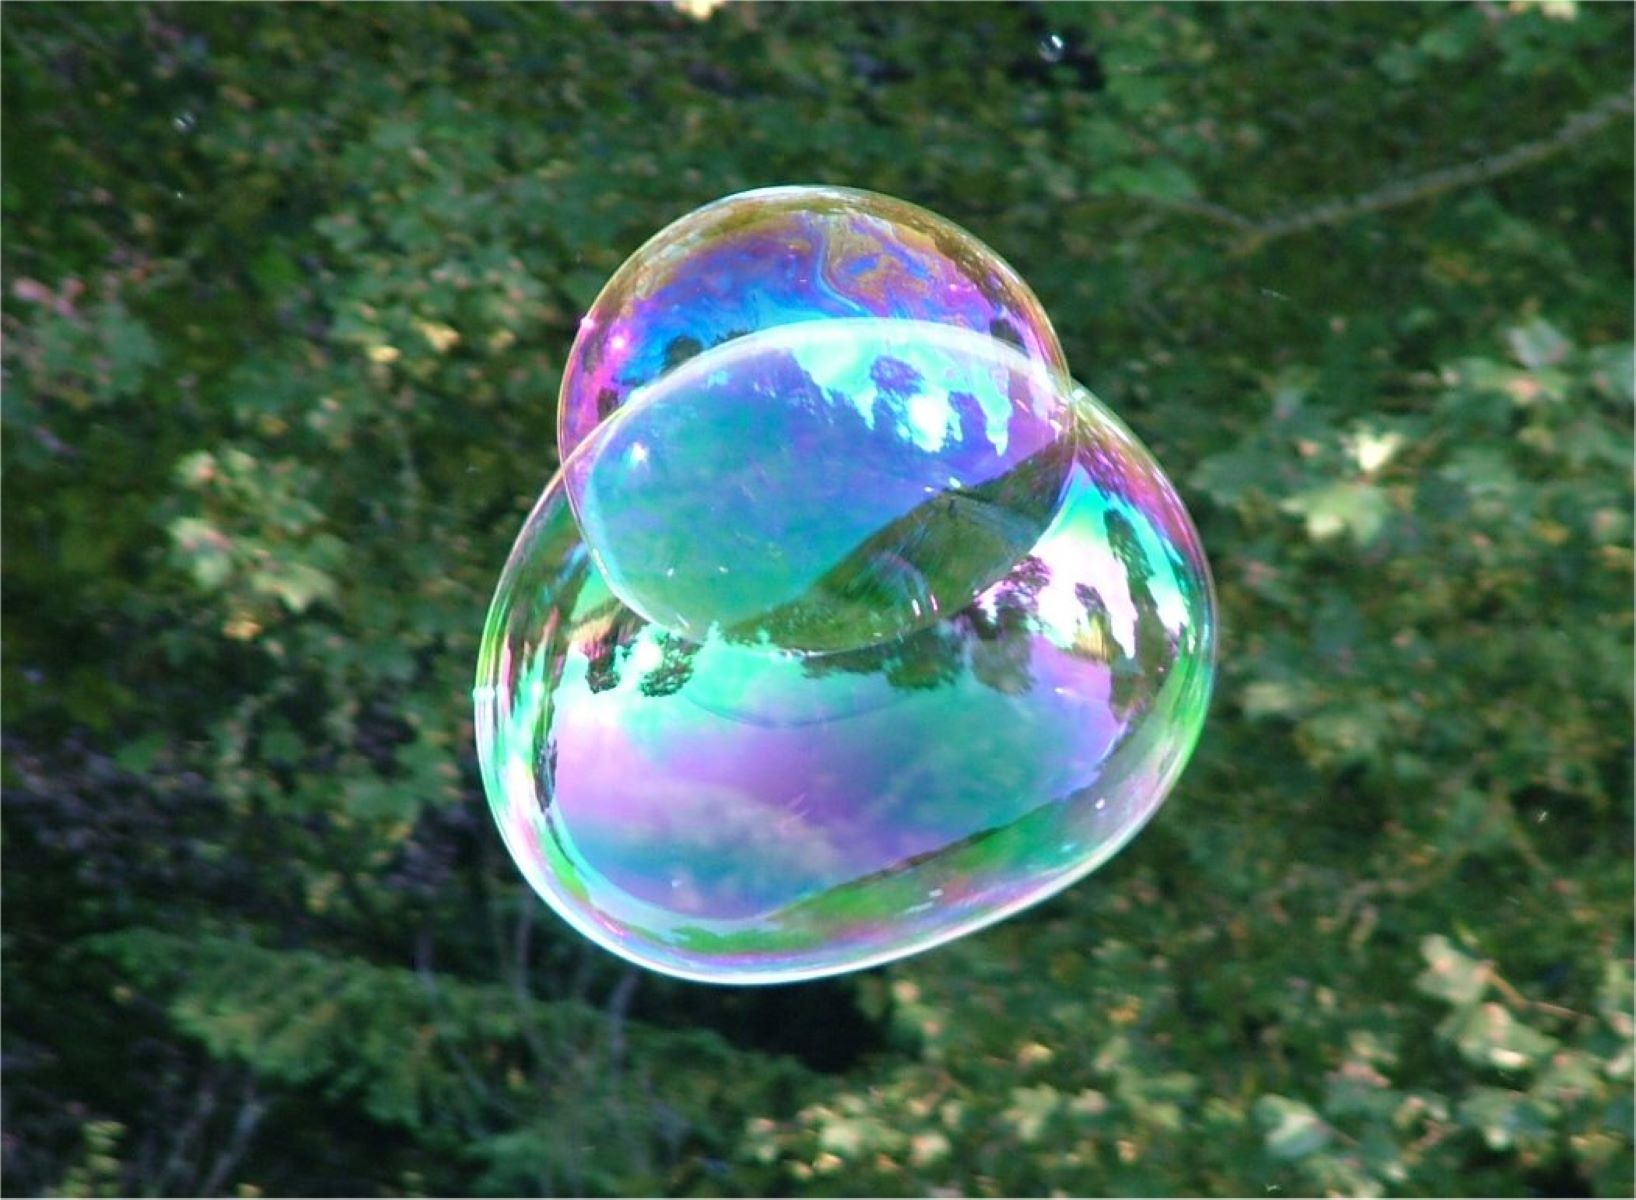
The allure of a glass waterfall lies in its ability to seamlessly blend with various design styles, from contemporary and minimalist to eclectic and luxurious. The interplay of light and water against the sleek, transparent surface of the glass creates a mesmerizing visual effect that can elevate the ambiance of any room. Moreover, the soothing sound of cascading water can contribute to a calming atmosphere, making the glass waterfall a perfect addition to spaces intended for relaxation and rejuvenation.
Embarking on the journey of creating a glass waterfall provides an opportunity to engage in a hands-on, immersive experience that combines artistic vision with technical skill. As you delve into the process of designing, cutting, and assembling the glass pieces, you'll witness the transformation of raw materials into a captivating work of art. The satisfaction of bringing your vision to life and witnessing the enchanting beauty of the finished product is a rewarding experience that resonates with the essence of craftsmanship and creativity.
Furthermore, the versatility of a glass waterfall allows it to serve as a striking element in various settings, such as residential living spaces, office reception areas, or even outdoor garden environments. Its ability to seamlessly integrate with different surroundings while maintaining its captivating allure makes it a versatile design feature that can adapt to diverse architectural and interior design concepts.
In the subsequent sections, we will delve into the step-by-step process of creating a glass waterfall, from designing and cutting the glass pieces to incorporating a water pump and optional lighting. By following these detailed instructions, you can embark on a captivating journey of crafting your own glass waterfall, adding a touch of sophistication and serenity to your chosen space.
Key Takeaways:
- Creating a glass waterfall is a captivating DIY project that combines artistry and technical skill to bring elegance and tranquility to any space. From designing and cutting glass panels to adding optional LED lighting, it’s a rewarding journey of creativity and craftsmanship.
- The glass waterfall’s versatility allows it to seamlessly blend with various design styles, making it a captivating addition to residential, commercial, and outdoor spaces. The optional LED lighting enhances the visual impact, creating a mesmerizing interplay of light and water that fosters a sense of serenity and elegance.
Read more: How To Make Waterfall Valances
Materials Needed
To embark on the exciting endeavor of creating a captivating glass waterfall, you will need a carefully curated selection of materials and tools to bring your vision to life. Here's a comprehensive list of the essential items required for this DIY project:
-
Tempered Glass Panels: The foundation of your glass waterfall, tempered glass panels serve as the primary material for constructing the cascading structure. Ensure that the panels are of high quality and suitable dimensions to accommodate your desired design.
-
Glass Adhesive: A reliable and strong glass adhesive is crucial for securely bonding the glass panels together. Opt for a specialized adhesive designed for glass applications to ensure structural integrity and longevity.
-
Water Pump: Select a water pump that is suitable for the size and scale of your glass waterfall. The pump should be capable of circulating water effectively, creating a seamless cascading effect while maintaining a tranquil flow.
-
Tubing and Fittings: Acquire flexible tubing and appropriate fittings to facilitate the circulation of water from the reservoir to the top of the glass waterfall. Ensure that the tubing is durable and compatible with the chosen water pump.
-
Reservoir: A reservoir or basin will contain the water and serve as the starting point for the cascading flow. The size of the reservoir should align with the dimensions of your glass waterfall and accommodate the water pump and tubing.
-
LED Lighting (Optional): If you desire to enhance the visual impact of your glass waterfall, consider incorporating LED lighting to illuminate the cascading water. Select waterproof LED lights that can be discreetly integrated into the structure for a mesmerizing effect.
-
Glass Cutter: A high-quality glass cutter is essential for precisely shaping the glass panels according to your design specifications. Ensure that the cutter is suitable for tempered glass and enables clean, accurate cuts.
-
Safety Gear: Prioritize safety by equipping yourself with protective gear, including safety goggles and gloves, to safeguard against potential hazards associated with working with glass and tools.
-
Measuring Tools: Accurate measurements are crucial for ensuring the precise alignment and dimensions of the glass panels. Utilize measuring tape, rulers, and other precision tools to maintain consistency and accuracy throughout the construction process.
-
Level and Support Structures: To ensure the stability and balance of the glass waterfall, have a level on hand to confirm proper alignment. Additionally, consider support structures or stands to elevate and display the finished glass waterfall effectively.
By gathering these essential materials and tools, you will be well-prepared to embark on the journey of crafting a mesmerizing glass waterfall that embodies elegance, innovation, and tranquility. With meticulous attention to detail and a passion for creativity, you can transform these raw materials into a captivating work of art that enriches its surrounding environment.
Step 1: Designing the Waterfall
Designing the glass waterfall serves as the foundational stage where creativity and technical precision converge to shape the visual and functional aspects of the final masterpiece. This pivotal step involves conceptualizing the layout, dimensions, and overall aesthetic of the waterfall, laying the groundwork for the subsequent construction phases.
Begin by envisioning the ideal location for the glass waterfall within your chosen space, considering factors such as lighting, spatial dynamics, and visual impact. Whether it's destined for a residential living room, a corporate lobby, or an outdoor garden, the placement of the waterfall will influence its design and the ambiance it creates. Take into account the surrounding decor and architectural elements to ensure seamless integration and harmonious coexistence.
Next, delve into the creative process of sketching and visualizing the desired form of the glass waterfall. Consider the shape, size, and curvature of the cascading glass panels, envisioning a design that resonates with your aesthetic preferences and complements the surrounding environment. Embrace the opportunity to experiment with various design concepts, exploring the interplay of straight lines, gentle curves, and asymmetrical arrangements to achieve a captivating visual composition.
Furthermore, meticulous attention to detail is essential when determining the dimensions of the glass panels, ensuring that they align with the intended proportions of the waterfall. Utilize precise measurements and scale models to refine the design, allowing for adjustments that optimize the visual impact and functionality of the structure. Strive for a design that not only captivates the eye but also facilitates the seamless flow of water, creating a mesmerizing cascade that embodies elegance and tranquility.
Moreover, consider the incorporation of additional elements, such as etched patterns or frosted accents on the glass panels, to infuse the waterfall with a touch of artistic flair. These embellishments can contribute to the overall ambiance and visual allure of the waterfall, adding depth and character to the transparent surface. Embrace the opportunity to infuse your design with personal touches that reflect your unique style and creative vision.
By meticulously conceptualizing and designing the glass waterfall, you lay the groundwork for a captivating creation that harmonizes with its surroundings and captivates the senses. This initial phase sets the stage for the subsequent steps of cutting, assembling, and bringing the design to life, culminating in a stunning glass waterfall that embodies the fusion of artistry and functionality.
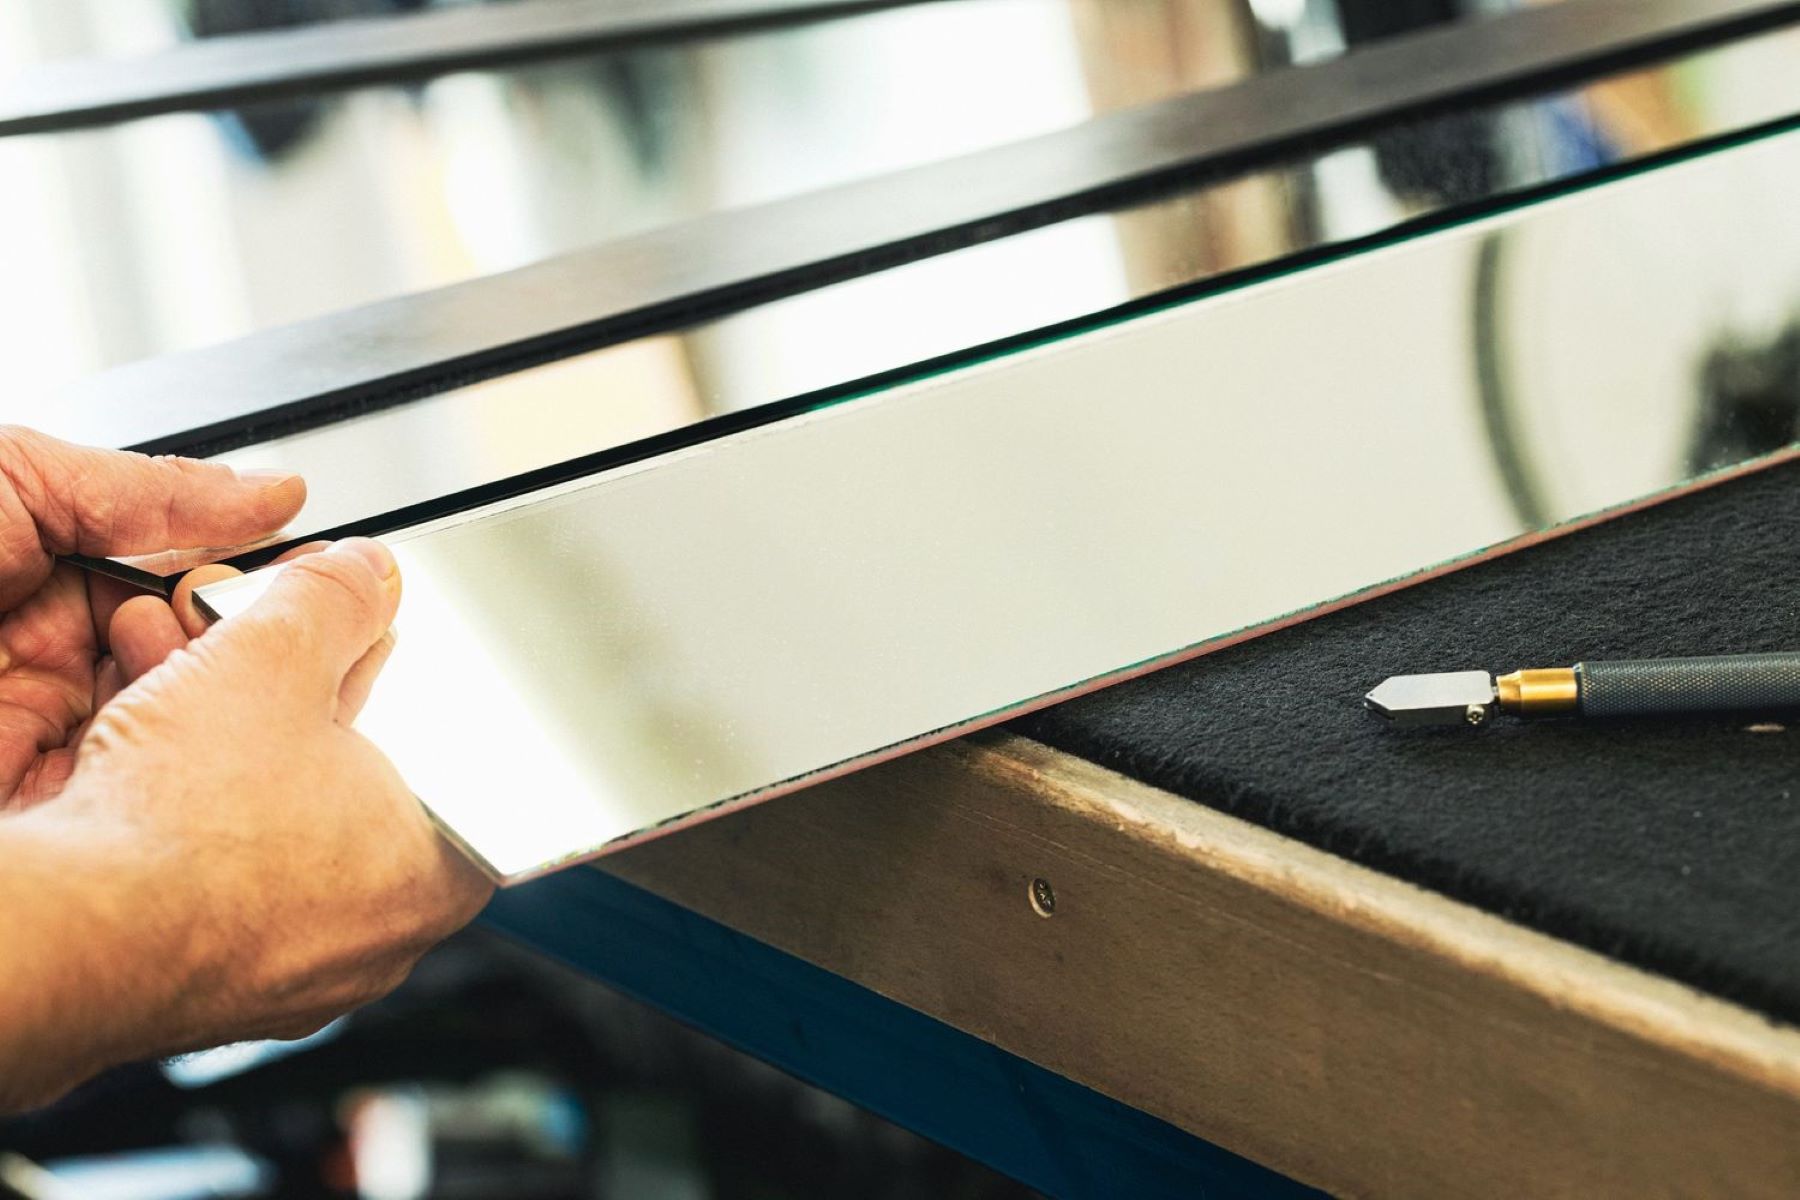
Step 2: Cutting and Assembling the Glass Pieces
The process of cutting and assembling the glass pieces marks a pivotal phase in bringing the envisioned glass waterfall to life. This intricate stage demands precision, patience, and a meticulous approach to transforming raw tempered glass panels into a seamless, cascading structure that embodies elegance and functionality.
Commencing with the cutting phase, it is imperative to prioritize safety and accuracy. Utilizing a high-quality glass cutter designed for tempered glass, meticulously score the panels along the predetermined lines, ensuring clean and precise cuts. Exercise caution and patience, as tempered glass demands a deliberate and controlled approach to achieve accurate results. Embrace the opportunity to witness the transformation of the rigid glass panels into the envisioned shapes, whether it be gentle curves, sleek angles, or asymmetrical forms that contribute to the captivating design.
Following the precise cutting of the glass panels, the assembly process unfolds as a delicate yet gratifying endeavor. Employing a reliable glass adhesive, carefully bond the individual pieces together, ensuring seamless transitions and structural integrity. Embrace the opportunity to witness the gradual fusion of the separate elements into a cohesive, flowing structure that embodies the essence of the envisioned design. Pay meticulous attention to alignment and symmetry, striving for a flawless union of the glass pieces that harmonizes with the original design concept.
Throughout the assembly phase, maintain a keen eye for detail and consistency, ensuring that each glass piece seamlessly integrates with its counterparts to form a harmonious, cascading composition. Embrace the opportunity to witness the gradual realization of your design, as the individual glass pieces unite to create a captivating visual and functional entity that embodies the essence of craftsmanship and creativity.
By meticulously navigating the cutting and assembly process, you pave the way for the transformation of raw materials into a captivating glass waterfall that transcends its physical form, embodying elegance, innovation, and tranquility. This phase serves as a testament to the fusion of technical precision and artistic vision, culminating in a mesmerizing creation that enriches its surrounding environment with its captivating allure.
When making a glass waterfall, use tempered glass for safety and durability. Ensure the glass panels are securely installed to prevent any accidents.
Step 3: Attaching the Water Pump
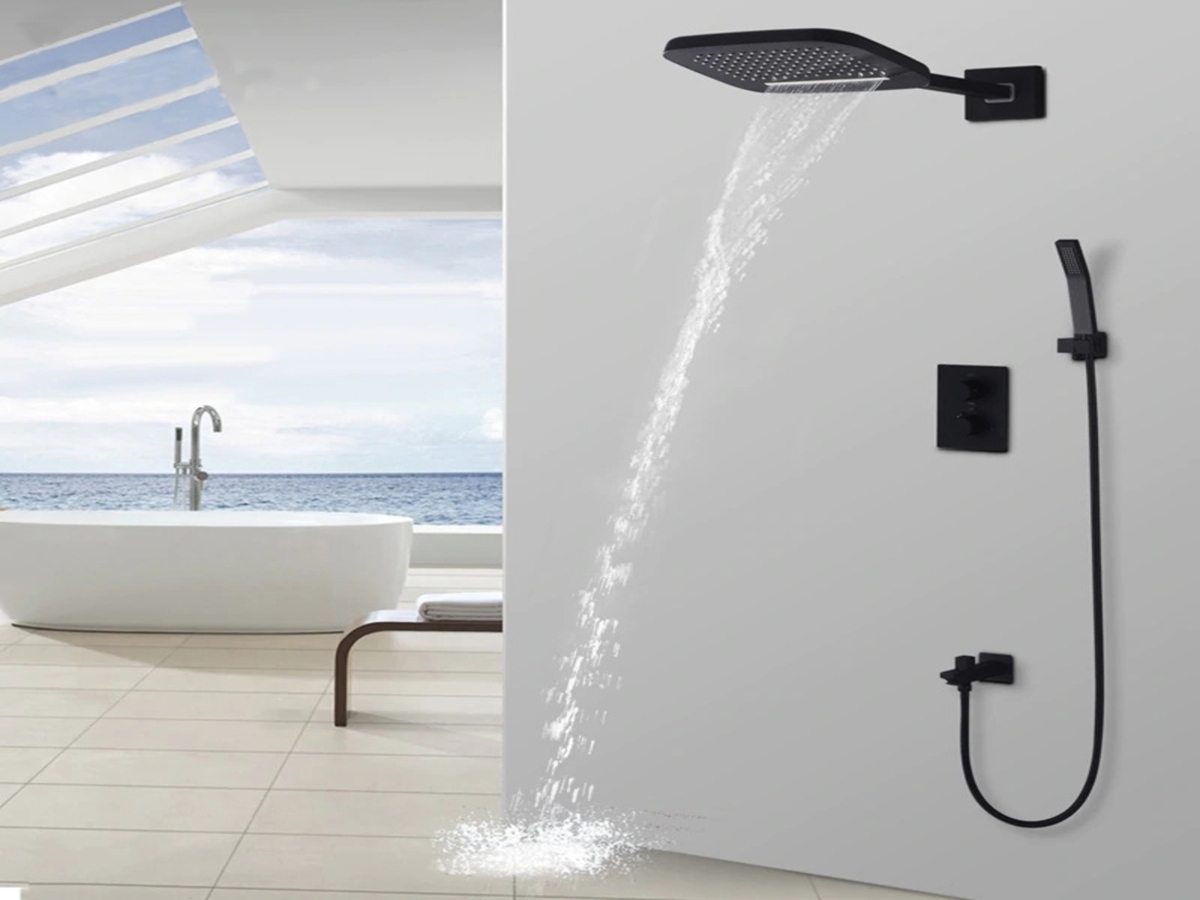
Attaching the water pump is a crucial step in bringing the glass waterfall to life, as it facilitates the mesmerizing cascade of water that defines this captivating feature. The seamless integration of the water pump ensures the harmonious fusion of form and function, allowing the glass waterfall to exude tranquility and elegance through the gentle flow of water.
Begin by selecting a water pump that aligns with the size and scale of your glass waterfall, ensuring that it possesses the necessary capacity to circulate water effectively. Prioritize a pump that offers adjustable flow settings, allowing you to tailor the cascading water to suit your preferences, whether you desire a gentle trickle or a more pronounced flow. Additionally, opt for a pump designed for submersible use, ensuring its compatibility with the reservoir and tubing configuration.
Position the water pump within the designated reservoir, ensuring that it is securely anchored and positioned to facilitate optimal water circulation. Prioritize a central location that allows the water to disperse evenly across the glass panels, creating a seamless cascade that embodies grace and fluidity. Secure the pump in place, ensuring stability and minimizing vibrations that could detract from the tranquil ambiance of the glass waterfall.
Next, connect the tubing to the outlet of the water pump, ensuring a secure and watertight seal to prevent any potential leaks. Carefully route the tubing along the interior of the glass waterfall, concealing it discreetly to maintain the visual purity of the cascading structure. Embrace the opportunity to integrate the tubing seamlessly, ensuring that it complements the design and remains inconspicuous, allowing the focus to remain on the captivating interplay of water and glass.
Once the tubing is in place, initiate a trial run of the water pump to assess its functionality and the flow of water across the glass panels. Adjust the flow settings as needed, fine-tuning the water's trajectory to achieve the desired cascade effect. Embrace this phase as an opportunity to witness the glass waterfall come to life, as the gentle flow of water imbues the structure with a captivating sense of serenity and movement.
By meticulously attaching the water pump, you infuse the glass waterfall with the dynamic element of cascading water, elevating its visual allure and creating a captivating focal point that embodies elegance and innovation. This pivotal step marks the convergence of technical precision and artistic vision, culminating in a mesmerizing creation that enriches its surrounding environment with the soothing presence of flowing water.
Read more: What Are Waterfall Countertops
Step 4: Adding Lighting (Optional)
Incorporating lighting into your glass waterfall presents an optional yet captivating opportunity to elevate its visual impact and create a mesmerizing ambiance. The strategic integration of LED lighting can transform the cascading water into a radiant spectacle, infusing the structure with an enchanting glow that captivates the senses and enhances its allure.
Begin by selecting waterproof LED lights designed for submersion, ensuring their durability and suitability for the aquatic environment within the glass waterfall. Opt for lights that emit a soft, ambient glow, complementing the tranquil nature of the cascading water and accentuating the transparency of the glass panels. Additionally, consider the color temperature and intensity of the LED lights, aiming to create a captivating visual effect that harmonizes with the surrounding space.
Strategically position the LED lights within the structure, concealing them discreetly to accentuate the cascading water while minimizing their visibility. Embrace the opportunity to experiment with different placement configurations, exploring the interplay of light and water to achieve a captivating illumination that accentuates the elegance of the glass waterfall. Whether you opt for a uniform distribution of lights or strategic focal points, prioritize a design that enhances the visual allure of the cascading water while maintaining a harmonious balance with the surrounding environment.
Once the LED lights are in place, initiate a trial illumination to assess their effect on the glass waterfall. Observe the interplay of light and water, noting the captivating reflections and refractions that unfold within the structure. Fine-tune the positioning and intensity of the lights as needed, striving to achieve a captivating visual composition that embodies sophistication and tranquility.
The integration of LED lighting into the glass waterfall transcends its aesthetic impact, contributing to the creation of an immersive sensory experience. The gentle glow of the lights, combined with the cascading water, fosters an ambiance of serenity and elegance, making the glass waterfall a captivating focal point that enriches its surrounding environment.
By embracing the optional addition of LED lighting, you infuse the glass waterfall with an enchanting radiance that transcends its physical form, creating a captivating interplay of light and water that resonates with innovation and tranquility. This optional enhancement marks the culmination of the glass waterfall's transformation into a captivating work of art that captivates the senses and elevates its surrounding space.
Step 5: Testing and Adjusting the Waterfall
With the meticulous construction of the glass waterfall nearing completion, the pivotal phase of testing and adjusting emerges as a crucial step in ensuring the seamless functionality and captivating allure of the finished masterpiece. This phase encompasses a series of meticulous assessments and refinements, allowing for the optimization of water flow, structural stability, and visual impact.
Initiate the testing phase by activating the water pump, observing the graceful cascade of water as it traverses the glass panels. Pay keen attention to the trajectory and distribution of the water, ensuring that it maintains a consistent and tranquil flow across the entire surface of the waterfall. Assess the alignment and positioning of the glass panels, confirming that they facilitate an uninterrupted flow while exuding a captivating sense of fluidity and elegance.
Simultaneously, evaluate the structural stability of the glass waterfall, ensuring that it remains securely anchored and balanced. Confirm that the adhesive bonds between the glass panels exhibit resilience and integrity, with no signs of instability or misalignment. Embrace this phase as an opportunity to fine-tune the structural elements, ensuring that the glass waterfall embodies a harmonious fusion of form and function.
Furthermore, assess the overall ambiance and visual impact of the glass waterfall within its designated space. Observe the interplay of light and water, noting the captivating reflections and refractions that unfold within the structure. Embrace the opportunity to witness the captivating allure of the waterfall in action, allowing its tranquil presence to resonate with the surrounding environment.
As the testing phase unfolds, embrace a meticulous approach to adjustments, fine-tuning the water flow, structural alignment, and visual composition as needed. Utilize this phase as an opportunity to optimize the glass waterfall, ensuring that it embodies the envisioned elegance, innovation, and tranquility. Embrace the iterative nature of this phase, allowing for refinements that elevate the glass waterfall into a captivating work of art that captivates the senses and enriches its surrounding space.
By meticulously navigating the testing and adjustment phase, you culminate the transformative journey of crafting a mesmerizing glass waterfall that transcends its physical form, embodying elegance, innovation, and tranquility. This pivotal phase marks the convergence of technical precision and artistic vision, ensuring that the glass waterfall stands as a captivating testament to the fusion of craftsmanship and creativity.
Conclusion
In conclusion, the journey of creating a glass waterfall unfolds as a captivating fusion of artistry, innovation, and technical precision. From the initial stages of envisioning and designing the waterfall to the meticulous cutting, assembly, and integration of water and optional lighting, this DIY project embodies the essence of craftsmanship and creativity. As the glass waterfall comes to life, it transcends its physical form, exuding elegance and tranquility while captivating the senses and enriching its surrounding environment.
The allure of a glass waterfall lies in its ability to seamlessly integrate with diverse design styles and architectural concepts, making it a versatile and captivating addition to residential, commercial, and outdoor spaces. Whether it graces a modern living room, a corporate lobby, or an outdoor garden, the glass waterfall serves as a mesmerizing focal point that elevates the ambiance and fosters a sense of serenity.
Furthermore, the optional integration of LED lighting adds an enchanting dimension to the glass waterfall, creating a captivating interplay of light and water that resonates with sophistication and innovation. The gentle glow of the lights, combined with the cascading water, fosters an ambiance of tranquility and elegance, making the glass waterfall an immersive sensory experience that captivates the senses.
As the glass waterfall nears completion, the meticulous testing and adjustment phase ensures that it embodies the envisioned elegance, innovation, and tranquility. This iterative process allows for refinements that optimize the water flow, structural stability, and visual impact, culminating in a captivating work of art that captivates the senses and enriches its surrounding space.
In essence, the creation of a glass waterfall transcends the realm of DIY craftsmanship, embodying a captivating fusion of form and function. It stands as a testament to the transformative power of creativity and technical skill, enriching its surroundings with a captivating presence that resonates with elegance and tranquility. Whether it serves as a focal point for relaxation, a visual centerpiece, or a symbol of artistic expression, the glass waterfall embodies the timeless allure of cascading water and transparent beauty.
Frequently Asked Questions about How To Make Glass Waterfall
Was this page helpful?
At Storables.com, we guarantee accurate and reliable information. Our content, validated by Expert Board Contributors, is crafted following stringent Editorial Policies. We're committed to providing you with well-researched, expert-backed insights for all your informational needs.


0 thoughts on “How To Make Glass Waterfall”