Home>Furniture>Outdoor Furniture>How To Build A Patio Waterfall
Outdoor Furniture
How To Build A Patio Waterfall
Modified: October 18, 2024
Learn how to build a stunning patio waterfall for your outdoor furniture setup. Enhance your backyard oasis with this step-by-step guide.
(Many of the links in this article redirect to a specific reviewed product. Your purchase of these products through affiliate links helps to generate commission for Storables.com, at no extra cost. Learn more)
Introduction
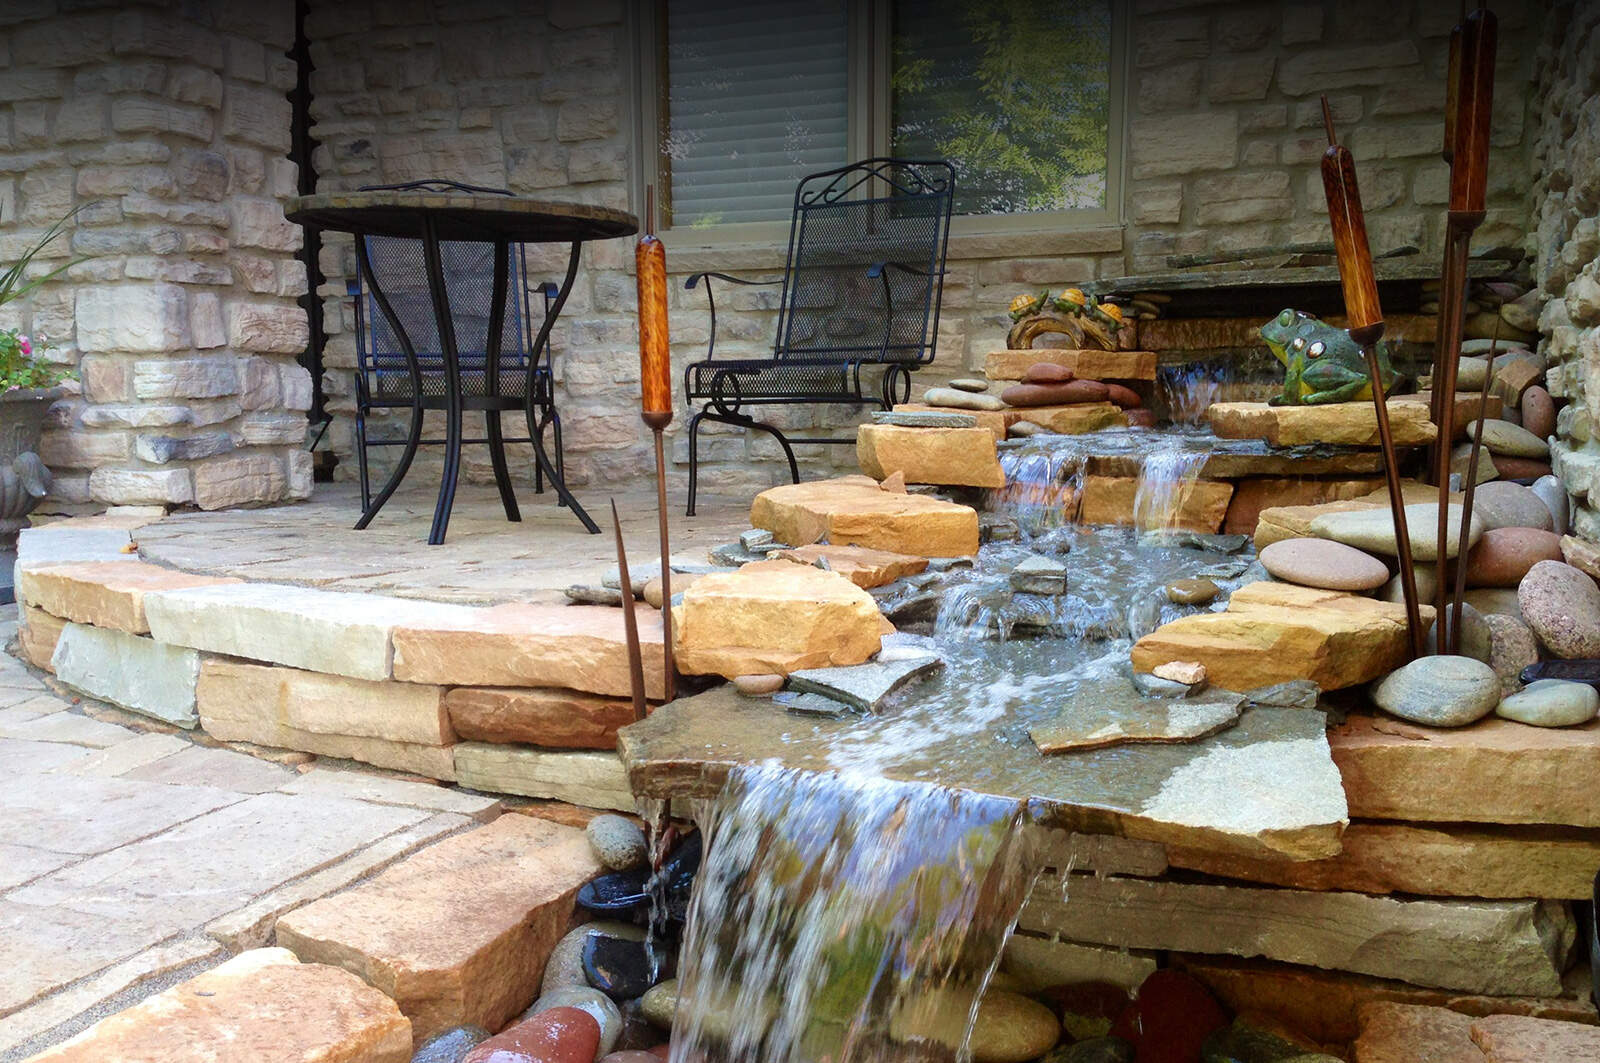
Welcome to the wonderful world of outdoor furniture, where you can relax and enjoy the beauty of nature right in your backyard. One essential piece of outdoor furniture that can truly elevate your outdoor space is a patio waterfall. A patio waterfall not only adds a touch of elegance and tranquility to your outdoor area, but it also creates a soothing ambiance with the sound of flowing water. Whether you want to create a peaceful oasis or simply add a decorative element to your patio, building a patio waterfall is a great DIY project that can be both rewarding and enjoyable.
In this article, we will guide you through the step-by-step process of building a patio waterfall, from gathering the necessary materials and tools to adding the finishing touches. So grab your construction gear and let’s dive into this exciting project!
Key Takeaways:
- Building a patio waterfall is a fun and rewarding DIY project that can turn your outdoor space into a peaceful oasis. By following the steps in this guide, you can unleash your creativity and create a stunning water feature right in your backyard.
- Adding plants, decorative rocks, and lighting to your patio waterfall can personalize the space and enhance its beauty. With the soothing sound of flowing water, your new outdoor oasis will provide a tranquil retreat for you to enjoy.
Read more: How To Build A Swimming Pool Waterfall
Step 1: Gather the necessary materials and tools
Before you begin building your patio waterfall, it’s important to gather all the materials and tools you’ll need for the project. This will ensure that you have everything on hand and will help streamline the construction process. Here is a list of items you’ll need:
- Preformed waterfall kit
- Pond liner
- Water pump
- Tubing
- Rocks and stones
- Shovel
- Trowel
- Sand
- Level
- Measuring tape
- Marker or chalk
- Rubber gloves
- Protective goggles
The preformed waterfall kit will serve as the base of your patio waterfall, providing the structure and shape of the waterfall. You can find these kits at most home improvement stores or online. Make sure to choose a kit that fits well with the size of your patio and matches the aesthetic you’re aiming for.
The pond liner is necessary to create a waterproof barrier for the waterfall. It will help prevent water from leaking and ensure that your patio remains dry. The water pump is essential for circulating water through the waterfall, creating the serene sound of flowing water.
Once you have gathered all the materials, it’s time to move on to the next step: choosing the location for your patio waterfall.
Step 2: Choose the location for your patio waterfall
Choosing the perfect location for your patio waterfall is crucial to creating a visually appealing and functional outdoor space. Here are a few factors to consider when selecting the location:
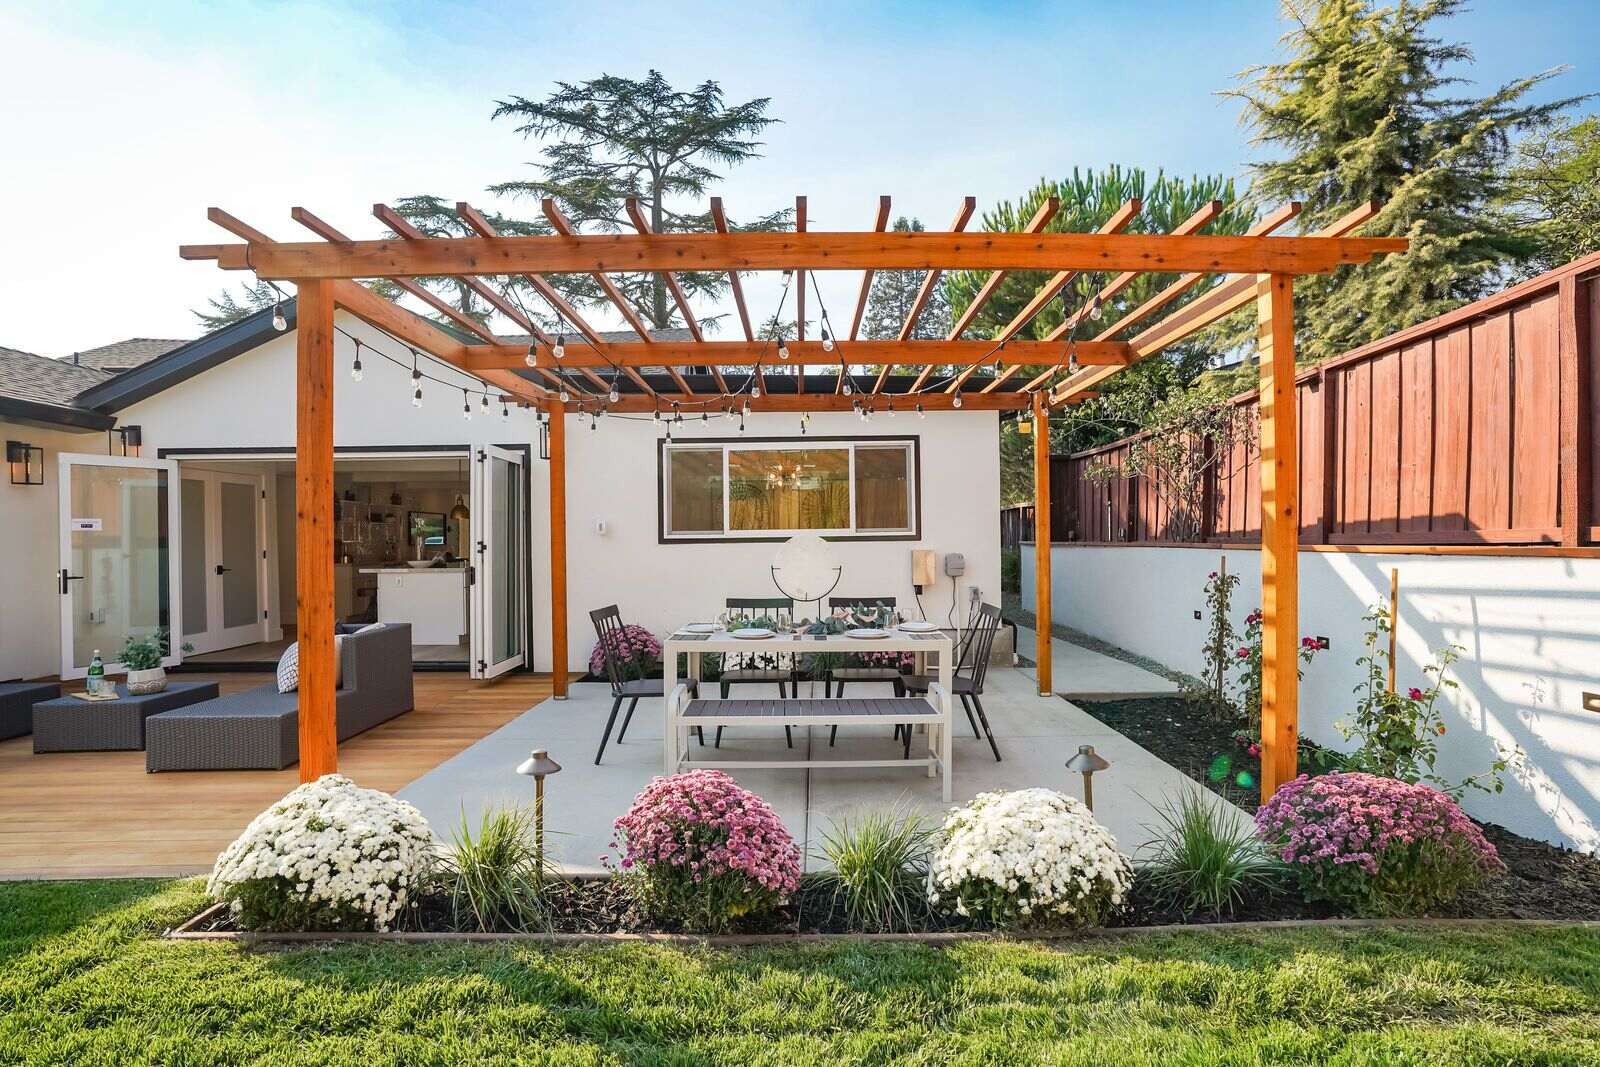
- Sunlight: Look for an area that receives a good amount of sunlight throughout the day. This will help promote the growth of plants and create a warm and inviting atmosphere.
- Accessibility: Make sure the location is easily accessible so that you can enjoy your patio waterfall from different angles. Consider the sight lines from your patio or other seating areas.
- Proximity to water and power source: You’ll need access to a water source for filling the waterfall and a power source for the water pump. Choose a location that is close to both to save on installation costs and ensure convenience.
- Landscaping and surroundings: Take into account the existing landscaping and surroundings of your patio. Consider how the waterfall will blend with the overall aesthetic and if any adjustments or additions need to be made to enhance its visual appeal.
Once you have identified the ideal location, mark the area using a marker or chalk. This will help you visualize the placement and layout of the patio waterfall. Take measurements of the marked area so that you have the dimensions needed to prepare the construction site in the next step.
Choosing the right location for your patio waterfall is crucial, as it sets the foundation for the overall design and atmosphere of your outdoor space. So take your time, consider these factors, and select the perfect spot to bring your vision to life.
Step 3: Prepare the area for construction
Now that you have chosen the location for your patio waterfall, it’s time to prepare the area for construction. This step involves clearing the space, leveling the ground, and creating a solid foundation for your waterfall. Here’s what you need to do:
- Clear the area: Begin by removing any plants, debris, or obstacles from the chosen location. This will ensure a clean and open space to work with. Use a shovel or garden tools to clear the area effectively.
- Level the ground: Use a level to determine if the ground is level. If there are any uneven spots, you’ll need to even them out to create a stable base for your waterfall. Dig out any high spots and fill in any depressions with sand. Use the level to check for an even surface.
- Excavate a trench: Next, you’ll need to dig a trench that will accommodate the pond liner and house the water pump and tubing. The depth and size of the trench will depend on the dimensions of your preformed waterfall kit. Use the measurements you took earlier to determine the appropriate dimensions for the trench.
- Lay the pond liner: Line the trench with the pond liner, ensuring that it covers the entire area and extends beyond the edges of the trench. This will create a waterproof barrier and prevent water seepage.
- Secure the pond liner: Use rocks, stones, or bricks to secure the pond liner in place. This will help anchor the liner and prevent it from shifting or moving during construction.
Preparing the area for construction is a crucial step that lays the foundation for your patio waterfall. Taking the time to clear the space, level the ground, and create a solid base will ensure a stable and durable structure. Once you have completed these preparations, it’s time to move on to the next step: building the foundation of the waterfall.
Step 4: Build the foundation of the waterfall
With the area prepared, it’s time to build the foundation of your patio waterfall. This step involves placing the preformed waterfall kit and securing it in place. Here’s what you need to do:
- Position the preformed waterfall kit: Carefully place the preformed waterfall kit in the trench, ensuring that it fits snugly and is centered within the space. Take into account the desired orientation and angle of the waterfall.
- Level the waterfall kit: Use a level to ensure that the preformed waterfall kit is perfectly level. Adjust the position of the kit as necessary to achieve a balanced and even appearance.
- Secure the waterfall kit: Once the kit is level, secure it in place using rocks, stones, or landscaping adhesive. This will help prevent any shifting or movement during the construction process and ensure a stable foundation for the waterfall.
- Connect the water pump: Follow the manufacturer’s instructions to install and connect the water pump to the tubing. Place the water pump inside the preformed waterfall kit, ensuring that it is positioned correctly to allow proper water flow.
Building a solid foundation is essential to the stability and functionality of your patio waterfall. By properly positioning and securing the preformed waterfall kit, you’re setting the stage for a beautiful and long-lasting water feature. Once the foundation is in place, it’s time to move on to the next step: installing the water pump and tubing.
Read more: How To Build Patio
Step 5: Install the water pump and tubing
Installing the water pump and tubing is a crucial step in creating a flowing and visually appealing patio waterfall. The water pump is responsible for circulating the water, while the tubing directs the water to create the desired waterfall effect. Here’s how you can install the water pump and tubing:
- Position the water pump: Place the water pump at the bottom of the preformed waterfall kit, ensuring that it is securely positioned. The pump should be submerged in water to allow for proper operation.
- Connect the tubing: Attach one end of the tubing to the water pump outlet and secure it tightly. Thread the tubing through the channels of the preformed waterfall kit, ensuring that it follows the desired path of the waterfall.
- Mount the tubing securely: Use clips or zip ties to secure the tubing in place along the sides of the preformed waterfall kit. This will help prevent it from shifting or coming loose.
- Test for water flow: Fill the preformed waterfall kit with water and turn on the water pump. Check for any leaks or malfunctions in the tubing and make adjustments as needed. Ensure that the water flows smoothly and creates the desired waterfall effect.
Proper installation of the water pump and tubing is essential for the functionality and visual impact of your patio waterfall. Take your time to position and secure the components correctly, and test for water flow to ensure a seamless and enjoyable water feature. With the pump and tubing in place, it’s time to move on to the next step: creating the waterfall structure.
Choose a location with access to electricity and water, and plan the design and size of your waterfall to fit the space. Consider using a pre-formed waterfall kit for easier installation.
Step 6: Create the waterfall structure
Creating the structure of the waterfall is where your creativity and vision come to life. This step involves arranging rocks and stones to create a natural-looking waterfall effect. Here’s how you can create the waterfall structure:
- Select rocks and stones: Choose a variety of rocks and stones in different sizes and shapes. Opt for materials that complement your outdoor space and desired aesthetic.
- Start from the bottom: Begin by placing larger rocks and stones at the base of the waterfall, near the water pump. These larger rocks will help create a solid foundation and provide stability.
- Build upwards: Gradually stack smaller rocks and stones on top of the larger ones, creating a cascading effect. Vary the sizes and angles of the rocks to mimic the natural flow of water.
- Pour water over the rocks: Test the flow of water over the rocks to ensure a realistic and visually appealing waterfall effect. Adjust the positioning of the rocks as needed to achieve the desired look.
- Fill gaps and crevices: Use smaller rocks and stones to fill in any gaps or crevices between the larger rocks. This will help create a seamless and natural appearance.
Creating the waterfall structure is an opportunity to unleash your artistic side. Play around with different arrangements and experiment with rock placements to achieve a visually stunning waterfall effect. Remember to step back and assess your work from different angles to ensure a balanced and aesthetically pleasing outcome.
With the waterfall structure in place, it’s time to add the finishing touches in the next step: adding rocks and stones for decoration.
Step 7: Add rocks and stones for decoration
Adding rocks and stones for decoration is a crucial step in enhancing the visual appeal and natural aesthetic of your patio waterfall. This step allows you to add personal touches and create a unique and stunning focal point in your outdoor space. Here’s how you can add rocks and stones for decoration:
- Select decorative rocks and stones: Choose rocks and stones that complement the overall design and theme of your outdoor space. Consider colors, textures, and sizes that will enhance the beauty of the waterfall.
- Place rocks around the waterfall: Strategically place rocks around the base of the waterfall and along the banks of any streams or ponds that may be part of your design. This will create a naturalistic look and help blend the waterfall into its surroundings.
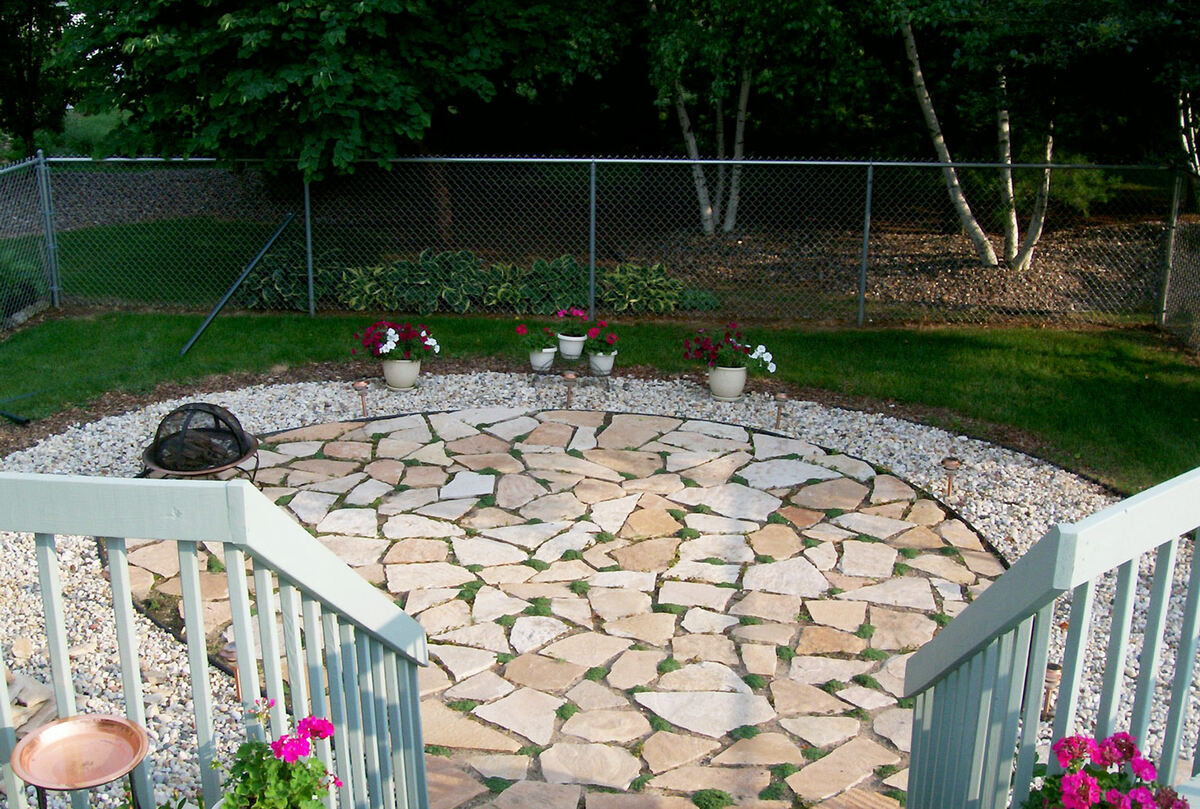
- Create a path with stepping stones: If you have space around the patio waterfall, consider adding stepping stones to create a pathway. This can lead visitors to the waterfall or provide a way to explore the area without stepping on sensitive plants or disturbing the water flow.
- Fill in gaps and crevices: Use smaller rocks and stones to fill in any gaps and crevices between larger rocks. This will create a seamless and natural look, making it appear as if the rocks have naturally settled into place.
- Experiment with different arrangements: Don’t be afraid to experiment with different rock arrangements. Play around with colors and sizes to achieve a visually striking and balanced composition. Step back and assess your work from various angles to ensure it looks cohesive and aesthetically pleasing.
Adding rocks and stones for decoration is a chance to let your creativity shine and personalize your patio waterfall. It’s the final step in creating a truly stunning and captivating outdoor feature that will leave your guests in awe.
With the rocks and stones in place, it’s time to move on to the next step: testing the water flow and making any necessary adjustments.
Step 8: Test the water flow and make adjustments if needed
Testing the water flow and making any necessary adjustments ensures that your patio waterfall is functioning properly and achieving the desired effect. Here’s how you can test the water flow and make any necessary adjustments:
- Turn on the water pump: Start by turning on the water pump and observing the flow of water over the rocks. Pay attention to the water level and flow rate.
- Check for leaks: Inspect the water pump, tubing, and connections for any signs of leaks. If you notice any leaks, tighten the connections or replace any damaged parts.
- Adjust the water flow: If you’re not satisfied with the water flow rate or the height of the waterfall, you can make adjustments. Some water pumps have adjustable flow controls that allow you to increase or decrease the water flow. You can also adjust the positioning of rocks and stones to redirect the flow or create a different waterfall effect.
- Listen to the sound of the water: The sound of flowing water is one of the main attractions of a patio waterfall. Listen carefully and make adjustments to the rocks and stones to achieve the desired sound. Experiment with different combinations and arrangements until you find the perfect balance.
Testing the water flow and making adjustments is an important part of the process to ensure that your patio waterfall provides a visually pleasing and relaxing experience. Take your time to observe and listen to the water flow, and make any changes necessary to achieve the desired result.
Once you’re satisfied with the water flow and overall appearance of your patio waterfall, it’s time to move on to the final step: adding plants and finishing touches.
Read more: How To Build Patio Rugs
Step 9: Add plants and finishing touches
Adding plants and finishing touches to your patio waterfall brings the whole project together and adds that final touch of beauty and uniqueness. Here’s how you can enhance your waterfall with plants and other finishing touches:
- Choose water-loving plants: Select plants that thrive in moist environments and can withstand the splashing water. Water lilies, irises, and horsetail are popular choices for water gardens. Place them strategically around the waterfall, taking into account their growth habits and sunlight requirements.
- Create a lush backdrop: Plant some taller plants or shrubs behind the waterfall to create a lush backdrop. This will provide depth and visual interest to the overall scene. Consider using ferns, bamboo, or ornamental grasses for a natural and tropical look.
- Introduce colorful flowers: Add pops of color by incorporating flowering plants. Choose flowers that complement your outdoor space and attract butterflies or hummingbirds. Position them strategically to create focal points and draw attention to specific areas of the patio waterfall.
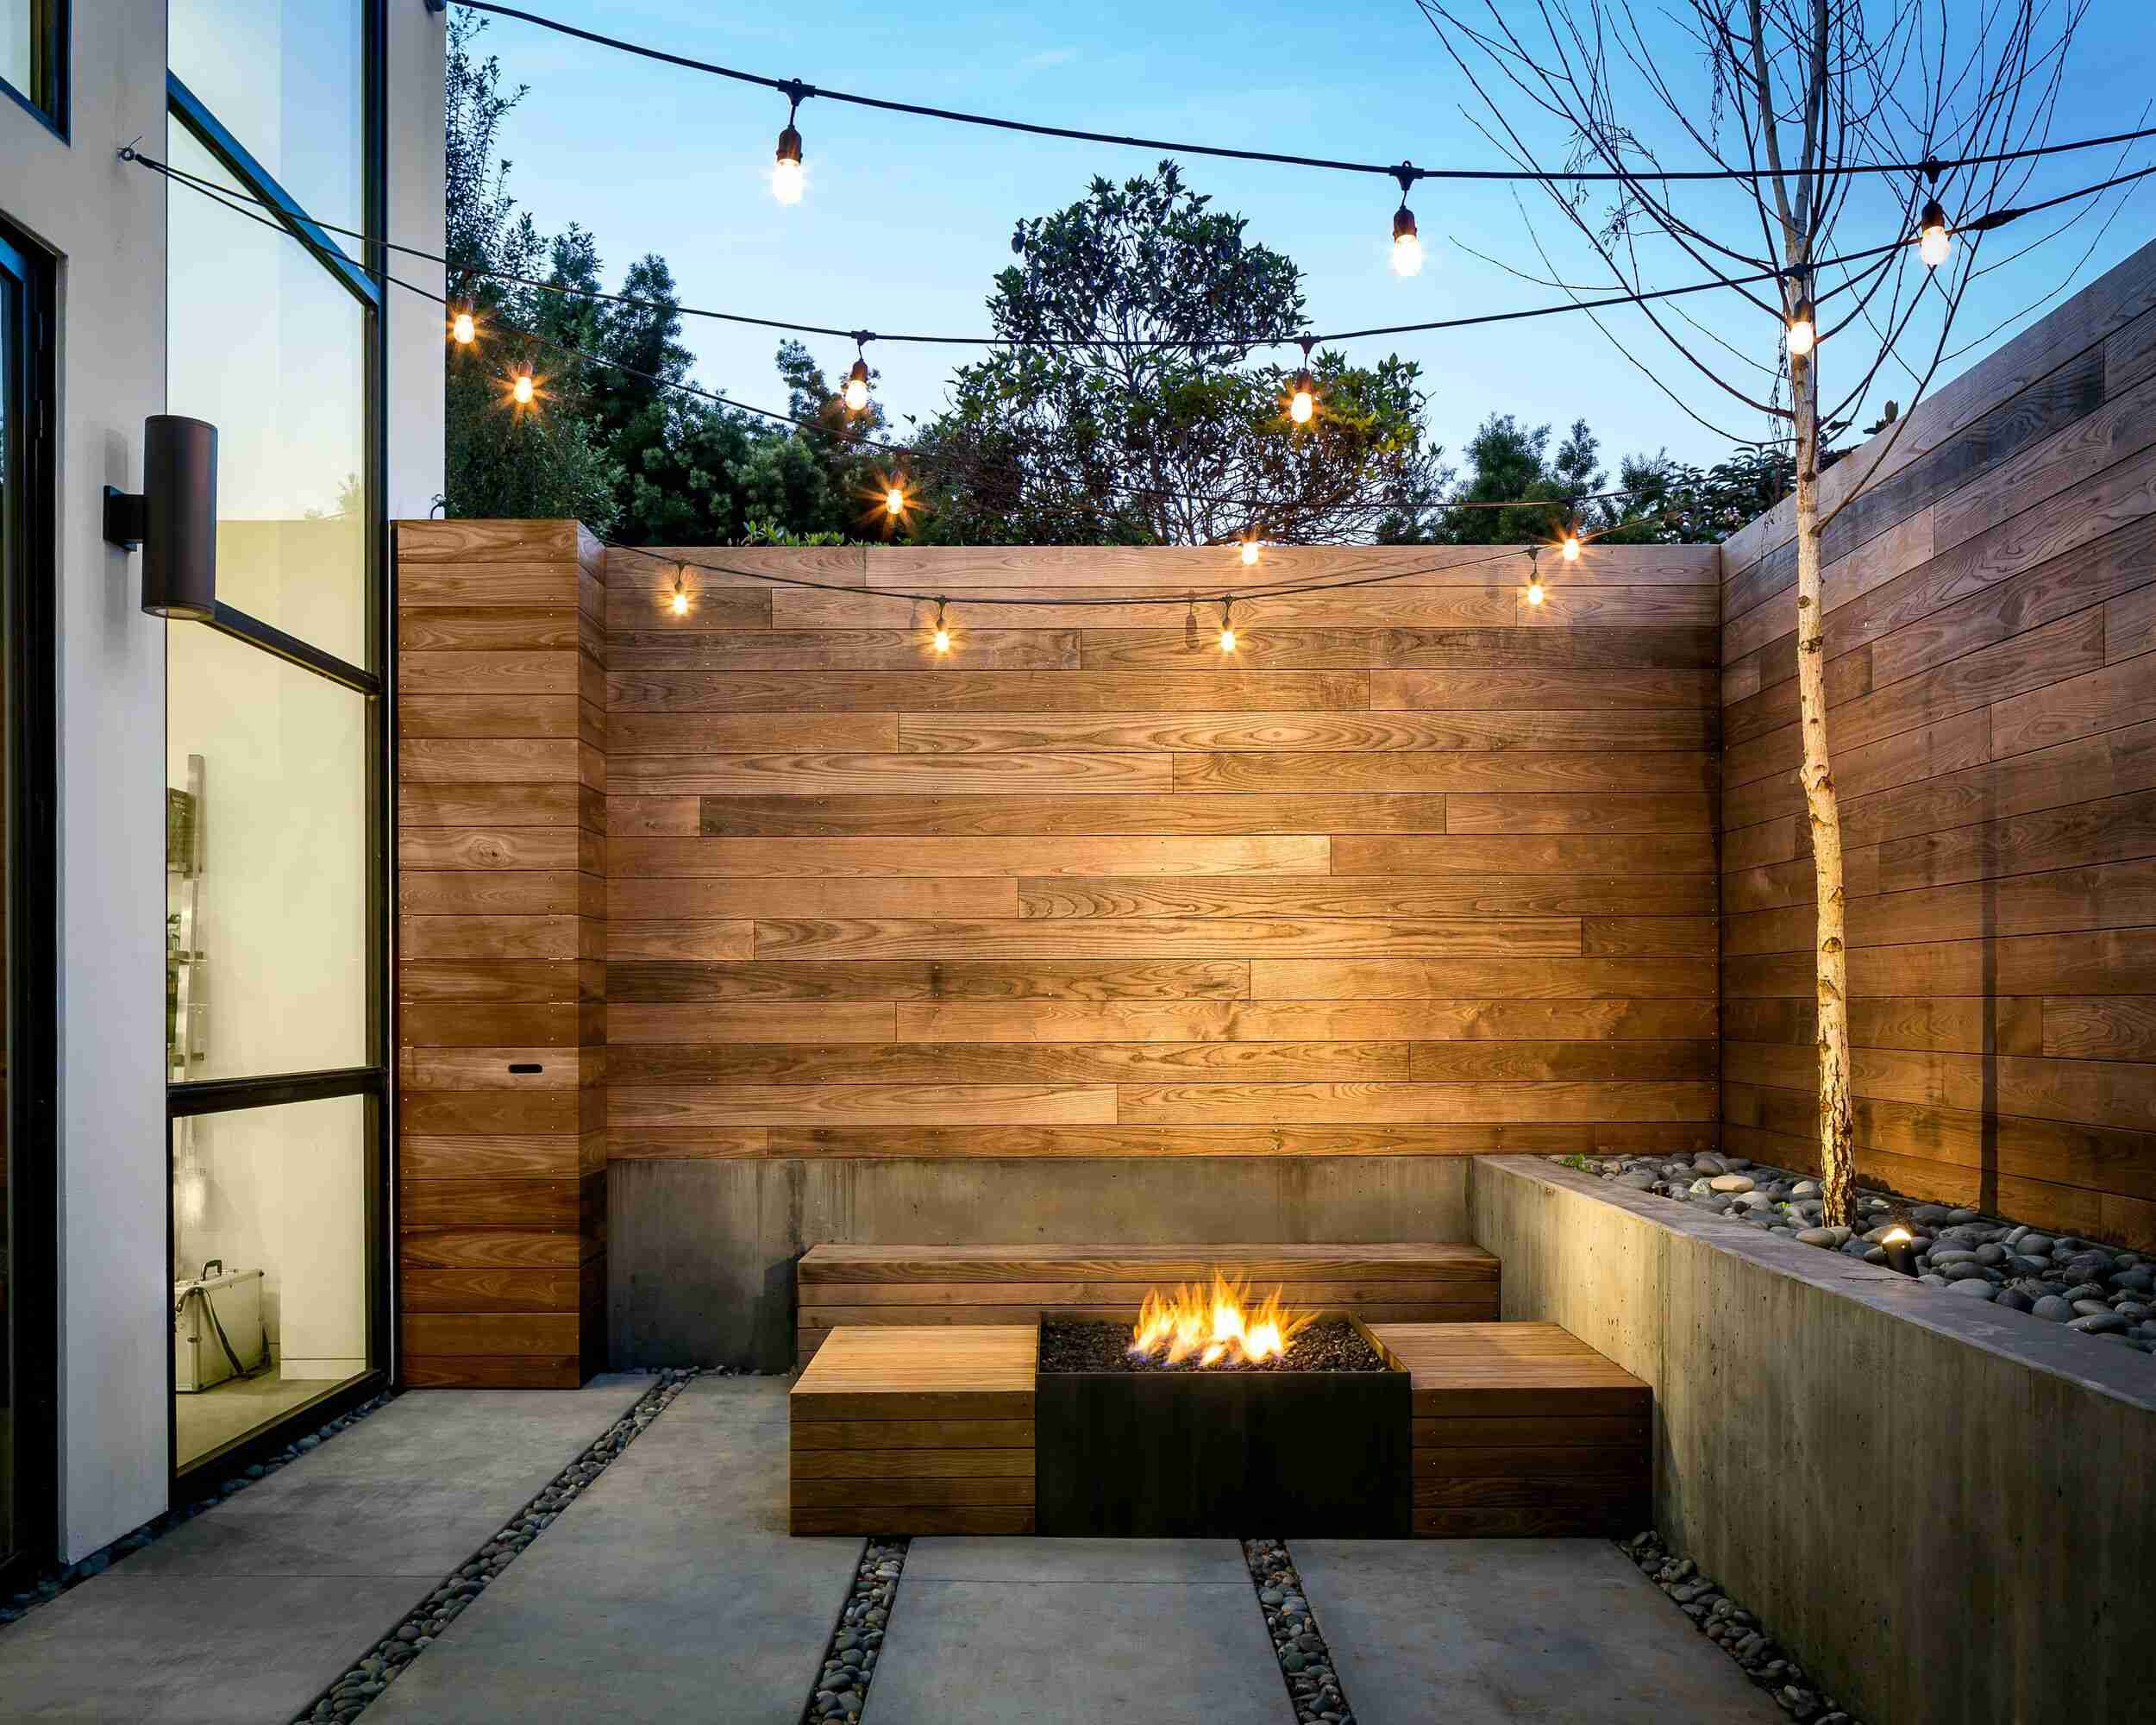
- Add lighting: Install outdoor lighting around your patio waterfall to create a magical ambiance in the evenings. Use spotlights to highlight the waterfall itself and incorporate pathway lights or string lights to illuminate the surrounding area.
- Accessorize with decorative elements: Consider adding decorative elements such as ceramic statues, driftwood, or decorative rocks to enhance the aesthetic appeal of your patio waterfall. These small touches can add personality and charm to your outdoor space.
Adding plants and finishing touches to your patio waterfall allows you to customize and personalize the space to your liking. It’s the final step in creating a stunning and enjoyable outdoor feature that will become the focal point of your outdoor area.
With the plants in place and the finishing touches applied, take a step back and admire your completed patio waterfall. Enjoy the soothing sounds of flowing water, the beauty of nature, and the transformative power it brings to your outdoor space.
Congratulations! You have successfully built your own patio waterfall and transformed your outdoor area into a tranquil oasis.
Remember to periodically maintain and clean your patio waterfall to ensure it continues to function properly and stays visually appealing for years to come.
Thank you for joining us on this DIY journey, and we hope you enjoy the serenity and beauty of your new patio waterfall!
Conclusion
Building a patio waterfall is a rewarding and fulfilling DIY project that can transform your outdoor space into a peaceful retreat. Through the steps outlined in this guide, you have learned how to gather the necessary materials and tools, choose the perfect location, prepare the area for construction, build the foundation, install the water pump and tubing, create the waterfall structure, add rocks and stones for decoration, test the water flow, and make adjustments if needed. Finally, you have added plants and finishing touches to complete your beautiful patio waterfall.
A patio waterfall not only adds a touch of elegance to your outdoor area, but it also provides the soothing sounds of flowing water, creating a tranquil ambiance. It’s a focal point that captivates the eye and brings a sense of serenity and connection with nature.
Throughout the process, you have had the opportunity to unleash your creativity, experiment with different arrangements, and personalize your patio waterfall according to your unique style and vision. By incorporating water-loving plants, creating a lush backdrop, adding colorful flowers, introducing lighting, and accessorizing with decorative elements, you have truly made your patio waterfall a reflection of your personality and taste.
As you enjoy the beauty and tranquility of your patio waterfall, don’t forget to periodically maintain and clean it to ensure its optimal performance and longevity. Regular checks for leaks and adjustments to the water flow will help keep your waterfall functioning properly and maintain its visual appeal.
We hope this guide has empowered you to take on the challenge of building a patio waterfall and that it has provided you with the knowledge and inspiration to create a truly remarkable outdoor space. So sit back, relax, and enjoy the soothing sounds and mesmerizing beauty of your very own patio waterfall.
Thank you for joining us on this journey, and we wish you many delightful moments in your outdoor oasis!
Frequently Asked Questions about How To Build A Patio Waterfall
Was this page helpful?
At Storables.com, we guarantee accurate and reliable information. Our content, validated by Expert Board Contributors, is crafted following stringent Editorial Policies. We're committed to providing you with well-researched, expert-backed insights for all your informational needs.


0 thoughts on “How To Build A Patio Waterfall”