Home>Furniture & Design>Interior Design Trends>How To Remove And Clean The Glass Shelf Above The Crisper Drawers In The French Door Refrigerator
Interior Design Trends
How To Remove And Clean The Glass Shelf Above The Crisper Drawers In The French Door Refrigerator
Modified: August 20, 2024
Learn how to effectively remove and clean the glass shelf above the crisper drawers in your French door refrigerator. Discover the latest interior design trends for a stylish and functional kitchen.
(Many of the links in this article redirect to a specific reviewed product. Your purchase of these products through affiliate links helps to generate commission for Storables.com, at no extra cost. Learn more)
Introduction
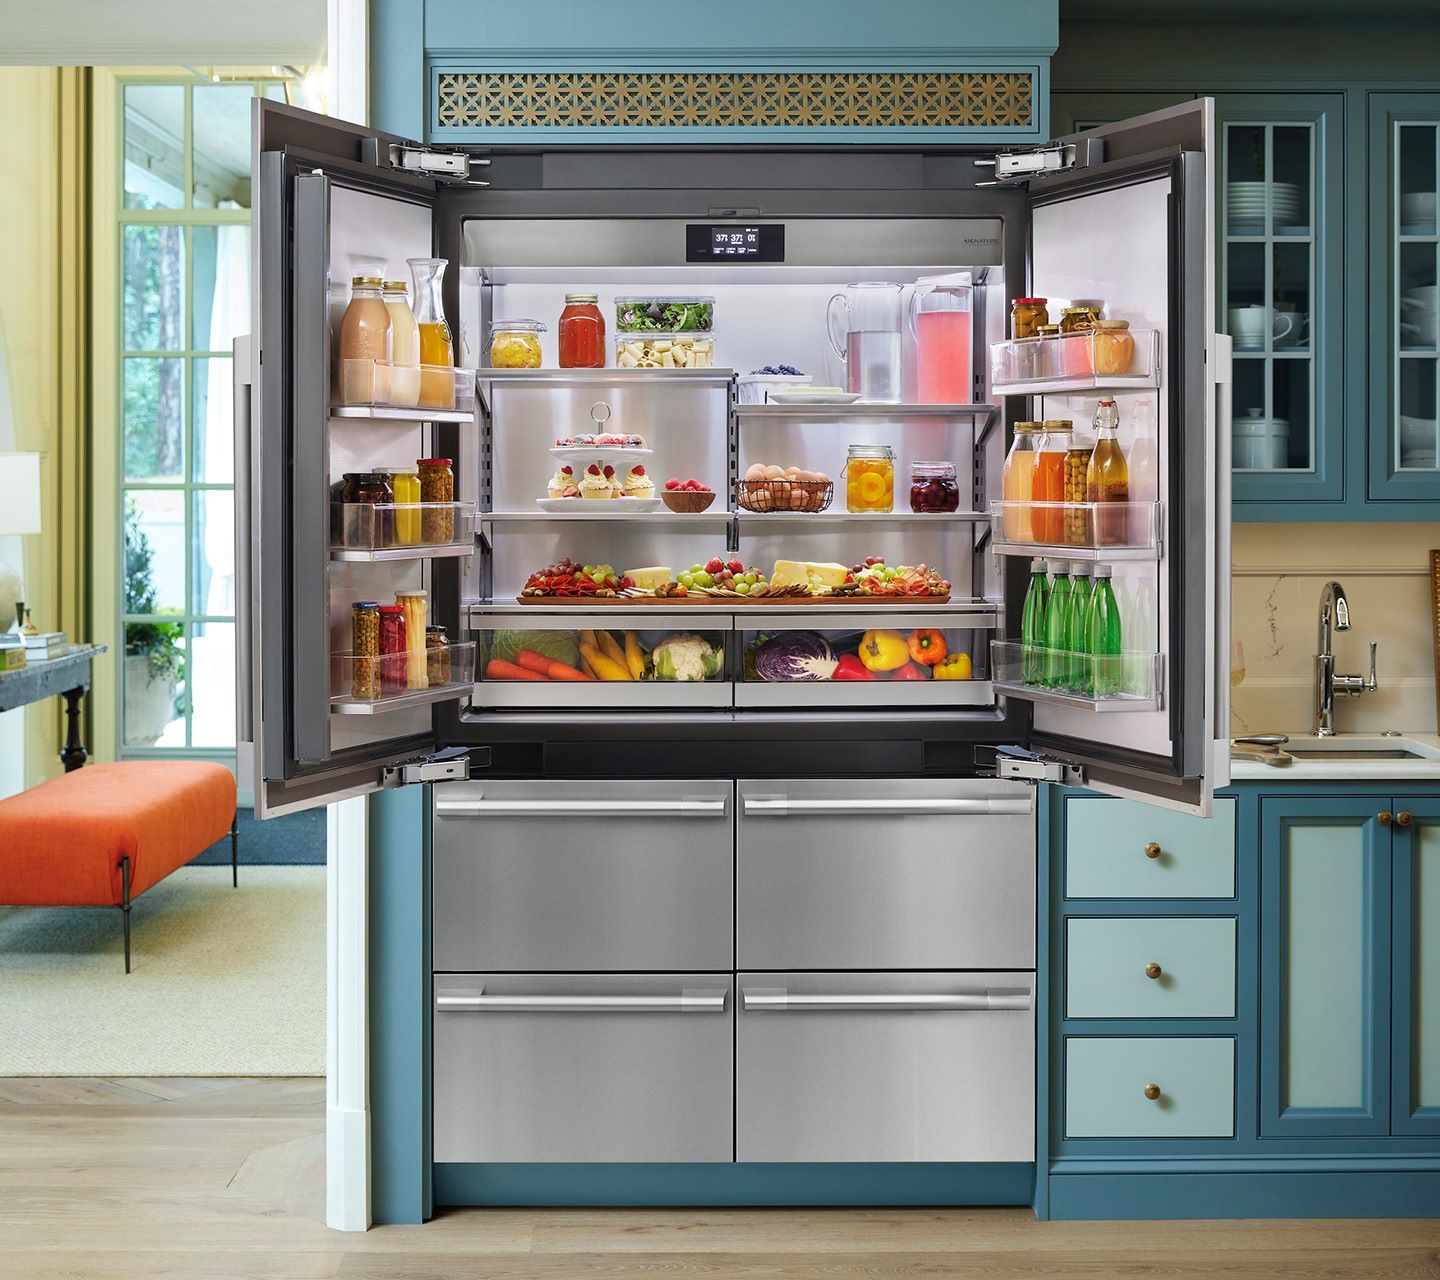
Cleaning the glass shelf above the crisper drawers in a French door refrigerator is an essential task to maintain a hygienic and organized kitchen. Over time, this shelf can accumulate spills, stains, and food particles, leading to unpleasant odors and potential bacterial growth. By regularly removing and cleaning this glass shelf, you can ensure a fresh and clean environment for storing your fruits and vegetables.
The process of removing and cleaning the glass shelf is relatively straightforward, requiring minimal tools and materials. With a few simple steps, you can effectively eliminate dirt and grime, restoring the shelf to its pristine condition. Not only does this contribute to a more visually appealing refrigerator interior, but it also promotes food safety and prolongs the lifespan of your appliance.
In this comprehensive guide, we will walk you through the step-by-step process of removing and cleaning the glass shelf above the crisper drawers in your French door refrigerator. By following these instructions, you can maintain a clean and organized refrigerator space, ensuring that your fresh produce remains in optimal condition. Let's dive into the details and equip ourselves with the necessary knowledge and techniques to accomplish this task efficiently and effectively.
Key Takeaways:
- Keep your French door refrigerator clean and hygienic by regularly removing and cleaning the glass shelf above the crisper drawers. This simple task ensures a fresh and organized space for storing your favorite fruits and vegetables.
- Gather warm soapy water, a soft cleaning cloth, and a drying cloth to effectively remove dirt and grime from the glass shelf. Thoroughly dry the shelf before reinstalling it in the refrigerator for a sparkling and pristine finish.
Tools and materials needed
To successfully remove and clean the glass shelf above the crisper drawers in your French door refrigerator, you will need a few essential tools and materials. These items are readily available and will facilitate a smooth and efficient cleaning process. Here's what you'll need:
-
Warm soapy water: Prepare a solution of mild dish soap and warm water in a container. This gentle yet effective cleaning solution will help to break down and remove any accumulated grime and food residue from the glass shelf.
-
Soft cleaning cloth or sponge: Select a non-abrasive cleaning cloth or sponge to avoid scratching the glass surface. Microfiber cloths are particularly suitable for this task, as they are gentle and highly absorbent, making it easier to wipe away dirt and spills.
-
Towel or drying cloth: Have a clean, dry towel or cloth on hand to thoroughly dry the glass shelf after cleaning. This will help prevent water spots and ensure that the shelf is completely dry before reinstalling it in the refrigerator.
-
Optional: Glass cleaner: If desired, you may choose to use a specialized glass cleaner to achieve a streak-free finish on the glass shelf. However, the warm soapy water solution is often sufficient for effectively removing dirt and grime.
-
Container for soaking removable parts (if applicable): If the glass shelf includes removable components, such as plastic trim or brackets, you may need a container to soak these parts in the warm soapy water solution for thorough cleaning.
By gathering these tools and materials before you begin the cleaning process, you can streamline the task and ensure that you have everything you need to achieve a sparkling clean glass shelf and a fresh refrigerator interior. With these items at your disposal, you'll be well-prepared to tackle the next steps in the process and restore the glass shelf to its original pristine condition.
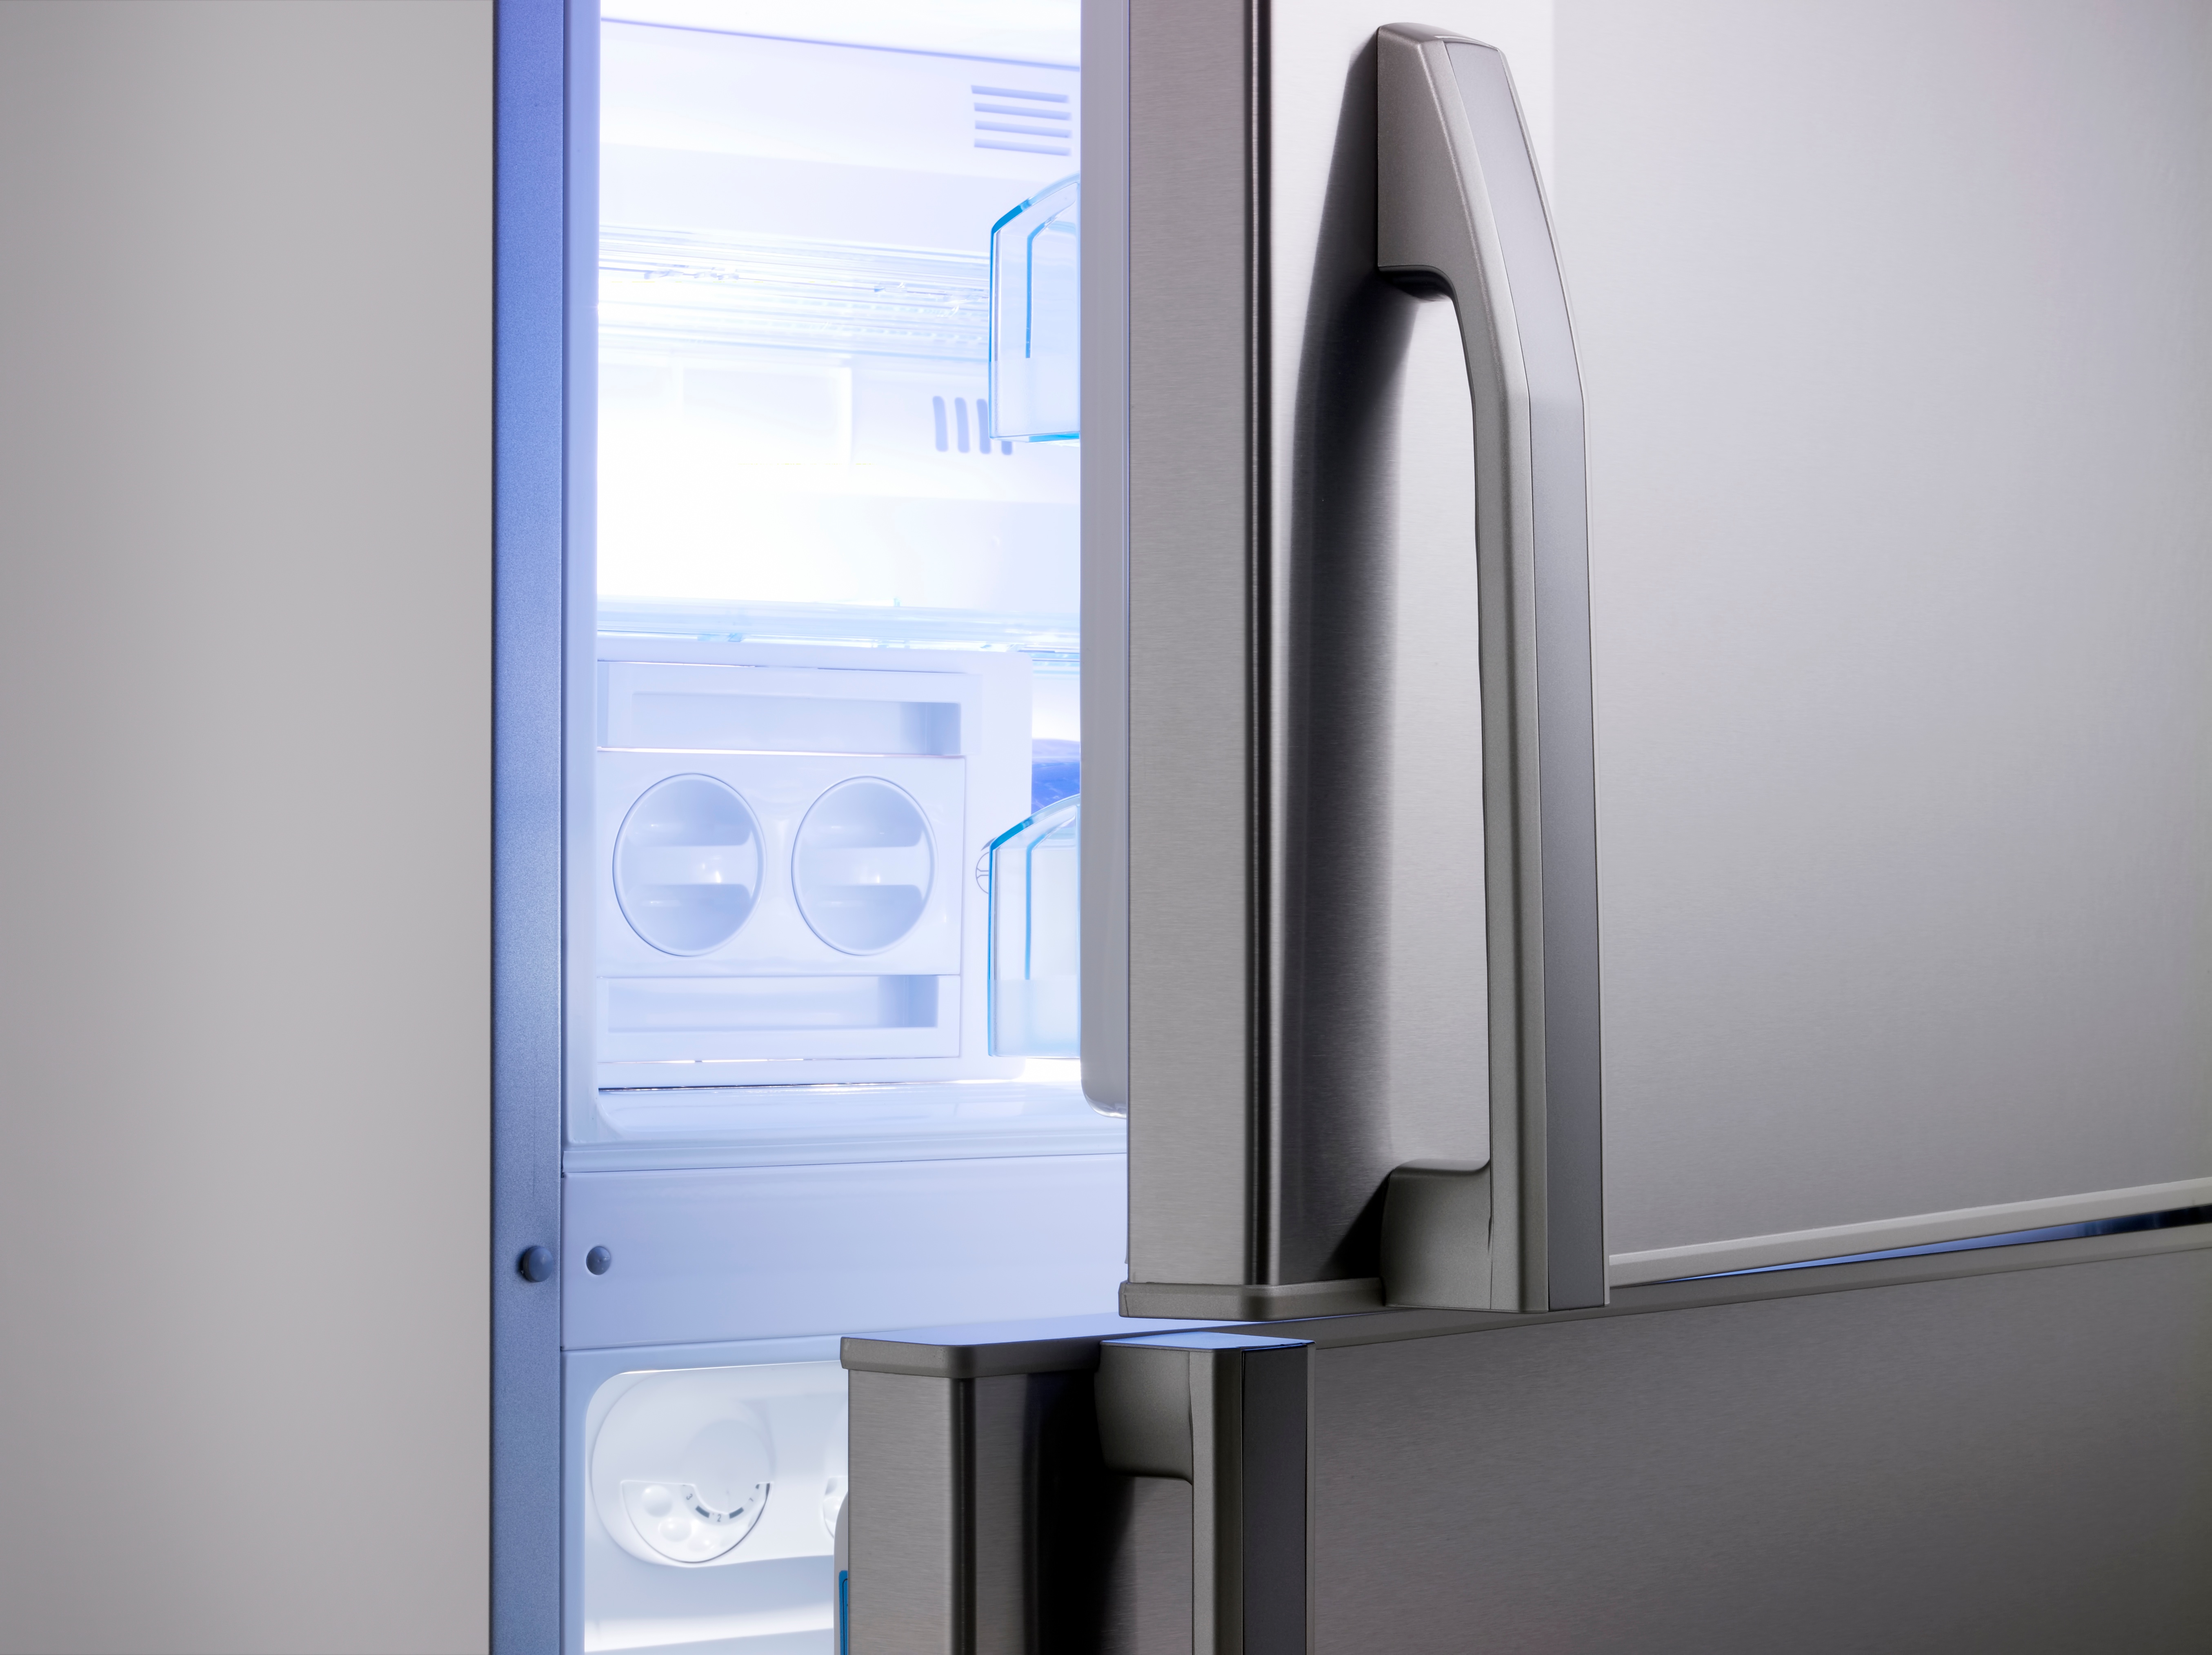
Step 1: Empty the shelf and remove it from the refrigerator
Before embarking on the process of cleaning the glass shelf above the crisper drawers in your French door refrigerator, it is essential to begin by emptying the shelf of any items stored on it. This includes removing fruits, vegetables, condiments, or any other items that may be resting on the shelf. By clearing the shelf of its contents, you can ensure unobstructed access and prevent any items from accidentally falling or spilling during the cleaning process.
Once the shelf is empty, the next step is to carefully remove it from the refrigerator. In most French door refrigerators, the glass shelf is designed to be easily removable for cleaning and maintenance purposes. To remove the shelf, gently lift the front edge upwards, taking care to support the weight of the shelf as you do so. As you lift the front edge, the shelf should slide forward on its rails or brackets, allowing you to carefully pull it out of the refrigerator compartment.
It is important to exercise caution and avoid tilting the shelf excessively during removal, as this could lead to accidental breakage or damage. If the shelf is equipped with any additional components, such as plastic trim or brackets, take note of their position and ensure that they remain intact during the removal process. If necessary, refer to the refrigerator's user manual for specific instructions on removing the glass shelf, as different models may have varying mechanisms for shelf removal.
Once the shelf has been successfully removed from the refrigerator, place it on a stable and flat surface, such as a kitchen counter or table, to prepare for the subsequent cleaning steps. With the shelf now accessible and free from any obstructions, you are ready to proceed to the next phase of the cleaning process, which involves thoroughly cleaning the glass surface to remove any accumulated dirt, spills, and residue.
By diligently following these initial steps to empty the shelf and remove it from the refrigerator, you can set the stage for a focused and effective cleaning process, ensuring that the glass shelf receives the attention it needs to be restored to a pristine condition. With the shelf now outside the refrigerator, you are ready to move on to the next step and begin the cleaning process in earnest.
Step 2: Clean the shelf with warm soapy water
With the glass shelf removed from the refrigerator and placed on a stable surface, it's time to initiate the cleaning process. Begin by preparing a solution of warm soapy water in a container. Use a mild dish soap and warm water to create a gentle yet effective cleaning solution. The warmth of the water helps to loosen and dissolve any stubborn grime or food residue adhering to the glass surface.
Dip a soft cleaning cloth or sponge into the soapy water solution, ensuring that it is thoroughly saturated. Gently wring out any excess water to prevent dripping, as excessive moisture can make the cleaning process more challenging. With the damp cloth or sponge in hand, carefully begin to wipe down the entire surface of the glass shelf.
Pay close attention to areas where spills or stains are present, applying slightly more pressure to effectively lift and remove the dirt. For particularly stubborn spots, allow the soapy water solution to sit on the affected area for a few minutes to help loosen the grime before gently scrubbing with the cloth or sponge.
As you clean the glass surface, be mindful of any edges or corners that may require additional attention. Ensure that the entire surface, including the underside of the shelf, is thoroughly cleaned to achieve a comprehensive and sparkling result. If the glass shelf includes removable components, such as plastic trim or brackets, take care to clean these parts with the soapy water solution as well, ensuring that all components are free from dirt and residue.
Once the entire surface has been cleaned, rinse the cloth or sponge to remove any soapy residue, then use it to wipe down the glass shelf with clean water. This step helps to remove any remaining soap and ensures that the glass surface is left clean and free from streaks. If desired, you may choose to use a specialized glass cleaner at this stage to achieve a streak-free finish, although the warm soapy water solution is often sufficient for effective cleaning.
After thoroughly cleaning the glass shelf with warm soapy water and rinsing away any residual soap, use a clean, dry towel or cloth to carefully dry the entire surface. Pay attention to any moisture trapped along the edges or in crevices, ensuring that the shelf is completely dry before proceeding to the next step.
By diligently following these detailed instructions for cleaning the glass shelf with warm soapy water, you can effectively remove dirt, spills, and residue, restoring the shelf to its original pristine condition. With the cleaning process now complete, the next step involves ensuring that the refrigerator surface is also clean before reinstalling the glass shelf.
To remove and clean the glass shelf above the crisper drawers in a French door refrigerator, first, empty the shelf and lift it up from the front. Then, wash the shelf with warm, soapy water and dry it thoroughly before placing it back in the refrigerator.
Step 3: Dry the shelf thoroughly
After cleaning the glass shelf with warm soapy water and rinsing away any residual soap, the next crucial step is to ensure that the shelf is thoroughly dried before reinstalling it in the refrigerator. Proper drying is essential to prevent water spots and streaks, ultimately achieving a sparkling and pristine finish on the glass surface.
Begin by using a clean, dry towel or cloth to carefully dry the entire surface of the glass shelf. Pay close attention to any moisture trapped along the edges, corners, or in crevices, as these areas are prone to retaining water droplets. Thoroughly wipe the entire surface, ensuring that no moisture remains before proceeding to reinstall the shelf in the refrigerator.
To achieve optimal drying, consider using a lint-free microfiber cloth, which is highly absorbent and gentle on the glass surface. The use of a microfiber cloth can help to effectively remove any lingering moisture, leaving the glass shelf impeccably dry and free from water spots.
If necessary, allow the glass shelf to air dry for a brief period in a clean and dry area, ensuring that it is completely free from moisture before returning it to the refrigerator. This additional step can be particularly beneficial in ensuring that the glass surface is impeccably dry, promoting a streak-free and pristine appearance.
During the drying process, take care to inspect the glass shelf for any remaining streaks or water spots. If any are detected, use a clean, dry portion of the cloth or a fresh microfiber cloth to gently buff the surface, effectively removing any residual moisture and achieving a flawless finish.
By meticulously drying the glass shelf, you can ensure that it is free from water spots and streaks, presenting a clean and sparkling surface that enhances the overall appearance of your refrigerator interior. With the shelf now thoroughly dried, you are ready to proceed to the next step, which involves cleaning the refrigerator surface before reinstalling the glass shelf.
Following these detailed instructions for drying the glass shelf thoroughly, you can achieve a pristine and immaculate finish, preparing the shelf for seamless reinstallation in the refrigerator. With the drying process complete, the stage is set for the final steps in the cleaning process, ensuring that both the glass shelf and the refrigerator interior are impeccably clean and ready for use.
Step 4: Clean the refrigerator surface
With the glass shelf now clean and thoroughly dried, it's essential to turn our attention to the refrigerator interior. Over time, spills, drips, and food particles can accumulate on the surfaces surrounding the area where the glass shelf is positioned. Cleaning the refrigerator surface not only enhances the overall cleanliness of the appliance but also ensures that the glass shelf will be reintegrated into a hygienic environment.
To begin, gather a fresh cleaning cloth or sponge and prepare a mild soapy water solution, similar to the one used for cleaning the glass shelf. Dip the cloth or sponge into the soapy water, ensuring it is adequately saturated, and then gently wring out any excess liquid to prevent dripping.
Carefully wipe down the refrigerator surfaces surrounding the area where the glass shelf is positioned. Pay close attention to the walls, edges, and any exposed components within the refrigerator compartment. This process helps to remove any accumulated spills, stains, or residue, contributing to a clean and inviting refrigerator interior.
For stubborn or dried-on spills, allow the soapy water solution to sit on the affected areas for a few minutes to help loosen the grime before gently scrubbing with the cloth or sponge. Be mindful of any grooves, seams, or crevices where dirt may be trapped, ensuring thorough cleaning in these areas.
Once the surfaces have been effectively cleaned with the soapy water solution, rinse the cloth or sponge to remove any residual soap and then use it to wipe down the refrigerator surfaces with clean water. This step helps to remove any remaining soap and ensures that the surfaces are left clean and free from streaks.
After cleaning the refrigerator surface, use a dry towel or cloth to thoroughly dry the cleaned areas. Pay attention to any moisture trapped in corners or along edges, ensuring that the refrigerator interior is impeccably dry before proceeding to reinstall the glass shelf.
By diligently cleaning the refrigerator surface, you can create a hygienic and visually appealing environment for the glass shelf to be reintegrated. With the refrigerator interior now clean and dry, you are ready to proceed to the final step, which involves reinstalling the glass shelf in the French door refrigerator.
Following these detailed instructions for cleaning the refrigerator surface, you can ensure that the entire refrigerator interior is pristine and ready to accommodate the freshly cleaned glass shelf. With the cleaning process now complete, the stage is set for the seamless reinstallation of the glass shelf, contributing to a clean and organized refrigerator space.
Step 5: Reinstall the glass shelf
With the glass shelf now thoroughly cleaned and the refrigerator interior pristine, it's time to proceed with the final step: reinstalling the glass shelf in the French door refrigerator. Carefully lift the glass shelf and position it back into the refrigerator compartment, ensuring that it aligns with the rails or brackets from which it was removed. As you slide the shelf back into place, be mindful of any additional components, such as plastic trim or brackets, ensuring that they are correctly positioned and securely attached.
Once the glass shelf is back in its designated location, gently lower the front edge to allow it to rest securely on the rails or brackets. Ensure that the shelf is level and sits firmly in place, providing a stable surface for storing fruits, vegetables, and other items. Take a moment to inspect the shelf and its surroundings, ensuring that it is correctly positioned and that all components are securely in place.
After reinstalling the glass shelf, take the opportunity to organize and place back the items that were temporarily removed from the shelf. Carefully arrange fruits, vegetables, and other items, optimizing the space to ensure efficient storage within the refrigerator. By thoughtfully organizing the contents of the glass shelf, you can maximize the available space and create a visually appealing and well-organized refrigerator interior.
Once the glass shelf is securely reinstalled and the items are neatly arranged, take a moment to appreciate the clean and refreshed appearance of the refrigerator interior. The sparkling glass shelf, free from dirt and grime, contributes to a hygienic and visually inviting environment for storing fresh produce and other refrigerated items. With the glass shelf back in place, the refrigerator interior is now ready to accommodate your food items, ensuring a clean and organized space for your culinary needs.
By diligently following these detailed instructions for reinstalling the glass shelf, you can seamlessly reintegrate the freshly cleaned shelf into the refrigerator, contributing to a clean and organized kitchen environment. With the glass shelf now back in place, you have successfully completed the process of removing and cleaning the glass shelf above the crisper drawers in your French door refrigerator, ensuring a fresh and hygienic space for storing your favorite foods.
Conclusion
In conclusion, the process of removing and cleaning the glass shelf above the crisper drawers in a French door refrigerator is a valuable maintenance task that contributes to a clean, organized, and hygienic kitchen environment. By following the step-by-step instructions outlined in this comprehensive guide, you can effectively restore the glass shelf to its pristine condition, ensuring that it provides a clean and stable surface for storing fruits, vegetables, and other refrigerated items.
The journey begins with the essential step of emptying the shelf and carefully removing it from the refrigerator, setting the stage for focused and effective cleaning. The use of warm soapy water and a soft cleaning cloth or sponge facilitates the thorough removal of dirt, spills, and residue from the glass surface, promoting a sparkling and hygienic finish. The meticulous drying process ensures that the glass shelf is free from water spots and streaks, contributing to a flawless appearance.
Furthermore, the attention to detail extends to cleaning the refrigerator surface, ensuring that the entire interior is pristine and ready to accommodate the freshly cleaned glass shelf. The seamless reinstallation of the glass shelf completes the process, providing a stable and clean surface for organizing food items within the refrigerator.
By diligently following these steps, you not only maintain a visually appealing refrigerator interior but also contribute to food safety and hygiene. A clean glass shelf above the crisper drawers enhances the overall functionality of the refrigerator, providing an inviting space for storing fresh produce and other refrigerated items.
Incorporating this cleaning process into your regular maintenance routine ensures that your French door refrigerator remains a clean and hygienic environment for storing food, ultimately contributing to a healthier and more organized kitchen space. With the glass shelf now back in place, you can take pride in the refreshed and pristine appearance of your refrigerator interior, knowing that it is equipped to maintain the freshness and quality of your favorite foods.
In essence, the process of removing and cleaning the glass shelf above the crisper drawers in a French door refrigerator is a simple yet impactful task that contributes to the overall cleanliness and functionality of the appliance. By embracing this maintenance routine, you can enjoy a clean and organized refrigerator space, ensuring that your fresh produce remains in optimal condition for your culinary endeavors.
Frequently Asked Questions about How To Remove And Clean The Glass Shelf Above The Crisper Drawers In The French Door Refrigerator
Was this page helpful?
At Storables.com, we guarantee accurate and reliable information. Our content, validated by Expert Board Contributors, is crafted following stringent Editorial Policies. We're committed to providing you with well-researched, expert-backed insights for all your informational needs.


0 thoughts on “How To Remove And Clean The Glass Shelf Above The Crisper Drawers In The French Door Refrigerator”