Home>Furniture & Design>Interior Design Trends>How To Use Mod Podge On Glass With Glitter
Interior Design Trends
How To Use Mod Podge On Glass With Glitter
Modified: August 17, 2024
Learn how to use Mod Podge on glass with glitter to create stunning interior design trends. Follow our step-by-step guide for a beautiful and unique finish.
(Many of the links in this article redirect to a specific reviewed product. Your purchase of these products through affiliate links helps to generate commission for Storables.com, at no extra cost. Learn more)
Introduction
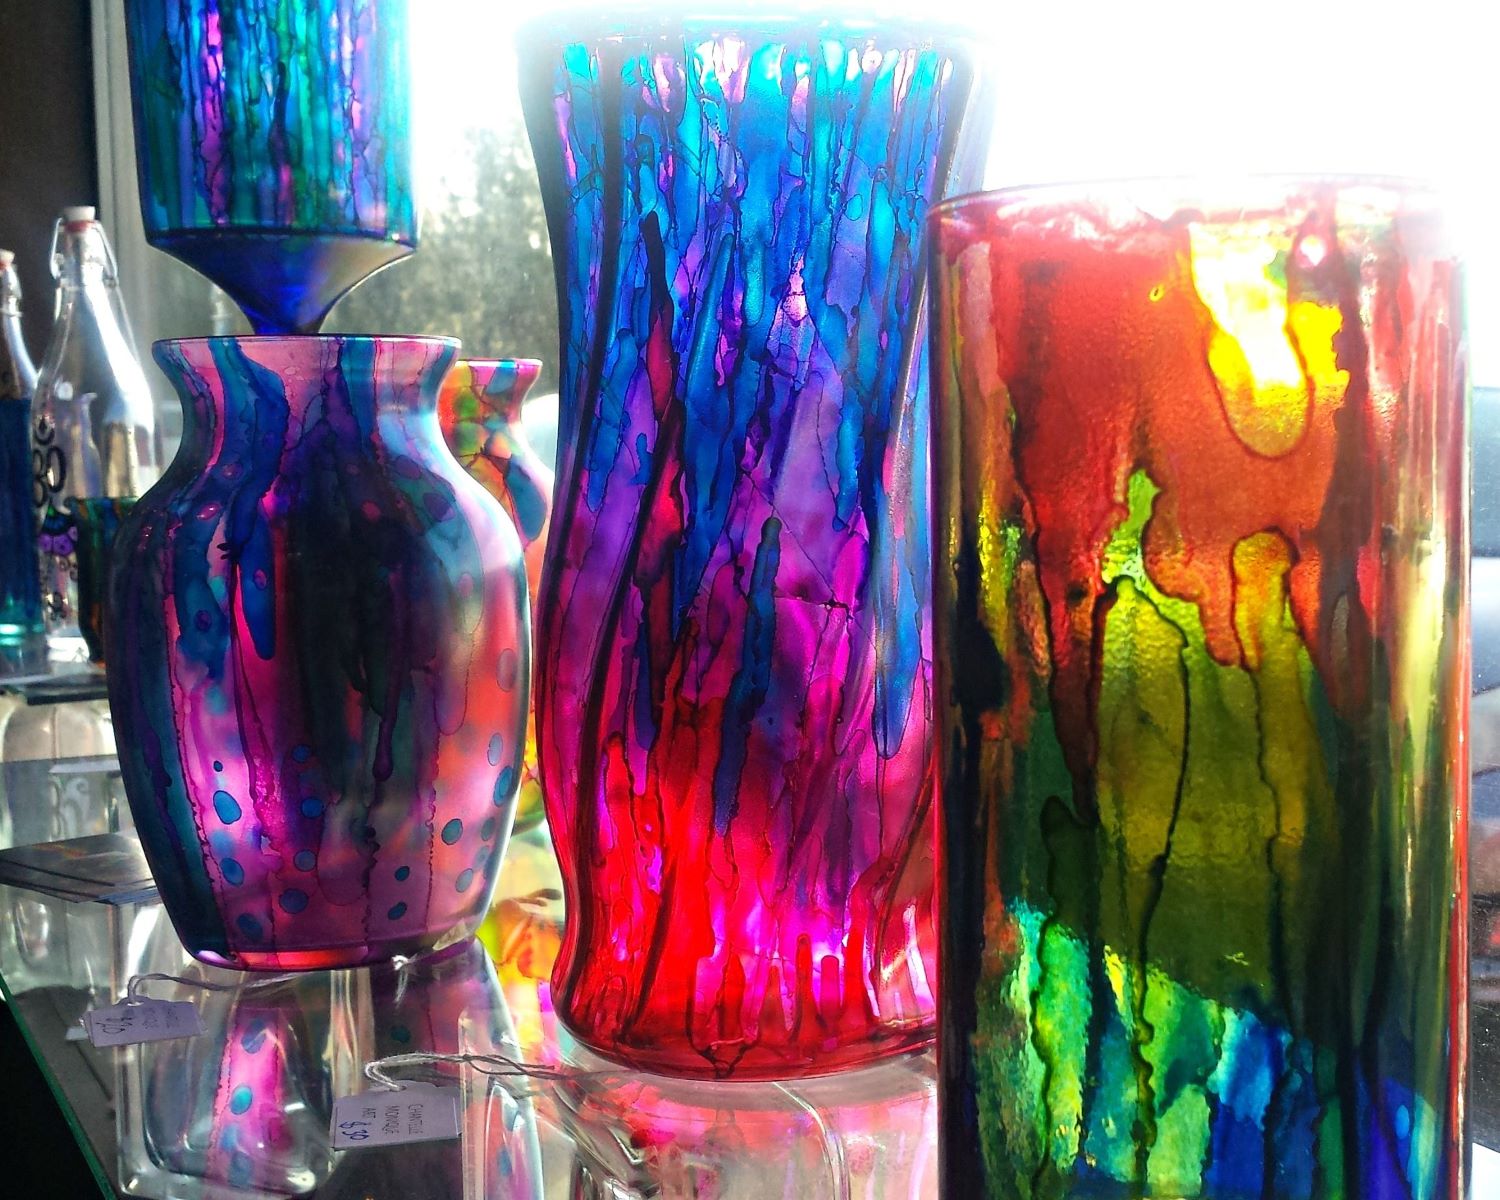
Are you looking to add a touch of sparkle and glamour to your glassware? Mod Podge, a versatile crafting essential, offers a simple and effective way to achieve this. By combining Mod Podge with glitter, you can transform ordinary glass surfaces into dazzling, eye-catching decor pieces. Whether you're upcycling old vases, creating custom glassware, or adding a personal touch to your living space, using Mod Podge on glass with glitter opens up a world of creative possibilities.
This article will guide you through the process of using Mod Podge on glass with glitter, providing step-by-step instructions and tips to ensure a successful and visually stunning outcome. With just a few materials and a bit of creativity, you can elevate the aesthetic appeal of your glass items and infuse them with a touch of shimmer and shine. So, gather your supplies and get ready to embark on a crafting adventure that will leave you with beautifully embellished glass decor pieces that reflect your unique style and personality.
Key Takeaways:
- Transform ordinary glass items into dazzling decor pieces by using Mod Podge and glitter. Elevate your crafting skills and add a touch of shimmer and shine to your living space with this simple and fun DIY project.
- With Mod Podge and glitter, unleash your creativity and make your glassware sparkle. Create unique and glamorous decor accents that reflect your style and personality, adding a touch of elegance to your home.
Read more: Which Mod Podge To Use On Glass
Materials Needed
To embark on your Mod Podge and glitter glass crafting journey, you'll need a few essential materials to ensure a smooth and successful process. Here's a comprehensive list of what you'll need:
-
Glass Items: Select the glass items you wish to embellish with glitter. This could include vases, jars, candle holders, or any other glassware that you want to transform into dazzling decor pieces.
-
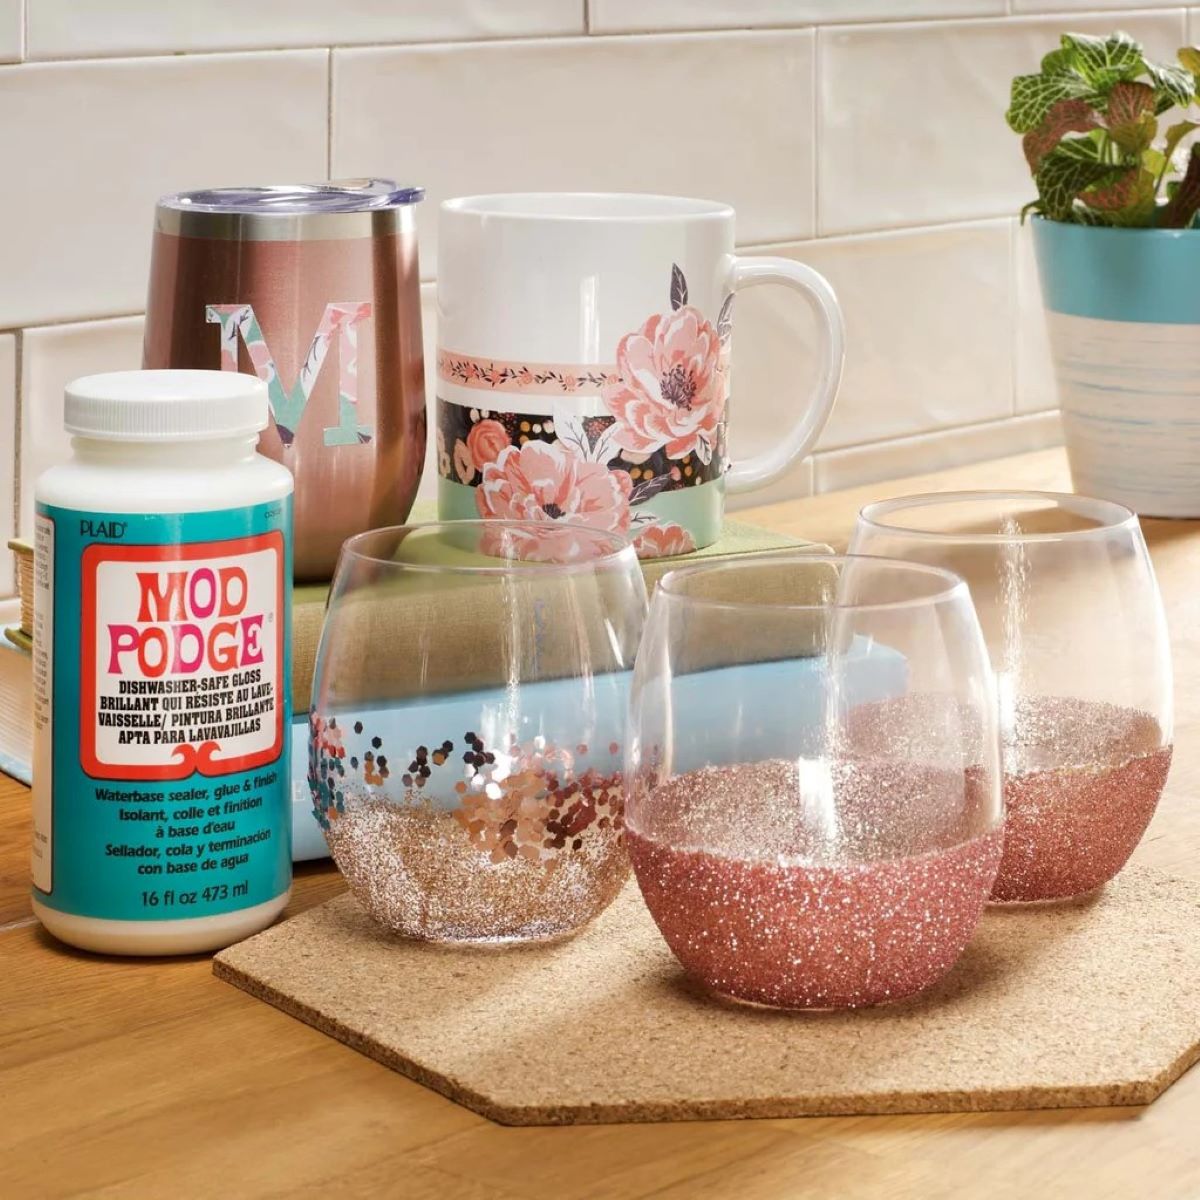
Mod Podge: This versatile decoupage medium will serve as the adhesive and sealant for your glitter application. Opt for the gloss or matte finish, depending on the desired final look of your project.
-
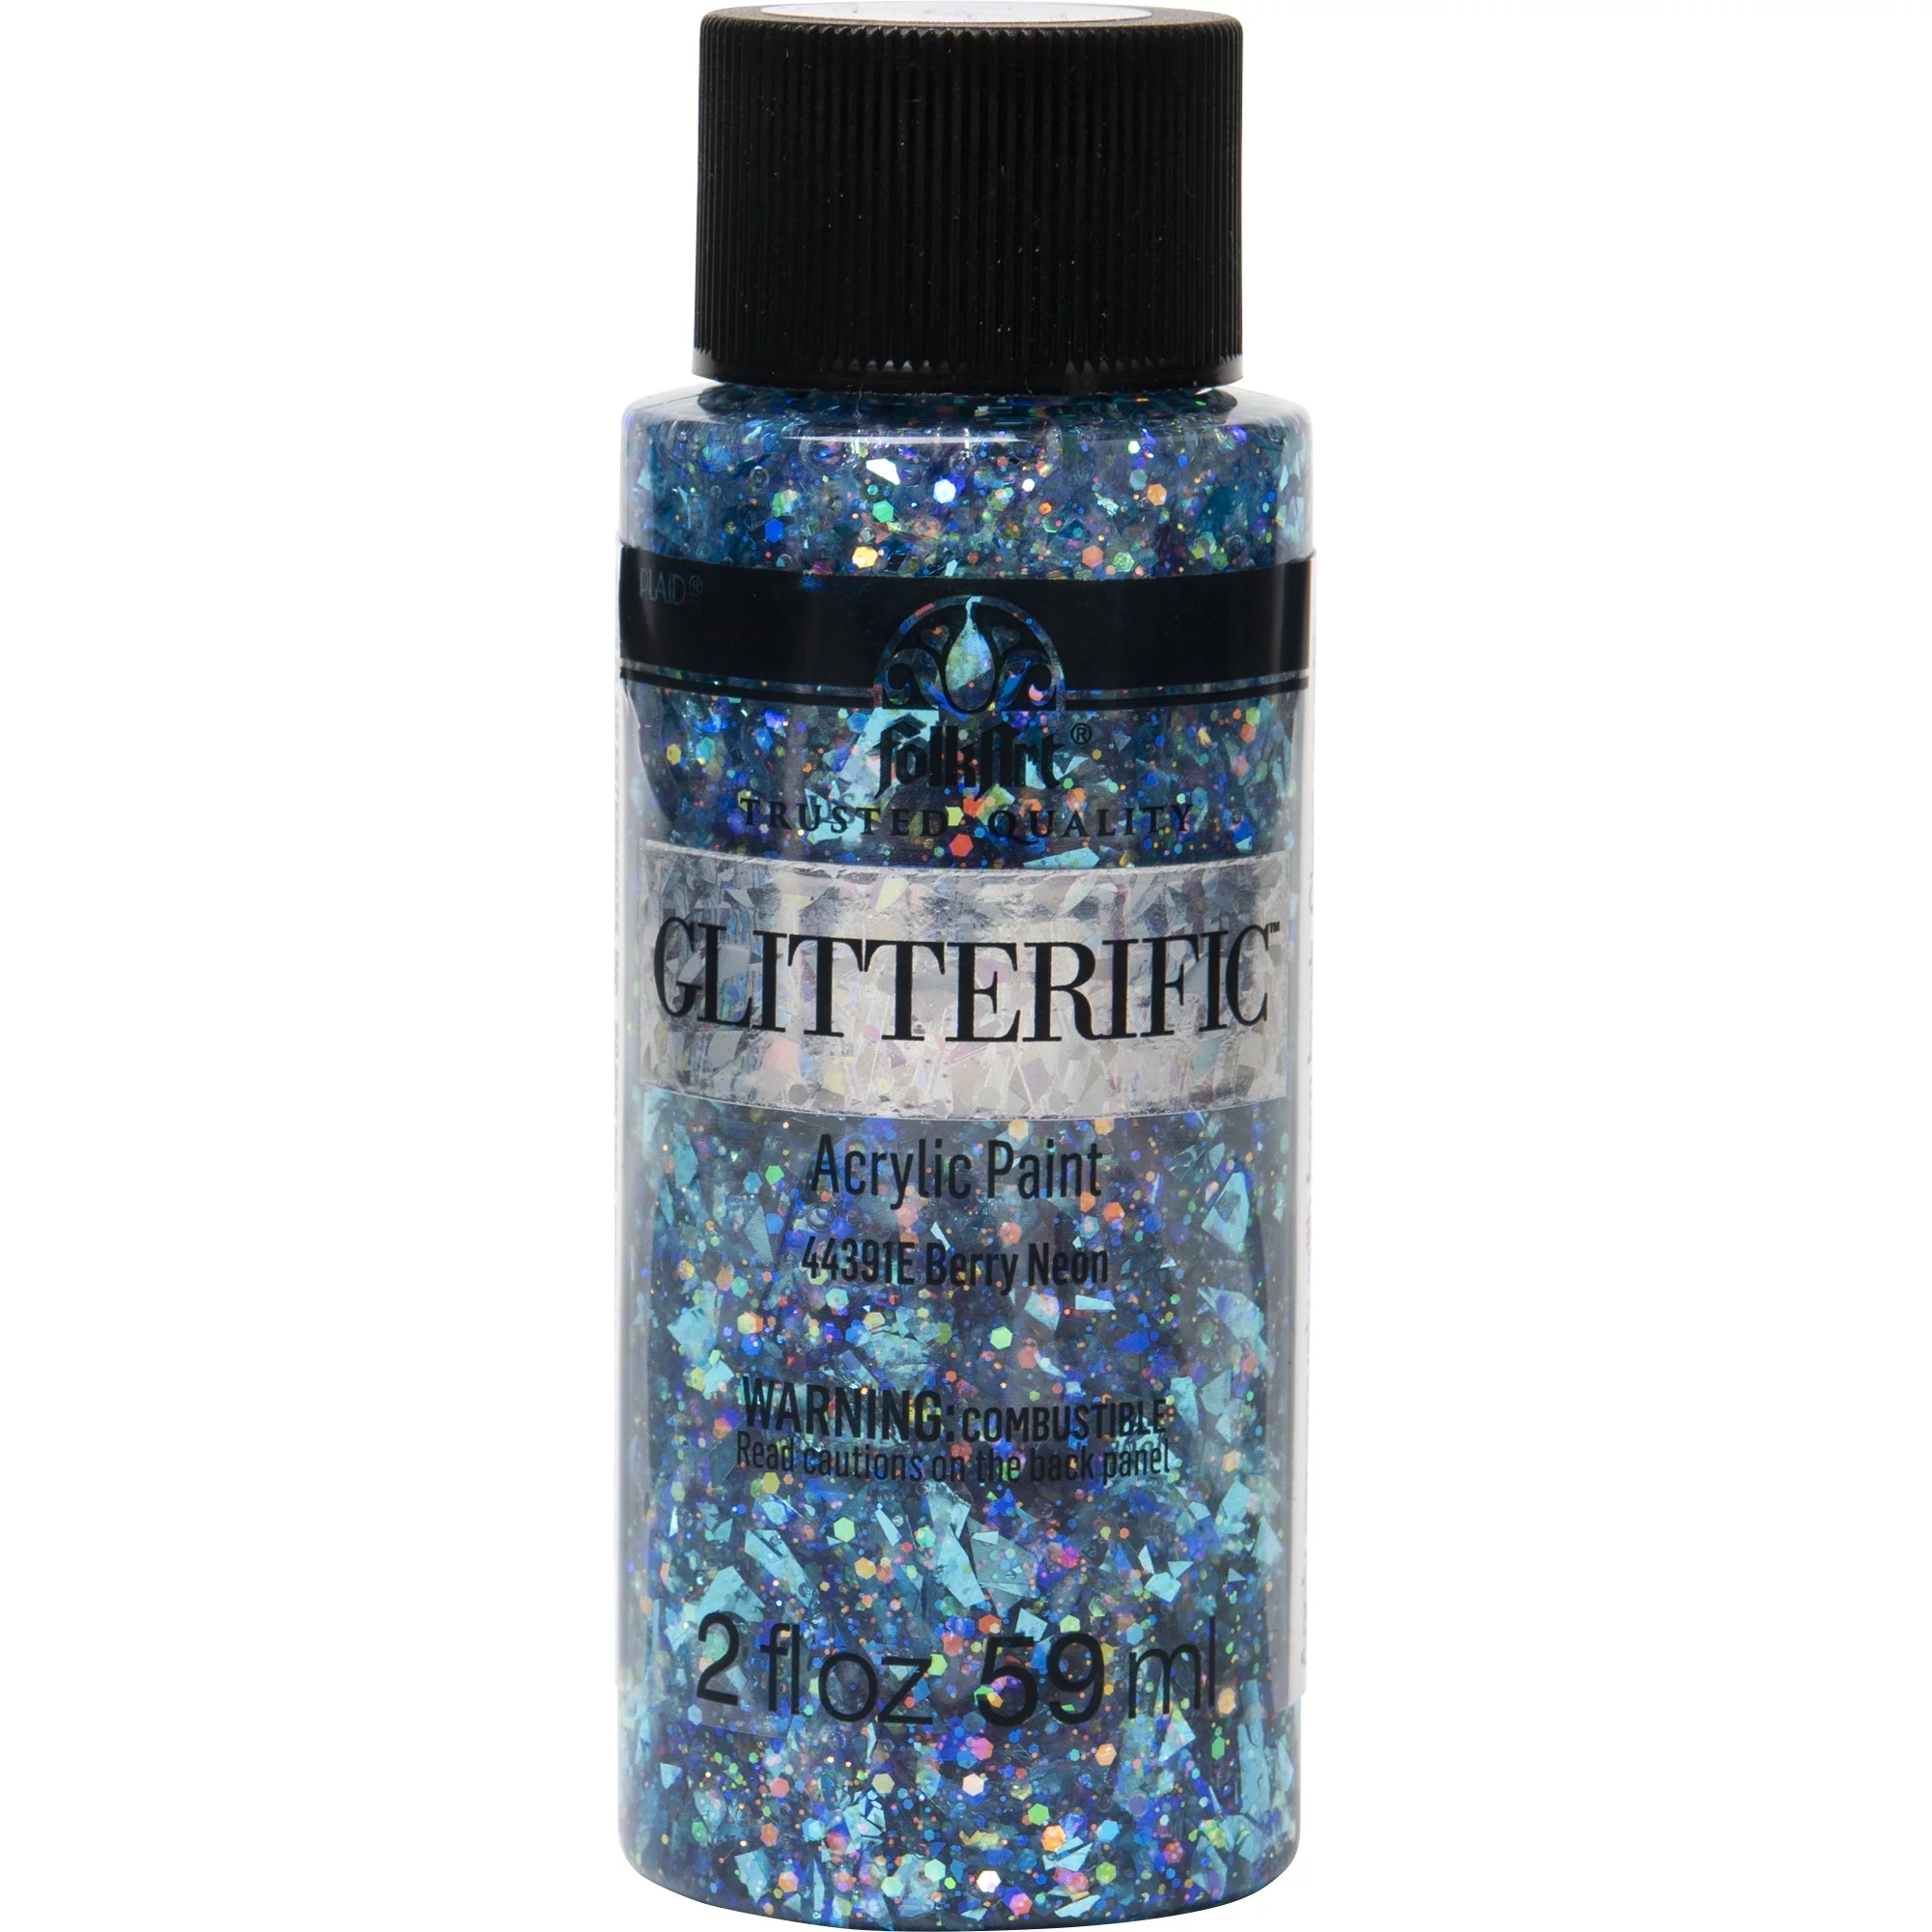
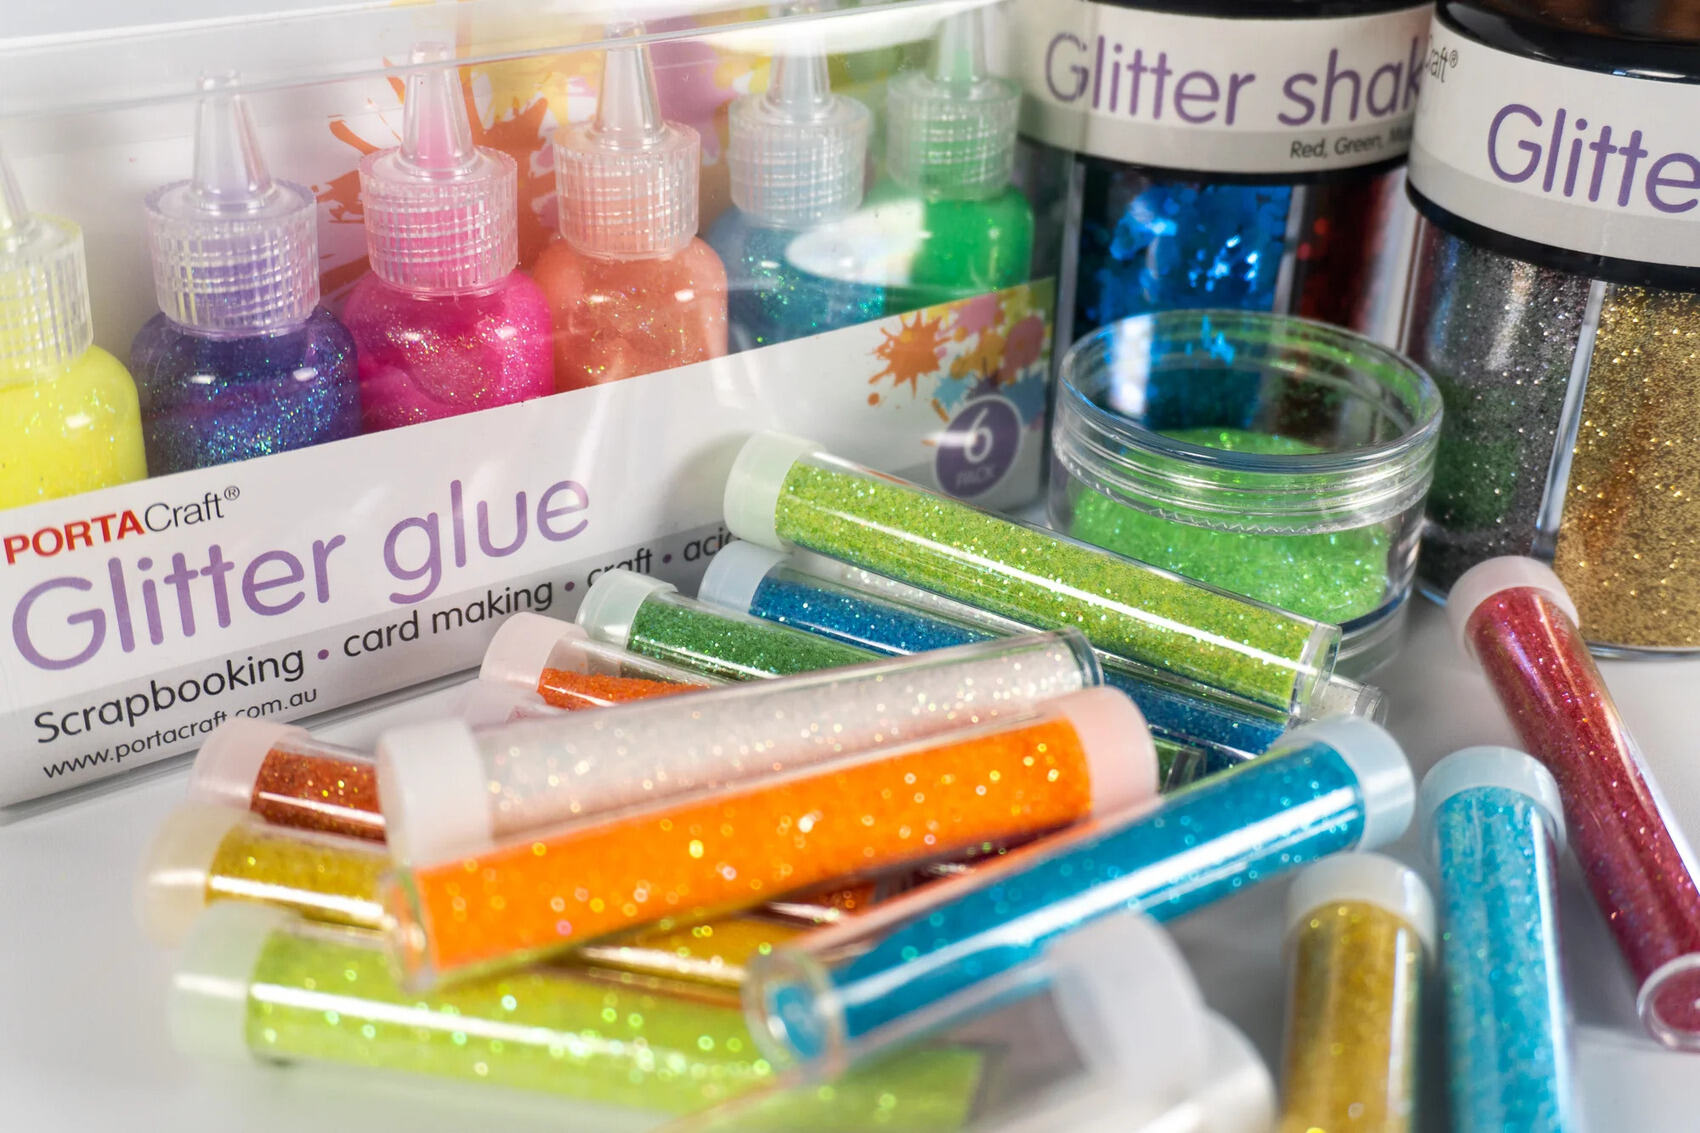
Glitter: Choose your preferred color(s) and size(s) of glitter to achieve the desired aesthetic. Whether you opt for fine, chunky, or a mix of both, the glitter will add a captivating sparkle to your glass items.
-
Foam Brush or Paintbrush: Select a high-quality foam brush or paintbrush to apply the Mod Podge evenly onto the glass surface. This will ensure smooth and precise application, preventing clumps or streaks.
-
Protective Covering: Lay down a protective covering, such as a plastic tablecloth or old newspapers, to safeguard your work surface from any potential mess or spills during the crafting process.
-
Sealant (Optional): Depending on the intended use of the glass item, you may consider using a sealant to provide additional protection and durability to the glittered surface.
-
Disposable Bowls or Plates: These will be used to contain and manage the glitter application process, making it easier to sprinkle and collect any excess glitter.
-
Paper Towels or Cloth: Keep these handy for cleaning up any spills or excess Mod Podge during the crafting process.
-
Gloves (Optional): If you prefer to keep your hands clean and glitter-free, consider wearing gloves while working with Mod Podge and glitter.
-
Well-Ventilated Workspace: Ensure that you have ample ventilation in your workspace to facilitate the drying process and minimize exposure to Mod Podge fumes.
Gathering these materials will set the stage for a successful Mod Podge and glitter glass crafting experience, allowing you to unleash your creativity and transform ordinary glass items into captivating works of art.
Step 1: Clean the Glass Surface
Before diving into the exciting world of Mod Podge and glitter, it's crucial to start with a clean canvas. Cleaning the glass surface ensures that the Mod Podge adheres smoothly and that the glitter application results in a flawless, sparkling finish. Follow these steps to prepare the glass surface for the crafting process:
-
Gather Your Supplies: Begin by assembling all the necessary materials, including the glass item you intend to decorate, a gentle glass cleaner or rubbing alcohol, and lint-free cloths or paper towels. Having everything within reach will streamline the cleaning process.
-
Remove Any Residue: Inspect the glass surface for any stickers, labels, or adhesive residue. If present, gently peel off the stickers or labels, and use a mild adhesive remover or rubbing alcohol to eliminate any stubborn residue. Ensure that the glass surface is free of any debris or particles that may interfere with the Mod Podge application.
-
Clean with Glass Cleaner or Rubbing Alcohol: Apply a small amount of glass cleaner or rubbing alcohol to a lint-free cloth or paper towel. Thoroughly wipe the entire glass surface, ensuring that it is free of dust, fingerprints, and any remaining residue. This step is crucial for promoting strong adhesion and achieving a professional-looking result.
-
Allow the Surface to Dry: After cleaning the glass surface, allow it to air dry completely. This will ensure that there is no moisture or residue left behind, setting the stage for a seamless Mod Podge and glitter application.
By meticulously cleaning the glass surface, you create an optimal foundation for the subsequent steps of the crafting process. This attention to detail sets the stage for a successful and visually stunning transformation of your glass item using Mod Podge and glitter. With the glass surface now pristine and ready for embellishment, you're one step closer to infusing it with a captivating sparkle that will elevate its aesthetic appeal.
Step 2: Apply Mod Podge
With the glass surface meticulously cleaned and prepped, it's time to apply the Mod Podge, the versatile decoupage medium that will serve as the adhesive for the glitter application. Follow these steps to ensure a smooth and precise application of Mod Podge onto the glass surface:
-
Prepare Your Workspace: Set up your crafting area on a flat, well-ventilated surface, ideally covered with a protective layer to catch any potential spills or excess Mod Podge. This will help maintain a clean and organized workspace throughout the crafting process.
-
Stir the Mod Podge: Before application, gently stir the Mod Podge using a stir stick or a clean, dry brush. This ensures that any settled particles are evenly distributed, resulting in a consistent application and finish.
-
Use a Foam Brush or Paintbrush: Dip a high-quality foam brush or paintbrush into the Mod Podge, ensuring that it is evenly coated but not dripping. Starting from the top or one side of the glass surface, apply a smooth, even layer of Mod Podge. Work in small sections to prevent the Mod Podge from drying too quickly.
-
Apply Evenly and Smoothly: As you apply the Mod Podge, use long, even strokes to create a uniform layer. Ensure that the Mod Podge covers the entire surface that you intend to glitter, leaving no patches or streaks. Pay attention to the edges and any intricate details on the glass item, ensuring that the Mod Podge is applied evenly in all areas.
-
Work in Sections: If you are decorating a large glass item, such as a vase or a jar, it's best to work in manageable sections to maintain control over the Mod Podge application. This approach prevents the Mod Podge from drying before you have the chance to apply the glitter.
-
Clean Up Any Spills or Excess Mod Podge: Throughout the application process, keep a paper towel or cloth handy to quickly clean up any spills or excess Mod Podge. This will help maintain a tidy workspace and ensure that the Mod Podge is applied only where intended.
By following these steps, you'll effectively apply the Mod Podge onto the glass surface, setting the stage for the next exciting phase of the crafting process: the glitter application. With the Mod Podge evenly and smoothly distributed, your glass item is now primed and ready to be transformed into a dazzling, glitter-adorned masterpiece.
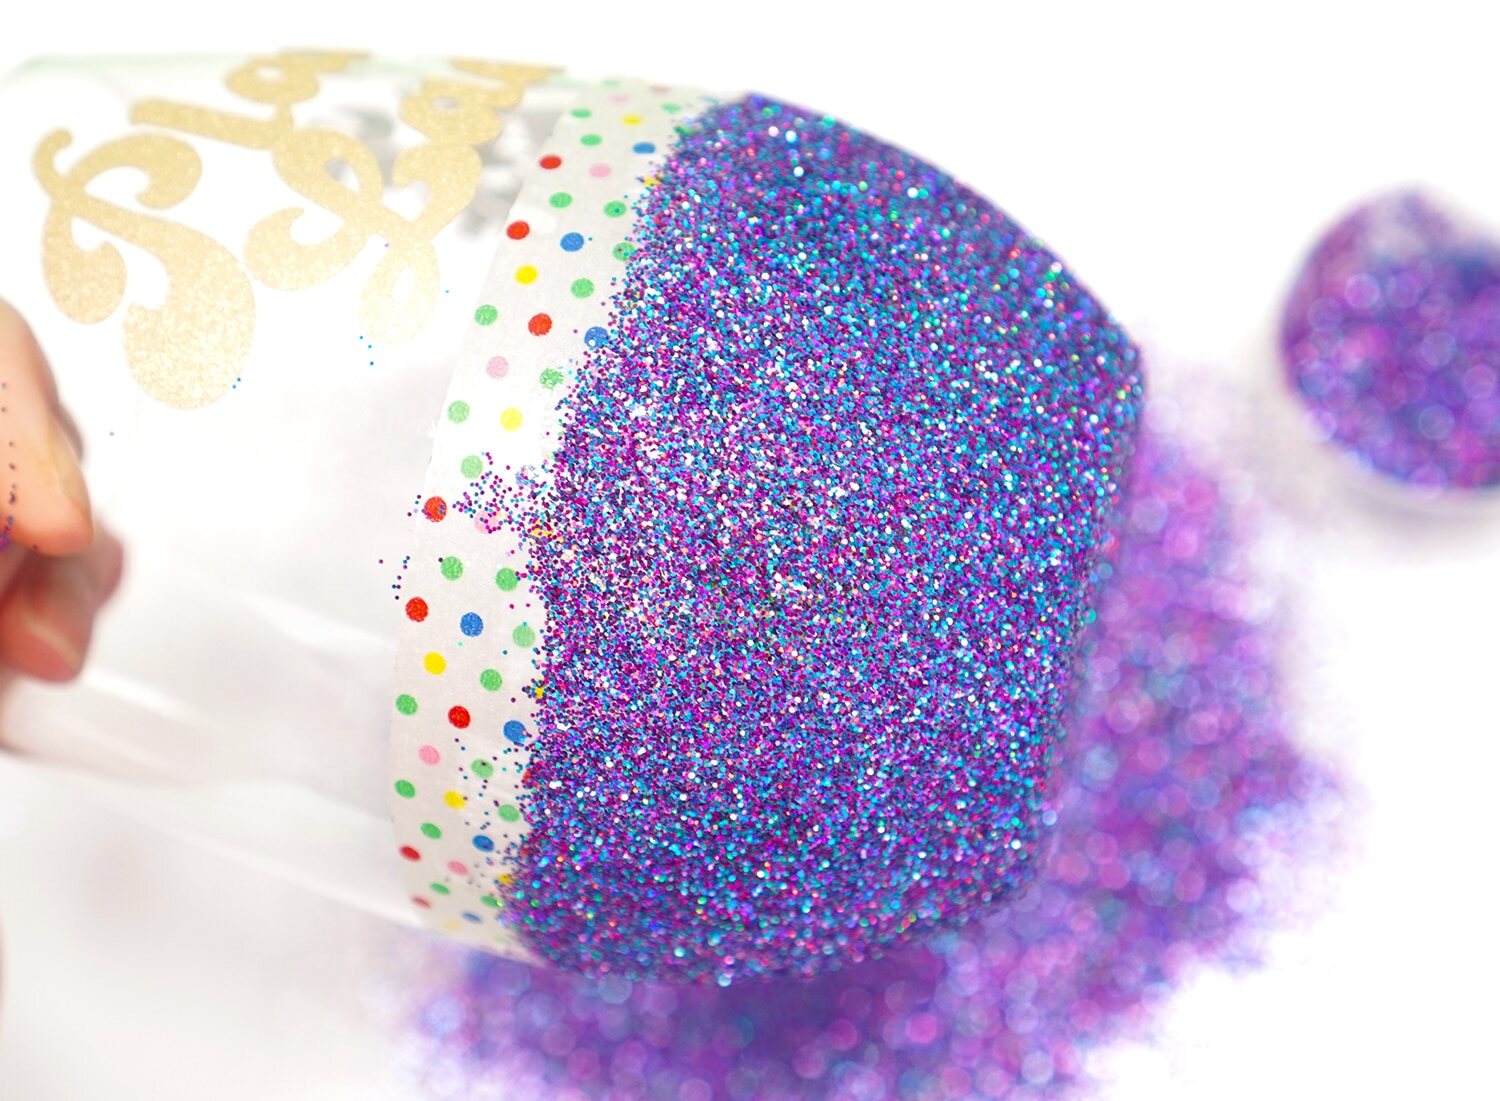
Step 3: Sprinkle Glitter
With the Mod Podge evenly applied to the glass surface, it's time to introduce the star of the show: glitter. This step is where the magic truly begins, as the glass item transitions from ordinary to extraordinary with the addition of shimmering particles. Follow these detailed steps to ensure a seamless and captivating glitter application:
-
Prepare Your Glitter: Before diving into the glitter application, ensure that your chosen glitter is readily accessible and that it is in a suitable container for easy sprinkling. Whether you've opted for fine, chunky, or a blend of glitter sizes, having it prepared and within reach will streamline the application process.
-
Select Your Technique: Depending on your desired aesthetic and the design of the glass item, you can choose between two primary techniques for applying the glitter. The first method involves gently sprinkling the glitter over the entire Mod Podge-coated surface, creating an all-over shimmer effect. The second technique entails strategically placing the glitter in specific areas or patterns to achieve a more controlled and intricate design.
-
Evenly Sprinkle the Glitter: Holding the glass item over a disposable bowl or plate, begin sprinkling the glitter onto the Mod Podge-coated surface. Use a gentle and consistent motion to ensure an even distribution of glitter, covering the intended areas with a captivating layer of sparkle. If you're aiming for a specific pattern or design, take your time to sprinkle the glitter precisely according to your vision.
-
Collect Excess Glitter: As you sprinkle the glitter, any excess particles will accumulate in the disposable bowl or plate, making it easy to collect and reuse the glitter as needed. This not only minimizes waste but also allows for a more efficient and controlled application process.
-
Inspect and Adjust: Once the glitter is applied, take a moment to inspect the glass item from different angles to ensure that the glitter coverage is uniform and meets your expectations. If any areas require additional glitter, gently sprinkle more to achieve the desired level of sparkle and coverage.
-
Tap Off Excess Glitter: After ensuring that the entire Mod Podge-coated surface is adorned with glitter, gently tap the glass item to dislodge any loose or excess glitter. This step helps create a smooth and polished finish while removing any stray particles that may detract from the final result.
By following these detailed steps, you'll effectively sprinkle the glitter onto the Mod Podge-coated glass surface, transforming it into a mesmerizing display of shimmer and radiance. With the glitter now adorning the glass item, it's poised to become a captivating centerpiece or decorative accent that exudes charm and elegance.
Read more: How To Remove Mod Podge From Glass
Step 4: Seal with Mod Podge
After the glitter has been meticulously applied to the glass surface, the next crucial step involves sealing the glitter in place with another layer of Mod Podge. This sealing process not only enhances the durability of the glittered surface but also ensures that the shimmering particles remain securely adhered to the glass item, preventing any unwanted shedding or flaking. Follow these detailed steps to effectively seal the glitter with Mod Podge, safeguarding the visual impact and longevity of your dazzling creation.
-
Prepare Your Workspace: As you transition to the sealing phase, ensure that your workspace remains well-ventilated and free of any potential debris or dust. A clean and organized environment will facilitate a smooth and precise application of Mod Podge, ensuring a professional finish.
-
Stir the Mod Podge: Just as in the initial application, gently stir the Mod Podge to guarantee an even consistency. This step is essential for achieving a uniform seal and ensuring that the glittered surface is effectively protected.
-
Use a Clean Foam Brush or Paintbrush: Select a fresh foam brush or paintbrush, ensuring that it is clean and free of any residual Mod Podge or glitter particles. Dip the brush into the Mod Podge, ensuring that it is evenly coated without excess dripping.
-
Apply a Smooth, Even Layer: Starting from one end of the glass surface, apply a smooth and even layer of Mod Podge over the glittered area. Use long, deliberate strokes to ensure that the Mod Podge evenly covers the glitter, effectively encapsulating the shimmering particles.
-
Seal the Entire Surface: Work methodically to seal the entire glittered surface, paying close attention to any intricate details or edges. This comprehensive sealing process ensures that every glittered area is adequately protected, enhancing the overall visual impact and longevity of the decorative transformation.
-
Avoid Overworking the Mod Podge: While applying the sealant, strive to avoid overworking the Mod Podge to prevent any disruption to the glitter particles. A smooth and controlled application will preserve the dazzling effect of the glitter while providing a protective seal.
-
Allow Sufficient Drying Time: After sealing the glitter with Mod Podge, allow the glass item to dry undisturbed for the recommended duration specified on the Mod Podge label. This drying period is crucial for ensuring that the sealant effectively sets, providing a durable and long-lasting finish.
By meticulously following these steps, you'll effectively seal the glitter with Mod Podge, safeguarding the captivating shimmer and ensuring that your glass item remains a stunning centerpiece or decor accent for years to come. With the glitter now securely sealed in place, your transformed glass item is ready to take center stage, captivating all who behold its radiant allure.
After applying Mod Podge to the glass, sprinkle glitter over the wet Mod Podge. Once dry, apply a top coat of Mod Podge to seal the glitter in place.
Step 5: Let It Dry
After the meticulous application of Mod Podge and glitter, the final step in the crafting process is to allow the glass item to dry thoroughly. This crucial phase ensures that the Mod Podge and glitter adhere securely to the glass surface, resulting in a durable and visually captivating finish. Here's a detailed overview of the essential aspects of letting the glass item dry, setting the stage for the grand reveal of your dazzling creation.
Air Circulation and Drying Time
Once the glass item is sealed with Mod Podge, it's essential to place it in a well-ventilated area to facilitate the drying process. Adequate air circulation expedites the evaporation of any residual moisture, allowing the Mod Podge to set and form a protective seal over the glittered surface. The recommended drying time can vary based on factors such as humidity levels and the thickness of the Mod Podge application. It's advisable to refer to the Mod Podge label for specific guidance on drying times, ensuring that the glass item receives the necessary duration to dry completely.
Avoiding Disturbance
During the drying period, it's crucial to avoid handling or disturbing the glass item to prevent any potential smudges or disruptions to the Mod Podge and glitter. Placing the glass item on a flat, level surface will minimize the risk of accidental movement or contact, allowing the Mod Podge to cure undisturbed. This period of undisturbed drying is instrumental in achieving a flawless and professional-looking finish, preserving the integrity of the glittered surface.
Read more: How To Seal Glitter On Glass
Visual Inspection
As the glass item dries, periodically inspect it from various angles to assess the progress of the drying process. Look for any areas where the Mod Podge may appear milky or uneven, as these sections indicate that the sealant is still in the process of drying. Additionally, observe the glittered surface to ensure that the shimmering particles remain securely adhered and that the overall finish maintains its captivating radiance. This visual inspection allows you to monitor the drying progress and identify any areas that may require additional drying time or touch-ups.
Ready for Display or Use
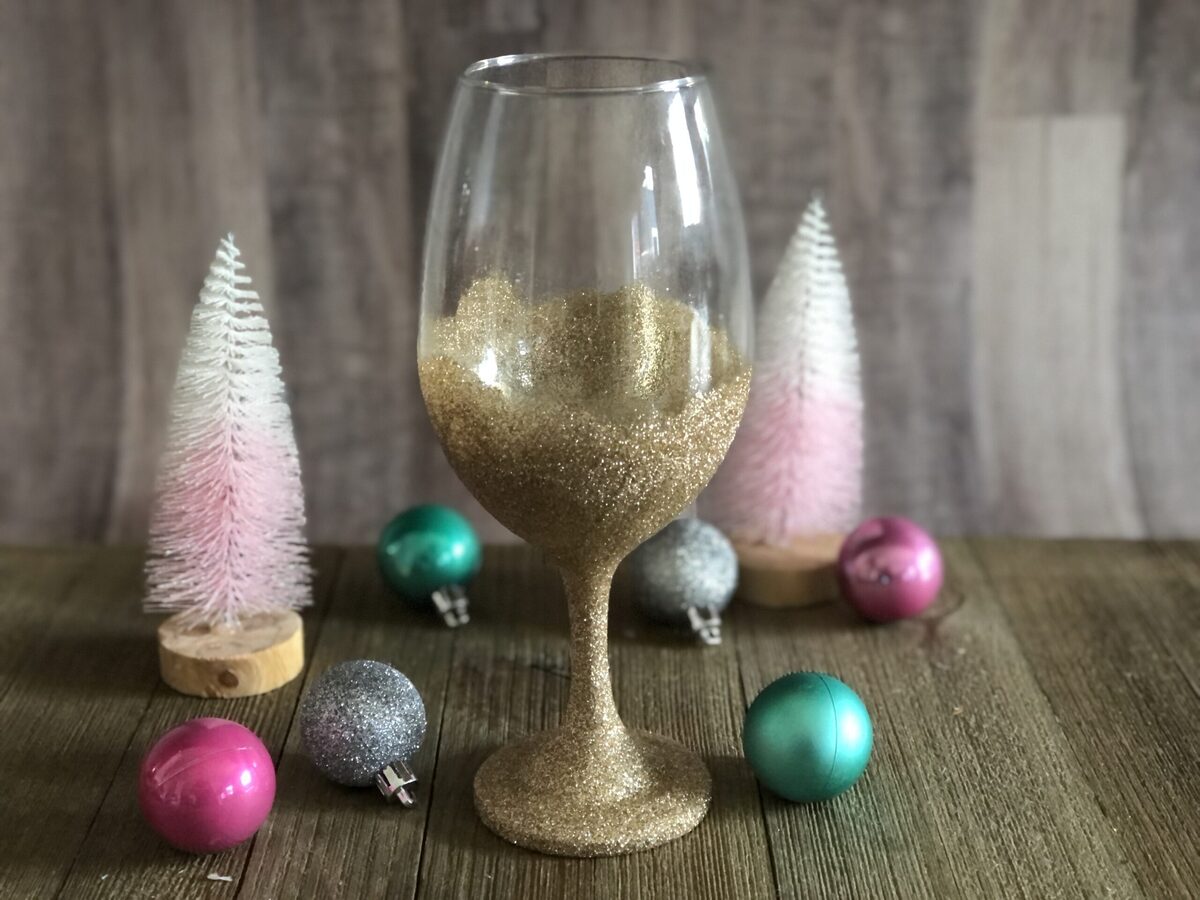
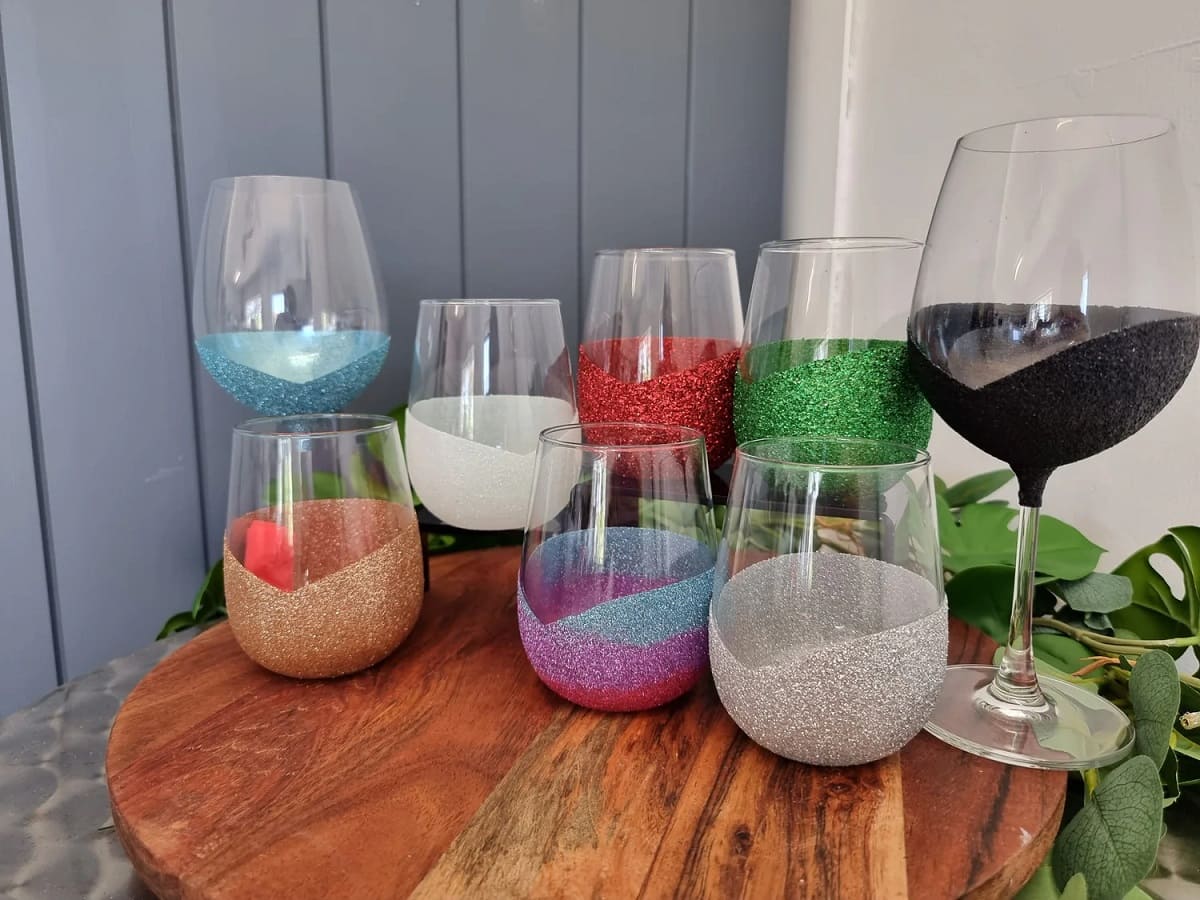
Once the glass item has completed the recommended drying duration, it is ready to take its place as a stunning centerpiece or decorative accent in your living space. The thorough drying process ensures that the Mod Podge and glitter have formed a resilient bond with the glass surface, creating a visually striking and enduring embellishment. Whether adorning a shelf, serving as a vase for vibrant blooms, or adding a touch of glamour to a tabletop, your glitter-enhanced glass item is now primed to captivate and delight all who behold its radiant allure.
By allowing the glass item to dry completely, you ensure that the Mod Podge and glitter transformation achieves its full potential, resulting in a dazzling and enduring decorative piece that reflects your creativity and style. With the drying process complete, your glitter-adorned glass item is poised to infuse your living space with a touch of shimmering elegance, showcasing the beauty of your crafting prowess and artistic vision.
Conclusion
In conclusion, the process of using Mod Podge on glass with glitter presents a captivating opportunity to transform ordinary glass items into extraordinary decorative pieces. By following the detailed steps outlined in this guide, you can embark on a crafting adventure that culminates in the creation of stunning, shimmering decor accents that reflect your unique style and creativity.
From the meticulous cleaning of the glass surface to the precise application of Mod Podge and the enchanting sprinkling of glitter, each step contributes to the seamless and visually captivating transformation of the glass item. The sealing of the glitter with an additional layer of Mod Podge ensures not only the durability of the decorative embellishment but also the preservation of its radiant allure for years to come.
As the glass item undergoes the essential drying process, it transitions from a work in progress to a dazzling centerpiece or decor accent that exudes charm and elegance. The thorough drying period allows the Mod Podge and glitter to form a resilient bond with the glass surface, resulting in a visually striking and enduring embellishment that is ready to take its place in your living space.
Whether adorning a shelf, serving as a vase for vibrant blooms, or adding a touch of glamour to a tabletop, your glitter-enhanced glass item is now primed to captivate and delight all who behold its radiant allure. The meticulous craftsmanship and attention to detail invested in the crafting process culminate in a decorative piece that reflects your artistic vision and adds a touch of shimmering elegance to your surroundings.
In essence, the art of using Mod Podge on glass with glitter transcends mere crafting; it is an expression of creativity and a testament to the transformative power of DIY decor. By infusing your glass items with a captivating sparkle, you imbue them with a touch of glamour and personality, elevating their aesthetic appeal and making them focal points of admiration in your home.
So, gather your supplies, unleash your creativity, and embark on a crafting journey that will leave you with beautifully embellished glass decor pieces, each a testament to your unique style and artistic flair. With Mod Podge and glitter as your allies, the possibilities for creating dazzling decor accents are as limitless as your imagination.
Frequently Asked Questions about How To Use Mod Podge On Glass With Glitter
Was this page helpful?
At Storables.com, we guarantee accurate and reliable information. Our content, validated by Expert Board Contributors, is crafted following stringent Editorial Policies. We're committed to providing you with well-researched, expert-backed insights for all your informational needs.
0 thoughts on “How To Use Mod Podge On Glass With Glitter”