Home>Furniture & Design>Interior Design Trends>How To Seal Modge Podge On Glass
Interior Design Trends
How To Seal Modge Podge On Glass
Modified: August 17, 2024
Learn how to seal Modge Podge on glass to create stunning interior design trends. Follow our step-by-step guide for a flawless finish.
(Many of the links in this article redirect to a specific reviewed product. Your purchase of these products through affiliate links helps to generate commission for Storables.com, at no extra cost. Learn more)
Introduction
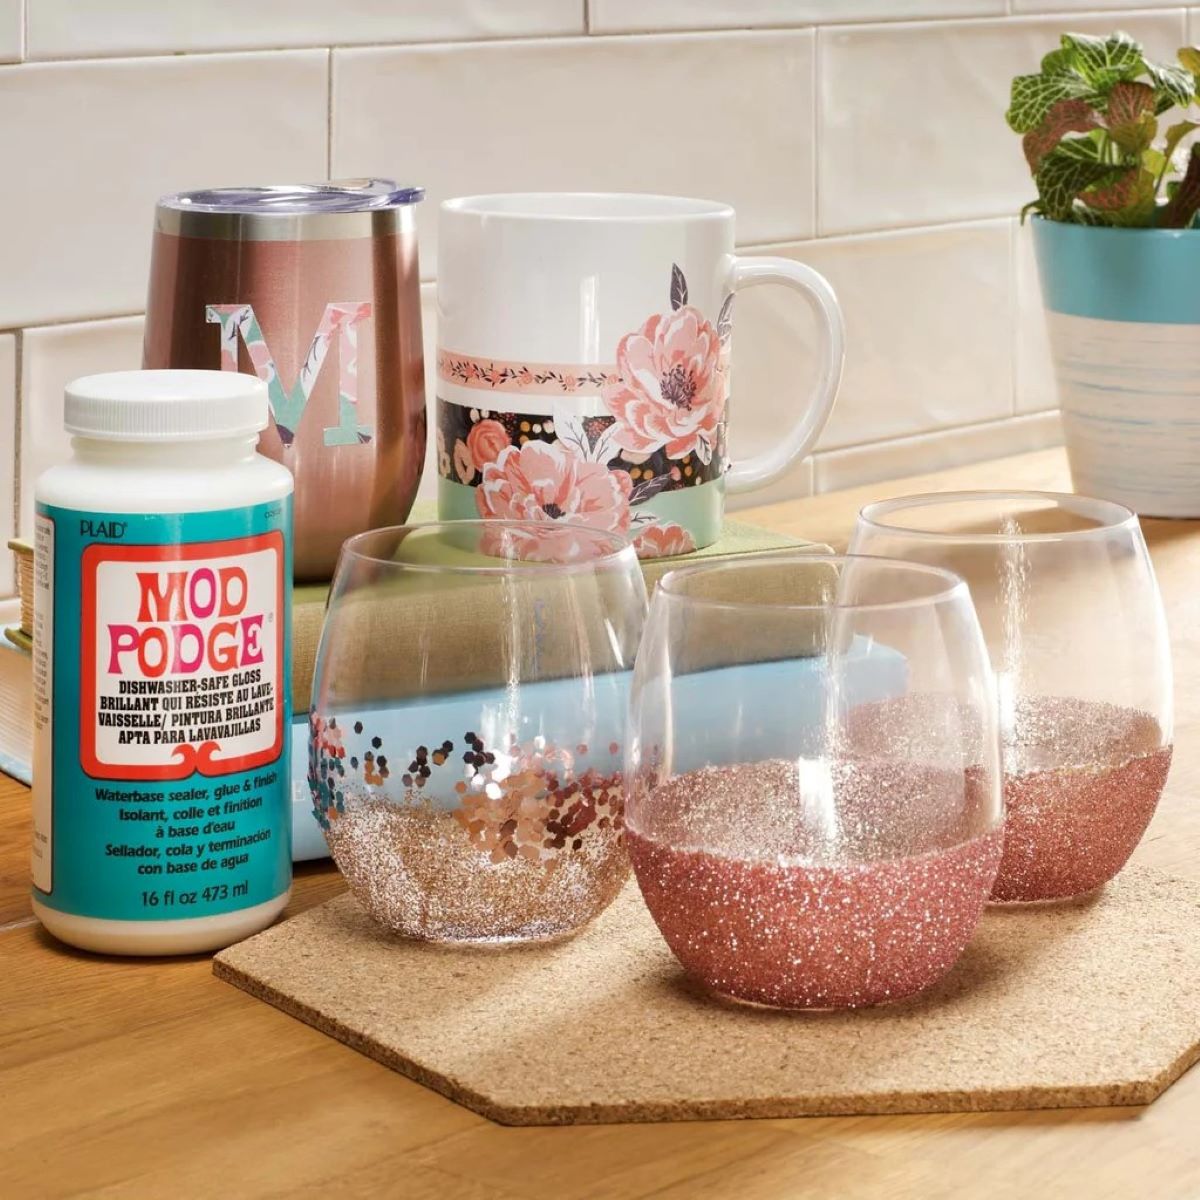
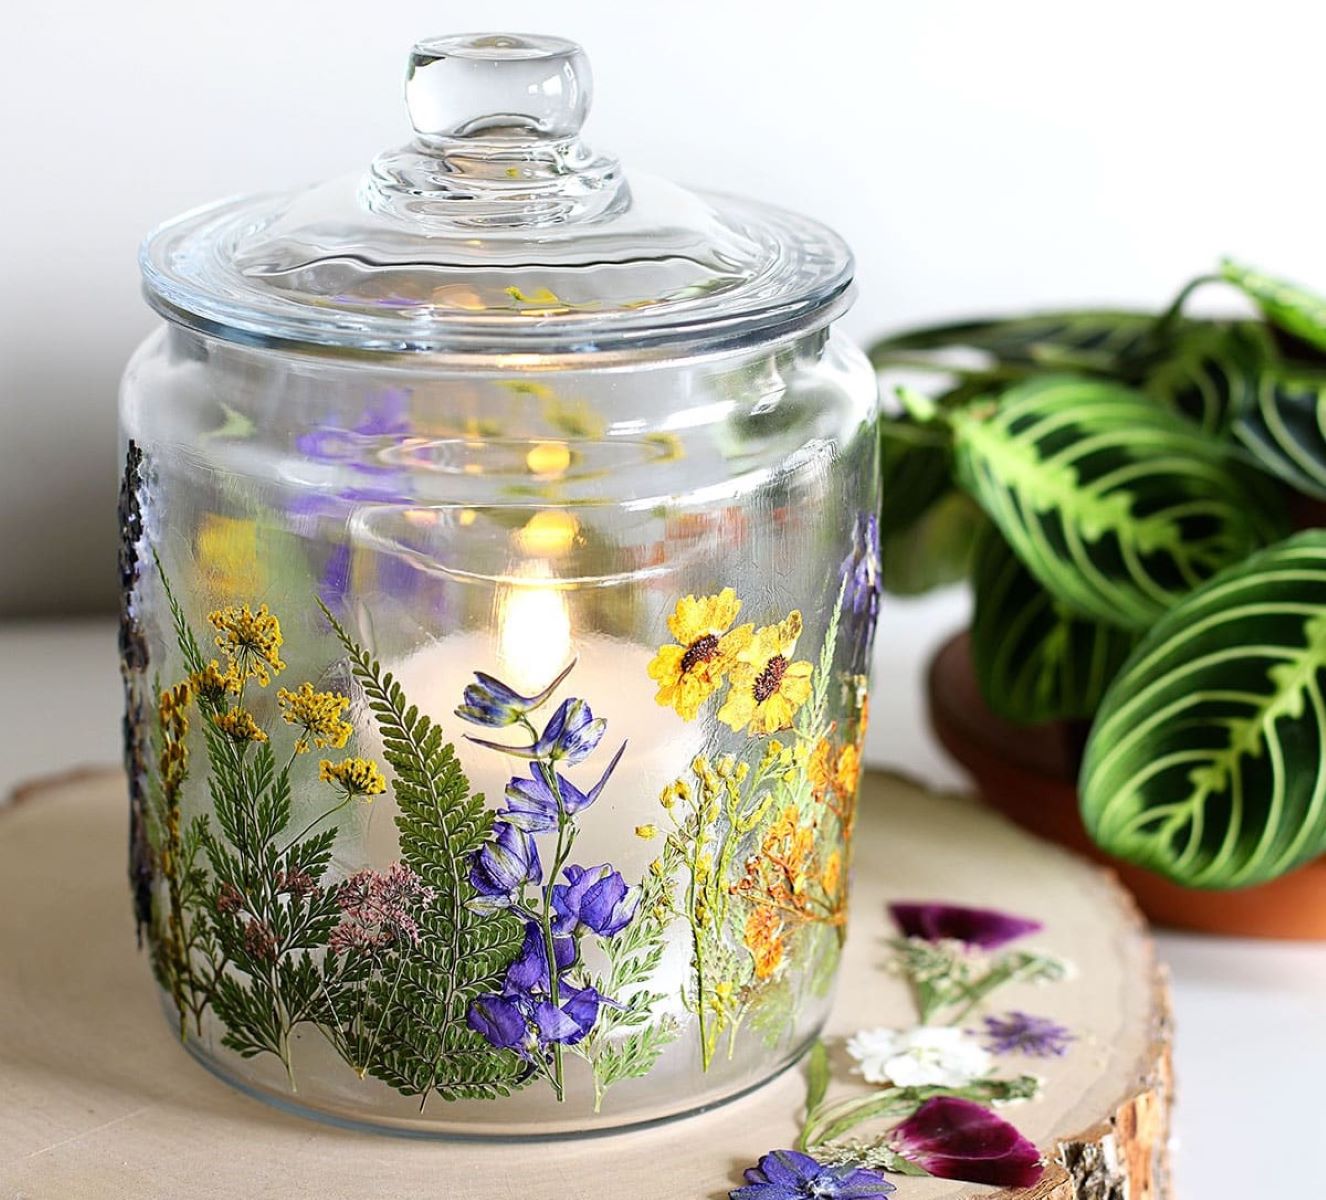
When it comes to adding a touch of creativity and personalization to glass surfaces, Mod Podge is a versatile and popular choice. Whether you're embellishing glassware, creating unique home decor, or crafting personalized gifts, Mod Podge offers a simple yet effective way to decorate and protect glass surfaces. This beloved all-in-one sealer, glue, and finish has been a staple in the crafting and DIY community for decades, cherished for its ability to transform ordinary glass items into stunning works of art.
Mod Podge comes in various formulations, including the classic Matte and Gloss finishes, as well as specialty formulas designed for specific applications. Its versatility makes it an ideal medium for adhering paper, fabric, and other decorative elements to glass, while also providing a protective seal that enhances durability and longevity.
In this comprehensive guide, we will walk you through the process of sealing Mod Podge on glass, ensuring that your creations remain vibrant and beautiful for years to come. From preparing the glass surface to applying multiple coats of Mod Podge and finally sealing the finish, each step plays a crucial role in achieving a professional-looking result.
By following these simple yet essential steps, you can elevate your glass crafting projects to new heights, unlocking the full potential of Mod Podge as a transformative medium for expressing your creativity. So, gather your materials and let's embark on this exciting journey of preserving and showcasing your artistic endeavors on glass surfaces.
Key Takeaways:
- Transform glass items into stunning works of art by sealing Mod Podge. Clean, apply, and seal with precision for durable and visually appealing results. Unleash your creativity and preserve your artistic endeavors on glass surfaces.
- Elevate glass crafting projects with Mod Podge. Follow simple steps to clean, apply multiple coats, and seal for long-lasting beauty. Embrace the transformative power of Mod Podge and showcase your creativity on glass.
Materials Needed
Before embarking on the process of sealing Mod Podge on glass, it's essential to gather the necessary materials to ensure a smooth and successful application. Here's a comprehensive list of items you'll need to complete this project:
-
Glass Surface: Select the glass item or surface that you intend to decorate and seal with Mod Podge. This could be anything from glassware, such as vases or jars, to glass photo frames or decorative mirrors.
-
Mod Podge: Choose the appropriate Mod Podge formulation based on your desired finish. Whether you prefer a classic matte look or a glossy sheen, ensure that you have the suitable Mod Podge variant for your project.
-
Foam Brush or Paintbrush: A high-quality foam brush or paintbrush is essential for applying Mod Podge evenly onto the glass surface. The choice between a foam brush and a paintbrush depends on the specific texture and intricacy of your project.
-
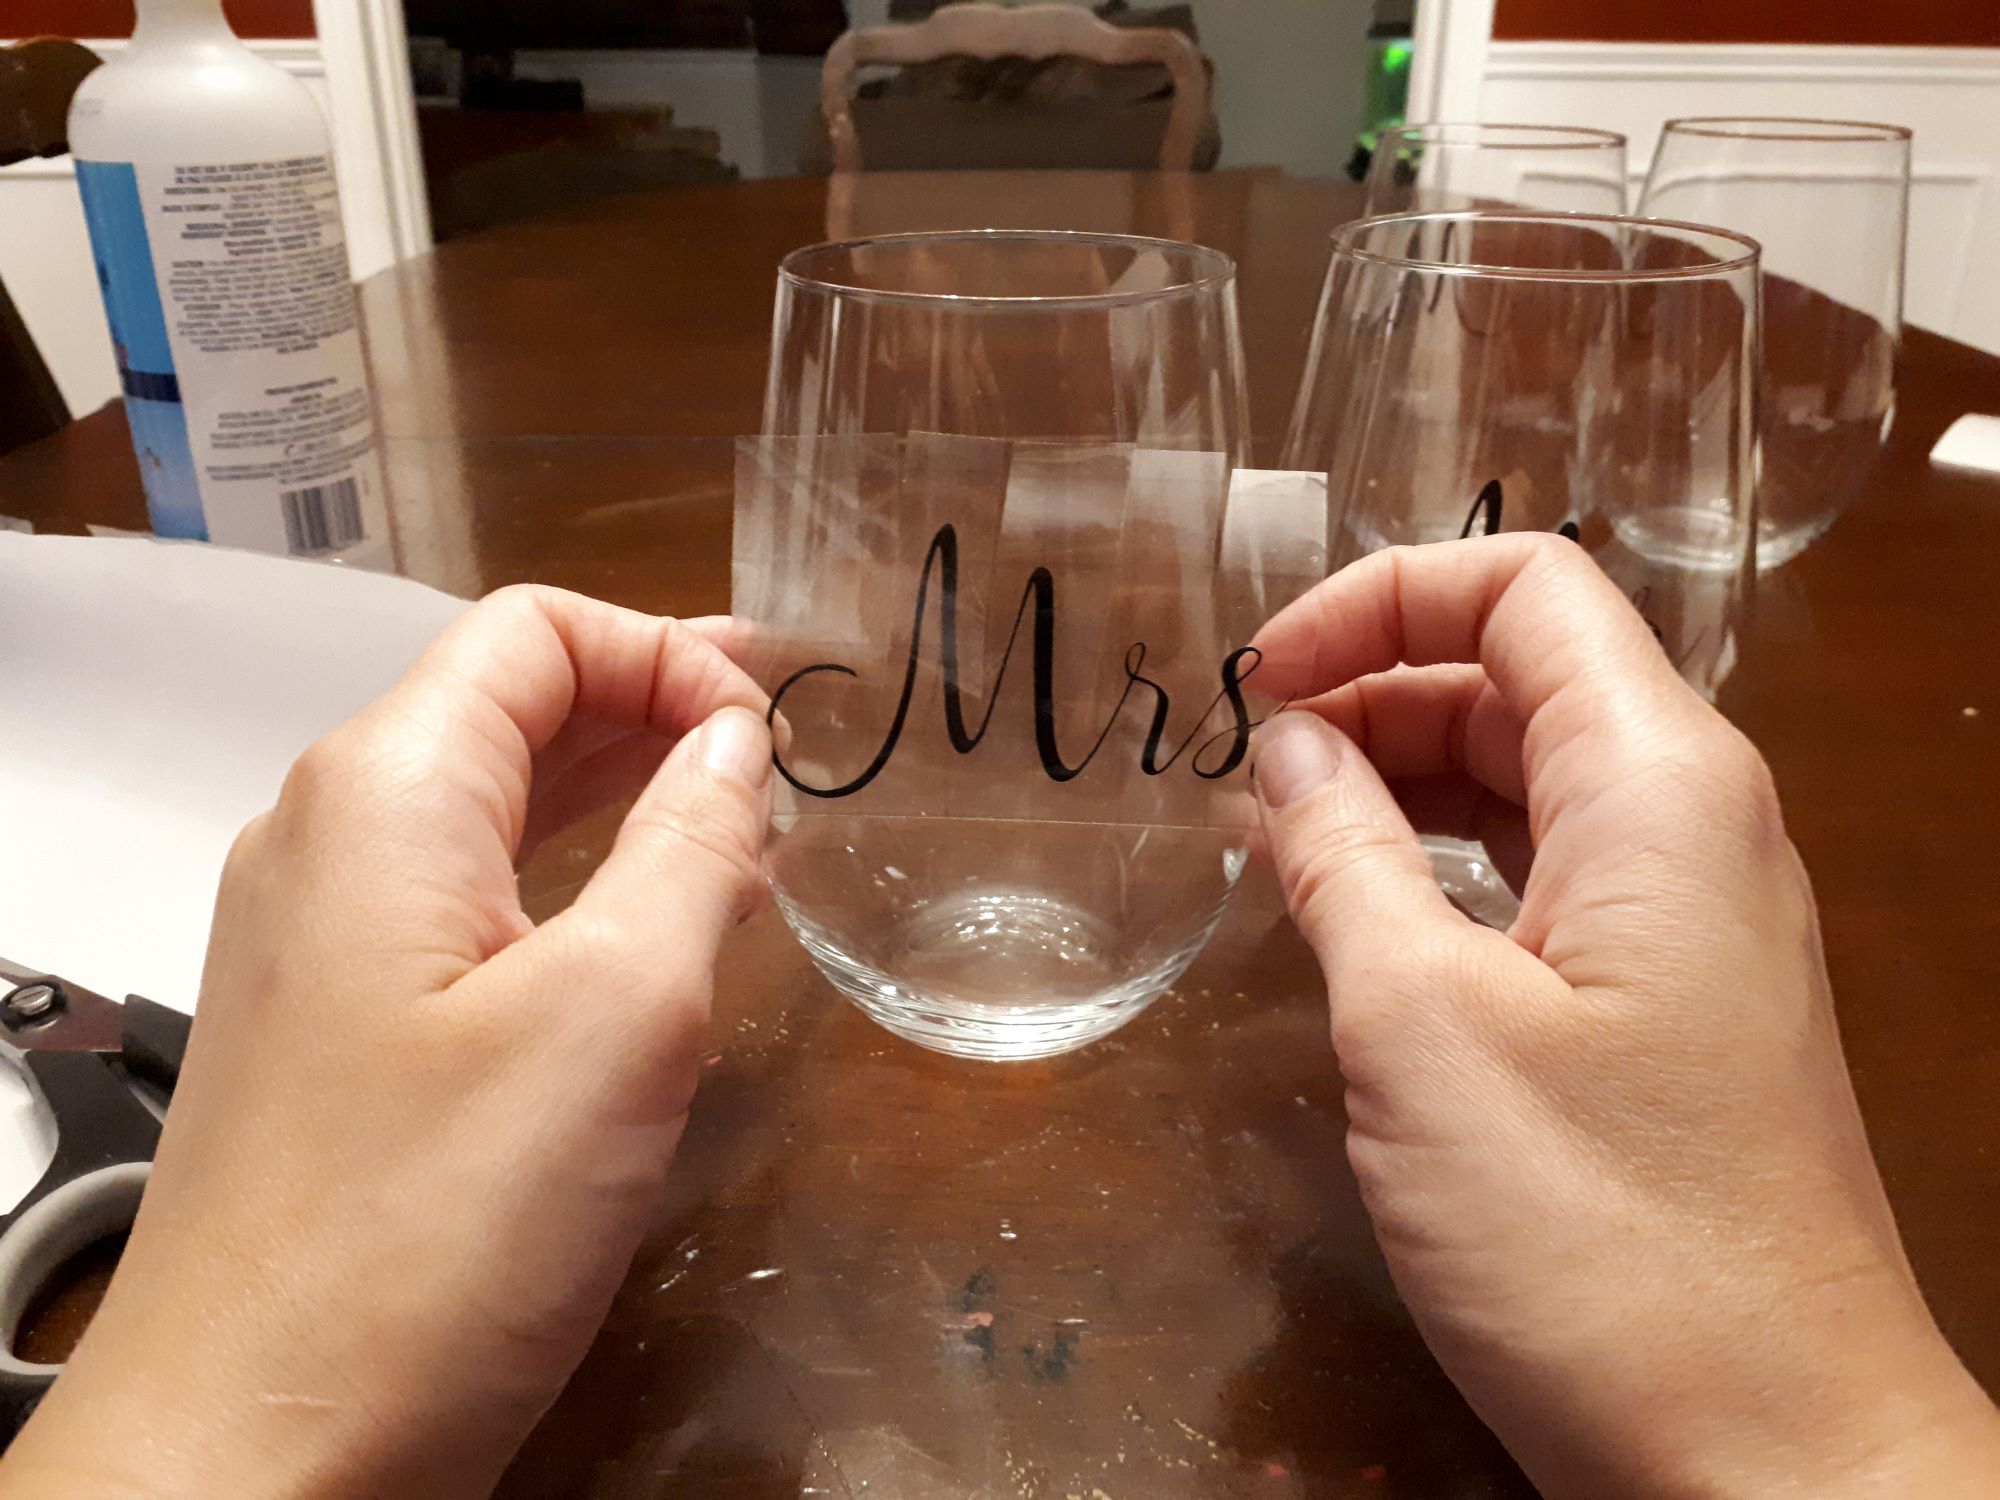
Decorative Elements: If you plan to embellish the glass surface with decorative elements such as paper cutouts, fabric, or other materials, ensure that you have these items ready for application.
-
Clean Cloth: Having a clean cloth or lint-free rag on hand is crucial for wiping the glass surface and ensuring that it is free from dust, fingerprints, or any other debris before applying Mod Podge.
-
Protective Sealant (Optional): Depending on the intended use of the glass item, you may consider a protective sealant to provide an additional layer of durability and resistance to external elements.
-
Workspace Protection: To safeguard your work area, consider using a protective covering such as a plastic sheet or old newspapers to prevent any accidental spills or stains.
-
Ventilation: If you are working with Mod Podge in an enclosed space, ensure that the area is well-ventilated to allow for proper air circulation during the application and drying process.
By ensuring that you have all these materials at your disposal, you can proceed with confidence, knowing that you are fully equipped to seal Mod Podge on glass and bring your creative vision to life.
Step 1: Clean the Glass Surface
Before diving into the exciting process of applying Mod Podge and sealing it on the glass surface, it is crucial to start with a clean canvas. Cleaning the glass surface thoroughly ensures that the Mod Podge adheres seamlessly and that the final result is free from blemishes or imperfections.
To begin, gather a clean cloth or lint-free rag to wipe down the glass surface. Ensure that the cloth is free from any lint or debris that could potentially transfer onto the glass. If the glass item is particularly dusty or has visible smudges or fingerprints, consider using a glass cleaner or a mild solution of water and vinegar to achieve a pristine surface.
Carefully wipe the entire glass surface, paying close attention to any intricate details or edges. It's essential to remove any dust, dirt, or residues that may have accumulated, as these can interfere with the adhesion of the Mod Podge and affect the overall finish of the project.
Once the glass surface is clean and free from any contaminants, allow it to dry completely before proceeding to the next step. This drying period ensures that the Mod Podge adheres to a smooth and dry surface, promoting optimal adhesion and a professional-looking finish.
By taking the time to clean the glass surface diligently, you set the stage for a successful application of Mod Podge, laying the foundation for a stunning and durable result. This initial step not only prepares the glass for the decorative and protective layers to come but also sets the tone for a meticulous and professional approach to your crafting endeavors.
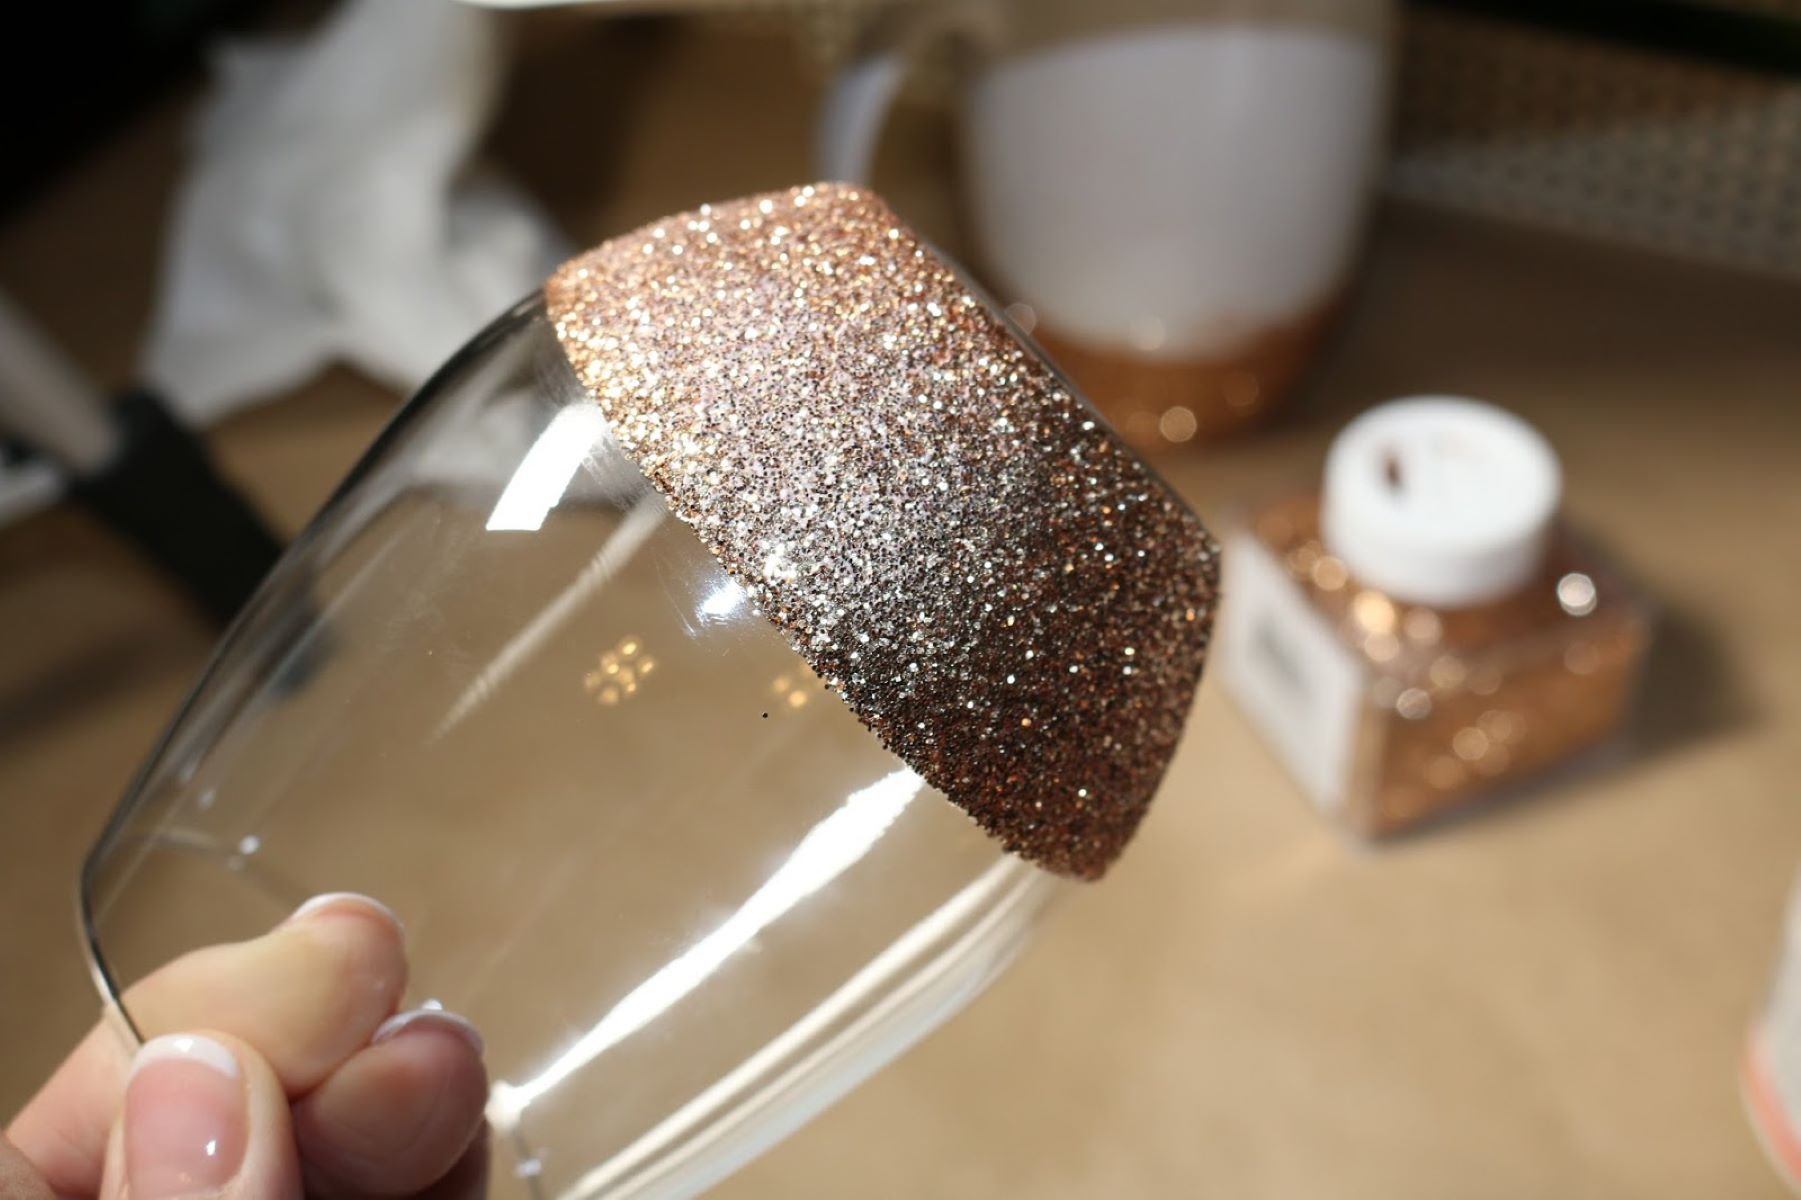
Step 2: Apply Mod Podge
With the glass surface meticulously cleaned and prepared, it's time to embark on the transformative process of applying Mod Podge. This step serves as the foundation for sealing and protecting the glass, while also providing a secure base for any decorative elements that will be incorporated into the project.
Begin by selecting the appropriate Mod Podge formulation based on your desired finish. Whether you opt for the classic Matte or Gloss variant, or a specialized formula designed for specific applications such as outdoor use or dishwasher-safe projects, ensure that you have the suitable Mod Podge variant at hand.
Using a high-quality foam brush or paintbrush, carefully apply a smooth and even layer of Mod Podge onto the clean glass surface. The goal is to achieve consistent coverage without any streaks or clumps, ensuring that the Mod Podge adheres seamlessly to the glass.
As you apply the Mod Podge, consider the specific design and decorative elements you plan to incorporate. If you intend to adhere paper cutouts, fabric, or other materials onto the glass, apply a thin layer of Mod Podge to the back of each element before carefully positioning it onto the glass surface.
Take your time during this process, paying attention to any intricate details or delicate areas of the design. Whether you're creating a personalized photo frame, embellishing a glass vase, or crafting a decorative mirror, precision and patience are key to achieving a professional-looking result.
Once the Mod Podge and any decorative elements are in place, allow the initial layer to dry completely. This drying period is essential for ensuring that the Mod Podge sets and adheres securely to the glass, laying the groundwork for subsequent coats and the final sealing process.
By approaching the application of Mod Podge with care and precision, you set the stage for a successful and visually stunning project. This step not only establishes a durable and protective foundation for your glass crafting endeavors but also sets the tone for the creative and transformative journey that lies ahead.
Step 3: Let It Dry
After applying the initial layer of Mod Podge and positioning any decorative elements, it's crucial to allow the project to dry thoroughly before proceeding to the next phase. The drying process is a pivotal stage in ensuring that the Mod Podge adheres securely to the glass surface, setting the stage for additional coats and the final sealing step.
As the Mod Podge dries, it undergoes a transformative process, transitioning from a wet, milky appearance to a clear and protective finish. This visual indicator serves as a cue for the progress of the drying process, allowing you to monitor the project's evolution and anticipate the next steps.
During the drying period, it's essential to maintain a controlled environment to facilitate optimal drying conditions. Ensure that the project is placed on a flat, level surface to prevent any uneven pooling or dripping of the Mod Podge. Additionally, consider the ambient temperature and humidity levels, as these factors can influence the drying time of the Mod Podge.
Depending on the thickness of the Mod Podge layer and the specific environmental conditions, the drying process may take anywhere from 15 minutes to 1 hour for the initial layer. It's important to exercise patience and refrain from handling or disturbing the project during this crucial phase, as premature handling can disrupt the drying Mod Podge and compromise the overall finish.
As the Mod Podge progresses through the drying stages, you'll notice a gradual transition from a visibly wet surface to a tacky, semi-dry texture. This intermediate phase indicates that the Mod Podge is nearing the final drying stage, preparing the surface for subsequent coats if desired.
By allowing the Mod Podge to dry thoroughly between coats, you ensure that each layer adheres securely and contributes to a durable and professional-looking finish. This patient and meticulous approach sets the foundation for a visually stunning and long-lasting result, showcasing the transformative power of Mod Podge on glass surfaces.
In the next step, we will delve into the process of applying a second coat of Mod Podge, building upon the initial layer to enhance the protective and decorative qualities of the project. With the foundation set and the Mod Podge nearing completion, the next phase promises to elevate the project to new heights of creativity and craftsmanship.
After applying Mod Podge to glass, let it dry for 15-20 minutes, then use a foam brush to apply a thin layer of clear acrylic sealer. Let it dry completely before handling.
Read more: How To Remove Mod Podge From Glass
Step 4: Apply a Second Coat
As the initial layer of Mod Podge dries to a clear and protective finish, the time has come to elevate the project by applying a second coat. This crucial step serves to reinforce the durability and resilience of the Mod Podge seal, ensuring that the glass surface is fully encapsulated and shielded from external elements.
Before proceeding with the second coat, take a moment to inspect the dried surface for any imperfections or inconsistencies. If you notice any areas that appear uneven or require additional coverage, gently sand the surface with fine-grit sandpaper to achieve a smooth and uniform texture. This preparatory step sets the stage for a flawless application of the second coat, promoting a seamless and professional finish.
Using the same high-quality foam brush or paintbrush employed for the initial layer, apply a smooth and even coat of Mod Podge over the dried surface. This second coat serves as a protective barrier, enhancing the resilience of the seal and fortifying the adhesion of any decorative elements that have been incorporated into the project.
As you apply the second coat, pay close attention to any intricate details or delicate areas of the design. Ensure that the Mod Podge is distributed evenly, covering the entire glass surface with precision and care. This meticulous approach not only enhances the protective qualities of the seal but also contributes to a visually stunning and professional-looking result.
Once the second coat is applied, allow the project to dry thoroughly, following the same principles of controlled environment and patience observed during the initial drying phase. As the Mod Podge progresses through the drying stages, you'll witness the transformation from a visibly wet surface to a clear and resilient finish, signaling the completion of the sealing process.
With the second coat of Mod Podge in place, the glass surface is now fortified with a durable and protective seal, ready to withstand the test of time. This pivotal step not only enhances the longevity and resilience of the project but also sets the stage for the final and transformative phase of sealing the Mod Podge on glass.
In the subsequent step, we will delve into the essential process of sealing the Mod Podge, ensuring that the project is safeguarded and preserved for years to come. With the foundation reinforced and the Mod Podge seal nearing completion, the next phase promises to elevate the project to new heights of durability and visual appeal.
Step 5: Let It Dry Again
After applying the second coat of Mod Podge, it is essential to allow the project to undergo a final drying phase, ensuring that the seal sets and cures to its full potential. This critical step not only contributes to the overall durability and resilience of the Mod Podge finish but also provides a window of anticipation as the project nears its completion.
As the second coat of Mod Podge dries, it undergoes a transformative process, transitioning from a visibly wet application to a clear and protective finish. This visual evolution serves as a testament to the progress of the drying process, offering a glimpse of the project's final appearance and reinforcing the anticipation of the finished result.
During this final drying period, it is crucial to maintain a controlled environment to facilitate optimal drying conditions. Placing the project on a flat, level surface ensures that the Mod Podge sets evenly, preventing any potential pooling or uneven distribution of the seal. Additionally, ensuring adequate ventilation and moderate temperature levels contributes to the efficient drying of the Mod Podge, promoting a smooth and professional finish.
Depending on the thickness of the Mod Podge layers and the specific environmental conditions, the final drying process may take anywhere from 1 hour to 24 hours. It is essential to exercise patience and refrain from handling or disturbing the project during this crucial phase, allowing the Mod Podge to set and cure undisturbed.
As the Mod Podge progresses through the final drying stages, you will witness the culmination of the transformative journey, as the seal transitions to a clear and resilient finish. This definitive phase marks the completion of the Mod Podge application, setting the stage for the project's unveiling and showcasing the enduring beauty and protective qualities of the seal.
By allowing the Mod Podge to dry thoroughly, you ensure that the project achieves its full potential, embodying the meticulous craftsmanship and attention to detail invested in the sealing process. This patient and dedicated approach culminates in a visually stunning and long-lasting result, celebrating the transformative power of Mod Podge on glass surfaces.
Step 6: Seal the Mod Podge
Sealing the Mod Podge on the glass surface is the final and crucial step in ensuring the longevity and resilience of your crafted masterpiece. This sealing process serves as the ultimate protective barrier, safeguarding the Mod Podge seal and preserving the visual appeal of the project for years to come.
To seal the Mod Podge effectively, consider using a specialized clear acrylic sealer designed for use on glass surfaces. This additional layer of protection enhances the durability of the Mod Podge seal, providing resistance against moisture, UV rays, and general wear and tear. When selecting a clear acrylic sealer, opt for a formulation that is compatible with Mod Podge and specifically formulated for use on glass to ensure optimal adhesion and longevity.
Before applying the clear acrylic sealer, ensure that the Mod Podge layers have dried completely, creating a stable foundation for the sealing process. Once the Mod Podge is dry, carefully apply a thin and even coat of the clear acrylic sealer over the entire glass surface. Use smooth and consistent strokes to achieve uniform coverage, ensuring that the sealant adheres securely to the Mod Podge layer.
As the clear acrylic sealer dries, it forms an additional protective barrier, enhancing the resilience and longevity of the Mod Podge seal. This sealing layer not only shields the Mod Podge from external elements but also provides a glossy and professional finish, elevating the visual appeal of the project.
After applying the clear acrylic sealer, allow the project to dry thoroughly according to the manufacturer's recommendations. This final drying phase ensures that the sealing layer sets and cures effectively, fortifying the Mod Podge seal and completing the transformative journey of preserving and showcasing your artistic endeavors on glass surfaces.
By sealing the Mod Podge with a clear acrylic sealer, you elevate your crafted glass project to new heights of durability and visual appeal. This essential step not only safeguards the Mod Podge seal but also celebrates the meticulous craftsmanship and creativity invested in the project, culminating in a visually stunning and long-lasting work of art.
Conclusion
In conclusion, the process of sealing Mod Podge on glass surfaces is a transformative journey that combines creativity, craftsmanship, and meticulous attention to detail. From the initial steps of cleaning the glass surface to the application of multiple Mod Podge coats and the final sealing process, each stage plays a crucial role in elevating ordinary glass items into stunning works of art.
By following the comprehensive steps outlined in this guide, crafters and DIY enthusiasts can unlock the full potential of Mod Podge as a versatile medium for decorating and protecting glass surfaces. The meticulous cleaning of the glass surface sets the stage for a flawless application of Mod Podge, ensuring optimal adhesion and a professional finish. The subsequent steps of applying multiple coats of Mod Podge and allowing thorough drying periods contribute to the durability and resilience of the seal, laying the foundation for a long-lasting and visually stunning result.
The final and essential step of sealing the Mod Podge with a clear acrylic sealer serves as the ultimate protective barrier, safeguarding the Mod Podge seal and enhancing the visual appeal of the project. This sealing layer not only provides resistance against external elements but also adds a glossy and professional finish, elevating the overall aesthetic of the crafted glass item.
By embracing the transformative power of Mod Podge, crafters can breathe new life into glassware, photo frames, mirrors, and various other glass surfaces, infusing them with personalized creativity and enduring beauty. Whether creating unique home decor, personalized gifts, or embellished glassware, the process of sealing Mod Podge on glass opens up a world of possibilities for expressing individuality and showcasing artistic endeavors.
As crafters embark on their own Mod Podge sealing projects, it is essential to approach each step with patience, precision, and a passion for creativity. By investing time and attention into the sealing process, crafters can ensure that their glass projects stand the test of time, captivating viewers with their visual appeal and enduring charm.
In essence, the journey of sealing Mod Podge on glass transcends the realm of crafting, embodying the spirit of artistic expression and the joy of transforming everyday items into cherished works of art. With the knowledge and techniques shared in this guide, crafters are empowered to embark on their own creative adventures, embracing the endless possibilities that Mod Podge offers for enhancing and preserving glass surfaces.
Frequently Asked Questions about How To Seal Modge Podge On Glass
Was this page helpful?
At Storables.com, we guarantee accurate and reliable information. Our content, validated by Expert Board Contributors, is crafted following stringent Editorial Policies. We're committed to providing you with well-researched, expert-backed insights for all your informational needs.


0 thoughts on “How To Seal Modge Podge On Glass”