Home>Furniture & Design>Living Room Furniture>How To Block Off Under A Recliner
Living Room Furniture
How To Block Off Under A Recliner
Modified: August 16, 2024
Learn how to effectively block off the space under your recliner for a cleaner living room. Find practical tips and solutions for your living room furniture and design.
(Many of the links in this article redirect to a specific reviewed product. Your purchase of these products through affiliate links helps to generate commission for Storables.com, at no extra cost. Learn more)
Introduction
When it comes to creating a comfortable and safe living room environment, ensuring the stability of your furniture is paramount. One common concern for many homeowners is the potential hazards posed by the space underneath a recliner. Whether you have young children, pets, or simply want to prevent items from getting lost under the recliner, blocking off this space can provide peace of mind and enhance the overall functionality of your living room.
In this comprehensive guide, we will walk you through the step-by-step process of effectively blocking off the area underneath a recliner. By following these simple yet essential steps, you can safeguard against potential accidents and maintain a clutter-free living space. With just a few basic materials and a bit of effort, you can transform your living room into a safer and more organized area for relaxation and entertainment.
So, if you've ever found yourself reaching into the depths under your recliner to retrieve lost items, or if you're concerned about the safety of young children or pets, this guide is for you. By taking proactive measures to block off the space under your recliner, you can create a more secure and enjoyable living room environment for everyone. Let's dive into the steps and get started on this practical home improvement project.
Key Takeaways:
- Keep your living room safe and organized by blocking off the space under your recliner. With simple materials and careful measurements, you can create a secure environment for relaxation and entertainment.
- By lifting, measuring, cutting, and placing the blocking material, you can ensure a snug fit and stable support for your recliner. Enjoy a clutter-free living room and peace of mind for your family’s safety.
Read more: How To Block Off Fireplace
Step 1: Gather the necessary materials
Before embarking on the task of blocking off the space under your recliner, it's essential to gather the required materials. By ensuring you have everything at hand, you can streamline the process and avoid interruptions. Here's a list of the materials you'll need for this project:
-
Measuring Tape: A measuring tape is indispensable for accurately determining the dimensions of the space under the recliner. This will enable you to cut the blocking material to the precise size, ensuring a snug fit.
-
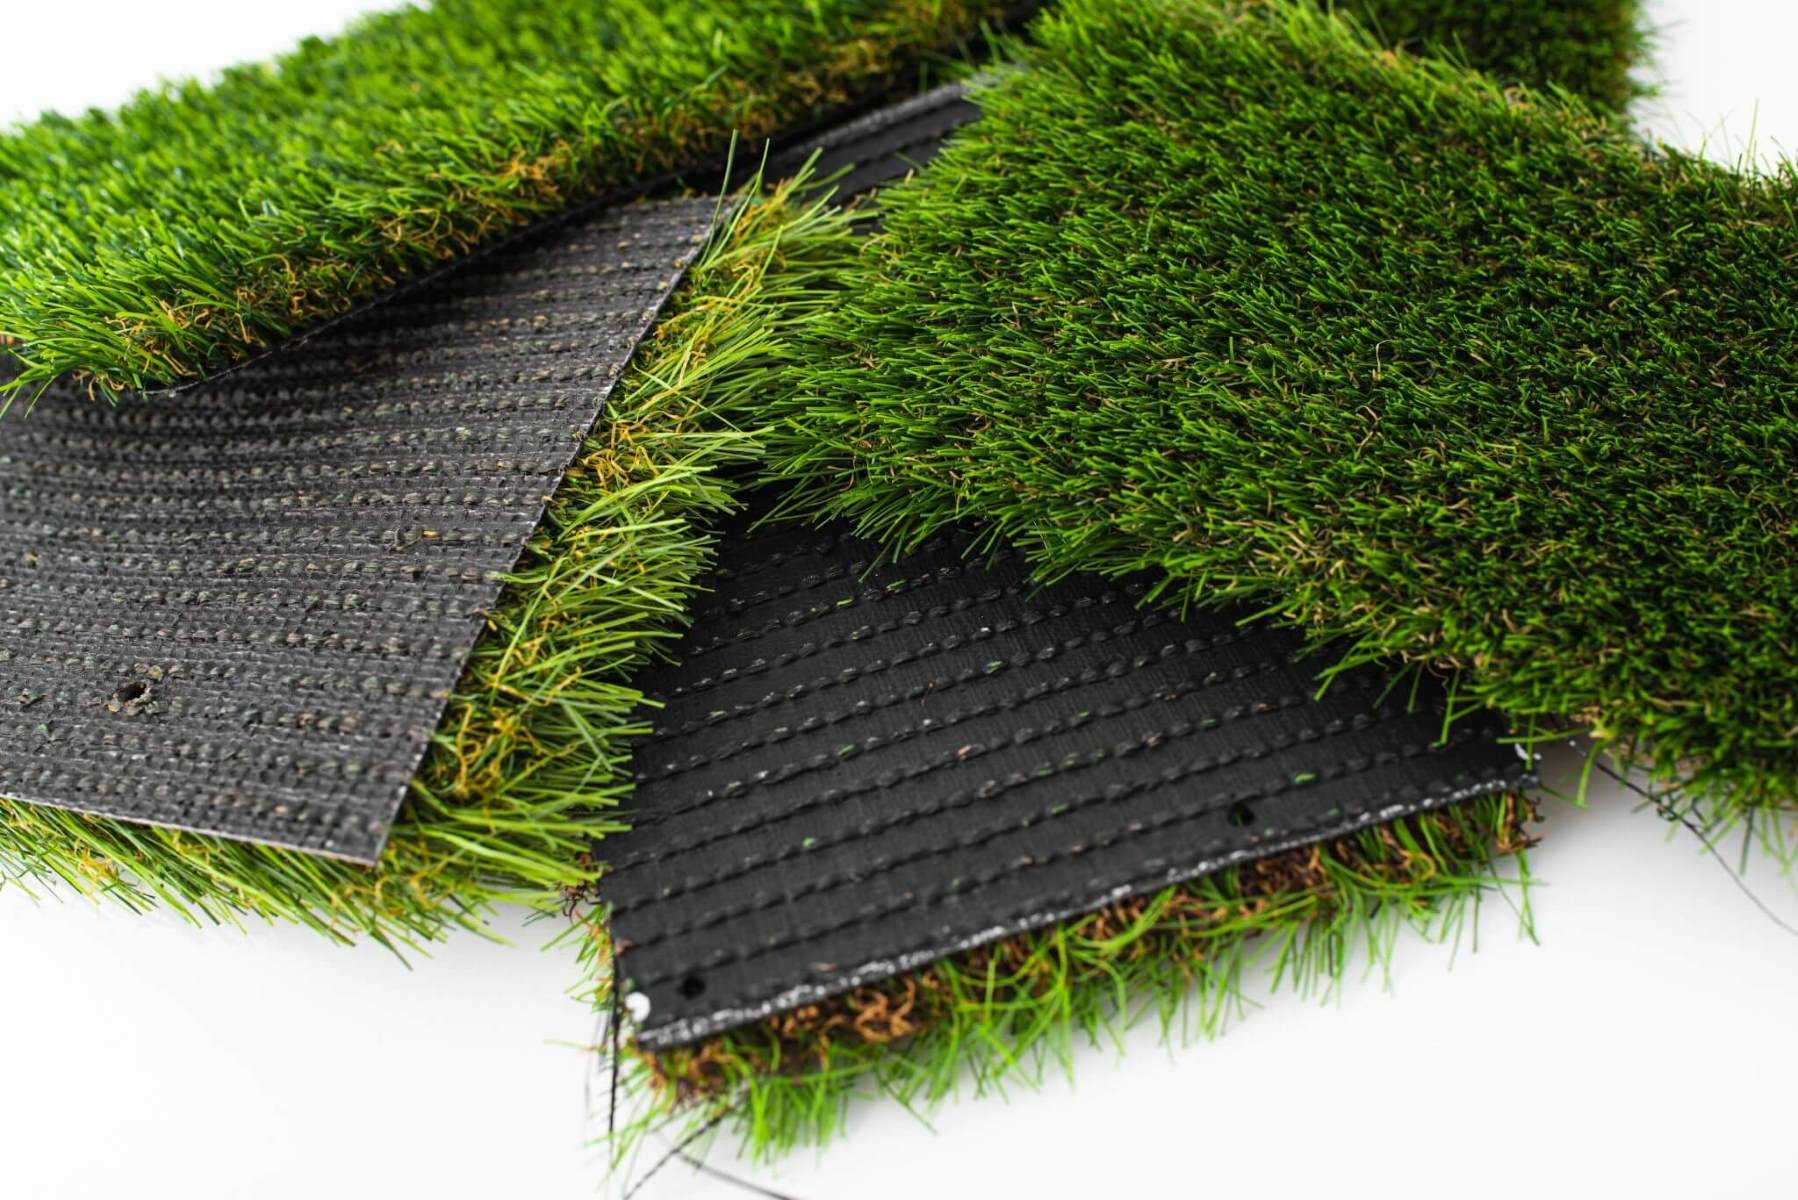
Blocking Material: Depending on your preference and the specific requirements of your recliner, you can choose from a variety of blocking materials. Common options include plywood, foam board, or even a custom-cut piece of wood. The material should be sturdy enough to provide adequate support and stability.
-
Cutting Tool: To customize the blocking material to fit the space under your recliner, you'll need a reliable cutting tool. A handsaw or jigsaw can be used to cut the material with precision, allowing for a perfect fit.
-
Protective Gear: Safety should always be a priority when working with tools. Be sure to have appropriate protective gear such as gloves and safety goggles to safeguard yourself during the cutting process.
-
Assistance (Optional): Depending on the weight and size of your recliner, you may require assistance to lift and maneuver it. Enlist the help of a family member or friend to ensure the process is carried out safely and efficiently.
By gathering these essential materials, you'll be well-prepared to tackle the task of blocking off the space under your recliner. With the right tools and materials in hand, you can proceed to the next steps with confidence, knowing that you have everything you need to complete the project effectively.
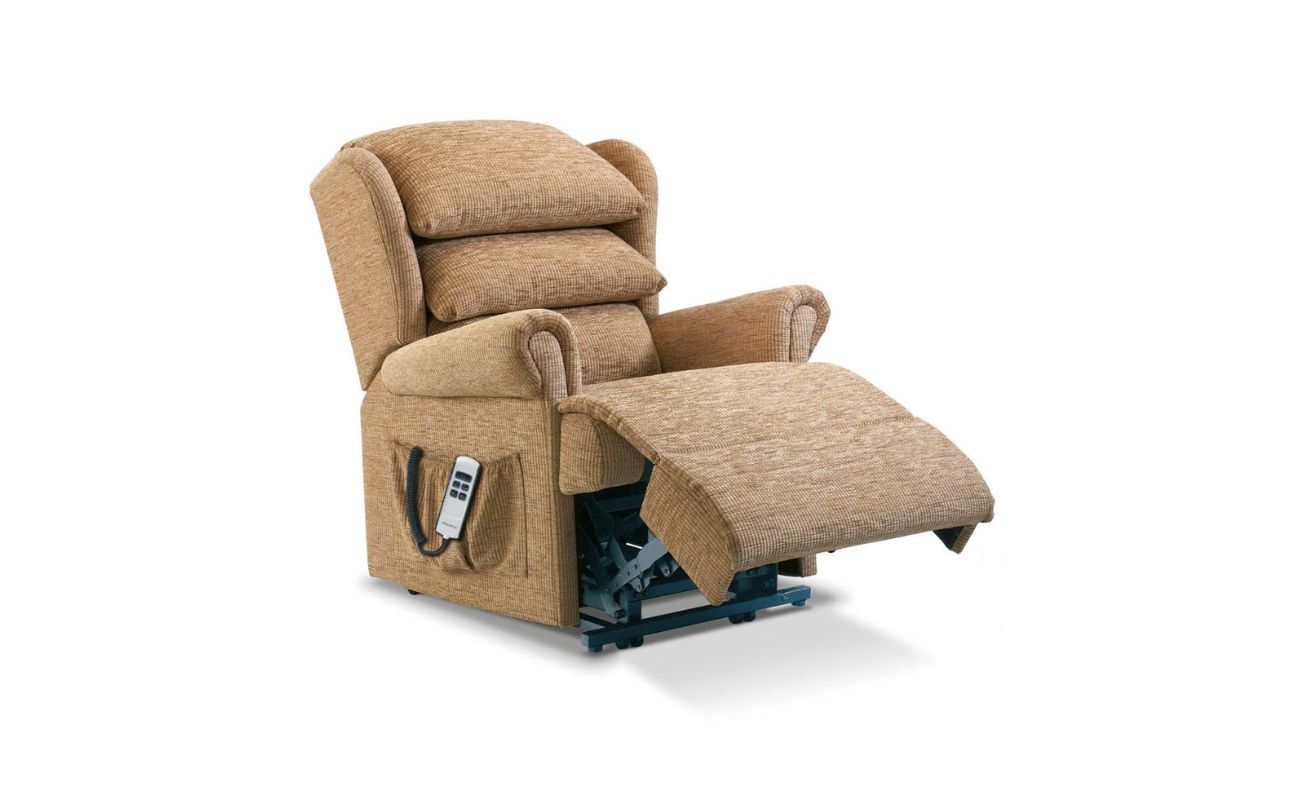
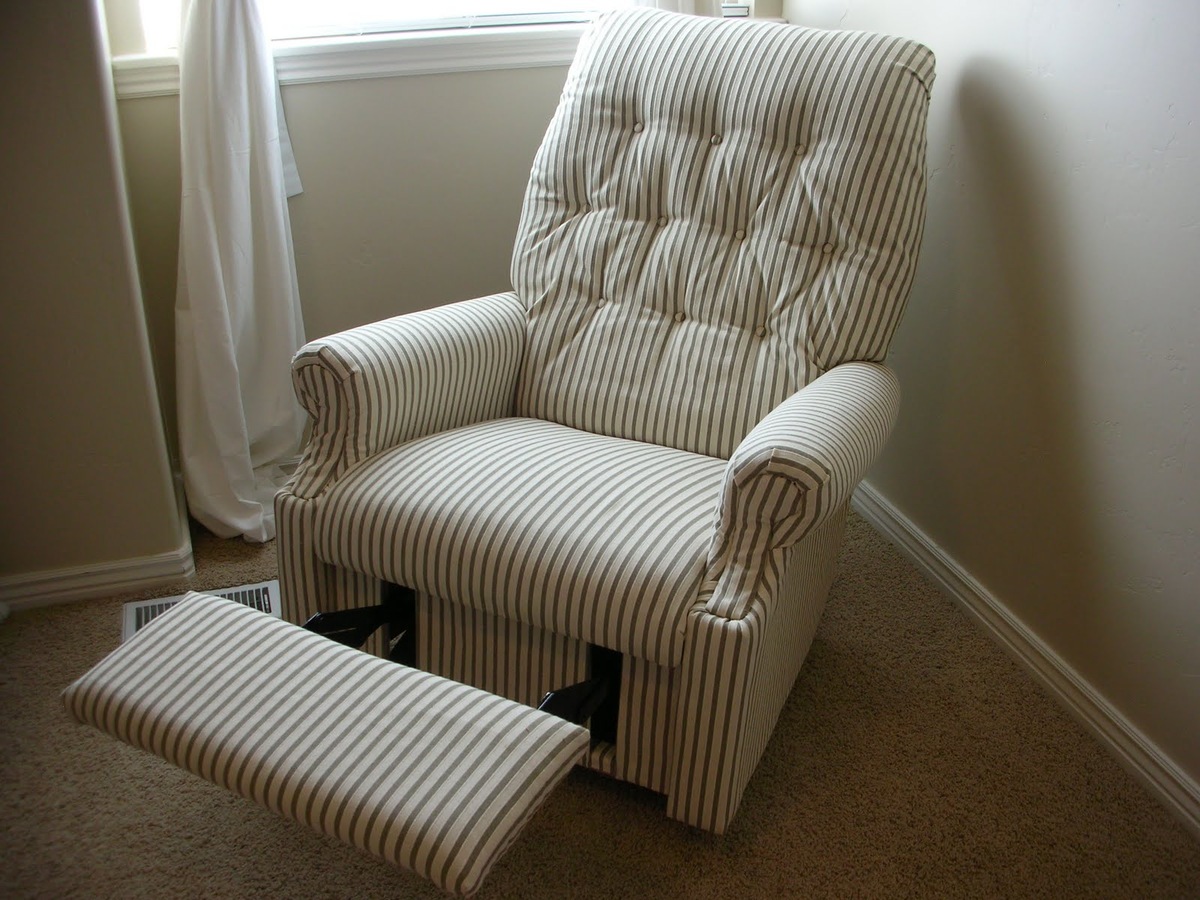
Step 2: Lift the recliner
Lifting the recliner is a crucial step in the process of blocking off the space underneath it. Before attempting to measure or place the blocking material, it's essential to elevate the recliner to create ample space for the subsequent tasks. Here's a detailed walkthrough of how to lift the recliner safely and effectively.
Firstly, ensure that the recliner is in its upright position and that there are no items or obstacles around it. This will provide a clear and unobstructed workspace for the lifting process. If the recliner is electrically powered, make sure to unplug it from the power source to prevent any accidental activation during the lifting procedure.
Next, position yourself at the front of the recliner and firmly grip the sides or base of the seat. If the recliner has a lever or handle for manual operation, ensure that it is in the locked position to prevent unintended movement. If the recliner is particularly heavy or bulky, it's advisable to enlist the assistance of another person to ensure safe and controlled lifting.
Using your leg muscles and maintaining a straight back, begin to lift the recliner by pushing upwards from the base. It's important to lift with your legs rather than your back to minimize the risk of strain or injury. As the recliner is raised, be mindful of maintaining a balanced and stable posture to prevent any wobbling or tilting.
Once the recliner is lifted to a sufficient height, it's advisable to place sturdy blocks or wedges beneath it to keep it elevated. This will provide ample space for the subsequent steps of measuring and placing the blocking material. Ensure that the blocks or wedges are securely positioned to prevent any unexpected shifting or movement of the recliner.
By following these steps, you can safely and effectively lift the recliner, creating the necessary clearance to proceed with the remaining tasks. With the recliner elevated, you can move on to the next steps with confidence, knowing that you have established a secure and accessible workspace for blocking off the space underneath the recliner.
Step 3: Measure the space underneath the recliner
With the recliner lifted and the workspace cleared, the next critical step is to measure the space underneath the recliner. Accurate measurements are essential for ensuring that the blocking material fits snugly and provides effective support. Here's a detailed guide on how to measure the space underneath the recliner:
-
Positioning: Begin by positioning yourself at the front of the recliner, ensuring that you have a clear view and access to the area underneath. If necessary, use a flashlight or additional lighting to illuminate the space, making it easier to take precise measurements.
-
Measuring Tape: Take a reliable measuring tape and carefully extend it into the space under the recliner. Measure the length, width, and height of the area, ensuring that each dimension is recorded accurately. It's important to account for any irregularities or obstructions within the space that may impact the placement of the blocking material.
-
Clearance: Pay close attention to the clearance between the bottom of the recliner and the floor. This measurement is crucial for determining the maximum thickness of the blocking material that can be accommodated without interfering with the recliner's stability or functionality.
-
Obstacles: Identify and note any obstacles or protrusions within the space, such as support bars, mechanisms, or wiring. These details are essential for customizing the blocking material to fit around or accommodate such features, ensuring a seamless and secure installation.
-
Double-Check: Once the initial measurements are taken, double-check each dimension to ensure accuracy. It's advisable to measure multiple points within the space to account for any variations or asymmetries that may be present.
-
Record Measurements: Record the measurements in a clear and organized manner, noting the length, width, height, and any specific considerations or irregularities observed during the measuring process.
By meticulously measuring the space underneath the recliner, you can lay the groundwork for a precise and tailored installation of the blocking material. These measurements will serve as the foundation for customizing the blocking material to fit seamlessly within the space, ultimately enhancing the stability and safety of the recliner. With the dimensions accurately recorded, you can proceed to the next step of cutting the blocking material to size, confident in the knowledge that you have obtained the necessary measurements for a successful installation.
Place furniture risers or blocks under the legs of the recliner to elevate it and create a barrier underneath. This will prevent small objects or pets from getting stuck underneath.
Step 4: Cut the blocking material to size
With the precise measurements of the space underneath the recliner in hand, it's time to proceed with cutting the blocking material to the exact size required for a seamless fit. This step is crucial in ensuring that the blocking material provides optimal support and stability while effectively closing off the space beneath the recliner. Here's a detailed guide on how to cut the blocking material to size:
-
Marking the Measurements: Begin by transferring the recorded measurements onto the blocking material. Use a pencil or marker to clearly mark the length, width, and height dimensions, ensuring that the lines are straight and accurately represent the required size.
-
Precision Cutting: Utilize a reliable cutting tool, such as a handsaw or jigsaw, to carefully cut the blocking material along the marked lines. Exercise caution and patience during the cutting process to achieve clean and precise edges. If the material is particularly thick or dense, consider using appropriate cutting blades or techniques to ensure a smooth and accurate cut.
-
Customizing for Obstacles: If the space underneath the recliner contains any obstacles or irregularities, such as support bars or protrusions, make necessary adjustments to the blocking material to accommodate these features. This may involve cutting notches, curves, or specific shapes to ensure a tailored fit that seamlessly integrates with the existing structure of the recliner.
-
Ensuring a Snug Fit: As the cutting process nears completion, periodically test the fit of the blocking material within the space under the recliner. Make any minor adjustments as needed to achieve a snug and secure fit, ensuring that the blocking material sits flush against the surrounding surfaces without impeding the recliner's movement or stability.
-
Smooth Edges: Once the blocking material is cut to the required size, take the time to smooth any rough edges or surfaces. This can be achieved using sandpaper or a similar smoothing tool to ensure that the edges are free from any sharp or jagged areas that may pose a risk of snagging or damage.
By meticulously cutting the blocking material to the precise size required, you can ensure a tailored and effective solution for blocking off the space underneath the recliner. With the blocking material customized to fit seamlessly within the space, you are one step closer to enhancing the safety and functionality of your living room environment.
Read more: How To Block A Chimney Off
Step 5: Place the blocking material underneath the recliner
With the blocking material cut to the precise size and tailored to fit the space underneath the recliner, the next critical step is to carefully place the material in its designated position. This process requires attention to detail and a methodical approach to ensure that the blocking material provides effective support and stability. Here's a detailed guide on how to place the blocking material underneath the recliner:
-
Clear the Workspace: Begin by ensuring that the area underneath the recliner is clear of any debris, dust, or obstructions. A clean and uncluttered workspace will facilitate the smooth placement of the blocking material and minimize the risk of any foreign objects interfering with the installation process.
-
Positioning the Blocking Material: Lift the recliner slightly to create enough clearance for sliding the blocking material into place. Carefully maneuver the blocking material into the space underneath the recliner, ensuring that it aligns with the dimensions and contours of the area. If the blocking material is particularly large or heavy, consider enlisting the assistance of another person to ensure controlled and precise placement.
-
Ensuring a Snug Fit: As the blocking material is positioned beneath the recliner, pay close attention to achieving a snug and secure fit. The material should sit flush against the surrounding surfaces, providing stable support without any gaps or unevenness. Gently adjust the position of the blocking material as needed to achieve an optimal fit, taking care to maintain its alignment with the dimensions of the space.
-
Testing Stability: Once the blocking material is in place, carefully lower the recliner to its resting position. Test the stability and balance of the recliner to ensure that the blocking material effectively supports its weight without any tilting or instability. Sit in the recliner and gently rock back and forth to assess its stability, making any necessary adjustments to the positioning of the blocking material to enhance its effectiveness.
-
Securing the Blocking Material (Optional): Depending on the specific design of the recliner and the blocking material used, you may consider securing the material in place to prevent any unintended movement. This can be achieved using non-permanent adhesives, Velcro strips, or other suitable fastening methods that allow for easy removal and repositioning if necessary.
By following these steps, you can effectively place the blocking material underneath the recliner, creating a secure and stable barrier that prevents items from getting lost and enhances the overall safety of the living room environment. With the blocking material in position, you can proceed to the final step of lowering the recliner and testing its stability, confident in the knowledge that you have taken proactive measures to safeguard the space underneath the recliner.
Step 6: Lower the recliner and test the stability
Lowering the recliner and testing its stability is the pivotal final step in the process of blocking off the space underneath. This step ensures that the blocking material effectively supports the weight of the recliner and maintains its stability, providing peace of mind and a secure living room environment. Here's a detailed guide on how to lower the recliner and test its stability:
-
Gentle Lowering: Carefully lower the recliner from its elevated position to the floor, ensuring a controlled and gradual descent. This allows you to observe how the blocking material responds to the weight of the recliner and ensures that it remains securely in place without shifting or dislodging.
-
Observing Stability: As the recliner settles into its lowered position, observe its stability and balance. Check for any signs of tilting, wobbling, or unevenness that may indicate inadequate support from the blocking material. A stable and level seating position indicates that the blocking material is effectively fulfilling its role.
-
Sitting Test: Sit in the recliner and test its functionality by reclining and adjusting the position. Pay attention to any unusual movements or instability that may arise during use. The recliner should maintain its smooth operation and stability, with the blocking material providing reliable support without impeding its movement.
-
Rocking Test: Gently rock back and forth in the recliner to simulate typical usage and movement. This test allows you to assess the resilience and stability of the blocking material under dynamic conditions, ensuring that it can withstand the regular movements associated with using the recliner.
-
Visual Inspection: Conduct a visual inspection of the area underneath the recliner to ensure that the blocking material remains securely in place and maintains its snug fit. Look for any signs of displacement, shifting, or gaps that may compromise the effectiveness of the blocking material.
-
Repositioning (if necessary): If any issues are identified during the stability test, such as minor shifting or instability, make the necessary adjustments to reposition the blocking material. This may involve slight realignment or additional support to enhance the stability and effectiveness of the blocking material.
By meticulously lowering the recliner and testing its stability, you can ensure that the blocking material provides reliable support and effectively closes off the space underneath. This final step serves as the ultimate validation of the successful installation, affirming that the living room environment is now safer, more organized, and free from the hazards associated with the space under the recliner.
Conclusion
In conclusion, by following the comprehensive steps outlined in this guide, you have successfully learned how to block off the space underneath a recliner, thereby enhancing the safety and functionality of your living room environment. This practical home improvement project not only provides peace of mind by preventing items from getting lost under the recliner but also contributes to a more organized and secure space for relaxation and entertainment.
By gathering the necessary materials, lifting the recliner, measuring the space underneath, cutting the blocking material to size, placing the material in position, and testing the recliner's stability, you have taken proactive measures to address a common concern in many households. The careful attention to detail and methodical approach to each step ensures that the blocking material provides reliable support and effectively closes off the space under the recliner.
The tailored installation of the blocking material, customized to fit the specific dimensions and contours of the space, serves as a testament to your commitment to creating a safer and more functional living room environment. The meticulous measurements, precision cutting, and thoughtful placement of the blocking material demonstrate your dedication to ensuring the stability and security of the recliner and its surroundings.
As a result of your efforts, you can now enjoy a living room that is free from the potential hazards associated with the space under the recliner. Whether you have young children, pets, or simply seek to maintain a clutter-free environment, the successful completion of this project contributes to a more enjoyable and worry-free living space.
Furthermore, the skills and knowledge gained from this experience can be applied to future home improvement projects, empowering you to tackle similar tasks with confidence and proficiency. The ability to assess, measure, customize, and install blocking materials is a valuable skill that can be utilized in various aspects of home maintenance and enhancement.
In essence, by taking the initiative to block off the space underneath your recliner, you have not only improved the safety and organization of your living room but also demonstrated a proactive approach to creating a comfortable and secure home environment. Your dedication to this practical endeavor reflects a commitment to maintaining a living space that prioritizes safety, functionality, and peace of mind for you and your loved ones.
Ready to tackle more projects around your house? If you've successfully blocked off under your recliner and want to keep that DIY spirit alive, you'll love our guide on DIY home projects. Packed with creative ideas and straightforward instructions, this guide will help you transform your home bit by bit without breaking the bank. Whether you're fixing up the garden or updating your living room, our tips make each project manageable and fun. So, grab your tools and let's get to work on making your home even more beautiful and functional!
Frequently Asked Questions about How To Block Off Under A Recliner
Was this page helpful?
At Storables.com, we guarantee accurate and reliable information. Our content, validated by Expert Board Contributors, is crafted following stringent Editorial Policies. We're committed to providing you with well-researched, expert-backed insights for all your informational needs.


0 thoughts on “How To Block Off Under A Recliner”