Home>Furniture & Design>Interior Design Trends>How To Install Glass Blocks
Interior Design Trends
How To Install Glass Blocks
Modified: August 27, 2024
Learn how to incorporate glass blocks into your interior design with our step-by-step guide. Discover the latest interior design trends for a modern and stylish look.
(Many of the links in this article redirect to a specific reviewed product. Your purchase of these products through affiliate links helps to generate commission for Storables.com, at no extra cost. Learn more)
Introduction
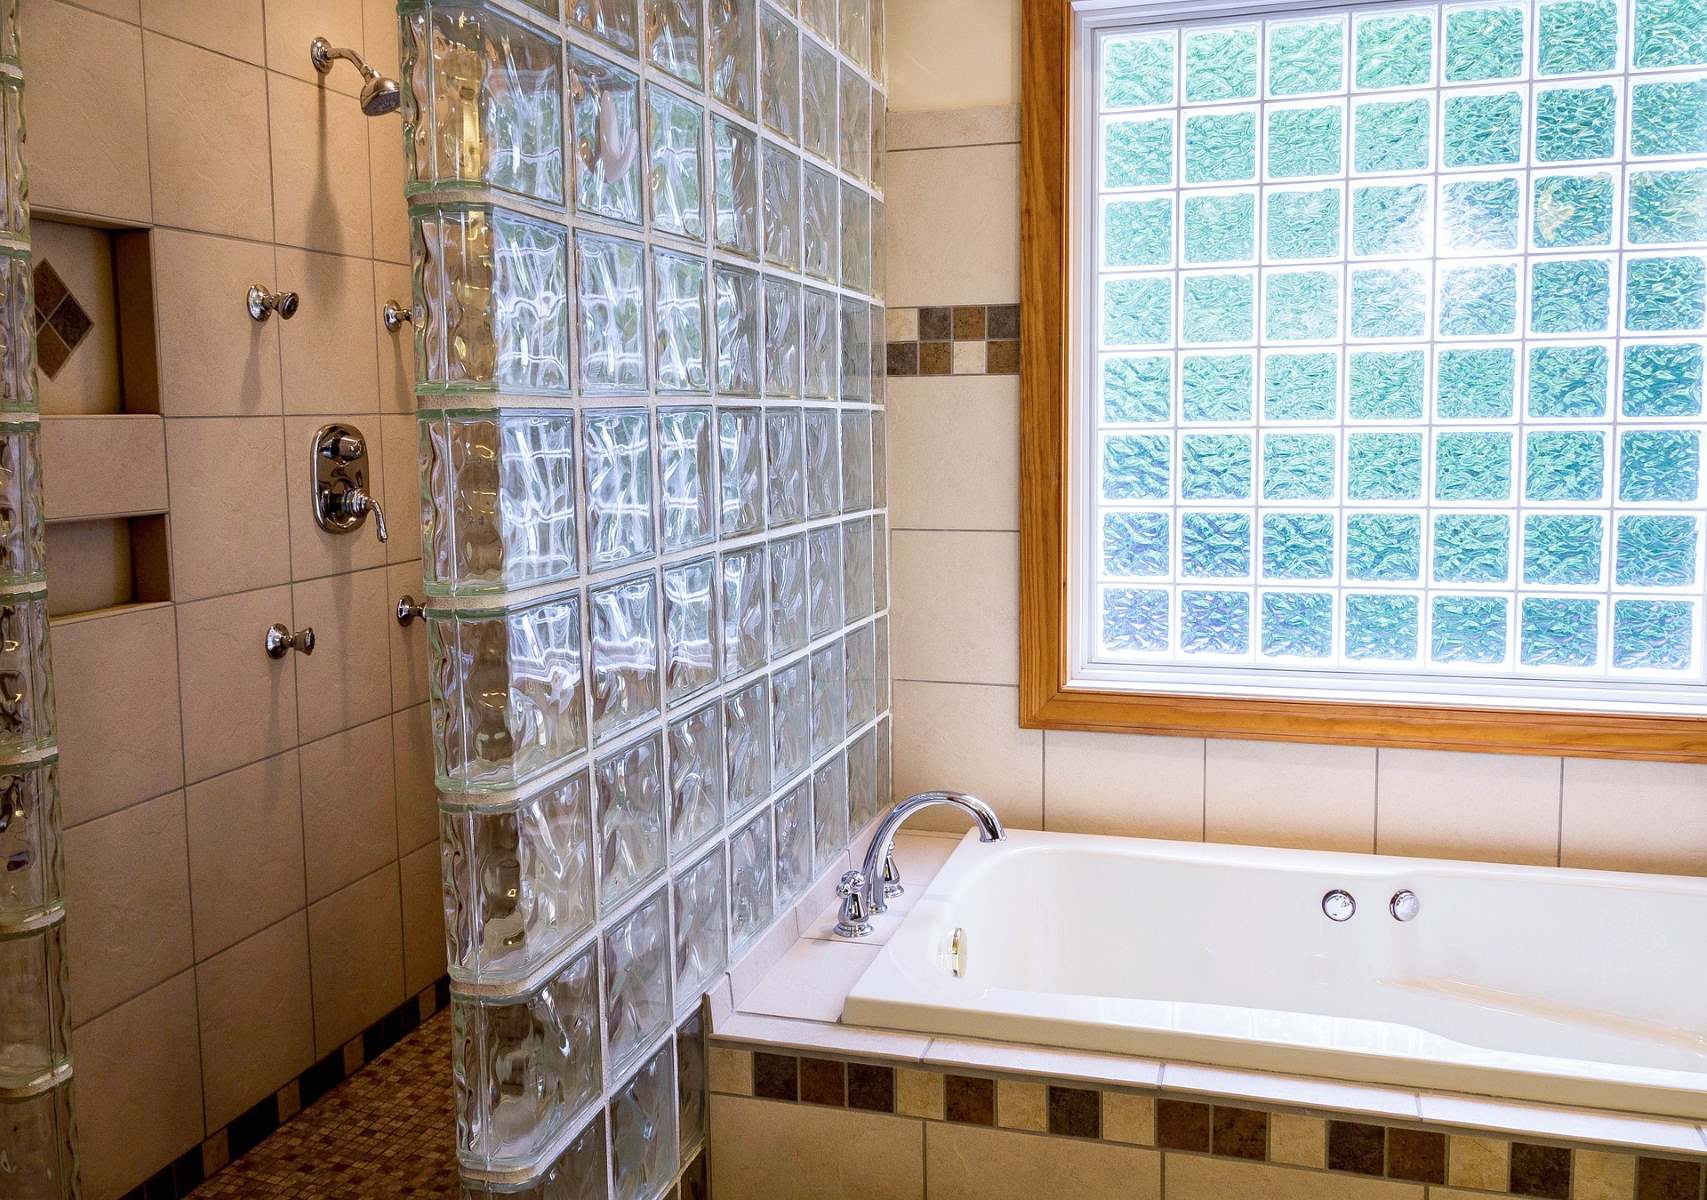
Installing glass blocks can add a touch of modern elegance and natural light to any space. Whether you're looking to enhance the aesthetics of your bathroom, kitchen, or even a partition wall, glass blocks offer a unique and stylish alternative to traditional building materials. With their translucent properties and ability to create a sense of openness, glass blocks have become a popular choice for both residential and commercial applications.
In this comprehensive guide, we will walk you through the step-by-step process of installing glass blocks. From gathering the necessary tools and materials to applying grout and adding the finishing touches, you'll gain valuable insights into the intricacies of this rewarding DIY project. By following these instructions, you can transform your living space and create a stunning visual impact that will impress your guests and elevate the overall ambiance of your home.
So, roll up your sleeves, put on your DIY hat, and let's dive into the world of glass block installation. With the right guidance and a can-do attitude, you'll soon be on your way to achieving a professional-looking result that showcases your creativity and enhances the beauty of your living environment. Let's get started!
Key Takeaways:
- Installing glass blocks can enhance any space with modern elegance and natural light. With the right tools and preparation, you can achieve a professional-looking result that elevates the ambiance of your home.
- The process of installing glass blocks involves meticulous planning, precise positioning, and expert grout application. By paying attention to detail and adding finishing touches, you can create a visually stunning and durable addition to your living environment.
Read more: How To Install Glass Block Windows
Step 1: Gather the Necessary Tools and Materials
Before embarking on the installation of glass blocks, it's essential to gather all the required tools and materials to ensure a smooth and efficient process. Here's a comprehensive list of what you'll need:
Tools:
- Glass Block Spacers: These specialized spacers ensure uniform spacing between the glass blocks, resulting in a professional and polished finish.
- Trowel: A notched trowel is essential for applying the mortar or adhesive to secure the glass blocks in place.
- Level: To ensure the glass blocks are installed perfectly plumb and level, a reliable level is indispensable.
- Rubber Mallet: This tool is used to gently tap the glass blocks into position without causing damage.
- Bucket: A sturdy bucket will be needed for mixing the mortar or adhesive.
- Sponge: A clean sponge is essential for wiping away excess mortar or grout during the installation process.
- Measuring Tape: Accurate measurements are crucial for achieving precise and symmetrical glass block arrangements.
- Safety Glasses and Gloves: Protect your eyes and hands during the installation process with safety glasses and gloves.
Materials:
- Glass Blocks: Select high-quality glass blocks in the desired size and style to suit your project. Consider options such as clear, frosted, or colored glass blocks to achieve the desired aesthetic.
- Mortar or Glass Block Adhesive: Choose a reliable mortar or glass block adhesive to secure the glass blocks in place. Ensure it is suitable for the specific conditions of your installation area.
- Grout: Opt for a grout that complements the color of your glass blocks to achieve a cohesive and visually appealing result.
- Sealant: A durable sealant will help to protect the glass blocks and ensure long-lasting performance, especially in areas prone to moisture.
- Caulk: Select a high-quality caulk to seal the edges and joints of the glass blocks, providing a clean and finished look.
By ensuring you have all the necessary tools and materials at your disposal, you'll be well-prepared to commence the installation process with confidence and precision. With these essentials in hand, you're ready to move on to the next step of preparing the installation area.
Step 2: Prepare the Installation Area
Before diving into the physical installation of glass blocks, it's crucial to adequately prepare the designated area to ensure a seamless and successful process. Proper preparation sets the foundation for a professional-looking result and contributes to the long-term durability of the installation. Here's a detailed breakdown of the essential steps involved in preparing the installation area:
Clear the Workspace
Begin by clearing the workspace of any obstructions, debris, or existing materials that may hinder the installation process. Ensure that the area is clean, free from dust, and devoid of any potential obstacles that could impede the precise placement of the glass blocks.
Assess the Surface
Thoroughly assess the surface where the glass blocks will be installed. It's imperative to ensure that the surface is structurally sound, level, and capable of supporting the weight of the glass blocks. Address any unevenness or imperfections in the surface to create a stable and uniform foundation for the installation.
Plan the Layout
Carefully plan the layout of the glass blocks, taking into consideration the desired pattern, spacing, and overall design aesthetic. Use a measuring tape and chalk lines to mark the precise locations where the glass blocks will be positioned. This meticulous planning stage is essential for achieving a visually appealing and symmetrical arrangement.
Prepare the Mortar or Adhesive
If using mortar, mix it according to the manufacturer's instructions, ensuring a smooth and workable consistency. For glass block adhesive, follow the recommended preparation guidelines. Having the mortar or adhesive ready for application streamlines the installation process and minimizes delays.
Read more: How To Update Glass Block Window
Protect Surrounding Surfaces
Safeguard surrounding surfaces and areas adjacent to the installation site. Use drop cloths or protective coverings to prevent accidental spills, splatters, or damage to nearby walls, floors, and fixtures. This precautionary measure helps maintain a clean and organized workspace throughout the installation.
Verify Accessibility
Ensure that all necessary tools, materials, and equipment are easily accessible within the installation area. This includes having a reliable power source for tools, a water supply for mixing mortar, and adequate lighting to facilitate precision during the installation process.
By meticulously preparing the installation area, you establish the groundwork for a smooth and efficient glass block installation. This proactive approach minimizes potential challenges and sets the stage for a visually stunning and structurally sound result. With the installation area primed and ready, you're now poised to move on to the next exciting phase of the installation process: installing the glass blocks themselves.
Step 3: Install the Glass Blocks
With the installation area meticulously prepared, it's time to embark on the exciting phase of positioning and securing the glass blocks. This step requires precision, attention to detail, and a methodical approach to ensure the glass blocks are aligned correctly and securely anchored in place. Here's a comprehensive guide to the process of installing glass blocks:
Positioning the First Row
Begin by applying a generous amount of mortar or glass block adhesive along the bottom edge of the installation area. Carefully position the first row of glass blocks onto the mortar, ensuring they are snugly nestled against each other and aligned with the marked layout. Use a level to verify that the blocks are perfectly plumb and level, making any necessary adjustments before the mortar sets.
Read more: How To Remove Glass Block Windows
Adding Subsequent Rows
As you progress to additional rows of glass blocks, insert glass block spacers between the blocks to maintain consistent spacing and alignment. Gently tap each block into place using a rubber mallet, ensuring they are firmly seated in the mortar or adhesive. Periodically check the level and alignment of the blocks to guarantee a uniform and professional-looking installation.
Creating Vents or Openings
If your installation design requires vents or openings within the glass block arrangement, carefully plan and create these spaces as you progress. Use specialized glass blocks designed for ventilation or work with precision to leave designated openings for airflow or access, maintaining the structural integrity of the overall installation.
Sealing Joints and Edges
As the glass blocks are positioned, pay close attention to the joints and edges where they meet. Apply a suitable sealant to these areas to create a watertight and secure bond between the blocks. This step is crucial, especially in moisture-prone areas such as bathrooms or kitchens, to prevent water infiltration and maintain the integrity of the installation.
Ensuring Uniformity and Symmetry
Throughout the installation process, consistently verify the uniformity and symmetry of the glass block arrangement. Adjust the positioning of individual blocks as needed to maintain a visually pleasing and balanced layout. Attention to detail at this stage contributes to the overall aesthetic appeal and professional finish of the installation.
By following these detailed steps, you can confidently navigate the process of installing glass blocks with precision and expertise. As each block finds its place within the arrangement, the transformative impact of natural light and modern elegance begins to take shape, elevating the ambiance of the space and showcasing your dedication to quality craftsmanship. With the glass blocks securely in position, the next phase of applying grout will further enhance the durability and visual impact of the installation.
Read more: How To Cover Glass Block Windows
Step 4: Apply Grout
Applying grout is a pivotal step in the glass block installation process, serving both functional and aesthetic purposes. The grout not only secures the glass blocks in place but also enhances the overall visual appeal of the installation. Here's a detailed exploration of the process of applying grout to achieve a professional and polished finish:
Mixing the Grout
Begin by preparing the grout mixture according to the manufacturer's instructions. Use a clean bucket to combine the grout powder with water, ensuring a smooth and lump-free consistency. It's essential to achieve the right balance of water and grout to facilitate easy application and optimal bonding with the glass blocks.
Application Technique
Using a grout float or a rubber trowel, carefully apply the grout mixture to the joints between the glass blocks. Work in small sections, pressing the grout firmly into the joints to fill any gaps and create a seamless transition between the blocks. Ensure that the grout completely fills the spaces without leaving voids or air pockets, contributing to the structural integrity of the installation.
Smoothing and Cleaning
After applying the grout, use a damp sponge to gently smooth the surface and remove any excess grout from the glass blocks. Work diagonally across the joints to achieve a uniform and clean finish. Rinse the sponge frequently to prevent grout residue from smearing onto the glass blocks, maintaining their pristine appearance.
Read more: How Much UV Does Glass Block
Final Touches
As the grout begins to set, use a clean, dry cloth to lightly buff the surface of the glass blocks, removing any residual grout haze. This final touch enhances the clarity and transparency of the glass, ensuring a striking visual impact that accentuates the beauty of the installation.
Curing and Sealing
Allow the grout to cure according to the manufacturer's recommendations, ensuring that it achieves optimal strength and stability. Once the grout has fully cured, consider applying a high-quality grout sealer to protect the joints and enhance the longevity of the installation. The sealer acts as a barrier against moisture and stains, preserving the integrity and appearance of the grout over time.
By meticulously following the steps for applying grout, you elevate the glass block installation to a professional standard, characterized by precision, durability, and aesthetic appeal. The seamless integration of grout not only reinforces the structural cohesion of the glass blocks but also contributes to the overall visual impact, creating a stunning focal point within the space. With the grout expertly applied, the installation nears completion, bringing you one step closer to enjoying the transformative beauty and functionality of your glass block creation.
Step 5: Clean Up and Finishing Touches
As the installation of glass blocks nears completion, attention to detail during the clean-up and finishing touches is crucial to achieving a flawless and professional result. This final phase not only ensures the cleanliness of the installation area but also adds the finishing touches that elevate the overall aesthetic appeal. Here's a detailed exploration of the essential steps involved in the clean-up and finishing touches process:
Removing Excess Grout and Residue
Begin by carefully inspecting the installed glass blocks for any residual grout or adhesive that may have inadvertently come into contact with the glass surfaces. Use a clean, damp sponge to gently remove any remaining grout haze or residue, ensuring that the glass blocks regain their pristine transparency. Pay particular attention to the edges and corners, where grout or adhesive may have accumulated during the installation process.
Read more: How To Install Belgian Block Driveway Edging
Polishing the Glass Blocks
Once the excess grout and residue have been removed, take the opportunity to polish the glass blocks to a sparkling finish. Using a clean, lint-free cloth and a high-quality glass cleaner, meticulously wipe down each glass block to enhance its clarity and luminosity. This step not only adds a final touch of brilliance to the installation but also showcases the inherent beauty of the glass blocks, allowing natural light to permeate the space with unparalleled radiance.
Inspecting and Touching Up
Thoroughly inspect the entire glass block installation for any imperfections or inconsistencies. Address any minor blemishes or irregularities by touching up the grout, ensuring that the joints are uniform and seamless. This meticulous attention to detail contributes to the overall refinement of the installation, presenting a cohesive and visually striking display of craftsmanship.
Clearing the Workspace
Once the glass block installation is immaculate and visually stunning, proceed to clear the workspace of any remaining tools, materials, or debris. Return any unused items to their designated storage spaces and dispose of waste materials responsibly. By restoring the workspace to its original cleanliness, you create an environment that accentuates the allure of the newly installed glass blocks.
Admiring the Transformation
With the clean-up and finishing touches complete, take a moment to step back and admire the transformative impact of the glass block installation. Revel in the interplay of light and transparency, the modern elegance, and the seamless integration of craftsmanship. The clean, polished, and visually captivating result stands as a testament to your dedication to excellence and your ability to elevate the ambiance of any space through the installation of glass blocks.
By meticulously attending to the clean-up and finishing touches, you bring the glass block installation to its full potential, culminating in a visually stunning and structurally sound addition to your living environment. With every detail perfected and every surface gleaming, the installation radiates a sense of sophistication and artistry, leaving a lasting impression and enhancing the overall aesthetic appeal of the space.
Frequently Asked Questions about How To Install Glass Blocks
Was this page helpful?
At Storables.com, we guarantee accurate and reliable information. Our content, validated by Expert Board Contributors, is crafted following stringent Editorial Policies. We're committed to providing you with well-researched, expert-backed insights for all your informational needs.


0 thoughts on “How To Install Glass Blocks”