Articles
How To Work With Concrete Block
Modified: August 28, 2024
Learn valuable tips and tricks for working with concrete blocks in our insightful articles. Enhance your construction skills and tackle projects with confidence.
(Many of the links in this article redirect to a specific reviewed product. Your purchase of these products through affiliate links helps to generate commission for Storables.com, at no extra cost. Learn more)
Introduction
Working with concrete blocks can be a rewarding and practical skill to have. Whether you’re planning to construct a wall, a foundation, or even a simple garden project, the versatility of concrete blocks makes them a popular choice for DIY enthusiasts and professional contractors alike. In this article, we will guide you through the process of working with concrete blocks, from selecting the right materials to applying the finishing touches. By following these steps, you can ensure that your concrete block project is not only structurally sound but visually appealing as well.
Before we dive into the nitty-gritty, it is important to note that working with concrete blocks requires careful planning, attention to detail, and adherence to safety precautions. Concrete block projects can be physically demanding and potentially hazardous, so it’s crucial to take the necessary measures to protect yourself and others around you.
Now, let’s explore the essential steps involved in working with concrete blocks, so you can confidently tackle your next construction project.
Key Takeaways:
- Safety is paramount when working with concrete blocks. Prioritize protective gear, stable work areas, and safe lifting techniques to minimize accidents and injuries.
- Carefully selecting the right concrete blocks, preparing the work area, and applying mortar accurately are crucial for successful and visually appealing concrete block projects.
Read more: How To Build A Concrete Block Foundation
Safety Precautions
Working with concrete blocks involves various risks and hazards that must be addressed to ensure safety on the job site. Before starting any concrete block project, it is crucial to take these safety precautions into consideration:
- Protective Gear: Always wear appropriate protective gear, including safety glasses, gloves, and a dust mask to protect yourself from potential hazards such as flying debris and dust.
- Stability of Work Area: Make sure the work area is stable and free from any potential hazards. Clear the area of any obstacles or tripping hazards to prevent accidents.
- Safe Lifting Techniques: Concrete blocks can be heavy, so it is important to use proper lifting techniques to avoid strain or injury. Bend from the knees and use your leg muscles to lift, rather than relying solely on your back.
- Secure Foundations: When building a wall or any structure using concrete blocks, ensure that the foundation is secure and stable. This will prevent the blocks from shifting or collapsing during construction.
- Mixing Concrete Safely: If you are mixing your own concrete, follow the manufacturer’s instructions carefully. Keep a safe distance from the mixer and avoid inhaling dust particles generated during the mixing process.
- Safety with Tools: When cutting or shaping blocks, use appropriate tools and follow recommended safety measures. Keep your fingers and hands away from the cutting edge to prevent injuries.
- Mortar Safety: When applying mortar, exercise caution to avoid skin and eye contact, as it may cause irritation. Use protective gloves and eyewear, and be mindful of proper ventilation in enclosed workspaces.
- Working in Teams: If possible, work with a partner or a team to ensure better visibility and coordination. This can help prevent accidents and improve overall safety on the job site.
Remember, safety should always be your top priority when working with concrete blocks. By following these precautions, you can minimize the risk of accidents and injuries, allowing you to focus on building your project with confidence.
Selecting the Right Concrete Blocks
Choosing the right concrete blocks is essential for the success of your project. There are several factors to consider when selecting concrete blocks:
- Type of Block: There are different types of concrete blocks available, such as standard blocks, corner blocks, and cap blocks. Determine the specific type of block you need based on the nature of your project.
- Size and Dimensions: Concrete blocks come in various sizes and dimensions, so it’s important to choose the right size that suits your project requirements. Consider factors such as wall thickness, load-bearing capacity, and overall design.
- Strength and Density: Concrete blocks are graded based on their compressive strength and density. Higher grade blocks are more durable and suitable for heavy-duty applications. Assess the strength and density requirements of your project before making a selection.
- Appearance: If aesthetics are important to you, consider the appearance of the concrete blocks. Some blocks come with decorative finishes or textures that can enhance the visual appeal of your project.
- Insulation Features: Depending on the purpose of your project, you may want to consider using concrete blocks with insulation properties. These blocks have built-in insulation, which can help regulate temperature and improve energy efficiency.
When purchasing concrete blocks, ensure that they meet the necessary standards and comply with local building codes. It is also advisable to buy from reputable suppliers who provide quality products.
By carefully selecting the right concrete blocks for your project, you can ensure that your construction is sturdy, functional, and aesthetically pleasing. Take the time to evaluate your project requirements and consult with professionals if needed to make an informed decision.
Preparing the Work Area
Before you start working with concrete blocks, it is crucial to properly prepare the work area. Taking the time to prepare the area beforehand will ensure a smooth and efficient construction process. Here are the steps to follow:
- Clean the Site: Clear the work area from any debris, vegetation, or other obstacles that may hinder your progress. This includes removing rocks, branches, and any other objects that may interfere with the placement of concrete blocks.
- Mark the Layout: Use a chalk line or string to mark the desired layout of your project. This will help you visualize the positioning of the concrete blocks and ensure accuracy during construction. Take measurements and mark the corners and edges of the project area.
- Level the Ground: It is essential to have a level surface for laying the foundation or base for your concrete blocks. Use a shovel or a landscaping rake to level the ground, removing any uneven areas or high spots. A smooth and even surface will provide a stable foundation for your project.
- Add Gravel or Sand: Depending on the project requirements, you may need to add a layer of gravel or sand to the prepared area. This will enhance drainage and provide a more solid base for the concrete blocks. Spread the gravel or sand evenly and use a compactor to ensure proper compaction.
- Install a Weed Barrier: To prevent weed growth and maintain a clean work area, consider installing a weed barrier before placing the concrete blocks. This will help minimize maintenance and keep the area tidy throughout the construction process.
- Set Up Temporary Supports: If you are working on a larger project or building a wall, it may be necessary to set up temporary supports or braces. These supports will ensure the stability of the structure while the mortar is setting. Follow the manufacturer’s instructions for proper installation and placement.
- Organize Tools and Materials: Before you begin construction, gather all the necessary tools and materials required for the project. This includes concrete blocks, mortar mix, trowels, levels, and any other tools specific to your project. Having everything organized and readily accessible will save you time and effort during construction.
By taking the time to prepare the work area correctly, you can ensure a solid foundation and smooth construction process. Proper preparation will contribute to the overall stability and longevity of your concrete block project.
Mixing Concrete for Blocks
Mixing the appropriate concrete for your blocks is crucial for the strength and durability of your project. Follow these steps to ensure proper concrete mixing:
- Gather Materials: Before you start mixing, gather all the necessary materials. You will need cement, sand, and aggregate (gravel or crushed stone). The exact proportions of these materials may vary depending on the specific concrete mix you are using. Refer to the manufacturer’s instructions or consult with a professional for guidance.
- Measure Proportions: Accurately measure the proportions of cement, sand, and aggregate according to the recommended mix ratio. This ratio will depend on the desired strength and consistency of your concrete. Use a shovel or a measuring container to ensure precise measurements.
- Thoroughly Mix Dry Ingredients: In a clean mixing container or wheelbarrow, combine the dry ingredients – cement, sand, and aggregate. Use a shovel or a mixing tool to blend the materials thoroughly. This step ensures that the dry ingredients are uniformly distributed, which is essential for achieving a consistent concrete mix.
- Add Water Gradually: Gradually add water to the dry mixture, starting with a small amount. Use a hose or a watering can to pour the water while continuously mixing. The amount of water required will depend on the specific mix and the desired consistency. Aim for a mixture that is workable but not too watery.
- Mixing and Testing Consistency: Continuously mix the ingredients, ensuring that the water is evenly distributed throughout the mix. Use a shovel or a hoe to blend the materials together. Once the mixture reaches a uniform consistency, perform a slump test to verify the workability. The concrete should hold its shape when molded into a mound but still slump slightly when tapped with a tool.
- Adjusting Mix Consistency: If the mixture is too dry, add small amounts of water and continue mixing until the desired consistency is achieved. Conversely, if the mix is too wet, add a small amount of dry mix (cement or sand) and thoroughly blend it with the rest of the mixture.
- Mixing Time: Mix the concrete for an appropriate amount of time to ensure proper blending and activation of the cement. Typically, 3 to 5 minutes of continuous mixing is sufficient. Maintain a consistent speed and rhythm while mixing to achieve a homogeneous mixture.
- Clean Tools and Work Area: After mixing the concrete, clean all the tools, containers, and the work area. Rinse off any dried cement or residue and dispose of waste material properly.
Remember to follow safety guidelines when working with cement and concrete mix. Wear protective equipment, such as gloves and a dust mask, to protect yourself from potential hazards.
By properly mixing the concrete, you will achieve a high-quality mixture that is ideal for constructing concrete blocks. A well-mixed concrete will ensure the structural integrity and longevity of your project.
Read more: How Many Concrete Blocks For Shed Foundation
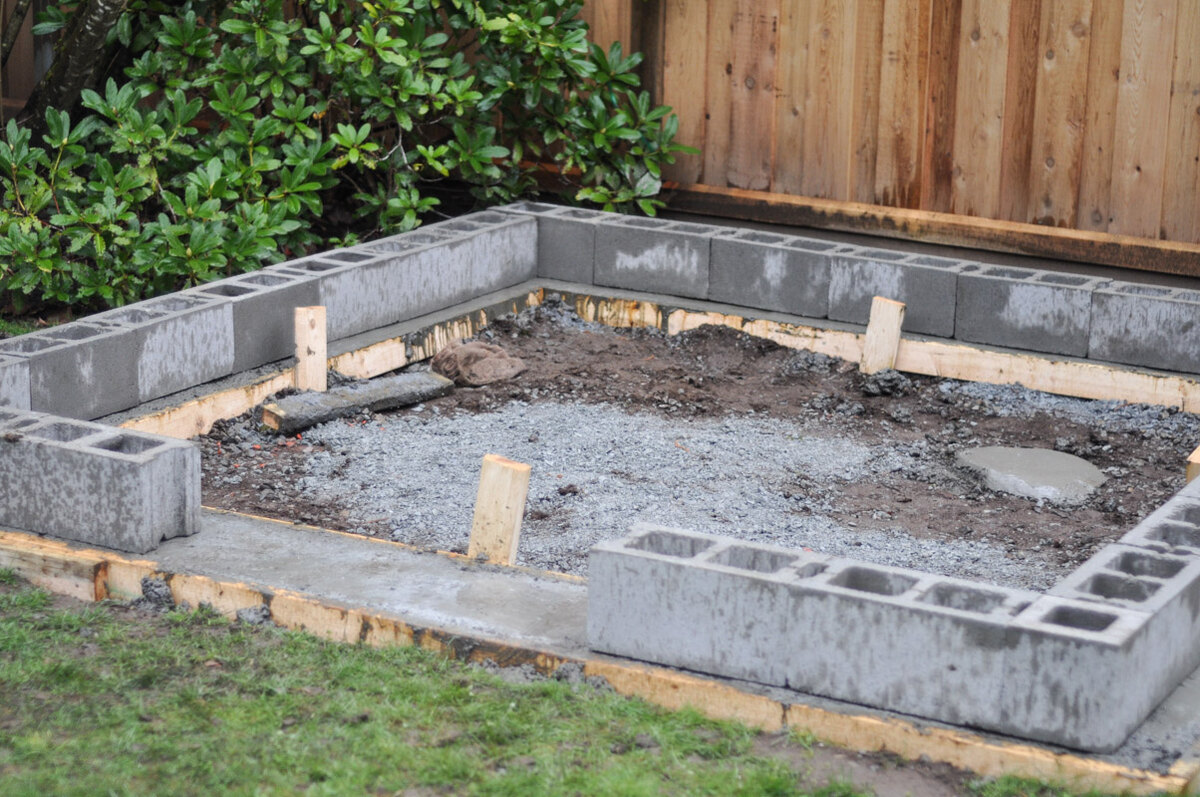
Laying the Foundation
Creating a solid foundation is essential for the stability and longevity of your concrete block project. Follow these steps to properly lay the foundation:
- Excavate the Area: Use a shovel or an excavator to dig out the area where the foundation will be laid. The depth and dimensions of the excavation will depend on the specific requirements of your project, such as the height of the walls or the structure being built. Ensure that the excavation is level and free from any debris or loose soil.
- Add a Base Material: After excavating, add a layer of compactable base material, such as crushed stone or gravel, to the excavated area. This layer will provide stability and proper drainage. Spread the base material evenly and compact it using a compactor or a tamper to ensure a solid foundation.
- Install Formwork: If you are constructing a raised foundation, such as for a wall or a structure, you may need to install formwork. Formwork is typically made of wood or metal and serves as a mold to hold the concrete in place. Ensure the formwork is properly aligned and securely anchored to prevent shifting when pouring the concrete.
- Level and Compact: Before pouring the concrete, use a level to ensure that the foundation area is flat and even. This step is crucial for a level and stable surface for laying the concrete blocks. Additionally, use a compactor or a tamper to compact the base material and eliminate any remaining voids.
- Moisten the Area: Before pouring the concrete, dampen the foundation area with water. This will prevent the dry soil from absorbing moisture from the concrete too quickly, which can weaken the bond. The foundation should be damp but not saturated.
- Pouring the Concrete: Begin pouring the concrete into the prepared foundation area. Start from one corner and work your way across. Use a shovel or a wheelbarrow to distribute the concrete evenly, filling the entire foundation area. Work quickly and efficiently to avoid any gaps or inconsistencies in the poured concrete.
- Spread and Level: Once the concrete is poured, use a screed board or a straight edge to spread and level the concrete across the foundation area. Move the screed board back and forth in a sawing motion to achieve a smooth and even surface.
- Finish the Surface: Depending on your project requirements, you can choose to finish the surface of the foundation using a float or a trowel. This will create a smooth and polished appearance. Alternatively, you can create a textured finish by using a broom or a brush to create patterns on the surface.
- Cure the Foundation: Allow the poured foundation to cure and harden for the recommended time. This typically involves keeping the area moist and protected from extreme temperature changes. Follow the manufacturer’s instructions or consult with a professional for specific curing requirements.
Laying a solid foundation is a crucial step in the construction process. By carefully following these steps, you can ensure that your concrete block project starts on a strong and stable base, setting the stage for a successful construction.
When working with concrete blocks, make sure to wear safety goggles and gloves to protect yourself from flying debris and sharp edges. Always use a level to ensure the blocks are properly aligned and evenly spaced.
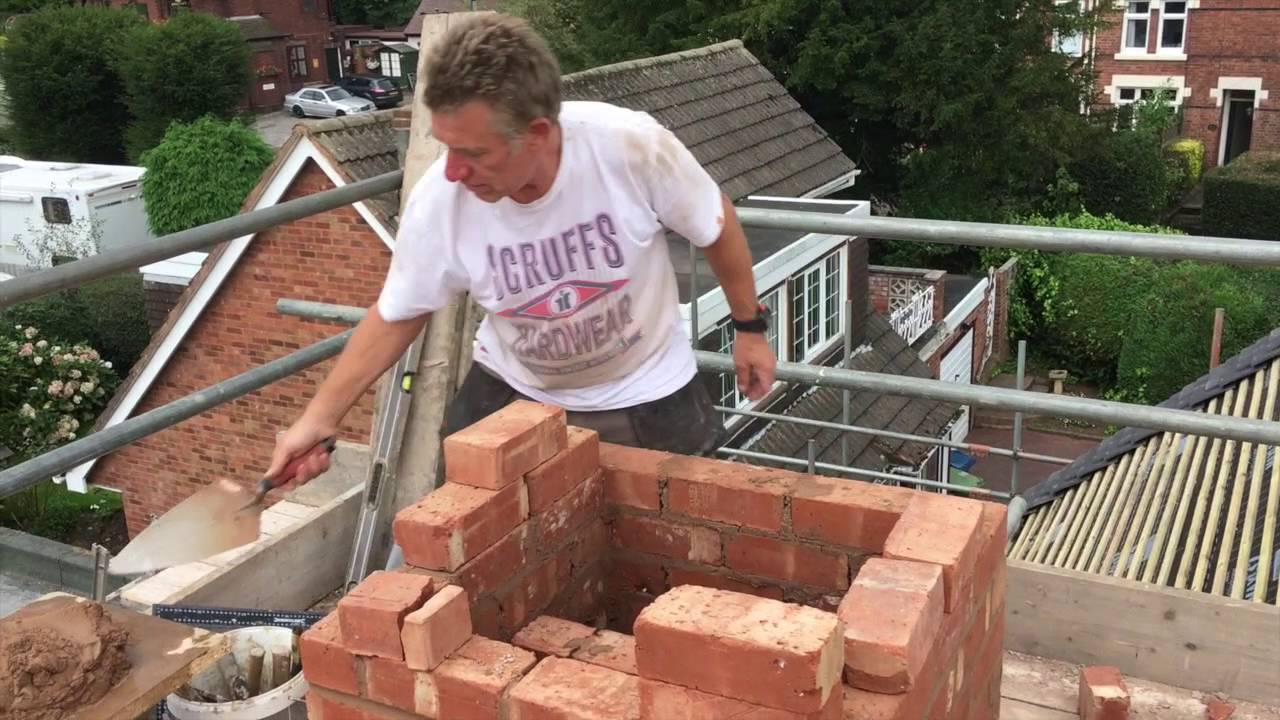
Building Concrete Block Walls
Building concrete block walls requires precision and attention to detail to ensure a sturdy and well-constructed structure. Follow these steps to build your concrete block walls:
- Prepare Mortar: Mix the mortar according to the manufacturer’s instructions or your preferred mix ratio. The consistency of the mortar should be thick enough to hold its shape but still workable. Use a trowel or a mixer to achieve a smooth and uniform consistency.
- Apply Mortar Bed: Start by applying a layer of mortar onto the foundation where the first row of concrete blocks will be placed. Use a trowel to spread a 1-inch thick layer of mortar, creating a bed for the blocks. This helps to secure the blocks and provides a level surface for placement.
- Set the First Course: Begin laying the first course of concrete blocks on the mortar bed. Apply a layer of mortar to the ends of the blocks, known as “butt joints,” as well as to the sides that will be touching adjacent blocks. Place each block firmly onto the mortar bed, ensuring a level and plumb position.
- Check for Level and Plumb: As you lay each block, use a level to ensure that it is horizontally level and a plumb line to ensure that it is vertically straight. Make any necessary adjustments by tapping the blocks with a rubber mallet. Accurate leveling and plumbing are crucial for a stable and visually pleasing wall.
- Fill Mortar Joints: Once the first course is complete, use a trowel to fill the mortar joints between the blocks with additional mortar. Remove any excess mortar as you go, ensuring a clean and even finish. The mortar joints provide strength and stability to the wall, so it’s important to fill them completely.
- Place Rebar or Reinforcement: Depending on the height and purpose of your concrete block wall, you may need to incorporate reinforcement, such as rebar. This adds structural integrity to the wall, especially for taller or load-bearing walls. Follow specific engineering and building codes for proper reinforcement placement.
- Continue Building Additional Courses: Repeat the process of applying mortar, setting blocks, and filling mortar joints to build additional courses of concrete blocks. Use a level and plumb line regularly to maintain accuracy and ensure the wall remains straight and level.
- Use Corner Blocks: When reaching corners of the wall, use specialized corner blocks to ensure a clean and tight fit. These blocks have one finished face on each side, allowing for a seamless transition around the corner.
- Leave Openings for Doors and Windows: If your concrete block wall includes openings for doors or windows, carefully plan and leave appropriate spaces while building the wall. Consult with a professional if necessary to ensure proper structural support and framing for these openings.
- Finishing Touches: Once the wall is fully built, use a brush or a sponge to clean any excess mortar from the surface. You can also add a decorative finish or apply a coat of paint, if desired, to enhance the appearance of the wall.
Building concrete block walls requires patience and attention to detail. By following these steps, you can construct a solid and visually appealing wall that will stand the test of time.
Cutting and Shaping Blocks
During the construction process, you may need to cut or shape concrete blocks to fit specific dimensions or accommodate openings. Follow these steps to properly cut and shape concrete blocks:
- Measure and Mark: Determine the precise dimensions and locations where the blocks need to be cut or shaped. Use a measuring tape and a pencil to mark the areas to be modified.
- Select the Right Tools: Different tools can be used to cut and shape concrete blocks, depending on the complexity of the cuts. Some common tools include a circular saw with a masonry blade, a power grinder with a diamond blade, or a block splitter. Choose the appropriate tool based on the specific requirements of your project.
- Wear Safety Equipment: When cutting or shaping concrete blocks, it is important to wear appropriate safety equipment, including safety glasses, gloves, and a dust mask. This will protect you from potential hazards such as flying debris and dust particles.
- Cut Blocks with a Circular Saw: If you have a large number of blocks to cut and need precise, straight cuts, a circular saw with a masonry blade is an effective tool. Set the saw to the appropriate depth for the cut and carefully follow the marked guideline while applying steady and even pressure. Remember to keep the saw blade cool by periodically wetting it with water.
- Shape Blocks with a Power Grinder: For shaping blocks or making curved cuts, a power grinder equipped with a diamond blade is the preferred tool. Use the grinder to carefully remove material from the block, gradually shaping it according to the desired contour. Practice caution and move the grinder in a controlled manner to prevent excessive removal of material.
- Split Blocks with a Block Splitter: If you need to split blocks in half or create smaller pieces, a block splitter is a useful tool. Place the block in the splitter’s jaws, aligning the cutting line with the splitting edge. Use the provided lever or mechanism to apply pressure, splitting the block along the marked line. This method is ideal for medium-size cuts and provides a clean break.
- Smooth Edges with a File: After cutting or shaping the blocks, you may need to smooth the edges. Use a file or sandpaper to carefully remove any rough edges or imperfections, creating a clean and professional finish.
- Clean Up Debris: Once the cutting and shaping process is complete, clean up any debris or dust created during the process. Dispose of waste material properly and ensure that the work area is clean and safe.
Remember to approach the cutting and shaping process with caution and precision. Take your time to achieve accurate cuts and shapes, as this will contribute to the overall quality and appearance of your concrete block project.
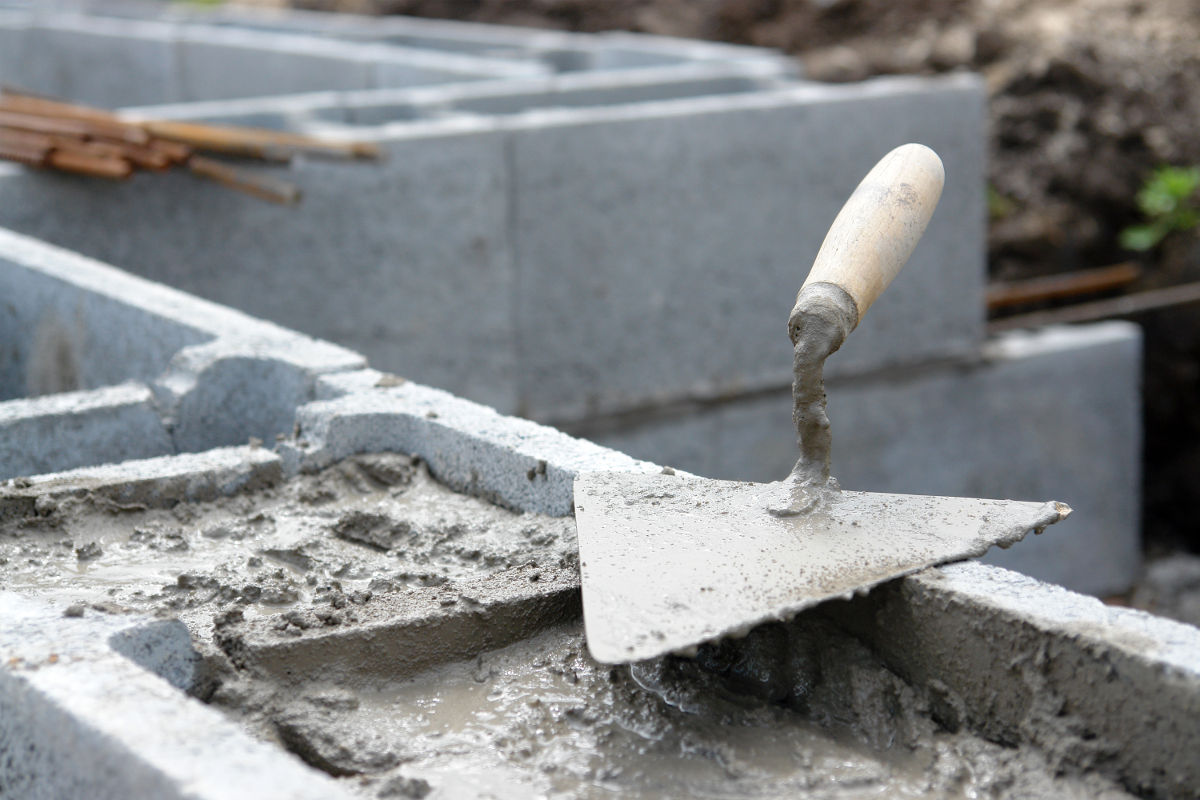
Applying Mortar
Applying mortar is a vital step in constructing concrete block projects. The mortar acts as a bonding agent, holding the blocks together and providing strength to the overall structure. Follow these steps to properly apply mortar when working with concrete blocks:
- Prepare the Mortar: Mix the mortar according to the manufacturer’s instructions or your preferred mix ratio. Ensure that the consistency of the mortar is workable but not too runny, as this will affect its bonding strength.
- Load the Mortar: Fill a mortar board or a small bucket with the prepared mortar. This will be the source from which you’ll grab mortar to apply to the blocks. Keep the mortar covered to prevent it from drying out.
- Apply Mortar to the Foundation: Start by applying a layer of mortar onto the foundation or the previous course of blocks. Use a trowel to spread a ½-inch thick layer of mortar, covering an area slightly larger than the size of the block to be placed.
- Add Mortar to the Sides: Before placing a block, add a layer of mortar to its sides, known as the “head joints.” This ensures proper bonding between the block being placed and the adjacent blocks. Use the trowel to apply a thin, even layer of mortar to both sides of the block.
- Position the Block: Carefully place the block onto the mortar bed, pressing it firmly into position. Wiggle the block slightly to help it settle into the mortar and ensure a good bond. Use a level to check for both horizontal and vertical alignment, adjusting as necessary.
- Fill the Vertical Joints: Once the block is in place, use the trowel to apply mortar to the vertical joints between the blocks. Scrape off any excess mortar from the surface of the blocks as you go.
- Tool the Joints: After filling the vertical joints, use a jointing tool or a pointing trowel to create a neat and concave shape in the mortar. This helps improve the overall appearance and reinforces the bond between the blocks.
- Repeat the Process: Repeat the process of applying mortar, placing blocks, and filling the joints until the course is complete. Check for level and plumb regularly, making adjustments as needed.
- Clean Up Excess Mortar: As you work, periodically clean off any excess mortar from the block faces using a trowel and a stiff brush. This will prevent the mortar from drying on the surface and affecting the appearance of the finished project.
- Cure the Mortar: Allow the mortar to cure and harden for the recommended time. This typically involves keeping the mortar joints moist by misting them with water or covering them with plastic. Follow the manufacturer’s instructions or consult with a professional for specific curing requirements.
By properly applying mortar, you ensure the structural integrity and longevity of your concrete block project. Take the time to apply the mortar accurately and neatly to achieve a well-built and visually appealing outcome.
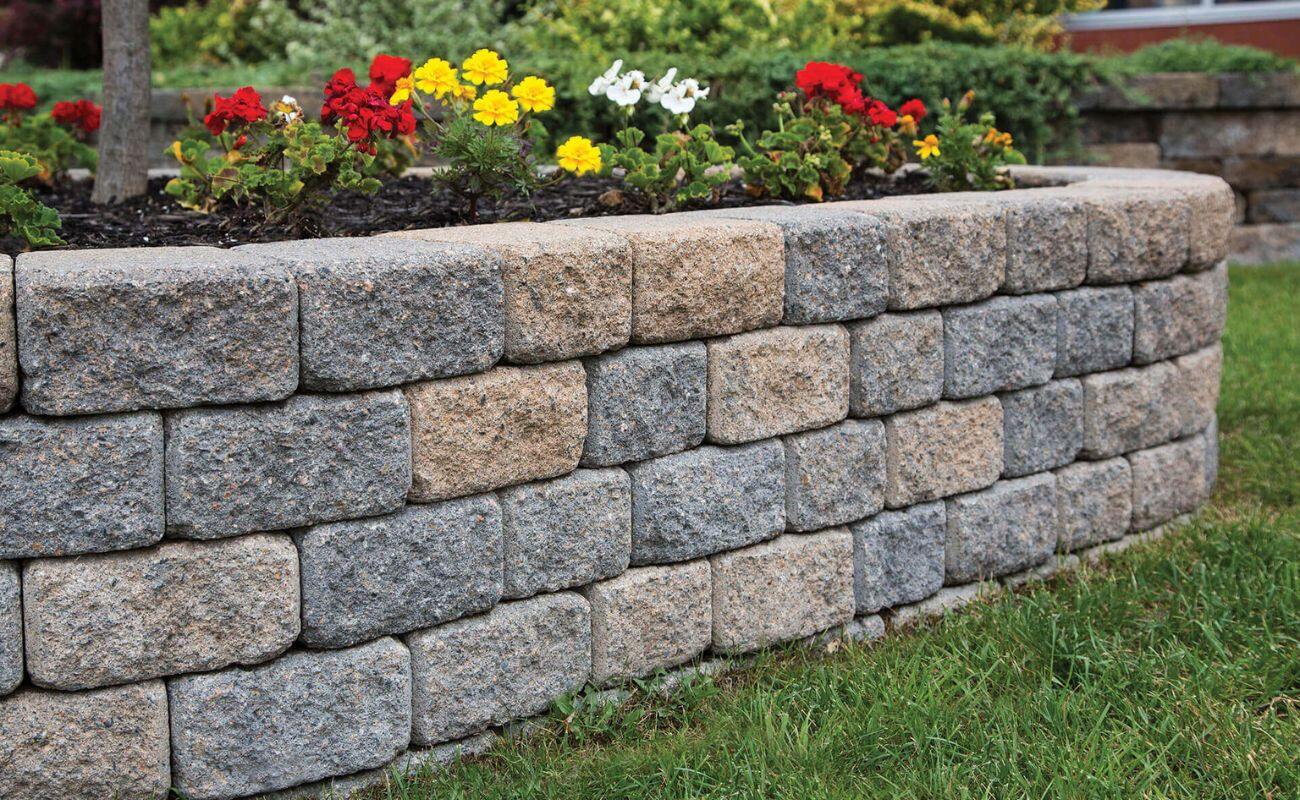
Finishing Techniques
Finishing techniques add the final touches to your concrete block project, enhancing its appearance and protecting it from external elements. Here are some common finishing techniques you can consider:
- Cleaning the Surface: Once the mortar has cured, clean the surface of the blocks to remove any residual mortar or debris using a wire brush or a stiff broom. This will create a clean and uniform appearance, revealing the natural beauty of the blocks.
- Applying a Surface Treatment: Depending on your aesthetic preferences, you can apply a surface treatment to your concrete block project. Options include painting, staining, or sealing the blocks. Choose a treatment that complements the overall style and color scheme you desire.
- Creating Textures: Use a variety of tools, such as a trowel, a brush, or a sponge, to create textures on the surface of the blocks. This can add visual interest and give the appearance of natural stone or brick. Experiment with different techniques to achieve the desired effect.
- Add Decorative Elements: Consider adding decorative elements to enhance the visual appeal of your project. This can include adding mosaic tiles, decorative inserts, or other creative designs to create a personalized touch.
- Sealing the Blocks: Sealing the blocks helps protect them from staining, moisture, and other environmental factors. Use a high-quality concrete sealer that is suitable for your specific block type. Follow the manufacturer’s instructions for proper application and maintenance.
- Landscaping and Surrounding Design: Pay attention to the landscaping and surrounding design of your concrete block project. Consider adding plants, shrubs, or other landscaping features to complement the overall aesthetics and create a cohesive look.
- Regular Maintenance: To maintain the beauty and longevity of your concrete block project, perform regular maintenance. This includes cleaning the surface, inspecting for damage, and repairing any cracks or deterioration promptly.
Remember that finishing techniques should be aligned with your project’s goals, style, and functionality. Take the time to explore different options and consult with professionals if needed to achieve the desired outcome.
By implementing these finishing techniques, you can elevate your concrete block project to the next level, creating a visually appealing and durable structure that enhances the overall aesthetics of your space.
Conclusion
Working with concrete blocks is a versatile and practical skill that allows you to undertake a wide range of construction projects. By following the steps outlined in this article, you can successfully work with concrete blocks to create structurally sound and visually appealing structures.
Throughout the process, it is important to prioritize safety by following safety precautions and wearing appropriate protective gear. This will ensure that you and those around you are protected from potential hazards.
When selecting concrete blocks, carefully consider the type, size, strength, and appearance that best suit your project requirements. Choosing the right blocks will lay the foundation for a successful construction project.
Preparing the work area properly sets the stage for efficient construction. Clearing the area of debris, leveling the ground, and organizing tools and materials will contribute to a smooth workflow.
Mixing concrete correctly ensures the strength and durability of your project. Measure the ingredients accurately and achieve the proper consistency for a high-quality mixture.
Laying a solid foundation is crucial for the stability and longevity of your concrete block project. Properly excavate the area, add a base material, and create a level surface before pouring the concrete.
Building concrete block walls requires attention to detail and accuracy. Take the time to ensure proper placement, level and plumb the blocks, and apply mortar correctly for a stable and visually pleasing structure.
Cutting and shaping concrete blocks may be necessary to fit specific dimensions or accommodate openings. Use the right tools and follow safety guidelines to achieve precise cuts and shapes.
Applying mortar accurately and neatly is essential for the bond and strength of the blocks. Take care to apply the mortar properly, fill the joints, and tool them for a professional finish.
The finishing touches, such as cleaning the surface, applying surface treatments or textures, and incorporating decorative elements, add the final touches to your project and enhance its overall appearance.
Regular maintenance, including cleaning, sealing, and landscaping, will help preserve the beauty and longevity of your concrete block project over time.
In conclusion, working with concrete blocks offers a world of possibilities for construction projects. By following the steps outlined in this article and using your creativity, you can successfully work with concrete blocks and create impressive structures that stand the test of time. So, roll up your sleeves, get your hands dirty, and start building with confidence!
Frequently Asked Questions about How To Work With Concrete Block
Was this page helpful?
At Storables.com, we guarantee accurate and reliable information. Our content, validated by Expert Board Contributors, is crafted following stringent Editorial Policies. We're committed to providing you with well-researched, expert-backed insights for all your informational needs.


0 thoughts on “How To Work With Concrete Block”