Home>Furniture & Design>Outdoor Furniture>How To Make An Outdoor Sofa
Outdoor Furniture
How To Make An Outdoor Sofa
Modified: April 22, 2024
Learn how to make your own outdoor sofa with our expert tips and ideas for outdoor furniture and design. Create a stylish and comfortable outdoor space today!
(Many of the links in this article redirect to a specific reviewed product. Your purchase of these products through affiliate links helps to generate commission for Storables.com, at no extra cost. Learn more)
Introduction
Welcome to the world of outdoor furniture crafting! Building your own outdoor sofa can be a rewarding and enjoyable project that not only saves you money but also allows you to create a customized piece that perfectly fits your space and style. Whether you have a spacious patio, a cozy terrace, or a lush garden, an outdoor sofa can serve as a focal point for relaxation and socializing with friends and family.
Creating your own outdoor sofa also provides the opportunity to showcase your creativity and woodworking skills. Imagine the satisfaction of lounging on a comfortable sofa that you built with your own hands, knowing that it's a unique addition to your outdoor living space.
In this guide, we will walk you through the process of constructing a sturdy and stylish outdoor sofa. You'll learn about the materials and tools needed, as well as the step-by-step instructions for building the frame, adding the seat and back, incorporating the arms, and putting the finishing touches. Whether you're a seasoned DIY enthusiast or a beginner looking to embark on a new project, this guide will equip you with the knowledge and confidence to create a beautiful outdoor sofa that complements your outdoor environment.
So, roll up your sleeves, gather your materials, and get ready to embark on a fulfilling journey of crafting your very own outdoor sofa. Let's dive into the details and bring your outdoor furniture design dreams to life!
Key Takeaways:
- Building your own outdoor sofa is a rewarding DIY project that saves money and allows for customization to fit your space and style, creating a unique focal point for relaxation and socializing in your outdoor living area.
- By carefully crafting and adding finishing touches to your outdoor sofa, you not only create a functional piece of furniture but also cultivate a space for relaxation, connection, and lasting memories in the great outdoors.
Read more: How To Make Sofa Cushions Higher
Materials Needed
Before diving into the construction process, it’s essential to gather all the necessary materials to ensure a smooth and efficient building experience. Here’s a comprehensive list of the materials required to construct your outdoor sofa:
- Pressure-treated lumber or cedar: These materials are ideal for outdoor furniture due to their durability and resistance to rot and decay. Choose high-quality lumber that can withstand the elements and provide long-lasting support for your sofa.
- Outdoor cushions: Select weather-resistant cushions designed specifically for outdoor use. These cushions should be able to withstand exposure to sunlight, moisture, and varying temperatures while maintaining their comfort and appearance.
- Exterior wood screws: Opt for corrosion-resistant screws that are suitable for outdoor applications. These screws will securely fasten the components of your sofa while withstanding exposure to the elements.
- Wood glue: High-quality wood glue will reinforce the connections between wooden pieces, adding strength and stability to your sofa’s frame and ensuring long-term durability.
- Waterproof sealant or outdoor wood finish: Applying a waterproof sealant or outdoor wood finish will protect the wood from moisture, UV rays, and other outdoor elements, extending the lifespan of your outdoor sofa.
- Sandpaper: Smooth out rough edges and surfaces, and prepare the wood for finishing by using a variety of sandpaper grits, such as coarse, medium, and fine.
- Outdoor fabric for upholstery: If you plan to upholster your sofa, choose high-quality outdoor fabric that is fade-resistant, water-repellent, and easy to clean. Consider the color and design that will complement your outdoor space.
- Foam padding: For added comfort, consider using high-density foam padding to enhance the support and plushness of your sofa’s cushions.
- Stain or paint (optional): If you prefer a colored or stained finish for your outdoor sofa, select a suitable exterior-grade stain or paint that complements your outdoor decor and provides protection against the elements.
By ensuring that you have all the necessary materials on hand, you can streamline the construction process and focus on bringing your outdoor sofa vision to fruition. With these materials at your disposal, you’re ready to embark on the exciting journey of building your own outdoor sofa.
Tools Required
Equipping yourself with the right tools is essential for efficiently constructing a sturdy and visually appealing outdoor sofa. Here’s a list of the tools you’ll need to bring your outdoor furniture project to life:
- Measuring tape: Accurate measurements are crucial for ensuring that your sofa’s components fit together seamlessly. A reliable measuring tape will help you achieve precision throughout the construction process.
- Saw: Whether you prefer a circular saw, miter saw, or hand saw, having a cutting tool on hand is essential for accurately shaping and sizing the lumber for your sofa’s frame and components.
- Drill/driver: A versatile drill/driver will be your go-to tool for creating pilot holes, driving screws, and assembling the various parts of your outdoor sofa. Ensure that you have a selection of drill bits suitable for woodwork.
- Screwdriver or screw gun: Depending on the type of screws you use, a screwdriver or screw gun will facilitate the efficient installation of screws and fasteners during the assembly process.
- Sanding block or orbital sander: Smooth out rough edges, refine surfaces, and prepare the wood for finishing using a sanding block or orbital sander. This tool will help you achieve a professional and polished look for your outdoor sofa.
- Clamps: Utilize clamps to hold components in place during assembly, ensuring that joints are secure and stable while the adhesive sets. Clamps are invaluable for achieving precise and sturdy connections.
- Square: A carpenter’s square or combination square will aid in maintaining accurate angles and ensuring that your sofa’s frame and components are aligned correctly during assembly.
- Paintbrushes or foam brushes: If you opt to apply a stain or paint finish to your outdoor sofa, having a selection of paintbrushes or foam brushes will allow you to achieve a smooth and even application.
- Safety gear: Prioritize safety by wearing protective gear such as safety glasses, ear protection, and a dust mask when using power tools and performing woodworking tasks.
By having these essential tools at your disposal, you’ll be well-prepared to tackle the construction process with confidence and precision. With the right materials and tools in hand, you’re ready to embark on the exciting journey of building your very own outdoor sofa.
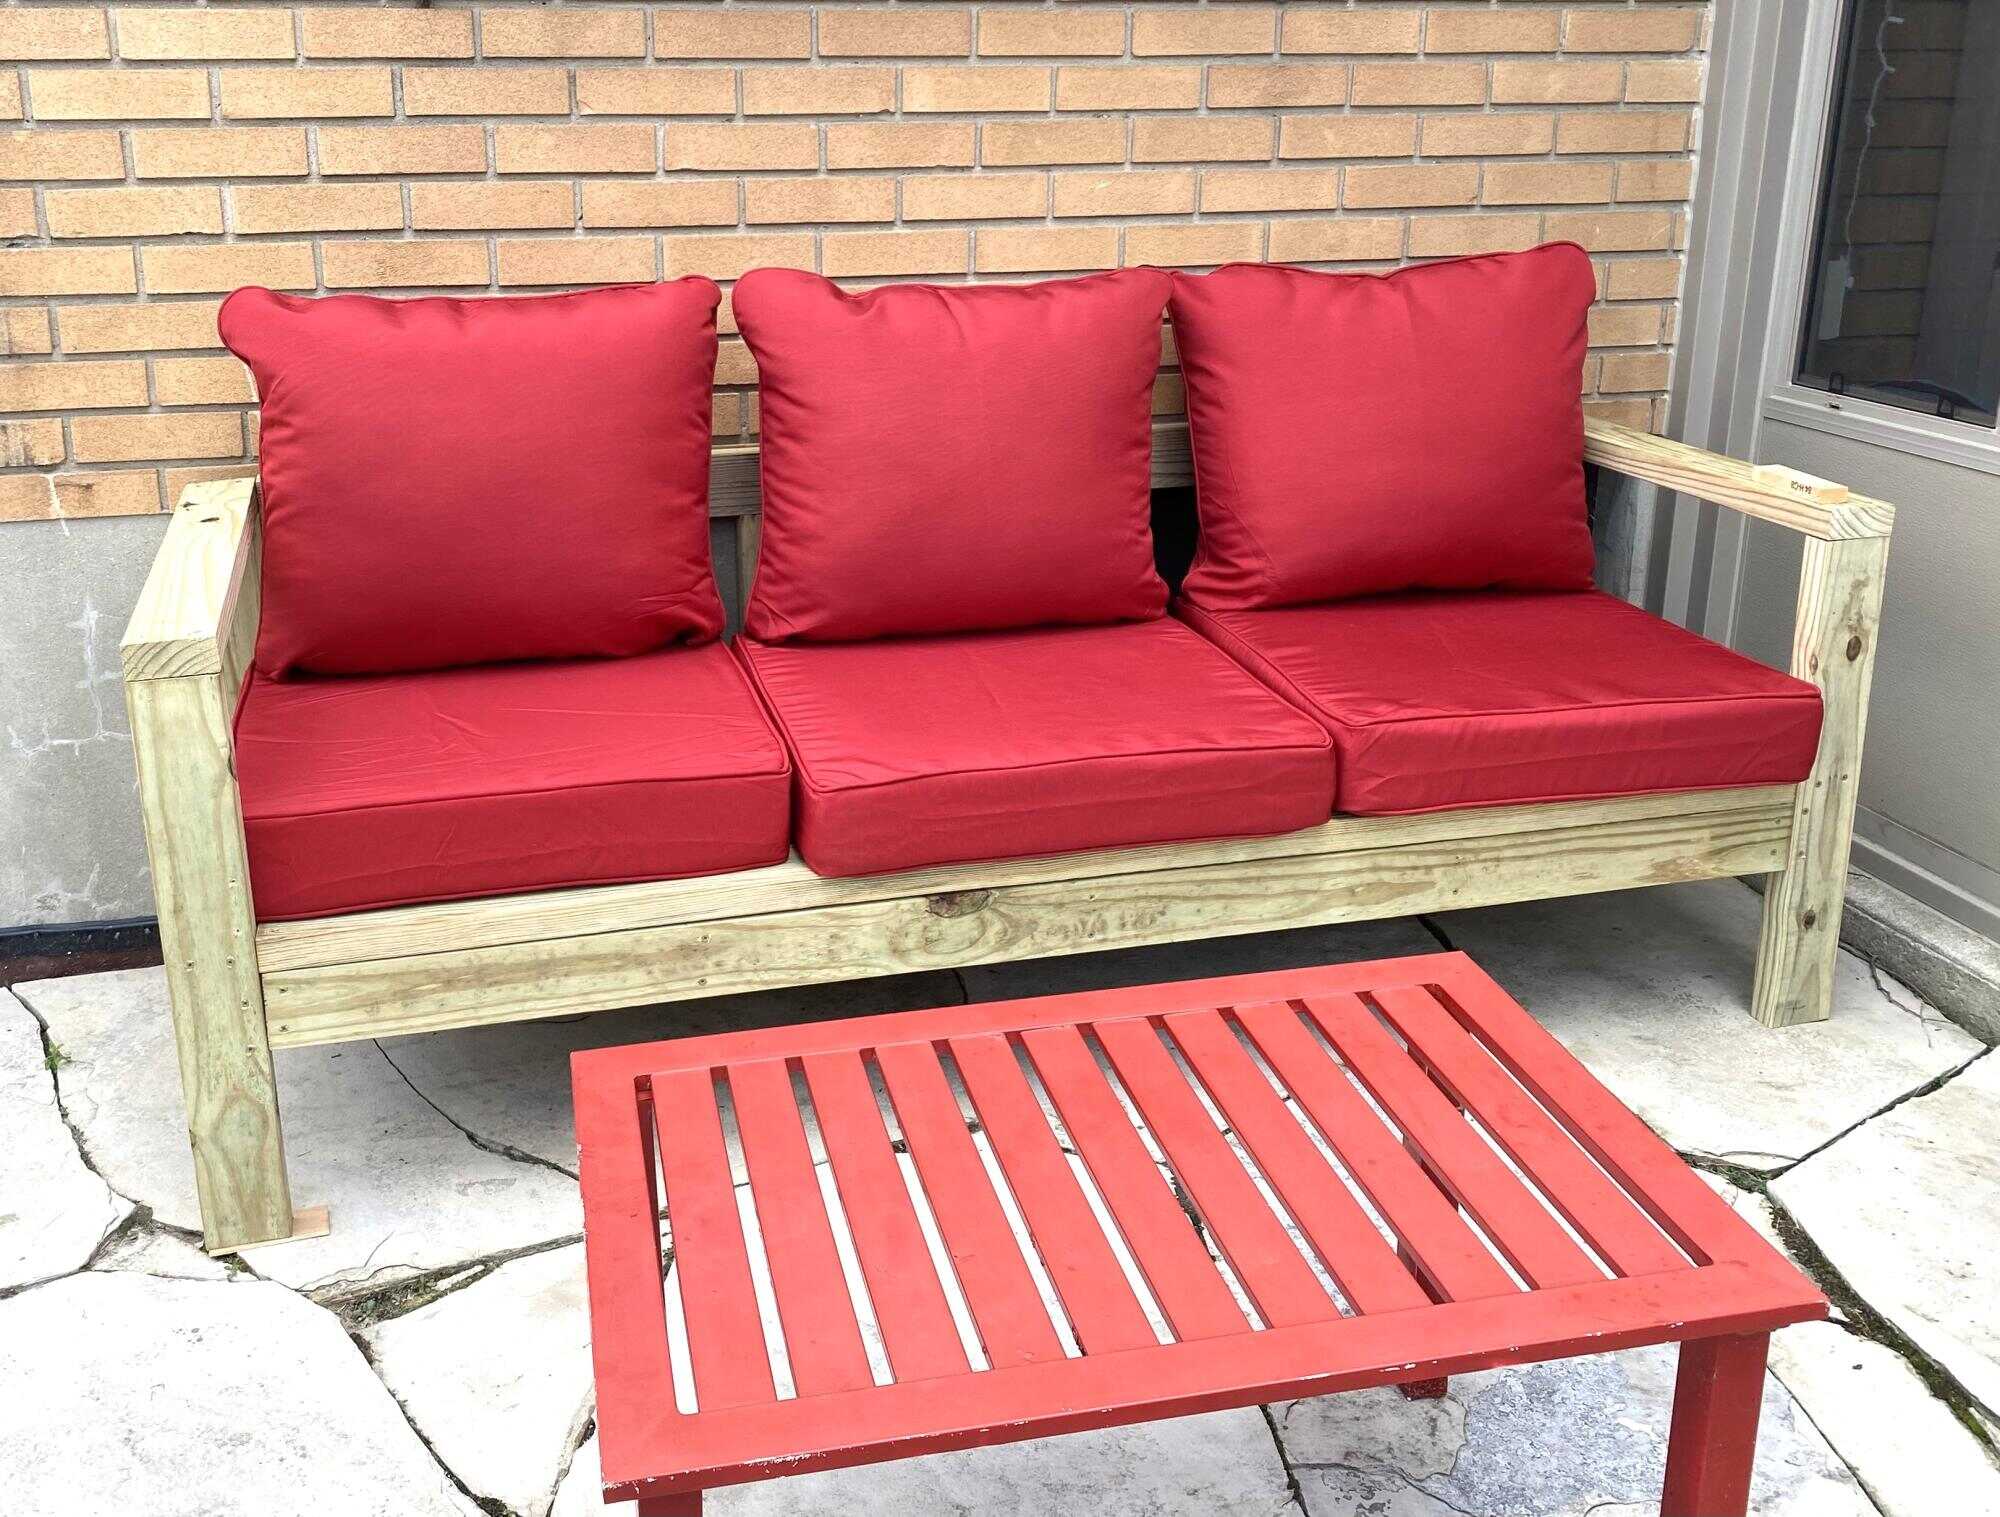
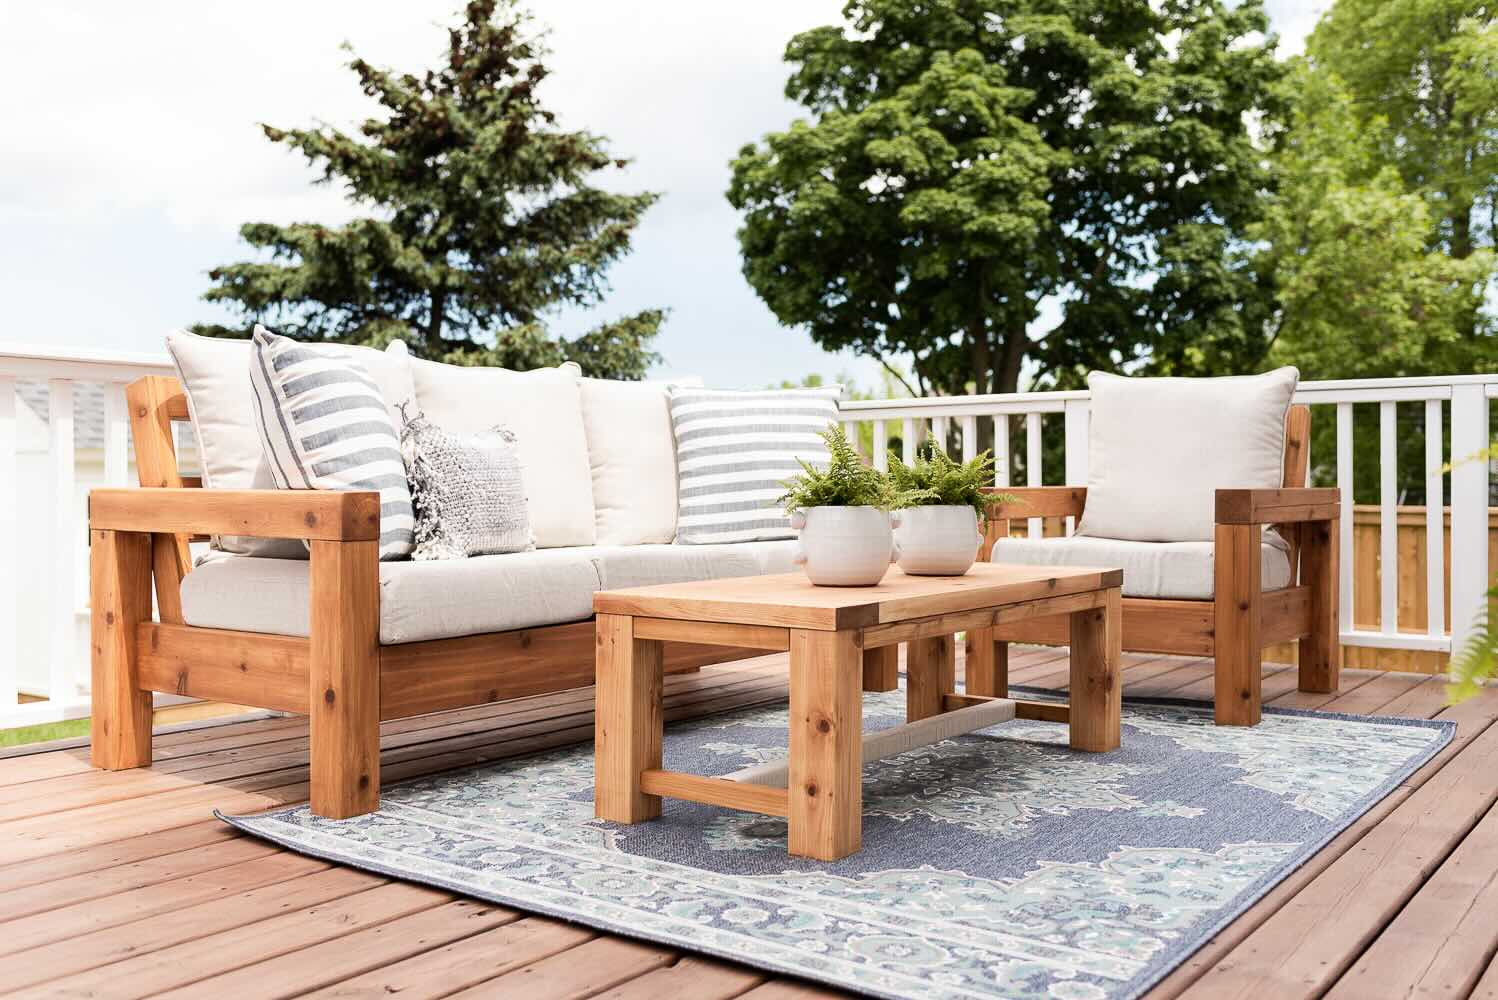
Step 1: Building the Frame
The foundation of your outdoor sofa lies in its sturdy frame, which provides structural support and serves as the backbone of the entire piece. Follow these steps to construct a robust and well-proportioned frame for your outdoor sofa:
- Prepare the lumber: Begin by measuring and cutting the lumber according to the dimensions of your desired sofa frame. Use a saw to make precise cuts, ensuring that the pieces fit together seamlessly.
- Assemble the frame components: Lay out the cut pieces of lumber according to the sofa’s design, such as the seat, back, and side components. Use a combination square to verify that the angles are accurate and that the components align correctly.
- Secure the frame: Utilize a drill/driver and exterior wood screws to secure the frame components together. Pre-drilling pilot holes can help prevent wood from splitting and ensure that the screws drive in smoothly, creating strong and reliable connections.
- Reinforce with wood glue: Apply wood glue to the joints before securing them with screws to reinforce the connections and enhance the overall stability of the frame. Wipe off any excess glue to maintain a clean and professional finish.
- Check for squareness: Use a carpenter’s square to check that the frame is perfectly square, with all angles measuring 90 degrees. This step is crucial for ensuring that the frame is structurally sound and ready for the next stages of construction.
- Allow the frame to dry and set: Once the frame is assembled, allow the wood glue to dry completely, ensuring that the connections are secure and the frame is ready for the next phase of the construction process.
By following these steps, you’ll establish a solid and reliable foundation for your outdoor sofa, setting the stage for the addition of the seat, back, arms, and finishing touches. With the frame in place, your outdoor sofa is well on its way to becoming a central and inviting feature of your outdoor living space.
When building an outdoor sofa, make sure to use weather-resistant materials such as cedar or teak to ensure durability and longevity.
Step 2: Adding the Seat and Back
With the frame of your outdoor sofa securely in place, the next crucial step is to add the seat and back components, creating a comfortable and supportive structure for lounging and relaxation. Follow these steps to seamlessly incorporate the seat and back into your outdoor sofa:
- Measure and cut the seat and back pieces: Using precise measurements, cut the lumber to create the seat and back components of your sofa. Ensure that the dimensions align with your design plan and the frame’s specifications.
- Position the seat and back: Carefully position the seat and back components within the frame, ensuring a snug and accurate fit. Make any necessary adjustments to achieve a seamless and visually appealing alignment.
- Secure the seat and back: Utilize a drill/driver and exterior wood screws to secure the seat and back components to the frame. Ensure that the connections are robust and reliable, providing ample support for individuals using the outdoor sofa.
- Reinforce with wood glue: Apply wood glue to the joints where the seat and back meet the frame, reinforcing the connections and enhancing the overall stability of the sofa’s structure. Wipe off any excess glue for a clean and professional finish.
- Smooth and refine the surfaces: Use sandpaper to smooth out any rough edges and refine the surfaces of the seat and back components, ensuring a comfortable and visually appealing finish that is ready for upholstery or cushions.
- Prepare for upholstery or cushions: If you plan to upholster the seat and back or add cushions, ensure that the surfaces are clean and free of debris, providing a suitable foundation for the upholstery or cushion installation.
By following these steps, you’ll seamlessly integrate the seat and back components into the frame of your outdoor sofa, creating a welcoming and comfortable seating area for outdoor enjoyment. With the seat and back in place, your outdoor sofa is ready to receive the finishing touches that will elevate its visual appeal and comfort.
Read more: How To Make Sofa Cushions Softer
Step 3: Adding the Arms
Adding arms to your outdoor sofa not only enhances its comfort and functionality but also contributes to its overall aesthetic appeal. The arms provide a place to rest and support the arms and can be customized to complement the style of your outdoor space. Follow these steps to seamlessly incorporate the arms into your outdoor sofa:
- Measure and cut the armrest components: Using precise measurements, cut the lumber to create the armrest components according to your desired design. Consider the height, width, and curvature of the arms to ensure a comfortable and visually appealing fit.
- Position the armrests: Carefully position the armrest components on each side of the sofa, ensuring that they align with the seat and back while providing ample space for comfortable arm support.
- Secure the armrests to the frame: Utilize a drill/driver and exterior wood screws to securely attach the armrests to the frame of the sofa. Ensure that the connections are robust and stable, providing reliable support for the arms and contributing to the overall structural integrity of the sofa.
- Reinforce with wood glue: Apply wood glue to the joints where the armrests meet the frame, reinforcing the connections and enhancing the overall stability of the sofa’s structure. Wipe off any excess glue for a clean and professional finish.
- Smooth and refine the armrest surfaces: Use sandpaper to smooth out any rough edges and refine the surfaces of the armrests, ensuring a comfortable and visually appealing finish that is ready for use.
- Customize the armrests (optional): If desired, consider customizing the armrests with additional detailing or design elements that complement the overall style of your outdoor sofa and outdoor living space.
By following these steps, you’ll seamlessly integrate the arms into your outdoor sofa, providing a comfortable and functional feature that enhances the overall appeal of the piece. With the arms in place, your outdoor sofa is one step closer to becoming a central and inviting element of your outdoor living area.
Step 4: Finishing Touches
As you near the completion of your outdoor sofa construction, it’s time to add the finishing touches that will elevate its visual appeal, comfort, and longevity. These final steps will ensure that your outdoor sofa is not only structurally sound but also a stunning and inviting addition to your outdoor living space:
- Apply a waterproof sealant or outdoor wood finish: Protect the wood from moisture, UV rays, and other outdoor elements by applying a waterproof sealant or outdoor wood finish. This step will enhance the durability and lifespan of your outdoor sofa, allowing it to withstand the rigors of outdoor conditions.
- Install outdoor upholstery or cushions: If you plan to upholster the seat and back or add cushions, carefully install the outdoor upholstery or cushions, ensuring a snug and comfortable fit. Select weather-resistant fabrics that can withstand exposure to sunlight and moisture while providing a cozy seating experience.
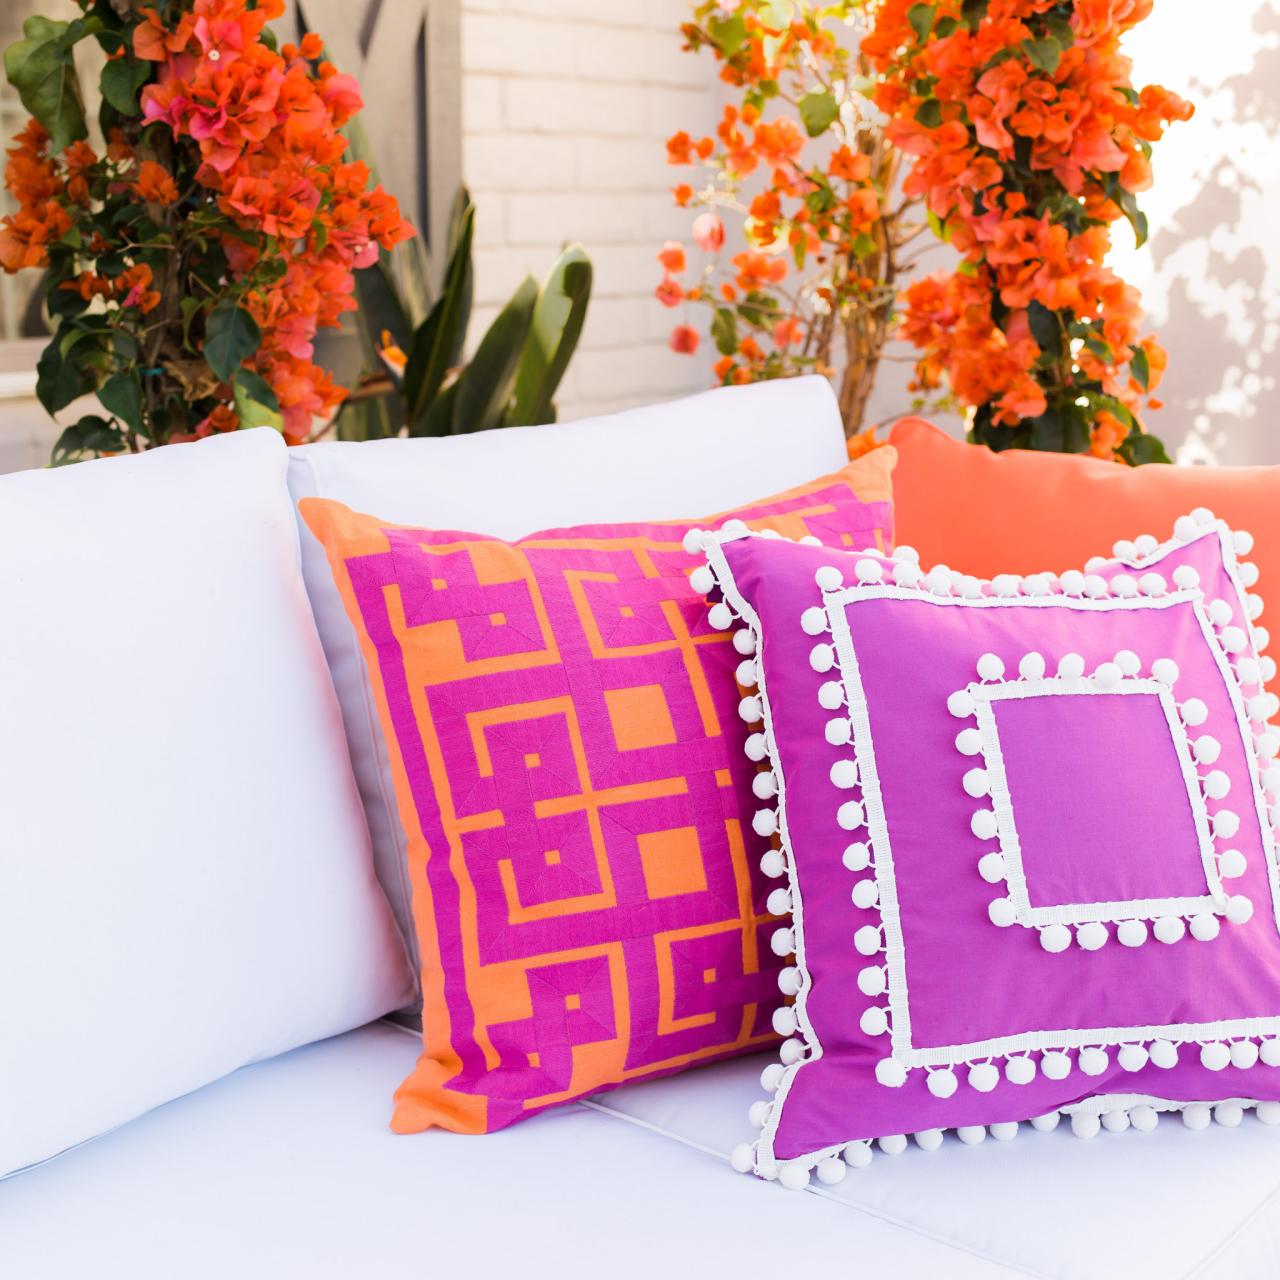
- Personalize with decorative pillows and throws: Add a touch of personality and comfort to your outdoor sofa by incorporating decorative pillows and throws that complement your outdoor decor. Choose colors and patterns that enhance the visual appeal of the sofa and create a welcoming atmosphere.
- Inspect and reinforce connections: Thoroughly inspect the connections and joints of the sofa to ensure that they are secure and stable. Reinforce any areas that may require additional support, ensuring the long-term integrity of the outdoor sofa.
- Accessorize with outdoor lighting or side tables: Consider accessorizing the area around your outdoor sofa with outdoor lighting or side tables, creating a cozy and functional outdoor living space that encourages relaxation and socializing.
- Enjoy and maintain: Once the finishing touches are complete, take the time to enjoy your newly constructed outdoor sofa. Regularly maintain and clean the sofa to preserve its beauty and functionality, allowing you to make lasting memories in your outdoor oasis.
By following these final steps, you’ll transform your outdoor sofa into a captivating and comfortable focal point of your outdoor living area. With the finishing touches in place, your outdoor sofa is ready to provide a welcoming and stylish space for relaxation, entertainment, and enjoyment of the great outdoors.
Conclusion
Congratulations on successfully completing the construction of your very own outdoor sofa! Through careful planning, precise craftsmanship, and attention to detail, you’ve brought to life a stunning and functional piece of outdoor furniture that reflects your creativity and woodworking skills. As you admire your handiwork, envision the countless moments of relaxation, social gatherings, and cherished memories that await in the comfort of your outdoor oasis.
Building an outdoor sofa is not just a DIY project; it’s an expression of your personal style and a testament to the joy of creating something beautiful and practical with your own hands. The process of crafting this piece has not only added a unique and inviting element to your outdoor space but has also provided a sense of fulfillment and accomplishment that comes with completing a meaningful project.
As you settle into your newly constructed outdoor sofa, surrounded by the beauty of nature and the comforts of home, take a moment to appreciate the craftsmanship and dedication that went into its creation. Your outdoor sofa is more than just a piece of furniture; it’s a reflection of your passion for design, woodworking, and the outdoor lifestyle.
Whether you’re lounging with a good book, hosting outdoor gatherings with friends and family, or simply savoring moments of tranquility, your outdoor sofa stands as a testament to your creativity and the joy of bringing your outdoor furniture design dreams to life. Embrace the satisfaction of knowing that you’ve not only built a beautiful piece of furniture but also cultivated a space for relaxation and connection in the great outdoors.
As you enjoy the fruits of your labor, may your outdoor sofa serve as a source of inspiration for future woodworking projects and as a gathering place for creating lasting memories. With your newfound expertise and the pride of completing this project, you’re well-equipped to continue exploring the world of outdoor furniture crafting and design, infusing your outdoor spaces with warmth, style, and your unique personal touch.
So, bask in the comfort of your outdoor sofa, revel in the beauty of your outdoor sanctuary, and continue to embrace the joy of bringing your outdoor furniture visions to life. Your outdoor sofa is not just a piece of furniture; it’s a symbol of creativity, craftsmanship, and the boundless possibilities of outdoor living.
Frequently Asked Questions about How To Make An Outdoor Sofa
Was this page helpful?
At Storables.com, we guarantee accurate and reliable information. Our content, validated by Expert Board Contributors, is crafted following stringent Editorial Policies. We're committed to providing you with well-researched, expert-backed insights for all your informational needs.


0 thoughts on “How To Make An Outdoor Sofa”