Home>Furniture>Bedroom Furniture>How To Assemble A Bed Frame With Headboard


Bedroom Furniture
How To Assemble A Bed Frame With Headboard
Modified: September 1, 2024
Learn how to assemble a bed frame with headboard and create a stylish addition to your bedroom furniture. Follow our easy step-by-step guide now!
(Many of the links in this article redirect to a specific reviewed product. Your purchase of these products through affiliate links helps to generate commission for Storables.com, at no extra cost. Learn more)
Introduction
Welcome to the world of bedroom furniture! If you’re here, chances are you’ve just bought a brand new bed frame with a headboard and are feeling a mix of excitement and confusion about how to assemble it. Don’t worry, you’re not alone!
Assembling furniture can seem daunting at first, but with a little patience and the right guidance, you’ll have your bed frame with headboard set up in no time.
In this article, we’ll walk you through the step-by-step process of assembling a bed frame with a headboard. We’ll cover everything from gathering necessary tools and materials to securing all connections and finishing touches.
So, roll up your sleeves, grab a cup of coffee, and let’s get started on transforming your bedroom into a cozy sanctuary!
Key Takeaways:
- Transform your bedroom into a cozy sanctuary by assembling a bed frame with a headboard. Gather tools, follow the manual, and secure connections for a sturdy and stylish result.
- Enjoy a restful sleep in your newly assembled bed frame with a beautiful headboard. Follow the step-by-step process, add finishing touches, and personalize your space for peaceful nights.
Read more: How To Assemble A Bed Frame
Step 1: Gather the Necessary Tools and Materials
Before you begin assembling your bed frame with a headboard, it’s crucial to gather all the necessary tools and materials. This way, you’ll have everything you need within arm’s reach, saving you time and frustration in the process.
Here’s a list of tools and materials you’ll commonly need:
- Allen wrench or screwdriver – Check the instruction manual to determine which type of tool is required for your specific bed frame.
- Hammer – Some bed frames may require hammering in certain components.
- Level – To ensure your bed frame is properly aligned.
- Tape measure – Useful for measuring and marking the placement of the bed frame.
- Plastic gloves – Protect your hands while handling sharp or rough edges.
- Instructions manual – Always refer to the manufacturer’s instructions for specific guidance.
In addition to the tools, it’s important to have a clear and spacious area to work in. Clear out any clutter in the room and make sure you have enough space to lay out the components of the bed frame.
Once you’ve gathered all the tools and cleared your workspace, you’re ready to move on to the next step! Remember, having all the necessary tools and materials at hand will make the assembly process much smoother and more efficient.
Step 2: Read the Instruction Manual
Now that you have everything prepared, it’s time to dive into the instruction manual for your bed frame. The instruction manual is your guide to properly assembling the bed frame and will provide you with specific steps and guidance.
When reading the instruction manual, be sure to pay attention to the following:
- Sequence of steps – The manual will outline the exact order in which you should assemble the bed frame. Following the correct sequence is essential to ensure a sturdy and stable end result.
- Warnings and precautions – Check for any safety precautions or warnings mentioned in the manual. This can include weight limits, necessary support systems, or any potential hazards to watch out for during assembly.
- Compatibility – If you’ve purchased a bed frame with a headboard separately, make sure the headboard is compatible with the bed frame. The manual should provide any necessary information on compatibility or modifications required.
- Additional tools or materials – Sometimes, the instruction manual may suggest additional tools or materials that can aid in the assembly process. Take note of these recommendations to ensure a smooth assembly.
Take your time to thoroughly read and understand the instruction manual before starting the assembly process. Familiarize yourself with the different components, their names, and how they fit together. This will help prevent any mistakes or confusion along the way.
By following the instructions provided in the manual, you’ll have a clear roadmap to successfully assemble your bed frame with a headboard.
Now that you’re well-versed in the instruction manual, it’s time to move on to the next step!
Step 3: Identify and Sort the Parts
Once you have a good understanding of the instructions, it’s time to identify and sort the parts of your bed frame with a headboard. This step is crucial to ensure that you have all the necessary components and to make the assembly process much smoother.
Here’s how you can effectively identify and sort the parts:
- Layout all the parts – Lay out all the components of the bed frame and headboard in a clear and organized manner. This will allow you to visually inspect and identify each part.
- Refer to the manual – Use the instruction manual as a reference to identify the specific parts and components. The manual should provide a labeled diagram or a list of all the parts included.
- Sort the parts – Group together similar parts and components. This will make it easier to locate the necessary pieces during the assembly process. For example, separate the screws, nuts, and bolts into different containers or compartments.
- Inspect for any damage – While sorting the parts, take a moment to inspect each piece for any signs of damage or defects. If you notice any issues, contact the manufacturer for replacements before proceeding with the assembly.
Sorting the parts before assembly will save you time and frustration, as you won’t have to search for specific components or deal with missing pieces in the middle of the process.
Once you have successfully identified and sorted all the parts, you can confidently move forward to the next step of assembling your bed frame with a headboard.
Step 4: Assemble the Headboard
With the parts sorted and ready, it’s time to start assembling the headboard of your bed frame. The headboard not only adds visual appeal to your bedroom but also provides support and stability to the bed frame.
Follow these steps to assemble the headboard:
- Position the headboard – Place the headboard in the desired location against the wall, ensuring it aligns with the bed frame.
- Attach the legs or brackets – Depending on the design of your headboard, you may need to attach legs or brackets to secure it to the bed frame or the wall. Refer to the instruction manual for specific guidelines.
- Connect any additional components – Some headboards may have additional components such as decorative panels or shelves. Follow the instructions provided to attach these components securely.
- Tighten all connections – Once the headboard is fully assembled, double-check that all connections are securely tightened. Use the appropriate tools, such as an Allen wrench or screwdriver, to ensure a stable and sturdy headboard.
Assembling the headboard is an important step as it sets the foundation for the rest of the bed frame assembly. Take your time to follow the instructions carefully and make sure all connections are properly secured.
Once you have successfully assembled the headboard, you can move on to the next step of attaching the side rails to complete your bed frame with a headboard.
When assembling a bed frame with a headboard, make sure to carefully follow the manufacturer’s instructions to ensure proper alignment and stability. Use the right tools and double-check all connections for a secure and safe assembly.
Read more: How To Attach A Headboard To A Bed Frame
Step 5: Attach the Side Rails
With the headboard assembled, it’s time to move on to attaching the side rails of your bed frame. The side rails play a crucial role in providing support and stability to the mattress and the entire bed structure.
Follow these steps to attach the side rails:
- Position the side rails – Place the side rails in the designated positions on the headboard and the footboard (if applicable).
- Align the holes – Ensure that the pre-drilled holes on the side rails align with the corresponding holes on the headboard and footboard.
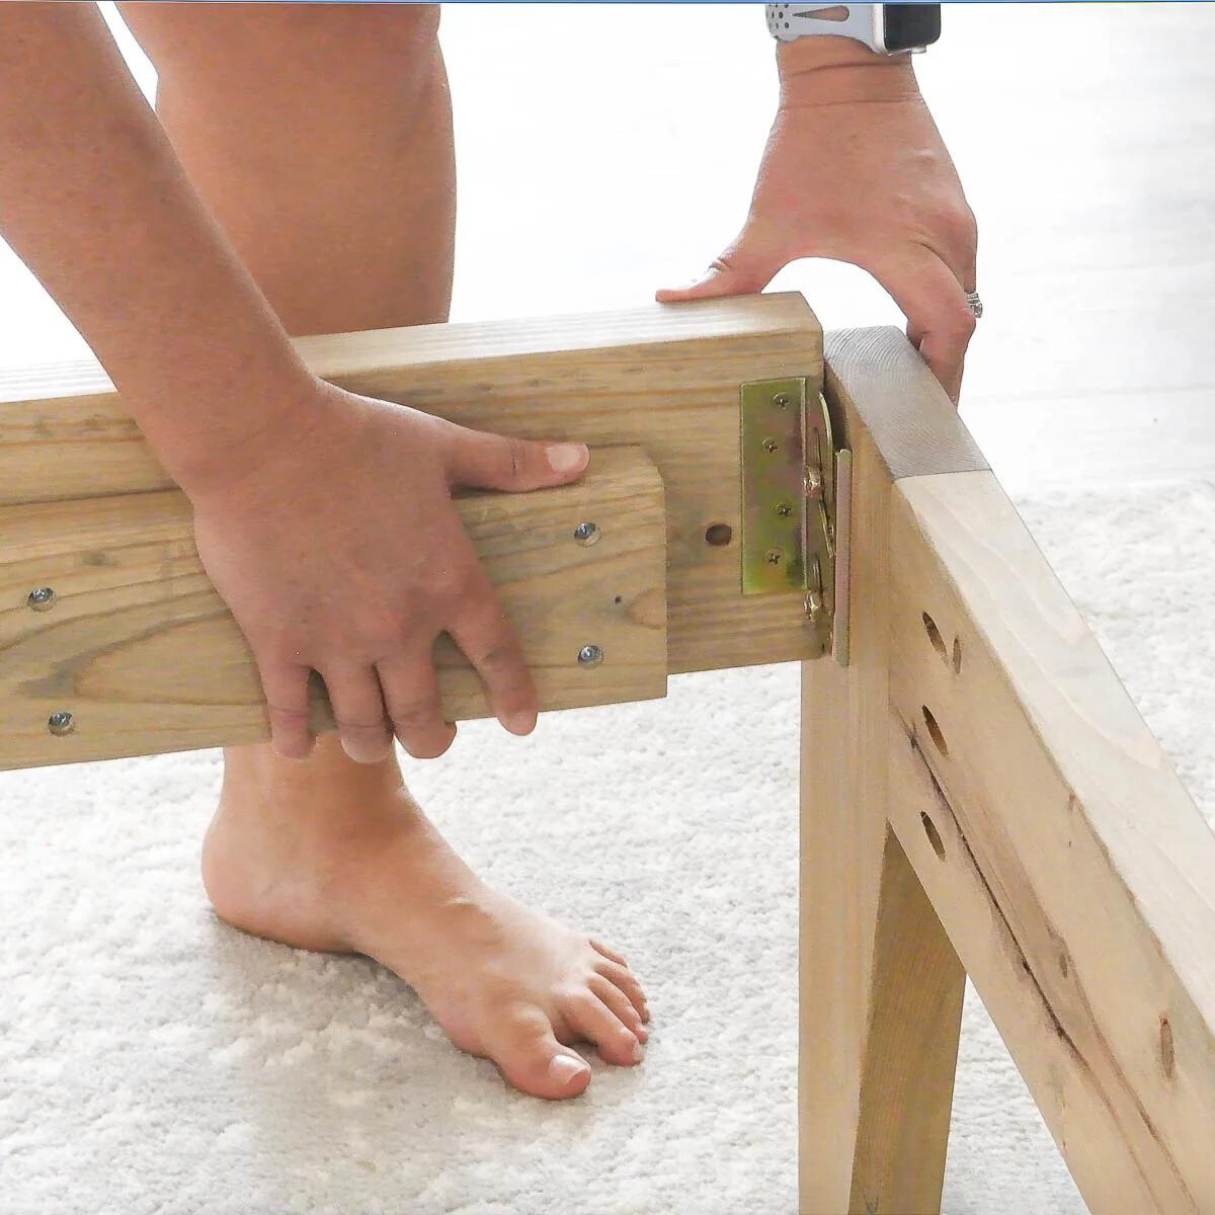
- Insert the bolts or screws – Insert the bolts or screws provided into the holes, making sure they are properly aligned and tightened. Depending on your bed frame, you may need to use additional tools.
- Tighten all connections – Use an Allen wrench, screwdriver, or any required tool to securely tighten the bolts or screws, ensuring a stable and secure attachment of the side rails to the headboard and footboard.
While attaching the side rails, it’s important to ensure that they are level and properly aligned with the headboard and footboard. Use a level to check for any unevenness and make necessary adjustments to achieve a balanced and sturdy bed frame.
Once you have successfully attached the side rails, your bed frame with a headboard is starting to take shape. The next step is to install the slats or foundation to provide support to the mattress.
Step 6: Install the Slats or Foundation
Now that the main structure of your bed frame with a headboard is in place, it’s time to install the slats or foundation. These components support the mattress, ensuring that it is properly supported and comfortable to sleep on.
Follow these steps to install the slats or foundation:
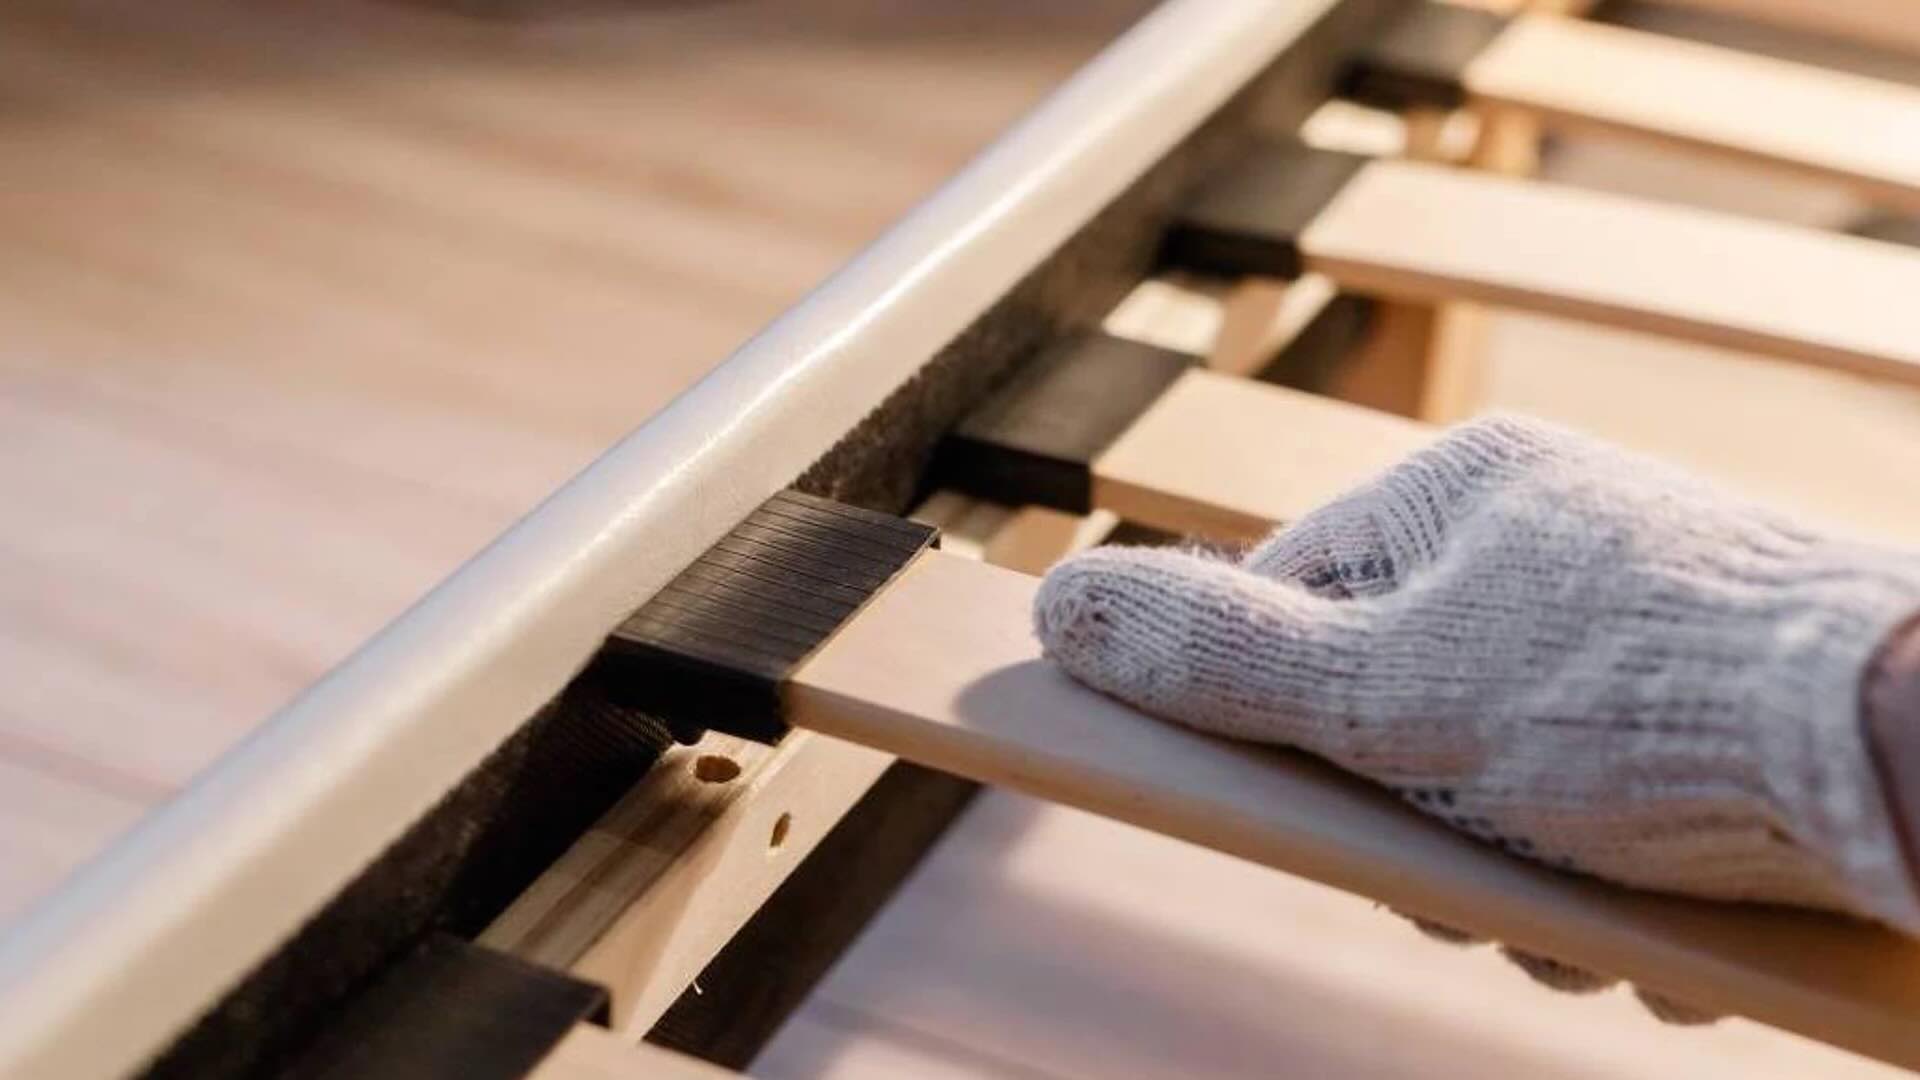
- Check for slat arrangements – If your bed frame comes with slats, check the instruction manual for the recommended arrangement. Some bed frames may require the slats to be evenly spaced, while others may have specific instructions for placement. If your bed frame requires a foundation instead of slats, ensure that it is properly positioned and aligned.
- Position the slats or foundation – Place the slats or foundation onto the bed frame, ensuring that they are centered and aligned from side to side.
- Secure the slats or foundation – Depending on the design of your bed frame, you may need to secure the slats or foundation with screws, clips, or brackets. Follow the manufacturer’s instructions for the proper installation method.
- Check for stability – Once the slats or foundation are installed, check for any signs of instability or movement. Ensure that all connections are tightened securely for a sturdy and reliable bed frame.
Installing the slats or foundation is a critical step in ensuring the overall stability and comfort of your bed frame. By following the recommended arrangements and properly securing them, you can create a solid base for your mattress.
With the slats or foundation successfully installed, your bed frame with a headboard is almost complete. The next step is to attach the footboard (if applicable) to add the finishing touches.
Step 7: Attach the Footboard (if applicable)
If your bed frame includes a footboard, this step will guide you through attaching it to the existing structure. The footboard adds a decorative element to your bed frame and provides additional stability and support.
Follow these steps to attach the footboard:
- Position the footboard – Place the footboard in the desired position at the opposite end of the bed frame from the headboard.
- Align the holes – Ensure that the pre-drilled holes on the footboard align with the corresponding holes on the side rails.
- Insert the bolts or screws – Insert the bolts or screws provided into the holes, ensuring they are properly aligned and tightened. You may need to use additional tools depending on your bed frame design.
- Tighten all connections – Use an Allen wrench, screwdriver, or any required tool to securely tighten the bolts or screws, ensuring a stable and secure attachment of the footboard to the side rails.
As you attach the footboard, make sure it is level and aligned with the rest of the bed frame. Use a level to check for any discrepancies and adjust as necessary.
If your bed frame does not include a footboard, you can skip this step and move on to the next one.
With the footboard successfully attached (or skipped), your bed frame with a headboard is almost complete. The final step involves securing all connections and adding the finishing touches.
Step 8: Secure all Connections and Finishing Touches
As you near the end of the bed frame assembly process, it’s important to ensure that all connections are securely tightened and add any finishing touches to complete the look of your bed frame with a headboard.
Follow these steps to secure all connections and add the finishing touches:
- Double-check all connections – Go through each connection point, including the headboard, side rails, and footboard (if applicable). Use the appropriate tools to tighten any loose bolts, screws, or brackets.
- Check for stability – Shake the bed frame gently to test for any wobbling or instability. If you notice any movement, investigate the cause and make necessary adjustments to ensure a sturdy and secure bed frame.
- Install additional accessories (optional) – To enhance the functionality or aesthetics of your bed frame, you may choose to add accessories such as a bed skirt, decorative knobs, or additional support legs. Follow the manufacturer’s instructions for the proper installation.
- Add the mattress and bedding – Once you are confident that all connections are secure, it’s time to place the mattress onto the bed frame. Ensure that the mattress is centered and aligned properly.
- Add bedding and decor – Complete the look of your bed frame by dressing it up with bedding, pillows, and other decor that suit your style and personal preference.
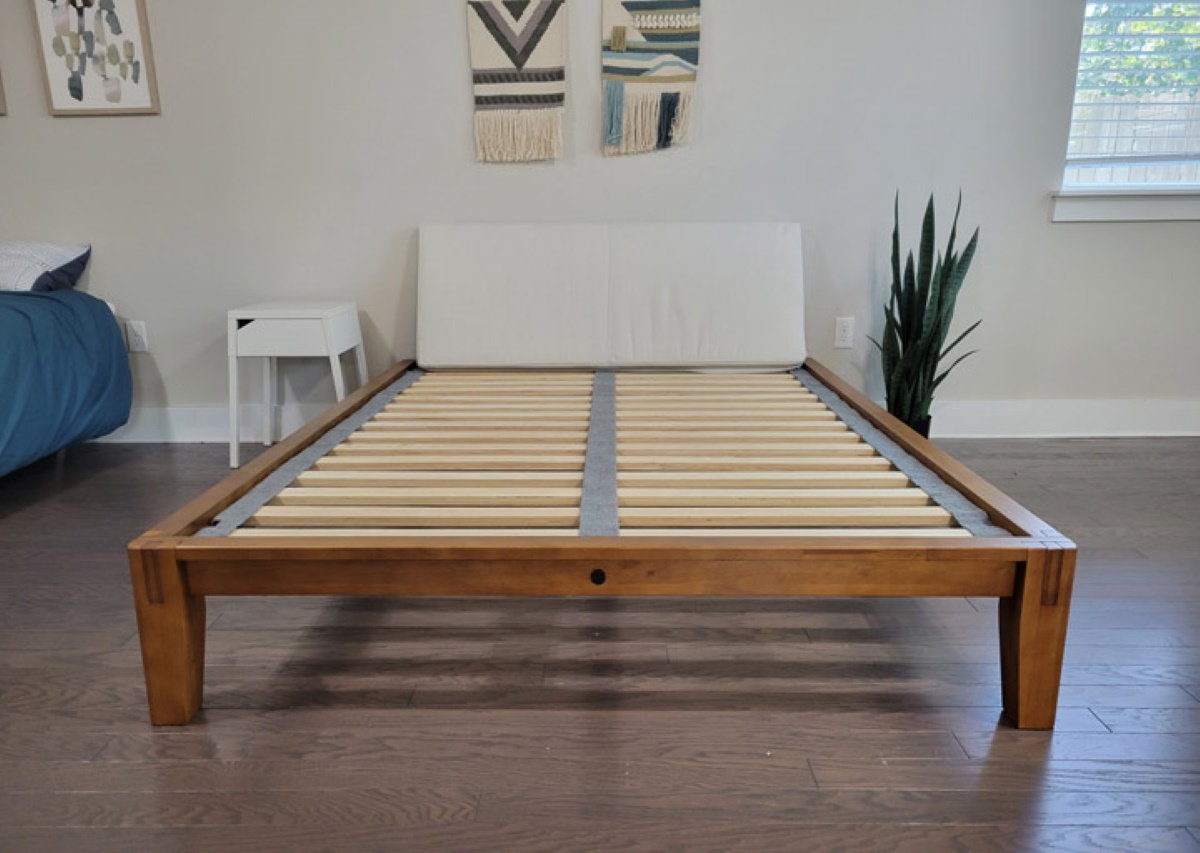
Take a moment to step back and admire your fully assembled bed frame with a headboard. You’ve successfully transformed your bedroom into a cozy and inviting space!
Remember to refer back to the instruction manual for any specific care or maintenance instructions for your bed frame. Regularly inspect and tighten the connections as needed to ensure the longevity of your bed frame.
Now, it’s time to enjoy a good night’s sleep in your newly assembled bed frame with a beautiful headboard. Sweet dreams!
Read more: How To Assemble A Metal Bed Frame
Conclusion
Congratulations on successfully assembling your bed frame with a headboard! You’ve followed the step-by-step process, gathered the necessary tools and materials, read the instruction manual, identified and sorted the parts, assembled the headboard, attached the side rails, installed the slats or foundation, and, if applicable, attached the footboard. Finally, you secured all connections and added the finishing touches to complete your bed frame.
By taking the time to assemble your bed frame correctly, you have created a sturdy, stable, and visually appealing piece of furniture that will provide you with comfort and support for years to come.
Remember to periodically check and tighten the connections to ensure the continued stability of your bed frame. Following any care or maintenance instructions provided by the manufacturer will also help extend the lifespan of your bed frame.
Now that your bed frame is complete, you can enjoy a restful sleep in a cozy and stylish bedroom. Personalize your space further by adding your favorite bedding, pillows, and decor that reflect your unique style and taste.
Thank you for joining us on this journey to assemble your bed frame with a headboard. We hope this guide has been helpful and that you have found joy in creating a warm and inviting space in your bedroom. Wishing you many nights of peaceful sleep and comfort!
Frequently Asked Questions about How To Assemble A Bed Frame With Headboard
Was this page helpful?
At Storables.com, we guarantee accurate and reliable information. Our content, validated by Expert Board Contributors, is crafted following stringent Editorial Policies. We're committed to providing you with well-researched, expert-backed insights for all your informational needs.











0 thoughts on “How To Assemble A Bed Frame With Headboard”