Home>Furniture>Bedroom Furniture>How To Assemble A Metal Bed Frame
Bedroom Furniture
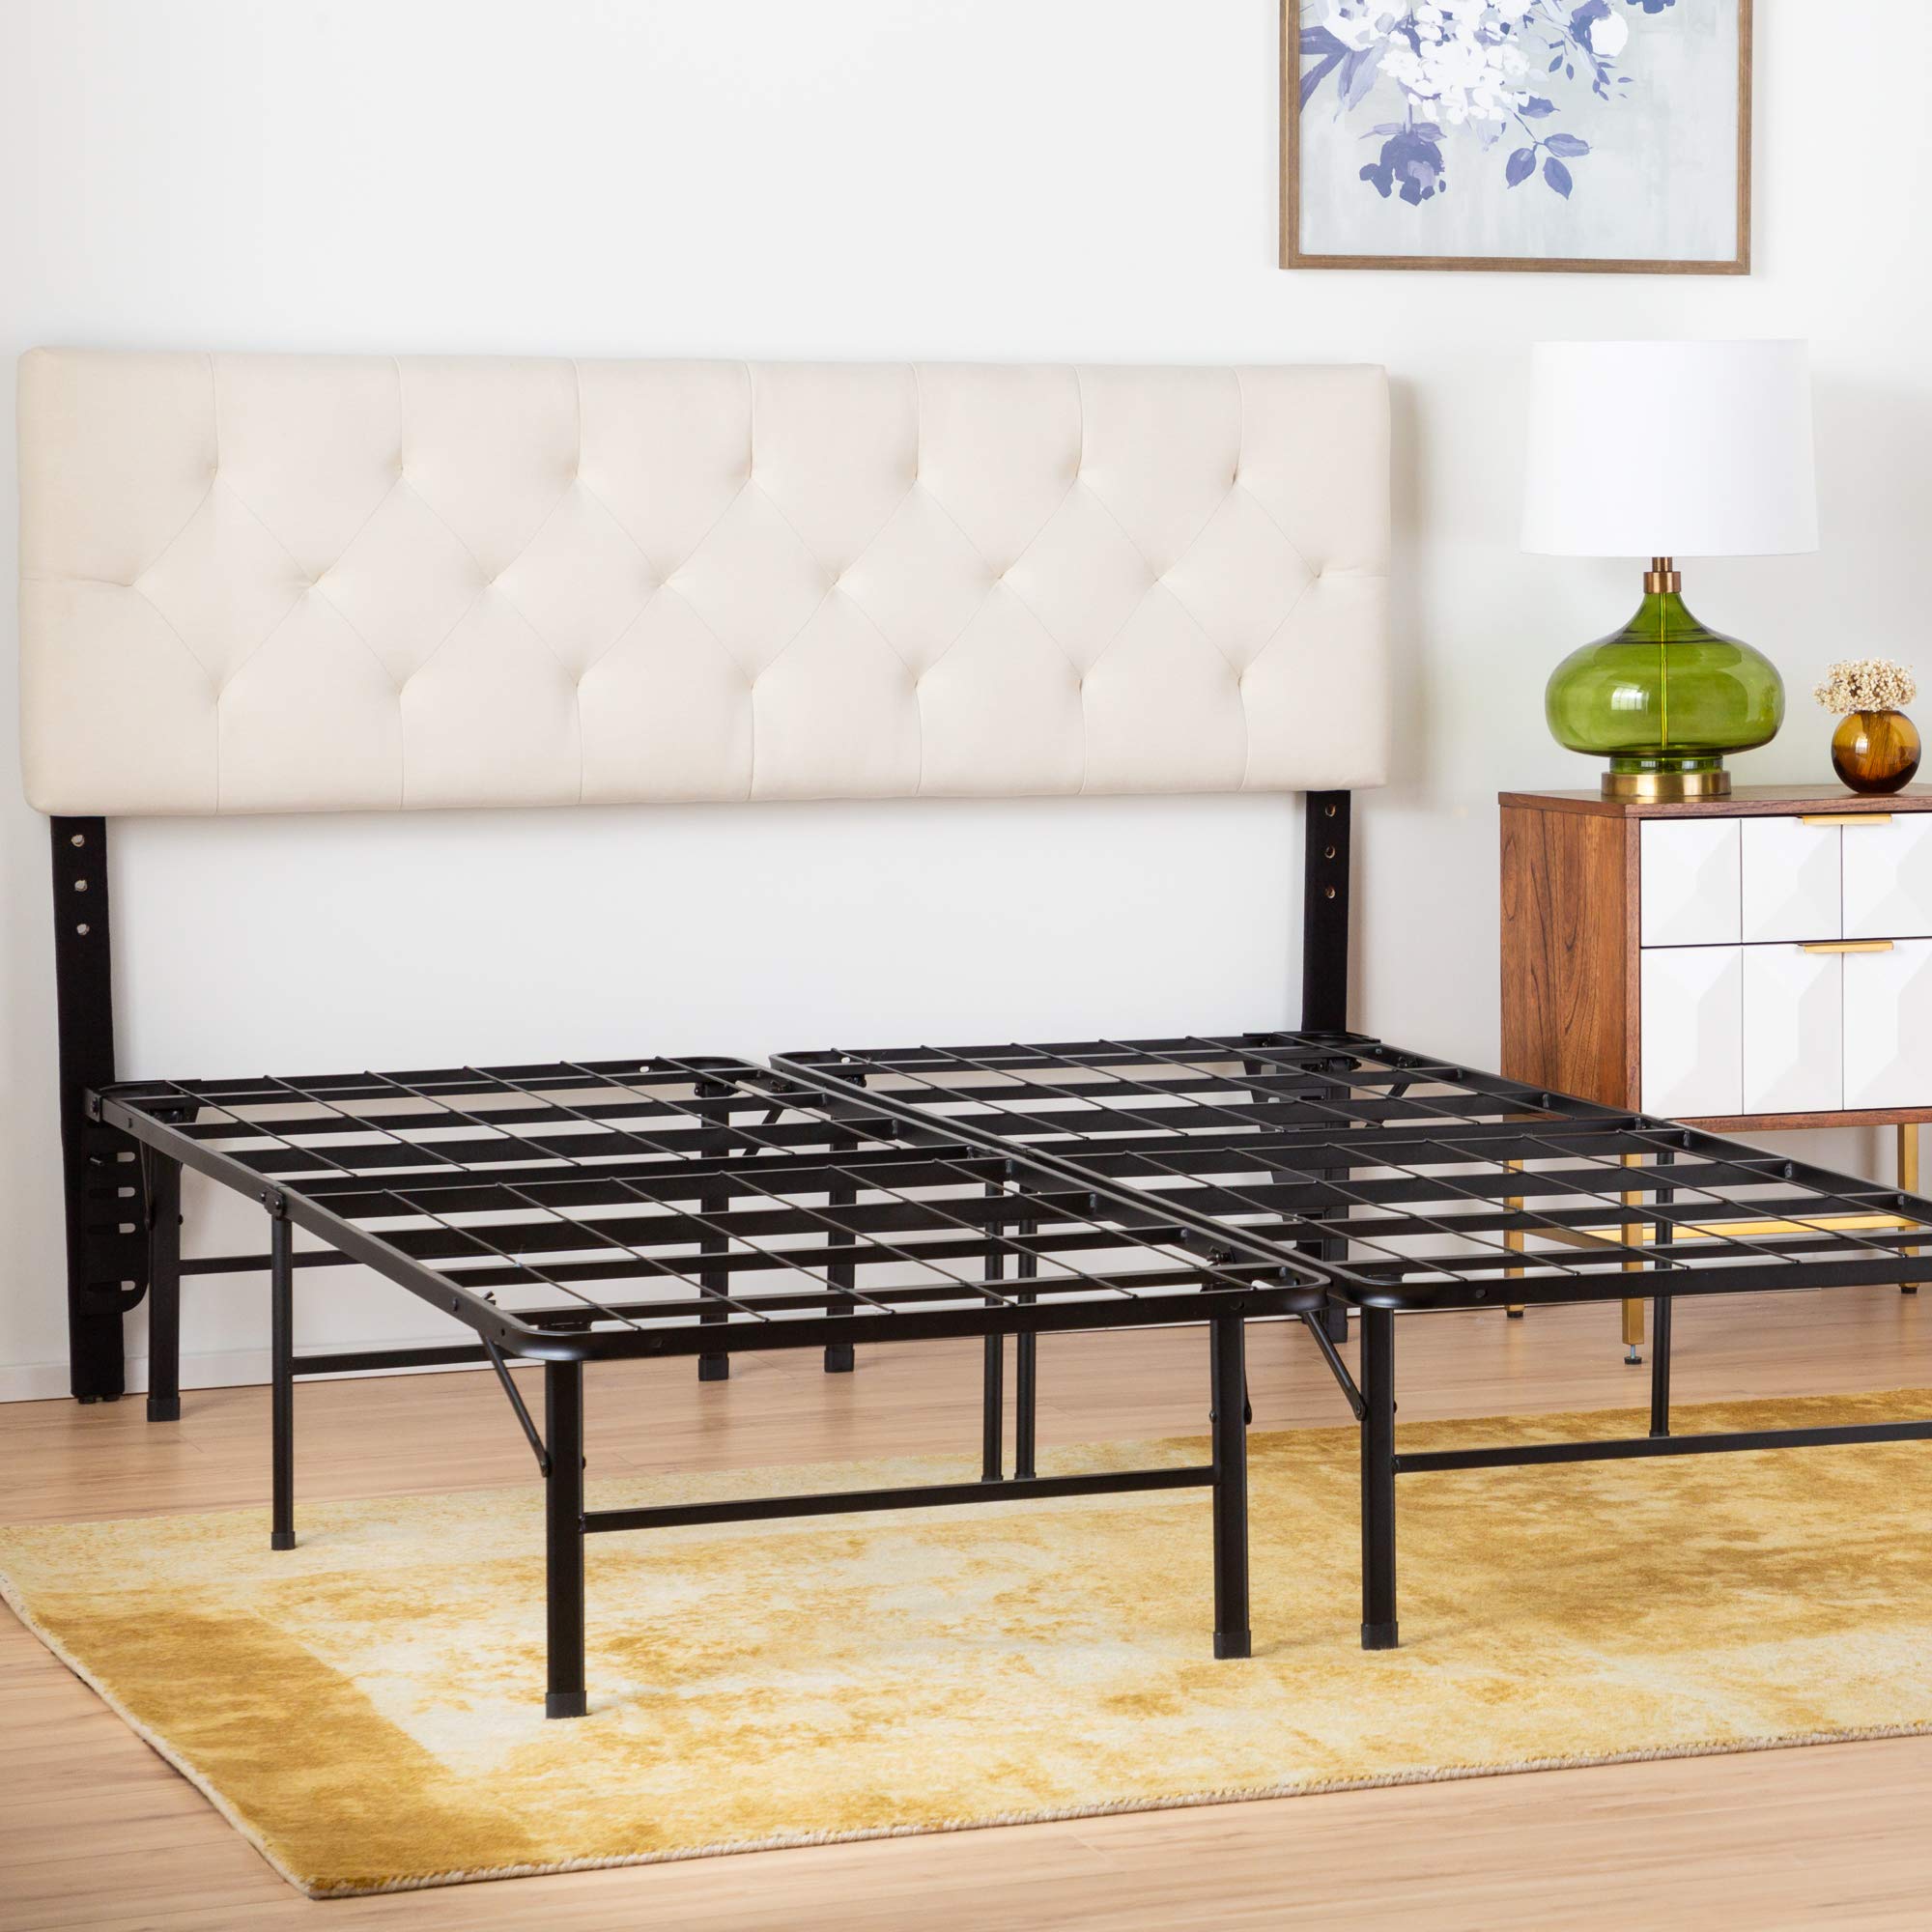
How To Assemble A Metal Bed Frame
Modified: November 1, 2024
Learn how to easily assemble a metal bed frame for your bedroom. Find step-by-step instructions and expert tips on assembling bedroom furniture.
(Many of the links in this article redirect to a specific reviewed product. Your purchase of these products through affiliate links helps to generate commission for Storables.com, at no extra cost. Learn more)
Introduction
Welcome to the comprehensive guide on how to assemble a metal bed frame. Whether you’ve recently purchased a new bed or need to reassemble your existing one, this step-by-step tutorial will walk you through the process.
Choosing a metal bed frame offers many benefits, such as durability and affordability. Additionally, metal bed frames are versatile and can complement a wide range of bedroom styles. By following these instructions, you’ll be able to assemble your bed frame in no time and enjoy a sturdy and comfortable sleep surface.
Before we dive into the assembly process, it’s essential to gather the necessary tools and materials. This will ensure a smooth and efficient assembly experience. Let’s move on to the first step!
Key Takeaways:
- Assembling a metal bed frame requires gathering tools, organizing components, and following step-by-step instructions. The process ensures a sturdy and stylish foundation for a comfortable sleep experience.
- Testing the stability and durability of the assembled bed frame is crucial for ensuring safety and comfort. Following manufacturer’s instructions and periodic maintenance will maintain the bed frame’s optimal condition.
Read more: How To Assemble A Bed Frame
Step 1: Gather the necessary tools and materials
Before you begin assembling your metal bed frame, it’s crucial to gather all the tools and materials you’ll need. Having everything ready will save you time and prevent any interruptions during the assembly process. Here’s a list of what you’ll need:
- Allen wrench or screwdriver: Most metal bed frames come with screws and bolts that require an Allen wrench or a screwdriver for assembly. Check your bed frame’s instruction manual to determine the specific tool you’ll need.
- Bed frame components: These include the metal side rails, center support beam (if applicable), headboard and footboard brackets, and any additional hardware that accompanies your specific bed frame model.
- Assembly instructions: Make sure to have the manufacturer’s assembly instructions on hand. These instructions will guide you through the assembly process and provide any additional information specific to your bed frame model.
- Protective gloves: While not essential, it’s recommended to wear protective gloves to prevent any potential injuries during assembly. This is especially important if the metal bed frame has sharp edges.
- Clear workspace: Choose a well-lit and spacious area in your bedroom where you can assemble the bed frame. Clear away any obstacles or clutter to ensure you have enough room to work comfortably.
Once you have all the tools and materials ready, you’re one step closer to completing the assembly of your metal bed frame. Now that you’re prepared, let’s move on to unpacking and organizing the bed frame components in the next step.
Step 2: Unpack and organize the bed frame components
Now that you have gathered all the necessary tools and materials, it’s time to unpack and organize the bed frame components. This step is essential to ensure that all the pieces are accounted for and easily accessible during the assembly process. Here’s how to proceed:
- Find a clear and open space: Clear a section of your workspace where you can lay out all the bed frame components. Ensure there’s enough room for easy access and movement.
- Unpack the components: Carefully remove the bed frame components from their packaging. Be mindful of any fragile or easily damaged parts.
- Check for any damage: Inspect each component for any signs of damage or defects. If you notice any issues, contact the manufacturer or retailer for assistance.
- Sort and organize: Group the similar components together, such as the side rails, brackets, and hardware. This will make it easier to locate each piece when needed.
- Refer to the instruction manual: Take a moment to review the bed frame’s assembly instructions. Familiarize yourself with the different components and their names to avoid confusion during assembly.
By following these steps, you ensure that you have a clear understanding of the bed frame components and that everything is in its place before proceeding with the assembly. Once you have organized the components, you’re ready to move on to the next step: connecting the bed frame side rails.
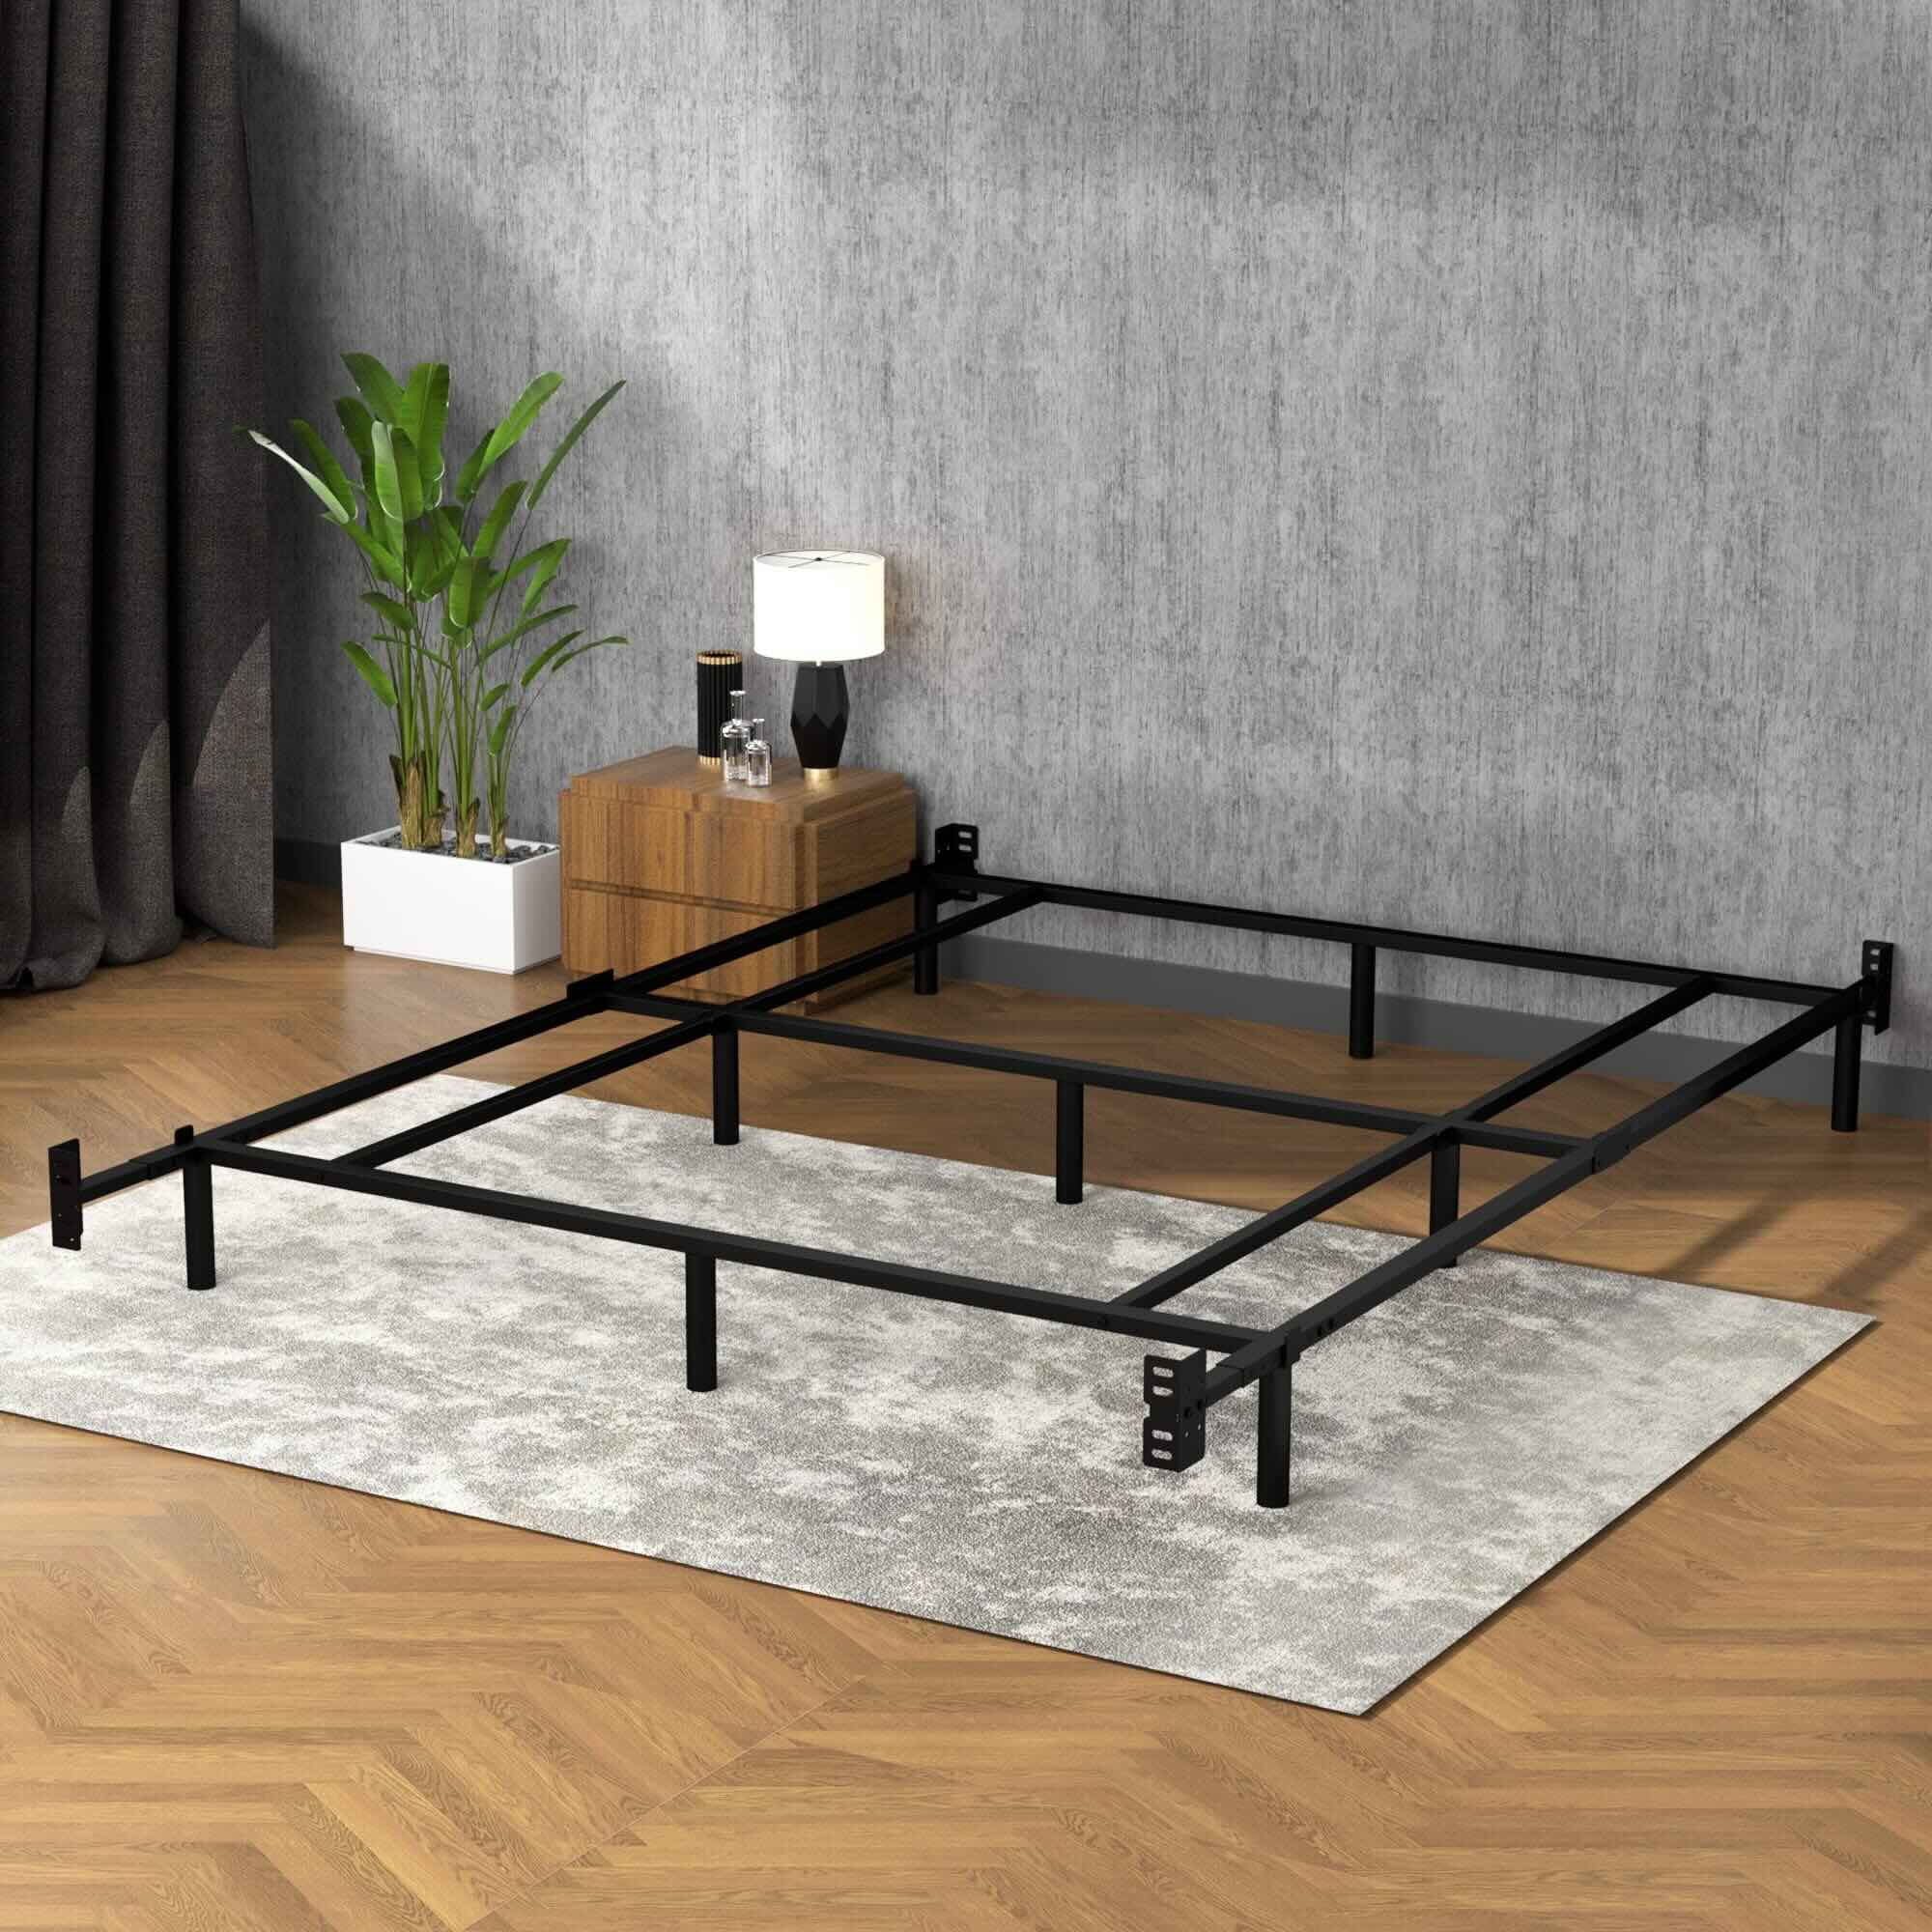
Step 3: Connect the bed frame side rails
Now that you have unpacked and organized the bed frame components, it’s time to connect the side rails. The side rails are the main structural components of the bed frame that will hold the mattress and provide stability. Follow these steps to connect the bed frame side rails:
- Position the side rails: Place the side rails in the designated spots on the headboard and footboard brackets or slots. Ensure that the rails are aligned properly for a seamless fit.
- Use the appropriate fasteners: Depending on your bed frame model, you may need to use screws, bolts, or other fasteners to secure the side rails in place. Refer to the assembly instructions for the correct type and size of fasteners.
- Tighten the fasteners: Using the Allen wrench or screwdriver, tighten the fasteners until they are secure. Be careful not to overtighten, as it may damage the bed frame or strip the threads.
- Double-check the alignment: Once the side rails are connected, double-check their alignment with the headboard and footboard. Ensure that they are level and parallel to each other.
By following these steps, you’ll successfully connect the bed frame side rails and establish the foundation of your bed frame. The side rails play a crucial role in supporting the weight of the mattress and ensuring the stability of the bed. With the side rails securely fastened, you’re ready to move on to the next step: attaching the center support beam (if applicable).
Step 4: Attach the center support beam (if applicable)
Some metal bed frames come with a center support beam that provides additional stability and support, especially for larger mattress sizes. If your bed frame includes a center support beam, follow these steps to attach it:
- Locate the center support beam: Check the bed frame components to find the center support beam. It is usually a long metal beam that runs horizontally across the center of the bed frame.
- Position the center support beam: Place the center support beam in the designated slots or brackets on the side rails. Ensure that it aligns properly and sits securely.
- Secure the center support beam: Use the provided screws or bolts to fasten the center support beam to the side rails. Make sure to tighten them securely, but avoid overtightening to prevent damage.
- Check the stability: Give the bed frame a gentle shake to test its stability. The center support beam should contribute to the overall sturdiness and prevent any excessive motion or sagging in the middle of the mattress.
Attaching the center support beam, if applicable, helps distribute the weight evenly and provides added support to the mattress and bed frame. This is particularly important for larger mattresses or when additional weight will be placed on the bed. Once you’ve successfully attached the center support beam, you’re ready to move on to the next step: installing the bed frame headboard and footboard brackets.
When assembling a metal bed frame, make sure to tighten all the screws and bolts securely to ensure stability and safety. Check for any loose parts regularly to prevent accidents.
Read more: How To Assemble A Wooden Bed Frame
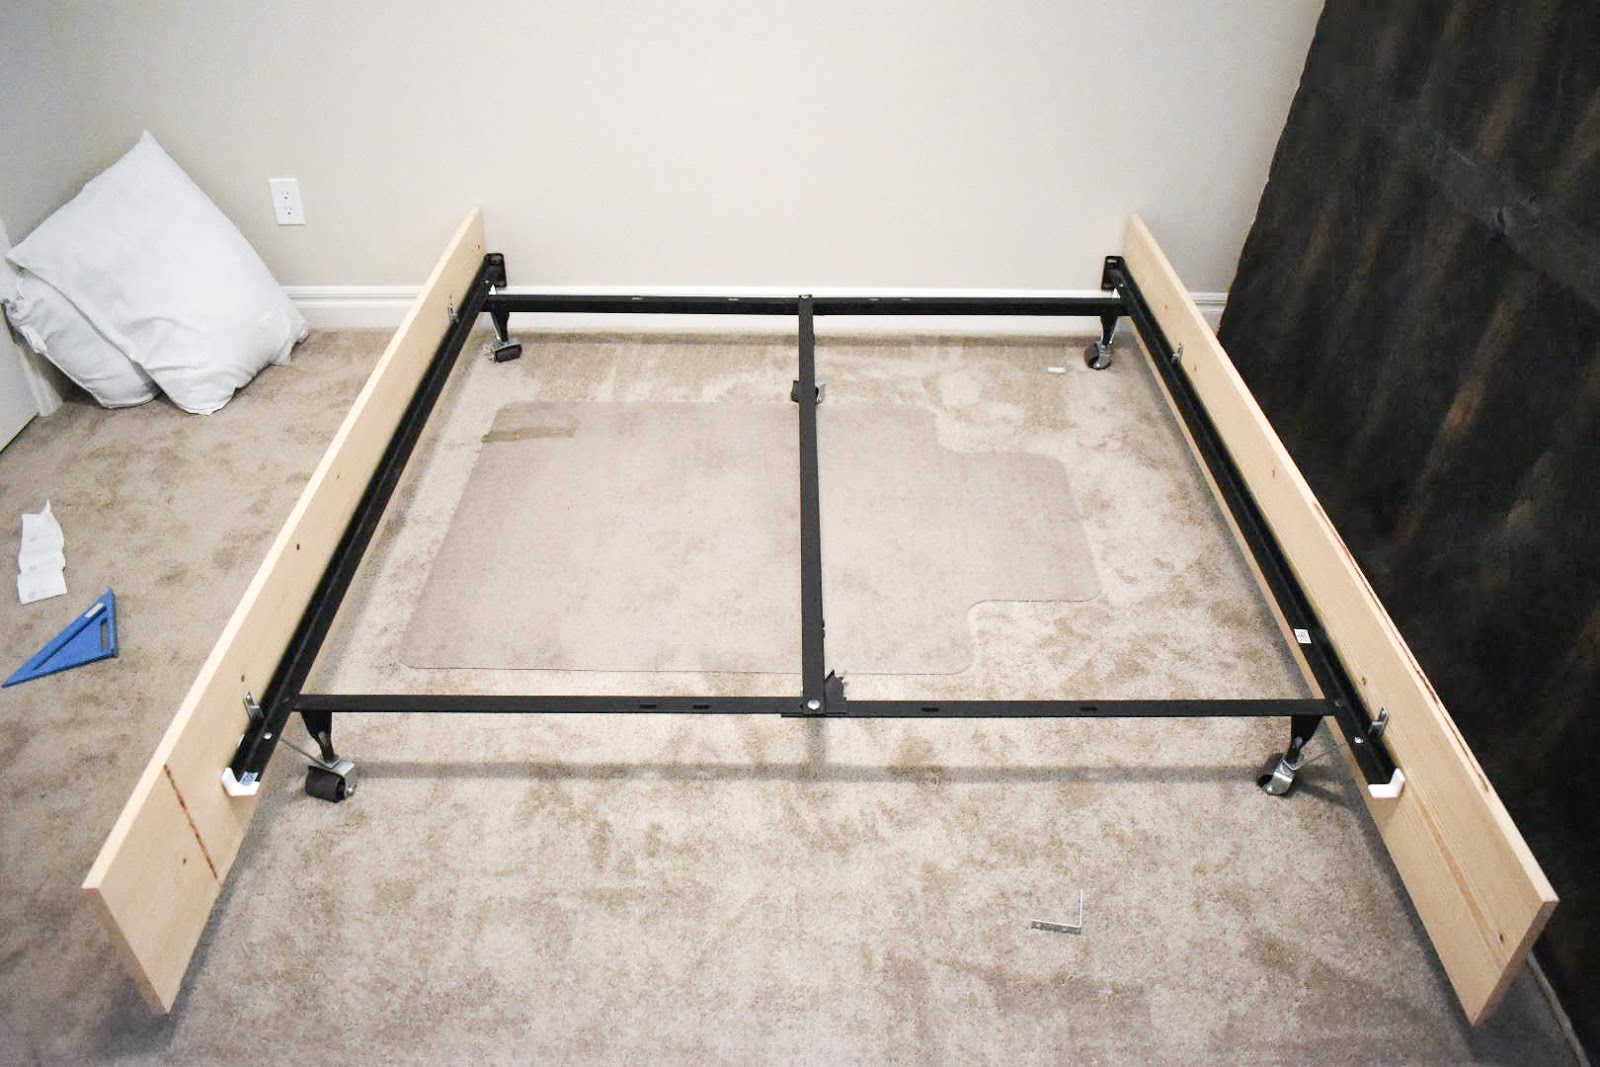
Step 5: Install the bed frame headboard and footboard brackets
If you have a headboard and/or footboard that you’d like to attach to your metal bed frame, this step will guide you through the process. Installing the brackets will allow you to secure the headboard and footboard, adding style and completing the overall look of your bed frame. Follow these steps:
- Identify the brackets: Locate the headboard and footboard brackets included with your bed frame. They may be separate pieces or integrated into the side rails.
- Position the brackets: Align the headboard brackets with the holes or slots on the headboard. Attach them using the provided screws or bolts. Repeat the same process for the footboard brackets.
- Secure the brackets: Ensure that the brackets are tightly and securely fastened to the headboard and footboard. Check for any excessive movement or wobbling.
- Attach the headboard and footboard: With the brackets securely in place, align the headboard and footboard with the brackets and slide them into position. Follow any additional instructions provided by the manufacturer to secure the headboard and footboard.
Installing the headboard and footboard brackets not only enhances the visual appeal of your bed frame but also provides stability and prevents the headboard and footboard from shifting or separating. Once you’ve successfully installed the brackets, you can move on to the next step: adjusting the bed frame height (if adjustable).
Step 6: Adjust the bed frame height (if adjustable)
If your metal bed frame has an adjustable height feature, this step will guide you through the process of adjusting it to your desired height. Adjustable bed frames offer the flexibility to accommodate different mattress heights or personal preferences. Here’s how to adjust the bed frame height:
- Locate the height adjustment mechanism: Examine your bed frame to identify the height adjustment mechanism. It may consist of multiple holes or slots along the side rails.
- Determine the desired height: Consider your mattress height and personal preference for the bed frame height. Some people prefer a lower profile, while others prefer a taller bed.
- Select the appropriate height setting: Depending on your bed frame design, choose the hole or slot that corresponds to your desired height. Align the side rails with the selected holes or slots.
- Secure the side rails: Using the provided screws or bolts, fasten the side rails to the bed frame structure at the chosen height setting. Ensure a secure and stable attachment.
- Test the stability: Verify the stability and durability of the adjusted bed frame height by giving it a gentle shake. Ensure there is no excessive movement or wobbling.
Adjusting the bed frame height allows you to customize your bed according to your needs and preferences. Whether you want a higher bed for easy entry and exit or a lower profile for a minimalist look, the adjustable height feature provides versatility. Once you have adjusted the bed frame height, proceed to the next step: securing the bed frame legs.
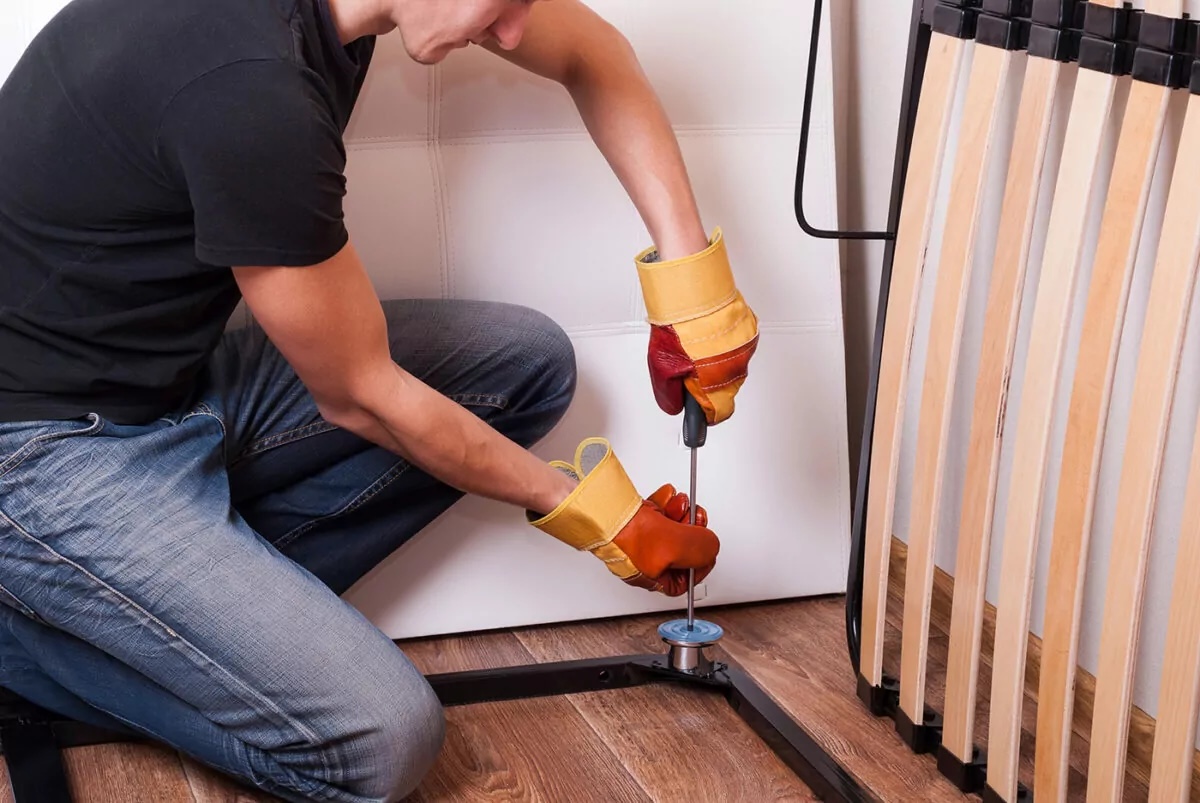
Step 7: Secure the bed frame legs
In this step, you will secure the legs of your metal bed frame. Properly securing the legs ensures the stability and support of the bed frame. Follow these steps to securely attach the legs:
- Identify the bed frame legs: Locate the legs included with your bed frame. They are usually separate pieces that attach to the corners of the side rails.
- Position the legs: Place each leg at the designated corner of the side rails. Ensure that they are aligned with the pre-drilled holes on the side rails.
- Attach the legs: Using the provided screws or bolts, fasten each leg to the side rails. Make sure to tighten the screws or bolts securely but avoid over-tightening to prevent damage.
- Double-check the stability: Once all the legs are attached, test the stability of the bed frame. Give it a gentle shake and ensure that it remains steady and balanced.
Securing the bed frame legs is crucial for maintaining stability and preventing any wobbling or tilting of the bed. Ensure that the legs are firmly attached to the side rails to provide a sturdy and durable foundation for your mattress. With the bed frame legs securely in place, you’re almost done with the assembly process.
Step 8: Test the stability and durability of the assembled bed frame
Now that you’ve completed the assembly of your metal bed frame, it’s important to thoroughly test its stability and durability. This final step will ensure that your bed frame is properly constructed and ready to support your mattress for a comfortable night’s sleep. Follow these guidelines to test the stability and durability of your assembled bed frame:
- Check for any loose connections: Inspect all screws, bolts, and fasteners to ensure they are securely tightened. Look for any signs of looseness or wobbling, and tighten any loose connections if necessary.
- Apply gentle pressure: Place your hands on different areas of the bed frame, including the side rails, headboard, and footboard. Apply gentle pressure to test the stability and rigidity of the frame. It should feel solid and not give or sway.
- Test weight capacity: If you have the opportunity, test the weight capacity of your bed frame by gradually adding weight to it. Remember to follow the manufacturer’s weight guidelines to avoid any damage or potential safety risks.
- Get on the bed: Carefully get on the bed and move around to assess its stability. Pay attention to any excessive creaking sounds or movement that may indicate a need for further adjustment or reinforcement.
- Recheck all connections: Once you’ve conducted the stability and durability tests, take a final look at all the connections. Ensure that everything is still securely fastened and tightened as needed.
By thoroughly testing the stability and durability of your assembled bed frame, you can have confidence in its ability to provide a safe and supportive sleep surface. If you experience any concerns or issues during the testing process, consult the manufacturer’s instructions or contact customer support for assistance.
Congratulations! You’ve successfully assembled your metal bed frame and completed all the necessary steps to ensure its stability and durability. Now you can enjoy a comfortable and well-supported sleep on your newly assembled bed frame.
Remember to refer back to the manufacturer’s instructions for any specific care or maintenance recommendations for your bed frame to keep it in optimal condition for years to come.
Read more: How To Assemble A Bed Frame With Headboard
Conclusion
Congratulations on successfully assembling your metal bed frame! By following the step-by-step guide outlined in this article, you have created a sturdy and reliable foundation for your mattress. Whether you’ve just purchased a new bed frame or reassembled an existing one, this process ensures that your bed frame is secure and ready to provide a comfortable sleep surface.
Throughout the assembly process, you learned how to gather the necessary tools and materials, unpack and organize the bed frame components, connect the side rails, attach the center support beam (if applicable), install the headboard and footboard brackets, adjust the bed frame height (if adjustable), secure the bed frame legs, and test the stability and durability of the assembled bed frame.
It’s essential to pay attention to the instructions provided by the manufacturer and exercise caution while handling the bed frame components. Taking the time to ensure each step is followed correctly will result in a well-assembled bed frame that can withstand daily use and provide you with a comfortable night’s sleep.
Remember to periodically check the bed frame for any loose connections and make adjustments as needed. This will help maintain the stability and durability of your bed frame over time.
Now that you have a properly assembled metal bed frame, it’s time to complete your sleep setup with a comfortable mattress, pillows, and bedding. Enjoy the benefits of a sturdy and reliable bed frame that will enhance your sleep experience and provide a stylish addition to your bedroom decor.
Thank you for following this guide, and we hope you enjoy many nights of restful sleep on your newly assembled metal bed frame!
Frequently Asked Questions about How To Assemble A Metal Bed Frame
Was this page helpful?
At Storables.com, we guarantee accurate and reliable information. Our content, validated by Expert Board Contributors, is crafted following stringent Editorial Policies. We're committed to providing you with well-researched, expert-backed insights for all your informational needs.


0 thoughts on “How To Assemble A Metal Bed Frame”