Home>Furniture>Bedroom Furniture>How To Disassemble A Zinus Bed Frame
Bedroom Furniture
How To Disassemble A Zinus Bed Frame
Modified: September 1, 2024
Learn how to easily disassemble your Zinus bed frame with step-by-step instructions. Transform your bedroom with this versatile piece of bedroom furniture.
(Many of the links in this article redirect to a specific reviewed product. Your purchase of these products through affiliate links helps to generate commission for Storables.com, at no extra cost. Learn more)
Introduction
Adding a new piece of furniture to your bedroom can instantly transform the space and create a cozy and stylish environment. However, there may come a time when you need to disassemble your bed frame, whether it’s for moving, storage, or simply to give your room a fresh new look. Disassembling a Zinus bed frame may seem like a daunting task at first, but with the right tools and some handy tips, it can be a straightforward process.
Before you begin, it’s important to gather all the necessary tools and materials to ensure a smooth disassembly. Having everything at hand will save you time and frustration. Some of the common tools you’ll need include a screwdriver, an Allen wrench, pliers, and a rubber mallet. Additionally, having protective gloves and goggles can help safeguard you during the process.
Now that you’re prepared, let’s dive into the step-by-step guide on how to disassemble a Zinus bed frame.
Key Takeaways:
- Disassembling a Zinus bed frame is a manageable task with the right tools and step-by-step approach. Remember to gather all necessary tools and materials before starting the process for a smooth and efficient disassembly.
- Safely pack and store the disassembled parts of your Zinus bed frame to ensure they remain organized and protected until you’re ready to reassemble. Labeling and proper storage will make the reassembly process seamless.
Read more: How To Disassemble A Bed Frame
Tools and Materials Needed
Before you embark on disassembling your Zinus bed frame, it’s important to gather the necessary tools and materials. Having these items on hand will make the process smoother and more efficient. Here are the tools and materials you’ll need:
- Screwdriver: This is essential for removing screws and other fasteners. Depending on the specific bed frame model, you may need a Phillips head or flathead screwdriver.
- Allen wrench: Many Zinus bed frames use Allen screws or bolts, so having the correct size Allen wrench is crucial for loosening and removing them.
- Pliers: Pliers can come in handy for gripping and manipulating small components, such as nuts and bolts.
- Rubber mallet: In some cases, the bed frame pieces may be connected by tight-fitting joints. A rubber mallet can be used to gently tap and loosen these connections for easier disassembly.
- Protective gloves: It’s always a good idea to wear gloves to protect your hands from any sharp edges or splinters during the disassembly process.
- Protective goggles: To further protect your eyes, wear goggles when disassembling your bed frame. This can prevent any dust or debris from getting into your eyes and causing irritation.
By gathering these tools and materials beforehand, you’ll be well-prepared to tackle the disassembly process. Keep them close by as you work through the steps to ensure a smooth and efficient dismantling of your Zinus bed frame.
Step 1: Remove the Mattress and Bedding
Before you begin disassembling your Zinus bed frame, it’s important to remove the mattress and any bedding that may be on top of it. Start by removing the pillows, sheets, blankets, and any other items that are on the bed. Once the bedding is clear, carefully lift the mattress off the bed frame and set it aside in a safe location.
If your mattress is on the heavier side or if you have a partner to help you, it’s recommended to have an extra set of hands for this step to prevent any strain or injury. Make sure to lift with your legs rather than your back to avoid any backache or muscle strain.
With the mattress and bedding safely removed, you’ll have clear access to the bed frame and can proceed to the next step of the disassembly process.
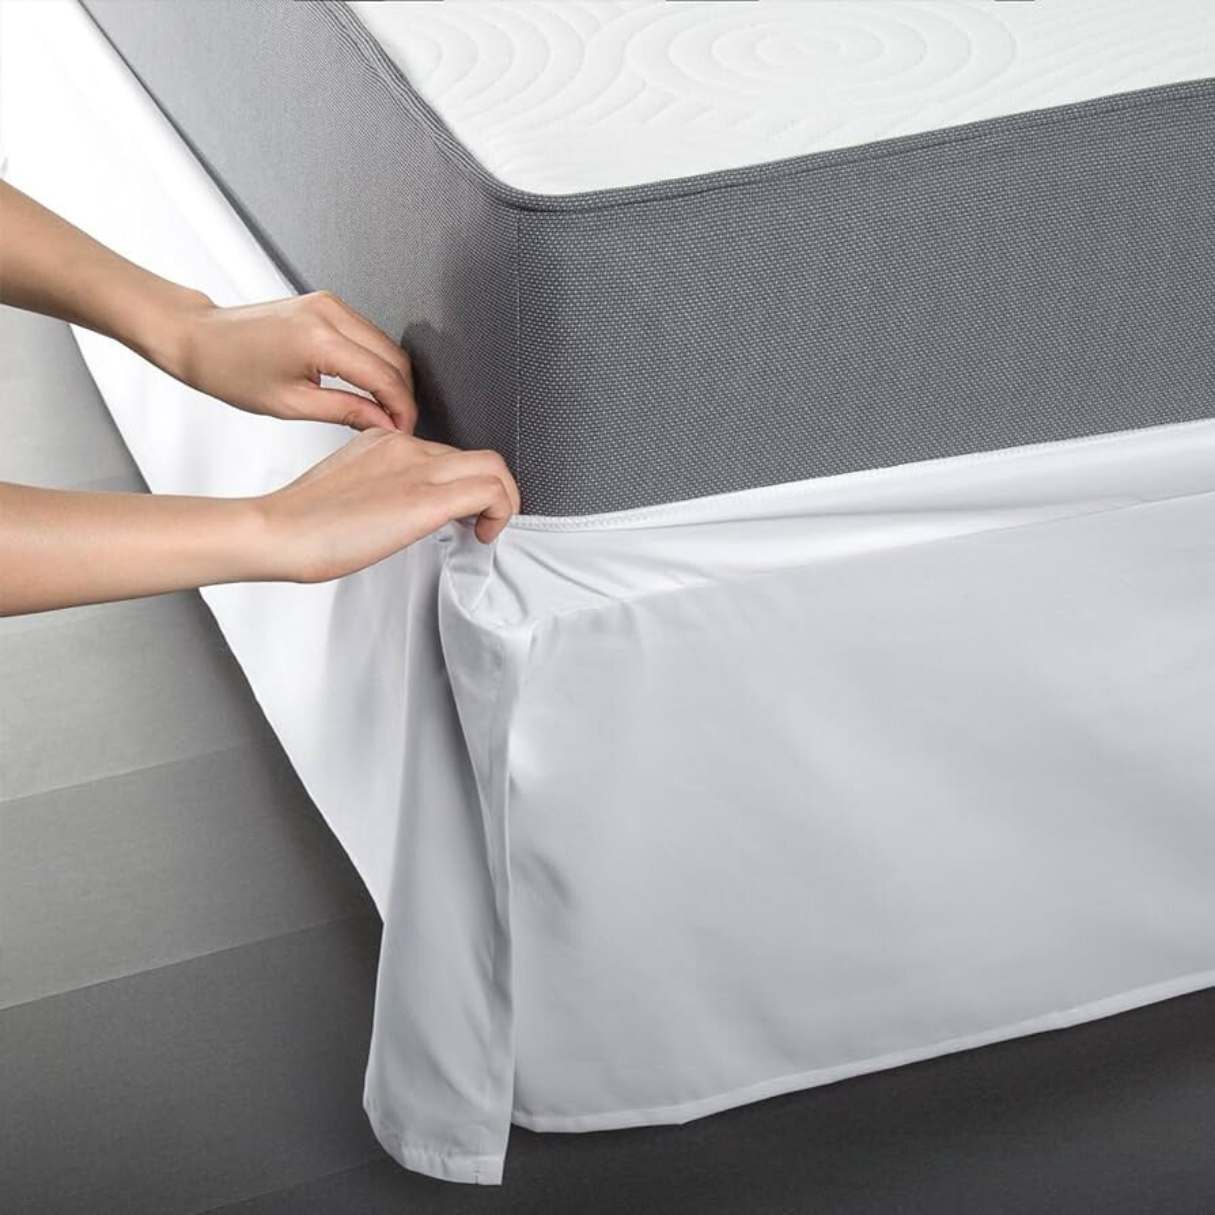
However, if you’re planning to move or store the mattress as well, consider covering it with a protective mattress cover or wrapping it in plastic to keep it dust-free and protected from any potential damage.
Once you have safely removed the mattress and bedding, you’re ready to move on to the next step.
Step 2: Unscrew the Legs or Casters
Now that the mattress and bedding are out of the way, it’s time to focus on removing the legs or casters of your Zinus bed frame. The process may vary depending on the specific model of your bed frame, but the general steps remain the same.
Start by inspecting the legs or casters of the bed frame. Look for any screws or bolts that are holding them in place. Using the appropriate tool, such as a screwdriver or Allen wrench, carefully unscrew and remove these fasteners. It’s important to keep track of the screws or bolts and set them aside in a safe place, so they don’t get misplaced during the disassembly process.
If your bed frame has casters, check if they are attached with screws or if they simply slide into sockets. In the case of screws, unscrew them like you would with the legs. If the casters slide into sockets, carefully lift and remove each caster from its socket. If they’re tightly fitted, you may need to use a rubber mallet to gently tap them out.
Once all the legs or casters are removed, set them aside in a designated container or bag. This will help keep them organized and easily accessible when you need to reassemble the bed frame in the future.
By unscrewing and removing the legs or casters, you’ve successfully taken the first steps in disassembling your Zinus bed frame. Now it’s time to move on to the next step.
Step 3: Take Apart the Headboard and Footboard
With the legs or casters removed, it’s time to disassemble the headboard and footboard of your Zinus bed frame. This step may require a bit more effort and attention, but with the right approach, it can be easily accomplished.
Start by closely examining the connections between the headboard and footboard and the main frame of the bed. Look for any screws, bolts, or other fasteners that are holding the pieces together. Using the appropriate tool, such as a screwdriver or Allen wrench, carefully unscrew and remove these fasteners.
As you remove the fasteners, make sure to keep track of them and set them aside in a safe place. It’s essential to keep these small parts organized to avoid losing them during the disassembly process.
Once the fasteners are removed, you can start to separate the headboard and the footboard from the main frame. Gently lift and detach each piece from the frame, taking care not to damage any surrounding components.
In some cases, the headboard or footboard may be attached to the frame with hooks or brackets. If this is the case, carefully lift the pieces while simultaneously detaching them from the hooks or brackets. Avoid twisting or forcing the pieces, as this can lead to damage.
Once the headboard and footboard are detached, set them aside in a safe and secure location. It’s a good idea to wrap them in a protective cover or blanket to prevent any scratches or damage during storage or transportation.
By taking apart the headboard and footboard, you’ve made significant progress in disassembling your Zinus bed frame. However, there are still a few more steps to go before completing the process.
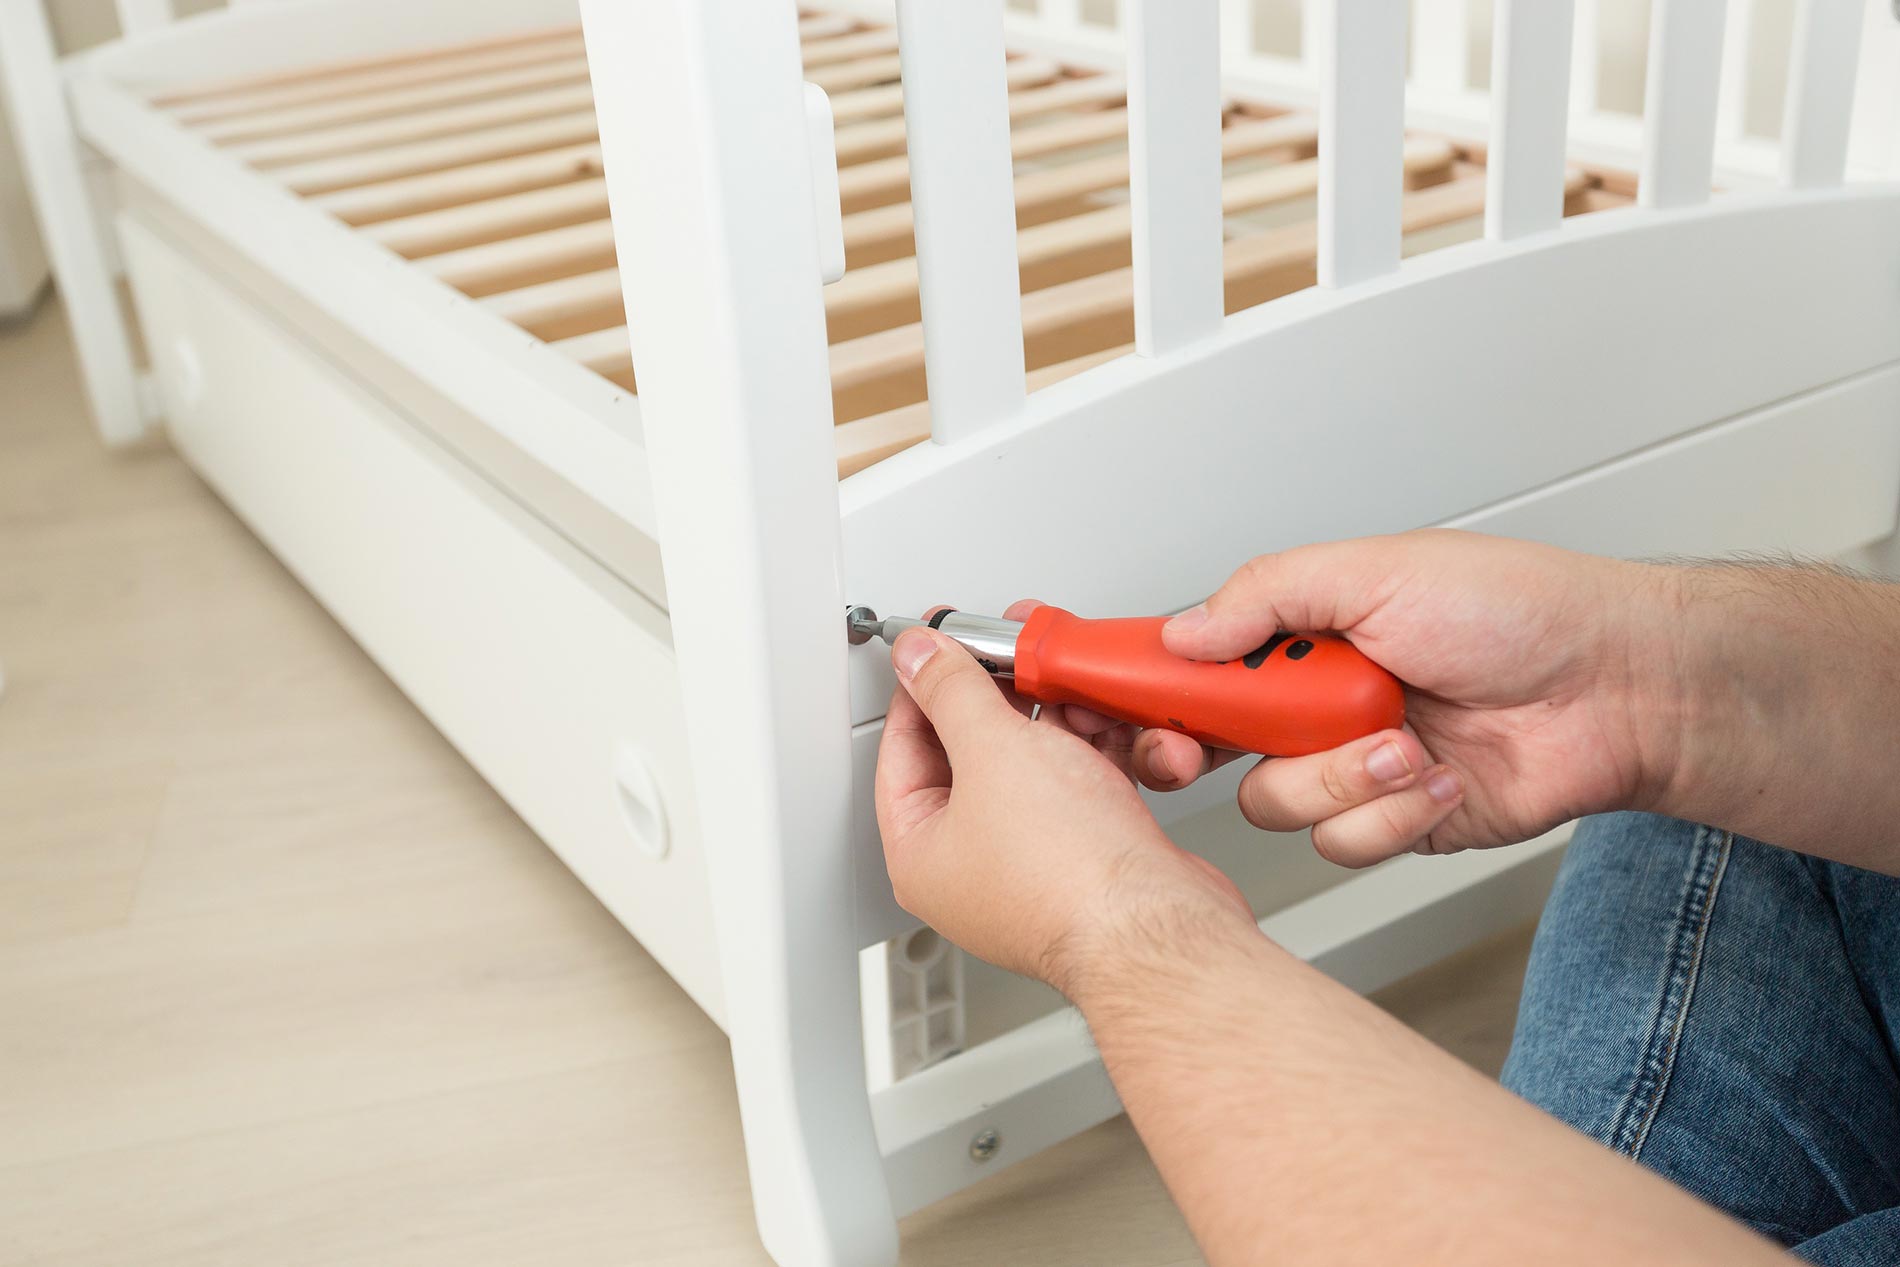
When disassembling a Zinus bed frame, start by removing the mattress and any bedding. Then, use a screwdriver to loosen and remove the bolts and screws holding the frame together. Keep track of the hardware to make reassembly easier.
Read more: How To Disassemble An Adjustable Bed Frame
Step 4: Disassemble the Side Rails
Now that the headboard and footboard are taken apart, it’s time to focus on disassembling the side rails of your Zinus bed frame. The side rails are the horizontal pieces that connect the headboard and footboard together. Follow these steps to safely remove them:
- Start by examining the connection points between the side rails and the headboard/footboard. Look for any screws or bolts that are securing the side rails in place.
- Using the appropriate tool, such as a screwdriver or Allen wrench, carefully unscrew and remove these fasteners. Be sure to keep track of the screws or bolts and set them aside in a safe place.
- Once the fasteners are removed, gently lift and slide each side rail away from the headboard and footboard.
- Some Zinus bed frames may have side rails that are connected with hooks or brackets. If this is the case, carefully lift and detach the side rails from these hooks or brackets.
- As you remove each side rail, be mindful of any additional support components or brackets that may be attached to them. Remove these components as well, if necessary.
Set the disassembled side rails and any accompanying components aside in a secure location. You can wrap them in a protective cover or blanket to prevent any damage during storage or transportation.
With the side rails successfully disassembled, you’re nearing the end of the bed frame disassembly process. However, there is still one more crucial step to complete.
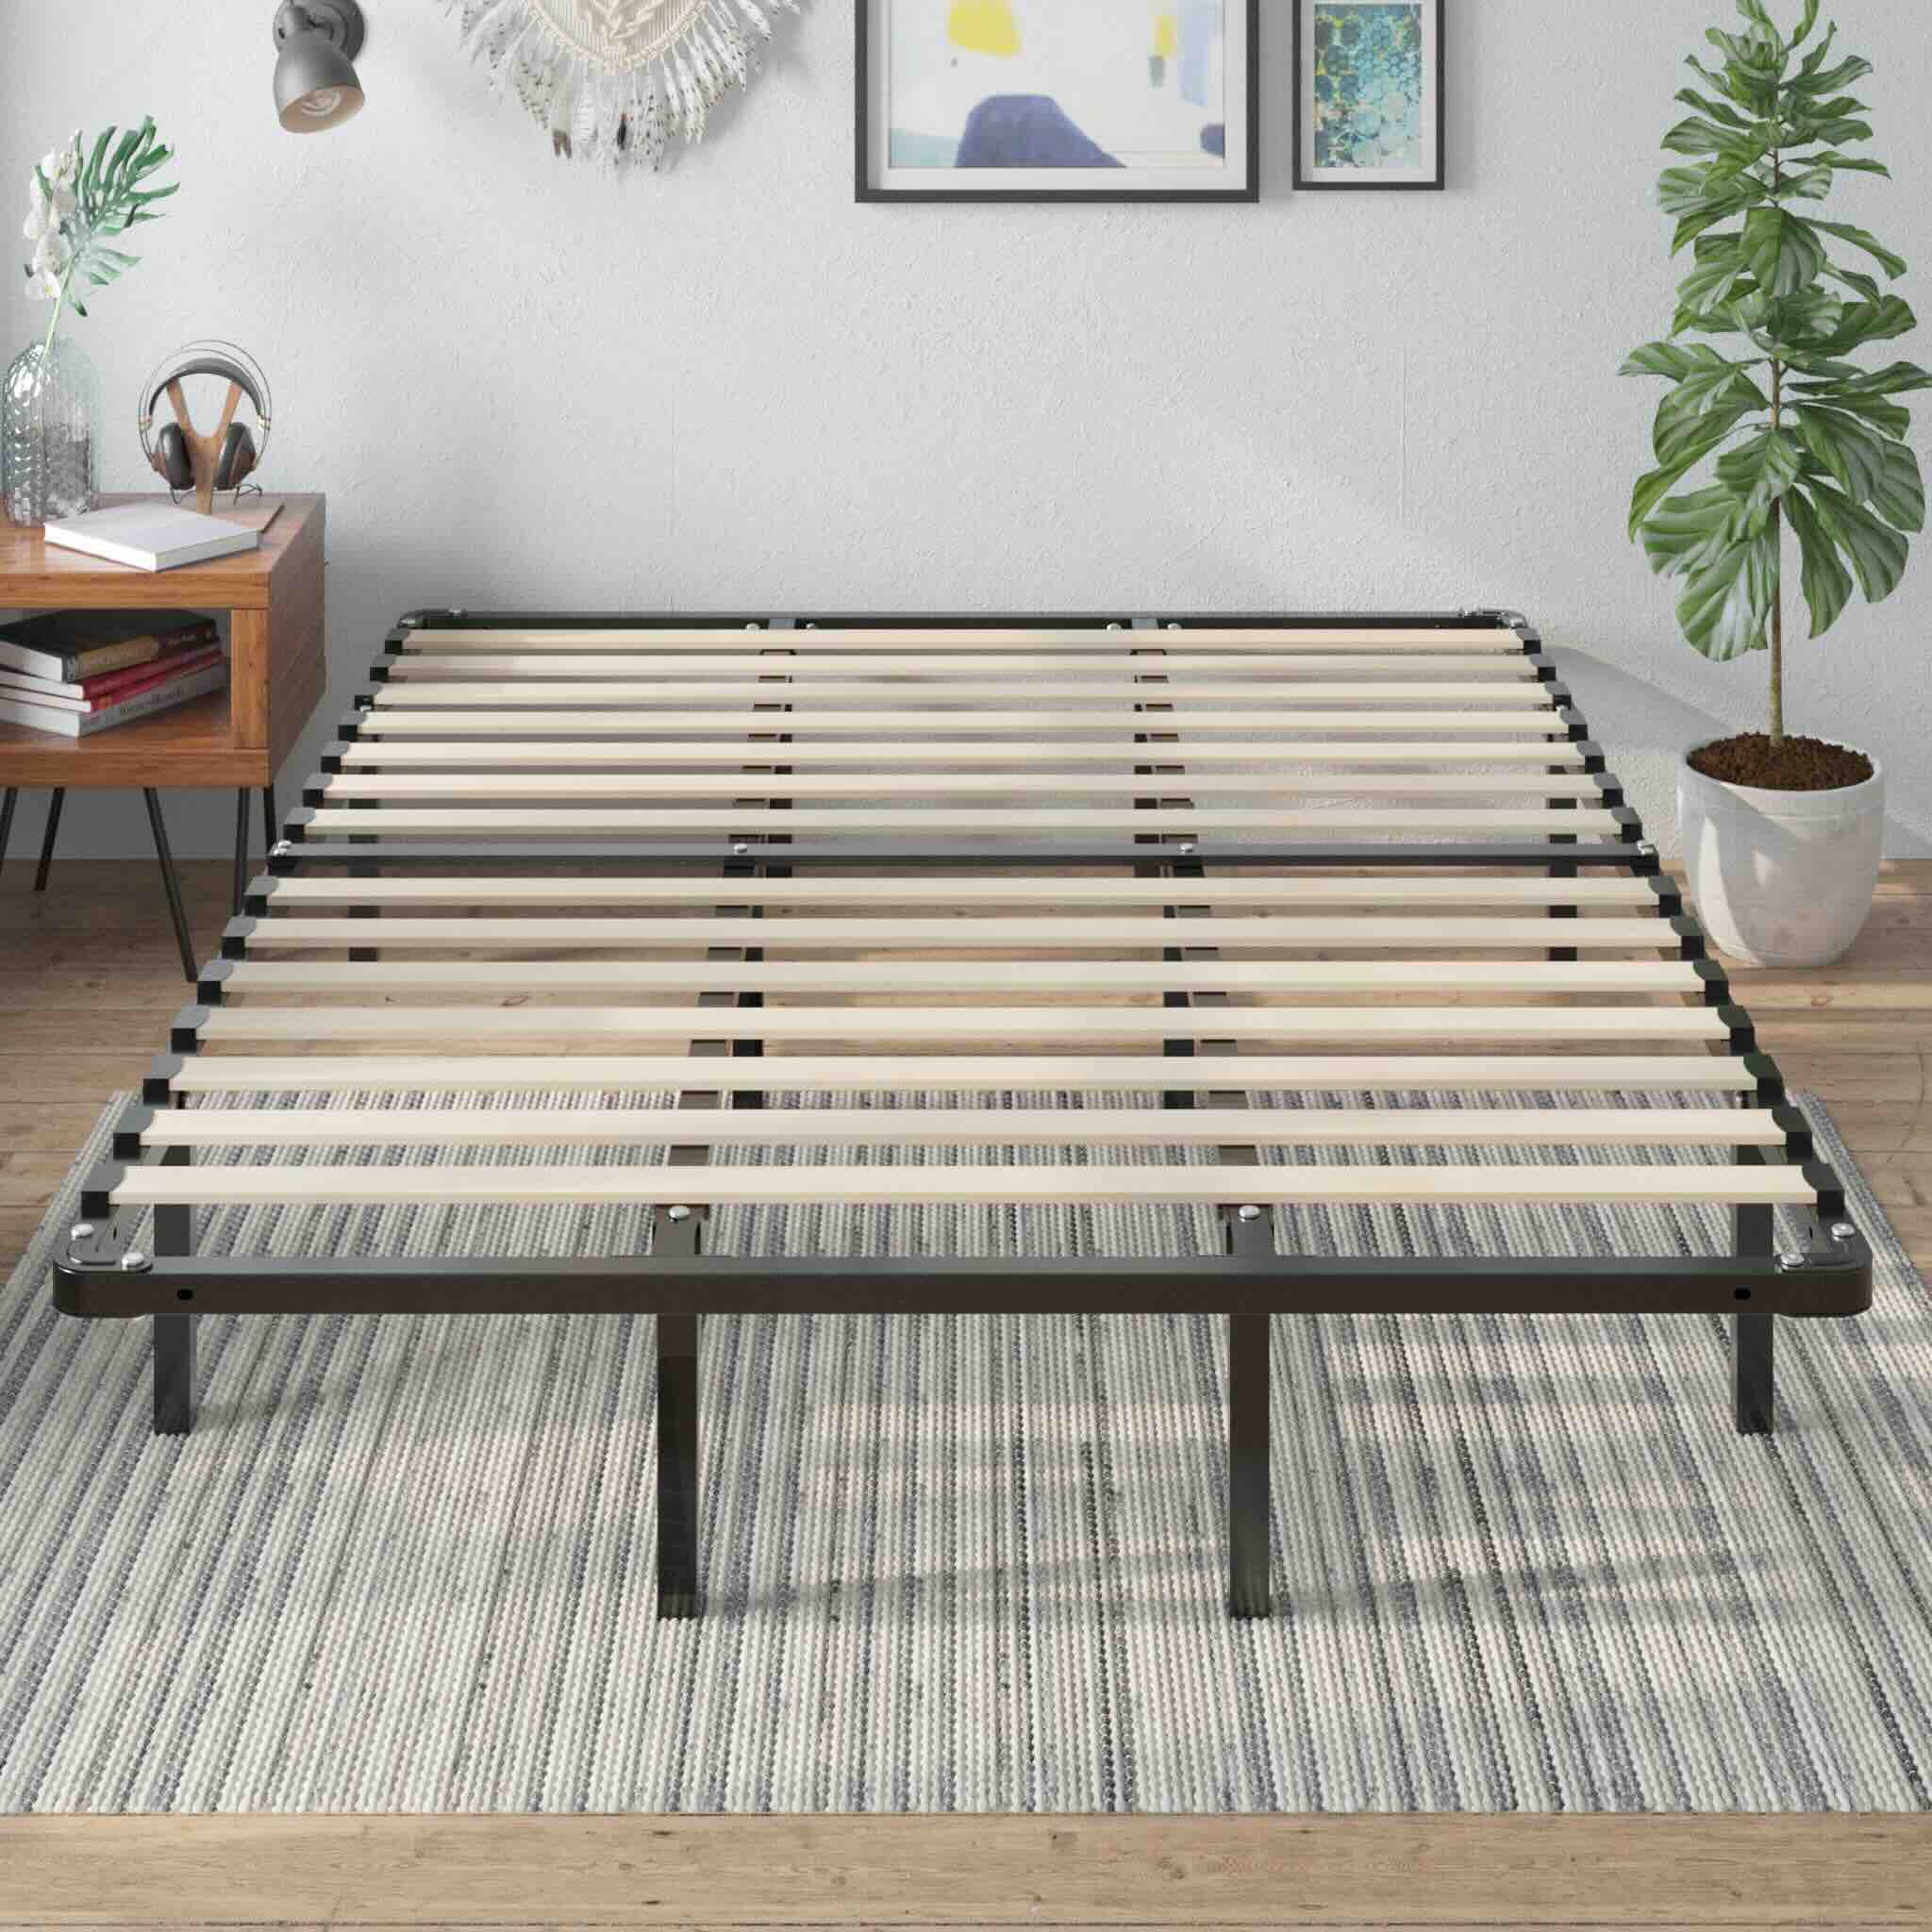
Step 5: Remove the Slats or Platform
In the final step of disassembling your Zinus bed frame, you’ll need to remove the slats or platform that provide support for the mattress. The method for doing this will depend on the specific design of your bed frame. Follow these steps to safely remove the slats or platform:
- Inspect the slats or platform to determine how they are attached to the bed frame. They may be secured with screws, bolts, or hooks.
- Using the appropriate tool, such as a screwdriver or Allen wrench, carefully unscrew or detach any fasteners that are holding the slats or platform in place. Keep track of the screws or bolts and set them aside in a safe location.
- Once the fasteners are removed, you can start removing the slats or platform one by one. If the slats are connected to each other, lift and slide them out of their supports. If the bed frame has a platform, carefully lift and remove it from the frame.
- As you remove each slat or the platform, be mindful of their size and weight to avoid any accidents or injuries. Enlist the help of a partner if necessary, especially if the slats or platform are heavy or awkward to handle.
- Once the slats or platform have been removed, set them aside in a safe and secure location. You may choose to stack them neatly or store them in a designated container to keep them organized.
With the slats or platform successfully removed, you have completed the disassembly of your Zinus bed frame. Congratulations!
Now that all the components have been disassembled, it’s time to move on to the final step of the process.
Step 6: Pack and Store the Disassembled Parts
After successfully disassembling your Zinus bed frame, it’s important to properly pack and store the disassembled parts. This will ensure that all the components remain organized and protected until you’re ready to reassemble the bed frame in the future. Follow these steps to pack and store the disassembled parts:
- Prepare a designated storage area or container where you can keep the disassembled parts. This can be a large plastic bin, a sturdy box, or any other suitable storage solution.
- Arrange the components in an orderly manner to avoid any confusion when you need to reassemble the bed frame. Stack the legs or casters together, and group the headboard, footboard, side rails, and slats or platform accordingly.
- If there are smaller components, such as screws, bolts, or other fasteners, place them in a sealable bag or small container. Make sure to label the bag or container and attach it securely to the larger parts it belongs to. This will prevent any loss or confusion.
- If possible, wrap each disassembled component in a protective cover or blanket to prevent any scratches or damage during storage or transportation. This is particularly important for the headboard and footboard, which may have more delicate finishes.
- Once all the components are packed and secured, carefully place them into the designated storage area or container. Make sure that the container is sealed properly to keep out dust and pests.
- Label the storage container with the name of the bed frame model or any other relevant information. This will make it easier to locate the parts when you need them in the future.
Store the packed components in a cool, dry, and secure location. Avoid placing heavy items on top of the container to prevent any damage to the disassembled parts.
By properly packing and storing the disassembled parts, you’ll be able to keep them organized and in good condition until you’re ready to reassemble your Zinus bed frame.
Congratulations! You have now successfully disassembled your Zinus bed frame and stored the components for future use.
Conclusion
Disassembling a Zinus bed frame may seem like a daunting task, but with the right tools, materials, and a step-by-step guide, it can be a straightforward process. By following the six steps outlined in this article, you can safely and effectively disassemble your bed frame, whether it’s for moving, storage, or a bedroom makeover.
Remember to start by removing the mattress and bedding, then unscrew the legs or casters. Next, take apart the headboard and footboard, disassemble the side rails, remove the slats or platform, and finally, pack and store the disassembled parts. These steps will ensure that all the components are safely stored and organized until you’re ready to reassemble your Zinus bed frame.
Throughout the disassembly process, it’s important to take care of yourself and protect your hands and eyes with gloves and goggles. Lift with your legs, not your back, to avoid any strain or injury. Keep track of all the screws, bolts, and fasteners, setting them aside in a safe place to prevent loss.
When the time comes to reassemble your bed frame, refer back to the labeled storage container and use the opposite order of the disassembly steps. With a little patience and attention to detail, you’ll have your Zinus bed frame back together in no time.
Remember, if you’re unsure about any step of the disassembly or reassembly process, it’s always a good idea to consult the manufacturer’s instructions or reach out to customer support for guidance.
By mastering the art of disassembling your Zinus bed frame, you’ll have the flexibility to move, store, or update your bedroom with ease. Enjoy the process and make the most of your stylish and versatile bed frame!
Now that you've mastered dismantling your Zinus bed frame, consider upgrading to the latest models. Our roundup, "10 Superior Zinus Bed Frame for 2024," offers insights on the newest designs that blend style with comfort. Whether you're eyeing a minimalist look or seeking extra storage options, this guide reveals perfect choices for refreshing your sleeping space. Don't miss out on finding the ideal Zinus bed frame to match your bedroom's vibe.
Frequently Asked Questions about How To Disassemble A Zinus Bed Frame
Was this page helpful?
At Storables.com, we guarantee accurate and reliable information. Our content, validated by Expert Board Contributors, is crafted following stringent Editorial Policies. We're committed to providing you with well-researched, expert-backed insights for all your informational needs.


0 thoughts on “How To Disassemble A Zinus Bed Frame”