Home>Furniture>Bedroom Furniture>How To Build A Bed Frame
Bedroom Furniture
How To Build A Bed Frame
Modified: August 27, 2024
Learn how to build a sturdy and stylish bed frame for your bedroom with our step-by-step guide. Transform your space with beautiful bedroom furniture.
(Many of the links in this article redirect to a specific reviewed product. Your purchase of these products through affiliate links helps to generate commission for Storables.com, at no extra cost. Learn more)
Introduction
When it comes to creating your perfect bedroom oasis, a sturdy and beautifully-designed bed frame is the foundation of your comfort and style. Building your own bed frame can be a rewarding and cost-effective project. Not only will it allow you to customize the design to suit your taste, but it also adds a personal touch to your sleeping space.
In this article, we will guide you through the step-by-step process of building a bed frame from scratch. We will provide a comprehensive list of the supplies needed, as well as detailed instructions on how to measure, cut, assemble, and finish your bed frame. So roll up your sleeves and get ready to embark on a DIY adventure that will leave you with a sense of accomplishment and a beautiful bed to rest your weary head!
Key Takeaways:
- Building your own bed frame is a rewarding DIY project that allows for personalization and cost savings. Follow the step-by-step process to create a durable and stylish foundation for a restful night’s sleep.
- Customizing your bed frame to suit your style and preferences adds a unique touch to your bedroom oasis. Enjoy the sense of accomplishment and comfort of your handcrafted masterpiece.
Read more: How To Build A Tall Bed Frame
Supplies Needed
Before you begin building your own bed frame, it’s important to gather all the necessary supplies. Here is a list of the items you’ll need:
- 2×4 lumber: This will be used to create the frame and support structure of the bed.
- Wood screws: Make sure to choose screws that are long enough to securely attach the pieces of wood together.
- Power drill: You’ll need a drill to create pilot holes for the screws and to secure them.
- Measuring tape: Accurate measurements are crucial to ensure that your bed frame fits properly.
- Saw: You’ll need a saw to cut the lumber to the appropriate lengths.
- Sandpaper or sander: This will be used to smooth out the rough edges and surfaces of the wood.
- Wood stain or paint: If you want to add a finish to your bed frame, choose a stain or paint that complements your bedroom decor.
- Paintbrush or rag: A brush or rag will be needed to apply the stain or paint.
- Level: This tool will help you ensure that your bed frame is level and balanced.
It’s always a good idea to double-check your supply list before you begin the project. Gather everything ahead of time to avoid any interruptions or delays during the building process.
Step 1: Measure and Plan
The first step in building a bed frame is to measure your mattress size and plan the dimensions of your frame accordingly. This will ensure a perfect fit for your mattress and allow for smooth assembly.
Start by measuring the length and width of your mattress. Take into account any additional space you’d like to add, such as a small overhang or a wider frame for aesthetic purposes. Keep in mind that the dimensions of your frame will determine the overall size of your bed, so it’s essential to be precise in your measurements.
Once you have your measurements, decide on the height of your bed frame. Consider your comfort and convenience when choosing a height. Some prefer a low-profile bed for a minimalist look, while others prefer a taller frame for ease of getting in and out of bed.
With your measurements and desired height in mind, draft a plan for your bed frame. Sketch out the design and make note of the number of pieces of lumber you’ll need, their lengths, and any additional features you want to incorporate, such as a headboard or footboard.
Take this opportunity to think about the overall style you want in your bed frame. Whether it’s a sleek and modern design or a rustic farmhouse look, consider how the frame will complement the existing decor of your bedroom.
Once you have a clear plan and measurements in place, you’re ready to move on to the next step: cutting the wood.
Step 2: Cut the Wood
Now that you have your plan and measurements, it’s time to start cutting the wood for your bed frame. Use a saw to accurately cut the pieces according to your design.
Start with the main frame pieces, typically made from 2×4 lumber. Measure and mark the appropriate lengths for the headboard, footboard, and side rails. Use a square or a level to ensure your cuts are straight.
Next, cut the support pieces that will strengthen the frame and provide stability. These pieces are usually shorter in length and will be attached to the interior of the frame. Measure and cut the support pieces according to your plan.
Take your time with the cutting process, ensuring that each piece is cut to the correct length and size. Double-check your measurements along the way to avoid any errors that could affect the overall stability and functionality of the bed frame.
After you have completed cutting the wood, it’s a good idea to label each piece to make assembly easier. Use tape or a permanent marker to label the corresponding parts and indicate their position within the frame.
With all the wood pieces cut and labeled, you’re ready to move on to the next step: assembling the frame.
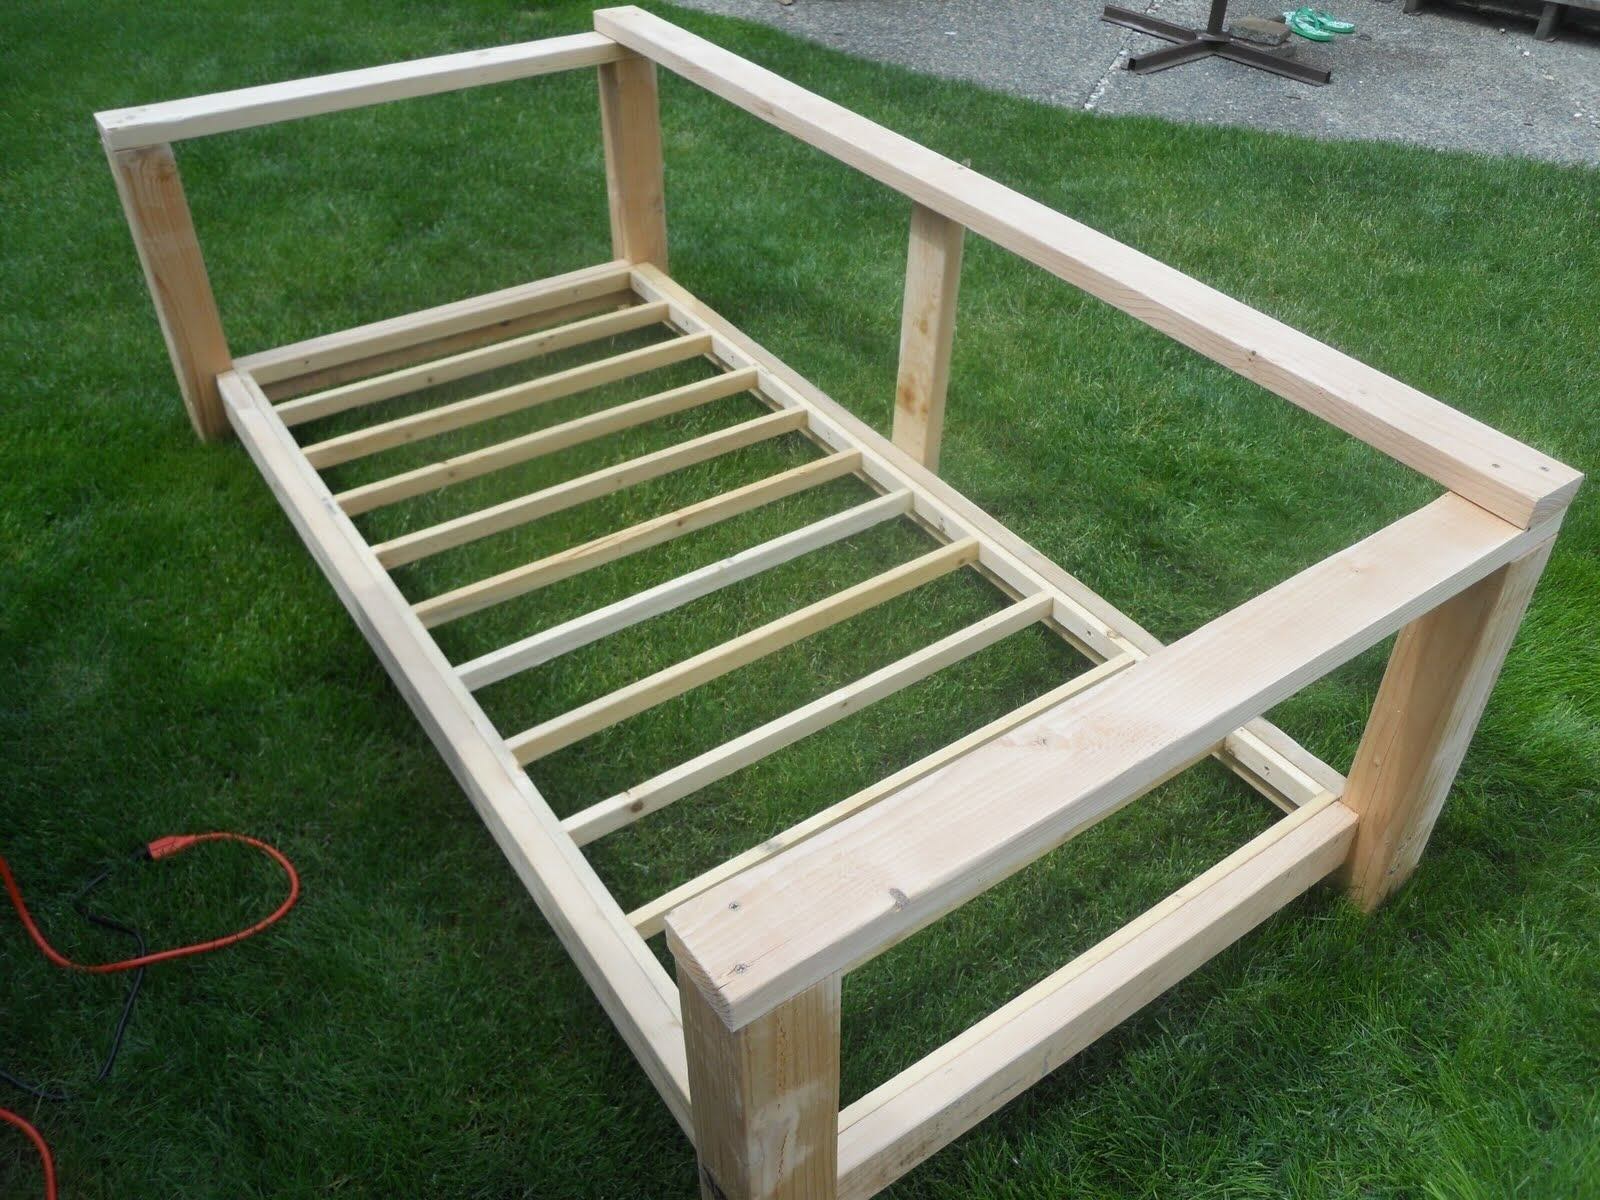
Step 3: Assemble the Frame
With your wood pieces cut to size, it’s time to start assembling the bed frame. This step is where all the pieces come together to form the structure of your frame.
Begin by laying out the main frame pieces on a flat surface, following your plan and design. Make sure the pieces are positioned correctly and align with your measurements.
Using wood screws, start attaching the pieces together. It’s helpful to have an extra pair of hands to hold the pieces in place while you secure them. Start with one corner of the frame and work your way around, attaching each joint securely.
As you assemble the frame, use a level to ensure everything is straight and aligned. This will ensure the stability and balance of the bed frame.
Once the main frame is assembled, move on to attaching the support pieces. These will strengthen the frame and prevent any sagging or movement of the mattress when it’s placed on top.
Position the support pieces inside the frame according to your plan. You can secure them using screws or brackets. Make sure they are evenly spaced and provide sufficient support throughout the frame.
Take your time during the assembly process, ensuring each piece is securely attached. Use a drill to create pilot holes for the screws, which will prevent the wood from splitting.
Once the frame is fully assembled, give it a gentle shake to ensure it feels sturdy and solid. If there is any wobbling or movement, reinforce the joints or tighten the screws as needed.
Congratulations! You’ve successfully assembled the frame of your DIY bed. Now it’s time to move on to the next step: attaching the legs.
When building a bed frame, make sure to measure and cut all pieces accurately to ensure a sturdy and level structure. Use quality materials and consider adding extra support in the center for larger mattresses.
Read more: How To Build A Pipe Bed Frame
Step 4: Attach the Legs
Attaching the legs to your bed frame is an important step as it provides the necessary support and stability. The legs will elevate the bed off the ground and ensure a secure foundation.
Start by determining the desired height of your bed frame. This will help you choose the appropriate length for your legs. Measure and mark the height on each corner of the frame.
Next, select the type of legs you want for your bed frame. You can choose pre-made legs from a hardware store or opt to create your own custom legs. Regardless of the type, ensure they are made from sturdy wood or metal to support the weight of the mattress and occupants.
Align the legs with the marked corners and use screws or brackets to attach them securely. Make sure the legs are straight and level. Use a level to double-check their alignment before tightening the screws.
If you have opted for custom-made legs, follow the design and instructions you have chosen to construct and attach them to the bed frame. This can be a fun opportunity to add a personal touch to your bed frame’s aesthetic.
Once you have attached all the legs, give your bed frame a gentle shake to ensure it feels stable and balanced. If there is any wobbling or instability, adjust the legs or reinforce the connections as necessary.
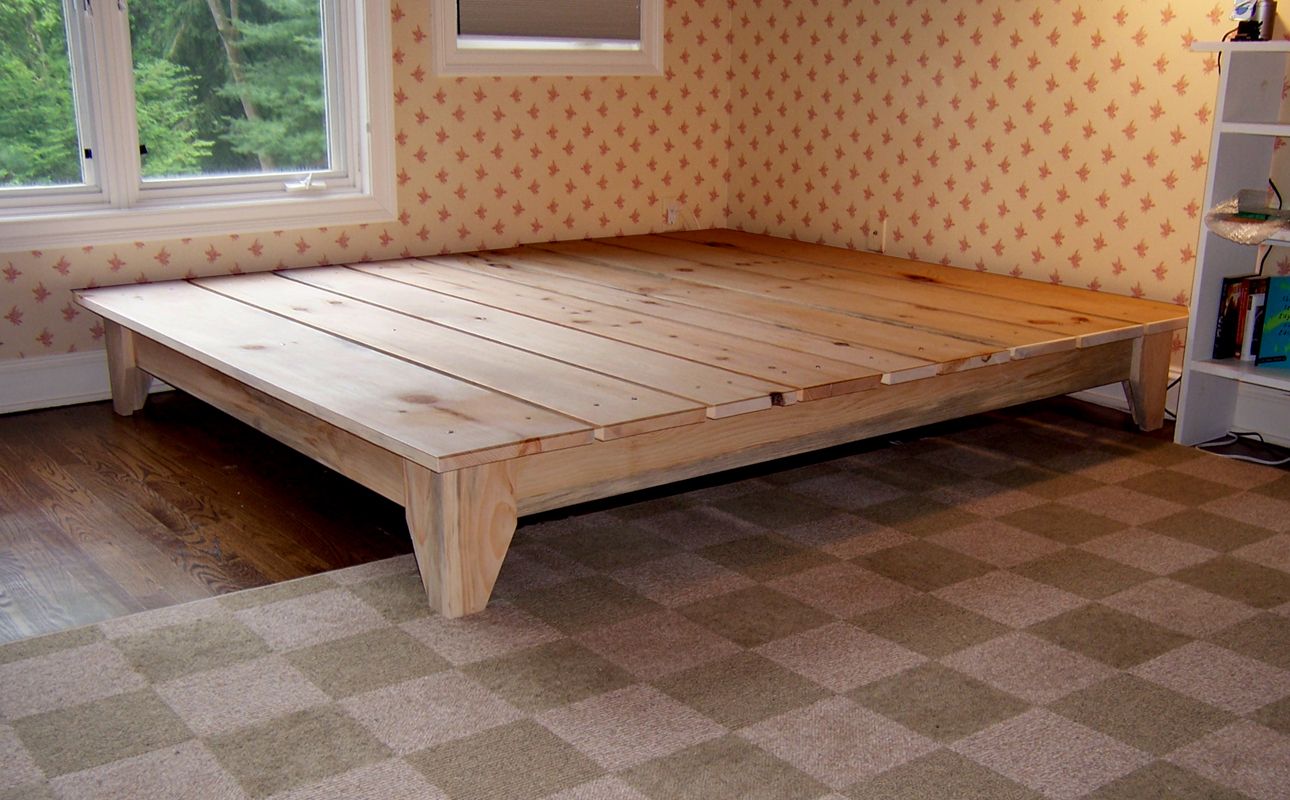
With the legs securely attached, you’re one step closer to completing your DIY bed frame. The next step is sanding and finishing to achieve a polished and smooth surface.
Step 5: Sand and Finish
Now that the structure of your bed frame is complete, it’s time to move on to the sanding and finishing process. This step will give your bed frame a polished and smooth surface, enhancing its appearance and ensuring a comfortable sleeping experience.
Start by using sandpaper or a sander to smooth out any rough edges or surfaces of the wood. Sand in the direction of the grain to avoid causing any scratches or damage to the wood. Focus on areas where there may be splinters or uneven surfaces.
Continue sanding until the wood feels smooth to the touch. Take extra care around the corners and joints to ensure they are also properly sanded.
Once the sanding is complete, it’s time to choose a finish for your bed frame. This will not only enhance the appearance but also protect the wood from wear and tear.
If you prefer a natural look, you can apply a clear coat or sealant to maintain the wood’s natural beauty. Alternatively, you can choose to stain the wood to achieve a desired color or apply paint for a more personalized touch.
If you choose to stain the wood, make sure to follow the manufacturer’s instructions for application and drying time. Apply multiple coats if desired, allowing each coat to dry thoroughly before applying the next one. Use a brush or a rag to evenly distribute the stain.
If you prefer to paint the bed frame, select a paint color that complements your bedroom decor. Apply multiple coats, allowing each coat to dry completely before adding the next coat. Use a brush or a roller for an even and smooth application.
Once the finish is applied, allow the bed frame to dry completely according to the instructions provided with the chosen finish. This will ensure the finish is properly cured and ready for use.
After the finishing process is complete, your bed frame will have a beautiful, smooth, and professional appearance. The next step is to add support slats to ensure proper mattress support.
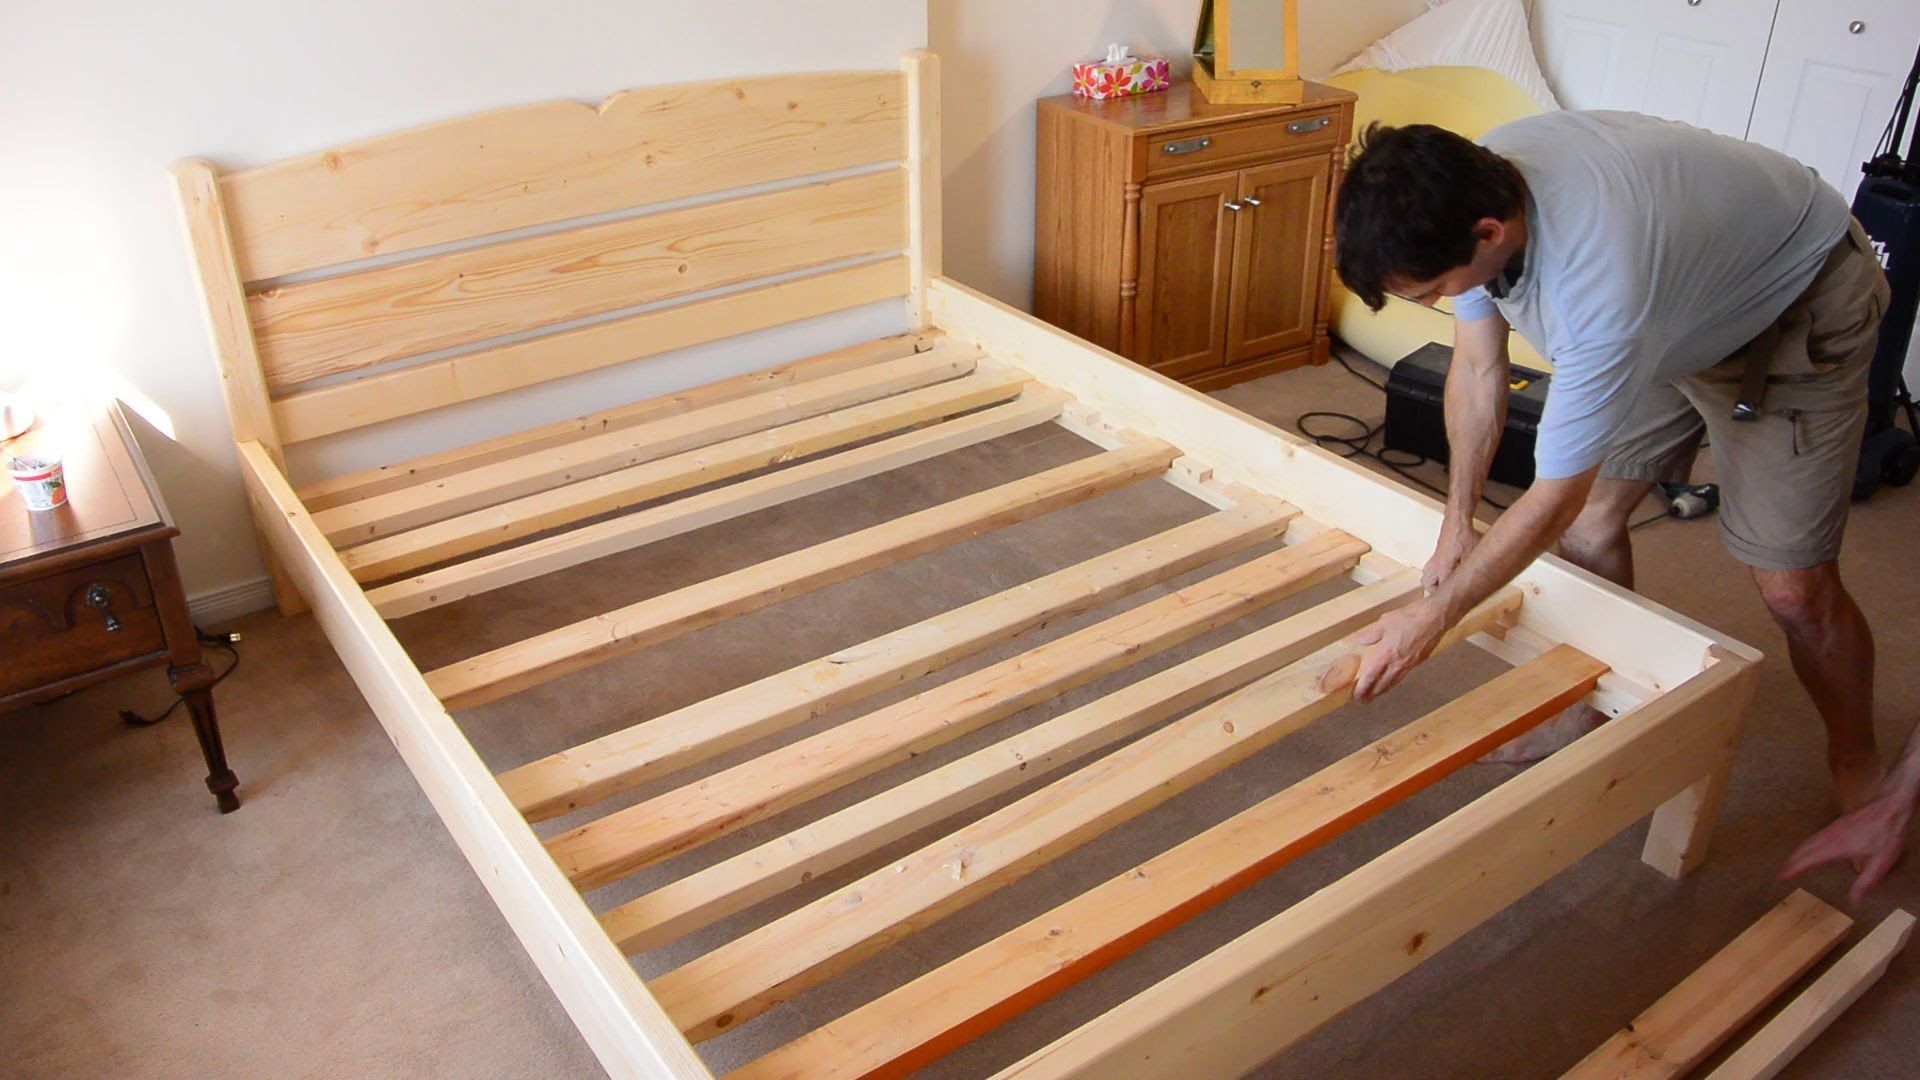
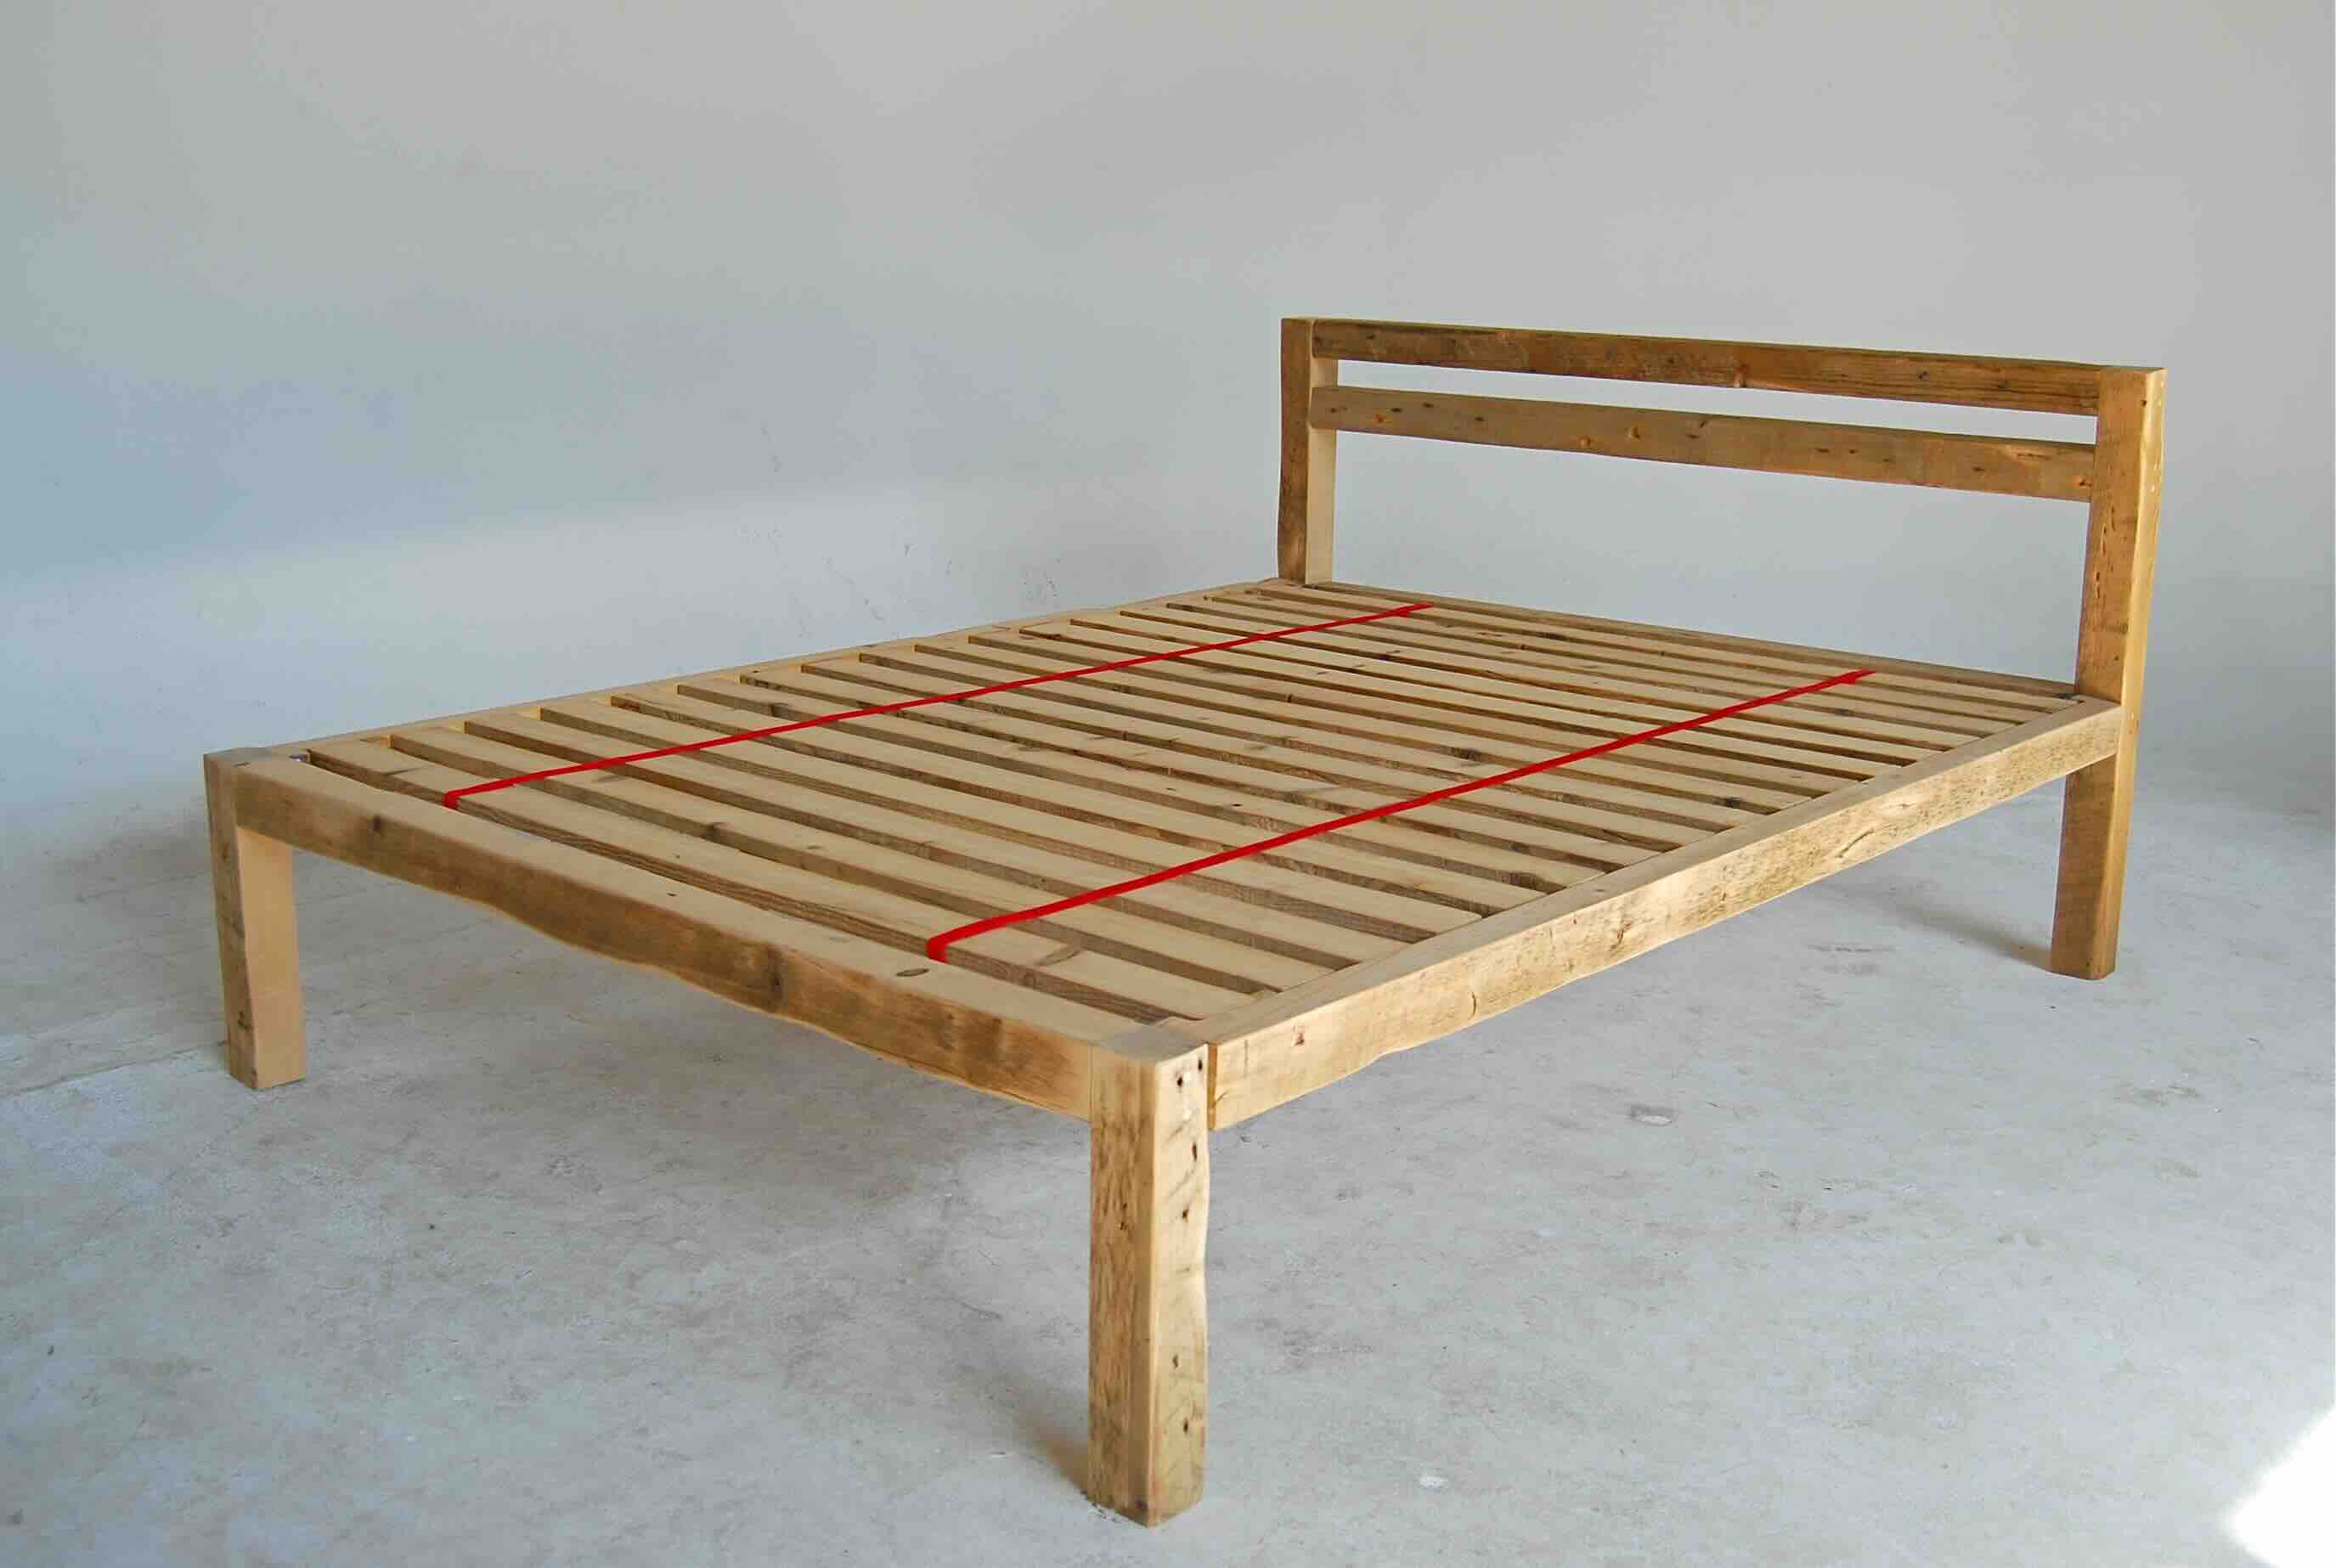
Step 6: Add Support Slats
Adding support slats to your bed frame is crucial for ensuring proper mattress support and preventing sagging. These slats will distribute the weight evenly across the frame and provide a sturdy foundation for your mattress.
Measure the width of your bed frame to determine the number and spacing of the support slats needed. Typically, it’s recommended to have at least three to five slats, depending on the size of your bed.
Using 2×4 lumber or another suitable material, cut the slats to the appropriate length. Ensure that they span the width of the frame and are evenly spaced for optimal support.
Position the slats across the width of the bed frame, ensuring they are parallel to each other and evenly spaced. Use screws or brackets to secure the slats to the side rails or support pieces of the frame.
Make sure the slats are securely attached to prevent any movement or shifting when the mattress is placed on top. You can also add additional support by attaching a center brace perpendicular to the slats in the middle of the frame.
Once the support slats are in place, give them a gentle shake to ensure they are secure and that the mattress will have proper support throughout the frame.
Before moving on to the last step, take a moment to admire your handiwork. You’ve come a long way in building your own bed frame, and now it’s time to install it in your bedroom.
Step 7: Install the Bed Frame
Congratulations! You’ve reached the final step in building your own bed frame. This step involves installing the bed frame in your bedroom and preparing it for use.
Start by clearing the space where you want to place your bed frame. Ensure that there’s enough room to comfortably maneuver and access the frame from all sides.
Position the bed frame in the desired location, making sure it’s level and aligned with the room’s layout. Use a level to check that the frame is balanced and adjust the legs if necessary.
If you have a headboard or footboard, attach them to the bed frame according to the manufacturer’s instructions or your design plan. This will complete the overall look of your bed frame.
With the bed frame securely in place, it’s time to place your mattress on top. Lift the mattress and carefully position it on the slats or support system of the frame.
Ensure that the mattress sits evenly and securely on the frame without any overhang. Adjust the position if needed, making sure all edges are aligned properly.
Once the mattress is in place, give it a gentle press and shake to confirm that it’s secure and properly supported by the frame and slats.
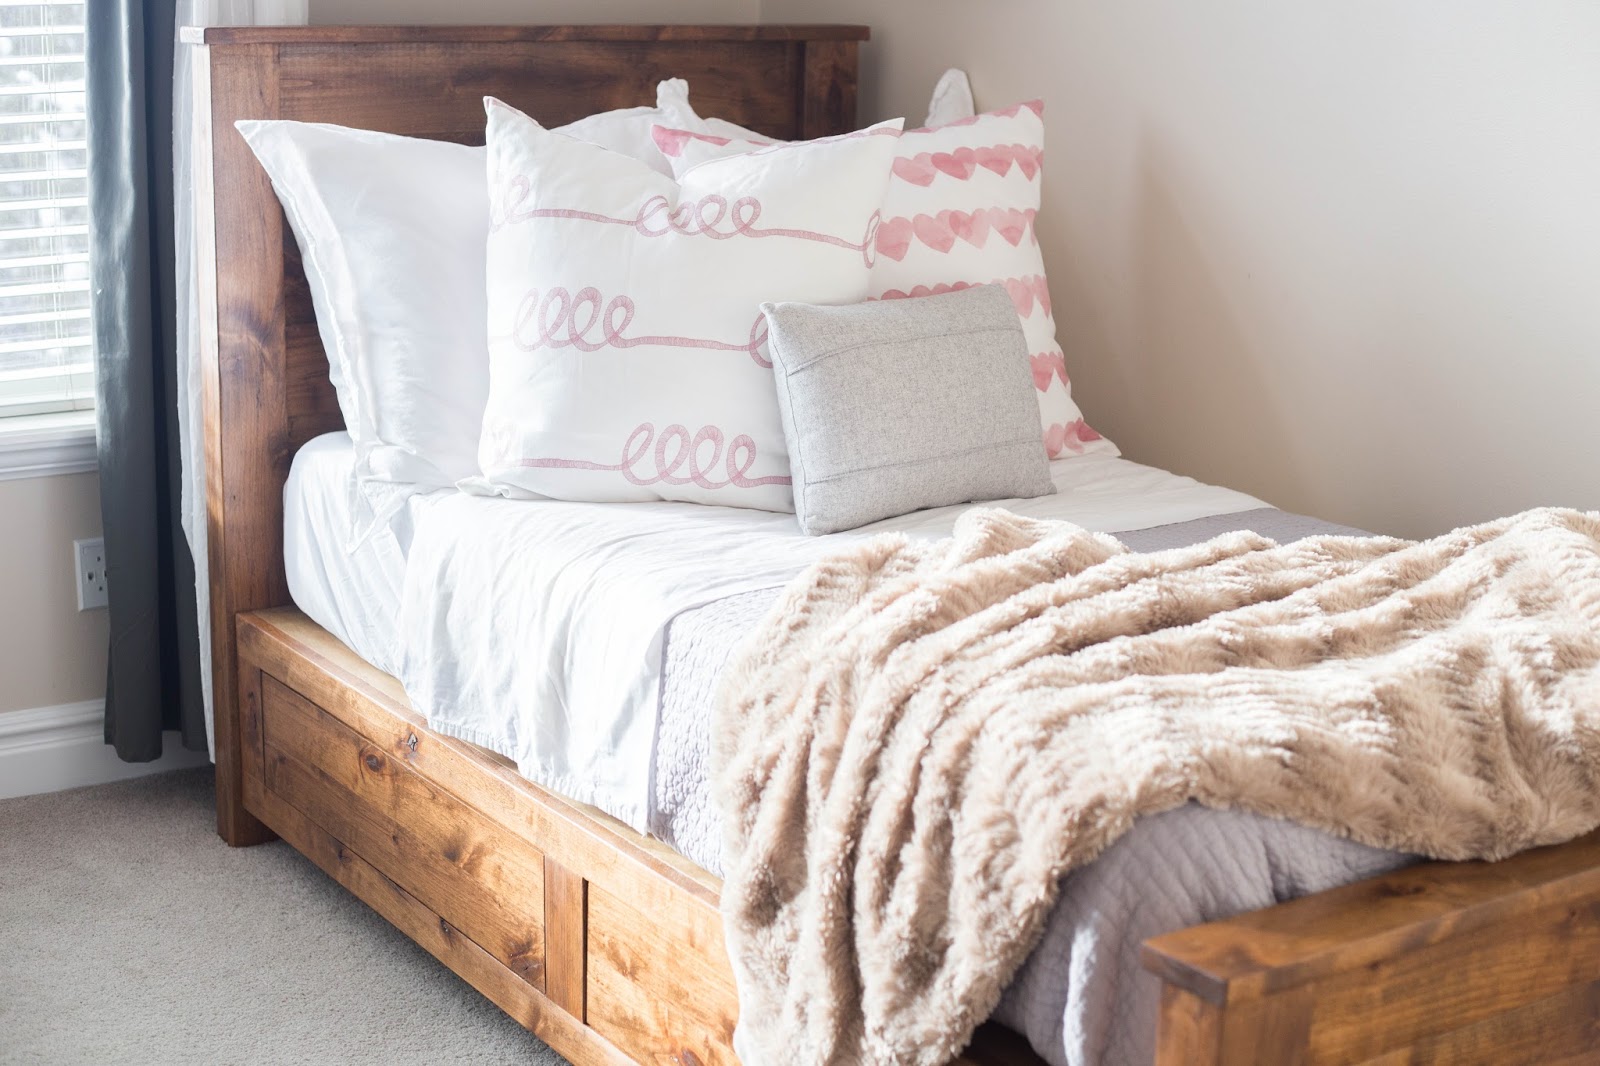
Finally, add your favorite bedding, pillows, and any additional decor to create your own cozy and inviting sleeping sanctuary.
Now, step back and admire your completed DIY bed frame. Not only have you successfully built a functional and personalized piece of furniture, but you’ve also added a touch of your own creativity and style to your bedroom.
Enjoy a restful night’s sleep on your newly built bed frame, knowing that you’ve accomplished a truly satisfying project and created a comfortable space to recharge and relax.
Well done!
Read more: How To Build A Bunk Bed Frame
Conclusion
Building your own bed frame is a rewarding and gratifying DIY project that allows you to personalize your sleeping space while saving money. By following the step-by-step process outlined in this article, you’ve learned how to measure and plan, cut the wood, assemble the frame, attach the legs, sand and finish, add support slats, and finally, install your bed frame.
Throughout this journey, you’ve honed your woodworking skills, exercised your creativity, and created a durable and stylish foundation for your mattress. The sense of accomplishment that comes with completing a project of this nature is unmatched, and you can take pride in the fact that you’ve built something functional and beautiful with your own hands.
Remember to consider your personal style and preferences when designing your bed frame. Whether you opt for a modern and sleek look or a rustic and cozy feel, the choices are endless. Customize your bed frame to suit your needs, and don’t be afraid to add your own unique touches.
As you enjoy the comfort of your newly built bed frame, remember to maintain it properly. Ensure regular cleaning, avoid excessive weight on the frame, and periodically check for any signs of wear or damage that may need repair.
Embarking on DIY projects like building a bed frame not only allows you to create bespoke pieces for your home but also fosters a sense of self-sufficiency and accomplishment. So, let your creative spirit soar, and continue exploring other projects that will enhance and beautify your living space.
Congratulations on completing your DIY bed frame project, and may you have many nights of restful sleep on your handcrafted masterpiece!
Frequently Asked Questions about How To Build A Bed Frame
Was this page helpful?
At Storables.com, we guarantee accurate and reliable information. Our content, validated by Expert Board Contributors, is crafted following stringent Editorial Policies. We're committed to providing you with well-researched, expert-backed insights for all your informational needs.


0 thoughts on “How To Build A Bed Frame”