Home>Furniture>Bedroom Furniture>How To Set Up A Sleep Number Bed
Bedroom Furniture
How To Set Up A Sleep Number Bed
Modified: January 5, 2024
Setting up a Sleep Number bed in your bedroom? Learn how to properly set up this innovative piece of bedroom furniture for better sleep and personalized comfort.
(Many of the links in this article redirect to a specific reviewed product. Your purchase of these products through affiliate links helps to generate commission for Storables.com, at no extra cost. Learn more)
Introduction
Welcome to the world of Sleep Number beds – where personalized comfort meets a good night’s sleep. If you’re new to Sleep Number or have just purchased one of their innovative mattresses, you may be wondering how to set it up properly.
In this article, we will guide you through the step-by-step process of setting up your Sleep Number bed. From unboxing the components to adjusting your Sleep Number setting, we’ll cover everything you need to know to ensure a smooth and comfortable setup.
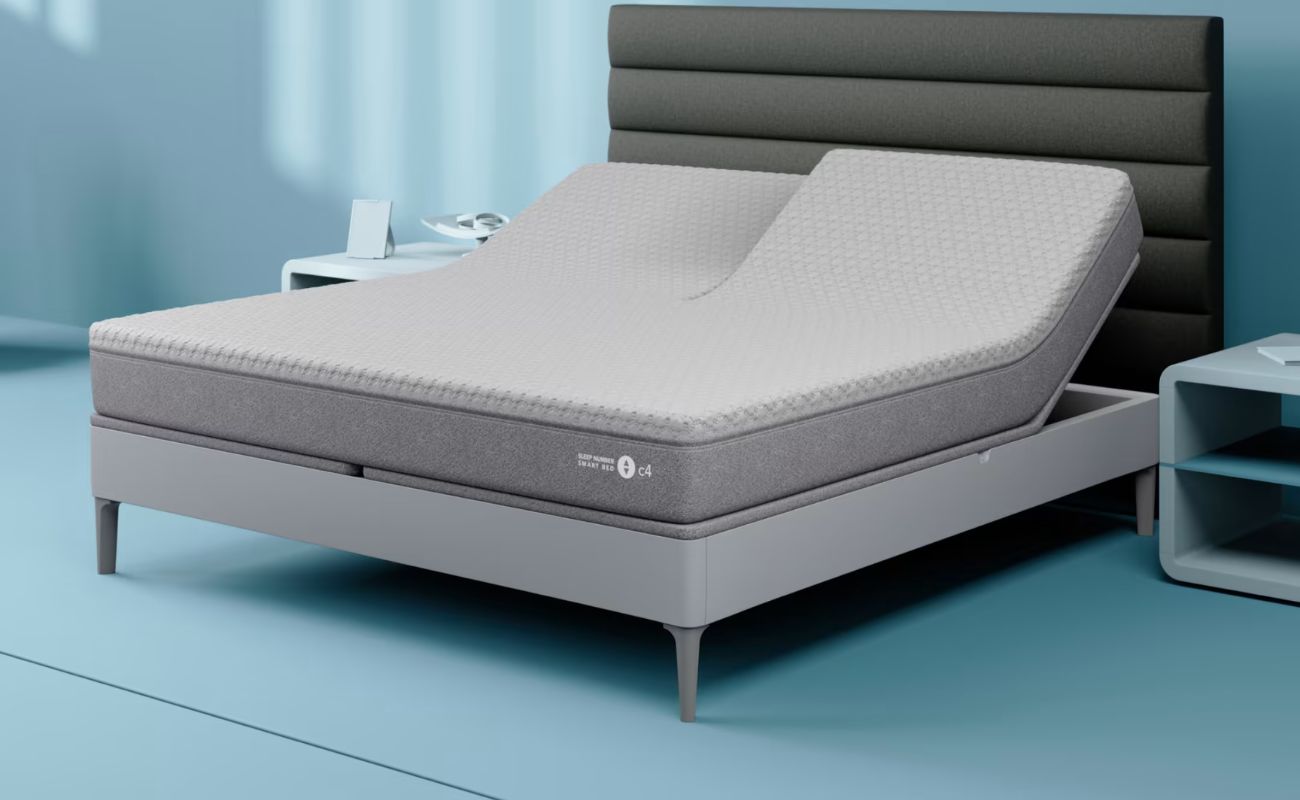
Sleep Number beds offer a unique sleep experience by allowing users to customize their mattress firmness and support level. With the help of adjustable air chambers, you can adjust your Sleep Number setting to find the perfect balance of comfort and support for your individual needs. Whether you prefer a plush mattress or a firm surface, Sleep Number beds can be personalized to meet your specific sleep preferences.
Setting up your Sleep Number bed is a straightforward process that can be completed in a few easy steps. By following the instructions provided, you’ll have your bed ready for a restful night’s sleep in no time.
Before we dive into the details, it’s important to make sure you have all the necessary components and tools on hand. The Sleep Number bed setup typically includes a bed frame, air chambers, an air pump, a hose, a mattress pad, and sheets. Additionally, you’ll need access to an electrical outlet to power the air pump.
Now that you’re prepared, let’s get started with the unboxing process and setting up your Sleep Number bed step by step.
Key Takeaways:
- Personalized Comfort: Setting up a Sleep Number bed is a straightforward process that allows you to customize your mattress firmness and support level to meet your specific sleep preferences.
- Enhanced Sleep Experience: Utilize additional features and accessories such as adjustable bases, sleep tracking, and under-bed lighting to further personalize and enhance your Sleep Number bed experience.
Read more: What Is A Sleep Number Bed
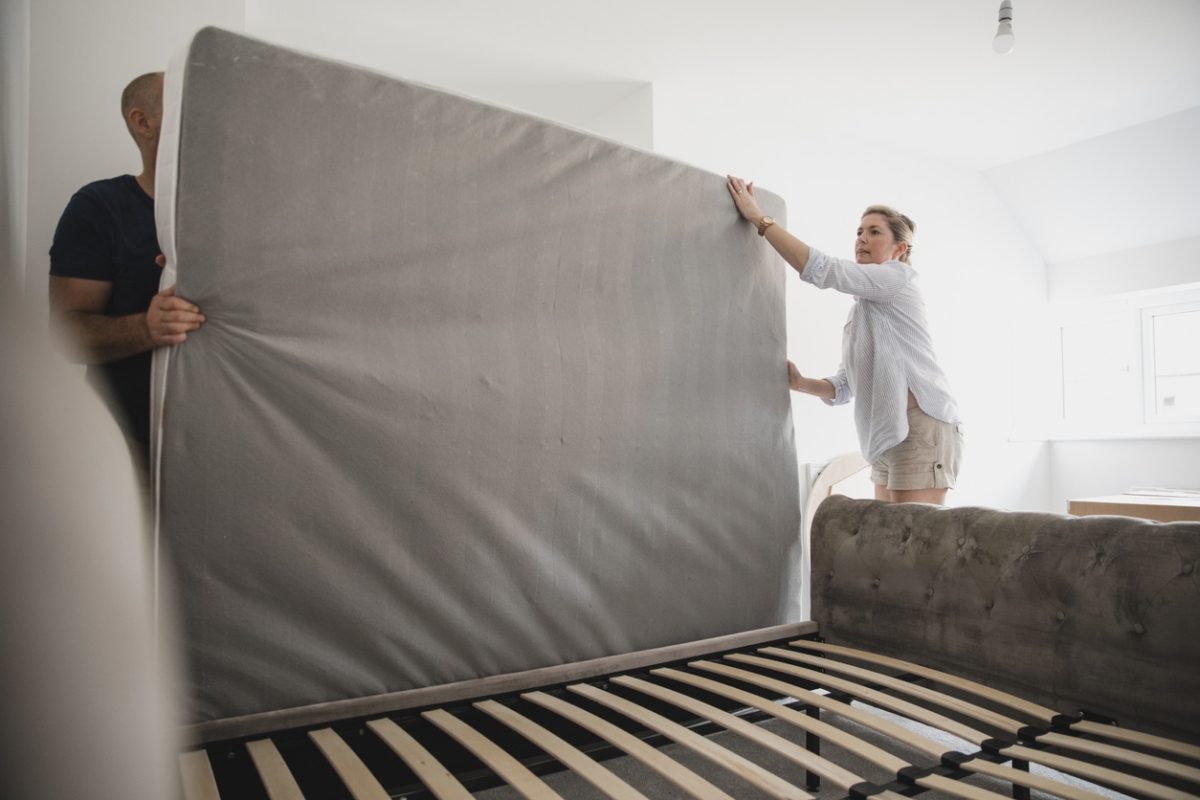
Step 1: Unboxing the Sleep Number Bed
Unboxing your Sleep Number bed is an exciting moment, as it brings you one step closer to enjoying a personalized sleep experience. Follow these steps to unbox your Sleep Number bed:
- Start by clearing a sufficient space in your bedroom where you plan to set up your bed. Remove any furniture or obstacles that may impede the setup process.
- Locate the main package containing the components of your Sleep Number bed. Carefully open the package using a box cutter or scissors, being cautious not to damage any of the contents inside.
- Take out the bed frame components and lay them out on the floor. Depending on the model you purchased, the bed frame may come in multiple pieces or be pre-assembled. If it requires assembly, refer to the included instructions for guidance.
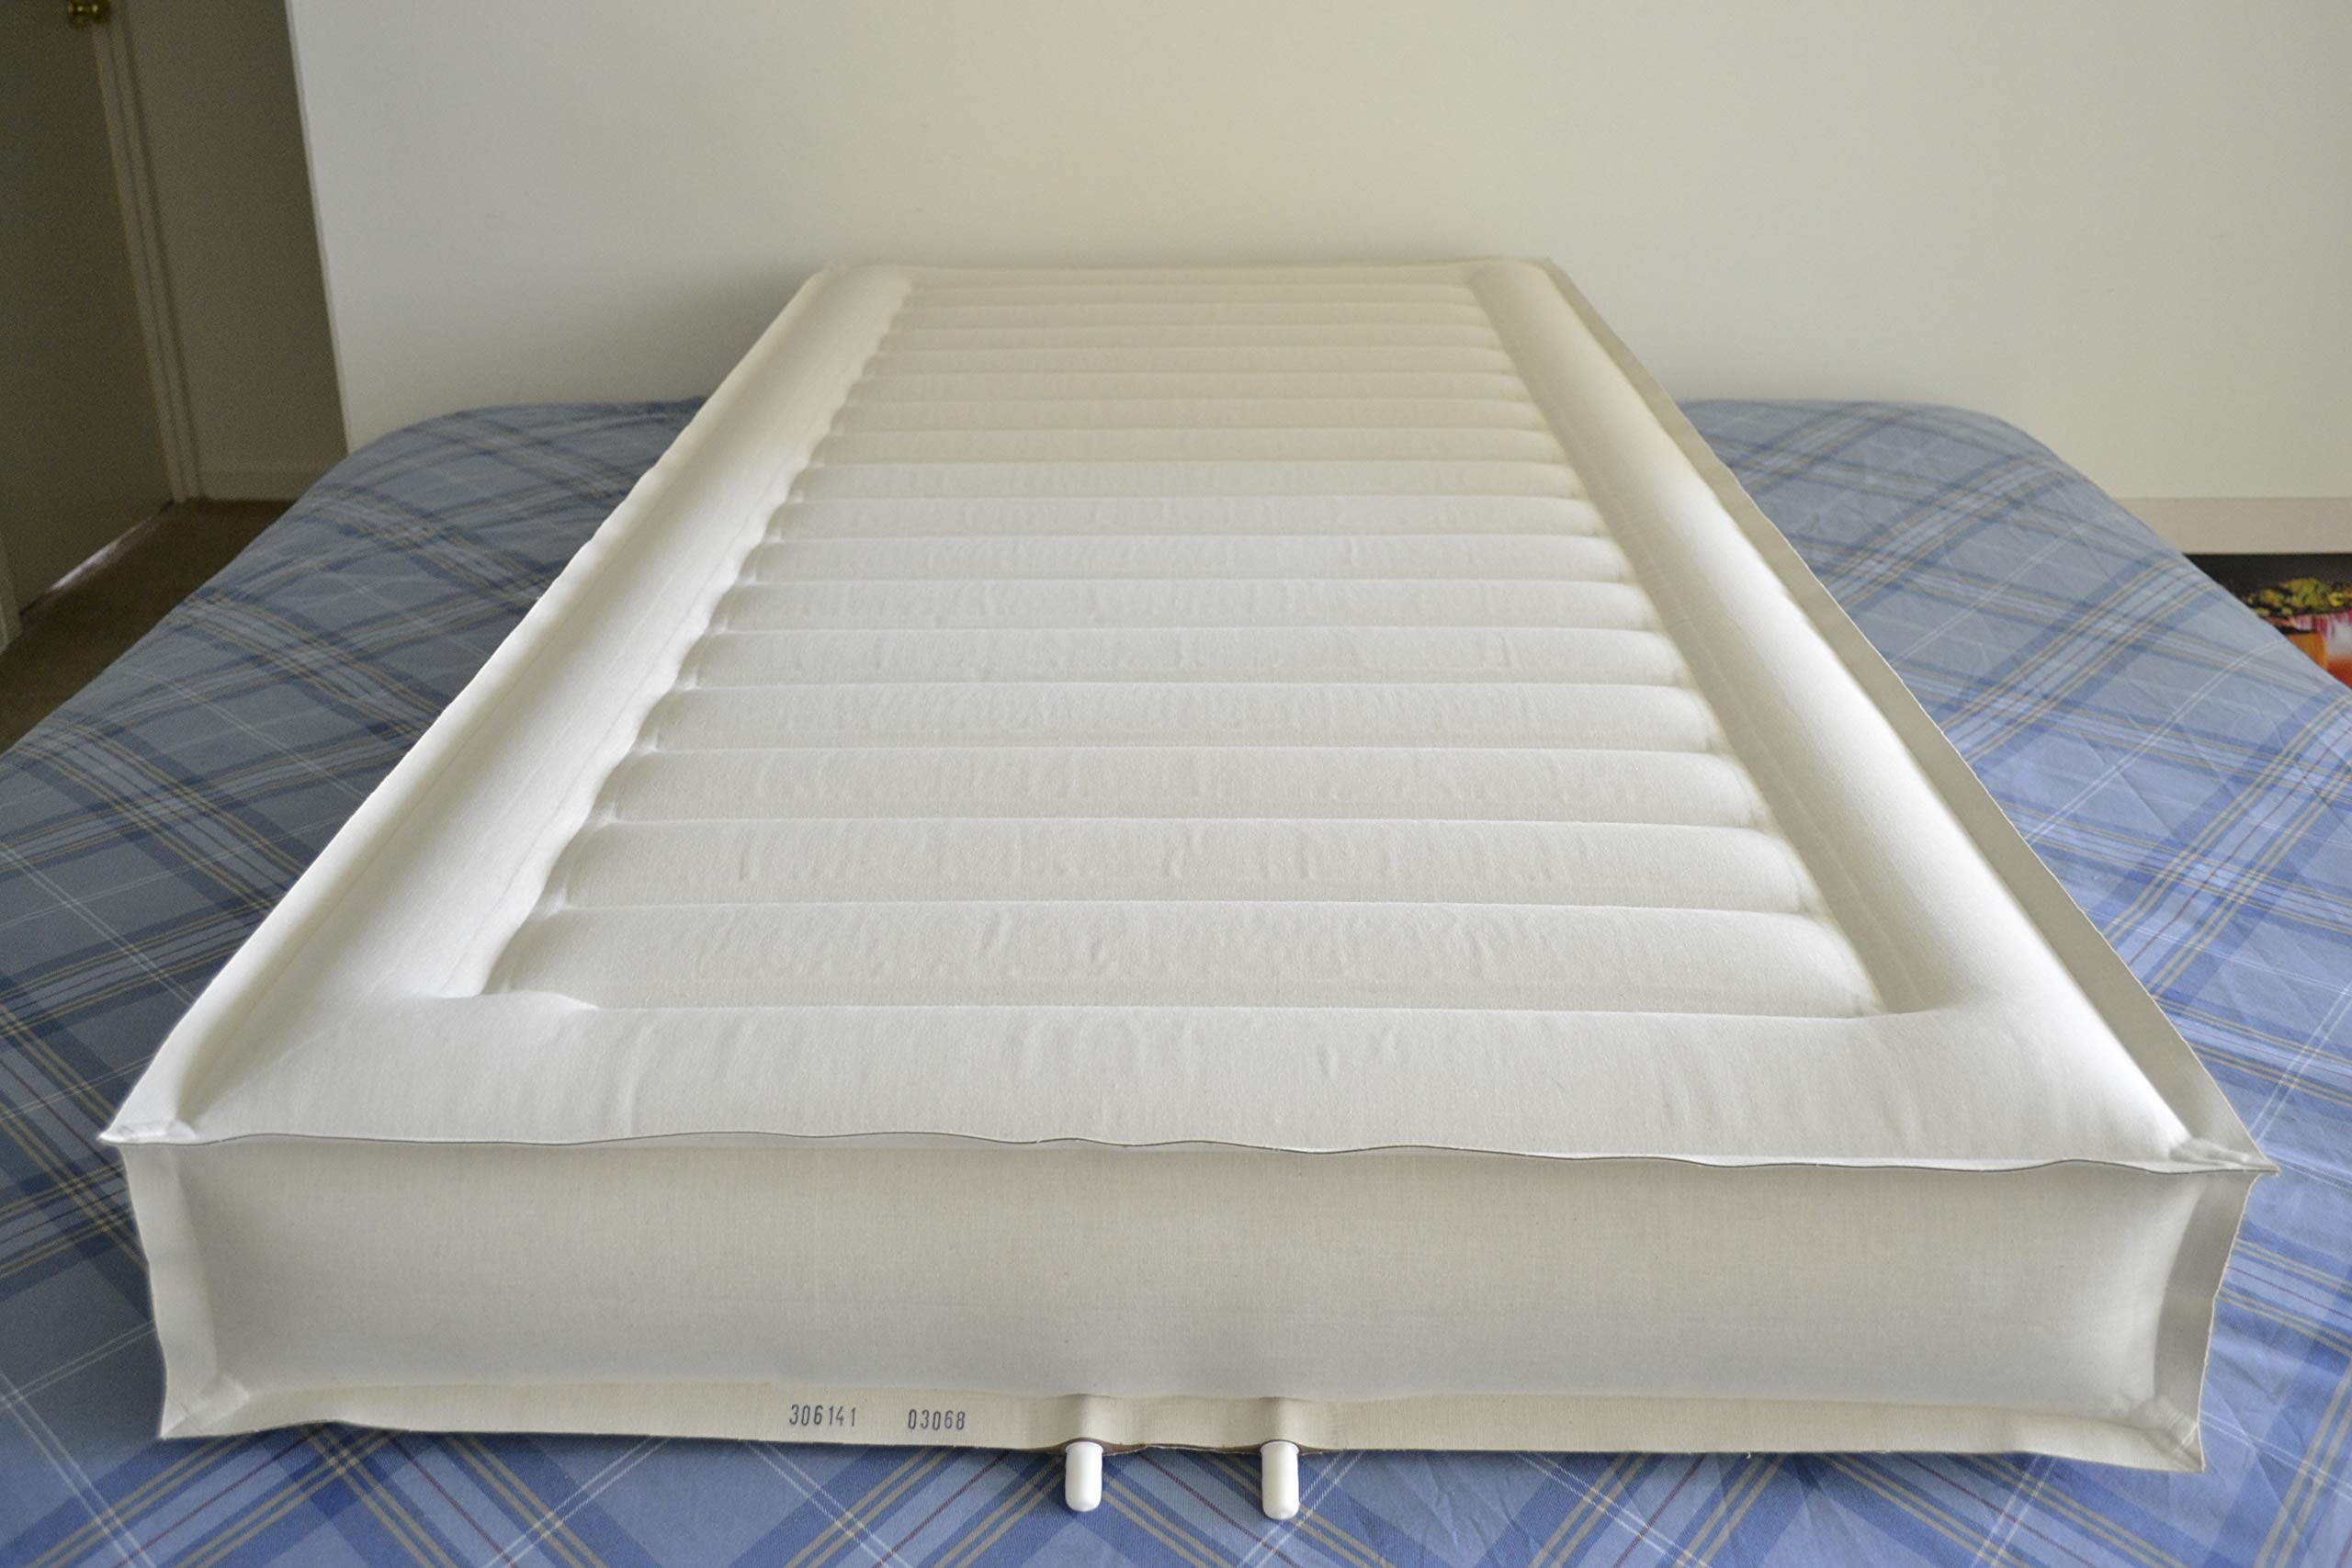
- Next, locate the air chambers and remove them from their packaging. These chambers are responsible for adjusting the firmness of your mattress. Ensure they are in good condition and free from any defects or damage.
- Find the air pump and hose. The air pump is the device responsible for inflating and deflating the air chambers. Place the air pump and hose aside for now, as they will be used in a later step.
- Lastly, locate the mattress pad and sheets that came with your Sleep Number bed. These components will provide a layer of comfort and protection to your mattress. Ensure they are clean and free of any debris or wrinkles.
By following these steps, you have successfully unboxed the components of your Sleep Number bed and are ready to move on to the next step – assembling the bed frame.
Step 2: Assembling the Bed Frame
Now that you have unboxed the components of your Sleep Number bed, it’s time to assemble the bed frame. Follow these steps to put together your bed frame:
- Refer to the instruction manual provided with your Sleep Number bed for specific assembly guidelines. Different bed models may have slight variations in the assembly process.
- Start by connecting the bed frame pieces together according to the instructions. This usually involves aligning the slots and connectors on each piece and securing them in place.
- Once the main frame is assembled, check for stability and ensure that all connections are tight. Wiggle the frame slightly to confirm that it is sturdy and properly put together. Adjust any loose connections if necessary.
- If your bed frame includes support legs, attach them to the designated areas on the frame. These legs provide additional stability and weight distribution for your Sleep Number bed.
- Inspect the bed frame to ensure that it is level. Use a spirit level or a similar tool to check if the frame is flat and balanced. Adjust the legs or make necessary modifications to achieve a level surface.
- Double-check all the connections and make sure that all screws and bolts are securely tightened. A sturdy and well-assembled bed frame is essential for the stability and longevity of your Sleep Number bed.
Once you have successfully assembled the bed frame, it’s time to move on to the next step – attaching the air chambers to your Sleep Number bed.
Step 3: Attaching the Air Chambers
With the bed frame assembled, it’s time to attach the air chambers to your Sleep Number bed. Here’s how you can do it:
- Locate the air chambers that you unboxed earlier. Check the chambers for any signs of damage or defects, such as leaks or punctures. If you notice any issues, contact Sleep Number customer support for assistance.
- Place each air chamber on the bed frame, positioning them in the appropriate spots for your desired sleep configuration. For a single sleeper, place one air chamber in the middle of the bed frame. For a couple, place two separate air chambers on each side of the bed frame.
- Align the air chamber connectors with the corresponding connectors on the bed frame. Gently push the connectors together until you hear a click, indicating that they are securely attached. Ensure there are no gaps or loose connections.
- Once the air chambers are attached, check that they are centered and evenly aligned on the bed frame. This will help distribute your weight evenly when lying on the mattress.
- Inspect the air chambers to make sure there are no kinks or twists in the air hoses. Ensure that the hoses are properly connected to the air chambers and that they are not tangled or obstructed.
- Once you have confirmed that the air chambers are securely attached and properly aligned, you can proceed to the next step – connecting the air pump and hose.
By following these steps, you have successfully attached the air chambers to your Sleep Number bed. This brings you one step closer to enjoying the personalized comfort that Sleep Number beds are renowned for.
Step 4: Connecting the Air Pump and Hose
Now that the air chambers are securely attached to your Sleep Number bed, it’s time to connect the air pump and hose. Follow these steps to complete this process:
- Place the air pump in a convenient location near your bed, ensuring that it is within reach of a power outlet. Make sure the pump is positioned on a stable and flat surface to prevent any vibrations during operation.
- Take the hose that came with your Sleep Number bed and connect one end to the air pump. Ensure the connection is secure and tight to prevent air leakage.
- Attach the other end of the hose to the designated opening on one of the air chambers. This can usually be found on the side or bottom of the chamber. Push the connector firmly until you hear a click or feel it lock into place.
- Repeat the previous step for the second air chamber if applicable. If you have a single air chamber, you can leave the second end of the hose detached.
- Turn on the air pump by plugging it into a power outlet. You may need to press the power button or switch on the pump to activate it. Refer to the instruction manual for any specific guidelines regarding the pump’s operation.
- Allow the air pump to inflate the air chambers gradually. This process may take a few minutes, and you will hear the pump humming as it delivers air into the chambers. Pay attention to the pressure level and listen for any unusual sounds or air leaks.
- Once the air chambers are fully inflated, you can use the pump to adjust the firmness by releasing air or adding more as desired. Experiment with different settings until you find your desired Sleep Number setting.
With the air pump and hose connected, and your air chambers properly inflated, you are one step closer to experiencing personalized comfort on your Sleep Number bed. The next step involves installing the mattress pad and sheets, so let’s move on.
When setting up a Sleep Number bed, make sure to carefully follow the instructions provided in the manual to ensure proper assembly and avoid any potential issues with the bed’s functionality.
Read more: How To Disassemble A Sleep Number Bed
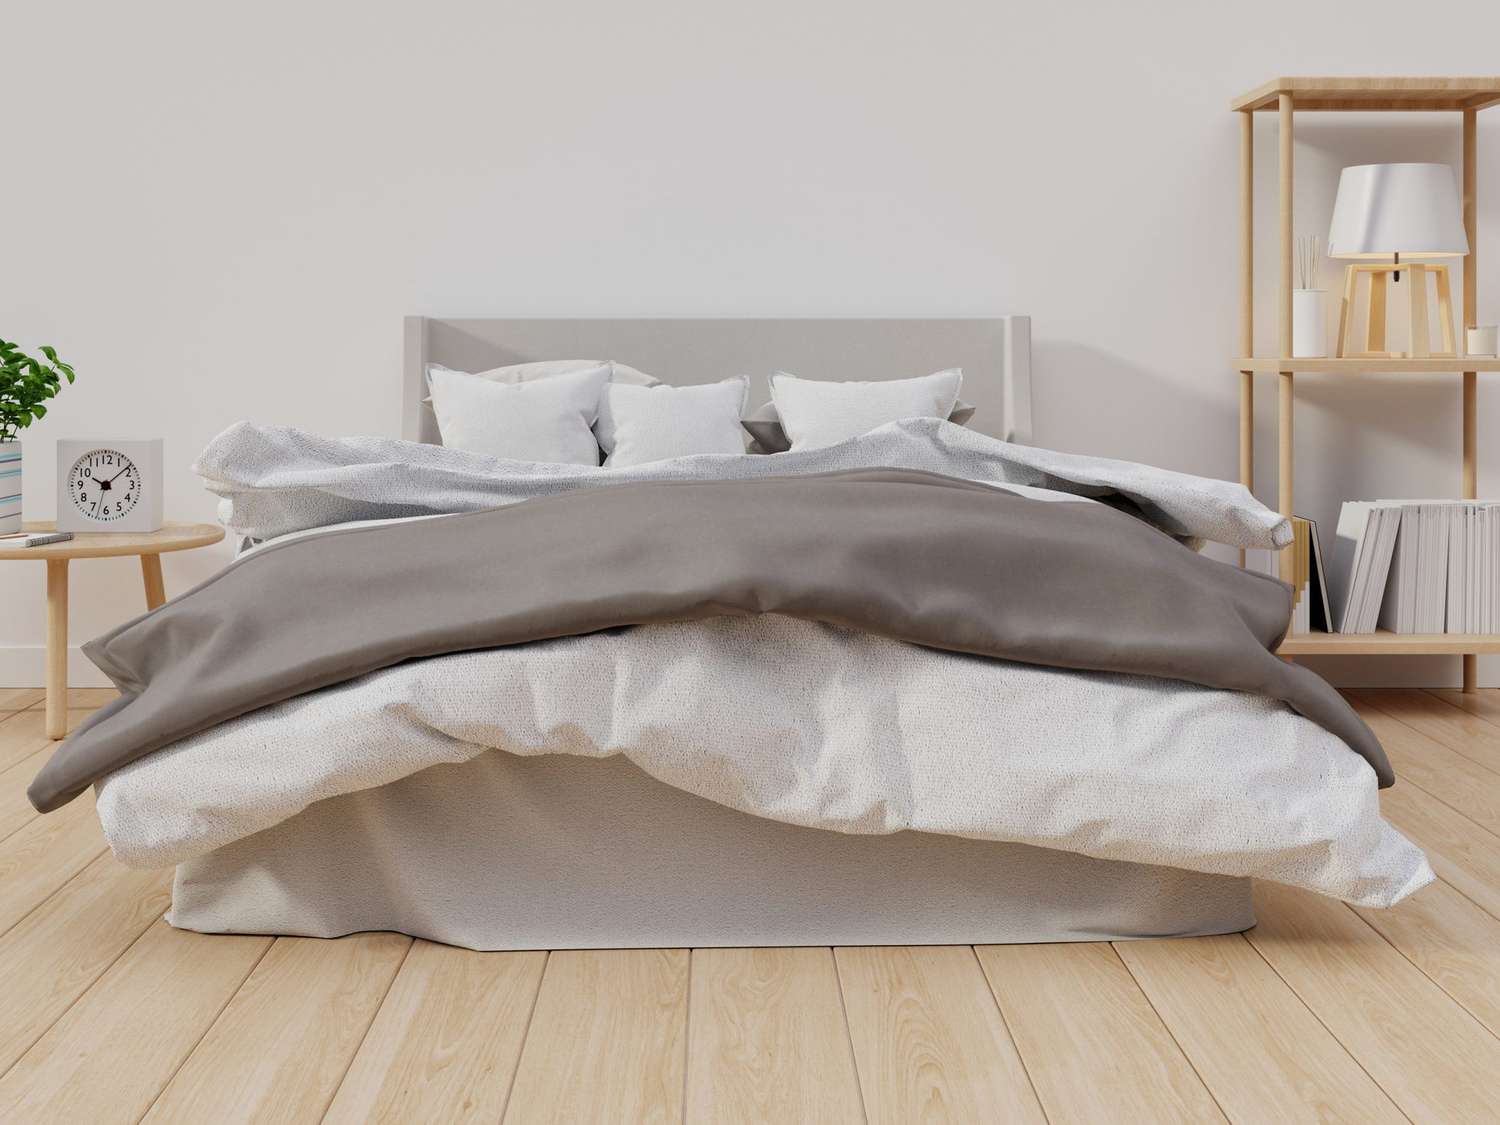
Step 5: Installing the Mattress Pad and Sheets
With the air chambers inflated and your Sleep Number bed ready, it’s time to make it cozy by installing the mattress pad and sheets. Follow these steps to complete this process:
- Start by placing the mattress pad on top of the air chambers. The mattress pad provides an additional layer of cushioning and protection for your Sleep Number bed. Ensure it is centered and covers the entire mattress surface.
- Smooth out any wrinkles or creases in the mattress pad to ensure a comfortable sleeping surface.
- Next, install the fitted sheet by placing it over the mattress pad. Fit the sheet snugly around the corners of the mattress to prevent it from slipping or coming undone during sleep.
- Smooth out the sheet and tuck any excess fabric under the mattress, ensuring a neat and secure fit.
- Add the flat sheet on top of the fitted sheet, aligning it with the head of the bed. Make sure the sheet is centered and drapes evenly on both sides of the mattress.
- Tuck the excess fabric of the flat sheet under the mattress at the foot of the bed. This will keep the sheet in place and give your bed a tidy appearance.
- Finish by adding any additional layers, such as blankets or a comforter, to suit your desired level of warmth and comfort.
By following these steps, you have successfully installed the mattress pad and sheets on your Sleep Number bed. The next step involves adjusting your Sleep Number setting to your liking, so let’s explore that next.
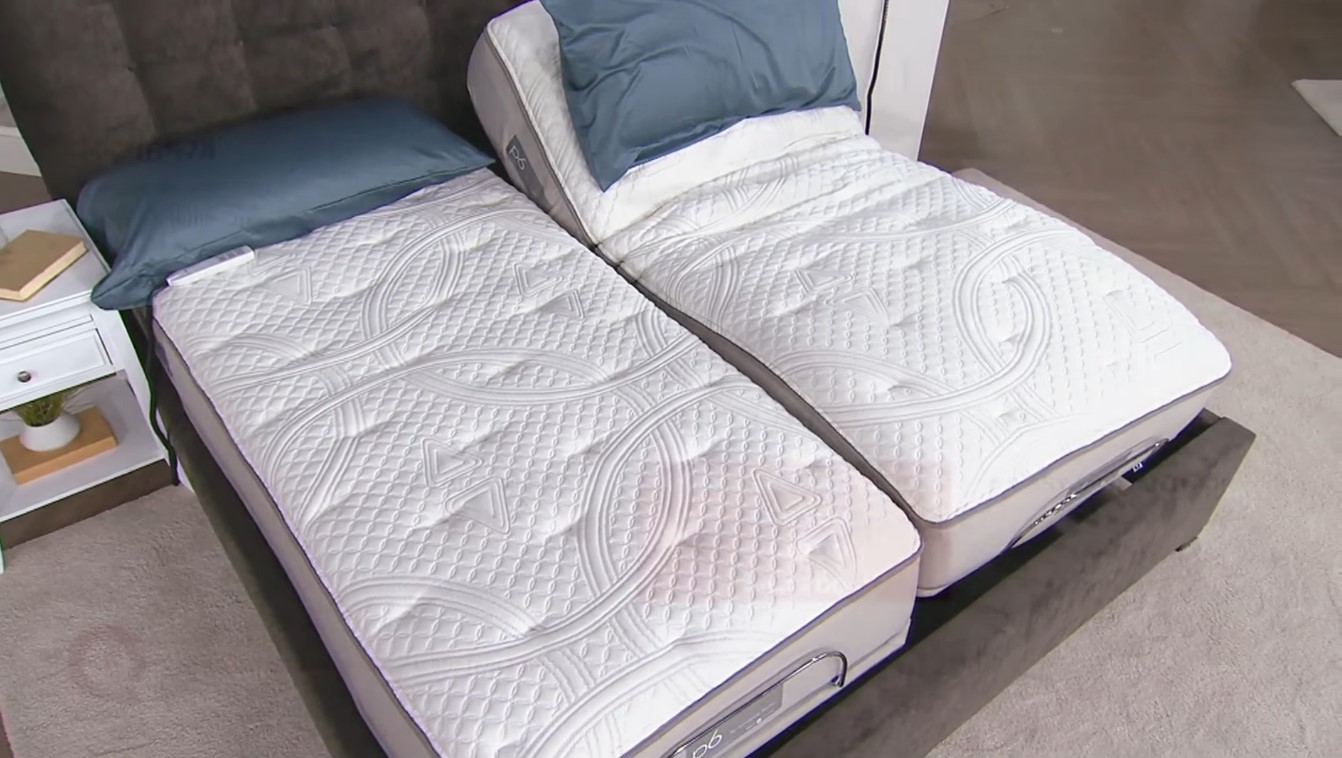
Step 6: Adjusting the Sleep Number Setting
One of the key features of a Sleep Number bed is the ability to customize and adjust your Sleep Number setting. This setting determines the firmness and support level of your mattress. Follow these steps to adjust your Sleep Number setting:
- Start by lying down on your Sleep Number bed and getting a feel for the current firmness level. Take note of how the mattress feels and whether it provides the desired amount of support.
- Locate the Sleep Number remote control, which should have come with your bed. The remote control allows you to adjust the firmness of your mattress with ease.
- On the remote control, you will find buttons or a dial that allows you to increase or decrease the Sleep Number setting. The buttons may be labeled with arrows or icons indicating higher or lower settings.
- Experiment with different Sleep Number settings by adjusting the firmness level up or down. Take your time to find the setting that feels most comfortable and supportive for your body.
- As you make adjustments, pay attention to how your body responds and how the mattress conforms to your shape. Remember that different sleep positions may require different levels of firmness.
- Continue adjusting the Sleep Number setting until you find the perfect balance of support and comfort. Don’t be afraid to try different settings and take your time to find what works best for you.
- Once you have found your ideal Sleep Number setting, take note of the corresponding number on the remote control. This will allow you to easily return to your preferred firmness in the future.
By following these steps, you can adjust your Sleep Number setting to find the perfect level of firmness and support for a restful night’s sleep. Next, let’s explore the features and functions of the Sleep Number bed remote control.
Step 7: Using the Sleep Number Bed Remote Control
The Sleep Number bed remote control is a powerful tool that allows you to personalize your sleep experience even further. Here’s how you can make the most of its features:
- Familiarize yourself with the buttons and functions on the remote control. It typically includes buttons to adjust the Sleep Number setting, activate massage features, control bed position (if applicable), and access additional settings.
- Use the Sleep Number setting buttons to increase or decrease the firmness of your mattress. This allows you to find your ideal level of comfort and support at any given moment.
- If your Sleep Number bed has massage features, explore the massage options available on the remote control. You may have the ability to adjust the intensity, speed, and area of the massage for a relaxing and rejuvenating experience.
- For adjustable beds, use the remote control to adjust the position of the bed. You can raise the head or foot of the bed to find a comfortable position for reading, watching TV, or relieving pressure on specific areas of your body.
- Some Sleep Number bed models also offer additional settings and features. These may include under-bed lighting, timer functions, sleep tracking, and more. Refer to the instruction manual or contact Sleep Number customer support for more information on these features.
- When not in use, keep the remote control in a safe and easily accessible location near your bed. This ensures that you can make adjustments to your Sleep Number setting or access other features whenever needed.
- If you have multiple Sleep Number beds in your home, ensure that each bed has its own dedicated remote control. This prevents any confusion or accidentally adjusting the wrong bed’s settings.
By utilizing the features and functions of the Sleep Number bed remote control, you can truly tailor your sleep experience to your preferences. Finally, let’s explore some additional features and accessories that can enhance your Sleep Number bed.
Step 8: Understanding Additional Features and Accessories
In addition to the core components of your Sleep Number bed, there are various additional features and accessories that can enhance your sleep experience. Let’s take a look at some of these:
- Pillow options: Sleep Number offers a range of pillows designed to complement your bed and provide personalized support for your head and neck. Explore the different pillow options available and choose one that aligns with your preferred sleep position and comfort level.
- Bedding accessories: Sleep Number offers a selection of bedding accessories such as mattress toppers, mattress protectors, and duvet covers. These accessories can add an extra layer of comfort, protection, and style to your Sleep Number bed.
- FlexFit adjustable base: If you have an adjustable base for your Sleep Number bed, familiarize yourself with its features and functions. The adjustable base allows you to elevate the head and foot of the bed, providing additional support and customization options for your sleep position.
- Sleep tracking: Some Sleep Number bed models offer sleep tracking technology, which can provide insights into your sleep patterns and help you make adjustments to improve your sleep quality. Explore the sleep tracking features available on your bed and utilize the accompanying Sleep Number app or other tools to monitor and optimize your sleep.
- Under-bed lighting: Sleep Number beds may feature under-bed lighting, which can serve as a gentle night light or be customized to your preferences. Understand how to control and adjust the under-bed lighting to create a relaxing ambiance in your bedroom.
- Remote control holder: Consider investing in a remote control holder or organizer to keep your Sleep Number bed remote control easily accessible and prevent it from getting misplaced or lost.
- Regular maintenance: Keep your Sleep Number bed in optimal condition by following the manufacturer’s recommendations for maintenance and care. This may involve periodically checking the air chambers for leaks, cleaning the mattress pad and sheets, and ensuring the bed frame is secure and stable.
By understanding and utilizing these additional features and accessories, you can further personalize and enhance your Sleep Number bed experience. Remember to refer to the instruction manual or reach out to Sleep Number customer support for any specific questions or concerns regarding these features.
With that, you have successfully set up your Sleep Number bed and are ready to enjoy endless nights of personalized comfort and quality sleep. Sweet dreams!
Read more: How To Move A Sleep Number Bed
Conclusion
Congratulations! You have successfully set up your Sleep Number bed and are now on your way to experiencing the ultimate in personalized comfort and quality sleep. By following the step-by-step process outlined in this guide, you have ensured that your Sleep Number bed is properly assembled, the air chambers are securely attached, and the mattress pad and sheets are neatly installed.
With the ability to adjust your Sleep Number setting, you can fine-tune the firmness and support of your mattress to suit your individual preferences and needs. Using the Sleep Number bed remote control, you can easily make these adjustments and explore additional features such as massage functions, adjustable bed positions, and more.
Remember to take advantage of the various accessories and features available to enhance your Sleep Number bed experience. From choosing the right pillow to utilizing sleep tracking technology, these additions can further personalize your sleep environment and help optimize your sleep quality.
Lastly, don’t forget to maintain your Sleep Number bed regularly. By following proper care and maintenance guidelines, you can ensure the longevity and performance of your bed for years to come.
We hope this guide has been helpful in setting up your Sleep Number bed. Enjoy the comfort, support, and customized sleep experience that Sleep Number provides. May you have many nights of restful sleep and wake up feeling rejuvenated and ready to conquer the day!
Frequently Asked Questions about How To Set Up A Sleep Number Bed
Was this page helpful?
At Storables.com, we guarantee accurate and reliable information. Our content, validated by Expert Board Contributors, is crafted following stringent Editorial Policies. We're committed to providing you with well-researched, expert-backed insights for all your informational needs.


0 thoughts on “How To Set Up A Sleep Number Bed”