Home>Furniture>Bedroom Furniture>How To Build A Murphy Bed


Bedroom Furniture
How To Build A Murphy Bed
Modified: January 19, 2024
Learn how to build a stylish and space-saving Murphy bed for your bedroom. Explore a variety of bedroom furniture options to create your dream space.
(Many of the links in this article redirect to a specific reviewed product. Your purchase of these products through affiliate links helps to generate commission for Storables.com, at no extra cost. Learn more)
Introduction
Are you looking to maximize the space in your bedroom without compromising on style and comfort? Look no further than a Murphy bed! A Murphy bed, also known as a wall bed or fold-down bed, is a versatile furniture piece that can transform your bedroom into a multifunctional space.
Whether you have a small apartment, a guest room that needs to double as a home office, or simply want to create more floor space in your bedroom, building a Murphy bed can be the perfect solution. Not only does it provide a comfortable place to sleep, but it can also be easily folded up and hidden behind a wall or a customized storage unit, giving you ample room for other activities during the day.
In this step-by-step guide, we will walk you through the process of building your own Murphy bed. Don’t worry if you’re not a seasoned DIY enthusiast – with the right materials, tools, and a little patience, anyone can successfully undertake this project. So, roll up your sleeves and let’s get started!
Key Takeaways:
- Building a Murphy bed is a DIY project that maximizes space and adds functionality to your bedroom. With the right materials, tools, and careful assembly, you can create a stylish and versatile sleeping solution.
- Safety and precision are crucial when building a Murphy bed. From measuring and cutting the bed frame to installing hardware and testing functionality, attention to detail ensures a secure and comfortable sleeping experience.
Read more: How To Build A Murphy Bed Frame
Step 1: Gather Materials and Tools
Before you embark on building a Murphy bed, it’s important to gather all the necessary materials and tools. Here’s a comprehensive list of what you’ll need:
- Wood for the bed frame: Choose high-quality plywood or solid wood boards that are sturdy enough to support the weight of the mattress.
- Bed hardware kit: Look for a Murphy bed hardware kit that includes the necessary hinges, springs, and locking mechanisms. These kits are designed specifically for fold-down beds and ensure smooth operation and safety.
- Mattress: Measure the dimensions of the bed frame to determine the appropriate size of the mattress.
- Screws and nails: Choose appropriate sizes of screws and nails to secure the various components of the bed frame.
- Wood glue: Use wood glue to reinforce the joints and ensure the bed frame’s durability.
- Saw: A circular saw or a miter saw will help you cut the wood to the required sizes accurately.
- Drill: A power drill with various drill bit sizes will be necessary for creating holes and attaching hardware.
- Screwdriver: Have both a Phillips and a flathead screwdriver on hand to tighten screws and fastenings.
- Tape measure: Accurate measurements are essential for a properly functioning Murphy bed. Use a tape measure to measure the dimensions of the room and the necessary components.
- Sandpaper: Smooth any rough edges or surfaces using sandpaper to achieve a polished finish.
- Paint or stain: Once the bed frame is built and sanded, you may choose to paint or stain it to match your bedroom decor.
Now that you have all the required materials and tools, you’re ready to move on to the next step: measuring and cutting the bed frame.
Step 2: Measure and Cut the Bed Frame
Accurate measurements are crucial when building a Murphy bed to ensure that it fits perfectly in your space. Follow these steps to measure and cut the bed frame:
- Measure your mattress dimensions: Measure the length, width, and thickness of your mattress. These measurements will determine the size of your bed frame.
- Determine the size of the bed frame: Add a few inches to the length and width of your mattress to account for the frame’s dimensions and to ensure a proper fit.
- Mark and cut the wood panels: Using a saw, cut the plywood or solid wood panels according to the dimensions you determined in the previous step. It’s important to make accurate and clean cuts to ensure the stability and aesthetics of the bed frame.
- Measure and cut the support slats: Measure the width of the bed frame and cut several slats that will support the weight of the mattress. These slats should be evenly spaced across the frame.
- Create notches for the hinges and hardware: Measure and mark the locations for the hinges and other hardware components on the side panels of the bed frame. Use a chisel or a router to create notches or recesses to accommodate the hardware. This step is essential for the smooth operation of the Murphy bed.
Take your time during the measurement and cutting process to ensure precision. Double-check your measurements and make necessary adjustments before moving on to the next step.
With the bed frame components cut and ready, it’s time to assemble them. Proceed to Step 3: Assemble the Bed Frame.
Step 3: Assemble the Bed Frame
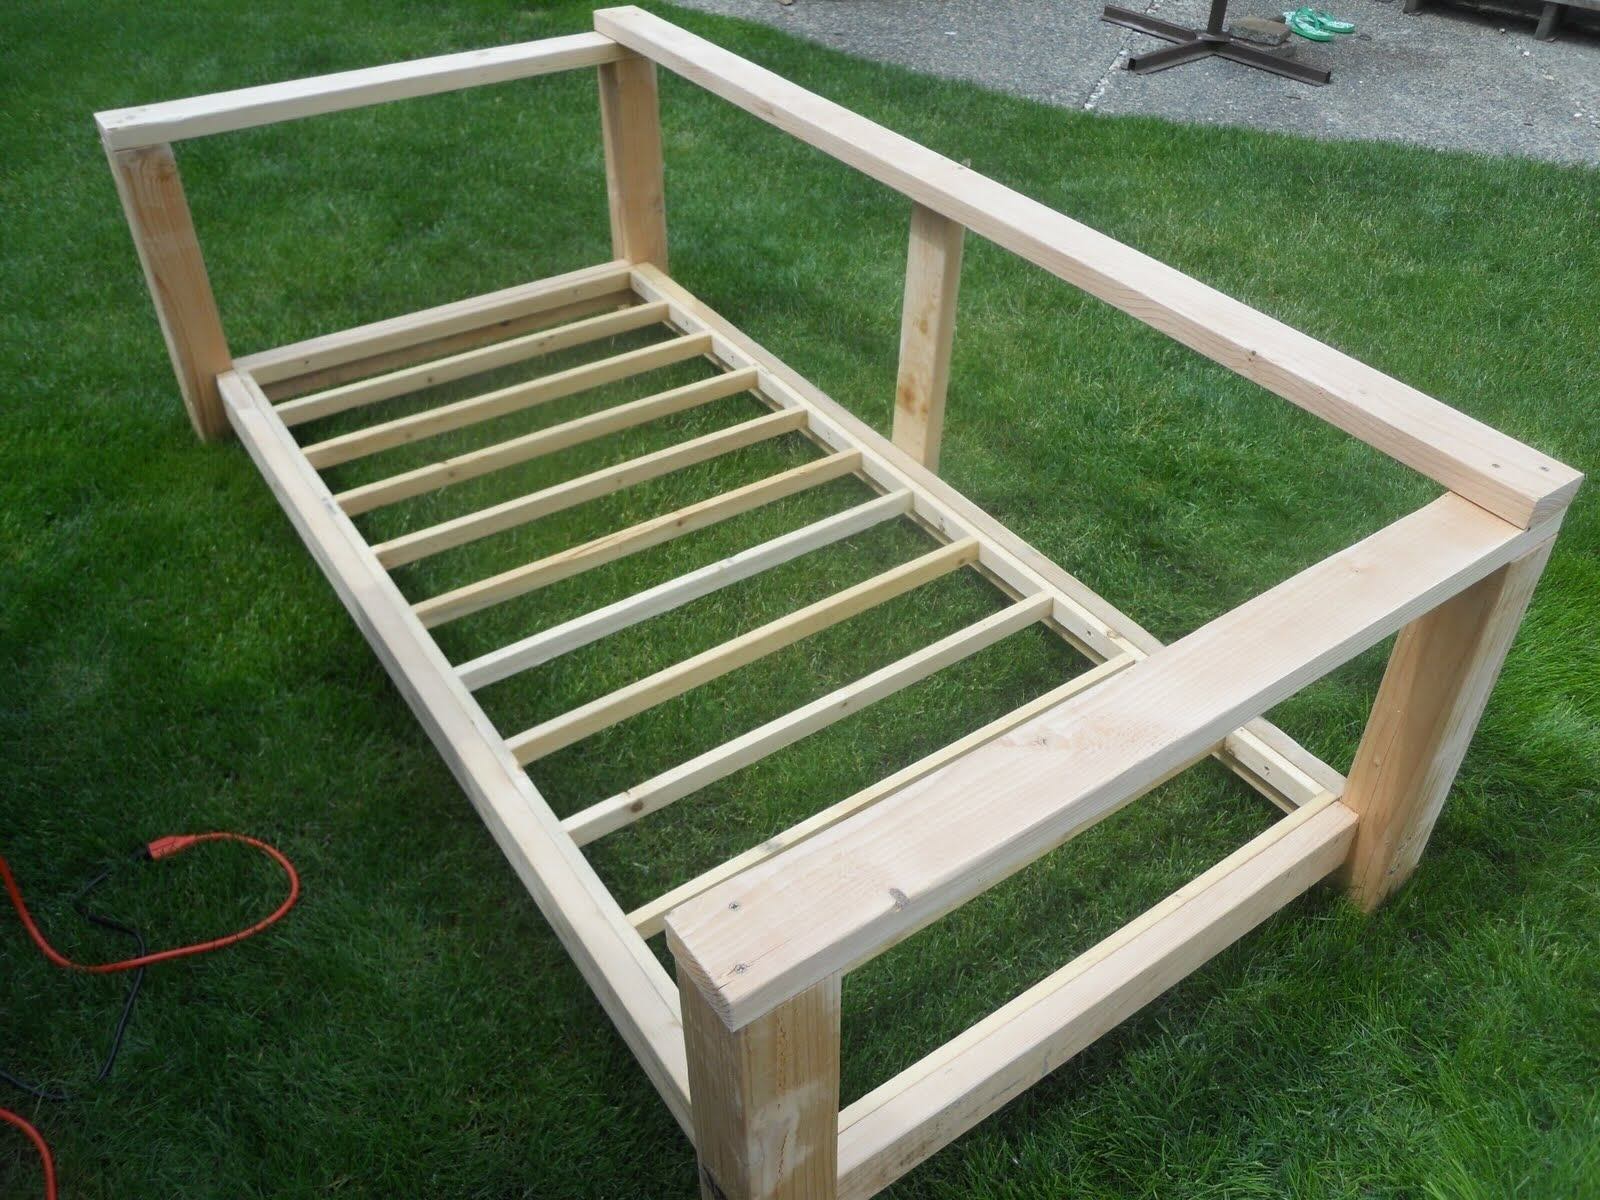
Now that you have all the components of the bed frame cut to the appropriate sizes, it’s time to assemble them. Follow these steps to assemble the bed frame:
- Lay out the side panels: Take the two side panels of the bed frame and lay them parallel to each other on a flat surface. Make sure the notches for the hinges and hardware are facing inward.
- Attach the support slats: Place the pre-cut support slats across the two side panels, evenly spacing them apart. Align the slats with the top and bottom edges of the side panels.
- Secure the slats: Use screws or nails to firmly attach the support slats to the side panels. Make sure the slats are level and flush with the edges of the side panels.
- Join the front and back panels: Attach the front and back panels of the bed frame to the side panels. Use screws or nails to secure the joints, ensuring a sturdy connection.
- Apply wood glue: To reinforce the bed frame, apply wood glue to all the joints before securing them with screws or nails. This will provide additional strength and durability.
- Check for squareness: Use a carpenter’s square or a measuring tape to ensure that the bed frame is square and all angles are 90 degrees. Adjust if necessary.
- Allow the glue to dry: If you used wood glue, give it sufficient time to dry according to the manufacturer’s instructions before moving on to the next step.
By following these steps, you will have successfully assembled the basic structure of the bed frame. Now, it’s time to proceed with Step 4: Install the Hardware.
Step 4: Install the Hardware
Installing the hardware is a crucial step in building a functional Murphy bed. The hardware allows for the smooth and secure operation of the bed, ensuring safety and convenience. Follow these steps to install the necessary hardware:
- Attach the hinge plates: Take the hinge plates from the bed hardware kit and align them with the notches you created on the side panels of the bed frame. Use screws or bolts to firmly secure the hinge plates in place.
- Install the pivot pins: Insert the pivot pins into the hinge plates. These pins will allow the bed frame to pivot up and down smoothly.
- Attach the mattress support mechanism: Depending on the type of hardware kit you have, install the appropriate mechanism to support the mattress when the bed is in the upright position. This may be in the form of springs, pistons, or a combination of both.
- Test the movement: Before proceeding to the next step, test the movement of the bed frame. Ensure that it opens and folds back smoothly and that the hardware is securely in place. Make any necessary adjustments or tighten any loose screws.
It is essential to follow the manufacturer’s instructions provided with the hardware kit during this step. Each kit may have specific installation requirements, and it’s important to adhere to them for optimal functionality and safety.
Once the hardware is installed, you’re ready to move on to Step 5: Attach the Bed Frame to the Wall.
When building a Murphy bed, make sure to use high-quality hardware and materials to ensure the bed is sturdy and safe for use. This will also help prolong the life of the bed.
Read more: What Is A Murphy Bed
Step 5: Attach the Bed Frame to the Wall
Attaching the bed frame to the wall is a critical step in ensuring the stability and safety of your Murphy bed. Follow these steps to securely mount the bed frame to the wall:
- Locate the studs: Use a stud finder to locate the studs in the wall where you plan to install the bed frame. Studs provide the necessary support for the weight of the bed and help distribute the load evenly.
- Mark the stud locations: Once you’ve located the studs, mark their positions on the wall using a pencil or masking tape. These markings will serve as a guide for attaching the bed frame.
- Position the bed frame: With the help of a friend or family member, hold the bed frame in its intended location against the wall. Make sure it is level and align it with the marked stud locations.
- Secure the bed frame to the wall: Use screws or lag bolts to securely fasten the bed frame to the wall, ensuring that you are drilling into the studs. Follow the manufacturer’s instructions for the recommended screw or bolt size and spacing.
- Double-check stability: Once the bed frame is attached, give it a gentle shake to ensure that it is securely anchored to the wall. Check for any excessive movement or instability. If necessary, tighten the screws or bolts further or make any adjustments to ensure a secure attachment.
Attaching the bed frame to the wall is a critical step to prevent accidents and ensure the bed functions properly. Take your time to ensure a secure installation, as the safety and stability of the Murphy bed depend on it.
Now that the bed frame is securely fastened to the wall, it’s time to move on to Step 6: Add Supports and Locking Mechanisms.
Step 6: Add Supports and Locking Mechanisms
Adding supports and locking mechanisms to your Murphy bed is essential for its functionality and safety. These components provide additional stability when the bed is in use and ensure that it remains securely in place when folded up. Follow these steps to add supports and locking mechanisms:
- Install support legs: Depending on the design of your Murphy bed, you may need to install support legs. These legs will provide additional support for the bed frame when it is in the open position. Attach the support legs according to the manufacturer’s instructions, typically using screws or bolts.
- Attach support brackets: Install support brackets to reinforce the connection between the bed frame and the wall. These brackets provide extra stability and help distribute the weight of the bed. Again, follow the manufacturer’s instructions for the proper installation method and hardware.
- Add locking mechanisms: Install locking mechanisms to secure the bed frame in the upright position when not in use. These can include latch systems or hook-and-eye mechanisms. Ensure that the locking mechanisms are robust and reliable to prevent any accidental folding of the bed.
- Test the supports and locking mechanisms: Once everything is installed, carefully test the supports and locking mechanisms. Open and close the bed several times to ensure that the supports provide adequate stability and that the locking mechanisms effectively hold the bed frame in place.
By following these steps, you’ll ensure that your Murphy bed is both functional and secure, providing a comfortable sleeping solution that can be safely stowed away when not in use.
With the supports and locking mechanisms in place, it’s time to move on to Step 7: Attach the Bed Frame Door.
Step 7: Attach the Bed Frame Door
Attaching the bed frame door is the final step in completing your Murphy bed. The door not only adds to the aesthetic appeal but also serves as a protective cover when the bed is folded up. Follow these steps to attach the bed frame door:
- Measure and cut the door panel: Measure the dimensions of the front of the bed frame and cut a plywood or solid wood panel accordingly. Make sure the door panel matches the style and finish of the bed frame to create a cohesive look.
- Attach hinges to the door panel: Attach hinges to one side of the door panel. These hinges will allow the door to swing open and closed smoothly. Ensure the hinges are positioned correctly, making sure the door will close flush with the bed frame.
- Align the door on the bed frame: With the help of a friend or family member, carefully align the door panel with the bed frame. Make sure the hinges are properly aligned with the side panel hinge plates on the bed frame.
- Secure the hinges: Once the door is properly positioned, use screws to secure the hinges to the hinge plates on the side panels. Ensure the door swings open and closed smoothly without any obstructions.
- Test the door operation: Open and close the door multiple times to ensure that it operates smoothly and aligns correctly with the bed frame. Make any necessary adjustments if the door is not properly aligned.
- Finishing touches: Sand any rough edges of the door panel and apply paint or stain to match the desired look of your Murphy bed. This will create a cohesive and polished appearance.
By following these steps, you will have successfully attached the bed frame door, completing your Murphy bed. Take a moment to admire your handiwork before moving on to the final step.
With the bed frame door attached, it’s time to move on to Step 8: Test the Bed and Make Adjustments.
Step 8: Test the Bed and Make Adjustments
Now that your Murphy bed is complete, it’s time to test it and make any necessary adjustments for optimal performance. Follow these steps to ensure your bed functions smoothly:
- Place the mattress on the bed frame: Carefully place your mattress on the bed frame, ensuring it fits snugly within the dimensions of the frame.
- Test the bed’s folding mechanism: Gently lift the foot of the bed to fold it up against the wall. Pay attention to how smoothly the bed folds and unfolds. If you encounter any resistance or stiffness, check for any obstructions or misalignments in the hinges and hardware.
- Secure the bed in its folded position: Once the bed is folded up, check that the locking mechanisms effectively secure the bed in place. Ensure that the bed remains stable and does not accidentally unfold while in its upright position.
- Test the bed’s functionality: Carefully lower the bed to its open position and ensure that it remains level and comfortable to sleep on. Test the support legs, brackets, and locking mechanisms to ensure they perform as intended.
- Make adjustments if necessary: If you encounter any issues or inconsistencies during testing, make the necessary adjustments. This may include tightening screws, realigning hinges, or reinforcing supporting components to improve stability and functionality.
Take the time to thoroughly test your Murphy bed and make any necessary adjustments to ensure its smooth operation. It’s essential to prioritize safety and comfort when using your bed on a daily basis.
Congratulations! You have successfully built and tested your Murphy bed. Enjoy the newfound space and functionality it brings to your bedroom.
With these eight steps, you now have the knowledge and guidance to build your very own Murphy bed. Remember to follow safety guidelines, refer to manufacturer instructions, and take your time throughout the process. Before you know it, you’ll have a stylish and practical furniture piece that transforms your bedroom into a versatile space.
Happy building!
Read more: How To Install A Murphy Bed
Conclusion
Congratulations on completing the journey of building your very own Murphy bed! By following the step-by-step guide outlined in this article, you have acquired the skills and knowledge to create a functional and space-saving piece of furniture. Your Murphy bed provides flexibility and versatility in your bedroom, transforming it into a multifunctional space that meets your needs.
Throughout the process, you gathered the necessary materials and tools, measured and cut the bed frame with precision, assembled it securely, installed the hardware for smooth operation, attached it to the wall, added supports and locking mechanisms, attached the door panel, and finally, tested the bed’s functionality. Each step has contributed to the successful completion of your project.
Remember, safety is important when utilizing your Murphy bed. Always check that the bed frame is securely fastened to the wall, and ensure that the locking mechanisms properly secure the bed in its upright position. Regularly inspect and maintain the hardware to keep your Murphy bed in excellent working condition for years to come.
In addition to the practical benefits, your Murphy bed adds a touch of style and elegance to your bedroom. Consider painting or staining the bed frame to match your existing decor or create a statement piece. Customize it further with decorative accents or lighting for a personalized touch.
Not only have you created a functional piece of furniture, but you have also developed valuable DIY skills along the way. Feel free to share your newfound knowledge and accomplishments with others, as building a Murphy bed can inspire and encourage creative solutions for optimizing living spaces.
Thank you for joining us on this DIY adventure. We hope you enjoy the benefits of your newly built Murphy bed and the additional space and flexibility it offers in your home. Now, get ready to rest and sleep soundly, knowing that you’ve conquered the art of building a Murphy bed!
Happy sleeping!
Frequently Asked Questions about How To Build A Murphy Bed
Was this page helpful?
At Storables.com, we guarantee accurate and reliable information. Our content, validated by Expert Board Contributors, is crafted following stringent Editorial Policies. We're committed to providing you with well-researched, expert-backed insights for all your informational needs.









0 thoughts on “How To Build A Murphy Bed”