Home>Furniture>Kitchen Furniture>How to Remove Magic Chef’s Stove Burners
Kitchen Furniture
How to Remove Magic Chef’s Stove Burners
Modified: May 6, 2024
Looking to remove stove burners in your Magic Chef appliance? Read our helpful articles for step-by-step instructions and expert tips on safely removing and cleaning stove burners.
(Many of the links in this article redirect to a specific reviewed product. Your purchase of these products through affiliate links helps to generate commission for Storables.com, at no extra cost. Learn more)
Introduction
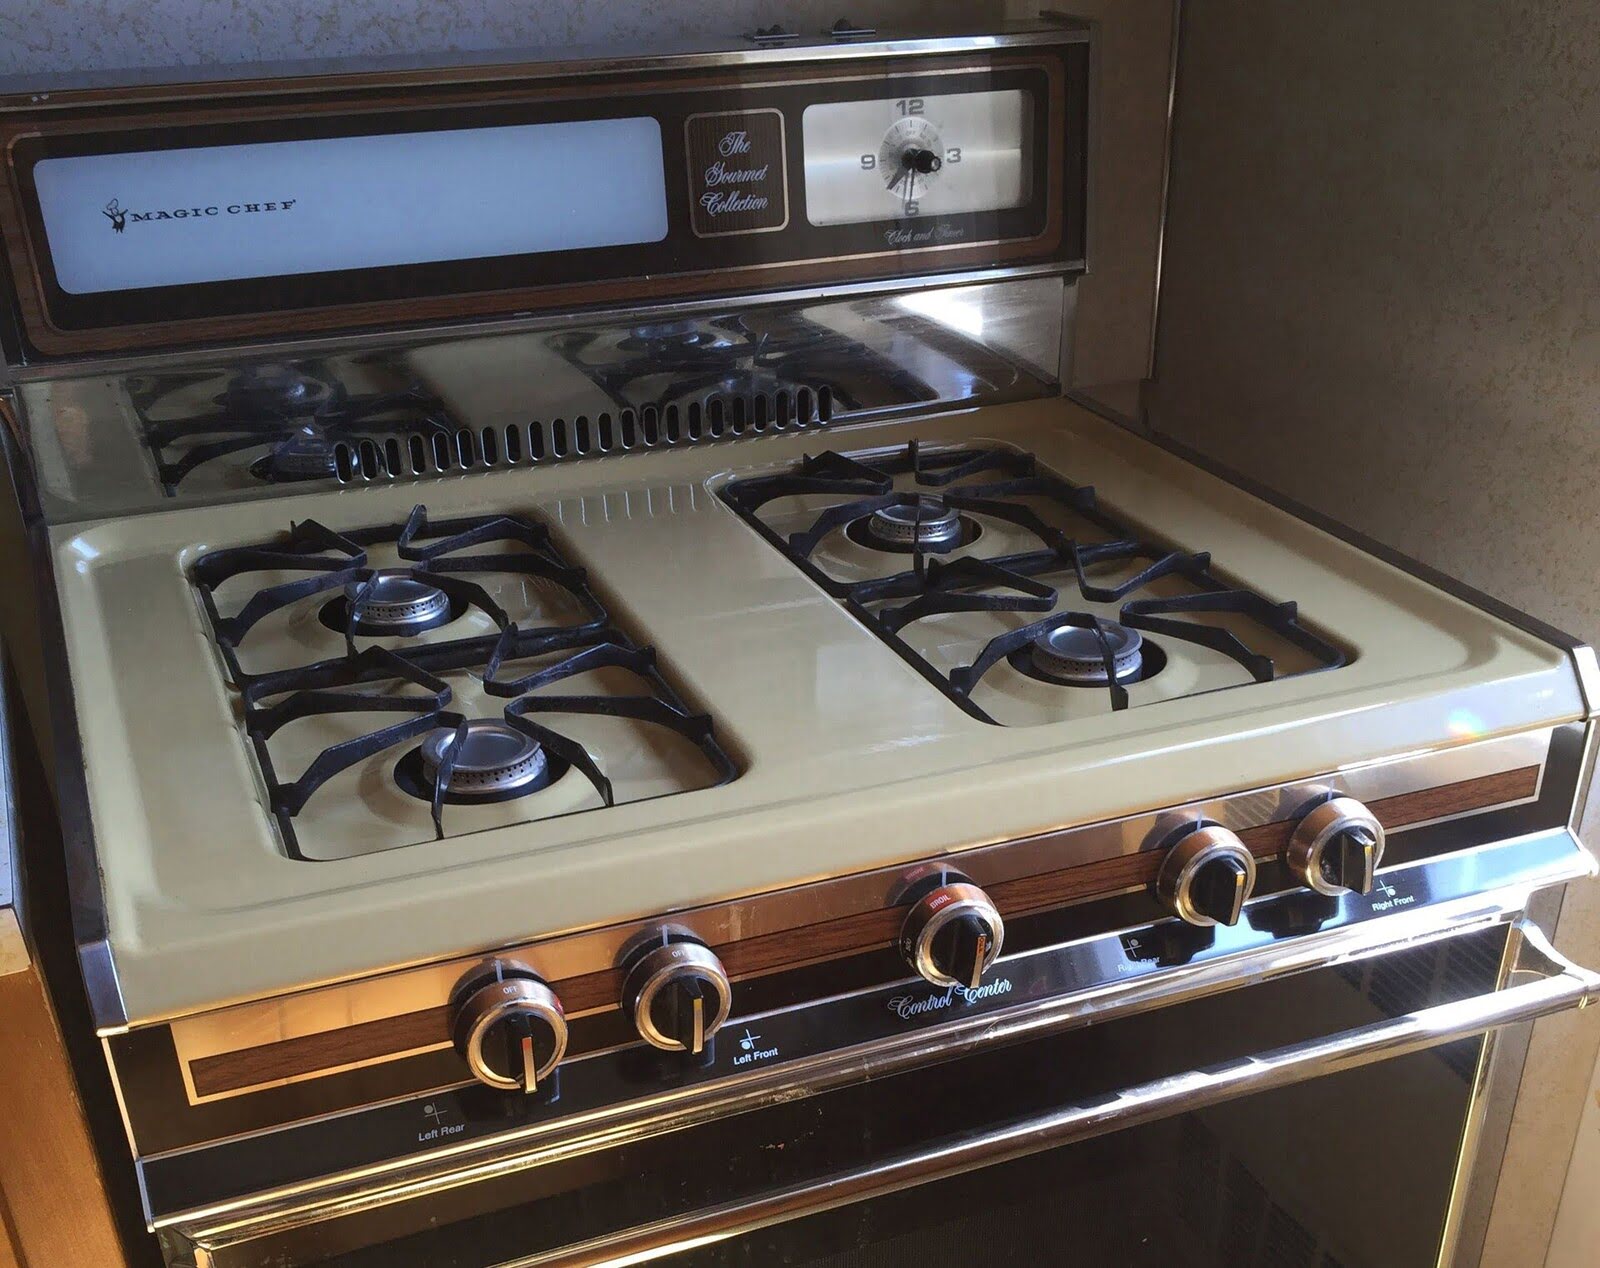
Welcome to this comprehensive guide on how to remove stove burners from a Magic Chef stove. The burners are an essential component of any stove, and over time, they can become dirty and clogged, affecting the overall performance of your appliance. Regular maintenance and cleaning of the burners are necessary to ensure optimal functionality and prevent potential hazards. Whether you’re experiencing poor heat distribution, uneven cooking, or simply want to give your stove a thorough cleaning, this step-by-step guide will walk you through the process of safely removing the stove burners from your Magic Chef stove.
Before we get started, it’s important to note that safety should always be your top priority when working with any electrical appliance. Make sure to follow all safety precautions outlined in the user manual of your specific Magic Chef stove model. If you’re unsure about any step, consider consulting a professional or contacting the manufacturer for guidance.
Now, let’s gather the necessary tools and materials before we begin the process of removing the stove burners.
Key Takeaways:
- Regular maintenance and cleaning of stove burners is crucial for optimal performance and safety. Follow the step-by-step guide to safely remove and clean Magic Chef stove burners for efficient cooking results.
- Prioritize safety by disconnecting the power and wearing protective gear before cleaning stove burners. Reassemble the components carefully to ensure stable and efficient burner performance.
Read more: How To Remove Stove Burners
Tools and Materials Needed
Before you start removing the stove burners, make sure you have the following tools and materials readily available:
- Screwdriver – You’ll need a screwdriver to remove any screws or fasteners holding the burners in place.
- Soft Cloth or Sponge – To clean the burners and remove any debris or grime.
- Mild Dish Soap – Use mild dish soap to clean the burners and remove stubborn stains.
- Warm Water – Warm water will help to dissolve grease and dirt on the burners.
- Old Toothbrush or Small Brush – This will come in handy for scrubbing hard-to-reach areas and removing buildup.
- Towel or Drying Rack – Use a towel or drying rack to dry the burners after cleaning.
Ensure that all the tools and materials are easily accessible so that you can navigate through the steps without interruption. Now, let’s move on to the next step and ensure that we take necessary safety precautions.
Step 1: Safety Precautions
Prior to removing the stove burners, it’s crucial to take certain safety precautions to protect yourself and prevent any accidents. Here are a few essential safety measures to consider:
- Turn off the Stove: Make sure the stove is completely turned off and unplugged from the power source. This will prevent any electrical accidents or unintended ignition of the burners during the removal process.
- Allow the Stove to Cool: It’s important to allow the stove to cool down before attempting to remove the burners. This will prevent any burns or injuries from hot surfaces.
- Wear Protective Gear: To protect your hands and prevent any chemical exposure, consider wearing gloves and safety goggles throughout the process. This will safeguard you from any potential harm or injuries.
- Work in a Well-Ventilated Area: Ensure that the area where you’re working is well-ventilated. This will help disperse any fumes or odors that may arise during the cleaning process.
By adhering to these safety precautions, you’ll minimize the risk of accidents and ensure a secure working environment. Now that you’ve taken the necessary safety measures, let’s move on to disconnecting the power to the stove.
Step 2: Disconnecting the Power
Before you begin removing the stove burners, it’s crucial to disconnect the power supply to your Magic Chef stove. This step ensures your safety and prevents any potential electrical accidents. Here’s how you can safely disconnect the power:
- Locate the Power Source: First, find the power cord of your stove. It should be located at the back of the appliance.
- Unplug the Power Cord: Gently pull out the power cord from the wall socket to disconnect the power supply to the stove. Make sure the cord is completely detached from the power source.
- Confirm Power Disconnection: To ensure that the power is indeed disconnected, try turning on the stove. If it doesn’t turn on, you can proceed with confidence knowing that it is completely powered off.
By disconnecting the power supply, you eliminate the risk of electric shock or accidental ignition of the burners. Now that you’ve successfully disconnected the power, it’s time to move on to the next step: removing the grates and drip pans.
Step 3: Removing the Grates and Drip Pans
Now that you’ve safely disconnected the power, it’s time to remove the grates and drip pans from your Magic Chef stove. Removing these components will provide better access to the burners for cleaning and maintenance. Follow these steps:
- Allow the Stove to Cool: Ensure that the stove has cooled down before attempting to remove the grates and drip pans. Touching hot surfaces can result in burns.
- Remove the Grates: Carefully lift the grates from the stove and set them aside. Depending on your stove model, the grates may be separate or connected.
- Take Out the Drip Pans: Locate the drip pans beneath the grates. These pans collect any food debris or spills. Slide them out from their position and place them aside for cleaning.
Once you have removed the grates and drip pans, they can be cleaned separately using warm soapy water or a suitable cleaning solution. Make sure to dry them thoroughly before reassembling them back onto the stove. Now that the grates and drip pans are out of the way, we can proceed to the next step: removing the burner caps.
Read more: How To Remove Electric Stove Burners
Step 4: Removing the Burner Caps
Now that the grates and drip pans have been safely removed, it’s time to move on to removing the burner caps from your Magic Chef stove. The burner caps are the topmost components of the burners and often accumulate grease and debris. Follow these steps to remove the burner caps:
- Identify the Burner Caps: Take a closer look at the burners on your stove. Each burner will have a corresponding burner cap. Identify the burner caps that need to be removed.
- Gently Lift the Burner Caps: Use your fingers or a gentle prying tool to lift the burner caps. Be cautious not to apply too much force as they can be delicate.
- Set Aside the Burner Caps: Once the burner caps are lifted, carefully set them aside on a clean and safe surface. This will prevent them from getting damaged or misplaced during the cleaning process.
With the burner caps removed, you now have better access to the burner heads. Take a moment to inspect the burner heads for any visible debris or buildup. If needed, use a soft cloth or brush to remove any loose dirt before proceeding to the next step: detaching the burner heads.
To remove stove burners on a Magic Chef stove, first ensure the burners are cool. Then, gently lift and pull the burner away from the stove. If there are any clips or screws holding the burner in place, carefully remove them before lifting the burner.
Step 5: Detaching the Burner Heads
Now that the burner caps have been removed, it’s time to detach the burner heads from your Magic Chef stove. The burner heads are responsible for dispersing heat and can become clogged with food particles or grease over time. Follow these steps to safely detach the burner heads:
- Locate the Burner Heads: Identify the burner heads that need to be detached. Each burner on your stove will have a corresponding burner head.
- Unscrew the Burner Heads: Use a screwdriver or the appropriate tool to unscrew the burner heads from their positions. Be gentle and take care not to force or strip the screws.
- Remove the Burner Heads: Once the screws are removed, carefully lift the burner heads from their positions. Take note of any gaskets or seals that may be present and ensure they stay intact.
- Set Aside the Burner Heads: Place the detached burner heads in a safe location to avoid any damage or misplacement during the cleaning process.
With the burner heads detached, you can now proceed to clean them thoroughly to remove any accumulated grime or debris. Follow the next step to learn how to properly clean the burner heads for optimal performance.
Step 6: Cleaning the Burners
Now that the burner heads have been detached, it’s time to clean them to ensure optimal performance and efficiency. Regular cleaning of the burners helps remove grease, food particles, and other debris that can impede their functionality. Follow these steps to effectively clean the burners:
- Prepare a Cleaning Solution: Fill a basin or sink with warm water and add a few drops of mild dish soap. This gentle solution will help dissolve grease and dirt.
- Submerge the Burner Heads: Submerge the detached burner heads in the cleaning solution and let them soak for about 15-20 minutes. This will help loosen any buildup.
- Scrub the Burner Heads: After soaking, use a soft cloth or an old toothbrush to scrub the burner heads gently. Pay attention to areas with stubborn stains or debris and scrub in circular motions.
- Rinse Thoroughly: Once the burner heads are clean, rinse them thoroughly under running water to remove any soap residue or remaining dirt.
- Dry the Burner Heads: After rinsing, use a clean towel or allow the burner heads to air dry completely. Ensure they are completely dry before reassembling them onto the stove.
Once the burner heads are cleaned and dried, proceed to the next step to learn how to reassemble them back onto the stove.
Step 7: Reassembling the Burners
With the burner heads now clean and dry, it’s time to reassemble them back onto your Magic Chef stove. Follow these steps to ensure a proper and secure reassembly:
- Inspect the Burner Heads: Before reassembling, take a moment to inspect the burner heads for any signs of damage or wear. Ensure that any gaskets or seals are intact and in good condition.
- Align the Burner Heads: Carefully align the burner heads with their respective openings on the stove. Make sure they are correctly positioned to ensure efficient heat distribution.
- Secure with Screws: Using the screwdriver or appropriate tool, tighten the screws to secure the burner heads in place. Take care not to overtighten to avoid any damage.
- Test the Stability: Gently shake the burner heads to ensure they are securely fastened and do not wobble or come loose. If necessary, tighten the screws further.
With the burner heads successfully reassembled, it’s time to move on to the final step: reconnecting the power supply to your Magic Chef stove.
Read more: How To Remove Whirlpool Stove Burners
Step 8: Reconnecting the Power
After successfully reassembling the burners onto your Magic Chef stove, it’s time to reconnect the power supply. Follow these steps to safely restore power to your appliance:
- Confirm the Stove is Off: Double-check that all burner knobs are in the off position before reconnecting the power. This will prevent any accidental ignition of the burners.
- Locate the Power Cord: Find the power cord of your stove, which should be located at the back of the appliance.
- Plug In the Power Cord: Align the prongs of the power cord with the corresponding slots in the wall socket. Firmly plug in the power cord to reconnect the power supply.
- Ensure Proper Connection: Ensure that the power cord is securely connected and there are no loose or exposed wires. This will help prevent any electrical hazards.
- Turn On the Stove: After confirming a secure power connection, turn on the stove and test each burner to ensure they are functioning properly.
With the power restored and the burners reassembled, you have successfully completed the process of removing and cleaning stove burners on your Magic Chef stove. Enjoy cooking with efficiently performing burners and a clean cooking surface!
Remember, regular maintenance and cleaning of your stove burners will not only improve their performance but also prolong the lifespan of your appliance. Make it a habit to clean the burners periodically to prevent buildup and ensure optimal functionality.
Thank you for following this comprehensive guide. Stay safe and happy cooking!
Conclusion
In conclusion, knowing how to remove stove burners from your Magic Chef stove is an essential skill for maintaining the performance and longevity of your appliance. By following the step-by-step instructions outlined in this guide, you can safely and effectively clean the burners to ensure optimal cooking results.
Remember to always prioritize safety by disconnecting the power and wearing protective gear before starting the cleaning process. Take the time to gather the necessary tools and materials to make the task more efficient and convenient.
Through a series of steps, you learned how to remove the grates and drip pans, followed by the burner caps and burner heads. Each component was then carefully cleaned to remove grease, debris, and stains, resulting in improved burner performance.
After cleaning, the burner heads were reassembled onto the stove, ensuring proper alignment and stability. Finally, the power supply was safely reconnected, allowing you to enjoy the fully functioning burners once again.
Regular maintenance and cleaning of stove burners are vital to prevent clogs, uneven cooking, and potential hazards. By incorporating these cleaning practices into your routine, you can extend the lifespan of your Magic Chef stove and ensure consistent cooking performance.
We hope this guide has provided you with the knowledge and confidence to effectively remove and clean your Magic Chef stove burners. Enjoy cooking with a well-maintained appliance and delicious meals!
Once you've mastered removing burners from your Magic Chef stove, why not explore other ways to enhance your kitchen skills? For those intrigued by culinary gadgets, check out our guide on the latest Magic Chef Air Fryer reviews, perfect for whipping up quick and healthy meals. If cleanliness is your priority, our comprehensive cleaning tips for refrigerators will ensure your fridge is spotless, boosting its efficiency and lifespan. And for appliance enthusiasts, learning how to remove Whirlpool stove burners might just make your maintenance routine a breeze. Dive into these articles to keep your home running smoothly and your cooking game strong.
Frequently Asked Questions about How To Remove Magic Chef's Stove Burners
Was this page helpful?
At Storables.com, we guarantee accurate and reliable information. Our content, validated by Expert Board Contributors, is crafted following stringent Editorial Policies. We're committed to providing you with well-researched, expert-backed insights for all your informational needs.


0 thoughts on “How to Remove Magic Chef’s Stove Burners”