Home>Furniture>Living Room Furniture>How To Make A Giant Bean Bag Chair

Living Room Furniture
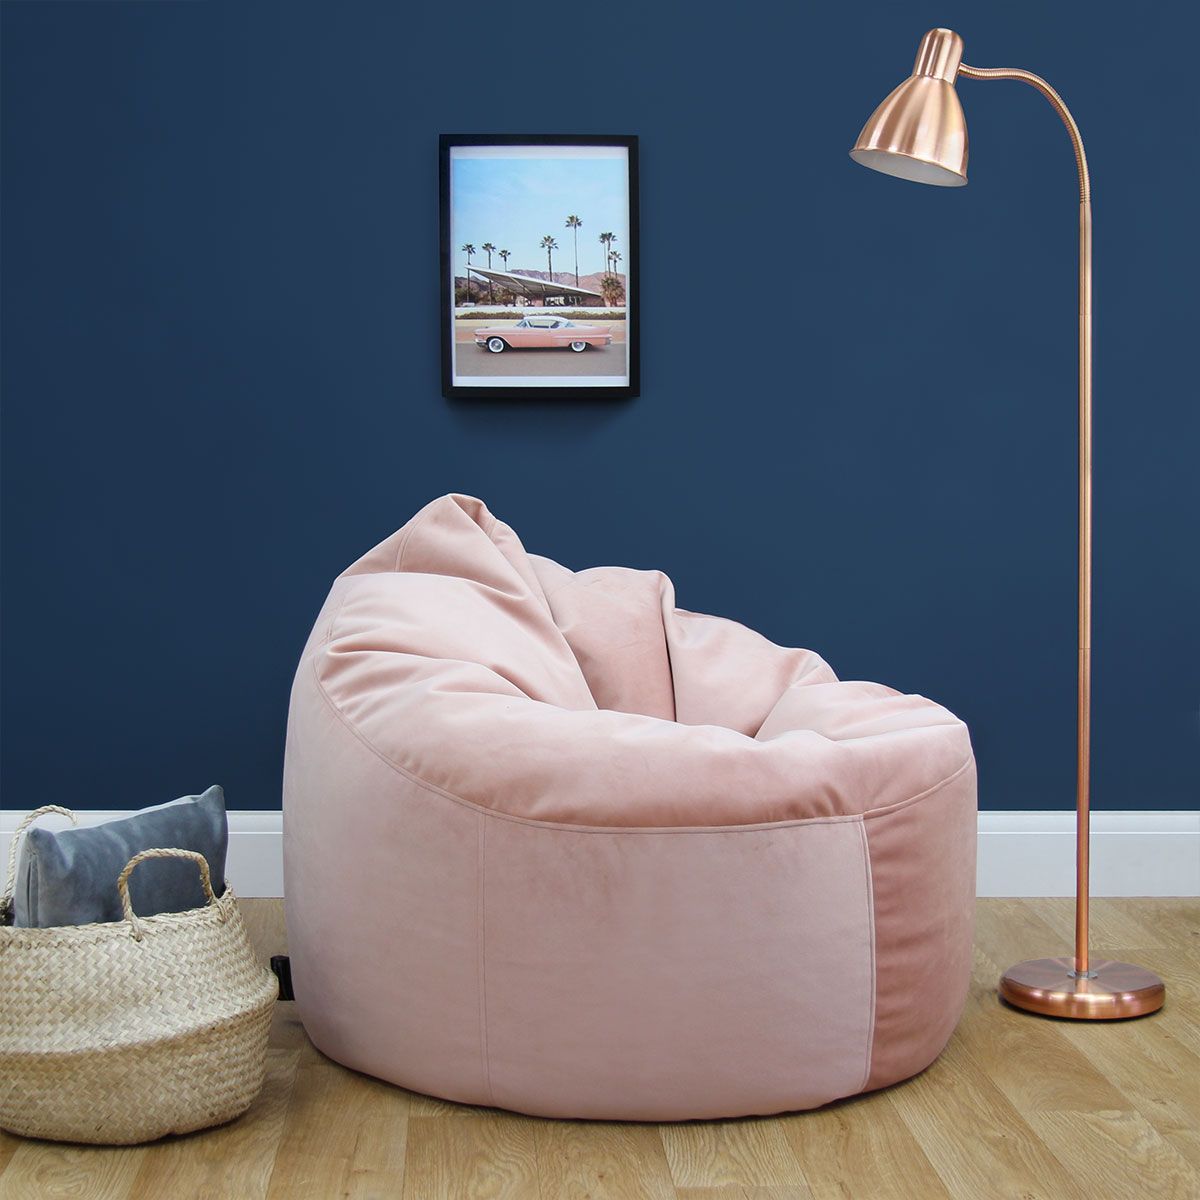
How To Make A Giant Bean Bag Chair
Modified: March 16, 2024
Discover how to make your own giant bean bag chair for your living room. Transform your space with this stylish and cozy piece of living room furniture.
(Many of the links in this article redirect to a specific reviewed product. Your purchase of these products through affiliate links helps to generate commission for Storables.com, at no extra cost. Learn more)
Introduction
Welcome to the world of ultimate comfort and relaxation – the giant bean bag chair! If you’re looking for a stylish and cozy addition to your living room furniture, then a giant bean bag chair is the perfect choice. Not only does it provide ample seating space, but it also adds a touch of fun and whimsy to any room.
Creating your own giant bean bag chair may seem like a daunting task, but fear not! In this article, we will guide you through the step-by-step process of making your very own bean bag chair. With a few basic materials and some sewing skills, you’ll have the comfiest seat in the house.
Before we dive into the details, let’s talk about the materials you’ll need for this project. Having everything prepared ahead of time will make the process smoother and more enjoyable.
Key Takeaways:
- Creating a giant bean bag chair is a fun and rewarding DIY project. With the right materials and sewing skills, you can customize your living room furniture for ultimate comfort and style.
- By following the step-by-step process outlined in the article, you can make your own cozy and inviting bean bag chair. Personalize it with your favorite fabrics and patterns to reflect your unique style.
Read more: Who Makes The Best Bean Bag Chairs
Materials Needed
Before you get started, gather the following materials:
- Heavy-duty fabric: Choose a durable fabric that can withstand daily use. Nylon, denim, or polyester are great options.
- Thread: Select a thread that matches the color of your fabric for a seamless finish.
- Zipper: Look for a sturdy zipper that is at least 20 inches long. This will allow you to easily fill and empty the bean bag chair.
- Bean bag filling: You can use polyurethane foam pellets, shredded memory foam, or traditional bean bag filler. The amount of filling will depend on the size of your chair.
- Scissors: A sharp pair of fabric scissors will make cutting your fabric panels much easier.
- Sewing machine: While it is possible to sew the bean bag chair by hand, a sewing machine will save you time and effort.
- Pins: Use straight pins to hold your fabric panels in place while sewing.
- Measuring tape: Accurate measurements are key to ensuring a well-fitted and comfortable bean bag chair.
- Pencil or fabric marker: These tools will help you mark your fabric panels for cutting and sewing.
- Iron and ironing board: Pressing your fabric before sewing will result in a more polished final product.
Once you have gathered all of the necessary materials, it’s time to move on to the next step – preparing the fabric.
Step 1: Preparing the fabric
Before you start cutting and sewing your fabric panels, it’s important to properly prepare the fabric to ensure a smooth and professional-looking bean bag chair. Here’s what you need to do:
- Wash and dry the fabric: If your fabric is machine washable, it’s a good idea to give it a gentle wash to remove any dirt or residue. Follow the manufacturer’s instructions for washing and drying. This will help prevent any shrinkage or fading after the bean bag chair is completed.
- Iron the fabric: Once your fabric is dry, iron it to remove any wrinkles or creases. This step is crucial for achieving a clean and polished finish.
- Lay out the fabric: Find a large, flat surface where you can lay out your fabric. Ensure that it is free from obstructions and smooth out any wrinkles.
- Cut the fabric panels: Using your measuring tape and fabric marker or pencil, measure and mark the dimensions for your fabric panels. The size and shape will depend on how big you want your bean bag chair to be. It’s recommended to have two identical fabric panels for the top and bottom, and four identical panels for the sides. Cut along the marked lines using sharp fabric scissors.
By taking the time to properly prepare your fabric, you’ll be setting yourself up for success in the next steps of the bean bag chair-making process. Now that your fabric is ready, it’s time to move on to cutting and sewing the fabric panels.
Step 2: Cutting and sewing the fabric panels
Now that your fabric is prepared, it’s time to cut and sew the fabric panels for your giant bean bag chair. Follow these steps to ensure a professional-looking and comfortable chair:
- Arrange the fabric panels: Lay out your fabric panels on a large, flat surface, making sure that the right sides are facing each other. This will ensure that the seams are on the inside of the bean bag chair.
- Pinning the panels: Use straight pins to secure the fabric panels together. Start by pinning the sides together, matching up the edges and corners. Repeat this process for all the panels.
- Sewing the panels: Using a sewing machine and a straight stitch, sew along the pinned edges of the fabric panels. Leave one side open to insert the filling later. Remember to backstitch at the beginning and end of your seams to reinforce them.
- Trim the seams: After sewing the fabric panels together, trim the excess fabric along the seams to reduce bulk and allow for a neater finish.
- Turn the fabric right side out: Carefully turn the fabric right side out through the open side. Use your fingers to push out any corners and create a smooth shape.
- Press the seams: Use an iron on a low heat setting to press the seams. This will help give your bean bag chair a polished look and ensure that the fabric lies flat.
Once you have sewn and pressed the fabric panels, you’re one step closer to completing your giant bean bag chair. The next step is adding a zipper, which will allow you to easily fill and empty the chair. Let’s move on to the next step.
When making a giant bean bag chair, be sure to use durable and washable fabric to withstand the weight and frequent use. Double stitching and reinforced seams will also help to prevent any tearing or bursting.
Step 3: Adding a zipper
Adding a zipper to your giant bean bag chair is essential for easy access to the filling. Follow these steps to seamlessly incorporate a zipper into your design:
- Measure and mark the zipper placement: Decide on the location for your zipper on one of the sides of the bean bag chair. Use a measuring tape and fabric marker to mark the length and position of the zipper.
- Prepare the fabric for the zipper: Cut a straight line along the marked length of the zipper placement. Make sure the cut is slightly longer than the actual length of the zipper to ensure a proper fit.
- Pinning the zipper: Open the zipper and place it face down on the wrong side of the fabric, aligning the edges with the cut opening. Pin the zipper in place using straight pins.
- Sewing the zipper: Attach a zipper foot to your sewing machine and sew along the edge of the zipper, removing the pins as you go. Start and end the stitching about an inch away from the ends of the zipper to allow for smooth opening and closing.
- Secure the ends of the zipper: To prevent the zipper from opening completely, sew a few stitches across the ends of the zipper tape, creating a stopper.
With the zipper securely attached, you now have a convenient opening to fill your bean bag chair. In the next step, we will guide you through the process of filling the chair. Stay tuned!
Read more: What Is A Bean Bag Chair
Step 4: Filling the bean bag chair
It’s time to bring your giant bean bag chair to life by filling it with the cozy stuffing. Follow these steps to ensure a plush and comfortable seat:
- Choose your filling: There are various options for bean bag chair filling, such as polyurethane foam pellets, shredded memory foam, or traditional bean bag filler. Select the filling that best suits your comfort preferences.
- Prepare your filling: If you’re using foam pellets or shredded memory foam, fluff them up by massaging and breaking apart any clumps. This will help them conform to the shape of your chair and provide optimal comfort.
- Fill the chair gradually: Start by gently pouring your filling into the bean bag chair through the zipper opening. Fill it in small amounts and periodically fluff and distribute the filling to ensure even distribution throughout the chair.
- Check the firmness: As you fill the chair, periodically sit on it to gauge the firmness level. Add more filling if necessary to achieve your desired level of comfort.
- Avoid overfilling: Be mindful not to overfill the bean bag chair, as this can put strain on the seams and zipper. Leave some space inside for the filling to conform and provide a comfortable seating experience.
Once you’re satisfied with the amount of filling, you’re almost done! The final step is to close the bean bag chair securely. Let’s move on to the next step to complete your creation.
Step 5: Closing the bean bag chair
You’re in the home stretch! The final step is to securely close your bean bag chair to keep the filling in place and ensure its longevity. Follow these steps to complete your project:
- Align the fabric edges: Ensure that the opening of your bean bag chair is aligned properly and that the fabric edges meet evenly. Adjust as necessary to create a seamless look.
- Pinning the fabric: Use straight pins to secure the fabric edges together. Make sure the pins are positioned close to the edge to prevent them from interfering with the zipper or causing discomfort when sitting on the bean bag chair.
- Sewing the opening: Using a sewing machine, stitch along the pinned edge to close the opening. A double stitch or a zigzag stitch is recommended for added durability.
- Add reinforcement stitches: To further strengthen the closure, consider sewing a few reinforcement stitches over the opening. This will provide extra security and prevent any accidental unraveling.
- Trim any excess threads: Once you’ve finished sewing, trim any loose threads to give your bean bag chair a neat and polished appearance.
And there you have it! Your giant bean bag chair is complete and ready for you to enjoy. Place it in your living room, bedroom, or any other cozy corner of your home, and get ready to sink into its plush embrace.
Remember to fluff and rotate your bean bag chair regularly to maintain its shape and comfort. Additionally, follow the manufacturer’s instructions for cleaning and care to ensure its longevity.
Congratulations on creating your very own giant bean bag chair! Your friends and family will surely be impressed by your DIY skills and the comfort it provides. Sit back, relax, and enjoy your new favorite spot in the house!
Conclusion
Creating your own giant bean bag chair is a rewarding and fun project that allows you to customize your living room furniture to fit your style and comfort. By following the step-by-step process outlined in this article, you’ve learned how to prepare the fabric, cut and sew the panels, add a zipper, fill the chair, and securely close it.
With your new bean bag chair, you’ve not only added a stylish and unique piece to your home but also a cozy and inviting seating option. Whether you’re lounging with a book, watching a movie, or simply relaxing, your giant bean bag chair will provide you with ultimate comfort and relaxation.
Remember to choose durable materials, take accurate measurements, and pay attention to the little details for a professional-looking result. Additionally, don’t be afraid to get creative and personalize your bean bag chair with fabrics and patterns that reflect your personality.
Now it’s time to sit back, sink into your plush bean bag chair, and enjoy many hours of comfort and relaxation. Whether you’re alone or hosting guests, your giant bean bag chair will quickly become a favorite spot in your home.
So gather your materials, put on some cozy music, and start creating your own giant bean bag chair today. Get ready to experience the ultimate in comfort, style, and relaxation!
Frequently Asked Questions about How To Make A Giant Bean Bag Chair
Was this page helpful?
At Storables.com, we guarantee accurate and reliable information. Our content, validated by Expert Board Contributors, is crafted following stringent Editorial Policies. We're committed to providing you with well-researched, expert-backed insights for all your informational needs.


0 thoughts on “How To Make A Giant Bean Bag Chair”