Home>Furniture>Outdoor Furniture>How To Install Trex Decking With Screws
Outdoor Furniture
How To Install Trex Decking With Screws
Modified: August 27, 2024
Learn the step-by-step process of installing Trex decking with screws and enhance your outdoor space with durable and stylish outdoor furniture.
(Many of the links in this article redirect to a specific reviewed product. Your purchase of these products through affiliate links helps to generate commission for Storables.com, at no extra cost. Learn more)
Introduction
Welcome to our comprehensive guide on how to install Trex decking with screws. If you’re looking to enhance your outdoor space with a beautiful and durable deck, Trex decking is an excellent choice. Known for its low maintenance and environmentally friendly features, Trex decking offers a long-lasting solution for your outdoor furniture needs.
Installing Trex decking with screws is a popular method that ensures a secure and reliable deck structure. Unlike other fastening options, such as hidden clips or nails, using screws provides added strength and stability to your deck. In this guide, we’ll walk you through the step-by-step process of installing Trex decking with screws, ensuring that you have all the necessary tools and knowledge to achieve a professional finish.
Before we get started, please note that while the installation process is relatively straightforward, it does require some level of DIY experience and basic woodworking skills. Additionally, ensure that you consult the manufacturer’s instructions and guidelines specific to your Trex decking product to ensure proper installation.
Now, let’s dive into the tools and materials you’ll need to gather before starting the installation process.+
Key Takeaways:
- Installing Trex decking with screws requires careful preparation, precise measurements, and secure attachment. Following the step-by-step process and using the right tools ensures a sturdy and visually appealing outdoor deck.
- Trex decking offers a low-maintenance, eco-friendly, and durable solution for creating a personalized outdoor space. With a wide range of colors and patterns, it allows for customization to suit individual style and preferences.
Read more: What Kind Of Screws To Use With Trex Decking
Tools and Materials Needed
Before you begin installing Trex decking with screws, it’s important to gather all the necessary tools and materials. Here’s a list of what you’ll need:
- Tape measure: Used for taking accurate measurements of the area where the decking will be installed.
- Chalk line: Helps in marking straight lines to guide the installation process.
- Circular saw or miter saw: Used for cutting the Trex decking boards to the desired length.
- Drill: Used for pre-drilling holes in the decking boards to prevent splitting and ensure accurate screw placement.
- Deck screws: Choose high-quality stainless steel or coated deck screws that are designed specifically for use with Trex decking.
- Impact driver or screw gun: Used for driving the deck screws into the boards quickly and efficiently.
- Ratchet or socket wrench: Used for tightening the screws securely.
- Jigsaw: If you need to make any curved or intricate cuts on the decking boards, a jigsaw can be handy.
- Safety equipment: Don’t forget to wear safety glasses, gloves, and ear protection to protect yourself during the installation process.
- Trex decking boards: Choose the color and style that best suits your outdoor space. Ensure that you have enough boards to cover the area and allow for any cuts or waste.
- Pressure-treated lumber: If you’re building a substructure for your deck, pressure-treated lumber will provide added strength and stability.
- Decking screws: In addition to the screws used to attach the decking boards, you’ll need screws to secure the substructure and any fascia boards.
Having these tools and materials ready will ensure a smoother installation process and a successful end result. Now, let’s move on to the first step: preparing the area.
Step 1: Prepare the Area
Before you start installing Trex decking with screws, it’s important to properly prepare the area where the deck will be built. Here’s how to do it:
- Measure and mark the area: Use a tape measure to determine the dimensions of your deck and mark the perimeter using a chalk line. This will provide a clear guideline for the installation process and ensure that the deck is properly aligned.
- Clear the area: Remove any existing furniture, plants, or debris from the area where the deck will be built. Clearing the area will provide a clean and level surface for the installation.
- Check for utilities: Before digging any post holes, it’s important to check for any underground utilities, such as gas, water, or electrical lines. Contact your local utility company to mark the locations of these lines to avoid any accidents or damage during the installation process.
- Prepare the ground: If you’re building a ground-level deck, you’ll need to prepare the ground by removing any grass, weeds, or rocks. Use a shovel or a sod cutter to strip away the top layer of vegetation and create a level surface.
- Consider drainage: Ensure that your deck has proper drainage by sloping the ground away from your house. This will prevent water from pooling on the deck and causing damage over time.
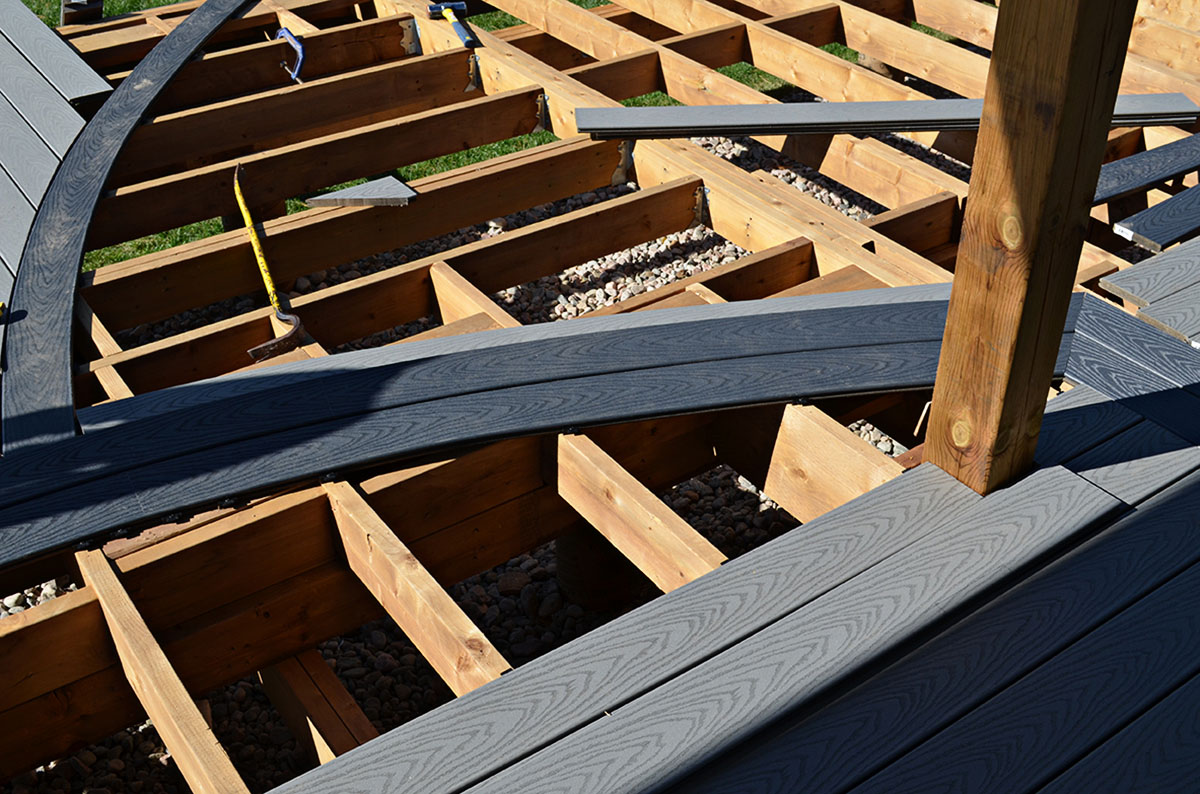
- Install footings: If you’re building an elevated deck, you’ll need to install footings. Dig holes at the marked locations and pour concrete into the holes to create a solid foundation for the deck.
- Attach ledger board: If your deck will be attached to your house, you’ll need to install a ledger board. This board will support the end of the deck that’s against the house. Use lag screws or through-bolts to securely attach the ledger board to the house.
By properly preparing the area, you’ll ensure a stable and long-lasting deck. With the area ready, you can now move on to measuring and planning the layout of your deck, which we’ll discuss in the next step.
Step 2: Measure and Plan
After preparing the area, the next step in installing Trex decking with screws is to measure and plan the layout of your deck. Taking accurate measurements and creating a detailed plan will help ensure a precise and aesthetically pleasing result. Follow these steps:
- Measure the area: Use a tape measure to determine the length and width of your deck. Ensure that you measure from the correct starting point and account for any irregular shapes or angles.
- Consider the deck height: Decide on the desired height of your deck. This will determine the length of the posts or the height of the footings if you’re building an elevated deck.
- Create a scale drawing: Using graph paper or a computer design program, create a scale drawing of your deck. This will help you visualize the layout and determine the number of decking boards required.
- Plan the deck pattern: Decide on the orientation and pattern of the decking boards. You can choose to install them parallel to the house or at a diagonal angle for a unique look. Consider using different board lengths and alternating colors for added visual interest. Take note of any obstacles, such as posts or trees, that may require special attention during installation.
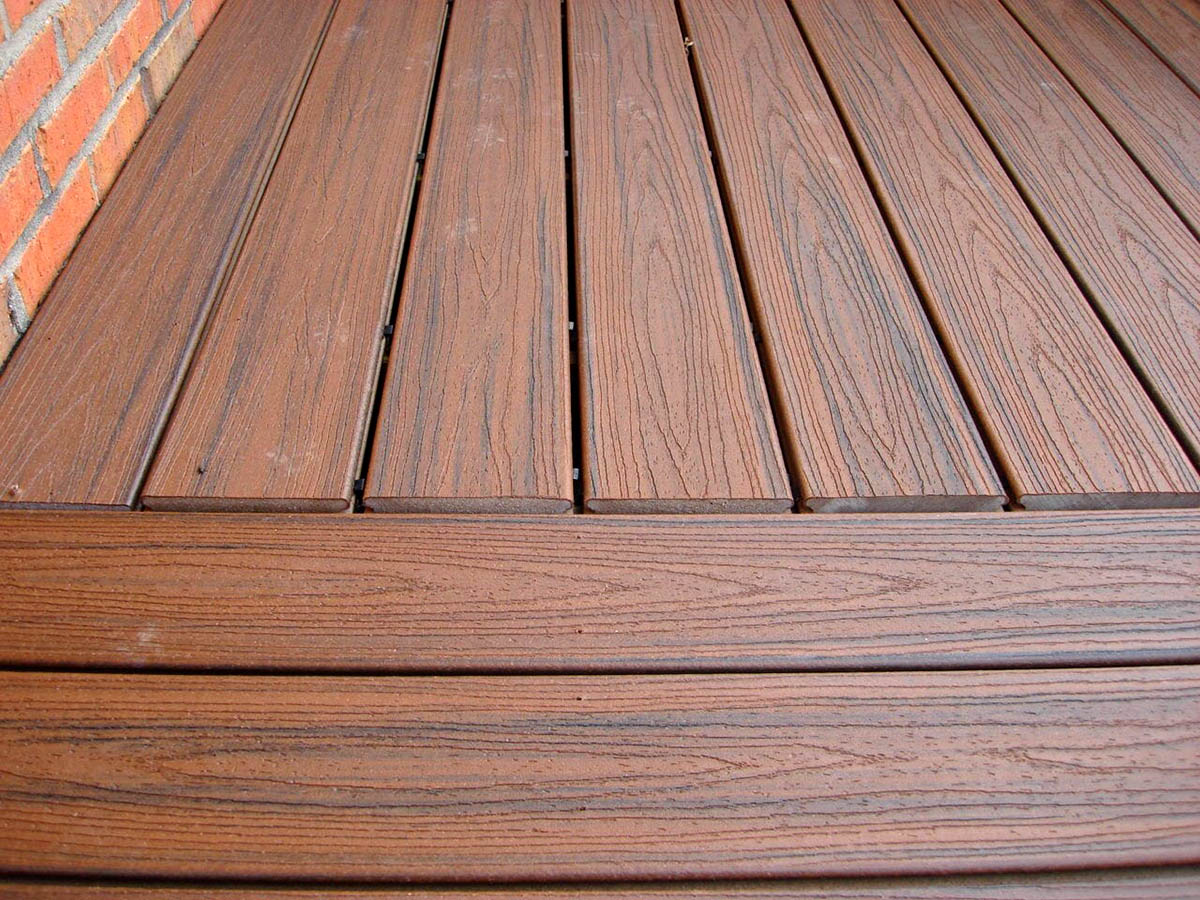
- Determine the spacing: Decide on the desired spacing between the decking boards. Trex recommends leaving a 3/16-inch gap between the boards to allow for expansion and contraction. Adjust this spacing if you prefer a different aesthetic or if your local building codes require a specific gap size.
By measuring accurately and planning your deck layout beforehand, you’ll minimize mistakes and ensure a smooth installation process. With your measurements and plan in hand, you’re ready to gather the decking materials for the next step, which we’ll cover in detail in the following section.
Step 3: Gather the Decking Materials
With the area prepared and the layout planned, it’s time to gather all the necessary decking materials for your Trex deck installation. Ensuring you have the right materials beforehand will make the installation process more efficient. Here’s what you’ll need:
- Trex decking boards: Purchase enough Trex decking boards to cover the measured area of your deck. Consider ordering extra boards to account for any mistakes, cuts, or future replacements.
- Composite deck screws: Use high-quality stainless steel or coated deck screws designed specifically for use with Trex decking. Check the manufacturer’s recommendations for the appropriate screw length and quantity based on the thickness of your decking boards.
- Pressure-treated lumber: If you’re building a substructure for your deck, you’ll need pressure-treated lumber to provide stability and support.
- Fascia boards: Fascia boards are optional but can provide a finishing touch to your deck’s edges. If desired, purchase matching Trex fascia boards.
- Post caps and railings: If your deck will have posts and railings, gather the necessary post caps and railings according to your desired design and style.
- Tools and hardware: Ensure you have all the necessary tools and hardware mentioned in the previous section, including a tape measure, chalk line, circular saw or miter saw, drill, impact driver or screw gun, ratchet or socket wrench, jigsaw (if needed), safety equipment, and any other tools specific to your deck design.
Double-check your measurements and plan to make sure you have the correct quantity of materials for your deck. It’s always better to have a little extra than to run out in the middle of the installation. Once you have all the materials gathered, you’re ready to move on to the next step: installing the starting board.
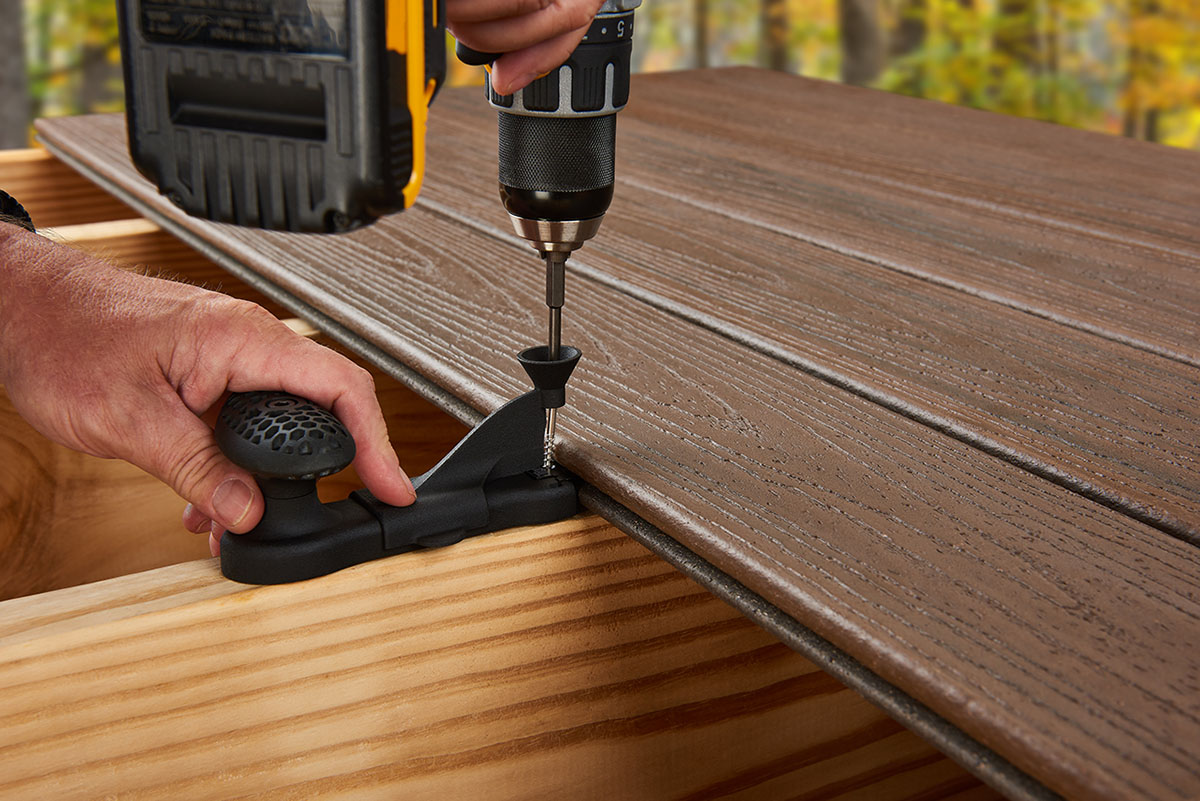
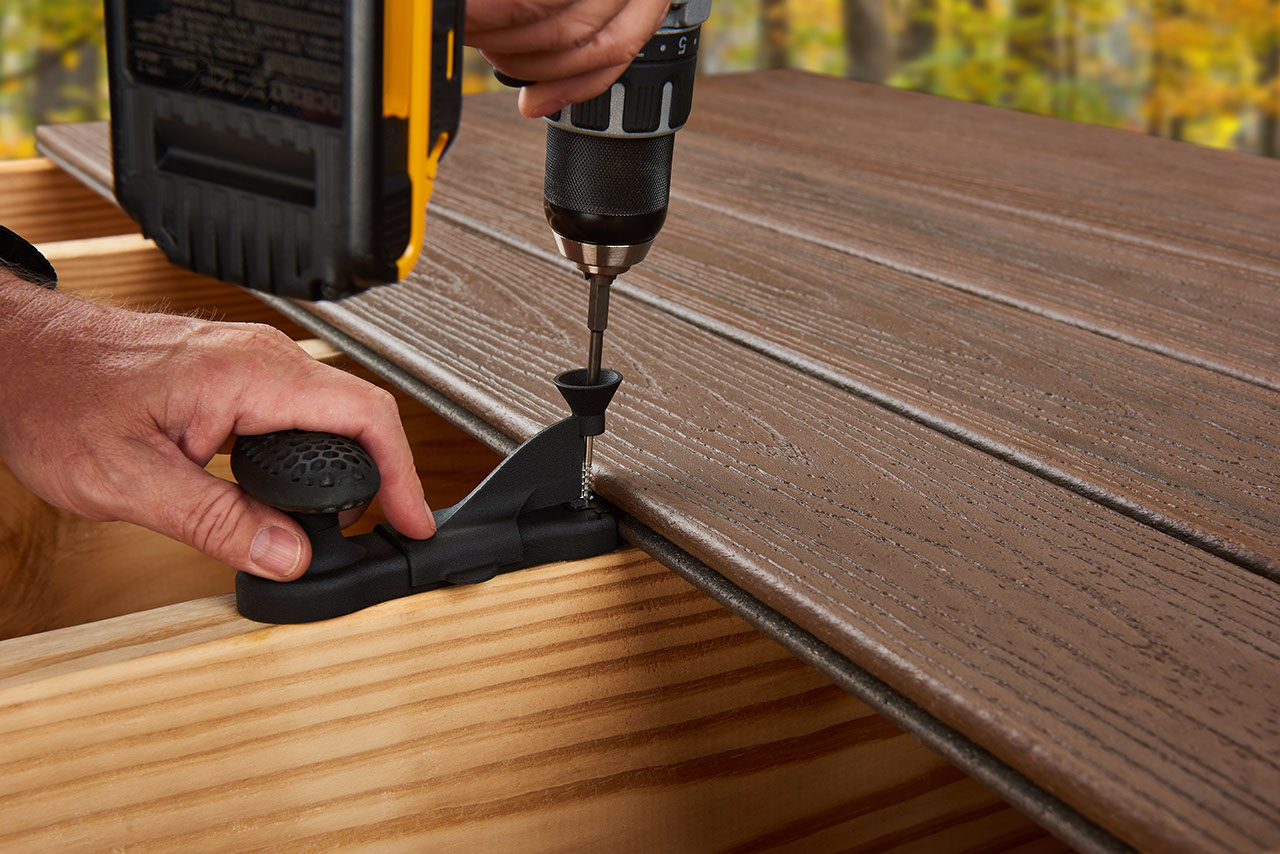
Pre-drill holes for the screws to prevent splitting and ensure a secure fit. Use stainless steel screws to prevent rust and corrosion over time.
Read more: What Is Trex Decking
Step 4: Install the Starting Board
Before you begin installing the decking boards, it’s important to properly install the starting board. This board will serve as the foundation for the rest of the deck installation. Follow these steps to install the starting board:
- Locate the joists: Use a stud finder or visually identify the joists beneath the deck’s surface. Joists are the horizontal beams that provide support to the decking boards.
- Measure and cut the board: Measure and cut the starting board to the length of the deck, accounting for any overhang or desired spacing.
- Align and level the board: Place the starting board at the edge of the deck, aligning it with the outer edge of the joists. Use a level to ensure the board is straight and level both horizontally and vertically.
- Pre-drill holes: Pre-drill holes through the starting board, into the joists, using a drill. This will prevent the board from splitting when the screws are inserted.
- Attach the board: Secure the board to the joists by driving deck screws into the pre-drilled holes. Use the appropriate screw length recommended by the manufacturer.
- Check for alignment: Double-check the alignment and levelness of the starting board before moving on to the next step. This will set the foundation for the rest of the deck installation.
By properly installing the starting board, you’ll ensure a solid and even base for the rest of the decking boards. With the starting board securely in place, you’re now ready to move on to the next step: attaching the subsequent boards.
Step 5: Attach the Subsequent Boards
With the starting board in place, it’s time to move on to attaching the subsequent Trex decking boards. Follow these steps to ensure a smooth and secure installation:
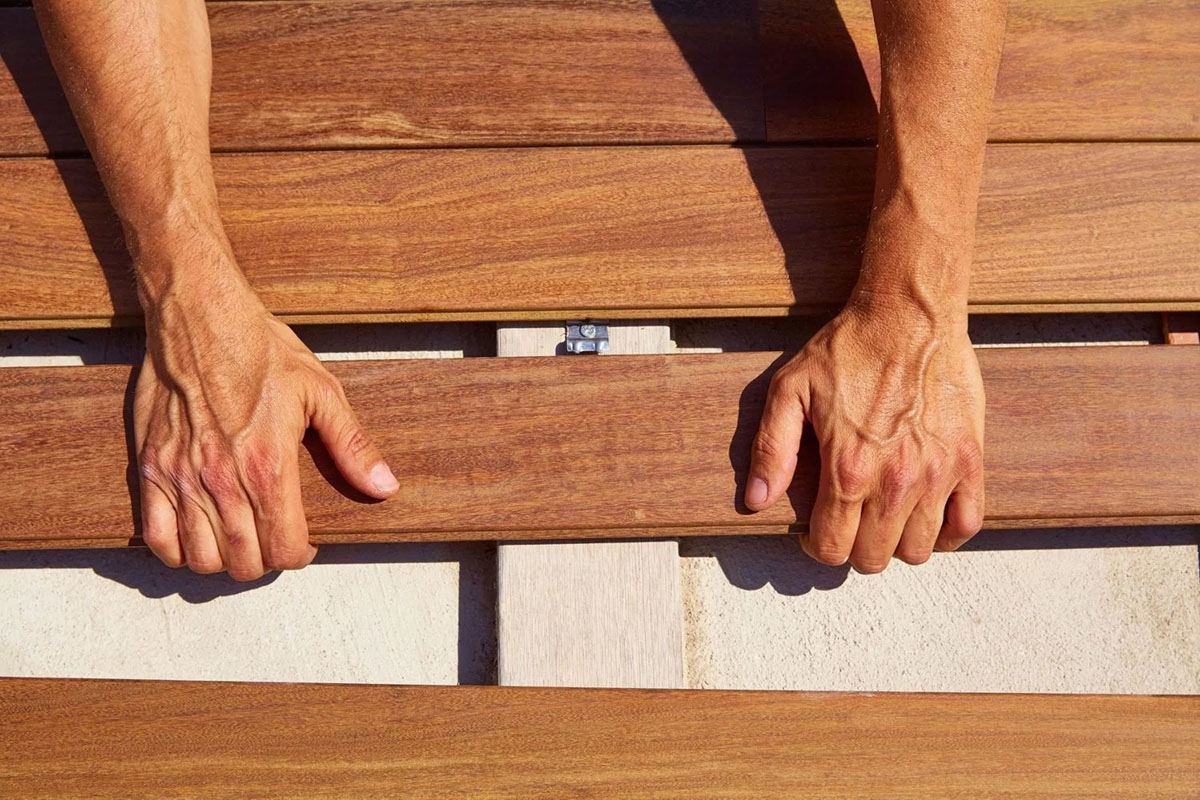
- Measure and cut the boards: Measure and cut each decking board to the desired length, accounting for any necessary overhang or spacing between boards.
- Place the board: Position the first board next to the starting board, ensuring a consistent gap between the two. Use spacers or a small piece of the same material to maintain the proper spacing between boards.
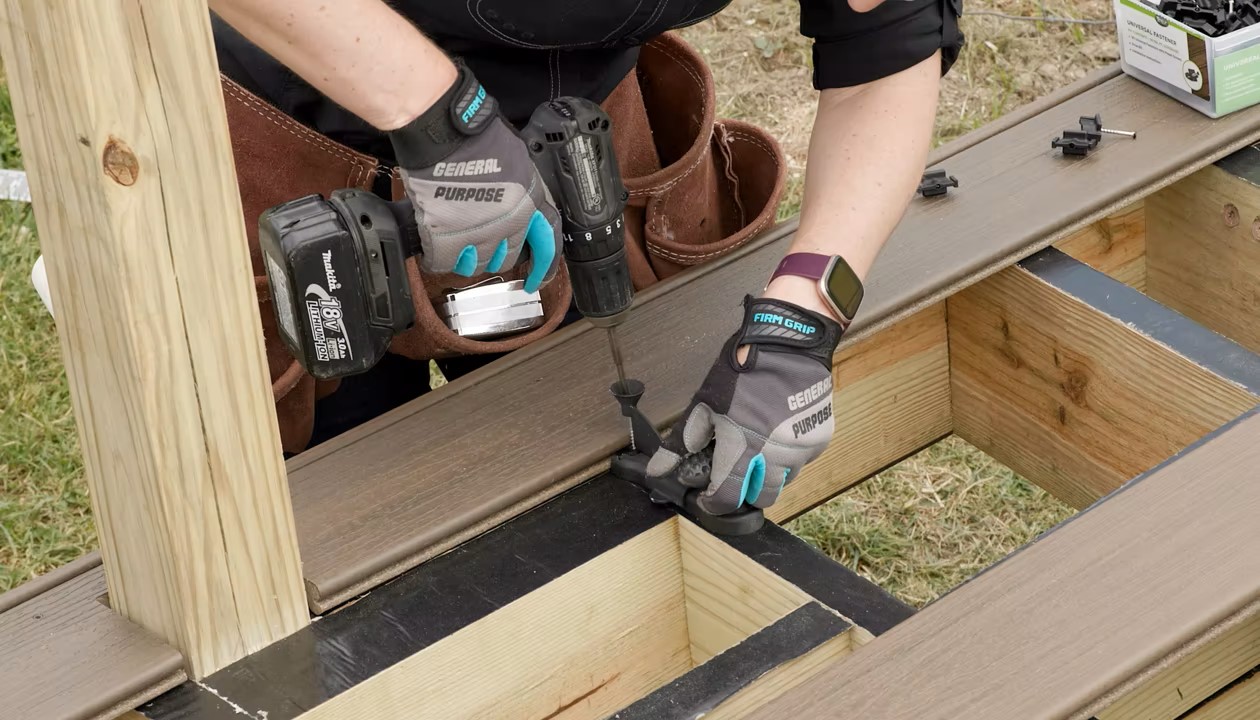
- Pre-drill holes: Use a drill to pre-drill holes into the decking board, taking care to avoid the joists. Pre-drilling will prevent the boards from splitting and ensure accurate screw placement.
- Attach the board: Drive deck screws through the pre-drilled holes, securing the board to the joists. Be sure to align the screws with the center of each joist for maximum stability.
- Continue the process: Repeat steps 2 to 4 for each subsequent decking board, ensuring consistent spacing and alignment. Use a chalk line or string to keep the boards straight and aligned.
- Trim the final board: Measure and trim the final decking board as needed to fit the remaining space. Ensure that it aligns with the outer edge of the joists and maintains the desired gap.
As you attach each subsequent board, double-check the alignment, spacing, and levelness to maintain a consistent and professional look. Take your time with this step to ensure the utmost precision. Once all the decking boards are securely attached, you’re ready to move on to the next step: securing the boards with screws.
Step 6: Secure the Boards with Screws
Now that all the decking boards are in place, it’s time to secure them by using screws. This step will provide the strength and stability needed for a long-lasting and sturdy deck. Follow these steps to properly secure the boards with screws:
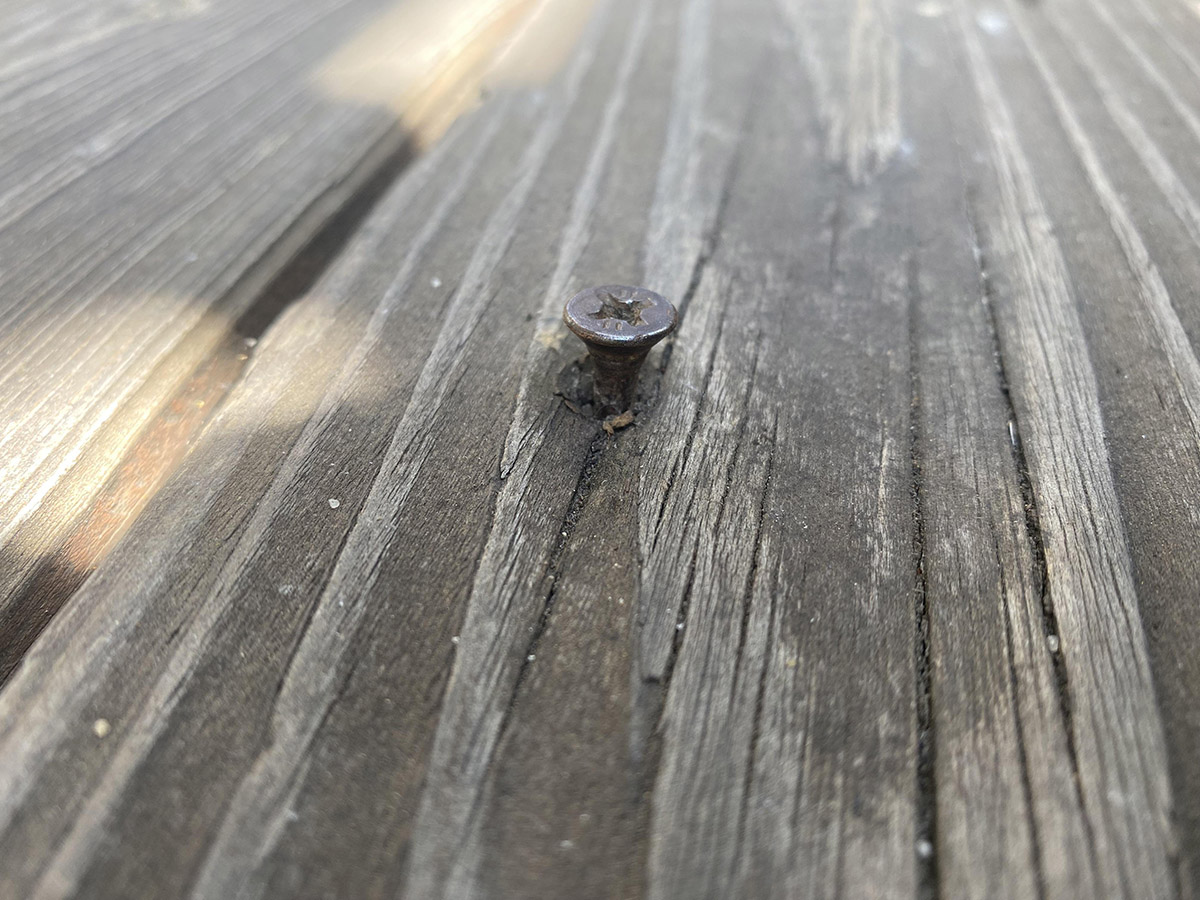
- Choose the appropriate screws: Select high-quality stainless steel or coated deck screws that are specifically designed for use with Trex decking. The length of the screws should be determined by the thickness of your decking boards.
- Pre-drill holes: Pre-drill holes through the decking boards at each joist. This will help prevent the deck boards from splitting and ensure accurate screw placement.
- Countersink the screws: Use a countersink drill bit or a screw gun with a countersink attachment to create a shallow hole on the surface of the decking board. This will allow the screw head to sit flush with the surface.
- Drive the screws: Use an impact driver or a screw gun to drive the screws into the pre-drilled holes. Drive the screw until it is flush with the decking surface, but be careful not to over-tighten and risk damaging the board.
- Place screws strategically: Space the screws appropriately, placing them near the ends and edges of the decking boards, as well as at the center of each joist. This will help ensure maximum stability and minimize the risk of warping or sagging.
- Check for evenness: As you secure the boards with screws, periodically check for evenness and levelness. Adjust the screws if necessary to ensure a consistent and smooth surface.
Securing the boards with screws will provide the necessary stability and prevent the decking boards from shifting or loosening over time. By following these steps and taking your time, you’ll ensure a secure and professional installation. With the boards securely fastened, you’re almost done! The next step will focus on adding the finishing touches to complete your Trex decking installation.
Step 7: Add Finishing Touches
With the decking boards securely attached, it’s time to add the finishing touches to complete the installation of your Trex decking. These final touches will enhance the appearance and functionality of your deck. Follow these steps to add the finishing touches:
- Trim the edges: If desired, trim the edges of the decking boards to create a clean and polished look. Use a circular saw or a router to make precise cuts.
- Add fascia boards: Install fascia boards along the perimeter of the deck to cover the exposed ends of the decking boards. This will give your deck a finished and professional appearance.
- Install stair treads: If you have stairs leading to your deck, install Trex stair treads to provide safe and functional access. Follow the manufacturer’s instructions for proper installation.
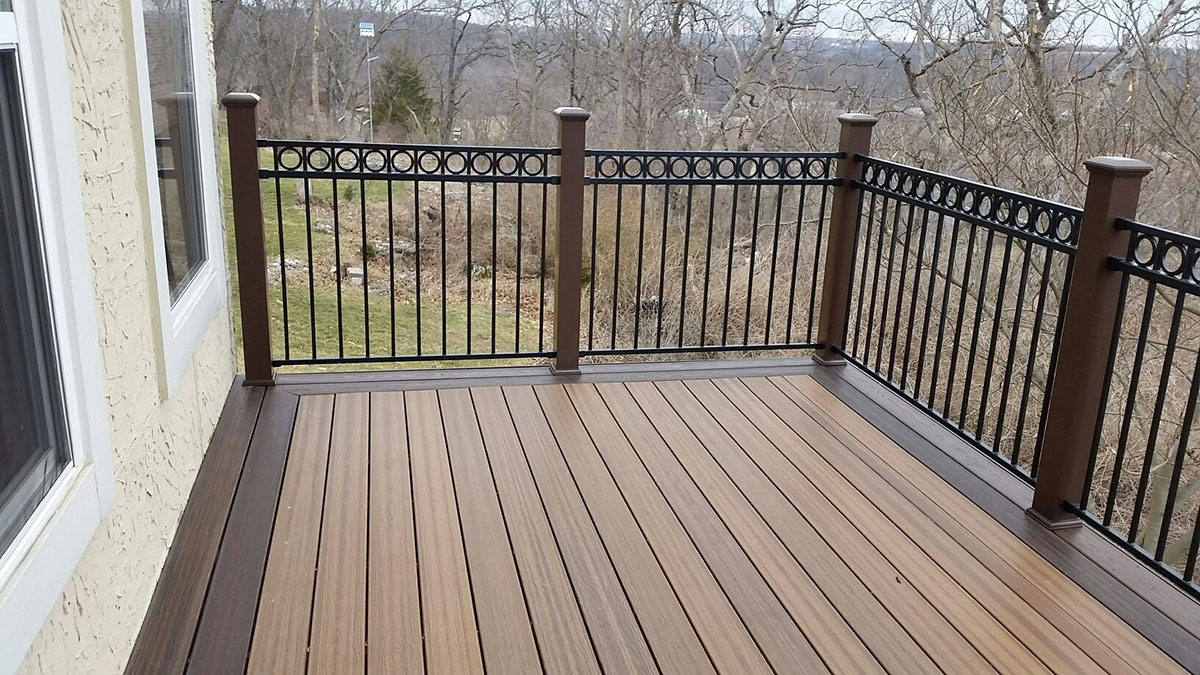
- Attach railing systems: Install the railing systems around the perimeter of your deck for added safety and aesthetics. Secure the railings according to the manufacturer’s instructions using appropriate hardware.
- Apply finishing touches: Apply any desired finishing touches, such as staining or sealing the deck, to protect it from the elements and enhance its longevity.
- Clean up and enjoy: Remove any debris or tools from the deck area and give it a thorough cleaning. Sit back, relax, and enjoy your newly installed Trex deck!
Adding these finishing touches will not only complete the overall look of your deck but also improve its functionality and durability. Remember to follow the manufacturer’s instructions and guidelines for each specific component or finishing touch to ensure proper installation.
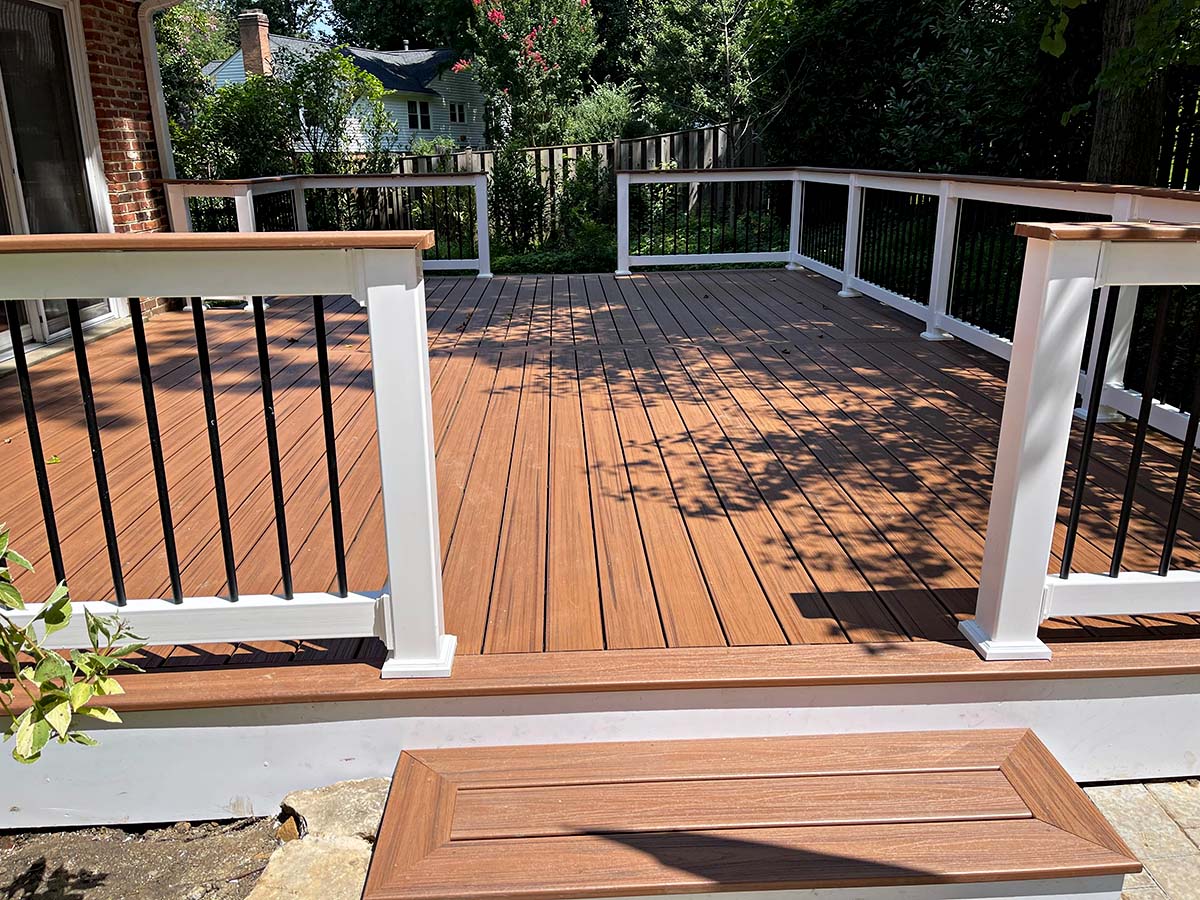
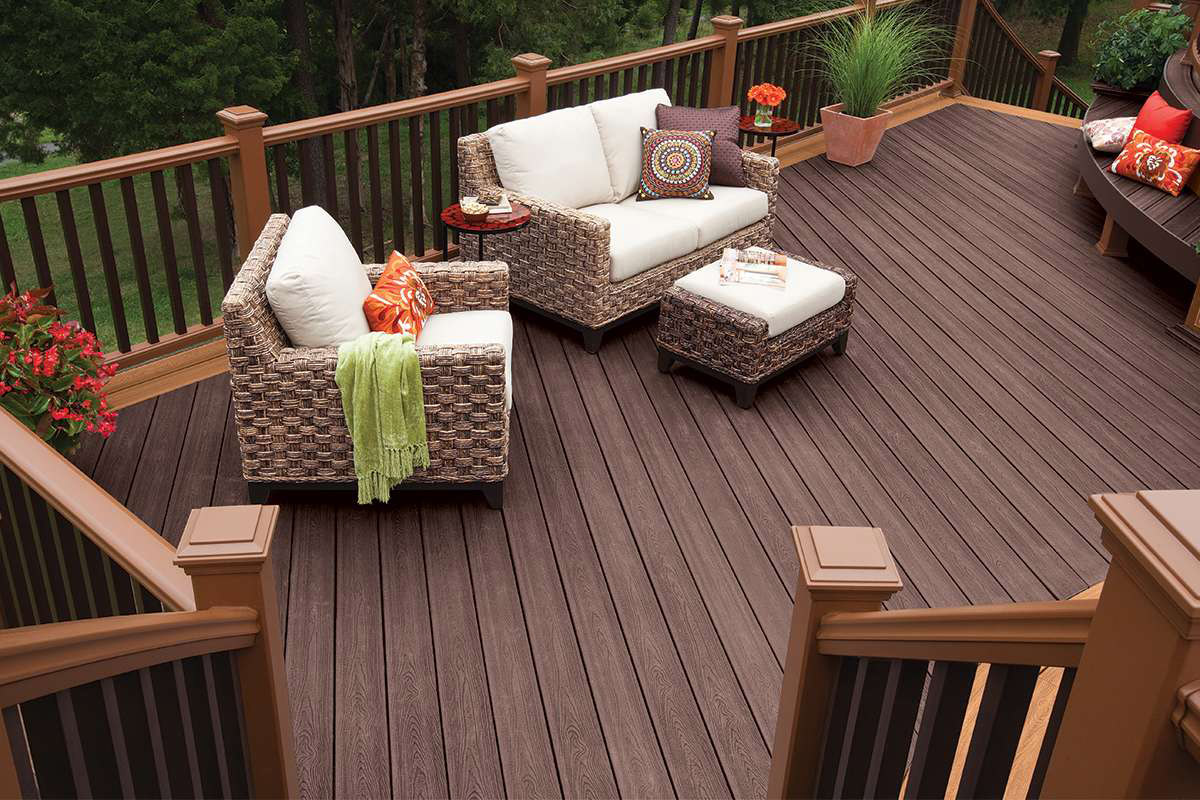
Congratulations! You have successfully installed your Trex decking with screws, creating a beautiful and inviting outdoor space for years to come. Regular maintenance and care will help to keep your deck in great condition. Enjoy spending time on your new deck and make lasting memories.
Read more: How To Straighten Trex Decking
Conclusion
Installing Trex decking with screws is a rewarding and relatively straightforward process that can transform your outdoor space into a beautiful and functional area. By following the steps outlined in this guide, you can ensure a secure and professional installation that will stand the test of time. From preparing the area and gathering the necessary materials to attaching the boards and adding the finishing touches, each step is crucial in creating a sturdy and visually appealing deck.
Remember, it’s important to consult the manufacturer’s instructions and guidelines for your specific Trex decking product. Additionally, ensure that you have the required tools and equipment on hand and practice proper safety precautions throughout the installation process.
With Trex decking, you can enjoy the benefits of a low-maintenance, eco-friendly, and durable outdoor space. Trex decking is made from recycled materials, reducing environmental impact while offering long-lasting performance and resistance to rot, fade, and mold.
Whether you’re looking to create a peaceful oasis for relaxation, an entertainment area for gatherings, or a space for outdoor dining, Trex decking is a versatile choice. Its wide range of colors, patterns, and finishes allows you to customize your deck to suit your style and preferences.
Now that you have the knowledge and confidence to install Trex decking with screws, embark on your journey to create the deck of your dreams. Enjoy the process and the final result as you create a welcoming outdoor retreat for yourself, your family, and friends to enjoy for years to come.
Frequently Asked Questions about How To Install Trex Decking With Screws
Was this page helpful?
At Storables.com, we guarantee accurate and reliable information. Our content, validated by Expert Board Contributors, is crafted following stringent Editorial Policies. We're committed to providing you with well-researched, expert-backed insights for all your informational needs.

0 thoughts on “How To Install Trex Decking With Screws”