Home>Furniture>Outdoor Furniture>How To Picture Frame Trex Decking
Outdoor Furniture
How To Picture Frame Trex Decking
Modified: August 27, 2024
Learn how to perfectly frame your Trex decking with our step-by-step guide. Create a stunning outdoor furniture space with our expert tips and techniques.
(Many of the links in this article redirect to a specific reviewed product. Your purchase of these products through affiliate links helps to generate commission for Storables.com, at no extra cost. Learn more)
Introduction
Welcome to the world of outdoor furniture! If you’re looking to transform your outdoor space into a relaxing oasis, investing in quality outdoor furniture is a must. Whether you have a spacious deck, a cozy patio, or a sprawling garden, the right outdoor furniture can enhance your outdoor living experience, providing comfort, style, and durability.
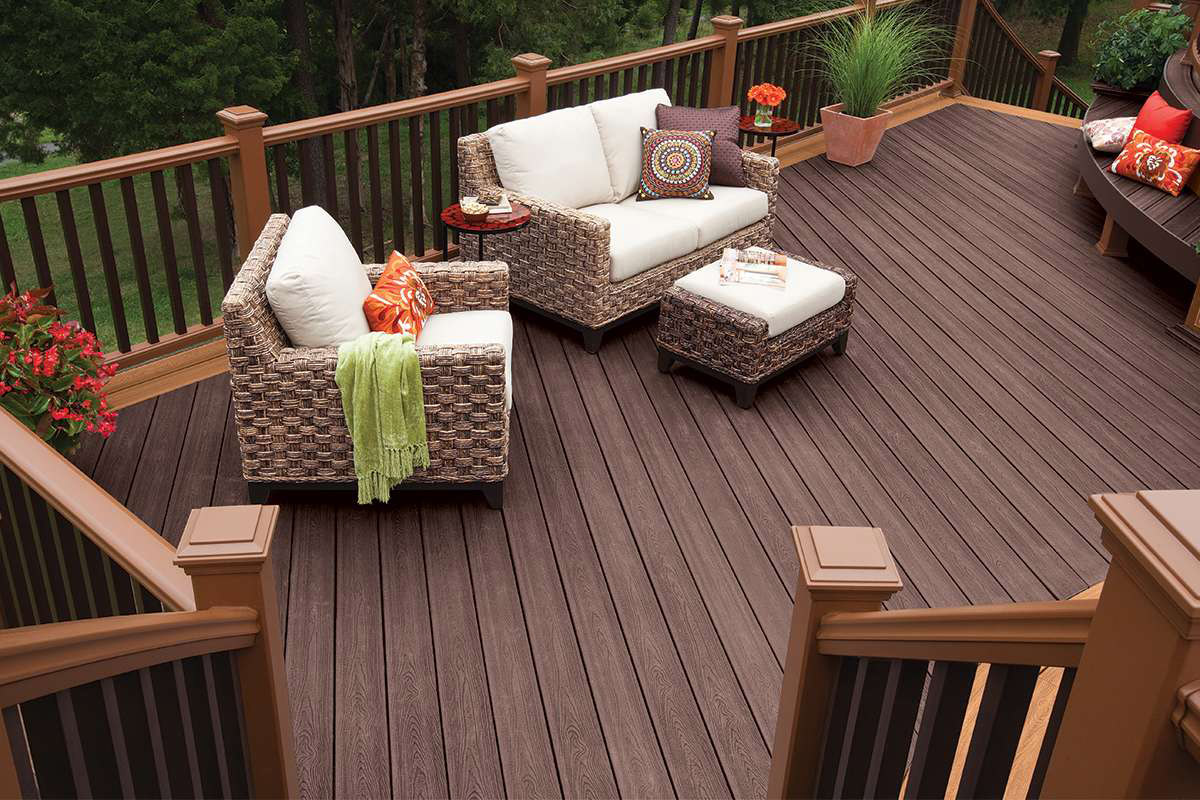
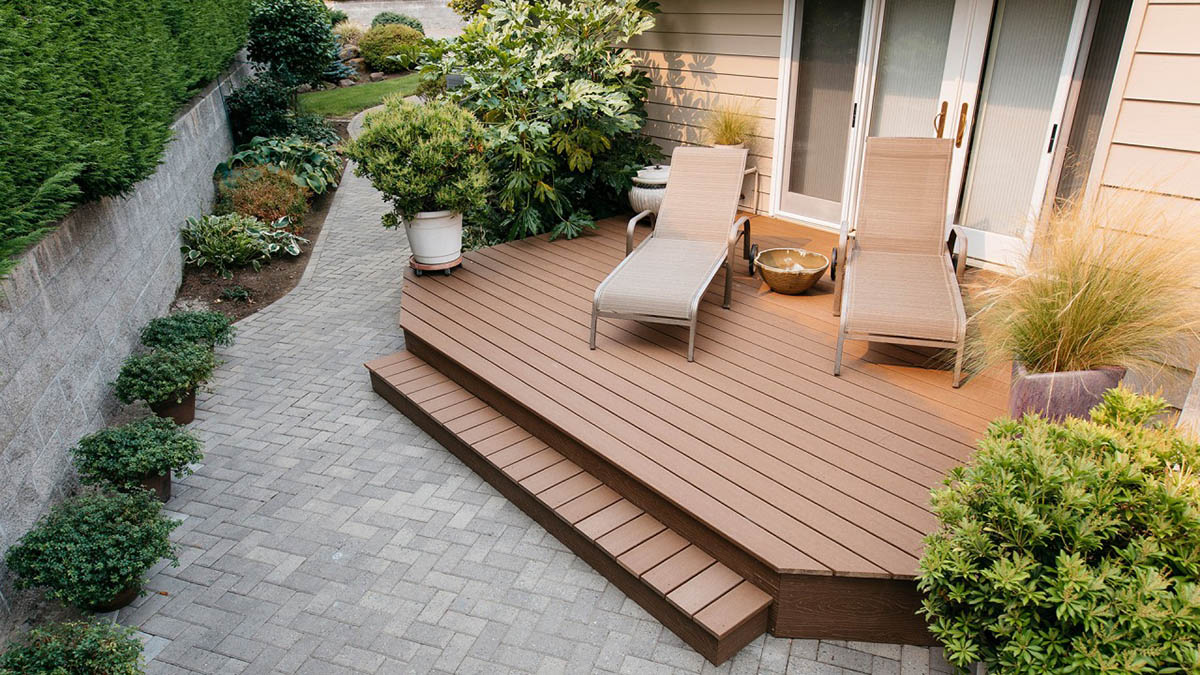
One popular choice for outdoor furniture is Trex decking. Trex is a leading brand known for its high-quality, low-maintenance composite decking. It offers the beauty of wood without the drawbacks of traditional lumber, such as rotting, splintering, and warping. With its sleek appearance, eco-friendly composition, and long-lasting performance, Trex decking is an excellent choice for outdoor furniture.
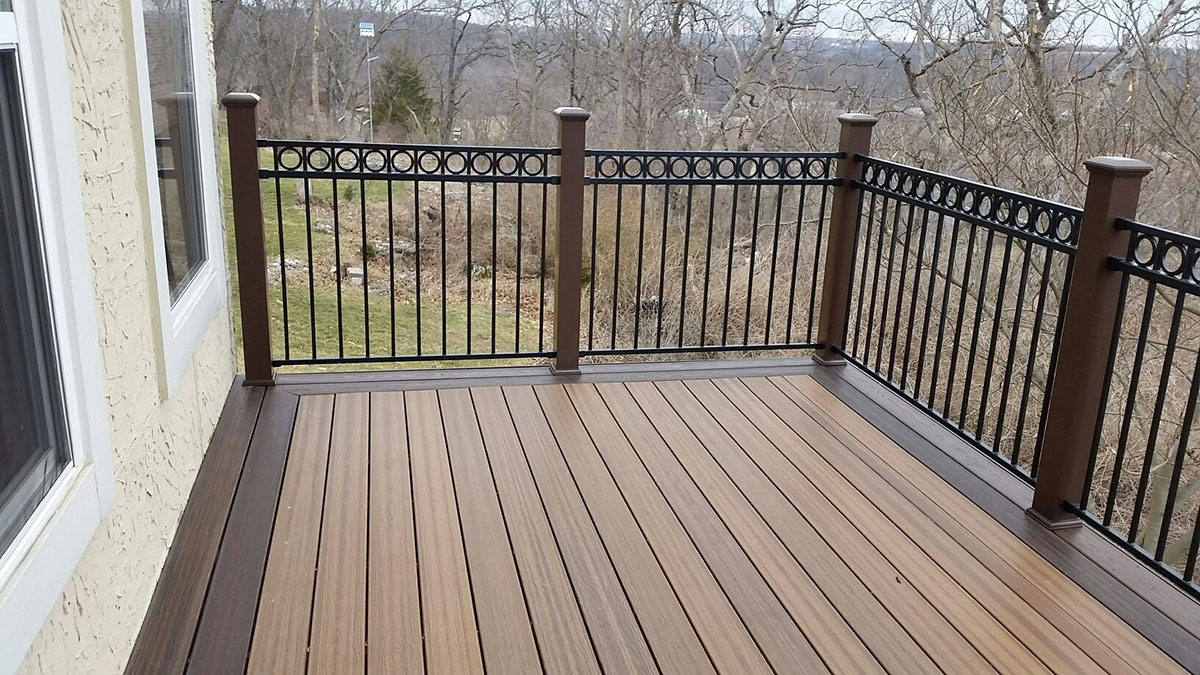
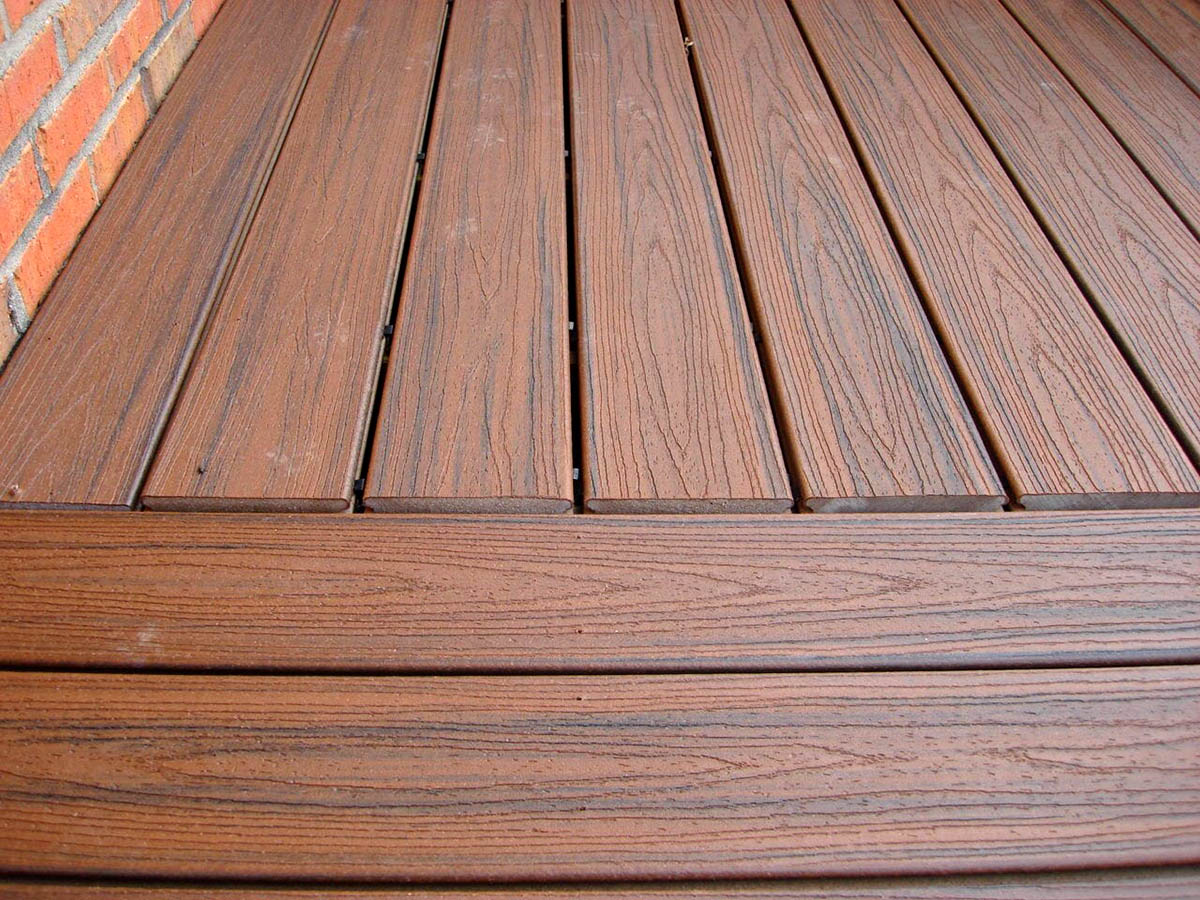
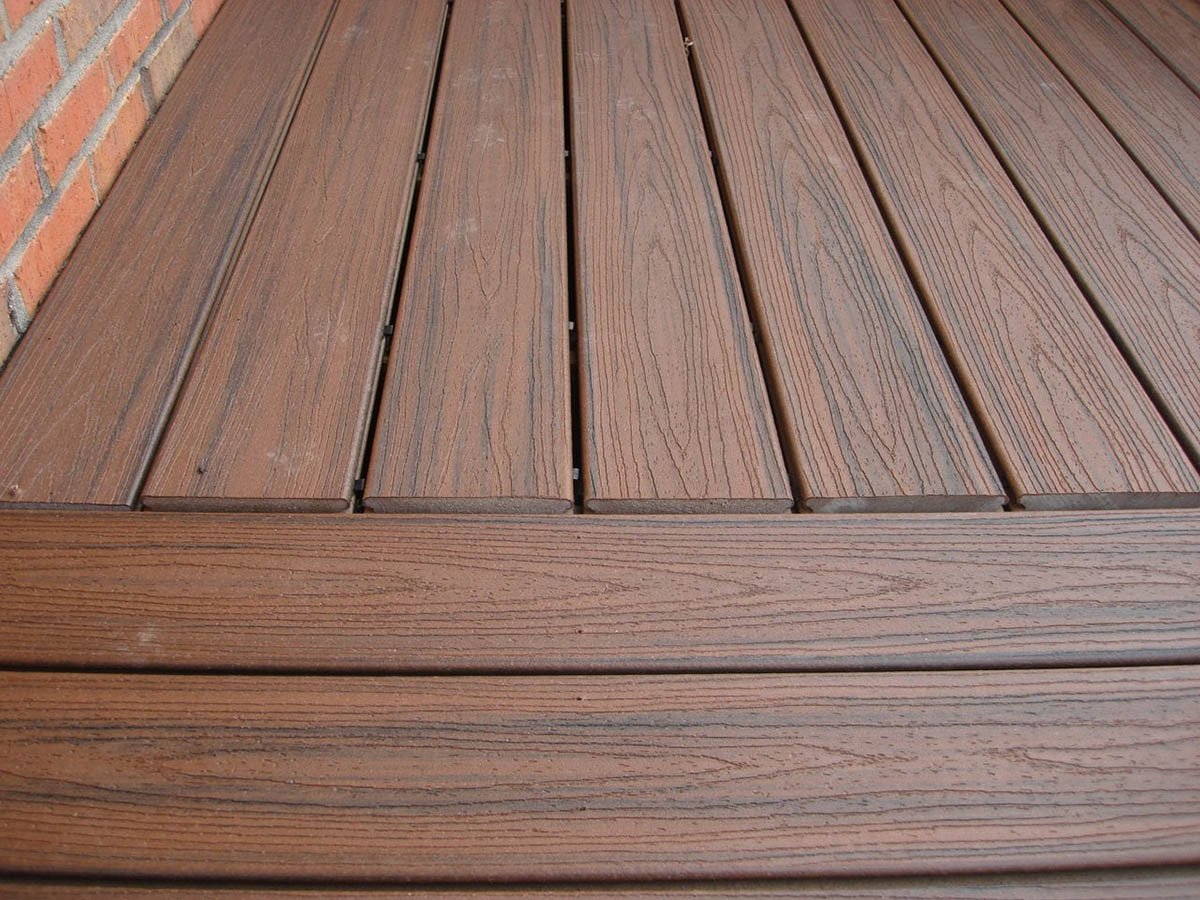
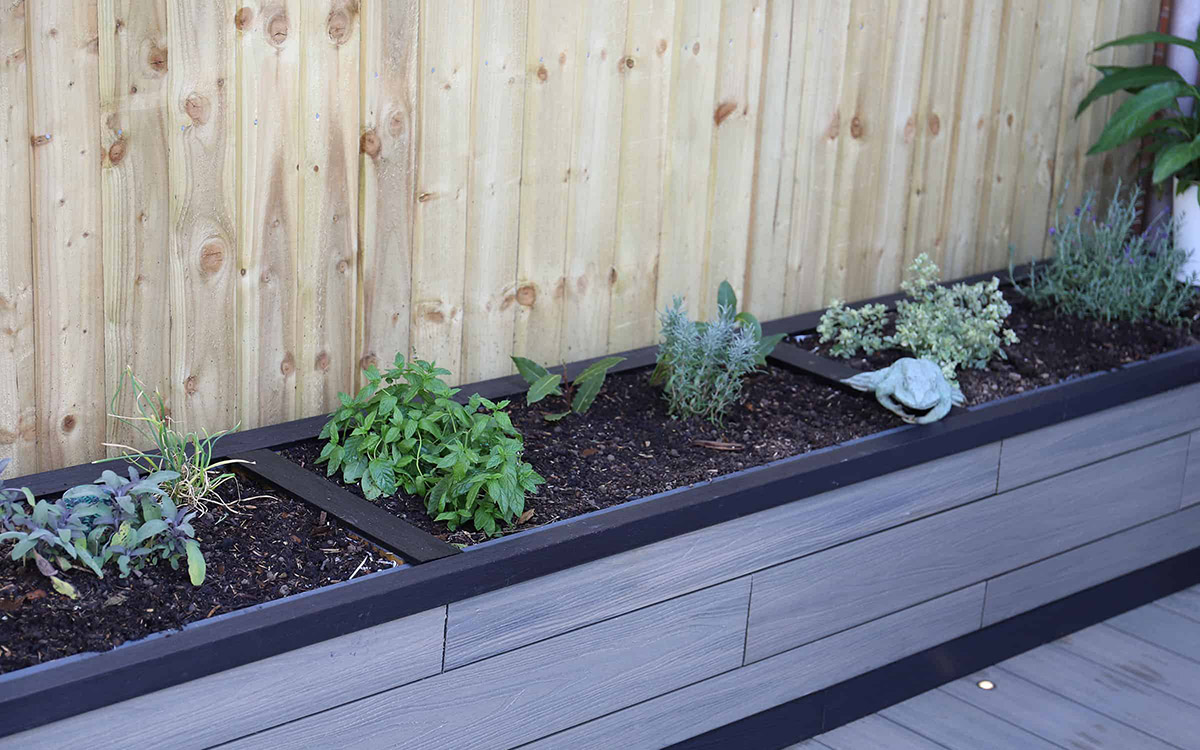
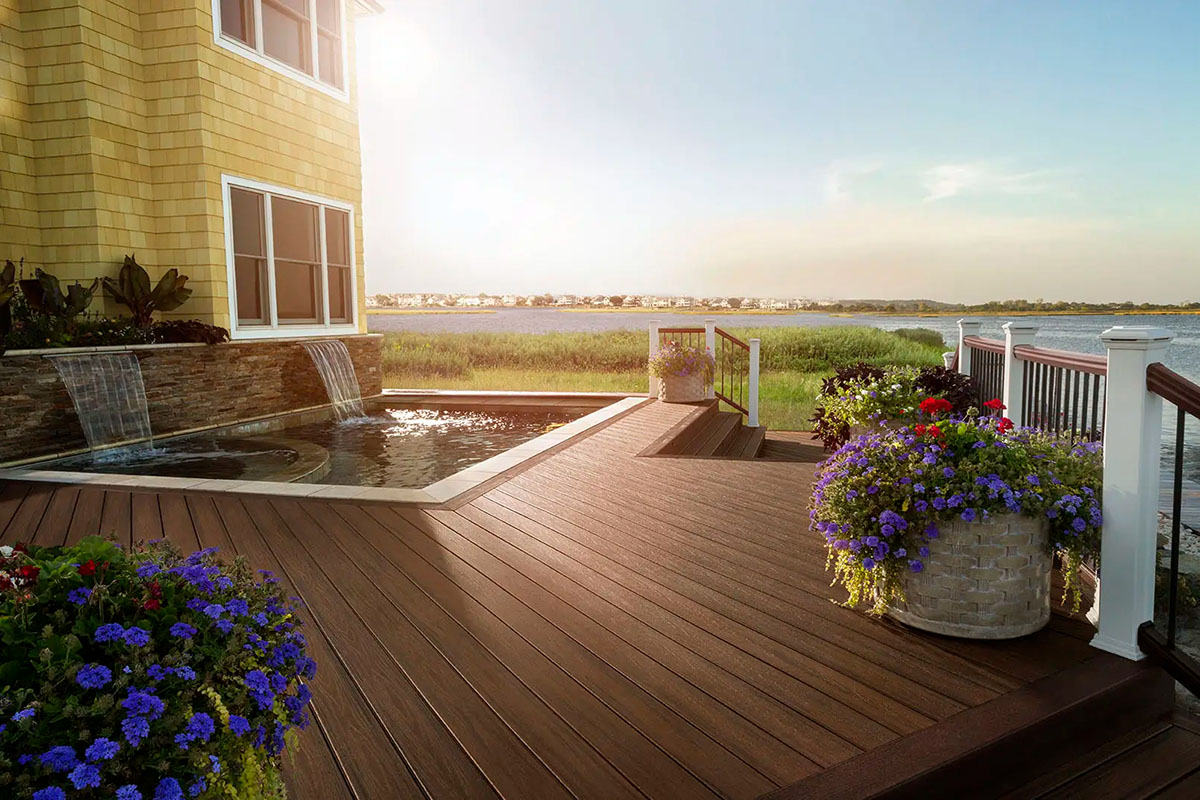
In this guide, we will explore how to frame a Trex decking project to give it a polished and finished look. Picture framing is a technique that involves adding a border or frame around the perimeter of the deck, creating a visually appealing and cohesive design. Not only does picture framing enhance the aesthetic appeal of the deck, but it also helps to protect the edges and adds structural integrity to the overall deck design.
Before diving into the steps required for picture framing Trex decking, let’s gather the necessary materials and tools.
Key Takeaways:
- Picture framing Trex decking involves precise measuring, careful planning, and secure installation of boards. This technique enhances the deck’s appearance and structural integrity, creating a polished outdoor space.
- By following the steps outlined in the guide, you can transform your outdoor space into a beautiful oasis with a durable and visually appealing Trex decking. Proper maintenance will ensure long-lasting enjoyment of your outdoor furniture.
Read more: What Is Trex Decking
Materials and Tools Needed
Here’s a list of materials and tools you’ll need to successfully frame your Trex decking:
- Trex composite decking boards
- Pressure-treated lumber for the picture frame boards
- Galvanized screws
- Measuring tape
- Pencil
- Circular saw
- Speed square
- Screwdriver or drill
- Clamps
- Level
Make sure you have all the materials and tools ready before starting the project. It’s essential to use the right materials to ensure the longevity and structural stability of your Trex decking. Additionally, having the appropriate tools will make the construction process more efficient and accurate.
Now that you have everything you need, let’s move on to the first step: measuring and planning your deck.
Step 1: Measure and Plan
Before you start framing your Trex decking, it’s crucial to measure your deck area accurately and plan the layout of the picture frame boards. This step will ensure precision and help you determine the quantity of materials required.
Here are the steps involved in measuring and planning:
- Measure the dimensions of your deck: Use a measuring tape to determine the length and width of your deck. Take multiple measurements to ensure accuracy.
- Plan the layout: Determine how you want the picture frame boards to be positioned. You can choose to frame the entire perimeter of the deck or create a border only on specific sides.
- Consider overhang: Decide on the desired overhang for your picture frame boards. This refers to the distance the boards will extend beyond the main decking boards. Common overhang measurements range from 1 to 2 inches.
- Account for mitered corners: If you plan to have mitered corners on your picture frame, calculate the angles accordingly. Mitered corners provide a clean and seamless look to the frame.
- Calculate the quantity of materials: Once you have the measurements and layout determined, calculate the number of Trex decking boards and pressure-treated lumber needed for the picture frame.
Ensure precise measurements and accurate calculations to avoid any material shortages or excesses. Taking the time to measure and plan will greatly contribute to the success of your Trex decking picture frame project.
Once you have the measurements and layout ready, it’s time to prepare the decking boards in the next step.
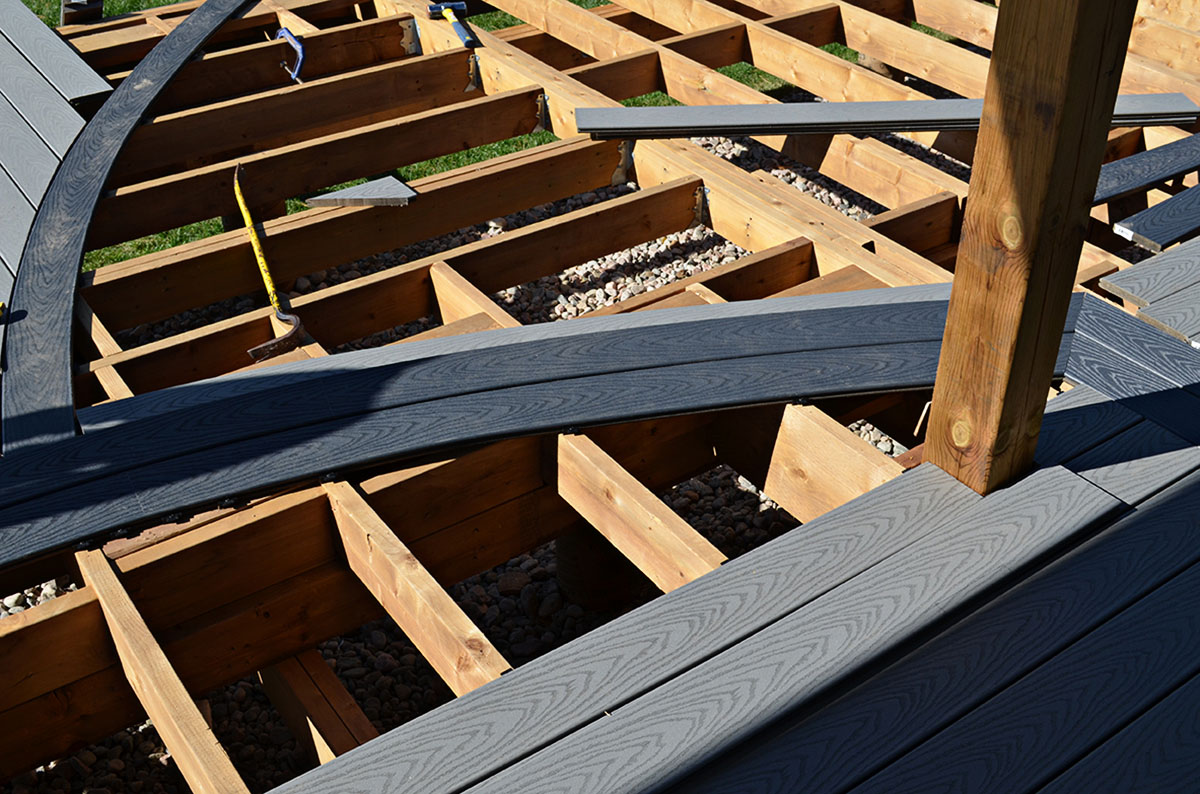
Step 2: Prepare the Decking Boards
Before you can start installing the picture frame boards for your Trex decking, it’s important to prepare the decking boards themselves. This step ensures that the main deck surface is clean, level, and ready to receive the frame.
Here’s how to prepare the decking boards:
- Clean the deck surface: Sweep away any debris, leaves, or dirt that may have accumulated on the deck. Use a pressure washer if necessary to remove stubborn stains or grime.
- Inspect the boards: Check the condition of the decking boards for any damage, such as cracks or rot. Replace any damaged boards before proceeding with the installation.
- Ensure levelness: Use a level to check the flatness of the decking boards. If you notice any uneven areas, you may need to make adjustments or add shims to achieve a level surface.
- Tighten or replace screws: Check the screws that secure the decking boards. Tighten any loose screws and replace any that are damaged or corroded.
- Apply any necessary treatments: If desired, apply a protective coating or sealant to the decking boards to enhance their longevity and resistance to the elements.
By properly preparing the decking boards, you set a solid foundation for the picture frame installation. It ensures a clean and level surface, allowing for a seamless and professional-looking outcome.
Once the decking boards are ready, you can move on to the next step: cutting the picture frame boards.
Step 3: Cut the Picture Frame Boards
With the decking boards prepared, it’s time to cut the picture frame boards for your Trex decking project. Cutting the boards accurately is crucial to ensure a seamless fit and a professional finish.
Here’s how to cut the picture frame boards:
- Measure and mark the length: Use a measuring tape to determine the length of the picture frame boards based on your deck measurements and layout. Mark the measurements with a pencil on the pressure-treated lumber.
- Set up the saw: Set up your circular saw with a fine-toothed blade suitable for cutting wood. Ensure that the saw is securely positioned and the blade is aligned properly.
- Make the cuts: Following your measured markings, carefully cut the picture frame boards using the circular saw. Take your time and maintain a steady hand to achieve clean and precise cuts. If you plan to have mitered corners, adjust the saw accordingly to create the desired angles.
- Check the cuts: After cutting each board, inspect the edges for any roughness or splintering. Use sandpaper or a router to smooth out any imperfections. This will ensure a clean and professional finish.
Remember to prioritize safety while using power tools. Wear appropriate protective gear, such as safety glasses and gloves, and follow the manufacturer’s instructions for your specific saw model.
Once you have all the picture frame boards cut to size, it’s time to proceed to the next step: installing the picture frame boards.
When picture framing Trex decking, use a contrasting color for the picture frame to create a visually appealing border. Make sure to carefully measure and cut the boards to ensure a clean and professional finish.
Read more: How To Straighten Trex Decking
Step 4: Install the Picture Frame Boards
Now that you have the picture frame boards cut to size, it’s time to install them around the perimeter of your Trex decking. This step will give your deck a polished and finished look.
Follow these steps to install the picture frame boards:
- Start at one corner: Begin by positioning the first picture frame board at one corner of the deck. Ensure that it is flush with the outer edge of the decking boards.
- Align the boards: Place the remaining picture frame boards against the first board, aligning them tightly together. Use clamps or temporary screws to hold the boards in place during the installation process.
- Ensure levelness: Use a level to check the horizontal alignment of the picture frame boards. Adjust as needed to maintain a level and straight installation.
- Leave appropriate gaps: Allow for small gaps between the picture frame boards to accommodate for natural expansion and contraction of the materials due to temperature changes.
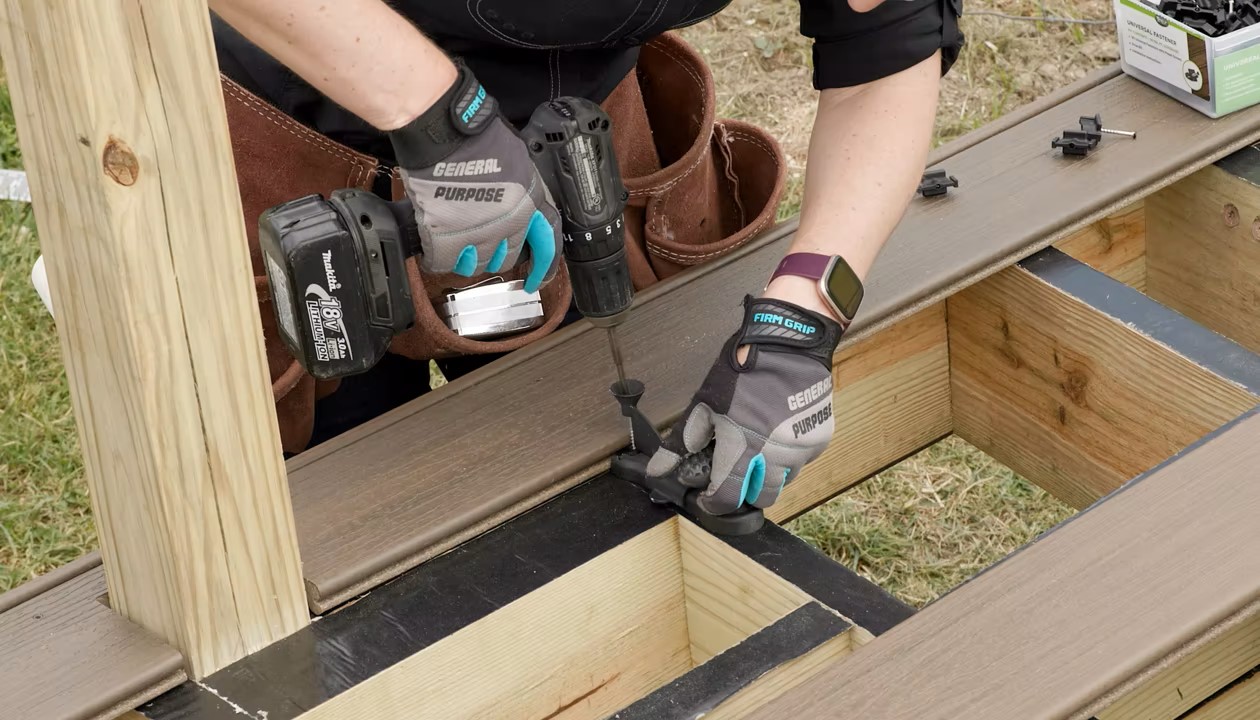
When installing the picture frame boards, it’s important to follow the manufacturer’s guidelines for fastening the boards to the deck structure. Use galvanized screws that are specifically designed for outdoor use to ensure durability and resistance to rust.
At this stage, you should have the picture frame boards installed around the perimeter of your Trex decking. The next step involves securing the picture frame boards in place.
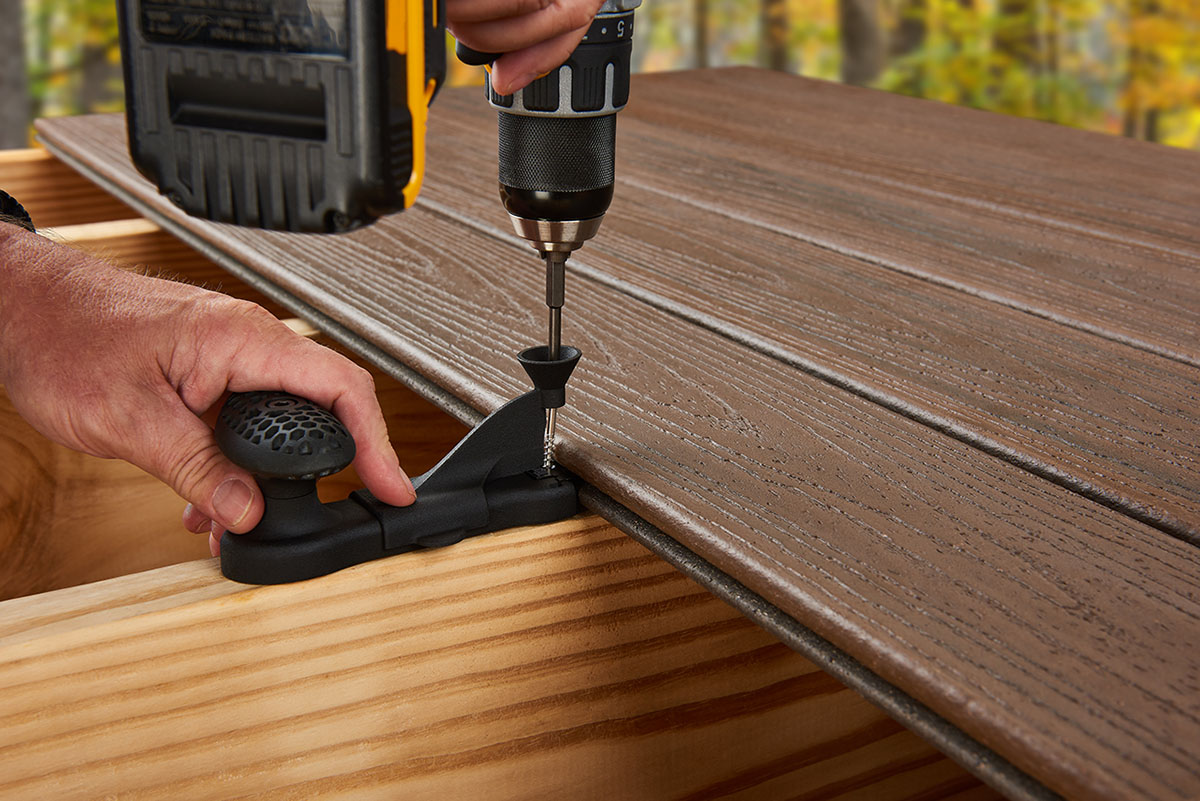
Step 5: Secure the Picture Frame Boards
With the picture frame boards installed, it’s time to secure them in place to ensure a sturdy and long-lasting frame for your Trex decking. Properly securing the boards will enhance the structural integrity of the deck and provide added stability.
Follow these steps to secure the picture frame boards:
- Pre-drill holes: Use a drill with a small drill bit to pre-drill holes along the length of the picture frame boards. This will prevent the boards from splitting when driving in the screws.
- Drive in screws: Align the picture frame boards and use a screwdriver or drill to drive in the galvanized screws through the pre-drilled holes. Make sure the screws are flush with the surface of the boards but not over tightened, as it may cause damage.
It’s essential to evenly space out the screws along the picture frame boards for optimal strength and stability. Be mindful of the type of decking material and its specific installation requirements. Refer to the manufacturer’s guidelines for recommended screw spacing.
Secure each picture frame board in place before moving on to the next. Take your time to ensure that all boards are properly fastened and provide a secure attachment to the deck structure.
With the picture frame boards securely fastened, your Trex decking project is almost complete. The next step involves completing the overall deck installation.
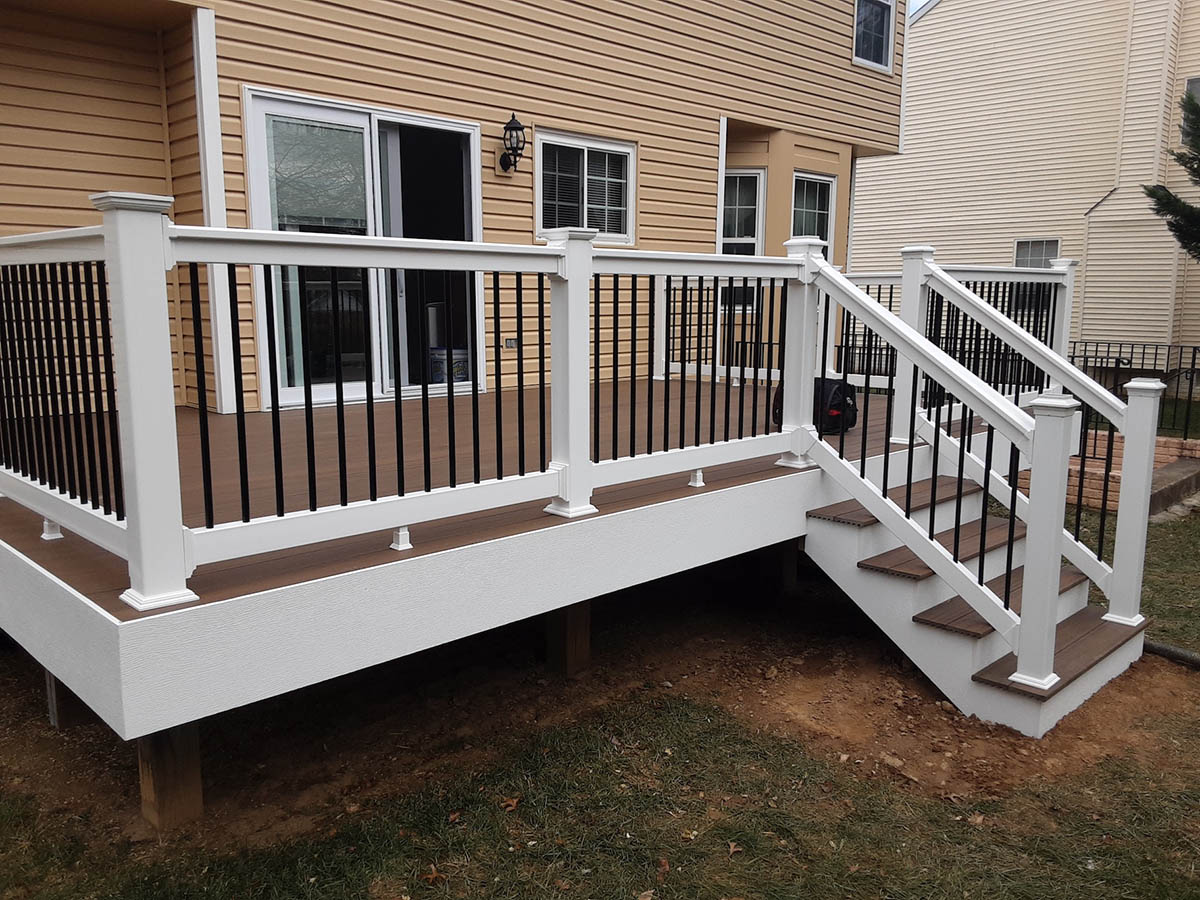
Step 6: Complete the Deck Installation
With the picture frame boards secured, it’s time to complete the overall deck installation for your Trex decking project. This final step will involve finishing touches and ensuring that all components of the deck are in place and functioning properly.
Follow these steps to complete the deck installation:
- Check for any loose boards: Inspect the entire deck surface, including the picture frame boards and the main decking boards, for any loose or uneven boards. Secure or replace any boards that require attention to ensure a stable and smooth deck surface.
- Install deck railing, if desired: If your deck design includes railing, follow the manufacturer’s instructions to install it properly. Ensure that the railing is secure and meets local building codes and safety standards.
- Add finishing touches: Consider adding finishing touches, such as post caps, decorative elements, or lighting fixtures, to enhance the overall aesthetic appeal and functionality of your Trex decking.
- Clean up the area: Remove any debris, tools, or materials from the deck area. Give the deck a thorough sweep or rinse to remove any dust or dirt that may have accumulated during the construction process.
Completing the deck installation with attention to detail will result in a beautiful and functional outdoor space that you can enjoy for years to come. Take pride in your craftsmanship and ensure that every element of the deck is properly installed and functioning.
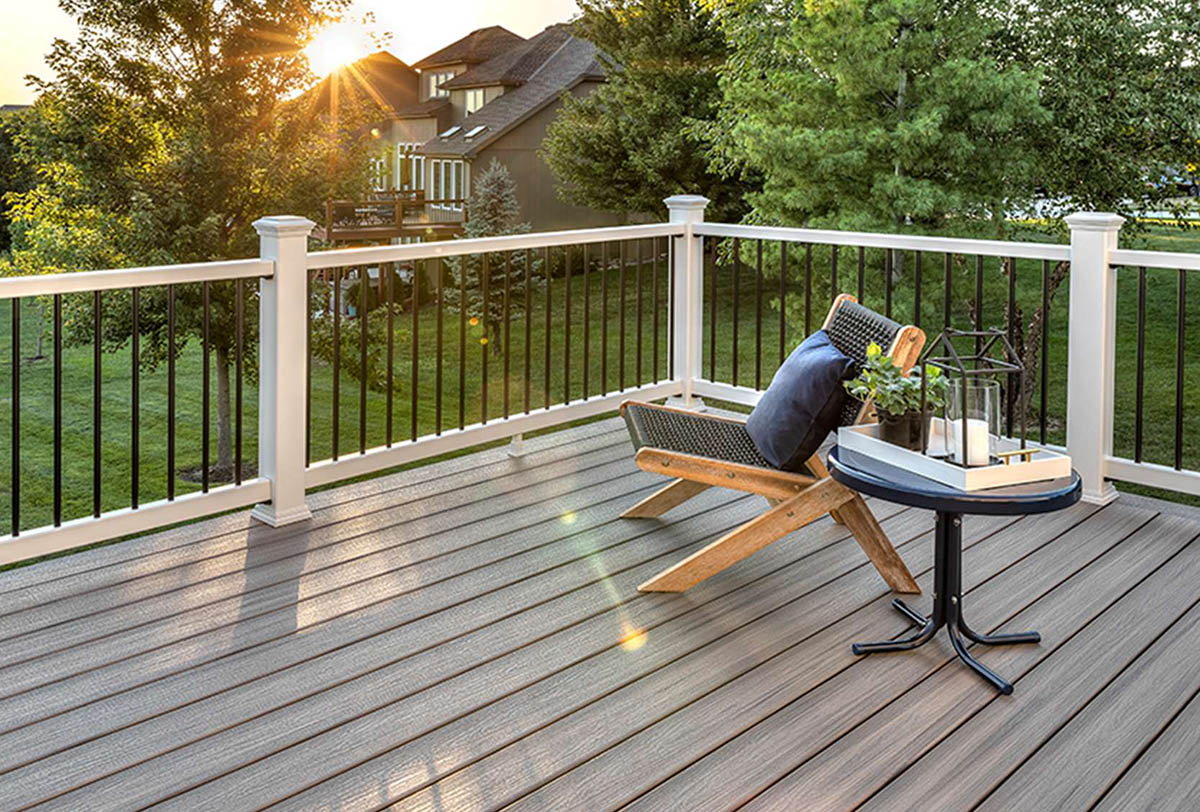
Once the deck installation is complete, it’s time to sit back, relax, and enjoy your newly transformed outdoor space.
Your Trex decking project is now finished, and you can take pride in your accomplished workmanship. By following these steps, measuring accurately, cutting precisely, and securing the picture frame boards, you have created a visually appealing and durable deck that will enhance your outdoor living experience.
Remember to regularly maintain and clean your Trex decking to ensure its longevity and keep it looking its best. With proper care, your outdoor furniture will provide you with many years of enjoyment and relaxation.
So go ahead, invite friends and family over, and bask in the comfort and beauty of your outdoor retreat!
That concludes our guide on how to picture frame Trex decking. We hope you found this information helpful and are inspired to embark on your own decking project. Enjoy your outdoor space and happy decking!
Conclusion
Creating a stunning outdoor space with Trex decking and picture framing is a rewarding project that can elevate the beauty and functionality of your outdoor furniture. By following the steps outlined in this guide, you can successfully frame your Trex decking, adding a polished and finished look to your deck.
Remember to always measure and plan your project carefully, ensuring precise cuts and proper alignment of the picture frame boards. Preparing the decking boards and securing the picture frame boards are essential steps that contribute to the overall durability and stability of the deck.
Completing the deck installation with attention to detail and adding any desired finishing touches will leave you with a stunning outdoor space that you can enjoy for years to come. Regular maintenance and cleaning will help keep your Trex decking in excellent condition and prolong its lifespan.
Whether you’re hosting gatherings, relaxing with a book, or enjoying a meal outdoors, your beautifully framed Trex decking will provide a comfortable and inviting environment.
So, gather your materials, roll up your sleeves, and embark on this exciting project to create the outdoor furniture of your dreams. With the right tools, techniques, and a little creativity, you can transform your outdoor space into a true sanctuary.
We hope this guide has inspired you and provided you with the knowledge and confidence to picture frame your Trex decking. Enjoy the process, and may your outdoor furniture project bring you joy and relaxation for many years to come.
Happy decking!
Now that you've mastered framing Trex decking, why not delve deeper into decking materials? If you're pondering whether Trex or another composite material suits your project better, our detailed comparison on Trex composite decking helps clarify these options. Ready to spruce up that deck even further? Dive into our exciting guide on enhancing decks for outdoor living, where simple yet impactful decor transforms any space.
Frequently Asked Questions about How To Picture Frame Trex Decking
Was this page helpful?
At Storables.com, we guarantee accurate and reliable information. Our content, validated by Expert Board Contributors, is crafted following stringent Editorial Policies. We're committed to providing you with well-researched, expert-backed insights for all your informational needs.

0 thoughts on “How To Picture Frame Trex Decking”