Home>Furniture>Outdoor Furniture>How To Do Stairs With Trex Decking
Outdoor Furniture
How To Do Stairs With Trex Decking
Modified: October 20, 2024
Learn how to build stairs using Trex decking for your outdoor furniture. Create a stunning and durable addition to your outdoor space with these step-by-step instructions.
(Many of the links in this article redirect to a specific reviewed product. Your purchase of these products through affiliate links helps to generate commission for Storables.com, at no extra cost. Learn more)
Overview
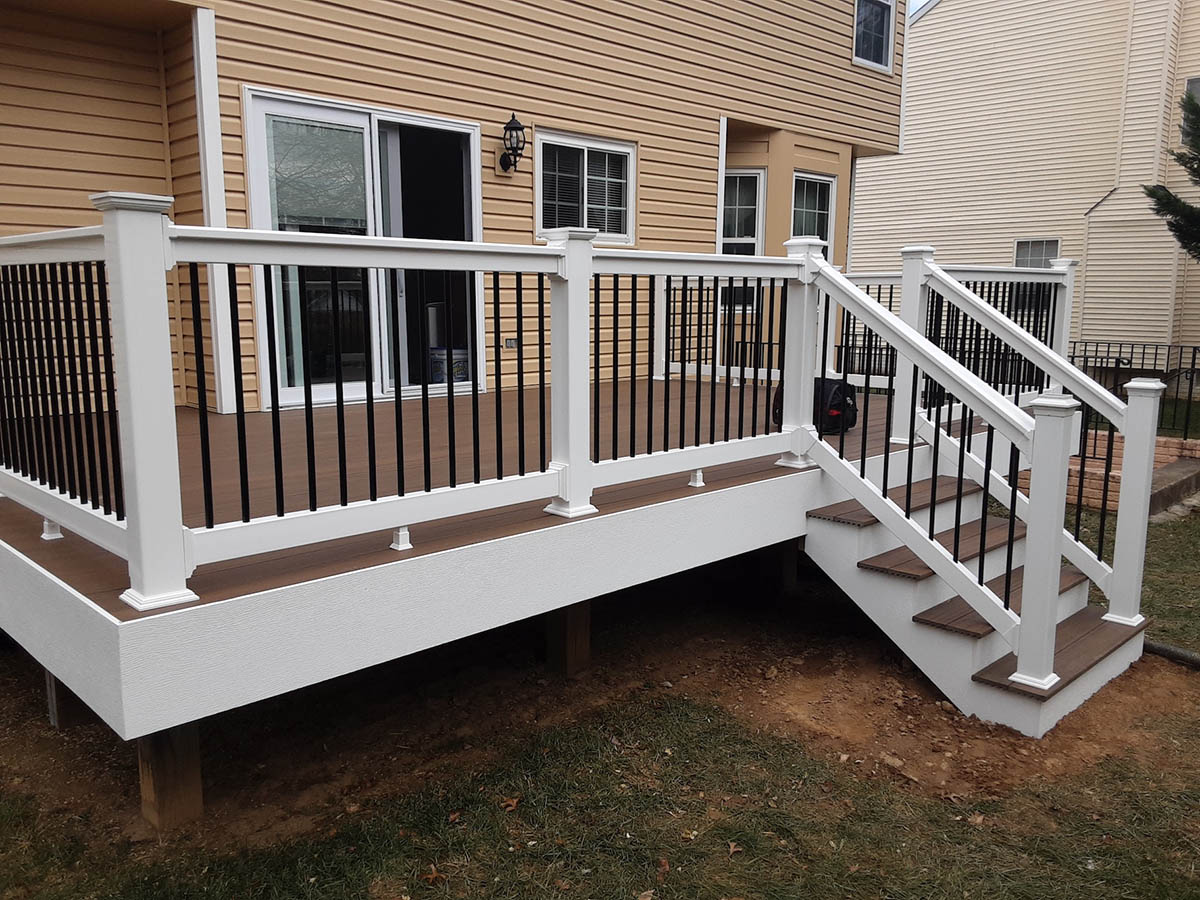
When it comes to building stairs for your outdoor space, using Trex decking can add both functionality and aesthetic appeal. Trex decking is a durable and low-maintenance material that is perfect for outdoor applications. Whether you are adding stairs to your deck, patio, or porch, following the right steps is essential to ensure a safe and sturdy structure.
In this article, we will guide you through the process of building stairs with Trex decking. From measuring and planning to installation and finishing touches, we will cover everything you need to know to create a beautiful set of stairs that complements your outdoor environment.
Before we dive into the step-by-step instructions, let’s go over the tools and materials you will need for this project:
- Tape measure
- Pencil
- Circular saw
- Drill
- Screwdriver
- Level
- Trex decking boards
- Stair stringers
- Stair risers
- Stair treads
- Deck screws
- Construction adhesive
- Handrail (optional)
With the necessary tools and materials ready, let’s get started with building your stairs.
Key Takeaways:
- Building stairs with Trex decking requires careful planning, precise measurements, and attention to safety. From preparing the area to adding finishing touches, creating a sturdy and beautiful staircase enhances your outdoor space.
- Prioritizing safety is essential when constructing Trex decking stairs. Following local building codes, using slip-resistant materials, and maintaining proper lighting ensures a secure and enjoyable experience for everyone using the stairs.
Read more: What To Do With Leftover Trex Decking
Tools and Materials Needed
Before you begin building your stairs with Trex decking, gather the following tools and materials:
Tools:
- Tape measure: Used to accurately measure the dimensions of the area where the stairs will be installed.
- Pencil: Essential for marking the measurements and making precise cuts.
- Circular saw: A power tool used to cut the Trex decking boards and the stair stringers to the desired lengths.
- Drill: Required for drilling pilot holes and installing screws.
- Screwdriver: Used to tighten the screws and secure the components together.
- Level: Helps ensure that the stairs are straight and level during installation.
Materials:
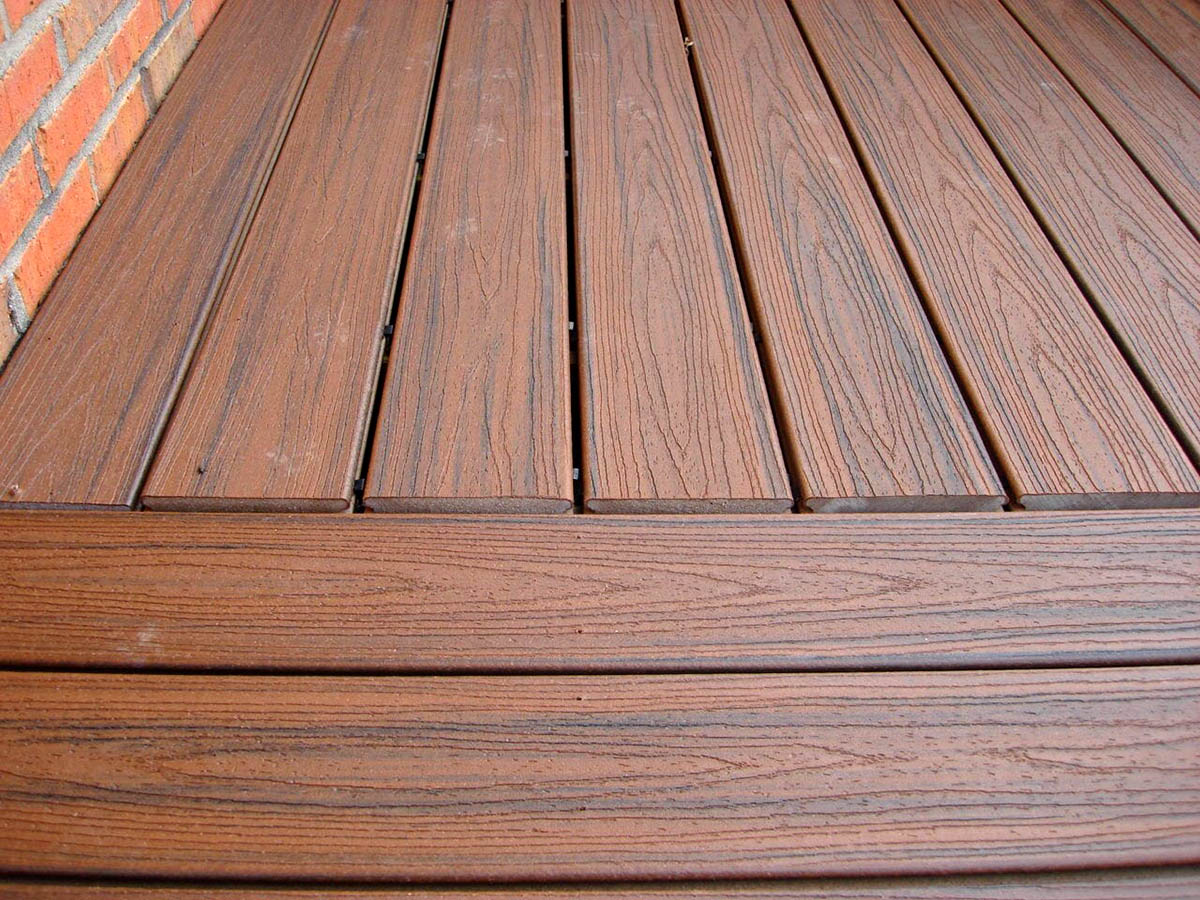
- Trex decking boards: Choose high-quality Trex decking boards that are specifically designed for outdoor use. These boards are durable, resistant to rot and insects, and require minimal maintenance.
- Stair stringers: These are the structural components that support the stair treads and risers. You can either purchase pre-cut stair stringers or build them yourself using pressure-treated lumber.
- Stair risers: These are the vertical components that provide support and create the face of each step. Stair risers can be made from the same Trex decking boards or other suitable materials.
- Stair treads: These are the horizontal components that you step on when using the stairs. Trex decking boards can be used as stair treads for a cohesive look, but other materials like pressure-treated lumber or stone can also be used.
- Deck screws: Use corrosion-resistant deck screws to secure the various components together. These screws should be long enough to penetrate the material and provide a secure attachment.
- Construction adhesive: A strong adhesive is useful for bonding the stair treads to the stair stringers, providing additional stability.
- Handrail (optional): Depending on the height and design of your stairs, you may want to install a handrail for added safety. The handrail can be made from Trex decking boards or other suitable materials.
Having these tools and materials on hand will ensure a smooth and efficient construction process. Once you’ve gathered everything, you’re ready to move on to the next step: measuring and planning your stairs.
Step 1: Measure and Plan
Before you start the construction process, it’s crucial to measure and plan your stairs accurately. Taking precise measurements will help you determine the number of stair stringers you need and ensure that your stairs fit the desired space.
Follow these steps to measure and plan your stairs:
- Measure the height: Measure the vertical distance from the ground to the top of the landing or deck where the stairs will start. This measurement will determine the number of stairs you need and the height of each riser.
- Calculate the number of risers: Divide the total height by the desired height of each riser. Round the quotient to the nearest whole number to determine the number of risers needed.
- Determine the tread depth: The tread depth is the horizontal distance from the front to the back of each step. It should be between 10-11 inches for optimal comfort. Multiply the number of risers by the desired tread depth to get the total run of the stairs.
- Check local building codes: Consult your local building codes to ensure compliance with regulations regarding stair dimensions, handrail requirements, and other relevant specifications.
- Draw a plan: Use graph paper or a design software to create a scaled drawing of your stairs. Include all measurements, dimensions, and design details, such as the location of the handrail and any landings.
- Double-check your measurements: Before proceeding, double-check all your measurements to ensure accuracy. It’s better to invest some time in verifying your calculations than realizing later that your stairs don’t fit properly.
By properly measuring and planning your stairs, you’ll lay the foundation for a successful construction project. Take your time during this step to avoid potential issues later on. With your measurements and plan in hand, you’re now ready to prepare the area for the installation of your Trex decking stairs.
Read more: What Is Trex Decking
Step 2: Prepare the Area
Before you can begin building your stairs with Trex decking, it’s important to properly prepare the area where the stairs will be installed. This step involves clearing the space, leveling the ground, and ensuring a stable foundation for your stairs.
Follow these steps to prepare the area for your Trex decking stairs:
- Clear the space: Remove any obstacles, debris, or vegetation from the area where the stairs will be constructed. This includes rocks, plants, and any other objects that could interfere with the installation.
- Mark the boundaries: Use stakes and string to mark the boundaries and outline of your stairs. This will help you visualize the space and ensure that the dimensions align with your plan.
- Level the ground: Use a shovel and a level to level the ground where the stairs will be built. Remove any bumps or uneven areas to create a smooth and stable surface.
- Create a stable foundation: Depending on the soil conditions and the height of your stairs, you may need to dig holes for footings. Consult local building codes for the appropriate depth and diameter of the footings, and use concrete mix to secure the footings in place.
- Add gravel or compact the soil: If necessary, add a layer of gravel or compact the soil to further stabilize the ground. This step is particularly important if you’re working with loose or sandy soil.
By preparing the area properly, you’ll ensure a solid and secure base for your Trex decking stairs. Taking the time to level the ground and create a stable foundation will contribute to the longevity and safety of your stairs. Once you’ve completed this step, you’re ready to move on to building the stair stringers.
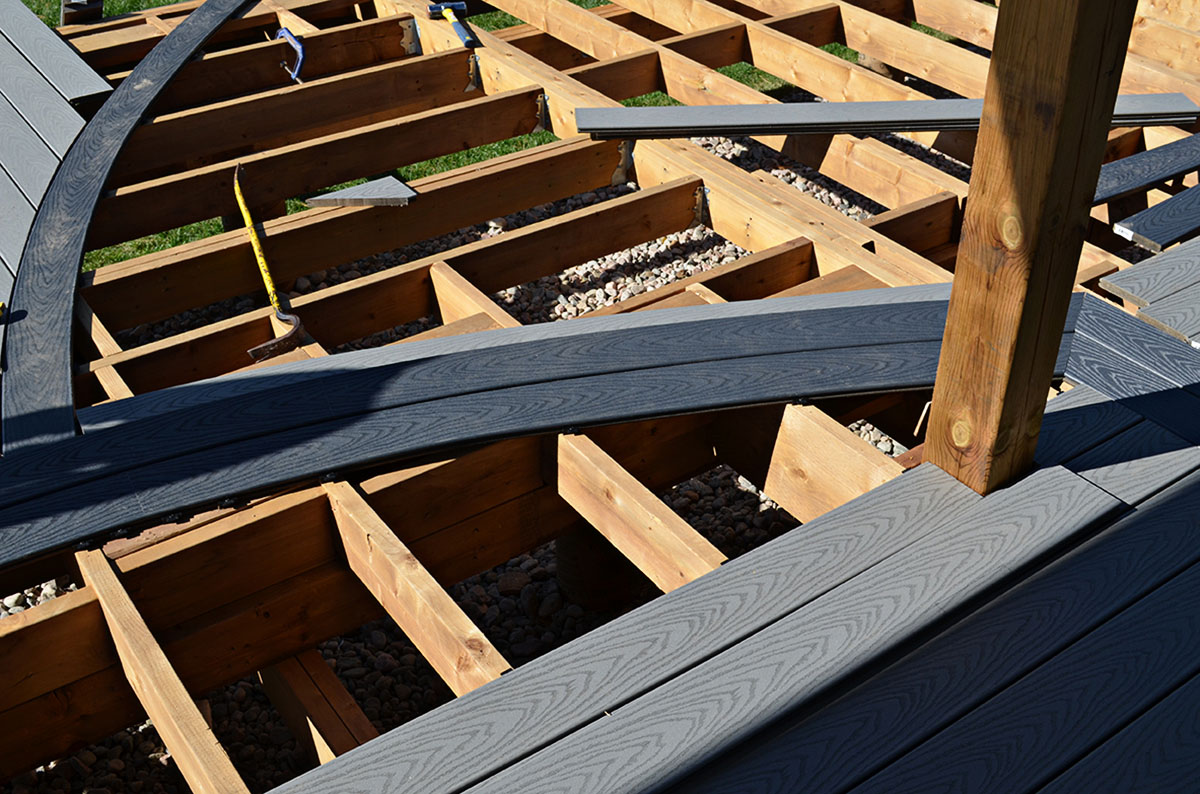
Step 3: Build the Stair Stringers
Now that you have measured, planned, and prepared the area for your Trex decking stairs, it’s time to build the stair stringers. Stair stringers are the structural components that support the stair treads and risers, providing stability and strength to the entire staircase.
Follow these steps to build the stair stringers:
- Measure and mark the bottom of the stringer: Place a straight board or level against the bottom step and mark a line on the stringer board to indicate the bottom of the stringer.
- Calculate the rise and run: Use your measurements and calculations from step 1 to determine the rise and run for each stair. The rise is the vertical height of each step, and the run is the horizontal depth.
- Mark the rise and run: Starting from the bottom of the stringer, measure and mark the rise and run for each step. Use a square or a stair gauge to ensure accuracy and consistency.
- Cut the stringer: Use a circular saw to cut along the marked lines, creating the notches for the stair treads and risers. Be careful and follow the safety precautions while operating the saw.
- Test-fit the stringer: Place the stringer in position on the prepared area and check for proper fit and alignment. Make any necessary adjustments if the stringer doesn’t sit flush with the ground or the desired slope.
- Repeat for additional stringers: If your staircase requires multiple stringers, repeat the above steps to build the remaining stringers. Ensure that all stringers are cut to the same dimensions for a uniform and balanced staircase.
Building the stair stringers accurately is crucial to the stability and safety of your Trex decking stairs. Take your time to measure and cut the stringers precisely to ensure a proper fit. Once you’ve completed this step, you can proceed to the next step: installing the stair risers.
Step 4: Install the Stair Risers
With the stair stringers in place, it’s time to move on to installing the stair risers. Stair risers are the vertical components that provide support and create the face of each step. Installing risers will give your Trex decking stairs a finished and polished look.
Follow these steps to install the stair risers:
- Apply construction adhesive: Apply a generous amount of construction adhesive to the back of the stair riser. This will help secure it to the stair stringer.
- Position the first riser: Place the first riser against the stair stringer, aligning it with the bottom and ensuring it sits flush. Press firmly to ensure good adhesion.
- Secure the riser: Use deck screws to secure the riser to the stair stringer. Place screws evenly along the top and bottom edges of the riser to ensure a secure attachment.
- Repeat for the remaining risers: Continue applying adhesive, positioning the risers, and securing them with screws. Ensure each riser is level and properly aligned with the stairs.
- Check for stability: Once all the risers are installed, check for stability and make any necessary adjustments. The staircase should feel sturdy and secure, with no wobbling or shifting.
Installing the stair risers is an important step to complete the structure of your Trex decking stairs. Take the time to align and secure them properly to ensure a professional and safe installation. With the risers in place, you are now ready to move on to the next step: attaching the stair treads.
Step 5: Attach the Stair Treads
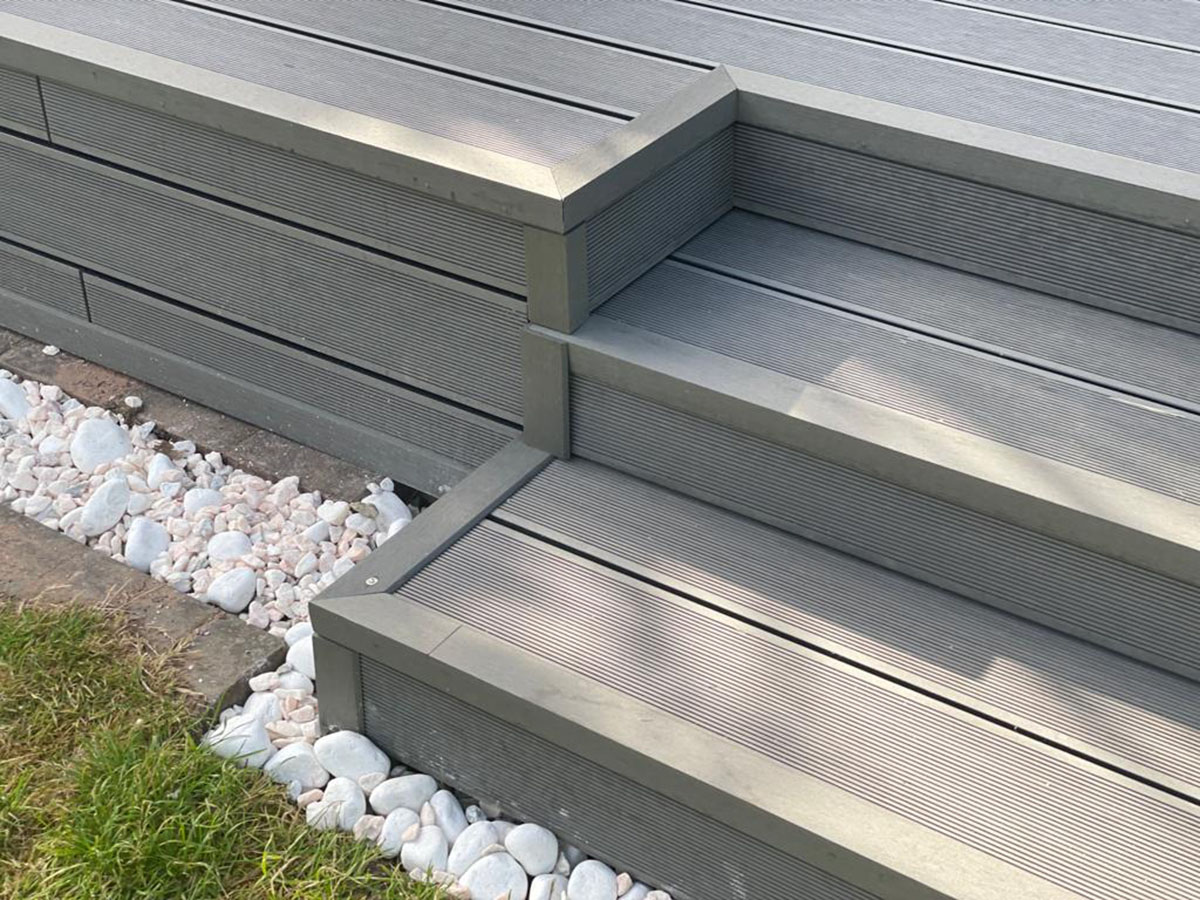
Once the stair risers are securely installed, it’s time to attach the stair treads. Stair treads are the horizontal components that you step on when using the stairs. Attaching the treads will provide a sturdy and comfortable surface for walking up and down your Trex decking stairs.
Follow these steps to attach the stair treads:
- Prepare the stair stringers: Ensure that the stair stringers are clean and free of any debris or adhesive residue from the previous steps.
- Apply construction adhesive: Apply a liberal amount of construction adhesive to the top of each stair stringer. This will help bond the stair treads securely.
- Position the first stair tread: Place the first stair tread on top of the stair stringers, aligning it with the front edge of the stair risers. Press down firmly to ensure good adhesion with the adhesive.
- Secure the stair tread: Use deck screws to secure the stair tread to the stair stringers. For optimal stability, place screws evenly along the top and bottom edges of the stair tread.
- Repeat for the remaining stair treads: Apply adhesive, position the stair tread, and secure it with screws. Make sure each stair tread is level and properly aligned.
- Check for stability and evenness: Once all the stair treads are attached, walk on the stairs to test for stability. Ensure that each step feels secure and that there are no noticeable unevenness.
Attaching the stair treads is an essential step in completing your Trex decking stairs. Make sure to use the construction adhesive and screws to create a strong and secure connection. With the stair treads in place, you’ve reached a significant milestone in the construction process. Next, we’ll move on to step 6: securing the handrail (optional).
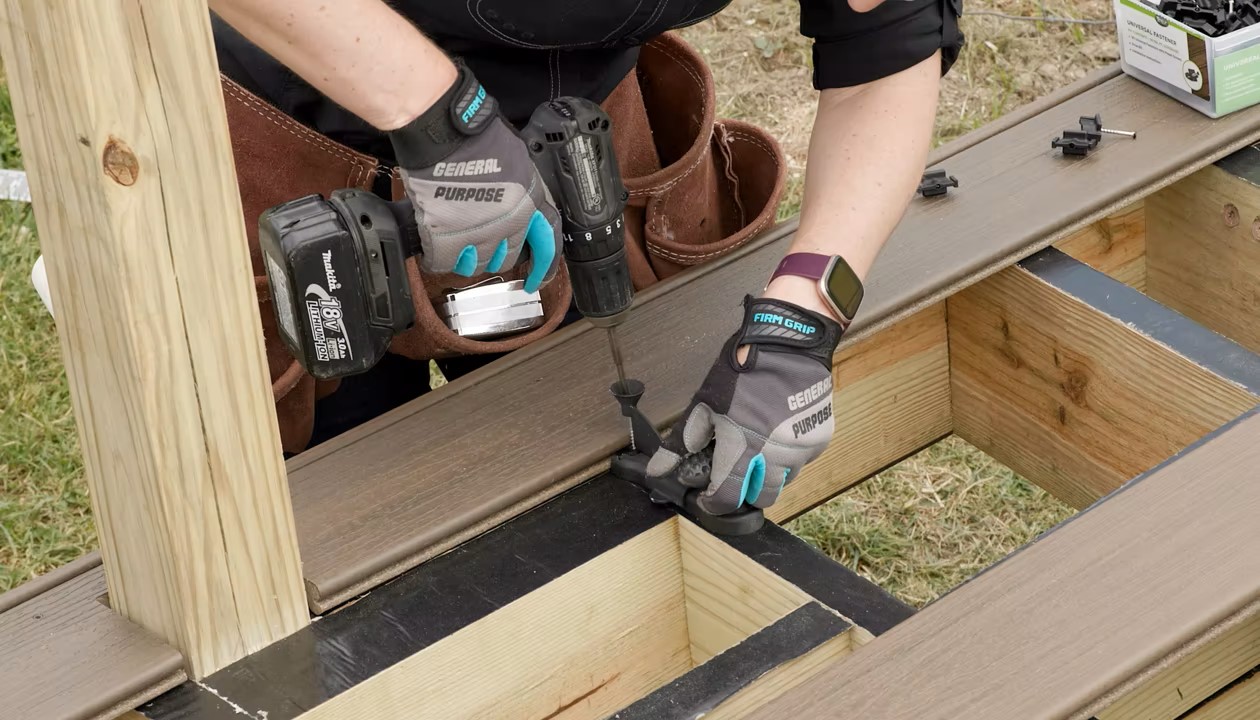
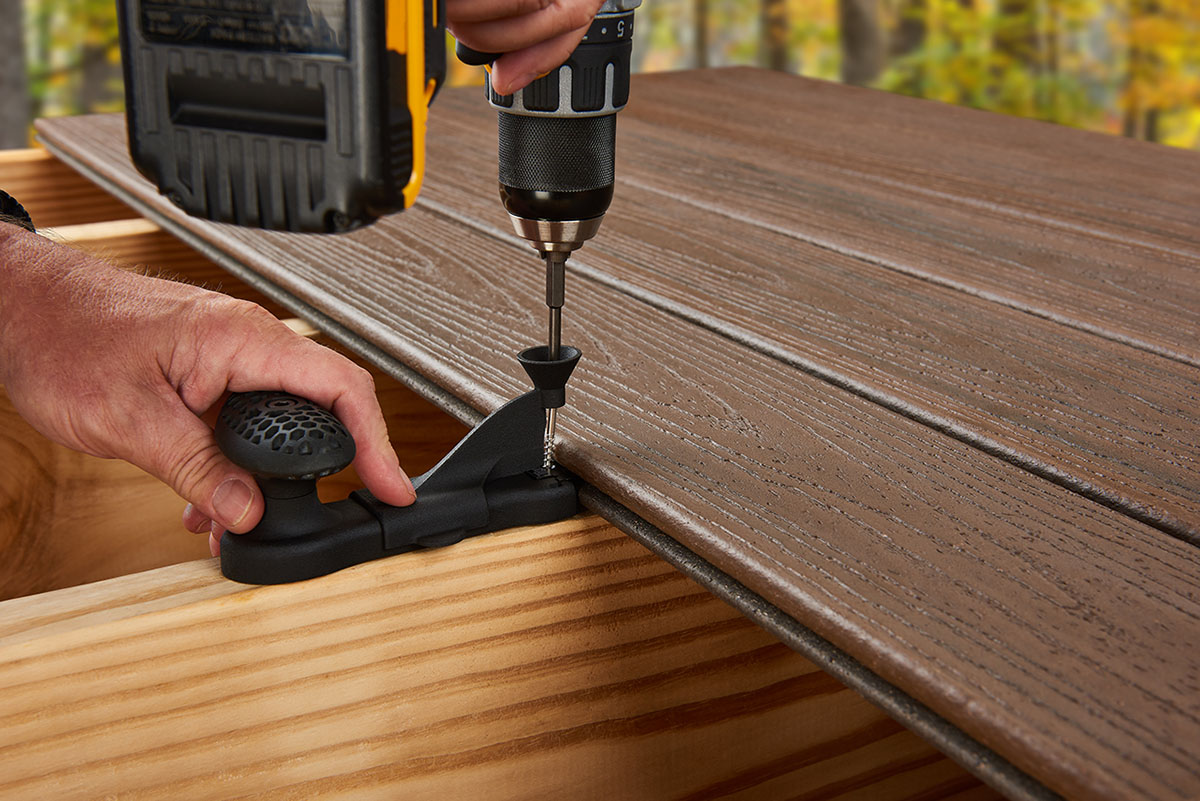
When building stairs with Trex decking, make sure to use the recommended fasteners and spacing to prevent warping. Also, consider using a hidden fastening system for a clean look.
Read more: How To Straighten Trex Decking
Step 6: Secure the Handrail
Adding a handrail to your Trex decking stairs is an optional but recommended step to enhance safety and provide additional support. A handrail can help prevent accidents and offer stability when ascending or descending the stairs. Here’s how you can secure the handrail:
- Determine the handrail height: Check your local building codes for the recommended height of the handrail. This will ensure compliance and optimal safety.
- Choose a handrail material: Select a suitable material for your handrail, such as Trex decking boards or a different type of railing system that matches your outdoor aesthetic.
- Measure and mark the handrail position: Use a tape measure to determine the proper length and position of the handrail. Mark the locations where the handrail posts will be installed.
- Install handrail posts: Attach the handrail posts to the stair stringers or the adjacent structure using appropriate mounting brackets and screws. Ensure they are securely fastened and level.
- Attach the handrail: Place the handrail on top of the installed posts and secure it in place. Use screws or brackets designed for the specific handrail material you are using.
- Test for stability: Once the handrail is attached, give it a firm shake to ensure it is stable and securely fastened. It should provide reliable support when needed.
- Consider additional handrail features: Depending on your needs and preferences, you may want to add post caps, balusters, or other decorative elements to enhance the aesthetic appeal of the handrail.
Securing the handrail is an important step that adds an extra level of safety and functionality to your Trex decking stairs. Follow the appropriate installation guidelines for your chosen handrail material to ensure a secure and aesthetically pleasing result.
With the handrail securely in place, your Trex decking stairs are almost complete. The final step is to add some finishing touches to refine the appearance and ensure maximum safety.
Step 7: Finishing Touches
As you near the completion of your Trex decking stairs, it’s time to add some finishing touches to refine their appearance and ensure maximum safety. These final touches will help create a polished and cohesive look for your outdoor space. Let’s explore the key finishing touches:
- Trim and clean the stairs: Trim any excess material from the stair treads or risers using a saw or utility knife. This will give the stairs a neat and tidy finish. Clean the entire staircase by sweeping or using a hose to remove dirt and debris.
- Apply a protective finish: To enhance the longevity and appearance of your Trex decking stairs, consider applying a protective finish. This can help protect against UV rays, moisture, and the elements. Follow the manufacturer’s instructions for the specific finish you choose.
- Add non-slip tread strips: For added safety, especially in wet or slippery conditions, consider adding non-slip tread strips to the stair treads. These adhesive strips provide extra traction and reduce the risk of slipping.
- Install stair lighting: If you plan to use your outdoor space at night or want to enhance the ambiance, installing stair lighting can be a great addition. LED lights along the stair treads or risers can improve visibility and create an inviting atmosphere.
- Add decorative elements: Lastly, consider adding decorative elements to personalize your Trex decking stairs. This could include potted plants, outdoor rugs, or other decorative accents that complement your outdoor space.
By paying attention to these finishing touches, you can ensure that your Trex decking stairs are not only functional but also aesthetically pleasing. These details will enhance the overall look and feel of your outdoor area, creating a welcoming and safe space to enjoy.
With the finishing touches complete, step back and admire your beautiful Trex decking stairs. You have successfully built a durable, low-maintenance staircase that will enhance the functionality and beauty of your outdoor space for years to come.
Remember to regularly inspect and maintain your Trex decking stairs to preserve their beauty and ensure their longevity. By taking proper care, your stairs will continue to provide a safe and inviting pathway for you and your guests.
Congratulations on completing the construction of your Trex decking stairs! Enjoy the satisfaction of a job well done and the many benefits they bring to your outdoor living space.
Note: Safety is of utmost importance when building and using stairs. Always follow local building codes, use appropriate safety equipment, and consult professionals if needed.
Safety Considerations
When building and using Trex decking stairs, it is essential to prioritize safety. Adhering to proper safety measures will help prevent accidents and ensure the longevity of your stairs. Consider the following safety considerations:
- Follow building codes: Before starting your project, familiarize yourself with the local building codes and regulations pertaining to stairs. This includes requirements for dimensions, handrail height, and other safety specifications.
- Use proper protective gear: When cutting materials or using power tools, always wear appropriate protective gear, including safety goggles, gloves, and ear protection. This will help prevent injuries and ensure your safety.
- Secure the stairs: Ensure that all components of your Trex decking stairs, including stringers, treads, risers, and handrails, are properly secured and stable. Regularly inspect and tighten any loose screws or connections to maintain stability.
- Utilize slip-resistant materials: Choose slip-resistant treads or consider adding non-slip strips to the stair treads. This will provide additional traction, especially in wet or slippery conditions, reducing the risk of accidents.
- Maintain proper lighting: Adequate lighting is crucial for safe navigation, particularly in the evening or low-light situations. Consider installing stair lighting to illuminate the stairs and make them easily visible and accessible.
- Regularly inspect and maintain: Perform regular inspections of your Trex decking stairs to identify and address any structural issues or signs of wear. Replace any damaged or deteriorated components promptly to maintain safety.
- Clear debris and obstacles: Keep the stairs and surrounding areas clear of debris, leaves, snow, or other obstacles that may pose tripping hazards. Regularly sweep or clean the stairs to ensure they are safe and accessible.
- Use handrails: Encourage the use of handrails when ascending or descending the stairs. Handrails provide stability and support, especially for individuals with limited mobility or balance issues.
- Supervise children and pets: Ensure that children and pets are supervised when using the stairs. Educate them about proper stair usage and safety guidelines to prevent accidents.
By prioritizing safety and following these considerations, you can create a secure and hazard-free environment for using your Trex decking stairs. Regular maintenance, careful usage, and vigilance will help ensure that your stairs provide a safe and enjoyable experience for everyone.
Remember, if you encounter any concerns or doubts during the construction process, consult with professionals or experts to ensure that your Trex decking stairs are built to the highest safety standards.
Note: This article provides general safety guidelines and recommendations. Always consult local building codes and regulations specific to your area and seek professional advice as needed.
Conclusion
Building stairs with Trex decking can greatly enhance the functionality, beauty, and safety of your outdoor space. Whether you’re adding stairs to your deck, patio, or porch, following the right steps is crucial to ensure a successful construction project. By measuring, planning, and preparing the area properly, as well as building stair stringers, installing risers and treads, and incorporating finishing touches, you can create a durable and visually appealing staircase that will withstand the test of time.
Throughout the process, always prioritize safety by following local building codes, using appropriate protective gear, and ensuring the stability and proper maintenance of your stairs. Handrails, slip-resistant materials, and proper lighting are just a few of the safety considerations to keep in mind.
With the construction complete, take a moment to appreciate the beauty and functionality of your Trex decking stairs. Enjoy the safe and convenient access they provide to your outdoor spaces, and take pride in the craftsmanship that went into their creation.
Remember, proper maintenance and regular inspections are key to ensuring the longevity of your stairs. Keep an eye out for any signs of wear or damage, and promptly address any issues to maintain safety and structural integrity.
Building stairs with Trex decking is a rewarding project that combines functionality, aesthetics, and safety. By following the steps outlined in this article, you can confidently create a set of stairs that will enhance your outdoor space for years to come.
So, grab your tools, gather your materials, and embark on the journey of building beautiful and functional Trex decking stairs. Transform your outdoor space into an inviting and safe haven that you and your loved ones can enjoy for countless seasons ahead.
Frequently Asked Questions about How To Do Stairs With Trex Decking
Was this page helpful?
At Storables.com, we guarantee accurate and reliable information. Our content, validated by Expert Board Contributors, is crafted following stringent Editorial Policies. We're committed to providing you with well-researched, expert-backed insights for all your informational needs.


0 thoughts on “How To Do Stairs With Trex Decking”