Home>Furniture>Outdoor Furniture>How To Build A Patio Gazebo
Outdoor Furniture
How To Build A Patio Gazebo
Modified: August 20, 2024
Discover how to build a stunning patio gazebo with our comprehensive guide. Transform your outdoor space with beautiful and functional outdoor furniture.
(Many of the links in this article redirect to a specific reviewed product. Your purchase of these products through affiliate links helps to generate commission for Storables.com, at no extra cost. Learn more)
Introduction
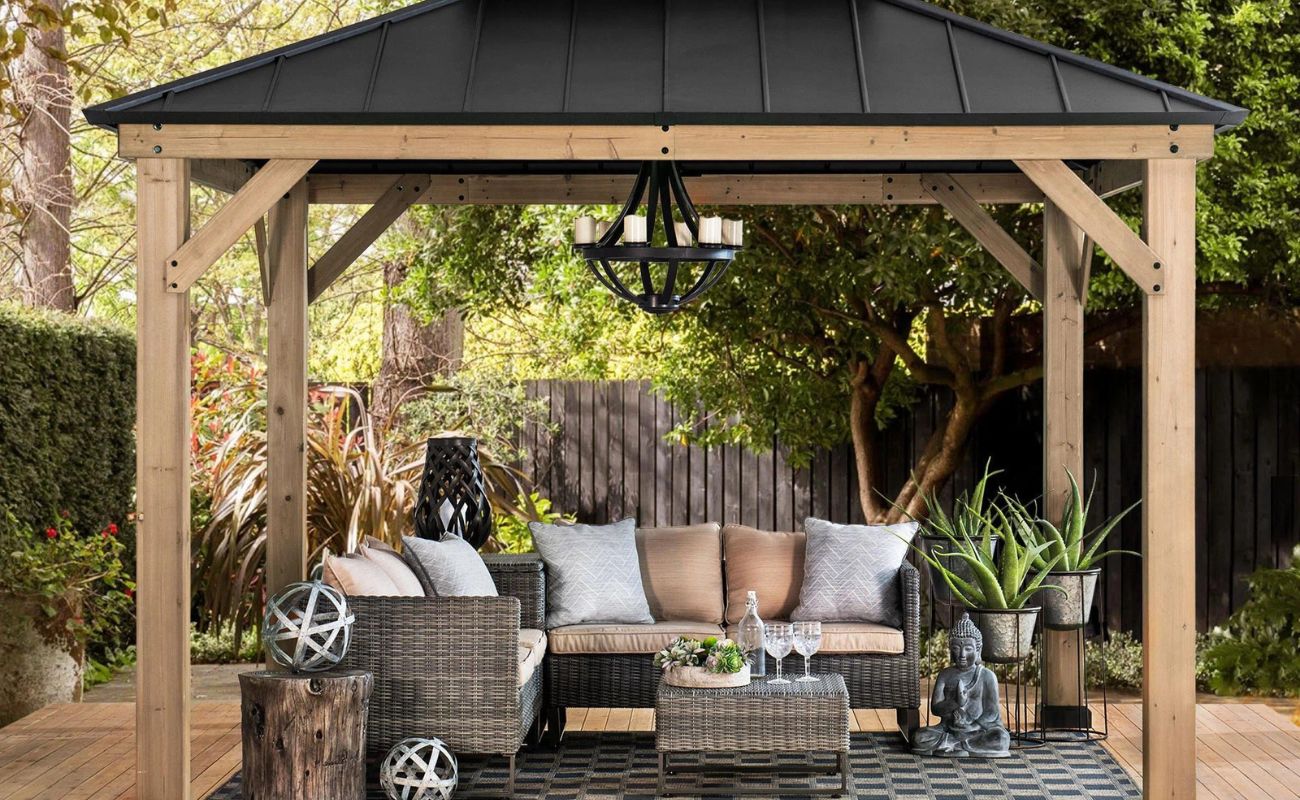
Building a patio gazebo is a fantastic way to enhance your outdoor living space. Not only does it provide a cozy and sheltered area to enjoy the outdoors, but it also adds a touch of elegance and charm to your backyard or garden. Whether you’re planning to host parties, relax with a good book, or simply enjoy a cup of coffee, a gazebo provides the perfect setting.
Constructing a patio gazebo may seem like a daunting task, but with the right guidance and a little bit of preparation, it can be a rewarding and fulfilling project. In this article, we will take you through the step-by-step process of building a patio gazebo, from choosing the right location to adding the finishing touches.
Before we dive into the details, it’s important to note that building a gazebo requires a certain level of skill and knowledge. If you’re a seasoned DIY enthusiast with experience in woodworking and outdoor construction, you’ll find this project enjoyable. However, if you’re a beginner, it’s recommended to seek assistance from a professional or enlist the help of a skilled friend or family member.
Now, let’s get started on building your dream patio gazebo!
Key Takeaways:
- Building a patio gazebo requires careful planning, the right location, and proper materials. It’s a rewarding project that adds elegance and charm to your outdoor space.
- From preparing the ground to adding finishing touches, each step in building a patio gazebo contributes to creating a beautiful and functional outdoor retreat.
Read more: How To Anchor A Gazebo On The Patio
Step 1: Choosing the Right Location
The first step in building a patio gazebo is choosing the best location for it in your outdoor space. Consider the following factors before finalizing the spot:
- Sunlight: Look for an area that receives an optimal amount of sunlight throughout the day. This will ensure that your gazebo is well-lit and comfortable to use during various times of the day.
- Views: Take advantage of any scenic views or natural features in your backyard. Position your gazebo in a way that allows you to enjoy these views and create a serene atmosphere.
- Accessibility: Determine how easily accessible the location is from your home and other areas of your yard. Consider pathways and any potential obstacles that may need to be addressed.
- Privacy: If privacy is important to you, choose a spot that offers some seclusion from neighboring properties or high-traffic areas.
Once you have identified a potential location, mark it out using stakes and string or spray paint. This will give you a clear visual representation of the gazebo’s footprint and help you visualize how it will fit into your outdoor space.
It’s also important to check for any underground utilities or structures that may be present in the area. Contact your local utility companies to come and mark out the location of any underground lines before you start digging.
Remember, the location you choose will have a significant impact on your overall gazebo experience, so take your time in selecting the perfect spot.
Step 2: Gathering Materials and Tools
Once you have chosen the ideal location for your patio gazebo, it’s time to gather the necessary materials and tools. Having everything ready before you start will help streamline the construction process and ensure that you have everything you need at hand.
Here are the materials you will need:
- Gazebo Kit: Depending on your preference, you can purchase a pre-fabricated gazebo kit or gather the materials to build it from scratch. A gazebo kit typically includes the necessary lumber, hardware, and roof materials.
- Lumber: If you decide to build the gazebo from scratch, you will need pressure-treated lumber for the frame. The quantity will depend on the size of your gazebo and the specific design you choose.
- Hardware: Stock up on nails, screws, and brackets to secure the various components of the gazebo. Make sure to use galvanized or stainless steel fasteners to prevent rust and ensure durability.
- Roofing Materials: Choose your preferred roofing material, whether it’s shingles, metal panels, or a thatched roof. Ensure that you have enough to cover the entire roof area of your gazebo.
- Concrete: If your gazebo requires a foundation, you will need concrete mix to pour into the post holes for stability.
- Tools: Here is a list of essential tools you will need: a circular saw, a tape measure, a level, a drill, a hammer, a post hole digger, a shovel, a ladder, safety glasses, and work gloves.
Before purchasing or gathering materials, it’s a good idea to create a detailed plan or consult with a professional to ensure that you have the correct quantities and dimensions. This will prevent any last-minute trips to the hardware store and keep the construction process on track.
Once you have all the materials and tools ready, you’re one step closer to creating your beautiful patio gazebo!
Step 3: Preparing the Ground
With the materials and tools gathered, it’s time to move on to preparing the ground where your patio gazebo will be installed. Proper preparation is essential to ensure stability and longevity for your gazebo.
Follow these steps to prepare the ground:
- Clear the area: Remove any plants, rocks, or debris from the chosen location. Trim any overhanging branches or bushes that might interfere with the gazebo’s construction or cause damage in the future.
- Level the ground: Use a shovel and a rake to level the ground as much as possible. The surface should be smooth and even to provide a stable foundation for the gazebo.
- Consider drainage: If your chosen location is prone to water accumulation or flooding, it’s important to address the issue. You can add a layer of gravel or install a drainage system to ensure proper water flow and prevent moisture damage to the gazebo.
- Prepare the foundation: Depending on the design and style of your gazebo, you may need to create a foundation. This can involve digging post holes and pouring concrete to secure the gazebo’s support posts. Follow the specifications provided in your gazebo kit or consult with a professional to ensure the correct foundation for your specific gazebo model.
Take your time during this step to ensure that the ground is properly prepared. A well-prepared foundation will provide a solid base for your gazebo and contribute to its stability and durability.
Once the ground preparation is complete, you’re ready to move on to the next step: building the foundation for your patio gazebo.
Step 4: Building the Foundation
Now that the ground is properly prepared, it’s time to move on to building the foundation for your patio gazebo. The foundation provides stability and support for the structure, ensuring that it stands strong for years to come.
Follow these steps to build the foundation:
- Layout the foundation: Refer to the instructions provided in your gazebo kit or consult with a professional to determine the exact layout and dimensions of the foundation. Use stakes and string to mark the locations of the support posts.
- Dig the post holes: Use a post hole digger or an auger to dig holes at the marked locations. The depth and diameter of the holes will depend on the size and type of your gazebo. Ensure that the holes are deep enough to provide stability and prevent shifting due to weather or soil conditions.
- Insert the support posts: Place pressure-treated lumber or metal support posts into the holes. Use a level to ensure that the posts are upright and plumb. If necessary, add temporary bracing to keep the posts in position during the installation process.
- Pour concrete: Mix the concrete according to the manufacturer’s instructions and pour it into the post holes, ensuring that it completely surrounds the support posts. Use a level to maintain the alignment of the posts and allow the concrete to cure as per the recommended timeframe.
- Attach brackets and crossbeams: Once the concrete has cured and the support posts are secure, attach metal brackets or crossbeams to connect the posts and create the framework for the gazebo. Follow the instructions provided with your gazebo kit or consult with a professional to ensure accurate installation.
Building a strong and sturdy foundation is crucial to the overall structural integrity of your gazebo. Take the time to complete this step carefully and accurately to ensure a solid foundation for your patio gazebo.
After completing the foundation, it’s time to move on to the next step: erecting the gazebo frame.
When building a patio gazebo, make sure to properly level the ground and use sturdy materials for the frame to ensure stability and durability.
Read also: 8 Best Patio Gazebo For 2025
Step 5: Erecting the Gazebo Frame
With the foundation in place, it’s time to move on to erecting the gazebo frame. This step brings your patio gazebo to life and begins to showcase its shape and structure.
Follow these steps to erect the gazebo frame:
- Refer to the instructions: Whether you are using a pre-fabricated gazebo kit or building from scratch, refer to the provided instructions for guidance on assembling the frame. Each gazebo model differs in design, so it’s important to follow the instructions specific to your gazebo kit.
- Assemble the frame sections: Typically, gazebo frames consist of multiple sections, including posts, crossbeams, and roof supports. Follow the instructions to connect these sections and create the frame structure.
- Secure the frame to the foundation: Use hardware provided or recommended by the manufacturer to secure the frame to the foundation. This step ensures stability and prevents movement of the gazebo during inclement weather.
- Check for level and alignment: Use a level to check that the frame is plumb and the crossbeams are level. Make any necessary adjustments to ensure proper alignment.
- Secure additional support: Depending on the size and design of your gazebo, you may need to add additional support, such as braces or brackets, to strengthen the frame and enhance its stability.
Take your time during this step to ensure that the frame is assembled correctly and securely. Double-check all connections and make any adjustments as necessary to ensure a solid and stable gazebo structure.
Once the gazebo frame is erected, it’s time to move on to the next step: installing the roof.
Step 6: Installing the Roof
Now that the gazebo frame is in place, it’s time to install the roof. The roof not only provides protection from the elements but also adds aesthetic appeal to your patio gazebo.
Follow these steps to install the roof:
- Choose the roofing material: Select the roofing material that best suits your preference and the overall design of your gazebo. Common options include shingles, metal panels, thatched roof, or polycarbonate sheets. Ensure that the material is weather-resistant and durable.
- Measure and cut the roofing material: Measure the dimensions of the roof area and carefully cut the roofing material to fit. Follow the manufacturer’s instructions for cutting and shaping the material.
- Start from the bottom: Begin installing the roofing material from the bottom of the roof and work your way up. This ensures that the material overlaps correctly and provides effective water drainage.
- Secure the roofing material: Use appropriate roofing nails, screws, or adhesive to secure the roofing material to the frame. Ensure that each piece is securely fastened and aligned with the adjacent pieces.
- Seal the joints: Apply a waterproof sealant or flashing around the joints and edges of the roofing material to prevent water leakage and enhance its durability.
Take precautionary measures while working on the roof, such as using a sturdy ladder, wearing appropriate safety gear, and working in favorable weather conditions.
Installing the roof completes the basic structure of your patio gazebo, and it’s time to move on to the final step: adding flooring and finishing touches.
Step 7: Adding Flooring and Finishing Touches
With the main structure of your patio gazebo complete, it’s time to add the finishing touches and create a beautiful and functional outdoor space. This final step involves adding flooring and other elements that will enhance the overall appearance and usability of your gazebo.
Follow these steps to add flooring and finishing touches to your patio gazebo:
- Choose the flooring material: Select a flooring material that suits your style and meets your needs. Popular options include wood decking, composite decking, pavers, or gravel. Consider factors such as durability, maintenance, and aesthetics when making your decision.
- Prepare the area: Clear the interior space of any debris or construction materials. Ensure that the area is clean and level before installing the flooring.
- Install the flooring: Follow the manufacturer’s instructions to install the chosen flooring material. This may involve laying planks, placing pavers, or spreading gravel. Take care to ensure proper alignment and secure installation.
- Add seating and furnishings: Make your gazebo comfortable and inviting by adding seating options such as benches, chairs, or a table. Consider the dimensions of your gazebo and choose furniture that fits well without overcrowding the space.
- Decorative elements: Enhance the ambiance of your gazebo by incorporating decorative elements such as potted plants, hanging lights, or outdoor curtains. These touches add personality and style to your outdoor oasis.
- Accessorize: Complete the look of your patio gazebo by adding accessories such as outdoor rugs, cushions, and throw pillows. These elements not only add comfort but also provide an opportunity to infuse some color and style into your space.
- Test and maintain: Once all the finishing touches are in place, take the time to test the functionality of your gazebo. Ensure that everything is secure, comfortable, and meets your expectations. Regularly clean and maintain your gazebo to keep it in pristine condition and extend its lifespan.
Adding flooring and finishing touches to your patio gazebo allows you to create a customized and inviting outdoor space where you can relax, entertain, and enjoy the beauty of your surroundings.
With these final steps completed, step back and admire your stunning patio gazebo, ready to be enjoyed for years to come!
Conclusion
Building a patio gazebo is a rewarding and fulfilling project that can transform your outdoor space into a tranquil retreat. By following the step-by-step process outlined in this guide, you can create a beautiful and functional gazebo that adds a touch of elegance to your backyard or garden.
From choosing the right location to adding the finishing touches, each step plays a crucial role in the construction process. By carefully preparing the ground, building a solid foundation, and erecting the gazebo frame, you ensure the stability and longevity of your gazebo. Installing the roof, choosing the right flooring, and adding personalized finishing touches allow you to create a space that reflects your style and meets your needs.
Throughout the construction process, it’s important to consider safety precautions, seek assistance when needed, and follow the instructions provided by the manufacturer or a professional. Additionally, regularly inspect and maintain your gazebo to keep it in optimal condition and extend its lifespan.
By completing this project, you create a versatile and inviting outdoor living space. Whether you use it for hosting gatherings, relaxing with a book, or simply enjoying nature, your patio gazebo becomes a cherished space that adds value to your home and enriches your lifestyle.
So, grab your tools, gather your materials, and embark on the journey of building your dream patio gazebo. With careful planning, patience, and a little bit of hard work, you’ll soon be able to enjoy the benefits of your own private oasis.
Frequently Asked Questions about How To Build A Patio Gazebo
Was this page helpful?
At Storables.com, we guarantee accurate and reliable information. Our content, validated by Expert Board Contributors, is crafted following stringent Editorial Policies. We're committed to providing you with well-researched, expert-backed insights for all your informational needs.


0 thoughts on “How To Build A Patio Gazebo”