Home>Furniture>Outdoor Furniture>How To Clean The Patio
Outdoor Furniture
How To Clean The Patio
Modified: March 7, 2024
Learn how to clean and maintain your outdoor furniture with our step-by-step guide to keep your patio looking its best.
(Many of the links in this article redirect to a specific reviewed product. Your purchase of these products through affiliate links helps to generate commission for Storables.com, at no extra cost. Learn more)
Introduction
Welcome to our comprehensive guide on how to clean your patio! Your patio is a wonderful space for outdoor living, entertaining guests, and enjoying the fresh air. However, over time, it can accumulate dirt, stains, and grime that can make it look dull and uninviting. That’s where proper cleaning techniques come in.
Cleaning your patio not only enhances its appearance but also helps preserve its lifespan. Regular maintenance ensures that your outdoor space remains functional and enjoyable for years to come. So, grab your cleaning supplies and let’s get started on revitalizing your patio space!
Before we dive into the step-by-step process, let’s gather the supplies you’ll need for a thorough patio cleaning:
Key Takeaways:
- Keep your patio looking great and lasting longer by regularly cleaning and maintaining it. Follow the step-by-step guide to remove stains, rinse, scrub, and even apply a protective sealant for added protection.
- Gather the necessary supplies, clear the patio, and follow the cleaning process to ensure a clean, refreshed, and protected patio. Regular maintenance will keep your outdoor space in pristine condition for years of enjoyment.
Read more: How To Clean A Patio Rug
Supplies Needed
Before you begin cleaning your patio, it’s essential to gather the necessary supplies. Having these items on hand will make the cleaning process much more efficient. Here’s a list of what you’ll need:
- Stiff broom or brush
- Garden hose with a spray nozzle
- Bucket
- Mild dish soap or patio cleaner
- Stain remover (if needed)
- Power washer (optional)
- Protective gloves
- Protective eyewear
- Old towels or rags
- Patio sealant (optional)
Make sure to choose a mild dish soap or a specialized patio cleaner that won’t damage the surface of your patio. Additionally, be prepared with any stain removers that may be necessary for tougher stains. A power washer can help speed up the cleaning process, but it’s not required for all patio surfaces.
Now that you have your supplies ready, let’s move on to the step-by-step process of cleaning your patio.
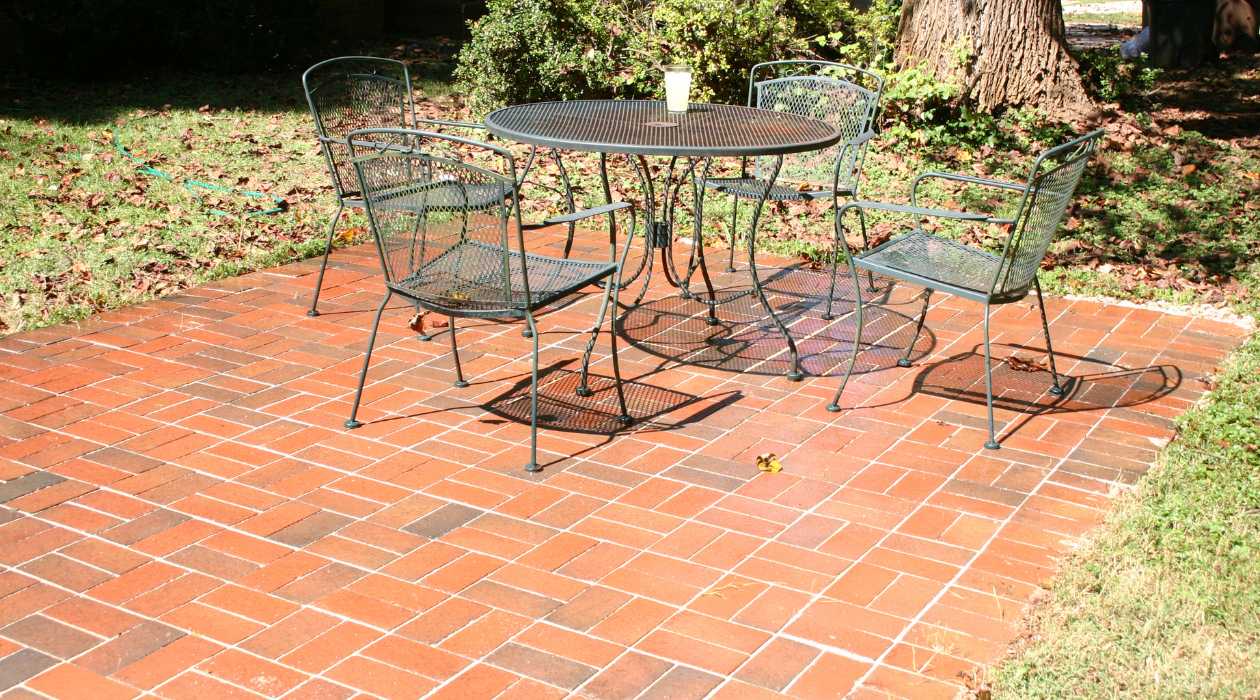
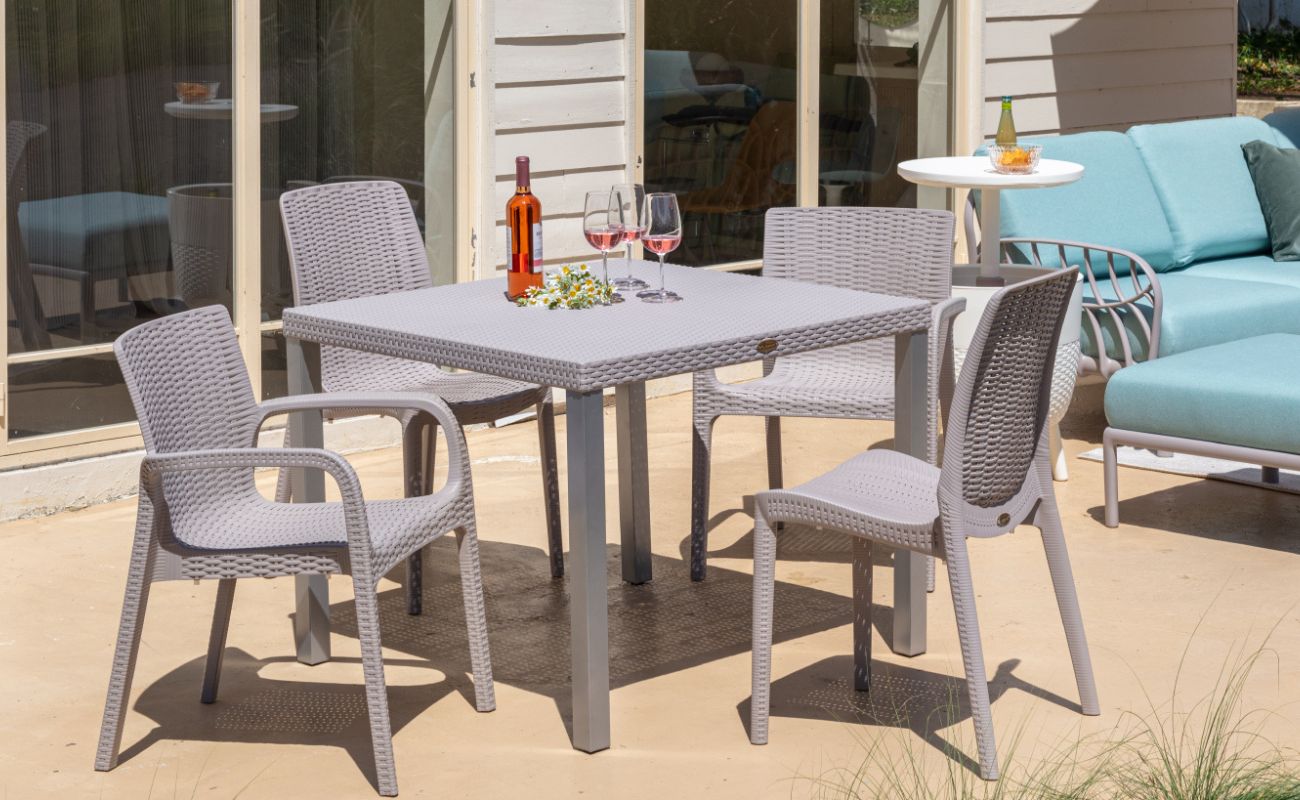
Step 1: Clearing the Patio
Before you begin the actual cleaning process, it’s important to clear your patio of any furniture, plants, or other items that may be in the way. This will give you a clear workspace and prevent any damage to your belongings during the cleaning process. Here’s what you need to do:
- Start by removing all furniture, pots, and decorations from the patio. Set them aside in a safe area away from the cleaning zone.
- If you have any plants or shrubs on your patio, consider covering them with a protective plastic sheet or moving them to a different area temporarily.
- Take a broom or brush and sweep away any loose debris such as leaves, twigs, or dirt. Pay special attention to the corners and crevices where dirt tends to accumulate.
- If you notice any stubborn or stuck-on dirt or grime, use a putty knife or scraper to gently lift it off the surface. Be careful not to scratch or damage the patio material.
By clearing your patio of any obstacles and sweeping away loose debris, you create a clean canvas to work with. This step also prevents any unwanted debris from being spread around or interfering with the cleaning process. Once your patio is clear and debris-free, you’re ready to move on to the next step: sweeping the surface.
Step 2: Sweeping the Surface
Now that your patio is free of furniture and debris, it’s time to give it a thorough sweeping. This step will help remove any remaining loose dirt or particles, preparing the surface for deeper cleaning. Follow these steps to sweep your patio surface effectively:
- Start at one end of your patio and work your way across, sweeping in a systematic pattern. This will ensure that you cover every inch of the surface.
- Use a stiff broom or brush to sweep the debris towards a designated area for easy collection.
- Pay close attention to the corners, edges, and crevices of your patio, as these areas tend to trap dirt and debris.
- If you encounter any stubborn dirt or stains during the sweeping process, try gently scrubbing them with the broom bristles or using a putty knife to lift them off.
- Once you’ve swept the entire patio surface, gather the collected debris using a dustpan or a garden rake.
- Dispose of the debris properly, either by bagging it for trash or composting it if it is organic material.
Sweeping the surface of your patio not only removes loose dirt but also helps to dislodge any ingrained particles. This step creates a cleaner and smoother surface, setting the stage for the next steps in the cleaning process. Now that your patio is swept and ready, it’s time to move on to step 3: removing stubborn stains.
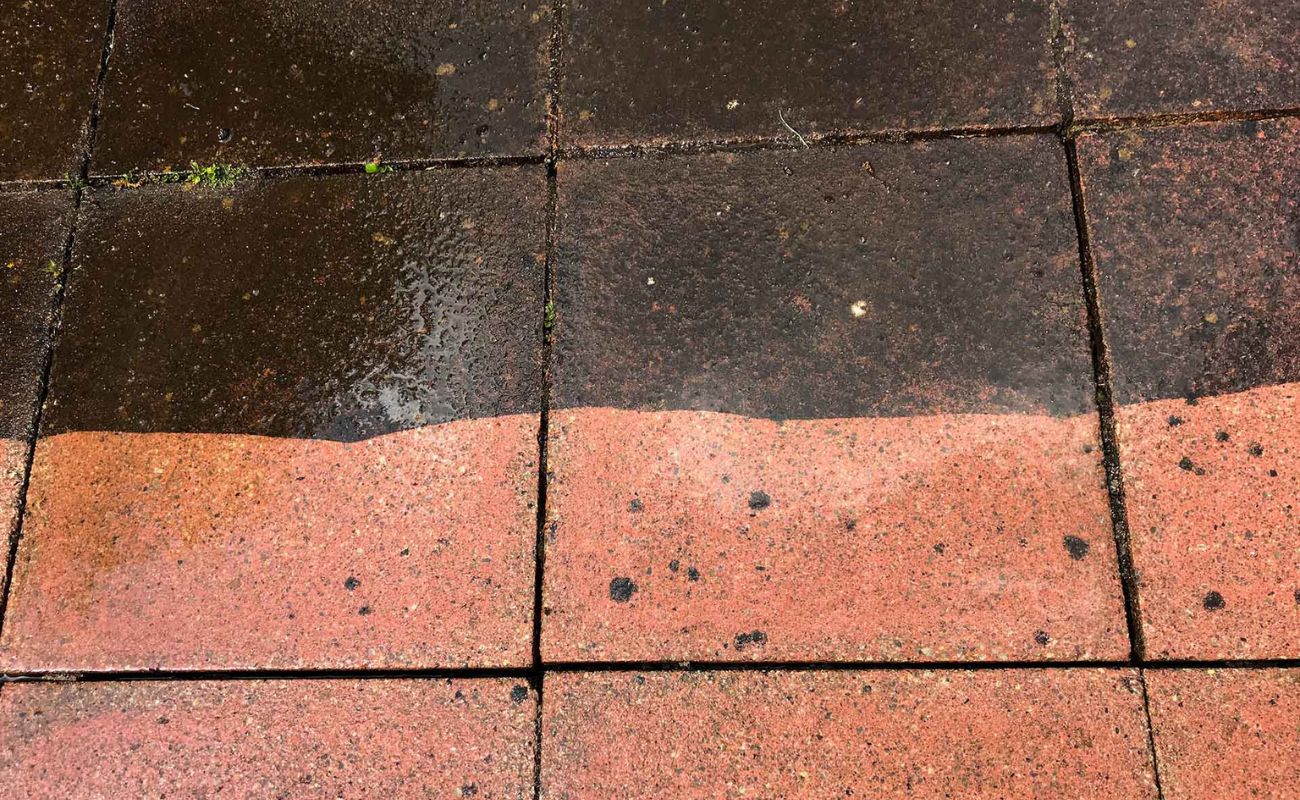
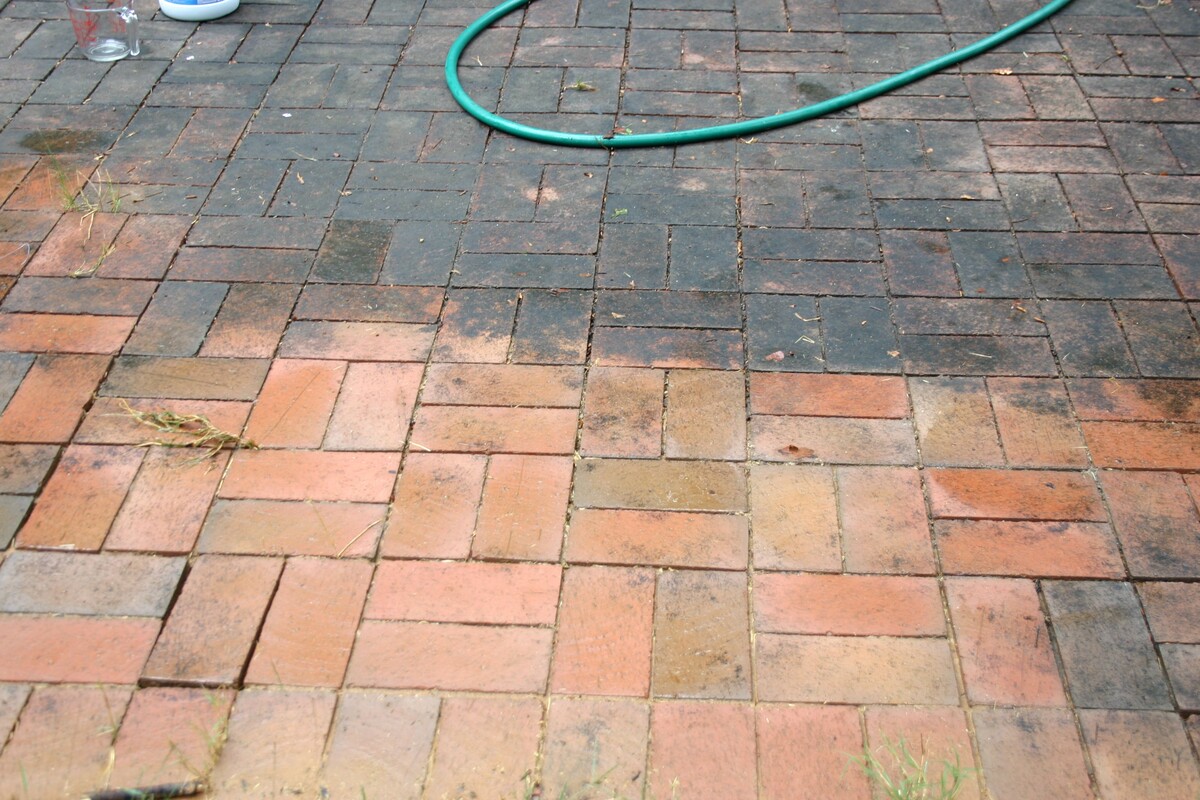
Step 3: Removing Stubborn Stains
Even with regular cleaning, your patio may develop stubborn stains over time. These stains can be caused by spilled liquids, grease, moss, or even rust. In this step, we will focus on effectively removing these tough stains. Follow these instructions to tackle those stubborn marks:
- Identify the type of stain you are dealing with. Different stains may require different cleaning techniques or specialized stain removers. For example, oil-based stains may need a degreaser, while rust stains may require a rust remover.
- If you have a specific stain remover designed for the type of stain you’re dealing with, follow the instructions provided on the product label. Apply the stain remover to the affected area and let it sit for the recommended amount of time.
- If you don’t have a specific stain remover, you can make a DIY solution using household ingredients. For oil-based stains, try mixing dish soap with warm water. For rust stains, a mixture of lemon juice and salt can be effective.
- Apply your chosen stain removal solution to the stained area and use a scrub brush or sponge to gently scrub the stain in a circular motion. Be careful not to scrub too hard, as this can damage the patio surface.
- Continue scrubbing until the stain starts to fade or lift. Depending on the severity of the stain, it may take several attempts to completely remove it.
- Rinse the area with water to remove any remaining residue and assess if the stain has been fully removed. If necessary, repeat the process until the stain is no longer visible.
Remember, different types of stains may require different treatment options, and the effectiveness of stain removal can vary. Take note of the specific stain and adjust your cleaning methods accordingly. Once you’ve successfully dealt with stubborn stains, it’s time to move on to step 4: rinsing the patio with water.
Read more: How To Clean Bluestone Patio
Step 4: Rinsing with Water
Now that you have tackled the stubborn stains on your patio, it’s important to thoroughly rinse the surface with water. Rinsing will remove any residue from the cleaning products and ensure a clean and fresh patio. Here’s how to effectively rinse your patio:
- Begin by connecting a spray nozzle to your garden hose.
- Turn on the water and adjust the water pressure to a moderate setting. You don’t want the water pressure to be too high, as it may damage the patio surface.
- Starting at one end of the patio, use the spray nozzle to thoroughly soak the entire surface with water.
- Pay particular attention to areas where you have applied stain removers or cleaning solutions. Rinse these areas more thoroughly to ensure all residue is washed away.
- Continue rinsing the patio until the water runs clear and there are no visible traces of cleaning products or stains.
By rinsing your patio with water, you effectively remove any remaining cleaning products, loosened dirt, and debris. This step also helps to refresh the patio and prepare it for the next phase of the cleaning process. Now that your patio is rinsed and clean, it’s time to move on to step 5: scrubbing with soap or detergent.
Use a pressure washer or a mixture of water and mild detergent to clean the patio surface. Scrub any stubborn stains with a brush and rinse thoroughly. Make sure to remove any debris and sweep the area before cleaning.
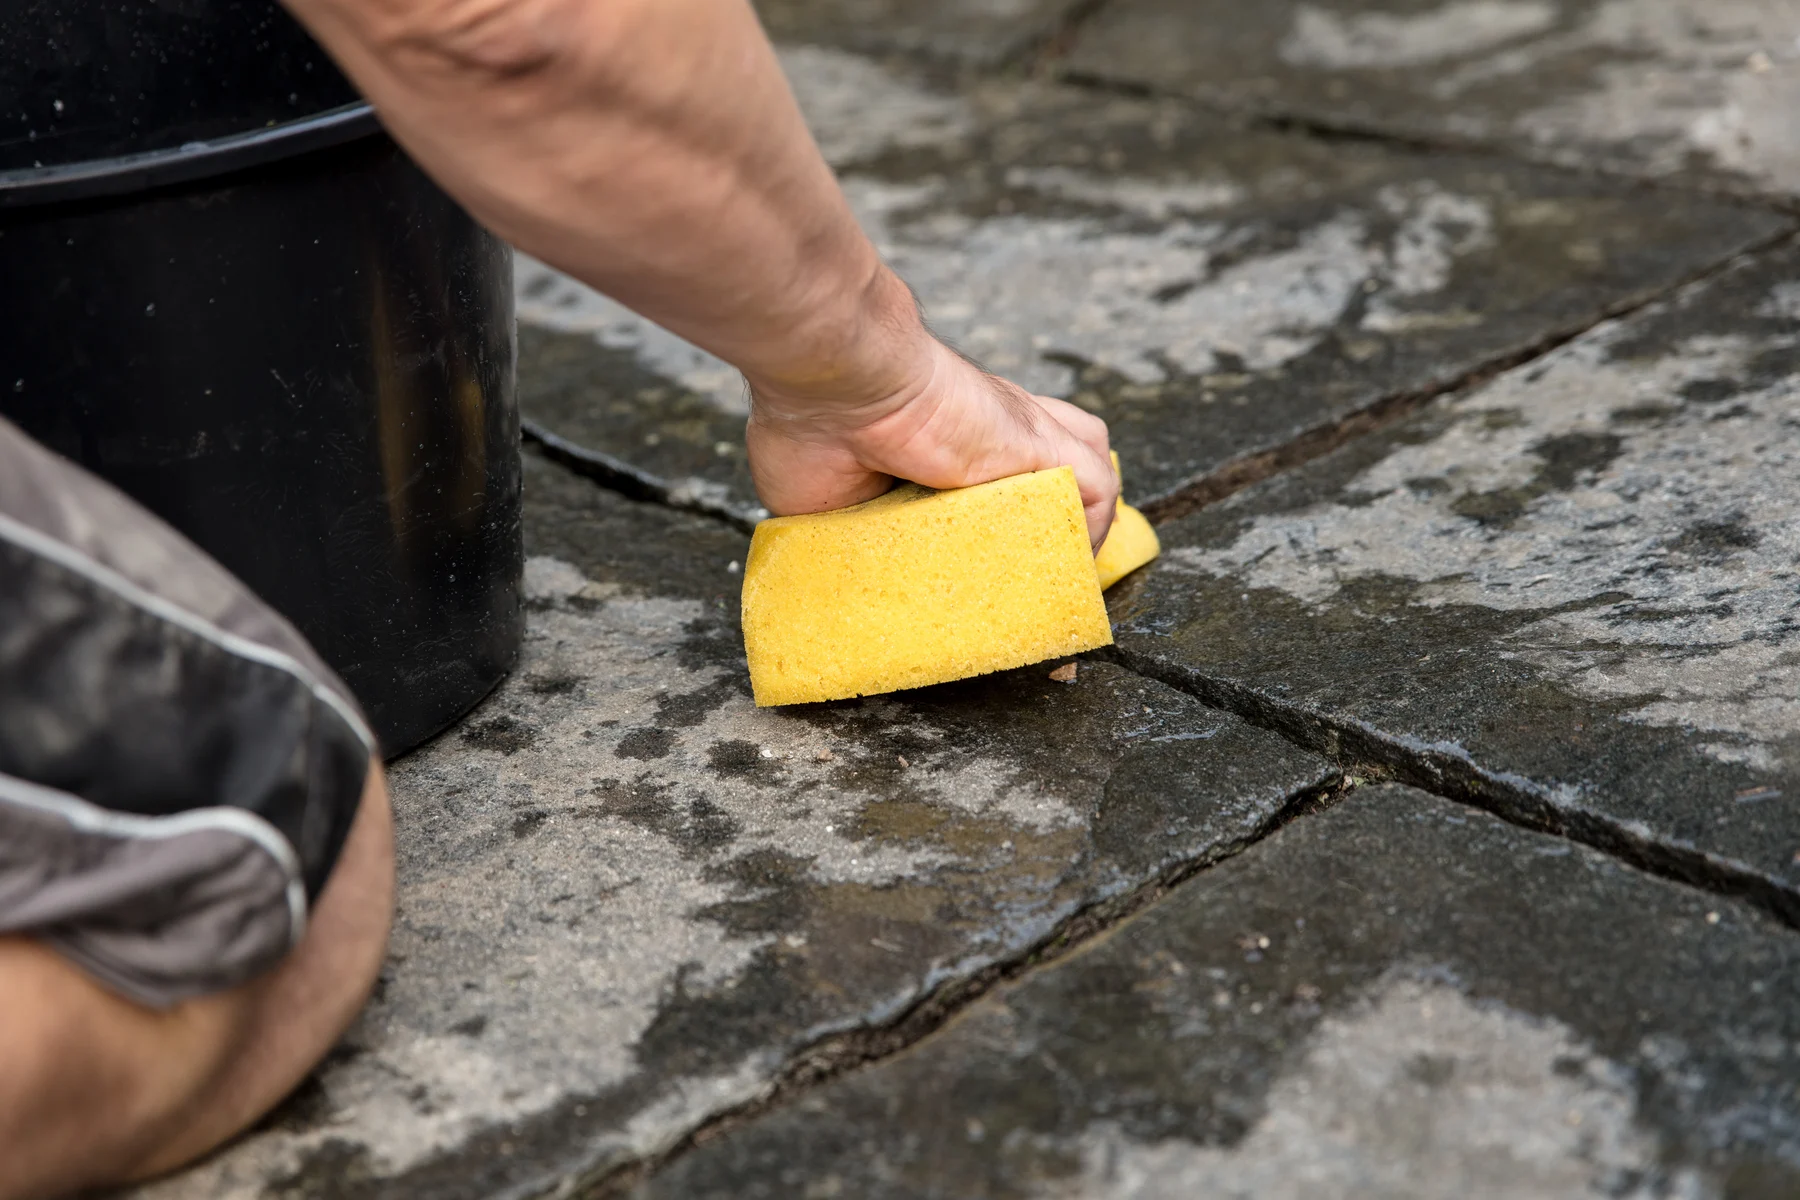
Step 5: Scrubbing with Soap or Detergent
After rinsing your patio with water, it’s time to give it a deep clean by scrubbing with soap or detergent. This step will help remove any remaining dirt, grime, and stains that may have survived the previous cleaning steps. Follow these instructions for an effective scrubbing process:
- Fill a bucket with warm water and add a mild dish soap or a specialized patio cleaner according to the manufacturer’s instructions.
- Dip a scrub brush or sponge into the soapy solution and start scrubbing the patio surface in a systematic pattern.
- Give extra attention to areas that are visibly dirty or stained. Apply more pressure and scrub in a circular motion to loosen and lift the dirt.
- If you encounter any stubborn stains during the scrubbing process, apply extra soap or detergent directly to the area and continue scrubbing until the stain is removed.
- Periodically rinse your scrub brush or sponge in clean water to remove dirt and soap residue.
- Continue scrubbing the entire patio surface, making sure to cover all areas including corners, edges, and crevices.
- Once you have scrubbed the entire patio, let the soapy solution sit on the surface for a few minutes. This will allow the soap or detergent to penetrate and break down any remaining dirt.
Scrubbing with soap or detergent helps to dislodge and break down any stubborn dirt or grime on your patio. Make sure to use a soft-bristled brush or sponge to prevent any scratching or damage to the surface. Once you’ve thoroughly scrubbed the patio, it’s time to rinse it again with water to remove the soapy residue. This will be addressed in the next step.
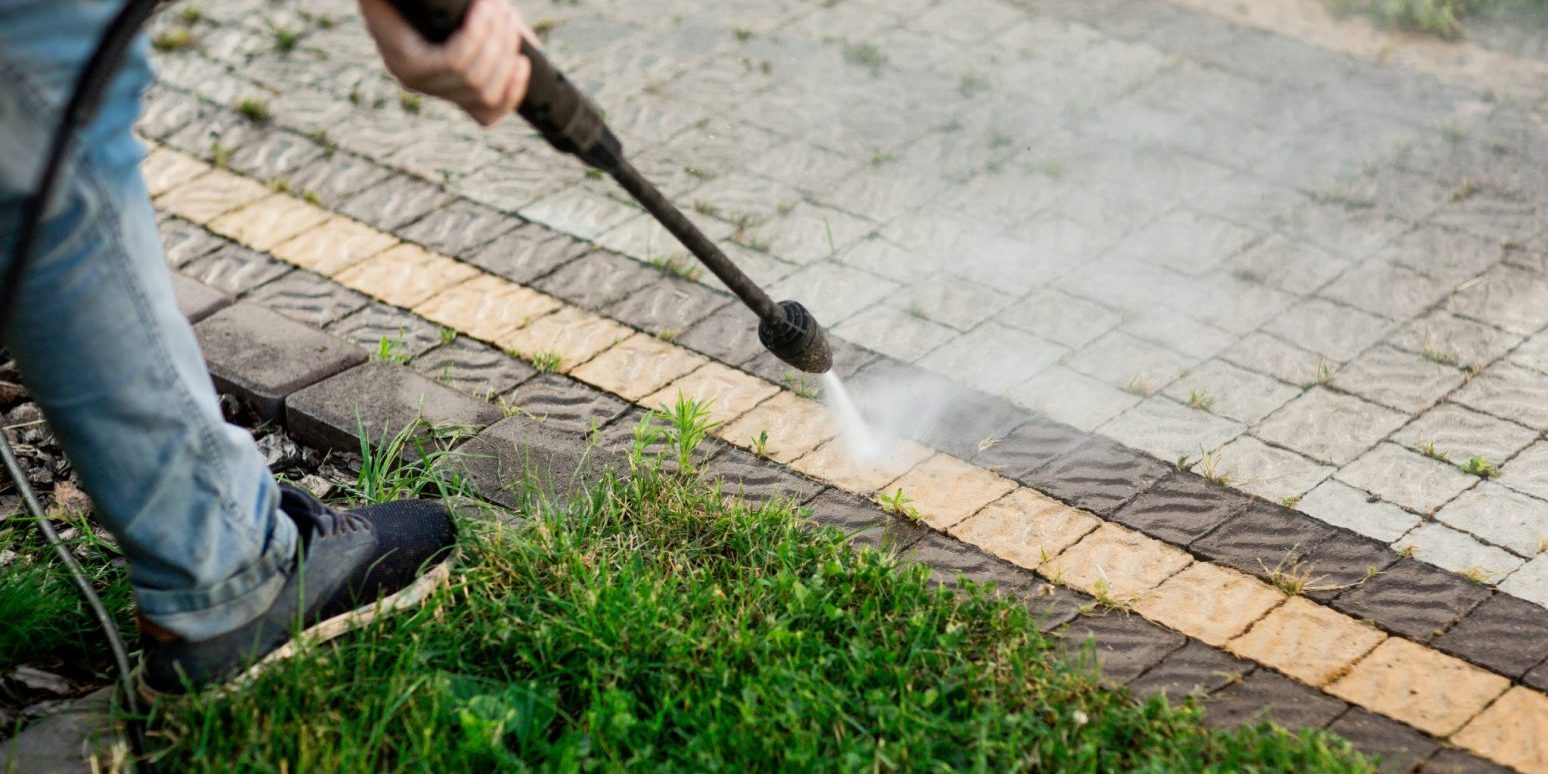
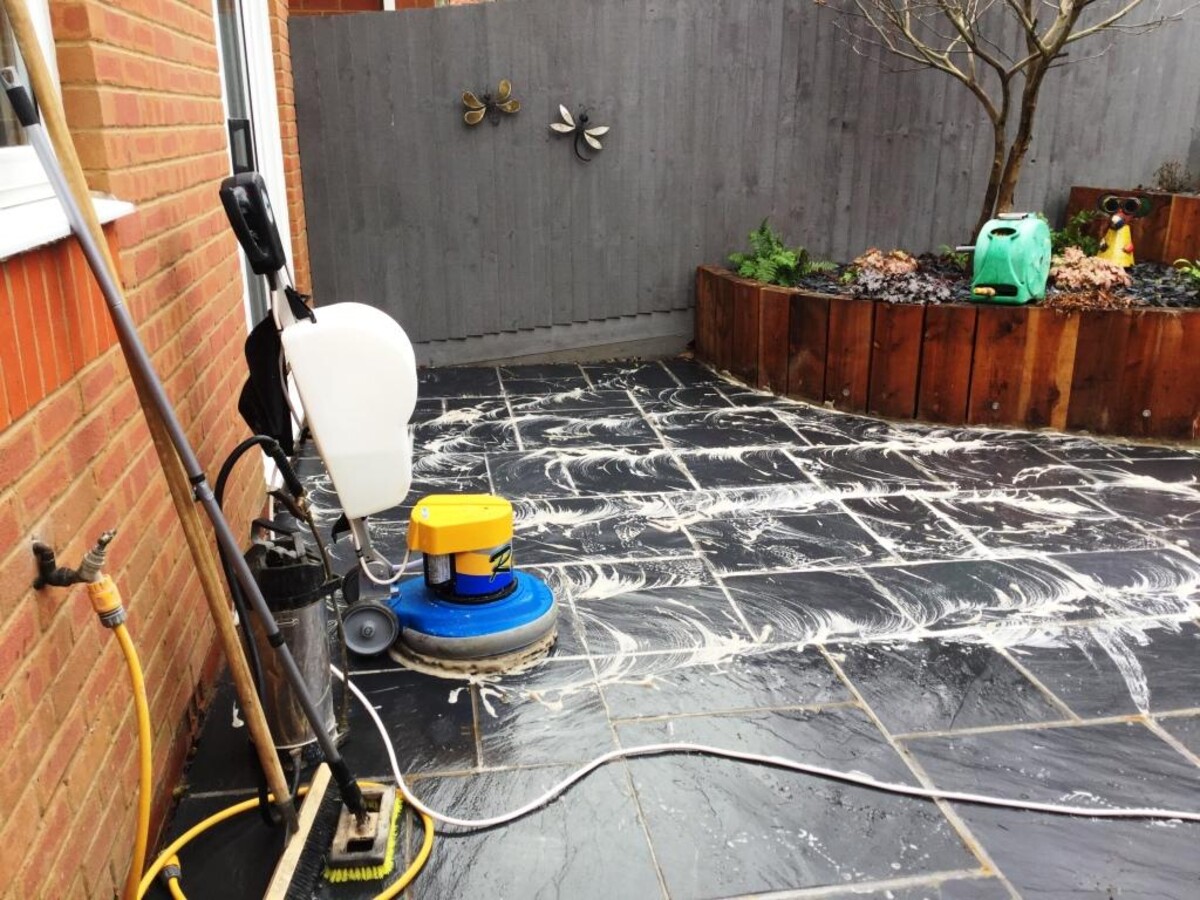
Step 6: Power Washing (if applicable)
Power washing can be an effective method for cleaning certain types of patio surfaces, especially those made of concrete, brick, or stone. If you have access to a power washer and believe it is appropriate for your patio, follow these guidelines for a safe and efficient power washing process:
- Ensure you have a power washer suitable for outdoor use. Read the manufacturer’s instructions and familiarize yourself with the machine’s settings and recommended pressure.
- Remove any loose debris and sweep the patio surface to ensure it is clear of dirt and dust.
- Start by using the lowest pressure setting on your power washer and gradually adjust as needed. Be cautious with high-pressure settings, as they can damage certain patio materials.
- Hold the power washer nozzle at a slight angle and aim it at the surface, keeping a distance of around 12 inches or as recommended by the manufacturer.
- Work in small sections, moving the nozzle slowly across the surface of the patio. Maintain a consistent distance and angle to ensure even cleaning.
- Pay attention to any stubborn stains or areas of heavy dirt buildup. Adjust the pressure or use a narrower nozzle attachment to target those areas more effectively.
- Avoid keeping the power washer nozzle in one spot for too long, as this can cause damage. Keep it in constant motion to prevent any potential harm to the patio surface.
- Once you have power washed the entire patio surface, allow it to dry completely before proceeding to the next step.
Note that power washing is not suitable for all patio surfaces, particularly those made of delicate materials like wood or certain types of tiles. Always follow the manufacturer’s guidelines and exercise caution to avoid any unnecessary damage. If power washing is not applicable to your patio, you can skip this step and proceed to the next one.
Step 7: Drying the Patio
After completing the cleaning process, it’s important to allow your patio to dry thoroughly before you start using it again. Proper drying prevents any slips or falls that could occur due to wet surfaces. Follow these steps to ensure your patio dries effectively:
- If weather conditions permit, let the patio air dry naturally. This can take several hours or longer, depending on the climate and the size of your patio.
- If you’re in a hurry or dealing with high humidity, you can use old towels or rags to help speed up the drying process. Lay them down on the surface of the patio and gently press down to absorb excess moisture.
- Keep in mind that using a leaf blower or a fan can also help accelerate the drying process, especially for patio areas with dense foliage or shady spots that may take longer to dry naturally.
- Avoid walking on the patio while it is still wet to prevent slipping or leaving footprints that may create an uneven appearance.
Ensuring that your patio is completely dry before you begin using it again is essential for both safety and the longevity of your patio. Once the surface is dry to the touch, you can move on to the final optional step, applying a sealant to protect your patio and enhance its appearance.
Read more: How Clean Concrete Patio
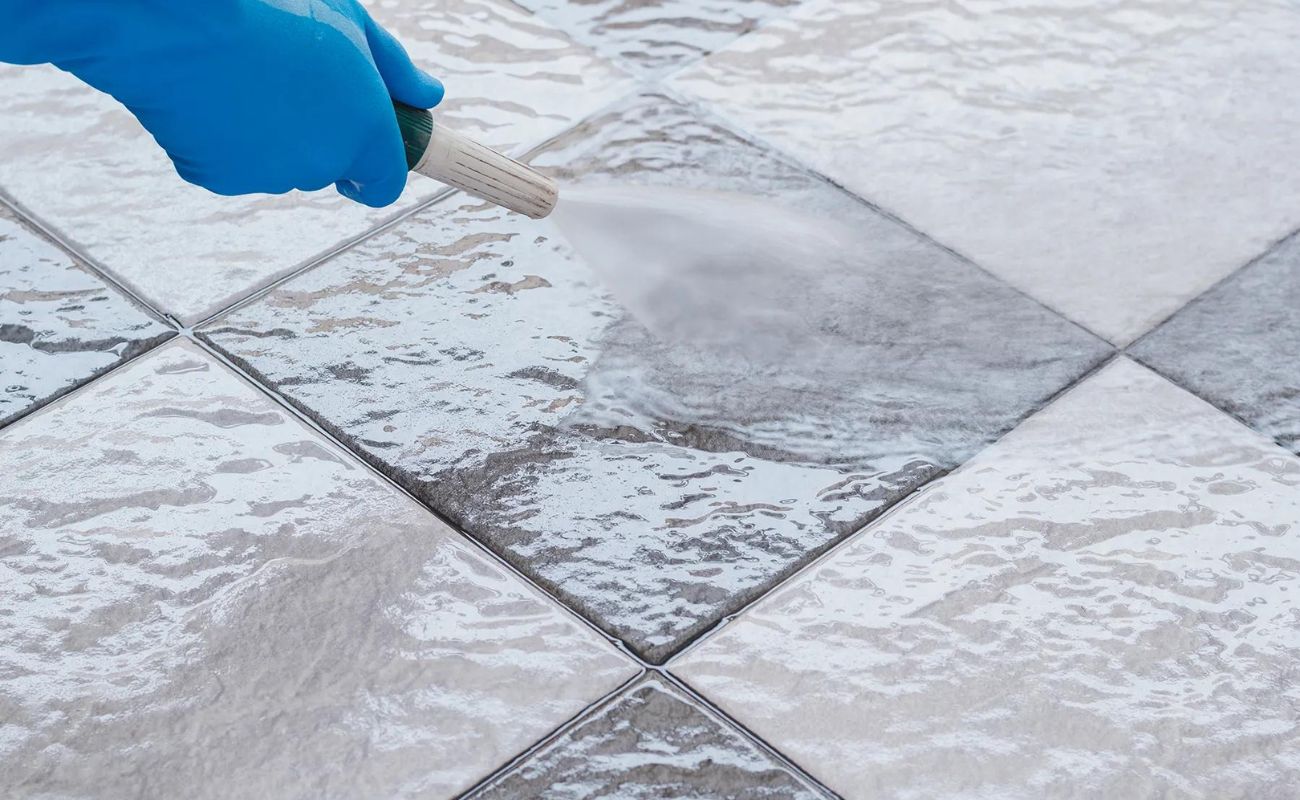
Step 8: Applying Sealant (optional)
Applying a sealant to your patio is an optional step but can provide additional protection and enhance its longevity. A sealant creates a protective barrier on the surface, shielding it from stains, moisture, and UV damage. Here’s how to apply a sealant to your patio:
- Choose a sealant suitable for your patio material. Common types of sealants include concrete sealers, stone sealers, and wood sealers. Read the instructions on the sealant product to ensure compatibility with your patio surface.
- Clean your patio thoroughly, removing any dirt, debris, and stains using the steps outlined earlier in this guide.
- Ensure the patio is completely dry before applying the sealant. This is crucial for proper adhesion and effectiveness.
- Follow the manufacturer’s instructions for the sealant application. This may involve using a brush, roller, or sprayer. Apply an even coat, making sure to cover the entire surface of the patio.
- Allow the sealant to dry according to the recommended drying time specified on the product label. This can range from a few hours to a couple of days.
- If necessary, apply a second coat of sealant following the same process as the first coat. Some sealants may require multiple coats for optimal protection.
- Allow the final coat of sealant to cure fully before placing furniture or other items back onto the patio surface. Check the instructions for the recommended curing time.
Applying a sealant to your patio can help prolong its lifespan and maintain its appearance over time. It offers added protection against weather elements, staining, and general wear and tear. However, be mindful that sealants may need to be reapplied periodically, depending on the type and quality of the product used. Always refer to the manufacturer’s instructions for specific guidance on maintenance and reapplication.
By following these steps, you can now enjoy a clean, refreshed, and protected patio. Regular maintenance and cleaning will help keep your outdoor space in pristine condition, ensuring many years of enjoyment for you, your family, and your guests.
Conclusion
Cleaning and maintaining your patio not only enhances its appearance but also helps extend its lifespan and ensures a safe and enjoyable outdoor space for relaxation and entertainment. By following the step-by-step guide provided, you now have the knowledge and tools to effectively clean your patio and tackle stubborn stains.
Remember to gather the necessary supplies, clear the patio, sweep the surface, and remove any stubborn stains using appropriate cleaning solutions. Rinse the patio with water, scrub with soap or detergent, and, if applicable, utilize a power washer for a deeper clean. Allow the patio to dry completely before considering the optional step of applying a protective sealant. These steps will ensure a thorough cleaning process.
Regular maintenance and cleaning of your patio will keep it looking its best and prevent dirt, grime, and stains from accumulating. Depending on your patio material, you may need to adjust the cleaning methods and use specific products tailored to your patio surface.
Now that you have the knowledge and the tools, it’s time to roll up your sleeves, get out your cleaning supplies, and give your patio the attention it deserves. Enjoy the benefits of a clean and well-maintained outdoor space, where you can relax, entertain, and make lasting memories.
Frequently Asked Questions about How To Clean The Patio
Was this page helpful?
At Storables.com, we guarantee accurate and reliable information. Our content, validated by Expert Board Contributors, is crafted following stringent Editorial Policies. We're committed to providing you with well-researched, expert-backed insights for all your informational needs.


0 thoughts on “How To Clean The Patio”