Home>Furniture>Outdoor Furniture>How To Clean Patio Tile
Outdoor Furniture
How To Clean Patio Tile
Modified: March 7, 2024
Learn how to clean patio tile and maintain your outdoor furniture with these easy steps. Keep your outdoor space looking stunning and extend the life of your outdoor furniture.
(Many of the links in this article redirect to a specific reviewed product. Your purchase of these products through affiliate links helps to generate commission for Storables.com, at no extra cost. Learn more)
Introduction
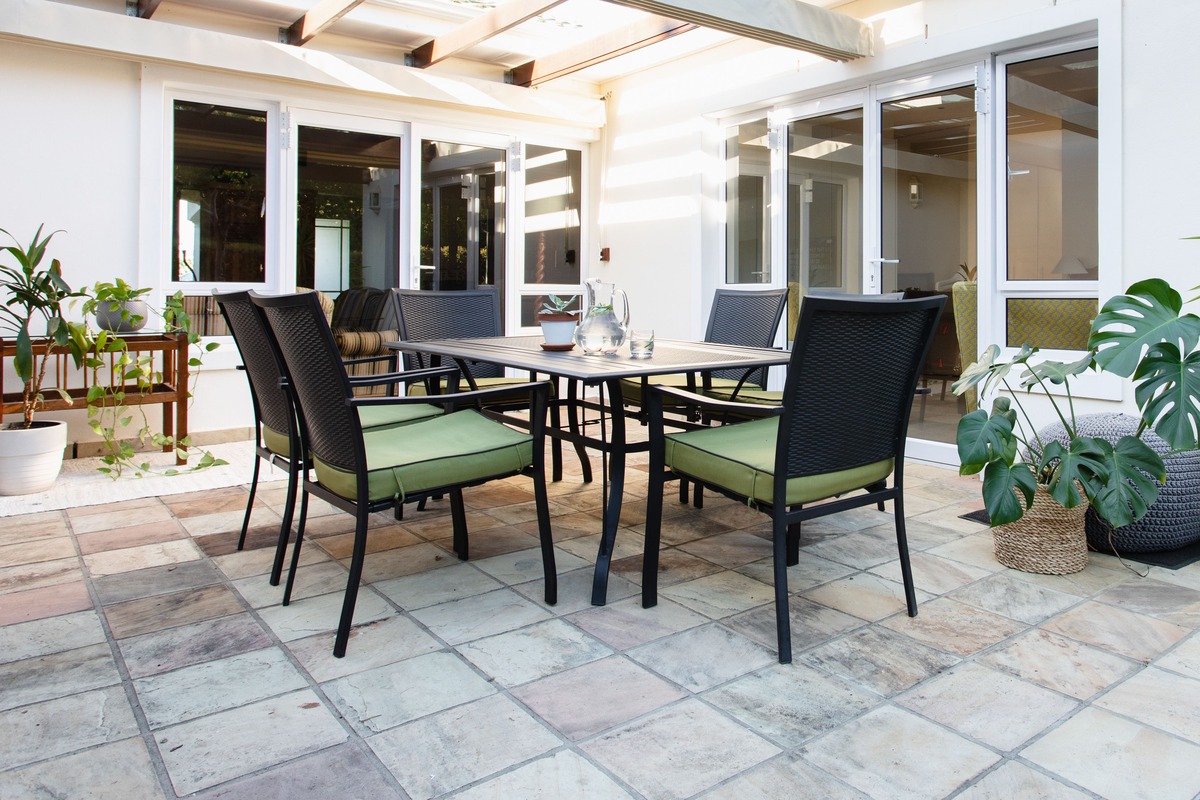
Welcome to our comprehensive guide on how to clean patio tile. Your patio is a place where you can unwind, relax, and enjoy the outdoors. But over time, dirt, grime, and stains can build up on your patio tile, diminishing its appearance and making it less inviting. That’s why regular cleaning and maintenance are crucial to keep your patio looking its best.
Cleaning patio tile may seem like a daunting task, but with the right supplies and proper techniques, it can be a manageable and satisfying endeavor. Not only will cleaning your patio tile improve its aesthetic appeal, but it can also extend its lifespan and prevent damage.
Whether you have ceramic, porcelain, or natural stone patio tile, our step-by-step guide will walk you through the process, ensuring that you achieve a spotless and presentable patio. So, grab your cleaning supplies and let’s dive in!
Key Takeaways:
- Regular cleaning and maintenance are crucial to keep your patio tile looking its best. Follow the step-by-step guide to achieve a spotless and presentable patio, ensuring a satisfying and manageable cleaning process.
- Different types of patio tile may require specific cleaning solutions, so always check the manufacturer’s recommendations. Have patience and try different methods or stronger cleaning solutions to tackle stubborn stains effectively.
Read more: How To Clean Outdoor Patio Tiles
Supplies Needed
To effectively clean your patio tile, you will need a few supplies. Here’s a list of what you’ll need:
- A broom or dust mop to sweep away loose dirt and debris.
- A bucket for mixing the cleaning solution and holding water.
- A scrub brush or nylon bristle brush for scrubbing the tile.
- A cleaning solution specifically designed for your type of patio tile. This can include a mild detergent, vinegar solution, or a commercial tile cleaner. Be sure to check the manufacturer’s recommendations for your specific type of patio tile.
- A garden hose or pressure washer for rinsing the tile.
- A squeegee or mop for drying the tile.
Having these supplies ready before you begin will ensure a smooth and efficient cleaning process. Additionally, it’s essential to wear appropriate clothing and protective gear to keep yourself safe and comfortable while working on your patio.
Step 1: Sweeping or Dusting
The first step in cleaning your patio tile is to remove any loose dirt, debris, or leaves that may have accumulated on the surface. This will prevent these particles from getting trapped and causing scratches during the cleaning process.
Start by using a broom or a dust mop to sweep the entire patio area. Make sure to sweep in all directions to ensure that you capture all the dirt and debris. Pay special attention to the corners and edges of the patio, as these areas tend to collect more dirt.
If you have a large patio or if there are stubborn debris, you may also consider using a leaf blower or a wet-dry vacuum to remove the loose particles. This will help speed up the process and ensure a thorough cleaning.
Once you’ve swept the entire patio, take a moment to visually inspect the tile surface. Look for any stubborn stains or areas that may require extra attention during the cleaning process. By identifying these areas in advance, you can address them more effectively later on.
Sweeping or dusting your patio tile is a crucial first step that sets the foundation for a successful cleaning. It ensures that the cleaning solution can penetrate the tile surface without obstruction, allowing for a more thorough cleaning process.
Step 2: Mixing Cleaning Solution
Once you’ve completed the initial sweeping or dusting of your patio tile, it’s time to mix the cleaning solution. The cleaning solution you use will depend on the type of patio tile you have and the level of dirt or stains present.
If you have ceramic or porcelain tile, a mixture of warm water and a mild detergent can be effective in removing dirt and grime. Start by filling a bucket with warm water, then add a small amount of the detergent according to the instructions on the package. Mix the solution well until the detergent is fully dissolved.
For natural stone tile, it’s important to avoid using harsh chemicals or acidic solutions that can damage the surface. Instead, opt for a pH-neutral cleaner specifically designed for natural stone. These cleaners are formulated to effectively clean without causing harm to the stone surface.
If you prefer a homemade cleaning solution, you can create a mixture of equal parts water and white vinegar. Vinegar is a natural and eco-friendly cleaning agent that can help remove stains and disinfect the patio tile.
Once you have prepared the cleaning solution, give it a gentle stir to ensure it is well mixed. It’s important to note that using more detergent or vinegar does not necessarily equate to better cleaning. Excessive amounts can leave residue on the tile surface and require additional rinsing.
Having the right cleaning solution is essential for achieving optimal results when cleaning your patio tile. By using the appropriate mixture, you can effectively remove dirt, grime, and stains without causing damage to the tile surface.
Step 3: Preparing the Patio Tile
Before applying the cleaning solution to your patio tile, it’s important to prepare the surface. This step will help ensure that the cleaning solution can penetrate the tile and effectively remove dirt and stains.
Start by removing any large or stubborn debris that may still be present on the patio. Use a soft-bristle brush or a putty knife to gently scrape away any dried-on dirt or grime. Be careful not to scratch the tile surface, especially if you have natural stone tile.
Next, wet the patio tile with clean water. This will help open up the pores of the tile and allow the cleaning solution to penetrate more effectively. Use a garden hose with a gentle spray or a watering can to wet the entire surface of the patio evenly.
If you notice any areas with heavy stains or discoloration, you can apply a pre-treatment solution directly to those areas. For example, a paste made from baking soda and water can be effective in removing tough stains. Apply the paste to the stained areas and gently scrub with a brush to loosen the stain before proceeding with the regular cleaning process.
By preparing the patio tile before applying the cleaning solution, you are ensuring that the solution can work at its full potential. Removing debris and wetting the tile surface will help to loosen dirt and make the cleaning process more efficient.
Read more: How To Clean Outside Patio Tile
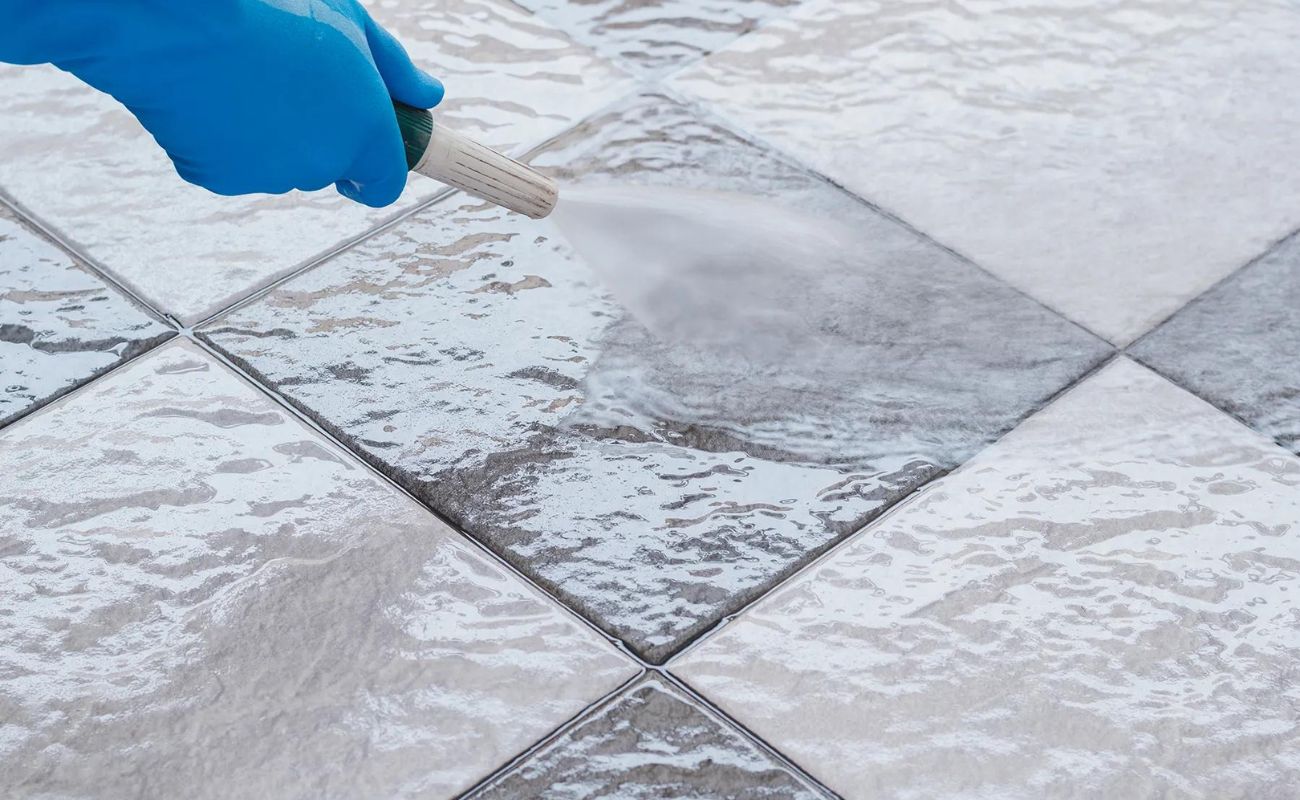
Step 4: Applying the Cleaning Solution
Now that you’ve prepared your patio tile, it’s time to apply the cleaning solution. Remember to wear appropriate gloves and protective clothing to prevent any potential skin irritations.
Start by pouring the cleaning solution onto the patio tile. Use a sponge, mop, or a sprayer to distribute the solution evenly across the surface. Ensure that the entire patio is covered, paying extra attention to any areas with visible stains or discoloration.
If you’re using a sponge or mop, gently scrub the tile while applying the cleaning solution. For tougher stains, you may need to let the solution sit on the tile for a few minutes to allow it to work on the dirt and grime.
As you apply the cleaning solution, be cautious not to oversaturate the tile. Excessive moisture can seep into the grout lines or underneath the tile, which may cause damage. Use a moderate amount of solution and add more as needed during the cleaning process.
If you’re using a sprayer, adjust the nozzle to a fine mist or a gentle spray pattern. This will help evenly distribute the cleaning solution without creating puddles or excessive runoff. Aim the sprayer at a consistent distance from the tile surface to ensure even coverage.
Once you’ve applied the cleaning solution to the entire patio, give it some time to work its magic. The cleaning solution will break down dirt, stains, and grime, making them easier to remove in the next step.
With the cleaning solution applied, you’re well on your way to revitalizing your patio tile. Next, we’ll move on to step 5, where we’ll tackle the task of scrubbing the tile.
To clean patio tile, mix equal parts water and white vinegar in a spray bottle. Spray the solution onto the tile, let it sit for a few minutes, then scrub with a brush and rinse with water. This natural solution will help remove dirt and grime from the tile surface.
Step 5: Scrubbing the Tile
Now that the cleaning solution has had some time to work on the dirt and stains, it’s time to scrub the patio tile. Scrubbing will help agitate and loosen any remaining grime, allowing for a thorough cleaning.
Start by selecting a scrub brush or a nylon bristle brush that is suitable for your type of patio tile. Avoid using abrasive brushes or tools that can scratch or damage the surface. If you have natural stone tile, choose a brush with softer bristles to prevent any potential scratching.
Dip the brush into the cleaning solution and begin scrubbing the tile in a back and forth motion. Apply moderate pressure, but be careful not to scrub too aggressively, as this can also cause damage. Focus on areas with visible stains or discolored spots, giving them a little extra attention.
Work in small sections, ensuring that you cover the entire patio tile surface. If you encounter stubborn stains, apply a bit more pressure or use a gentle circular motion to break them up. Take your time and be thorough, making sure to cover all corners, edges, and crevices.
If you’re dealing with grout lines, use a grout brush or an old toothbrush to scrub them. Grout lines tend to accumulate dirt and stains, and a thorough scrubbing will help restore their cleanliness.
As you scrub, periodically rinse the brush with clean water to remove any dirt or debris that may have accumulated. This will prevent the brush from spreading dirt back onto the tile surface as you continue cleaning.
Continue scrubbing the patio tile until you’re satisfied with the cleanliness. The scrubbing process may take some time and effort, especially if your patio tile hasn’t been cleaned in a while. But the end result will be well worth it.
Once you’ve completed the scrubbing process, it’s time to move on to step 6: rinsing the tile to remove the cleaning solution and any loosened grime.
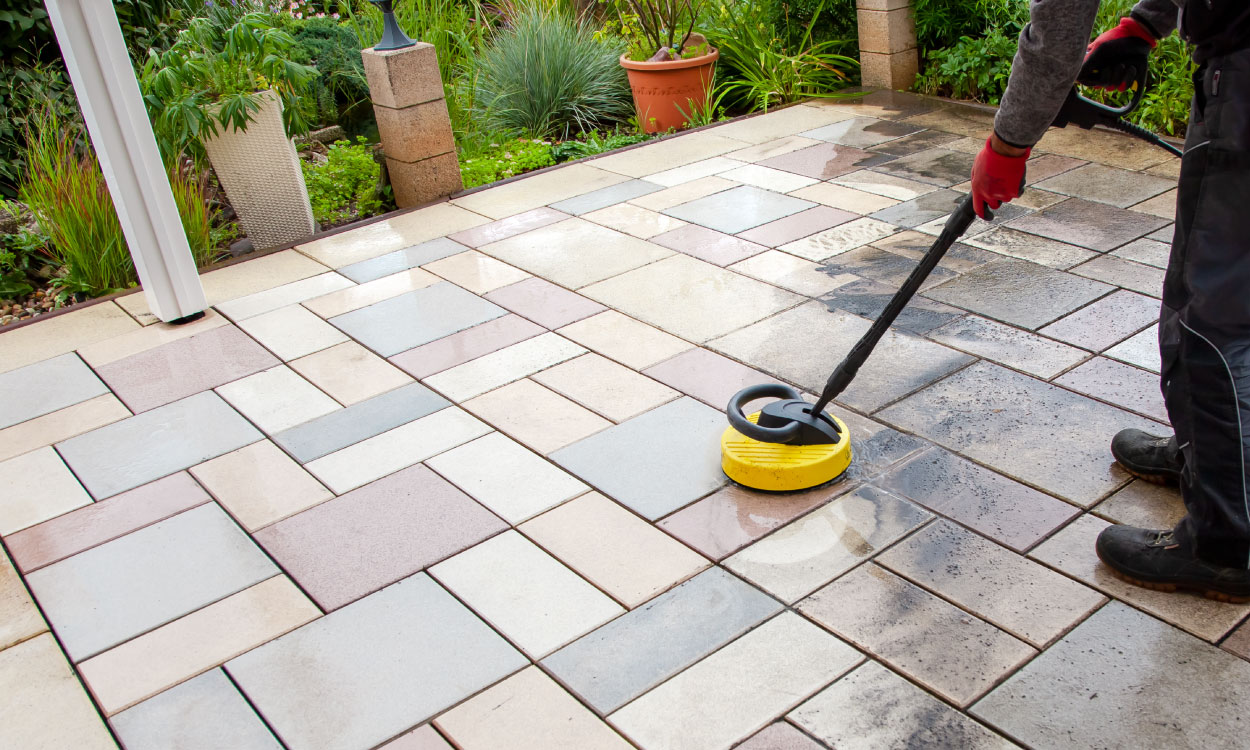
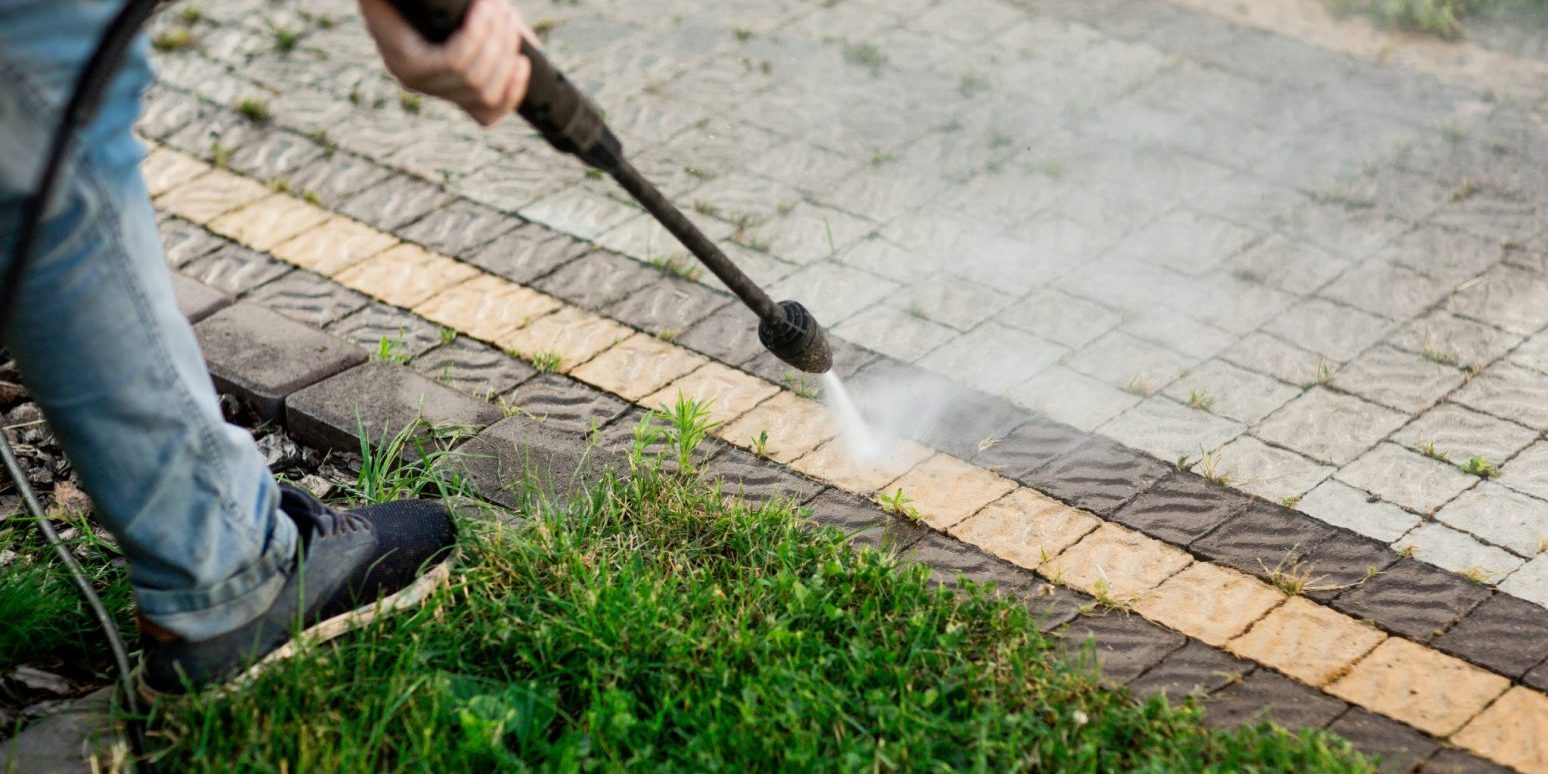
Step 6: Rinsing the Tile
After the scrubbing process, it’s essential to thoroughly rinse the patio tile to remove the cleaning solution, as well as any loosened dirt and grime. Rinsing will leave the tile surface clean and ready for the next step of the cleaning process.
To begin, grab a garden hose or a pressure washer if you have one. Start at one end of the patio and work your way systematically towards the other end, ensuring that you cover the entire surface. Use a gentle spray or setting to avoid damaging the tile or grout.
Direct the water flow diagonally across the tile, moving from one corner to the opposite corner. This helps to ensure even coverage and prevents water from pooling in one area. Pay extra attention to corners, edges, and grout lines, as these areas tend to accumulate more dirt and cleaning residue.
Continue rinsing until the water runs clear and there are no visible traces of the cleaning solution. This may require multiple passes with the hose or pressure washer, especially if you were dealing with significant dirt or stains.
If you don’t have access to a garden hose or pressure washer, you can use buckets of clean water to rinse the tile. Pour the water over the patio tile and use a mop or a sponge to distribute and remove the cleaning solution. Repeat this process until the water remains clear.
As you rinse, take the opportunity to visually inspect the tile surface. Look for any remaining stains or areas that may require further cleaning. If needed, you can spot-treat these areas with a suitable cleaner and repeat the scrubbing and rinsing steps.
Proper rinsing is crucial to ensure that no residue of the cleaning solution or loosened grime remains on the patio tile. This will leave the surface clean and ready for the final steps of the cleaning process.
Step 7: Drying the Tile
Once you’ve thoroughly rinsed the patio tile, it’s time to dry the surface. Proper drying will help prevent water spots and streaks, ensuring that your patio looks clean and polished.
If you have a small patio, you can use a squeegee to remove excess water from the tile surface. Start at one end and pull the squeegee towards you in a smooth and controlled motion. Continue this process, working your way across the entire patio until you’ve removed most of the water.
If you don’t have a squeegee, you can use a mop with an absorbent head to soak up the water. Simply push the mop over the tile surface, gradually moving across the patio until you’ve absorbed most of the water.
For larger patios or areas that are difficult to reach with a squeegee or mop, allow the tile to air dry naturally. This may take some time, especially in humid or cool weather, but it will still yield satisfactory results.
In some cases, you may notice water spots or streaks remaining on the tile despite your best efforts. If this occurs, grab a soft, microfiber cloth or towel and gently buff the tile to remove any remaining moisture or residue.
Keep in mind that drying the patio tile thoroughly is not only important for aesthetic reasons but also for preventing slips and falls. Excess water on the tile surface can create a slippery environment, especially if you’re walking on it with wet shoes or bare feet.
By ensuring that your patio tile is completely dry, you’re one step closer to enjoying a clean and well-maintained outdoor space.
Read more: How To Tile A Patio
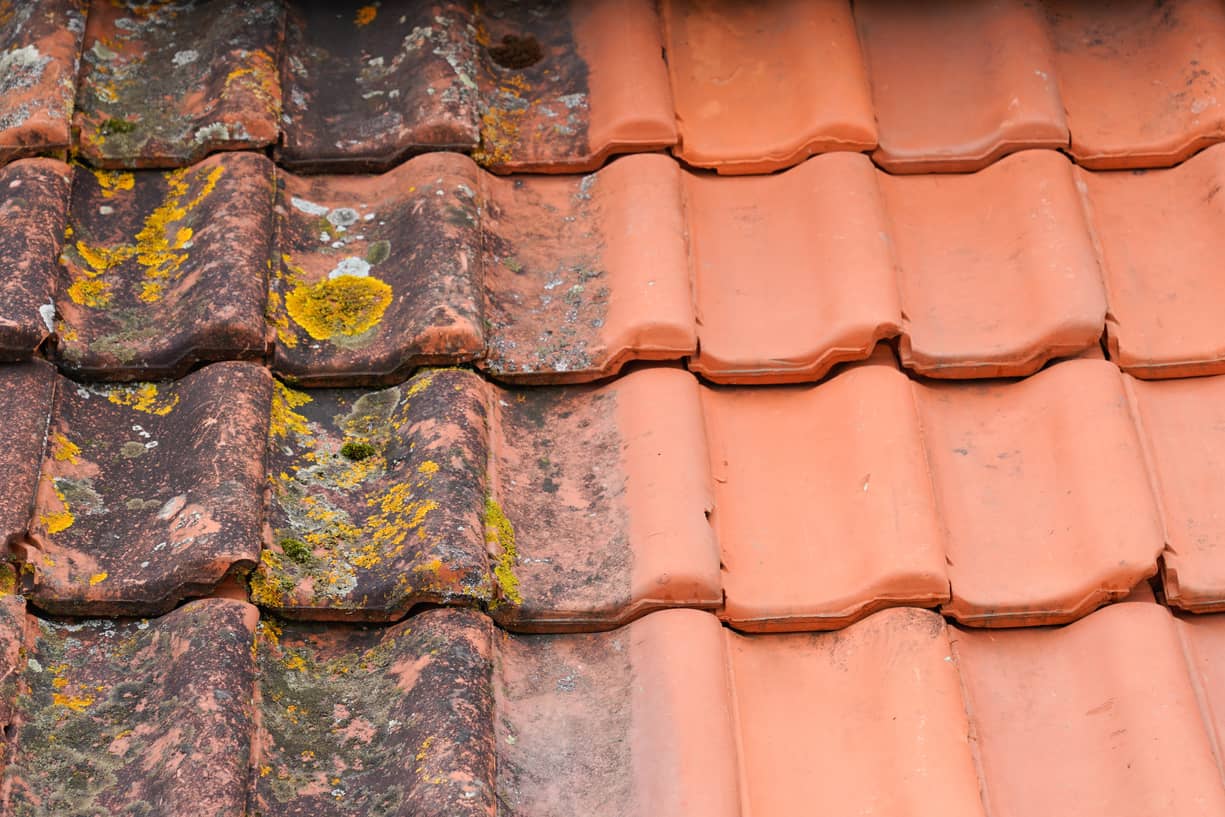
Step 8: Removing Stubborn Stains
Despite your best efforts, you may still have some stubborn stains on your patio tile. Don’t worry; there are a few additional steps you can take to tackle these tough stains and restore the cleanliness of your outdoor space.
If the stains persist, try using a stronger cleaning solution specifically formulated for removing tough stains. Look for a product designed for your type of patio tile and follow the manufacturer’s instructions for application. Apply the solution to the stained areas and let it sit for the recommended amount of time. Use a scrub brush or a sponge to agitate the stain and then rinse the area thoroughly.
If the stains are oil-based, you can use a degreasing agent such as dish soap or a commercial oil stain remover. Apply the degreaser to the stained area, scrub gently, and rinse thoroughly. Repeat the process as needed until the stain is lifted.
For organic stains like moss, algae, or mildew, you can use a mixture of equal parts water and chlorine bleach. Apply the bleach solution to the affected areas, scrub gently, and let it sit for a few minutes. Rinse thoroughly to remove the bleach and any remaining stains.
In some cases, you may need to resort to more aggressive methods such as using a pressure washer or a steam cleaner. These tools can generate high-pressure water or steam to remove stubborn stains effectively. However, be cautious when using these methods, as excessive pressure or heat can damage certain types of patio tile.
If you’re dealing with rust stains, avoid using bleach or acidic cleaners as they can worsen the stain. Instead, opt for a commercial rust stain remover specifically designed for outdoor surfaces. Follow the instructions carefully and always wear protective gloves and eyewear when working with these products.
Remember, each type of stain may require a different approach, so it’s crucial to identify the nature of the stain and choose the appropriate solution accordingly.
By taking the time to address stubborn stains using these additional techniques, you can ensure that your patio tile looks pristine and free from any remaining blemishes.
Conclusion
Cleaning your patio tile may initially seem like a daunting task, but with the right supplies and techniques, it can be a manageable and rewarding process. By following the steps outlined in this guide, you can achieve a spotless and beautiful patio that you can enjoy for years to come.
From sweeping and dusting to scrubbing and rinsing, each step plays a crucial role in ensuring a thorough and effective cleaning. Preparing the tile, applying the cleaning solution, and scrubbing away dirt and stains all work together to restore the beauty of your outdoor space.
Remember, different types of patio tile may require specific cleaning solutions, so always check the manufacturer’s recommendations and use the appropriate products to avoid damaging the surface. And if you encounter stubborn stains, have patience and try different methods or stronger cleaning solutions to tackle them effectively.
After cleaning, make sure to thoroughly rinse and dry the patio tile to prevent water spots and streaks from forming. This will leave your patio looking clean, polished, and ready for your next outdoor gathering or relaxation session.
Regular maintenance and cleaning are key to preserving the longevity and appearance of your patio tile. By incorporating these cleaning practices into your routine, you can keep your patio looking its best and continue to enjoy its beauty.
So, get ready to roll up your sleeves, gather your supplies, and give your patio tile the cleaning it deserves. Your outdoor oasis will thank you with a refreshed and inviting ambiance for you, your family, and your guests to enjoy.
Frequently Asked Questions about How To Clean Patio Tile
Was this page helpful?
At Storables.com, we guarantee accurate and reliable information. Our content, validated by Expert Board Contributors, is crafted following stringent Editorial Policies. We're committed to providing you with well-researched, expert-backed insights for all your informational needs.
0 thoughts on “How To Clean Patio Tile”