Home>Furniture>Outdoor Furniture>How To Plant Patio Containers
Outdoor Furniture
How To Plant Patio Containers
Modified: March 7, 2024
Learn how to plant and arrange outdoor furniture in patio containers for a beautiful and functional outdoor space. Find tips and ideas for creating the perfect container garden.
(Many of the links in this article redirect to a specific reviewed product. Your purchase of these products through affiliate links helps to generate commission for Storables.com, at no extra cost. Learn more)
Introduction
Welcome to the world of outdoor furniture! If you are considering creating a cozy and inviting outdoor space, then patio containers are a must-have addition to your decor. Patio containers not only add visual interest and beauty to your outdoor area but also provide an opportunity to showcase your favorite plants and flowers.
In this article, we will guide you through the process of planting patio containers, from selecting the right container and choosing the right plants to preparing the container, planting, and maintaining your beautiful containers. Whether you are a seasoned gardener or just starting out, this comprehensive guide will help you create stunning patio containers that will enhance the beauty of your outdoor living space.
So, let’s roll up our sleeves and get ready to create a vibrant and flourishing outdoor oasis!
Key Takeaways:
- Create stunning patio containers by choosing the right container, selecting suitable plants, and preparing the soil. Regular watering, fertilizing, and maintenance will keep your outdoor space vibrant and inviting.
- Transform your outdoor area with vibrant patio containers. Choose the perfect container, select plants that suit your climate and style, and maintain them with proper watering, fertilizing, and care. Enjoy a flourishing oasis right outside your door!
Read more: How To Plant Patio Tomatoes
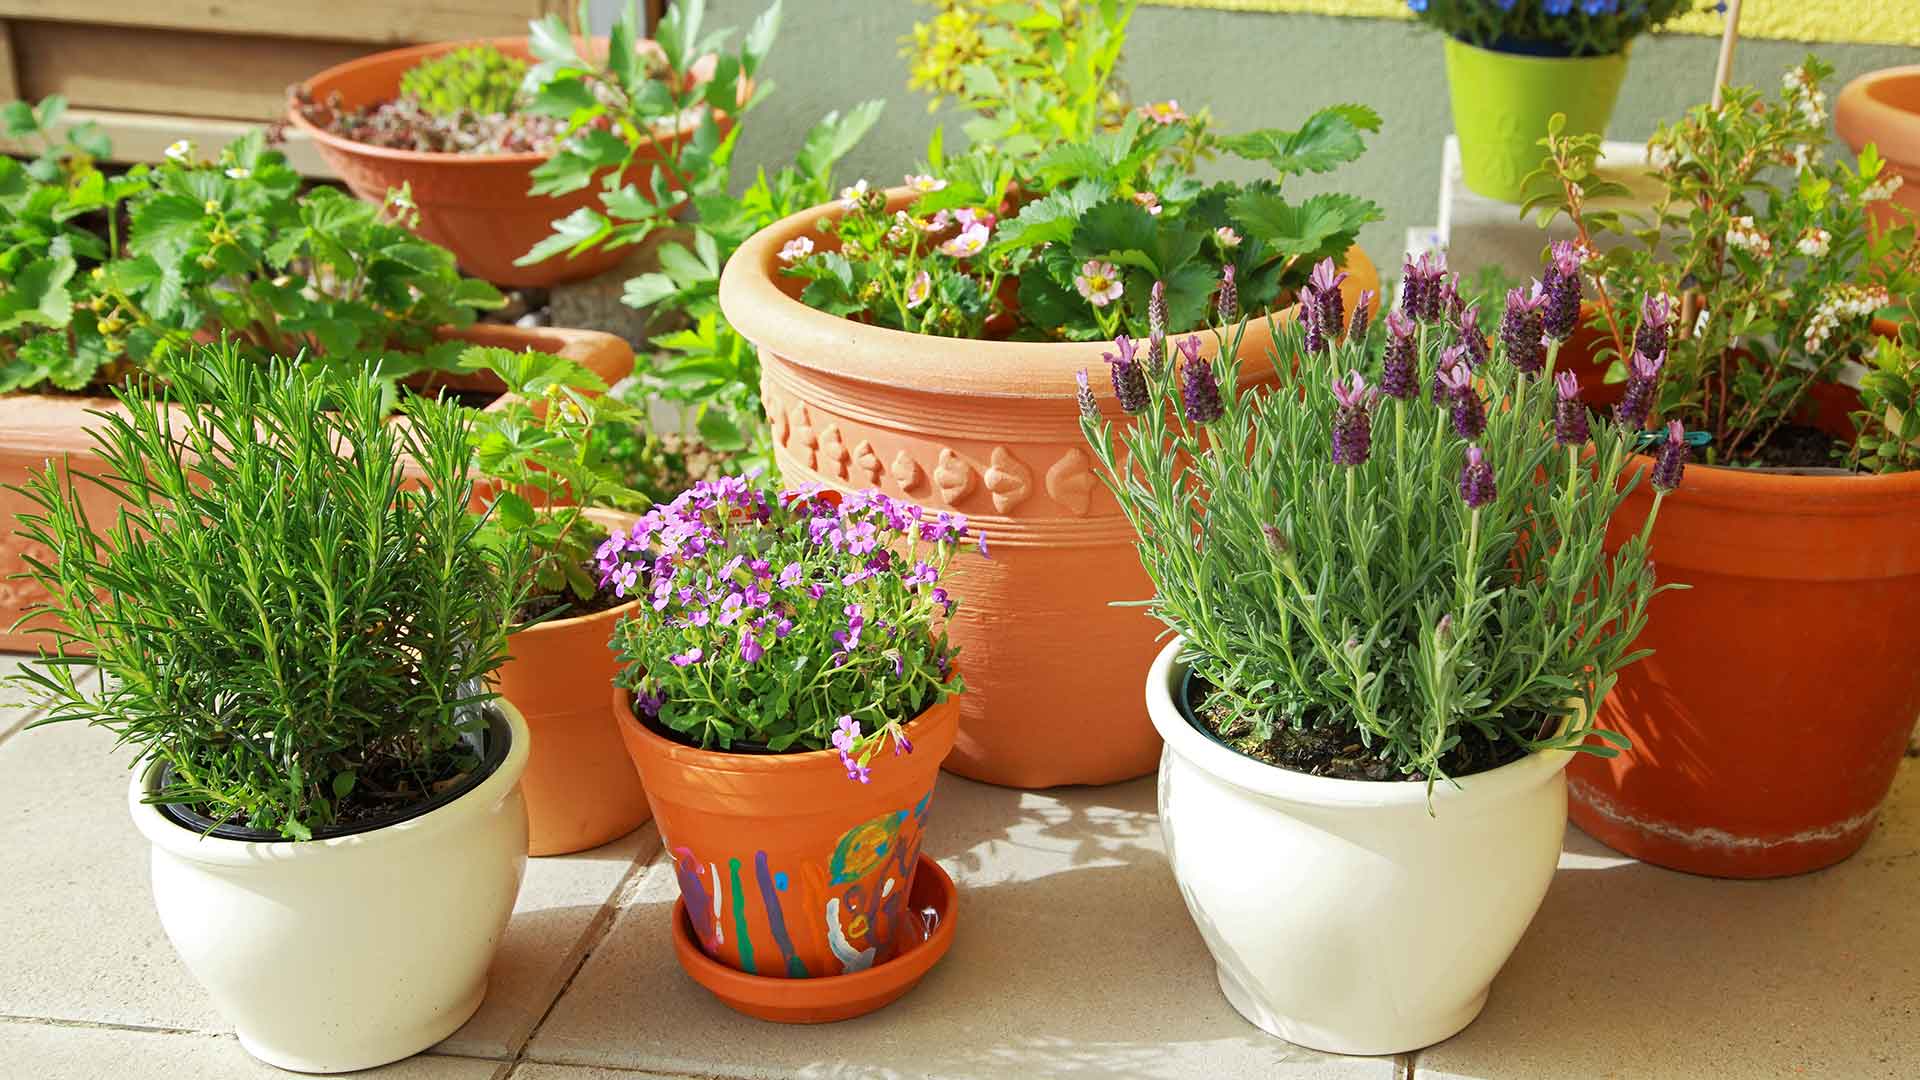
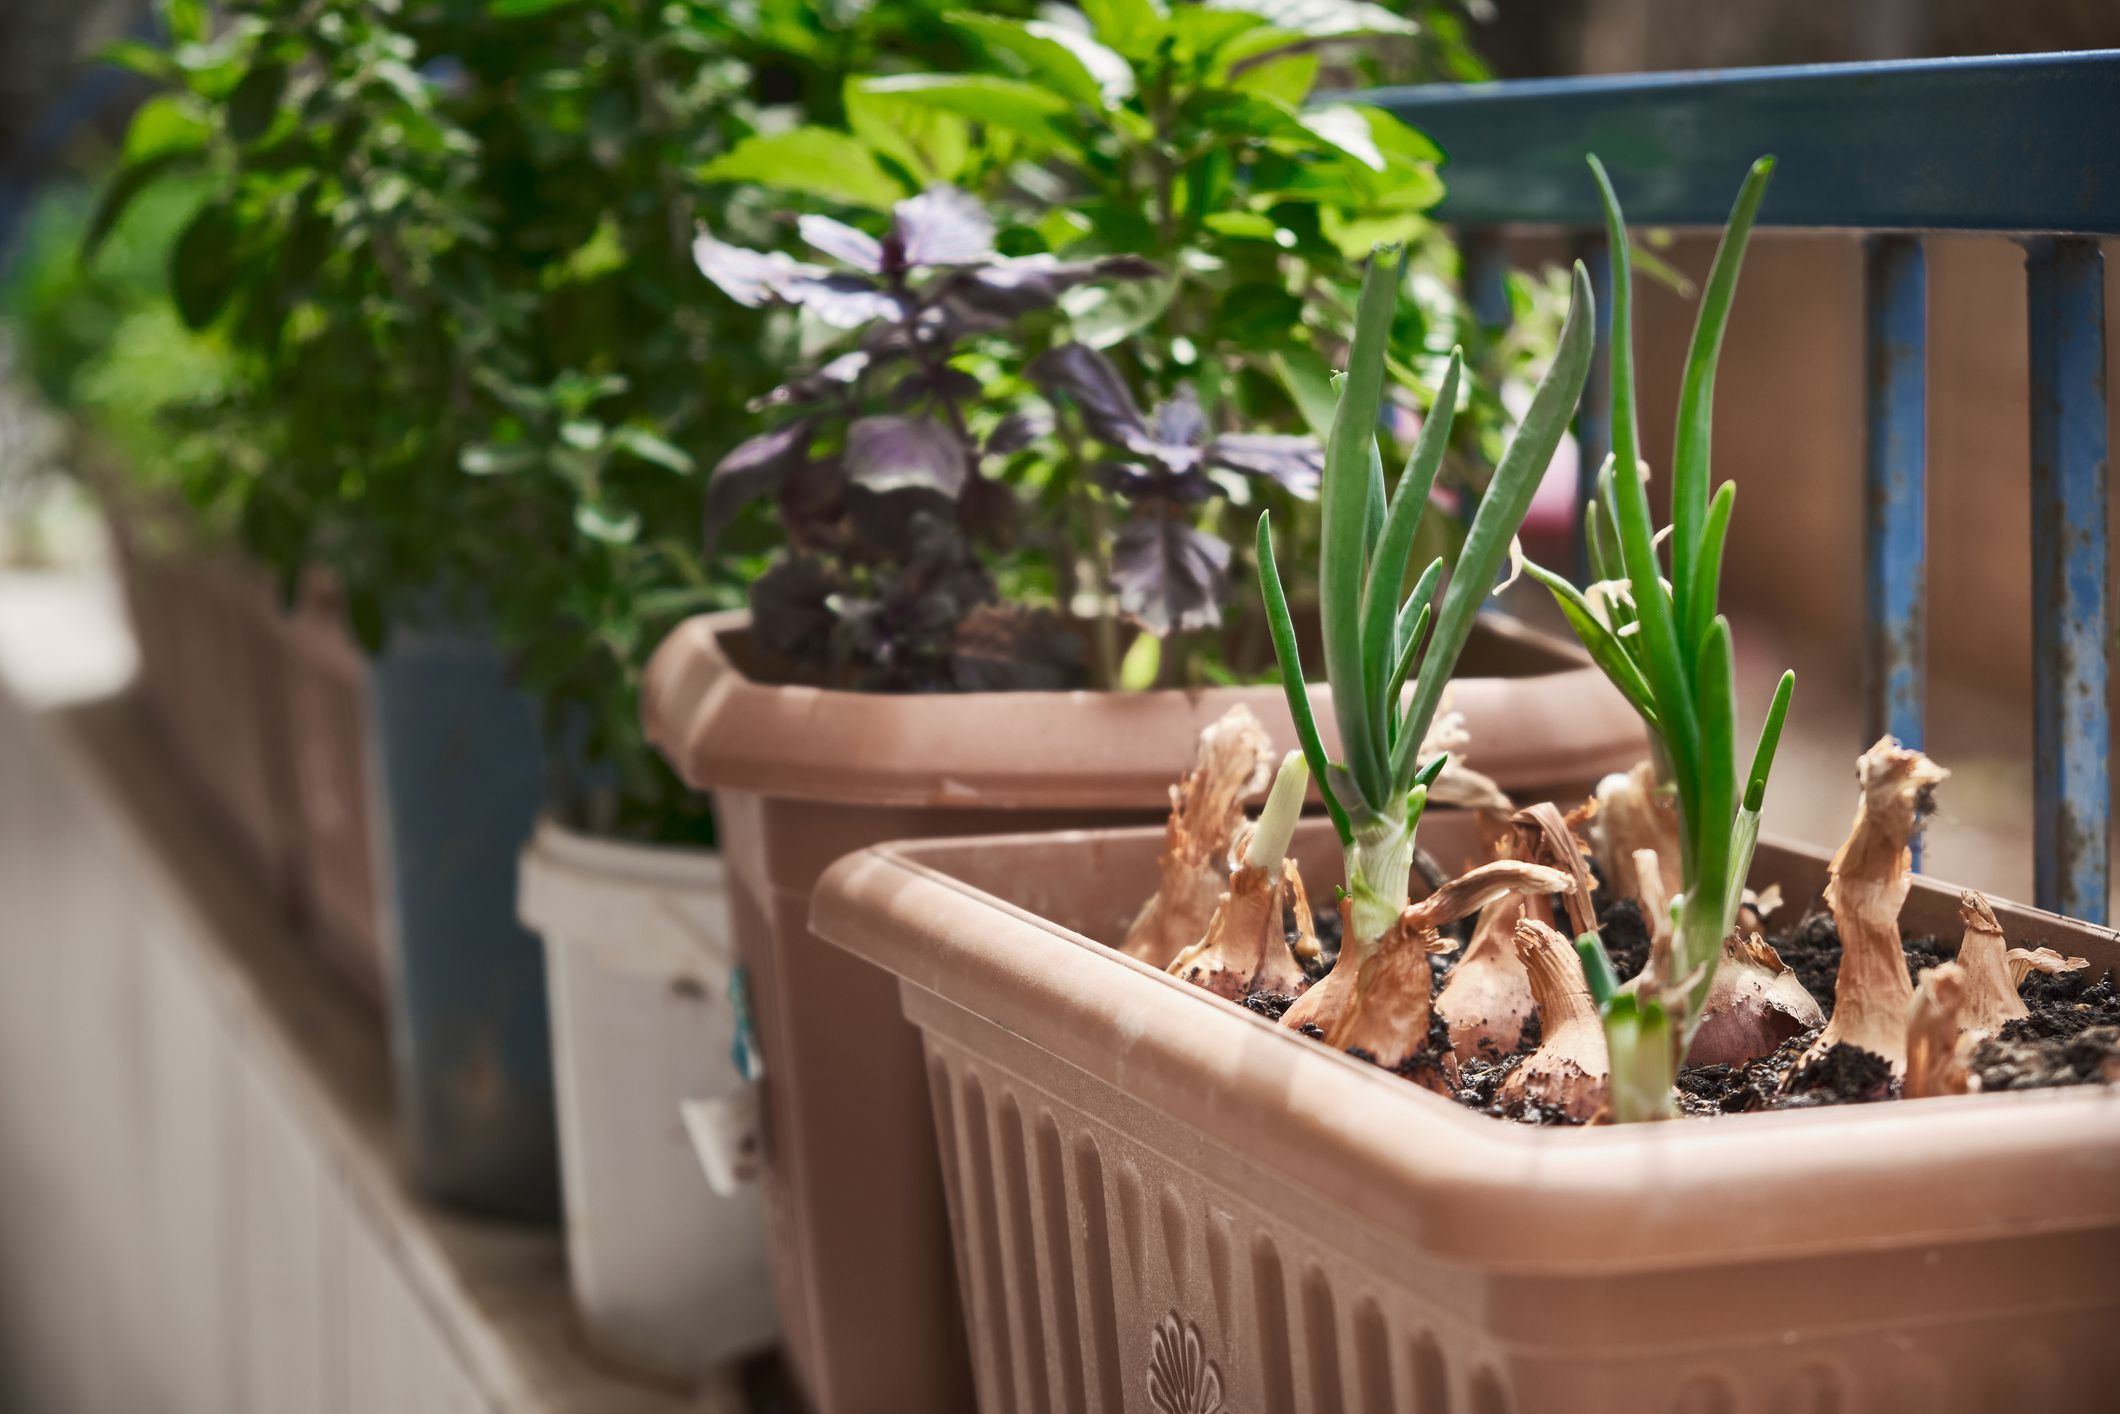
Selecting the Right Container
When it comes to selecting the right container for your patio, there are a few factors to consider. First and foremost, ensure that the container is suitable for outdoor use and made of durable materials that can withstand the elements. Common options include clay pots, plastic containers, metal troughs, and wooden planters.
The size of the container is also crucial. Make sure to choose a container that is spacious enough to accommodate the root system of the plants you intend to grow. As a general rule, the container should be at least 12-18 inches deep and have a diameter large enough to provide ample growing space.
Additionally, consider the style and design of the container, as it should complement the overall aesthetic of your outdoor space. Whether you prefer rustic, contemporary, or traditional designs, there is a wide range of container options available to suit your personal taste.
Lastly, don’t forget about drainage. Ensure that the container has sufficient drainage holes at the bottom to prevent waterlogged soil and potential damage to your plants. If your chosen container doesn’t have drainage holes, you can either drill them yourself or line the bottom with a layer of gravel to facilitate drainage.
By selecting the right container, you lay a solid foundation for successful patio container gardening. Now that you have the perfect container, it’s time to move on to the next step: choosing the right plants.
Choosing the Right Plants
Choosing the right plants for your patio containers is essential to create a harmonious and thriving outdoor space. Here are some factors to consider when selecting your plants:
- Climate: Take into account the climate of your region and choose plants that are suitable for the conditions. Some plants thrive in hot and sunny climates, while others prefer shade or cooler temperatures.
- Light Requirements: Assess the amount of sunlight your patio receives throughout the day. This will help you determine whether your plants require full sun, partial shade, or full shade. Select plants that are compatible with the light conditions of your patio.
- Plant Size: Consider the mature size of the plants you choose. Ensure that they will not outgrow the container and overcrowd other plants. Opt for compact or dwarf varieties if space is limited.
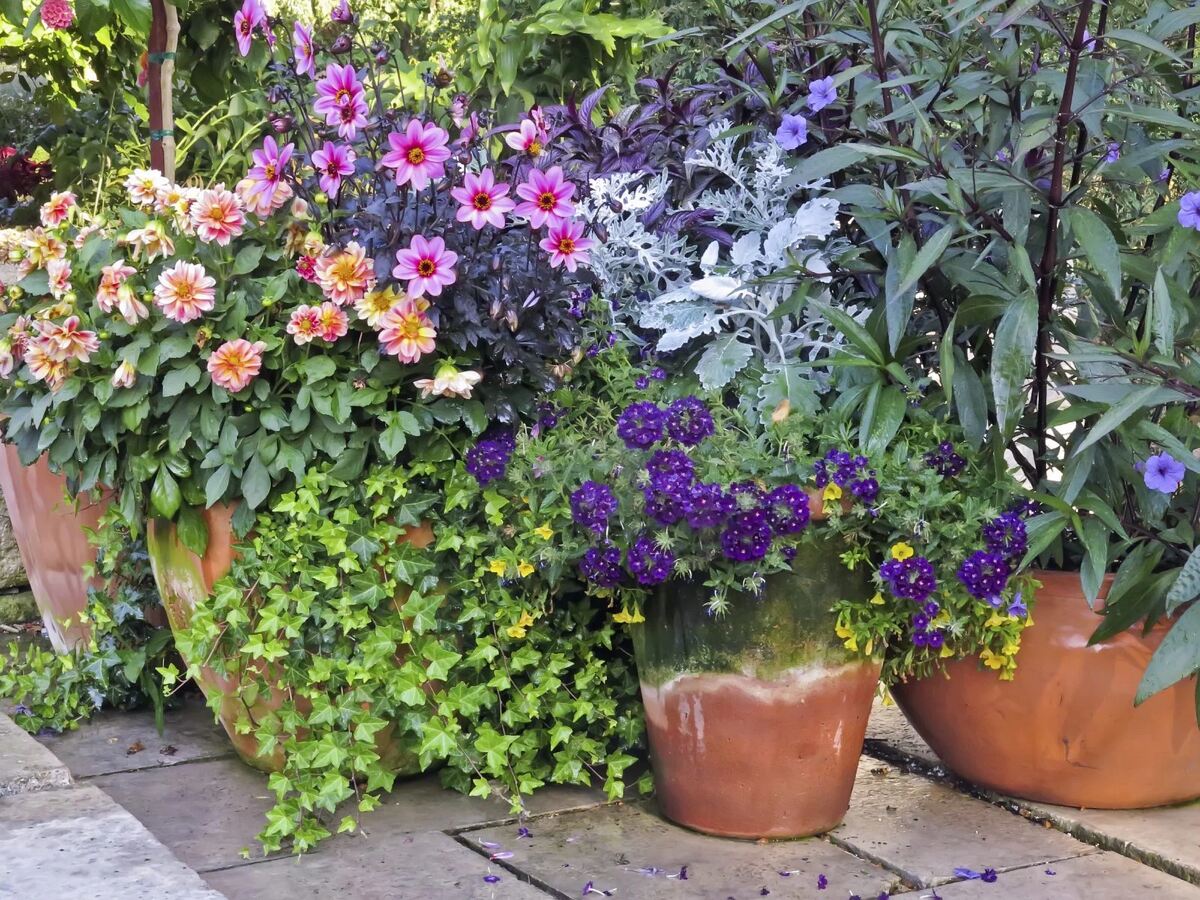
- Planting Style: Think about the overall look and feel you want to create in your patio containers. Do you prefer a vibrant burst of colorful flowers, a lush green foliage display, or a combination of both? Select plants that match your desired planting style.
- Seasonality: Decide whether you want to create a patio container garden that thrives all year round or if you prefer to switch out plants seasonally. Some plants are annuals and bloom for one season, while others are perennials and return year after year.
Consider incorporating a variety of plants in your patio containers to add texture, height, and visual interest. Combining plants with different foliage colors, textures, and growth habits creates a dynamic and captivating display.
Now that you have a better idea of the factors to consider, it’s time to move on to the next steps: preparing the container and filling it with soil.
Preparing the Container
Before you start planting your patio container, it’s important to prepare the container properly to provide the best growing environment for your plants. Follow these steps to prepare your container:
- Clean the Container: If you are reusing a container from a previous planting, make sure to clean it thoroughly. Remove any debris, old soil, or plant remains. Scrub the container with a mixture of water and mild soap to sanitize it and prevent the spread of diseases.
- Inspect for Damage: Check the container for any cracks, chips, or other damage. Damaged containers may not provide adequate support for your plants and can cause water leakage. Replace or repair any damaged containers.
- Apply a Protective Layer: To protect the container and extend its lifespan, consider applying a waterproof sealant or a coat of outdoor paint. This will help prevent water damage and weathering, ensuring that the container lasts for years to come.
- Elevate the Container: If your container doesn’t have built-in feet or a drainage tray, consider placing it on pot feet or small blocks of wood. This will allow for proper drainage and prevent the container from sitting directly on the ground, which can lead to waterlogging and root rot.
- Place a Drainage Layer: Add a layer of coarse gravel or broken pottery pieces at the bottom of the container. This will improve drainage and prevent the soil from becoming compacted over time.
By taking the time to properly prepare your container, you create a sturdy and healthy foundation for your plants. Now that your container is ready, it’s time to move on to the next step: filling it with soil.
Filling the Container with Soil
Filling your patio container with the right type of soil is crucial for the overall health and growth of your plants. Follow these steps to ensure your container is filled with the proper soil:
- Choose a Quality Potting Mix: Avoid using garden soil for container gardening, as it tends to be heavy and doesn’t provide proper drainage. Instead, opt for a high-quality potting mix specifically formulated for containers.
- Fill the Container: Start by placing a layer of potting mix at the bottom of the container, ensuring it covers the drainage layer. Add enough soil to provide adequate growing space for the roots of your plants.
- Break Up Soil Clumps: Use your hands or a garden trowel to break up any large clumps of soil and ensure a uniform texture throughout the container. This will allow the roots to penetrate the soil easily and promote healthy plant growth.
- Leave Room for Water: Ensure that there is enough space at the top of the container to accommodate watering. Leaving a small gap between the soil surface and the rim of the container prevents water from overflowing when watering your plants.
- Consider Adding Amendments: Depending on the type of plants you are growing, you may need to add some amendments to the soil. For example, adding organic matter like compost or well-rotted manure can help improve soil fertility and nutrient retention.
After filling your container with the appropriate soil, gently firm it down to remove any air pockets and level the surface. Your container is now ready for planting!
Read more: How To Arrange Potted Plants On A Patio
Planting the Container
Now that you have prepared your container and filled it with soil, it’s time to start planting! Follow these steps to ensure successful planting of your patio container:
- Arrange the Plants: Before you start planting, arrange your plants in the container to determine their optimal placement. Consider the height, growth habit, and color of each plant to create a visually appealing arrangement.
- Dig Planting Holes: Use a small hand trowel or your fingers to dig planting holes in the soil. Make sure the holes are wide and deep enough to accommodate the root balls of your plants.
- Remove Plants from Containers: Gently remove the plants from their nursery containers, being careful not to damage the roots. If the roots appear root-bound or densely packed, loosen them gently before planting.
- Place the Plants: Carefully place each plant in its designated hole, ensuring that the top of the root ball is level with the soil surface. Adjust the plants as needed to achieve the desired arrangement.
- Fill in with Soil: Once your plants are in position, backfill the holes with additional potting mix, gently firming the soil around the roots. Make sure there are no air pockets around the roots, as this can hinder their growth.
- Water Thoroughly: After planting, give your container a thorough watering to settle the soil and provide moisture to the newly planted plants. Ensure that water reaches all parts of the container, ensuring proper hydration.
Remember to follow any specific planting instructions for your chosen plants, such as proper spacing and depth requirements. Once planted, your patio container will start to come to life, bringing beauty and vitality to your outdoor space.
Next, we will explore how to properly water and fertilize your patio containers to ensure healthy growth and bountiful blooms!
Watering and Fertilizing
Watering and fertilizing are essential aspects of maintaining the health and vitality of your patio containers. Here are some guidelines to help you properly care for your plants:
Watering:
Proper watering is crucial for the success of your patio container garden. Follow these tips to ensure your plants receive adequate hydration:
- Monitor Moisture Levels: Check the moisture level of the soil regularly by sticking your finger about an inch deep into the soil. If the soil feels dry at that depth, it’s time to water.
- Water Deeply: When watering, make sure to thoroughly saturate the soil until water flows out from the drainage holes. This helps encourage deep root growth and prevents shallow rooting.
- Water Consistently: Establish a regular watering schedule to ensure a consistent moisture level. Generally, it’s better to water deeply less frequently than to water lightly on a daily basis.
- Avoid Overwatering: While it’s important to keep the soil moist, overwatering can lead to root rot and other plant health issues. Ensure proper drainage and adjust your watering frequency accordingly.
- Consider Watering Tools: Using a drip irrigation system or a watering wand with a gentle shower nozzle can help ensure even distribution of water and prevent damage to delicate leaves and flowers.
Fertilizing:
Fertilizing your patio containers provides essential nutrients to support the growth and blooming of your plants. Here are some tips for fertilizing:
- Choose the Right Fertilizer: Select a balanced, slow-release fertilizer specifically formulated for container plants. Look for a fertilizer with an NPK ratio that suits the needs of your plants.
- Follow Instructions: Read the instructions on your chosen fertilizer and follow the recommended dosage and application frequency. Overfertilizing can lead to chemical burn or nutrient imbalances that harm your plants.
- Timing Matters: Start fertilizing your patio containers about a month after planting, once the plants have established. Fertilize regularly throughout the growing season, usually every 4-6 weeks.
- Apply Properly: Evenly distribute the fertilizer over the soil surface, keeping it away from the plant stems. Water the container thoroughly after fertilizing to help the nutrients reach the root zone.
- Monitor Plant Response: Pay attention to how your plants respond to fertilization. If they show signs of nutrient deficiency or excessive growth, adjust your fertilizing practices accordingly.
By providing your patio containers with proper watering and fertilizing, you will help your plants thrive and flourish, creating a vibrant and beautiful outdoor space.
Now that you know how to care for your patio containers, let’s move on to discussing maintenance and additional care.
Choose the right size container for your plants, ensuring it has drainage holes. Use high-quality potting soil and water regularly to keep the soil moist but not waterlogged.
Maintenance and Care
Maintaining and caring for your patio containers will ensure the long-term health and beauty of your plants. Here are some essential tips for maintaining your patio containers:
Regular Maintenance:
- Remove Faded Blooms: Regularly deadhead and remove faded blooms to encourage continuous blooming and prevent your container from looking unkempt.
- Prune and Shape: Prune back any overgrown or leggy plants to maintain a compact and well-shaped container. This helps improve air circulation and prevents overcrowding.
- Inspect for Pests: Regularly check your plants for any signs of pests, such as aphids or caterpillars. If you notice any infestations, take immediate action to prevent damage to your plants.
- Monitor Soil Moisture: Keep an eye on soil moisture levels, especially during hot and dry periods. Adjust your watering frequency accordingly to prevent drying out or overwatering.
- Check for Disease: Inspect your plants for any signs of disease, such as leaf spots or fungal growth. If you notice any issues, treat them promptly to prevent the spread to other plants.
Seasonal Care:
- Winter Protection: In colder regions, protect your patio containers from freezing temperatures by moving them to a sheltered area or wrapping them with burlap or frost covers.
- Seasonal Refresh: Consider refreshing your patio containers with new plants or changing the color scheme to add variety and interest. This allows you to enjoy different looks throughout the year.
- Monitor Sun Exposure: As the seasons change, the sun’s angle and intensity may vary. Monitor the amount of sunlight your patio receives and adjust the positioning of your containers accordingly.
- Feed and Mulch: During the growing season, periodically replenish the soil with organic matter or slow-release fertilizer to provide necessary nutrients. Mulching the surface of the soil can help retain moisture and suppress weed growth.
General Care Tips:
- Protect from Extreme Conditions: Shield your patio containers from strong winds, excessive heat, or heavy rains, as these conditions can damage or stress your plants.
- Rotate and Rearrange: Periodically rotate your containers or move them to different spots to promote even growth and prevent plants from leaning towards the light source.
- Stay Vigilant: Regularly observe your patio containers and take prompt action if you notice any signs of stress, nutrient deficiencies, or pests. Early intervention can prevent further damage and ensure plant health.
By following these maintenance and care tips, you can enjoy a lush, vibrant, and healthy patio container garden that will be the envy of your neighbors.
Now that you have all the information you need, it’s time to put your newfound knowledge into practice and transform your outdoor space with stunning patio containers!
Conclusion
Congratulations! You are now equipped with the knowledge and skills to create beautiful and thriving patio containers for your outdoor space. By selecting the right container, choosing the appropriate plants, and properly preparing the container and soil, you have laid a strong foundation for success.
Remember to water and fertilize your patio containers regularly, ensuring that your plants receive adequate hydration and nutrients. Practice proper maintenance and care to keep your containers looking their best, from deadheading blooms and pruning plants to monitoring for pests and diseases.
With each passing season, your patio containers will continue to bring joy and beauty to your outdoor area. Don’t be afraid to get creative and change things up by refreshing your containers with new plants or different color schemes. Let your imagination run wild and experiment with different combinations and arrangements.
Whether you have a small balcony, a spacious patio, or a cozy courtyard, patio containers offer a fantastic opportunity to express your personal style and showcase your gardening skills. They bring nature closer to your doorstep and create a welcoming and inviting atmosphere for you, your family, and your guests to enjoy.
So, let your green thumb shine and get started on your patio container garden today. Remember, the possibilities are endless, and the joy of gardening awaits you just outside your door!
Frequently Asked Questions about How To Plant Patio Containers
Was this page helpful?
At Storables.com, we guarantee accurate and reliable information. Our content, validated by Expert Board Contributors, is crafted following stringent Editorial Policies. We're committed to providing you with well-researched, expert-backed insights for all your informational needs.


0 thoughts on “How To Plant Patio Containers”