Home>Furniture>Outdoor Furniture>How To Light A Patio
Outdoor Furniture
How To Light A Patio
Modified: October 20, 2024
Learn how to light up your patio with outdoor furniture. Create a cozy and inviting atmosphere for your outdoor gatherings.
(Many of the links in this article redirect to a specific reviewed product. Your purchase of these products through affiliate links helps to generate commission for Storables.com, at no extra cost. Learn more)
Introduction
Welcome to the ultimate guide on how to light your patio! A well-lit outdoor space not only enhances the aesthetic appeal of your patio but also extends its functionality, allowing you to enjoy it even after daylight fades. Whether you’re hosting a cozy dinner party or simply relaxing with a book, the right lighting can create an inviting ambience and make your patio a true outdoor oasis.
However, choosing the right lighting for your patio can be a daunting task. With so many options available, it’s important to consider various factors such as the size and layout of your patio, the desired mood, and your personal style preferences.
In this article, we will take you through a comprehensive step-by-step process to help you light your patio effectively. From determining your lighting needs to choosing the right fixtures and planning the layout, we’ll cover everything you need to know to create a stunning outdoor lighting design.
So, let’s get started and transform your patio into a beautifully lit space that you’ll love spending time in, day and night!
Key Takeaways:
- Transform your patio into a captivating oasis by carefully planning and installing a variety of lighting fixtures, such as pathway lights, spotlights, and decorative options, to create the perfect ambiance for day and night enjoyment.
- Prioritize maintenance and safety by regularly testing and adjusting your patio lighting, replacing bulbs, and ensuring proper electrical connections to preserve the beauty and functionality of your outdoor space.
Read more: How To Hang Patio Lights On A Covered Patio
Step 1: Determine the Lighting Needs
Before you begin selecting lighting fixtures and planning the layout, it’s crucial to assess your lighting needs for the patio. Consider how you typically use the space and the activities you enjoy. Do you primarily use your patio for entertaining guests, dining, or relaxing? Thinking about these factors will help you determine the type and intensity of lighting required.
Start by identifying the key areas of your patio that require lighting. Common areas include dining areas, seating areas, pathways, and landscape features such as plants or fountains. Each of these areas may have different lighting requirements, so it’s important to evaluate them individually.
Next, think about the desired mood and ambiance you want to create on your patio. Do you want a warm and cozy atmosphere with soft lighting, or do you prefer a brighter, more vibrant space? The mood you want to achieve will influence the type of fixtures and bulbs you choose.
Consider the practical aspects as well, such as safety and security. Adequate lighting can help prevent accidents and deter intruders, so it’s essential to prioritize safety when designing your lighting setup.
Furthermore, take into account the natural lighting conditions in your outdoor space. Are there any nearby trees or structures that cast shadows? Understanding the existing natural light sources will help you strategize your artificial lighting placement for optimal results.
By carefully considering your lighting needs, you can create a well-lit patio that meets your functional requirements while creating a captivating ambiance. Once you have a clear understanding of your lighting needs, you’re ready to move on to the next step: choosing the right lighting fixtures.
Step 2: Choose the Right Lighting Fixtures
Now that you have determined your lighting needs, it’s time to choose the right fixtures to bring your patio to life. There are various types of lighting fixtures available, each suited for different purposes and styles, so it’s important to select ones that align with your vision.
Here are some common lighting fixtures to consider:
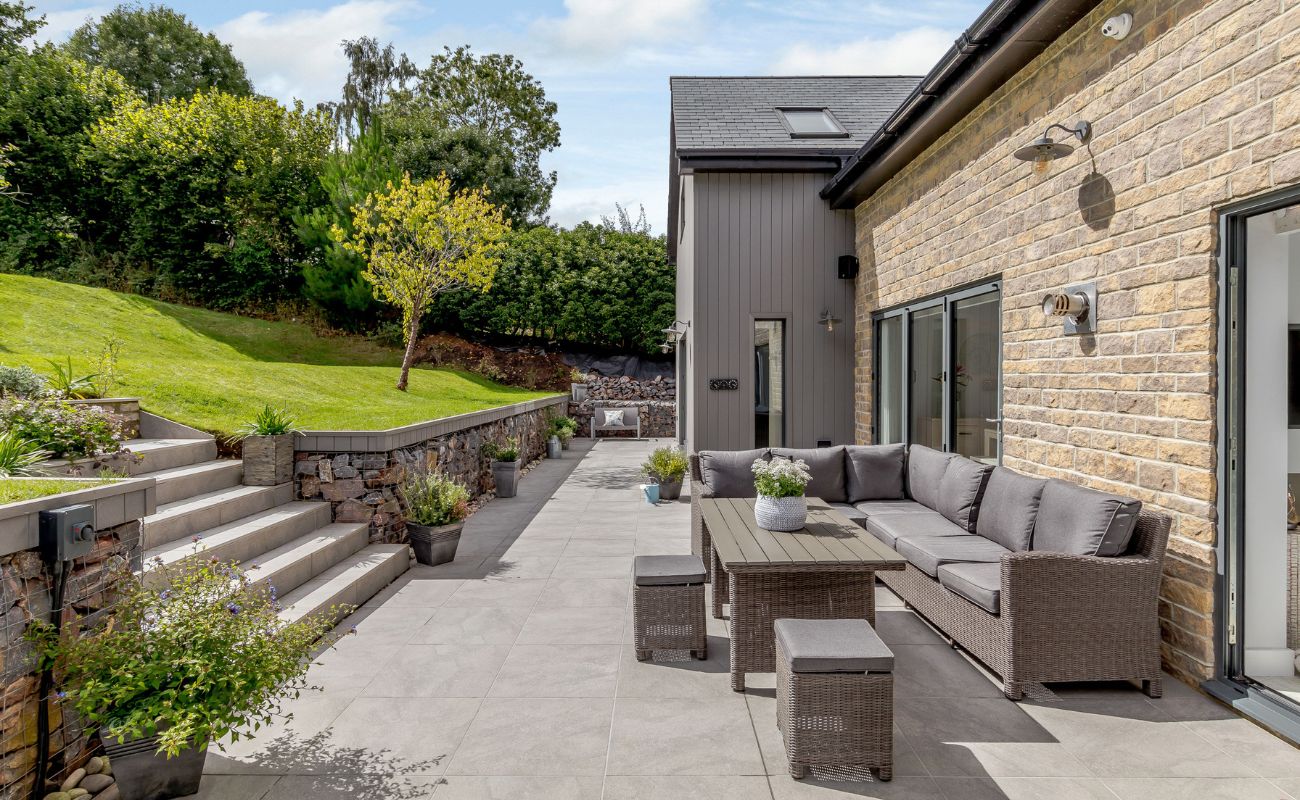
- Overhead Lighting: Overhead lighting provides general illumination for the entire patio area. Options include pendant lights, chandeliers, or ceiling-mounted fixtures. Choose fixtures that complement your patio’s style and ensure they are weather-resistant if they will be exposed to the elements.
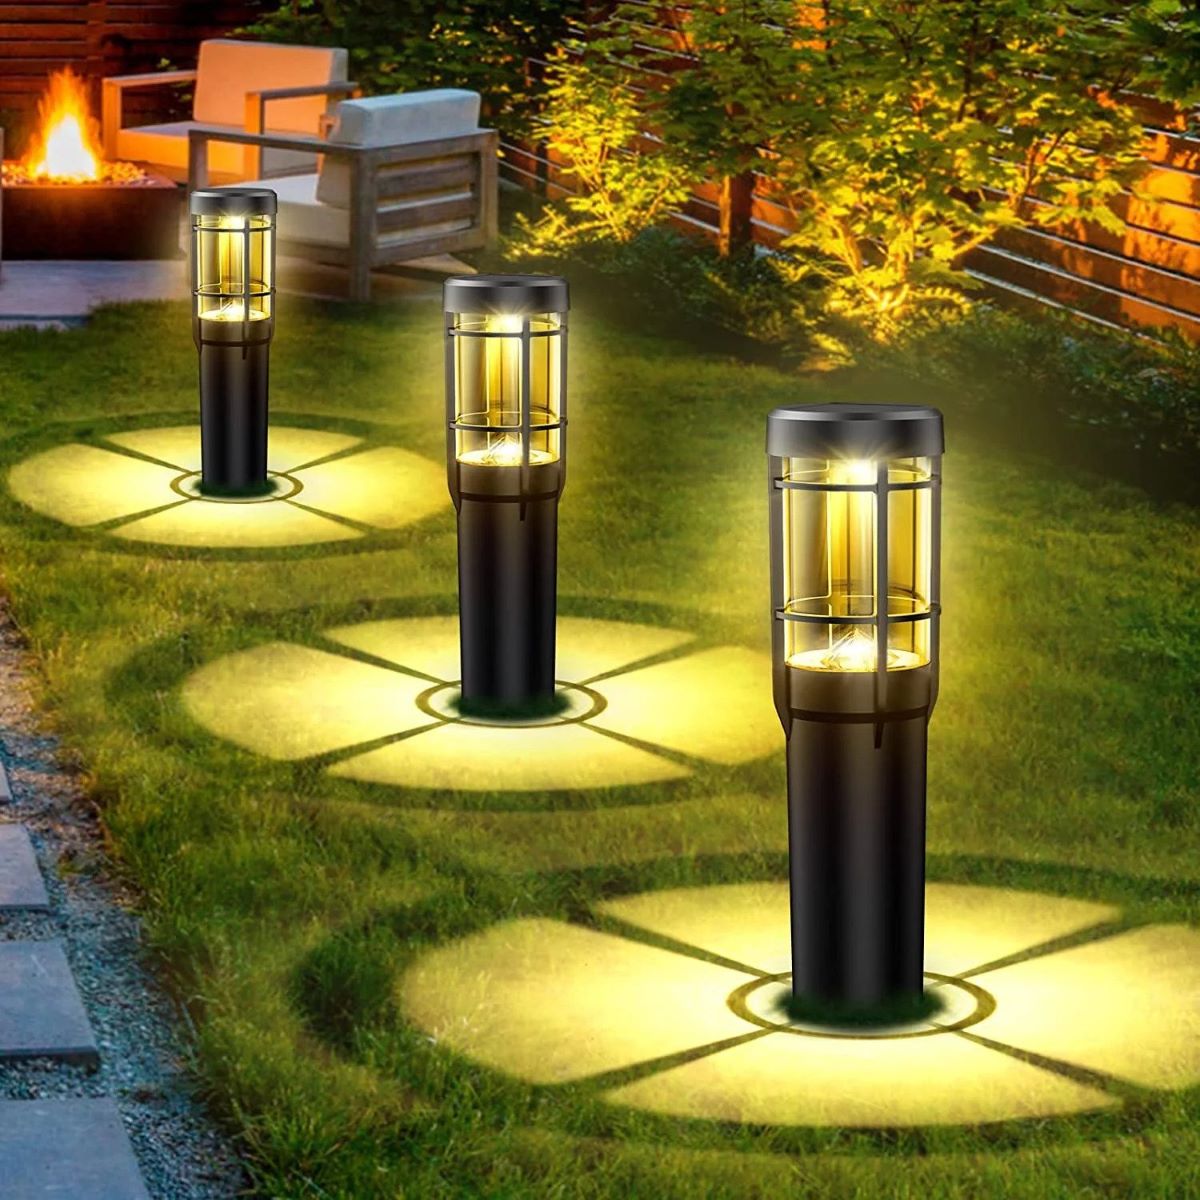
- Pathway Lighting: If you have walkways or paths on your patio, consider installing pathway lights. These low-level lights are typically installed along the edges of pathways to provide guidance and prevent accidents. Options include stake lights, solar-powered lights, or recessed path lights that blend seamlessly with the surrounding landscape.
- Spotlights: Spotlights are a great way to highlight specific areas or features on your patio, such as architectural elements, plants, or artwork. These directional lights can be placed on the ground, mounted on walls, or even installed on trees or pergolas. Opt for adjustable fixtures that allow you to control the direction and intensity of the light.
- Wall Sconces: Wall sconces not only provide additional lighting but also add a touch of elegance to your patio. These fixtures are installed directly on the walls and come in a variety of styles, from traditional lanterns to modern designs. Choose weather-resistant sconces that complement your patio’s aesthetic.
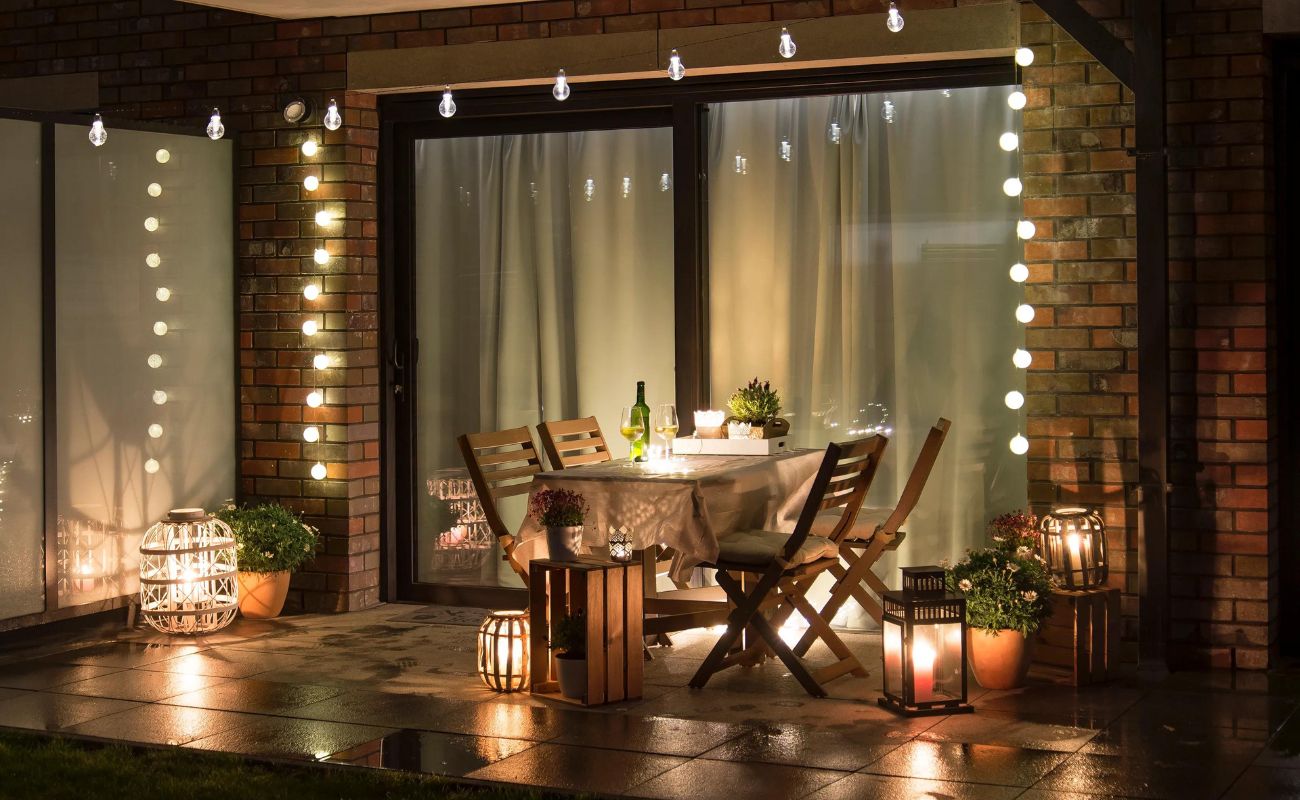
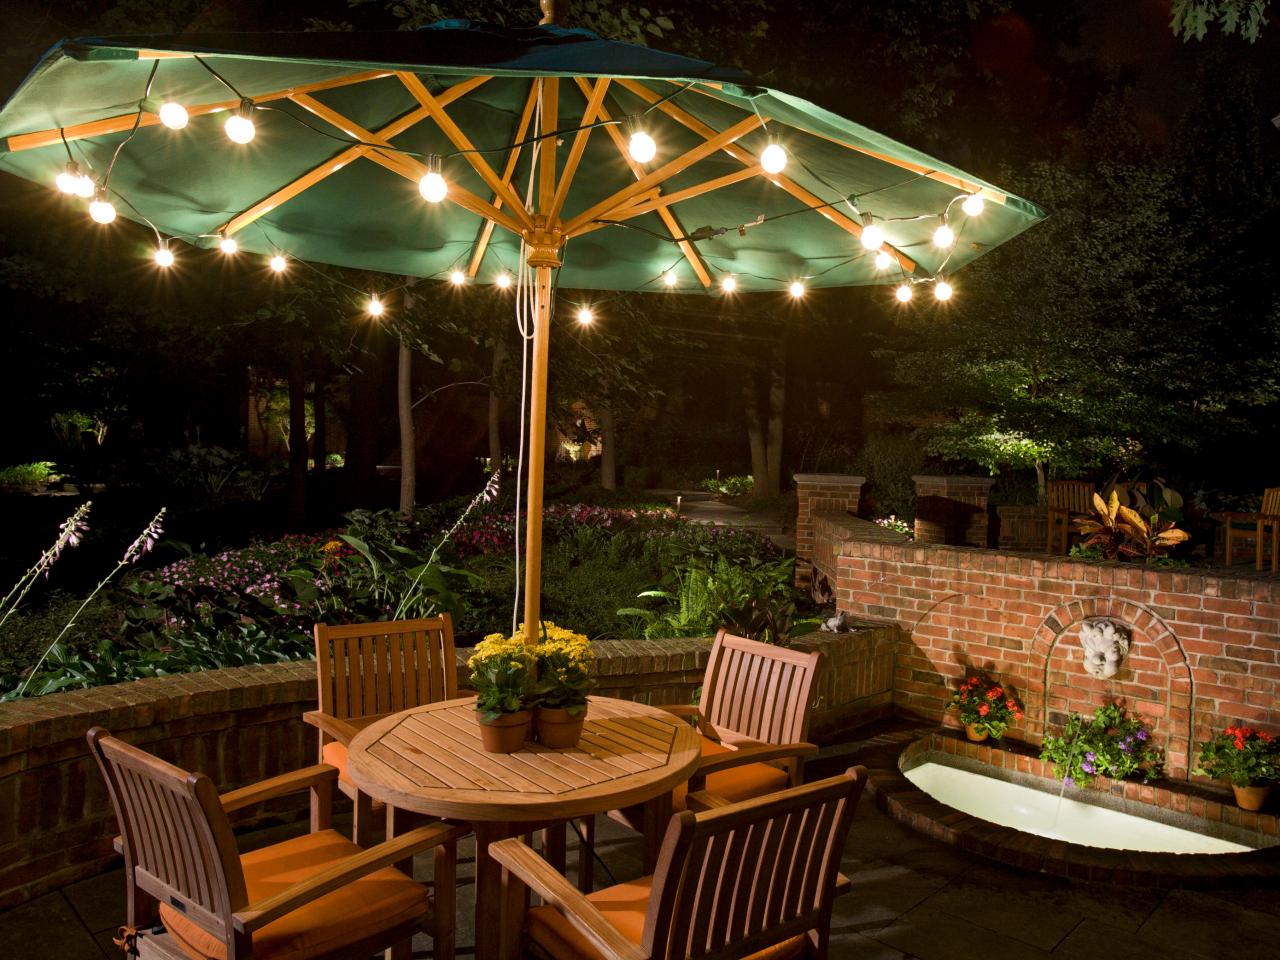
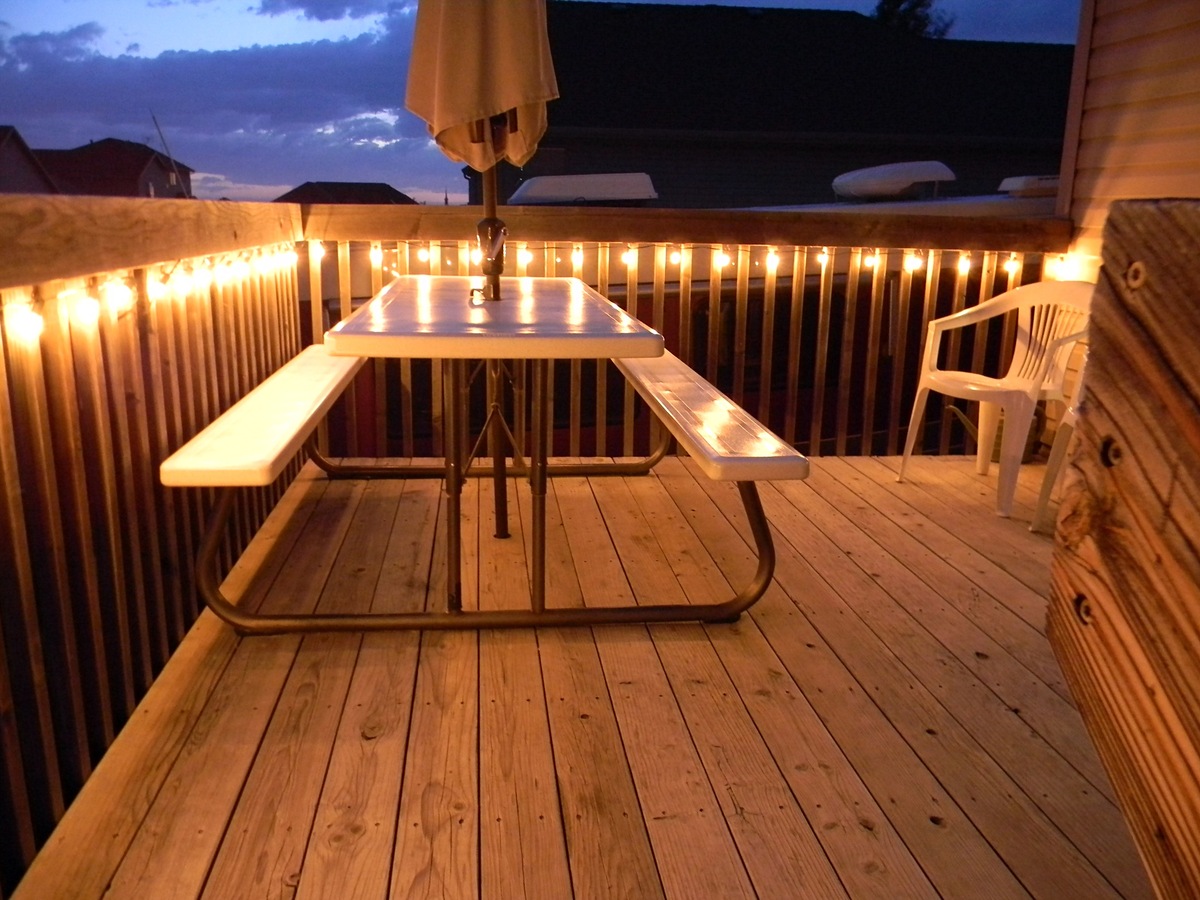
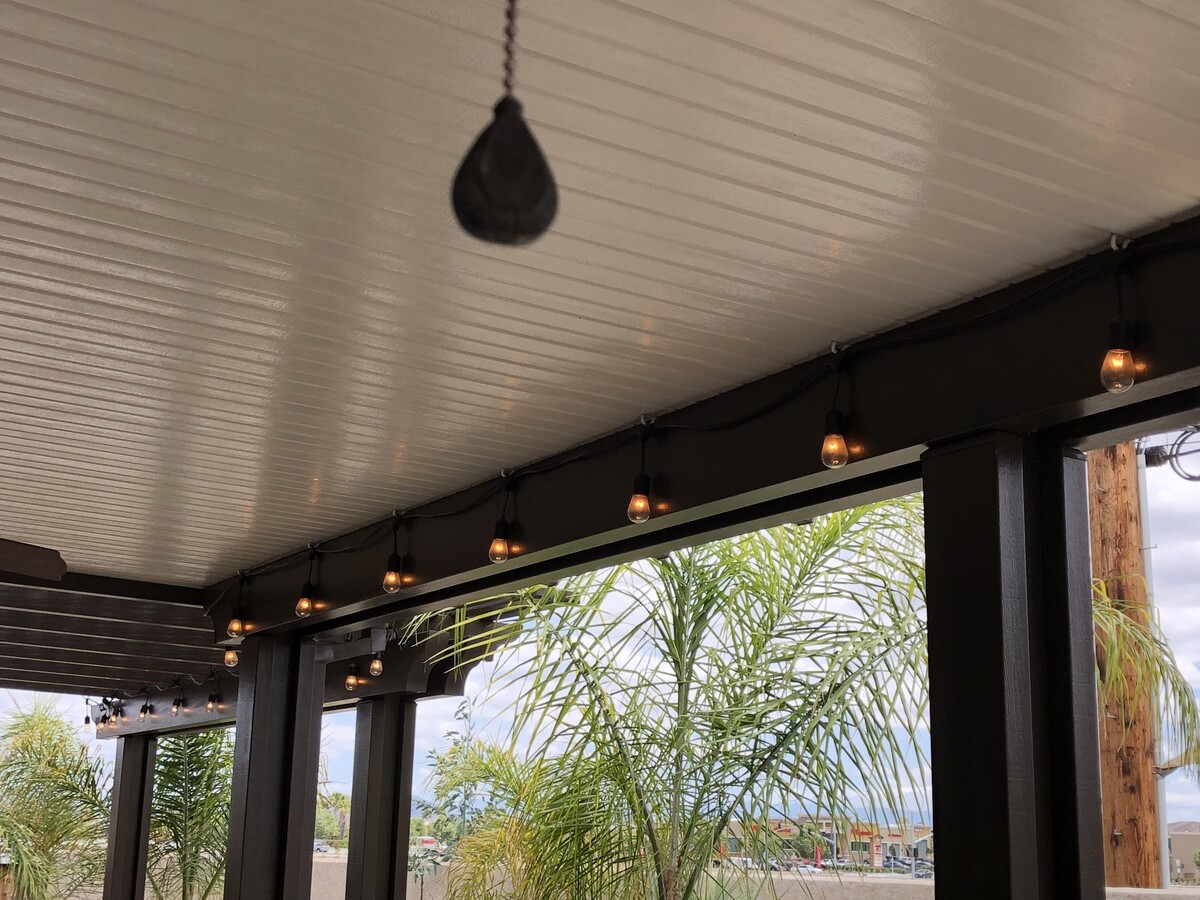
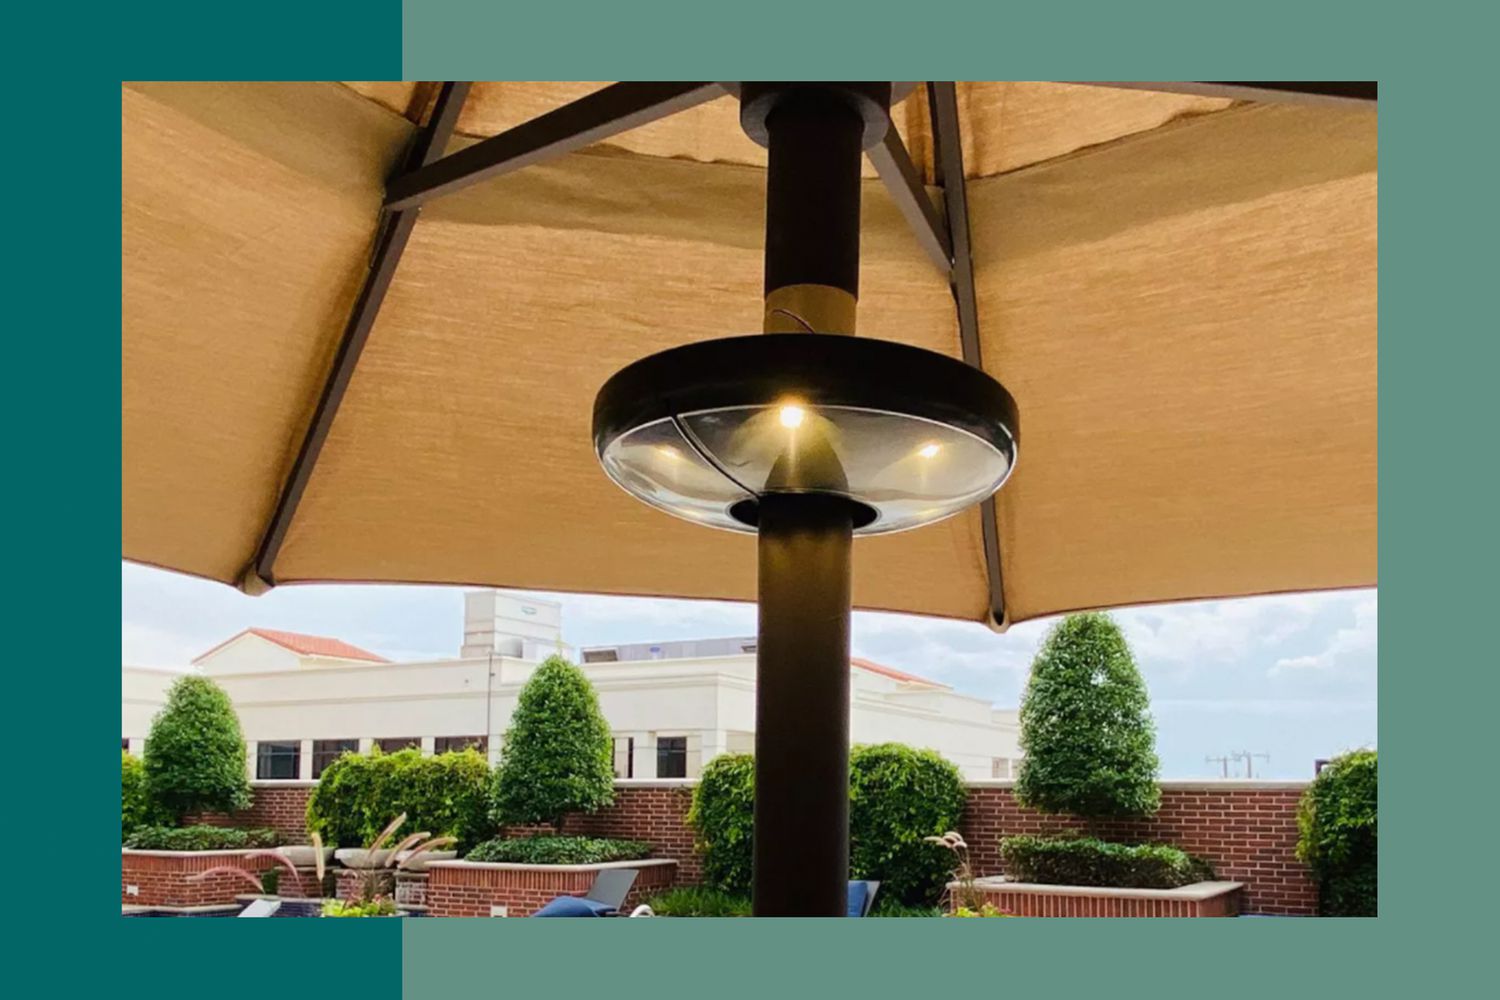
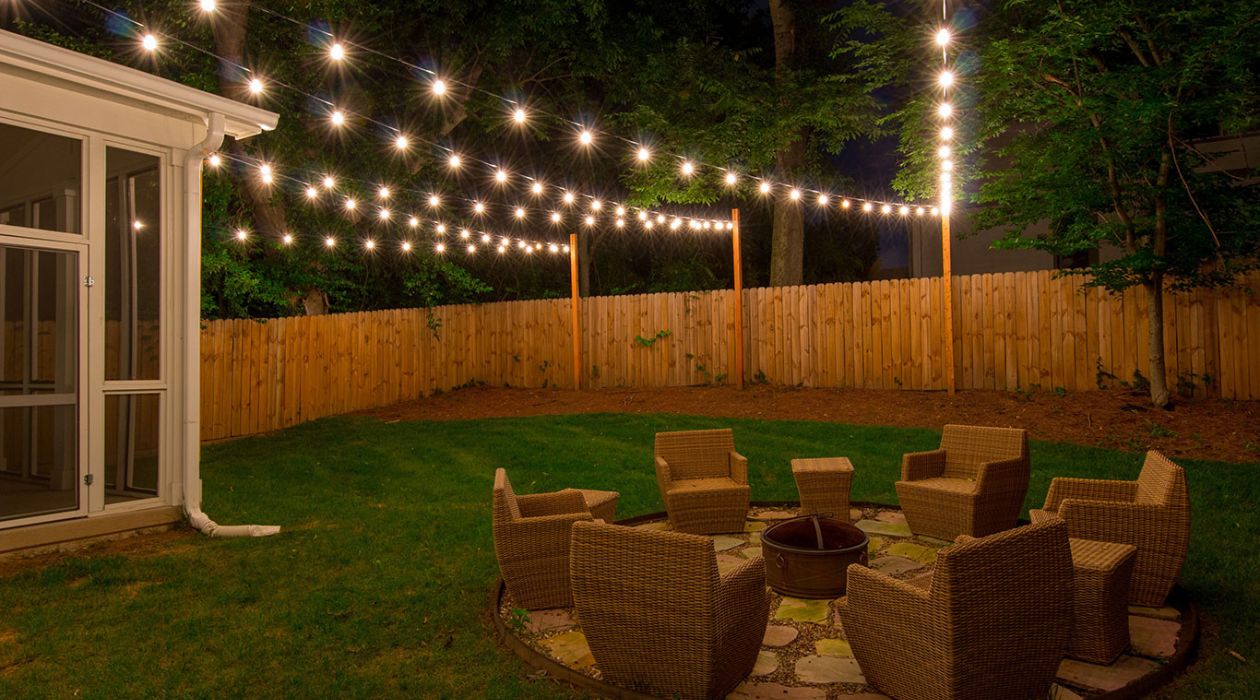
- String Lights: String lights are a popular choice for creating a warm and inviting atmosphere on the patio. These versatile lights can be hung across the space, draped around pergolas or trees, or even attached to umbrellas. Opt for LED bulbs for energy efficiency and longevity.
When choosing lighting fixtures, ensure they are rated for outdoor use and can withstand the elements. Look for fixtures with an IP rating, indicating their water and dust resistance level. Additionally, consider the type of bulbs to use, such as LED or solar-powered options, for efficiency and durability.
By carefully selecting the right lighting fixtures, you can enhance the functionality and aesthetics of your patio. With the fixtures chosen, you’re ready to move on to the next step: planning the layout of your patio lighting.
Step 3: Plan the Layout
Now that you have chosen the right lighting fixtures, it’s time to plan the layout for your patio lighting. A well-planned layout ensures that the lighting is evenly distributed, highlights the key areas of your patio, and creates a balanced and cohesive look.
Start by considering the focal points of your patio, such as dining areas, seating areas, or unique architectural features. These focal points will be your primary focus when placing your lighting fixtures. Think about how you want to accentuate these areas and create a welcoming atmosphere.
Next, create a rough sketch or diagram of your patio. This will serve as a visual guide to help you determine where to place your lighting fixtures. Consider the existing electrical outlets and the availability of power sources. If there are no convenient power sources, you may need to hire an electrician to install outdoor electrical outlets.
Divide your patio into zones based on the different lighting needs and functions. For example, you may have a dining zone, a lounging zone, and a pathway zone. This will help you allocate the appropriate lighting fixtures to each area and ensure a cohesive look.
When placing your fixtures, consider the height and positioning. Overhead lighting should be hung at a sufficient height to provide adequate illumination without obstructing the view or becoming a hazard. Pathway lights and spotlights should be strategically positioned to cast light where it is needed most.
Experiment with different lighting angles and directions to create interesting effects. For example, angling spotlights to wash a textured wall or illuminating plants from below can add depth and visual interest to your patio. Play around with the positioning until you achieve the desired effect.
In addition to the fixtures themselves, consider incorporating lighting controls into your layout. Dimmers, timers, or smart lighting systems allow you to adjust the brightness and set automatic schedules, giving you maximum control and convenience.
Throughout the planning process, keep in mind the balance between functionality and aesthetics. The layout should provide adequate lighting for practical purposes, while also enhancing the ambiance and beauty of your patio.
Once you have finalized the layout, it’s time to move on to the next step: installing outdoor electrical outlets if needed.
Step 4: Install Outdoor Electrical Outlets
When it comes to patio lighting, having accessible outdoor electrical outlets is essential for powering your lighting fixtures. If you don’t have existing outlets in convenient locations, you may need to install outdoor electrical outlets to ensure a seamless and safe electrical connection.
Here’s a step-by-step guide to installing outdoor electrical outlets:
- Plan the placement: Determine the ideal locations for the outdoor electrical outlets, keeping in mind the layout of your patio and the proximity to the lighting fixtures. Choose areas that are easily accessible and won’t pose any tripping hazards.
- Shut off the power: Before starting any electrical work, shut off the power to the area where you’ll be installing the outlets. This can be done by turning off the corresponding circuit breaker in your electrical panel.
- Install the electrical box: Use a waterproof outdoor electrical box that is suitable for the purpose. Mark the position of the box on the wall and cut out a hole using a jigsaw. Secure the electrical box to the wall using screws or anchors.
- Run the electrical conduit: Install a waterproof electrical conduit from the electrical box to the nearest existing electrical source. This conduit will protect the electrical wiring and ensure a safe connection. Secure the conduit to the wall using conduit straps.
- Connect the wiring: Run electrical wires through the conduit from the existing source to the outdoor electrical box. Connect the wires in accordance with local electrical codes, ensuring proper grounding.
- Install the outdoor outlet: Attach the outdoor outlet to the electrical box by securing it with screws. Make sure the outlet cover is weatherproof and provides protection against moisture and dust.
- Test and verify: Once the installation is complete, turn the power back on and test the outdoor outlets to ensure they are functioning properly. Use a voltage tester to verify that there is power to the outlet.
- Weatherproof the outlets: To protect the outdoor outlets from the elements, consider using weatherproof outlet covers or installing outlet boxes with built-in weatherproofing features.
It’s crucial to note that electrical work should always be carried out by a qualified electrician if you’re not experienced or comfortable with it. They will ensure the proper installation, compliance with local codes, and adherence to safety precautions.
Now that you have installed the outdoor electrical outlets, you’re ready to proceed with the installation of the lighting fixtures. In the next step, we’ll cover how to install overhead lighting on your patio.
Step 5: Install Overhead Lighting
Overhead lighting is an essential component of patio lighting, providing general illumination for the entire space. Whether you prefer a dramatic statement piece or a simple and functional fixture, installing overhead lighting can transform your patio into a well-lit and inviting area.
Here’s a step-by-step guide to help you install overhead lighting on your patio:
- Select the right fixture: Choose a lighting fixture that complements the style of your patio and provides the desired lighting effect. Consider factors such as the size of the fixture, the type of bulbs it requires, and its weather resistance for outdoor use.
- Plan the location: Determine the ideal location for your overhead lighting fixture. This will depend on the layout of your patio and the direction of the light you want to cast. Typically, the fixture should be positioned in the center or above the main focal point of your patio, such as a dining table or seating area.
- Turn off the power: Before starting any electrical work, ensure that the power to the area is turned off by switching off the corresponding circuit breaker in your electrical panel.
- Install the electrical box: Attach a weatherproof electrical box to the ceiling or structure of your patio at the desired location for the fixture. Make sure the box is securely fastened and aligned properly with the support of the fixture.
- Connect the wiring: Run the electrical wires from the electrical box to the nearest power source, ensuring they are properly connected and secured. It’s crucial to follow local electrical codes and use appropriate wiring techniques.
- Mount and secure the fixture: Gently mount the overhead lighting fixture onto the electrical box, following the manufacturer’s instructions. Make sure it is securely fastened, and any decorative components, such as shades or covers, are properly installed.
- Turn on the power: Once the fixture is properly installed, turn the power back on and test the overhead lighting to ensure it is functioning correctly. Use a voltage tester to verify that there is power to the fixture.
- Adjust and aim the light: Depending on the design of your fixture, you may have the option to adjust and aim the light to achieve your desired lighting effect. Experiment with different angles and directions to find the optimal positioning.
Remember, if you are uncomfortable working with electrical components, it’s always best to hire a licensed electrician to handle the installation. They have the knowledge and expertise to ensure a safe and efficient installation.
With your overhead lighting installed, you can now move on to the next step: installing pathway lighting to guide and illuminate your patio’s walkways.
Consider using string lights or lanterns to create a warm and inviting atmosphere on your patio. Hang them above the seating area or along the perimeter for a cozy and well-lit outdoor space.
Step 6: Install Pathway Lighting
Pathway lighting is an essential element of patio lighting, providing both practicality and aesthetics. It not only ensures safe navigation but also adds a charming ambiance to your outdoor space. Installing pathway lighting is relatively straightforward and can significantly enhance the overall look and functionality of your patio.
Follow these steps to install pathway lighting:
- Plan the pathway layout: Determine the path or walkway where you want to install the lighting. Consider the length, width, and curves of the pathway. This will help you decide how many lights you’ll need and their spacing along the path.
- Select the right pathway lights: Choose lighting fixtures specifically designed for outdoor pathways. Look for fixtures that are weather-resistant, durable, and designed for easy installation. Consider options such as stake lights, solar-powered lights, or recessed path lights, depending on your preferences and requirements.
- Mark the light placement: Use stakes or markers to indicate the desired locations for your pathway lights along the path. Take into account any obstacles or landscaping elements that may affect the placement, such as plants, trees, or landscape borders.
- Prepare the installation area: Clear any debris or vegetation from the ground where the lights will be installed. This will ensure a stable and level surface for the lights.
- Install the pathway lights: Follow the manufacturer’s instructions to install the pathway lights. This may involve inserting the lights into the ground, securing them with stakes, or attaching them to a base. Ensure that the lights are positioned securely and at the desired height to provide sufficient illumination along the pathway.
- Connect the wiring: If your pathway lights require a wired connection, carefully run the electrical wires underground from one light to another, making sure to bury them deep enough to avoid accidental damage. Connect the wires properly and secure them with waterproof connectors.
- Test the lights: Once the installation is complete, turn on the power supply to the pathway lights and test them to ensure they are functioning correctly. Make any necessary adjustments to the positioning or alignment of the lights to achieve the desired lighting effect.
- Regular maintenance: Regularly inspect and clean your pathway lights to ensure they stay in good working condition. Replace any damaged bulbs or fixtures promptly to maintain the overall appearance and functionality of your pathway lighting.
Pathway lighting provides not only illumination but also improves safety and adds visual interest to your patio. With the pathway lights installed, your patio is on its way to becoming a beautifully lit and inviting space.
In the next step, we will explore how to accentuate your patio using spotlights to highlight specific areas or features.
Step 7: Accentuate with Spotlights
Spotlights are a fantastic addition to your patio lighting design, allowing you to highlight specific areas or features and create a captivating focal point. Whether you want to showcase a beautiful tree, architectural elements, or an outdoor art installation, spotlights can add drama and depth to your outdoor space. Here’s how you can accentuate your patio with spotlights:
- Identify the focal points: Determine the key elements or areas you want to highlight on your patio. This could include trees, shrubs, sculptures, water features, or architectural details. Take note of their locations to plan the placement of your spotlights.
- Choose the right spotlights: Select spotlights that are suitable for outdoor use and provide the desired lighting effect. Consider factors such as beam angle, brightness, and adjustability. LED spotlights are energy-efficient and offer longevity.
- Decide on the lighting technique: There are various techniques you can use to accentuate with spotlights. For instance, uplighting involves placing spotlights on the ground and directing the light upward to highlight tall trees or features with height. Downlighting involves mounting spotlights higher up to cast light downward onto certain areas.
- Position the spotlights: Install the spotlights in the chosen locations, ensuring they are securely mounted. Experiment with different angles and directions to achieve the desired lighting effect. Adjust the position as needed to avoid casting harsh shadows or glare.
- Consider beam spreads: Depending on the size and distance of the object or area you’re highlighting, adjust the beam spreads of the spotlights accordingly. Narrow beams can create a more focused and dramatic effect, while wider beams can provide a broader wash of light.
- Balance the lighting: Take into account the overall balance of your patio lighting. Ensure that the spotlights are not overpowering or creating stark contrasts with the rest of the lighting. They should complement the ambient lighting and enhance the overall ambiance rather than distract from it.
- Control the intensity: Consider using lighting controls, such as dimmers or timers, to adjust the intensity of the spotlights. This allows you to create different moods throughout the evening and conserve energy when needed.
- Regular maintenance: Periodically check and clean the spotlights to remove dirt, debris, or any obstructions that may affect their performance. Also, check the alignment and positioning, making any necessary adjustments to ensure the desired effect.
Spotlights can add a captivating touch to your patio lighting design, drawing attention to the unique features and creating a visually stunning outdoor space. With the spotlights carefully positioned, you can create an enchanting atmosphere on your patio.
In the next step, we will explore various decorative lighting options to further enhance the aesthetics of your outdoor space.
Step 8: Consider Decorative Lighting Options
Decorative lighting options add charm and personality to your patio, elevating its visual appeal and creating a welcoming ambiance. These additional lighting elements can enhance the overall atmosphere and make your outdoor space truly magical. Here are some decorative lighting options to consider:
- Fairy Lights: Fairy lights add a whimsical and enchanting touch to your patio. These delicate string lights can be hung along fences, wrapped around tree trunks, or draped across pergolas to create a soft and dreamy glow. Choose warm white or color-changing fairy lights to match your patio’s style and desired mood.
- Lanterns: Lanterns are both functional and decorative, adding a touch of elegance and charm to your patio. You can opt for traditional lanterns with candles or choose LED lanterns for a safer and more long-lasting option. Place them on tables, hang them from hooks, or use shepherd’s hooks to line pathways with lanterns.
- Outdoor Candles: Candles create a romantic and cozy ambiance on your patio. Use flameless candles for a worry-free option or opt for citronella candles to repel insects. Place them in candle holders or lanterns, or even float them in a decorative bowl of water for a unique effect.
- Globe or Edison Bulbs: Globe or Edison bulbs are a popular choice for a vintage or industrial aesthetic. Hang them in clusters or string them across your patio to create a nostalgic and warm glow. Consider using dimmer switches to adjust the intensity and set the desired ambiance.
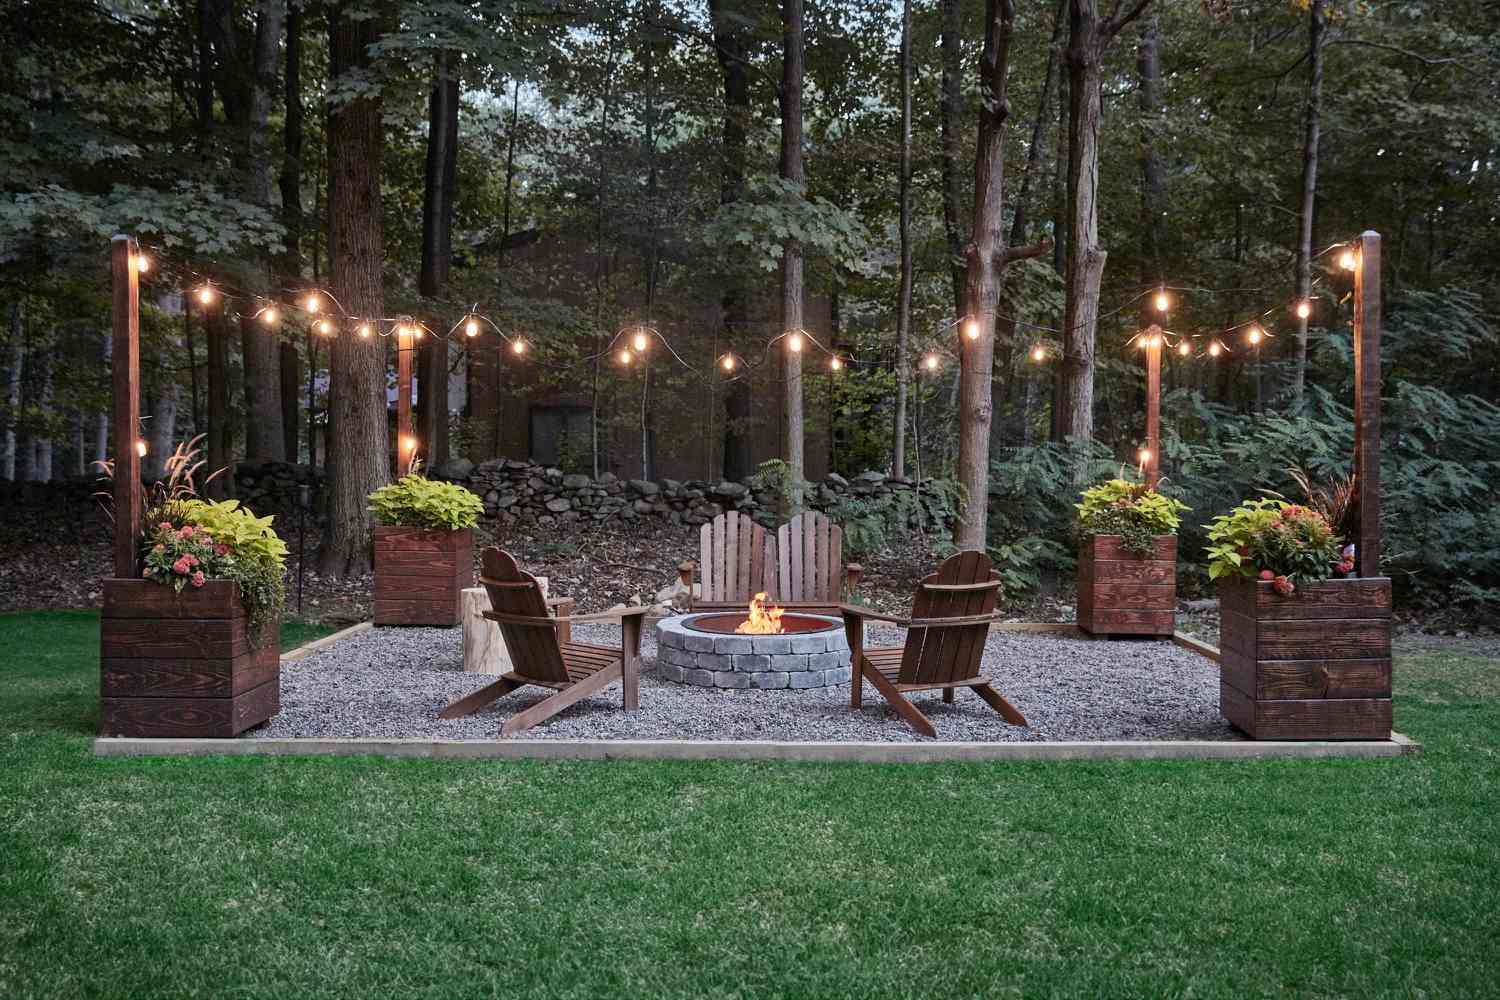
- Outdoor Fire Pit: An outdoor fire pit not only provides warmth but also adds a mesmerizing glow to your patio. Gather around the fire pit with family and friends, and enjoy the cozy atmosphere it creates. Ensure safe installation and follow local regulations for fire pits in your area.
- Landscape Lighting: Enhance the beauty of your patio by incorporating landscape lighting. Use well lights or uplights to showcase plants, trees, or architectural features. Consider placing lights near water features to create a serene and captivating effect.
- Artistic Light Fixtures: Consider unique and artistic light fixtures that can serve as beautiful focal points on your patio. These can include sculptural light installations, string light curtains, or even custom-made fixtures that reflect your personal style and taste.
When incorporating decorative lighting options, ensure they are weather-resistant and suitable for outdoor use. Follow the manufacturer’s guidelines for installation and maintenance to ensure safety and longevity.
Remember that the key is to strike a balance between functionality and aesthetics. Experiment with different decorative lighting elements to create a patio space that reflects your style and serves as an inviting retreat.
In the next step, we will discuss how to test and adjust the lighting on your patio to achieve the desired effect.
Read more: How To String Up Patio Lights
Step 9: Test and Adjust the Lighting
Once you have installed all the lighting fixtures on your patio, it’s time to test and adjust the lighting to ensure you achieve the desired effect. Testing and adjusting your patio lighting will help you fine-tune the ambiance, address any issues, and create the perfect atmosphere for your outdoor space. Follow these steps to test and adjust your patio lighting:
- Turn on all the lights: Begin by turning on all the lights on your patio. This will allow you to see how each fixture contributes to the overall lighting scheme and evaluate the overall brightness and distribution of light.
- Observe the lighting effect: Take a step back and observe the lighting effect from different angles and areas of your patio. Pay attention to any areas that may be too bright, too dim, or unevenly lit. Note any areas that lack proper illumination or where the lighting may be too harsh.
- Make adjustments: If certain areas are too bright, consider using dimmers or adjusting the positioning of the fixtures to redirect the light. On the other hand, if certain areas are too dim, add additional lighting fixtures or adjust the placement to enhance the brightness. Balance the lighting so that no areas are overly shadowed or overwhelmed by light.
- Consider color temperature: Evaluate the color temperature of the lighting. If you prefer a warm and cozy ambiance, choose bulbs with a lower color temperature (around 2700K). For a cooler and more vibrant feel, opt for bulbs with a higher color temperature (around 4000K). Experiment with different bulb options to find the ideal ambience.
- Experiment with lighting controls: If you have installed lighting controls such as dimmers or timers, play around with them to refine the lighting atmosphere. Adjust the brightness levels and create different lighting scenes to suit various activities or moods on your patio.
- Consider energy efficiency: Evaluate the energy consumption of your patio lighting. Consider replacing traditional bulbs with energy-efficient LED bulbs, which not only consume less energy but also last significantly longer. This will help reduce your carbon footprint and save on electricity bills.
- Solicit feedback: Invite family members or friends to provide feedback on the lighting. They may offer a different perspective and help you identify any areas for improvement that you may have overlooked.
- Regularly assess and adjust: Keep in mind that your outdoor space may change over time due to various factors such as seasonal vegetation growth or landscape modifications. Regularly reassess the lighting and make necessary adjustments to accommodate these changes and ensure your patio remains beautifully illuminated.
Testing and adjusting your patio lighting may require some trial and error, but it’s a vital step in creating the perfect ambiance for your outdoor space. By being thoughtful and attentive to the lighting effects, you can achieve a well-balanced and captivating patio environment.
In the final step, we will discuss some maintenance and safety tips to keep in mind for your patio lighting setup.
Step 10: Maintenance and Safety Tips
Once you have completed the installation and fine-tuning of your patio lighting, it’s important to prioritize maintenance and safety to ensure the longevity and optimal performance of your lighting setup. Regular maintenance and safety measures will not only preserve the beauty of your patio but also provide a safe and enjoyable outdoor space. Here are some maintenance and safety tips to keep in mind:
- Regularly clean your lighting fixtures: Dust, dirt, and debris can accumulate on lighting fixtures over time, affecting their performance and appearance. Regularly clean the fixtures with a soft cloth or brush to remove any residue. For stubborn dirt or grime, use a mild cleaning solution and follow the manufacturer’s instructions.
- Replace bulbs when necessary: Bulbs may burn out or lose their brightness over time. Monitor the performance of your bulbs and replace them as needed to maintain consistent lighting levels. Follow the manufacturer’s recommendations for compatible replacement bulbs.
- Inspect and repair damaged wiring: Regularly inspect the wiring of your lighting setup for any signs of damage or wear. Check for loose connections, exposed wires, or frayed cables. If you notice any issues, promptly repair or replace the damaged wiring to avoid electrical hazards.
- Trim vegetation near lighting fixtures: Plants, shrubs, or trees near your lighting fixtures may obstruct the light or pose a fire risk. Regularly trim vegetation to ensure that the lighting is not hindered and that there is sufficient clearance around the fixtures.
- Secure loose fixtures: Over time, fixtures may become loose due to weather conditions or vibrations. Periodically check the fixtures and ensure they are secure and stable. Tighten any loose screws or fasteners as necessary.
- Protect against harsh weather conditions: Outdoor lighting fixtures are designed to withstand the elements, but it’s still important to protect them during extreme weather conditions. Consider using weatherproof covers or shelters to shield the fixtures from heavy rain, snow, or excessive direct sunlight.
- Follow electrical safety guidelines: Adhere to electrical safety guidelines when working with your patio lighting setup or making any modifications. Ensure that all electrical connections are properly insulated, grounded, and waterproof. If you’re unsure about any electrical work, consult an experienced electrician.
- Be mindful of energy consumption: Consider energy-efficient options for your patio lighting, such as LED bulbs or solar-powered fixtures. This not only reduces your energy consumption but also lowers your environmental impact and saves on electricity bills.
- Regularly test and replace batteries: If you have any battery-operated lighting fixtures, regularly test and replace the batteries as needed to ensure consistent performance.
- Keep an eye on potential fire hazards: Monitor any open flames, such as candles or fire pits, and keep them away from flammable materials. Never leave open flames unattended and always extinguish them properly after use.
By following these maintenance and safety tips, you can ensure that your patio lighting remains in excellent condition, providing a safe and enjoyable outdoor environment for years to come.
Congratulations! You have now successfully completed all the steps to light your patio. With a well-planned and beautifully lit patio, you can create memorable outdoor experiences and enjoy your outdoor space day and night.
Enjoy your perfectly illuminated patio!
Conclusion
Lighting plays a crucial role in transforming your patio into a stunning and inviting outdoor space. By following the steps outlined in this guide, you can create a well-lit patio that not only enhances the aesthetics of your outdoor area but also extends its functionality, allowing you to enjoy it day and night.
From determining your lighting needs and selecting the right fixtures to planning the layout and installing outdoor electrical outlets, each step is critical in creating a cohesive and visually appealing lighting design. By considering factors such as the desired mood, safety considerations, and the natural lighting conditions of your outdoor space, you can make informed decisions to achieve the perfect lighting setup.
Throughout the process, it’s important to regularly test and adjust your lighting to ensure the desired effect. Fine-tuning the lighting levels, adjusting the positioning of fixtures, and experimenting with different lighting techniques will help you create the ideal atmosphere for your patio.
Remember to prioritize maintenance and safety to ensure the longevity and optimal performance of your patio lighting. Regularly clean and inspect your fixtures, replace bulbs as needed, and take precautions to protect against harsh weather conditions. By following these maintenance and safety tips, you can enjoy your beautifully lit patio for years to come.
With a well-planned and carefully executed patio lighting design, you can transform your outdoor space into a captivating oasis. Whether you’re hosting a gathering, enjoying a quiet evening, or simply basking in the beauty of your illuminated patio, the right lighting can create a magical and inviting atmosphere.
So, go ahead and embark on the journey of transforming your patio with the power of lighting. Let your creativity shine and make your outdoor space a place where memories are made and moments are cherished.
Frequently Asked Questions about How To Light A Patio
Was this page helpful?
At Storables.com, we guarantee accurate and reliable information. Our content, validated by Expert Board Contributors, is crafted following stringent Editorial Policies. We're committed to providing you with well-researched, expert-backed insights for all your informational needs.


0 thoughts on “How To Light A Patio”