Home>Furniture>Outdoor Furniture>What To Put Under Patio Stones
Outdoor Furniture
What To Put Under Patio Stones
Modified: March 7, 2024
Discover the best options for outdoor furniture to place under your patio stones. Create a stylish and comfortable outdoor space with our top recommendations.
(Many of the links in this article redirect to a specific reviewed product. Your purchase of these products through affiliate links helps to generate commission for Storables.com, at no extra cost. Learn more)
Introduction
Creating a patio space in your outdoor area can provide a beautiful and functional addition to your home. Whether you want a spot to relax, entertain guests, or enjoy outdoor meals, a patio made with sturdy and attractive patio stones can be the perfect solution. However, in order to ensure your patio stands the test of time, it is important to properly prepare the ground and select the right materials. One crucial aspect of patio installation is what to put under the patio stones. This article will guide you through the process of selecting the right materials and installing them to create a stable and long-lasting patio foundation.
Key Takeaways:
- Choose the right material for your patio base, considering factors like climate and stone size. Gravel, sand, crushed stone, or concrete are all viable options, each with its own advantages and considerations.
- Properly prepare the area, level the ground, and install a weed barrier before placing the patio stones. Take your time and use a level to achieve a professional-looking installation.
Read more: What To Put Between Patio Stones
Selecting the Right Material
When it comes to what to put under patio stones, there are a few different options to consider. The material you choose will depend on factors such as the climate in your area, the size and weight of the stones, and your budget. Here are some popular choices:
- Gravel: Gravel is a common option for patio bases. It is inexpensive, easy to install, and provides good drainage. However, it may shift over time and may not be suitable for larger and heavier stones.
- Sand: Sand is another commonly used material for patio bases. It is easy to level and provides a stable surface for the stones. However, it doesn’t offer as much drainage as gravel and may require additional measures to prevent weed growth.
- Crushed Stone: Crushed stone is a durable and stable option for patio bases. It provides good drainage and can withstand heavy loads. However, it may be more expensive than other materials and may require professional installation.
- Concrete: If you want a solid and long-lasting patio foundation, concrete is the way to go. It offers excellent stability and can withstand heavy stones. However, concrete installation can be more labor-intensive and may require professional help.
Consider the characteristics of each material and choose the one that best fits your specific needs and preferences for your patio project.
Preparing the Area
Before you can start installing the base material for your patio stones, it is important to properly prepare the area. Here are the steps to take:
- Clear the area: Remove any existing vegetation, debris, or obstacles from the area where you plan to build your patio. This will ensure a clean surface and prevent any interference during the installation process.
- Mark the boundaries: Use stakes and string or spray paint to mark the boundaries of your patio. This will help you visualize the space and ensure that the patio is the right size and shape for your needs.
- Measure and plan: Measure the dimensions of your patio and calculate the amount of base material and patio stones you will need. This will help you avoid any unnecessary trips to the store or running out of materials during the installation process.
- Check for drainage: Assess the natural slope of the area and make sure it allows for proper drainage. If necessary, consider making adjustments by adding or removing soil to ensure water does not collect on your patio surface.
By properly preparing the area, you will create a solid foundation for your patio and ensure its longevity. Take the time to complete these steps before moving on to the next stage of the installation process.
Leveling the Ground
Once you have cleared and prepared the area for your patio, the next step is to level the ground. This is an important step to ensure that your patio stones sit evenly and securely. Here’s how to do it:
- Remove topsoil: Use a shovel or garden rake to remove the top layer of soil from the area where your patio will be. This will expose the underlying soil and provide a level surface to work with.
- Compact the soil: Use a tamper or plate compactor to compact the soil, creating a firm and stable base. This will help prevent any shifting or settling of the ground once the patio stones are installed.
- Check for level: Use a long, straight board or level to check the levelness of the ground. Place it in different areas of the prepared area and adjust the soil as needed to ensure a flat and even surface.
- Inspect for any low or high spots: As you check for levelness, keep an eye out for any low or high spots on the ground. Low spots can be filled with additional soil or compacted, while high spots can be leveled by removing some soil.
- Repeat the compacting process: After leveling the ground, go over it again with the tamper or plate compactor to ensure that it is compacted and stable.
Take your time during this step to ensure that the ground is properly leveled. A well-leveled surface will provide a solid foundation for your patio and help prevent any unevenness or sinking of the patio stones in the future.
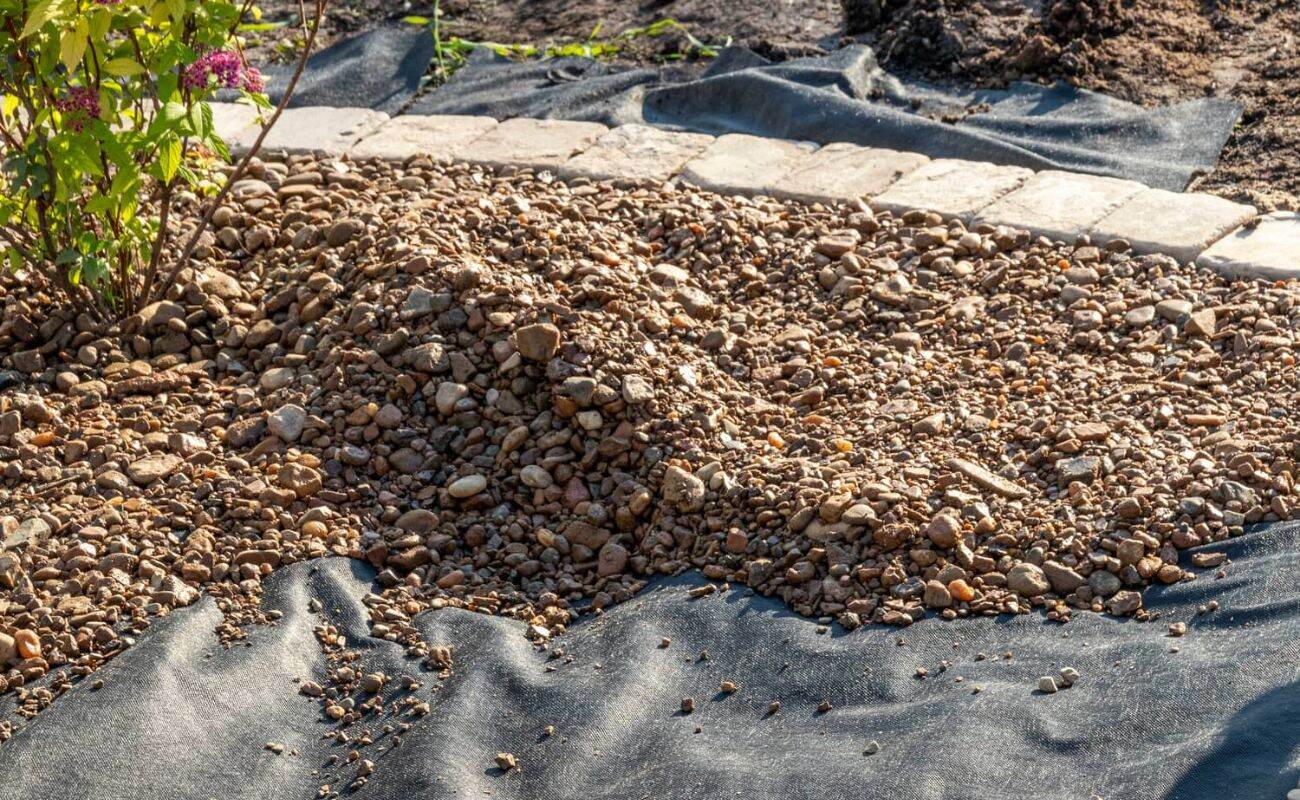
Installing Weed Barrier
One common issue with outdoor spaces is the growth of weeds and grass between patio stones. To prevent this, it is important to install a weed barrier before laying down the base material. Here’s how to do it:
- Cut the weed barrier: Measure the dimensions of your patio area and cut the weed barrier material accordingly. Make sure to leave a few inches of overlap along each edge to ensure complete coverage.
- Clear the area: Remove any remaining debris or loose materials from the ground to create a clean surface for the weed barrier.
- Lay down the weed barrier: Unroll the weed barrier over the prepared ground, ensuring that it covers the entire patio area. Smooth out any wrinkles or folds to ensure a flat and even surface.
- Secure the weed barrier: Use landscape staples or stakes to secure the weed barrier to the ground. Place them approximately every 2-3 feet along the edges and in the middle of the barrier to ensure it stays in place.
- Trim excess material: Trim any excess weed barrier material along the edges of the patio area using a pair of scissors or utility knife. This will give your patio a neat and finished appearance.
By installing a weed barrier, you will greatly reduce the likelihood of weeds and grass growing between your patio stones. This will not only save you time and effort in the long run but also help maintain the overall appearance of your patio.
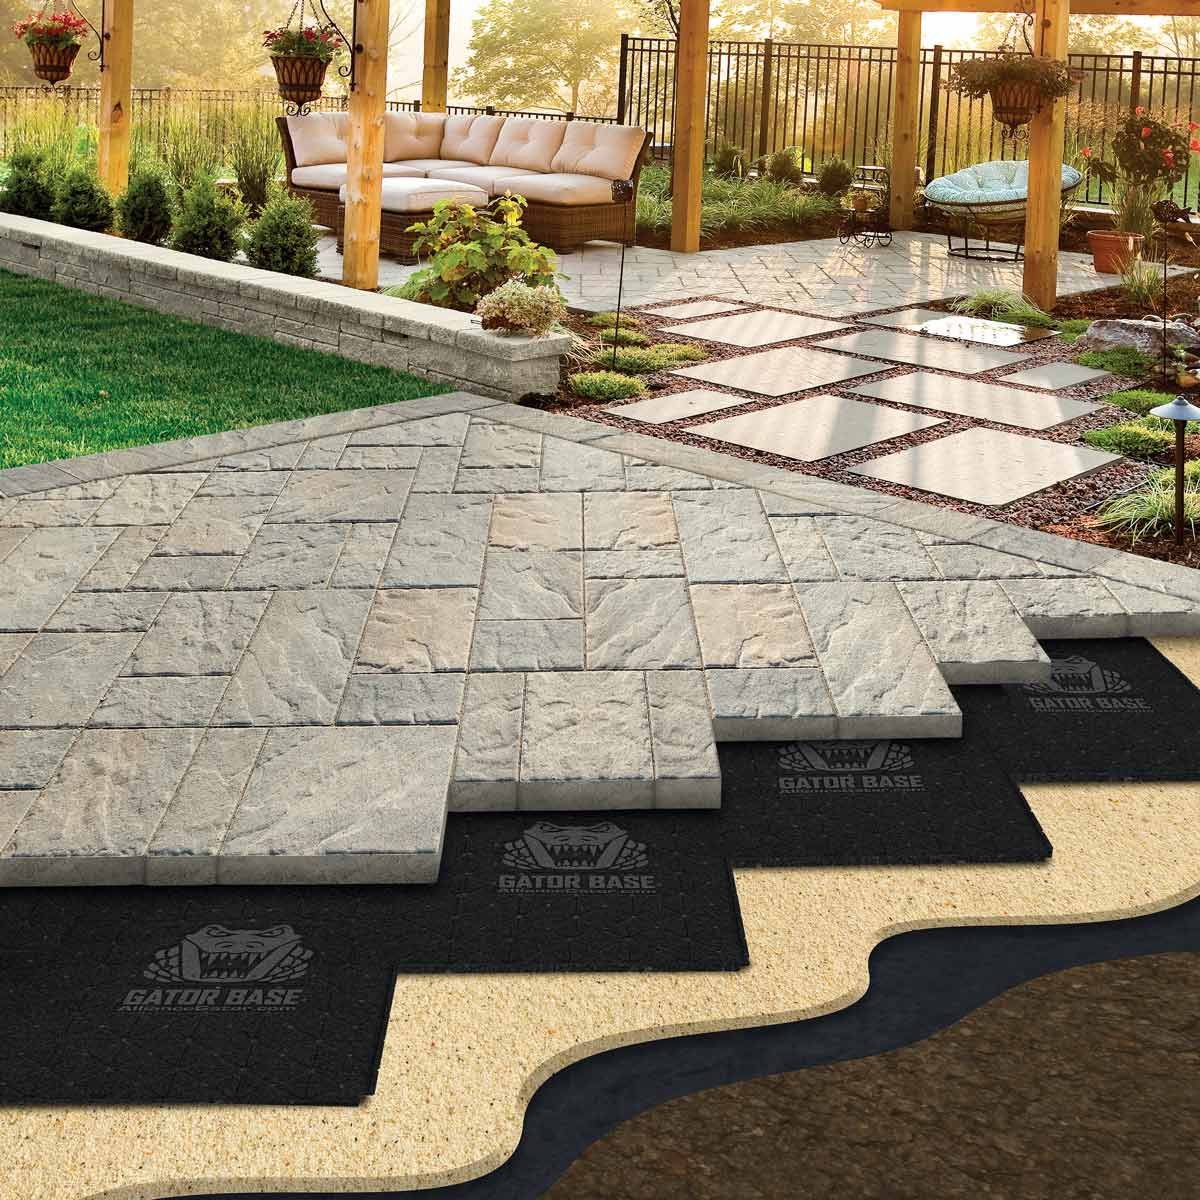
Before laying patio stones, make sure to properly prepare the base by compacting the soil, adding a layer of gravel for drainage, and then a layer of sand for leveling. This will ensure a stable and long-lasting patio surface.
Read more: What To Put Under Pots On A Patio
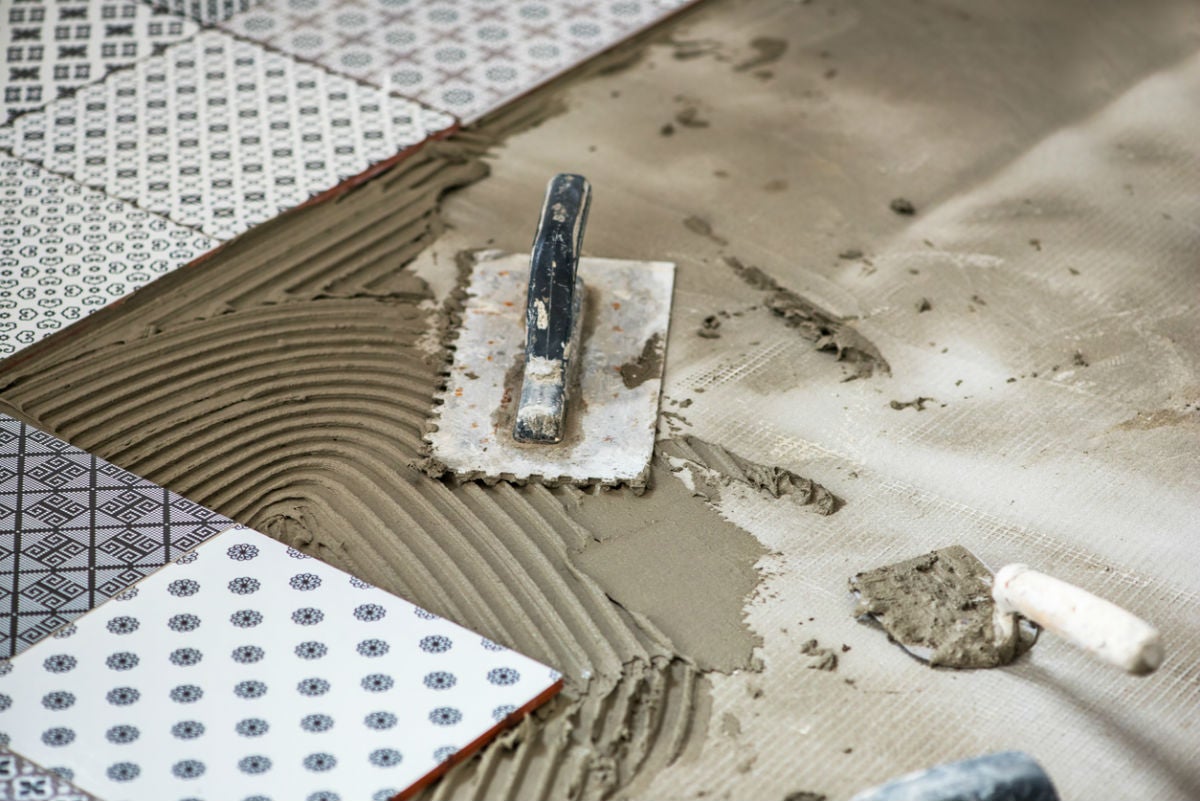
Adding a Base Layer
Once the weed barrier is in place, it’s time to add a base layer to provide stability and support for your patio stones. Here’s how to do it:
- Choose the base material: Select the appropriate base material based on your preference and the recommendations for your patio project. Common options include gravel, sand, crushed stone, or a combination of these materials.
- Spread the base material: Begin by spreading a layer of the chosen base material evenly over the weed barrier. The thickness of the base layer will depend on the size and weight of your patio stones, but a general rule of thumb is to aim for a layer that is approximately 2-4 inches thick.
- Level the base material: Use a rake or straight-edge board to level the base material and ensure a flat and even surface. Pay attention to any low or high spots and make adjustments as necessary. Having a properly leveled base layer will contribute to the stability and longevity of your patio.
- Compact the base material: To enhance the stability of the base layer, use a tamper or plate compactor to compact the material. This will help to create a solid and firm foundation for your patio stones.
- Recheck for level: After compacting the base material, double-check for levelness using a long, straight board or level. Make any necessary adjustments to ensure an even surface across the entire patio area.
The addition of a properly prepared base layer is essential for the longevity and stability of your patio. Taking the time to ensure a well-leveled and compacted base will help prevent shifting and settling of the patio stones over time.
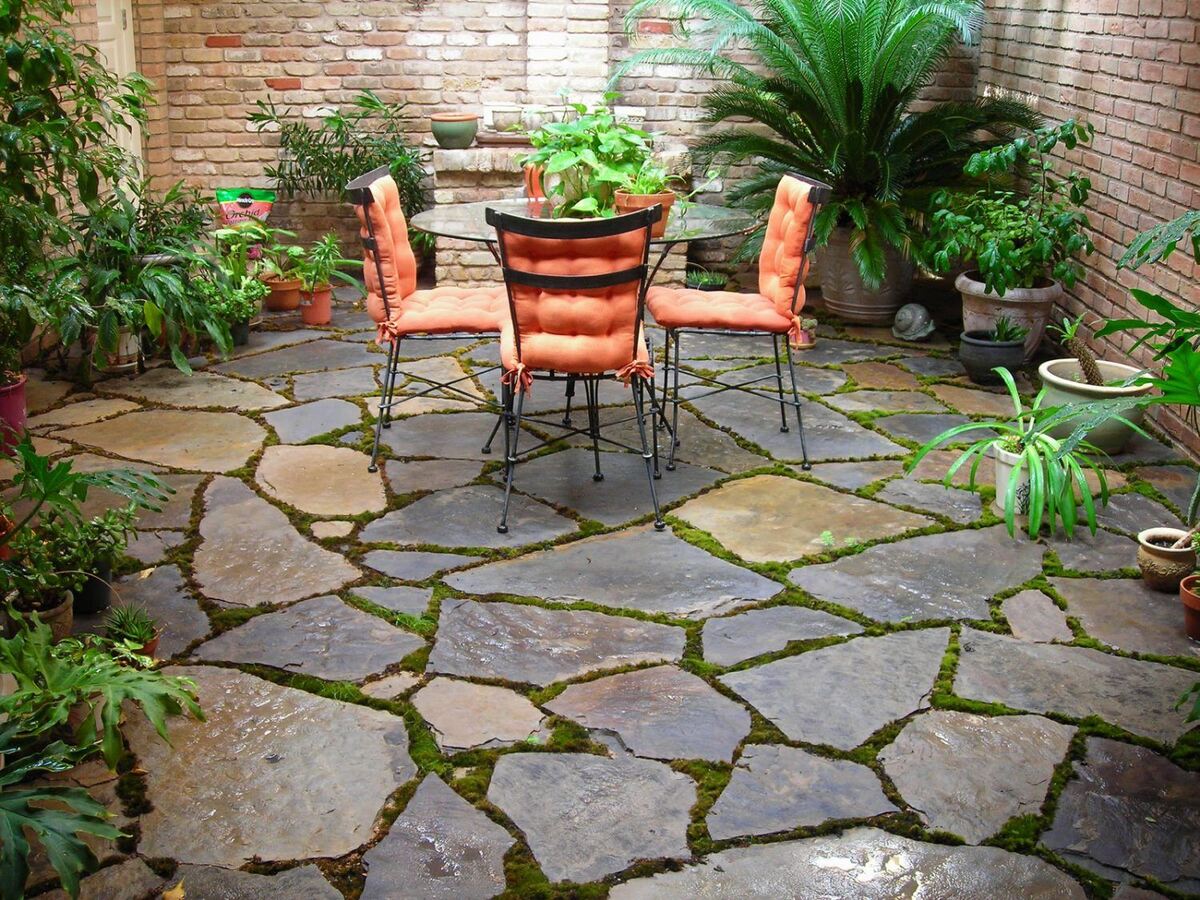
Placing the Patio Stones
With the base layer in place, it’s time to start placing the patio stones. This step requires careful attention to detail to ensure proper alignment and spacing. Here’s how to do it:
- Plan the layout: Before placing the patio stones, plan the layout to determine the best arrangement for your patio. Consider factors such as the size and shape of the stones, any desired patterns, and the overall design of your outdoor space.
- Start in one corner: Begin placing the patio stones in one corner of the patio area. Make sure to leave a small gap, usually around 1/8 to 1/4 inch, between each stone to allow for proper drainage and to accommodate any necessary adjustments.
- Tap stones into place: Use a rubber mallet or a hammer with a block of wood to gently tap each stone into place. This will help ensure that it is properly seated on the base material and level with the surrounding stones.
- Check for level and alignment: As you place each stone, use a level to check for both levelness and alignment with the adjacent stones. Make any adjustments as needed to maintain a uniform surface.
- Continue placing stones: Work your way across the patio area, placing stones one by one. Take your time and pay attention to the details to ensure a professional-looking installation.
Keep in mind that the exact placement process may vary depending on the specific patio stone type and any unique design considerations. Follow the manufacturer’s instructions for best results and consider seeking professional guidance if needed.
By carefully placing the patio stones, you will create an aesthetically pleasing and functional patio area that will enhance your outdoor living space for years to come.
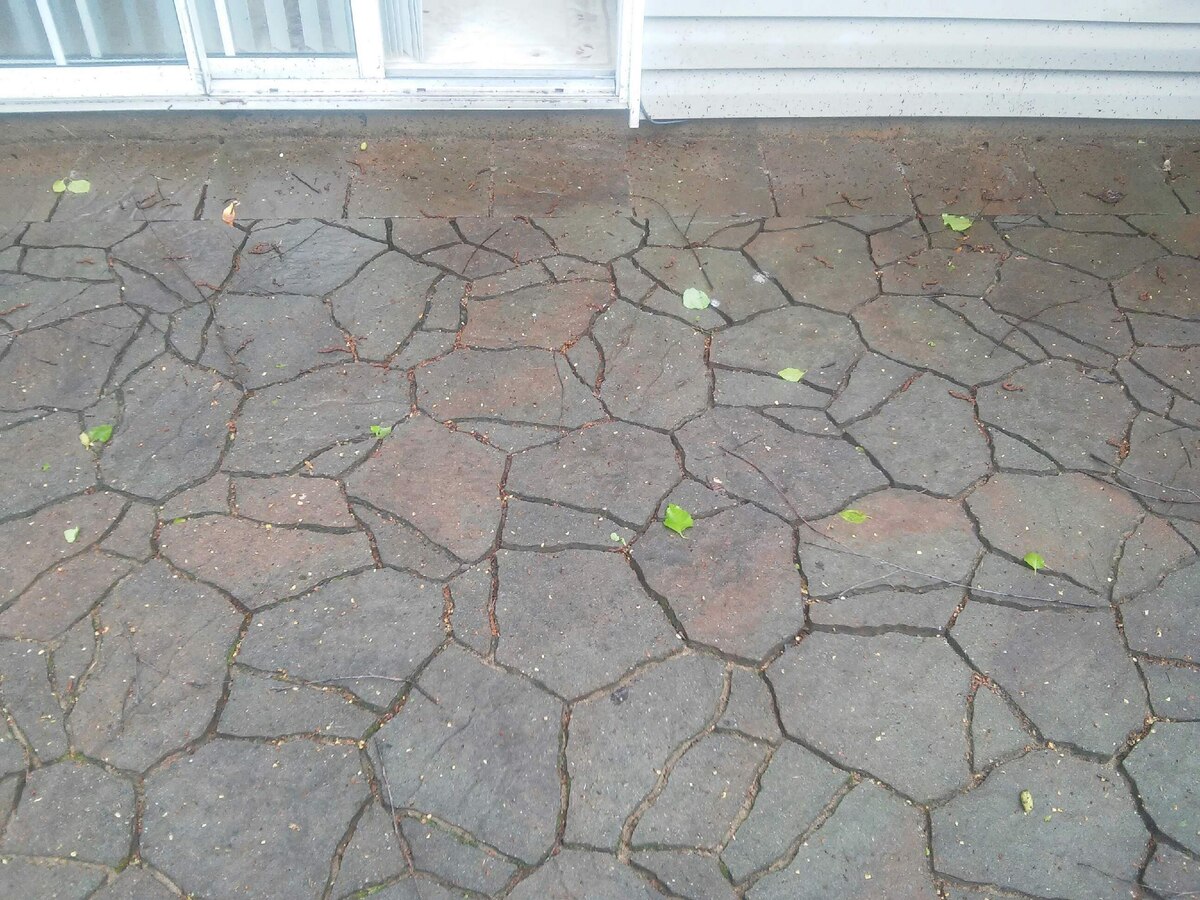
Filling the Gaps
Once the patio stones are in place, it’s time to fill in the gaps between them. This step not only enhances the overall appearance of your patio but also helps to stabilize the stones and prevent weed growth. Here’s how to fill the gaps:
- Select the filling material: Depending on your preference and the look you want to achieve, choose an appropriate material for filling the gaps. Common options include polymeric sand, regular sand, or stone dust.
- Pour the filling material: Pour the filling material onto the patio surface, ensuring that it goes into the gaps between the stones. Use a broom or brush to sweep the material into the gaps and ensure even distribution.
- Compact the filling material: Use a tamper or plate compactor to gently compact the filling material. This will help to settle it into the gaps and create a more stable surface. Repeat this step if necessary to ensure the gaps are fully filled.
- Clean the surface: Use a leaf blower or a broom to remove any excess filling material from the surface of the patio stones. This will give your patio a clean and finished appearance.
- Water the area: Once the filling material is in place and compacted, lightly mist the patio surface with water. This will activate the binding agents in some filling materials, helping to create a solid bond and prevent shifting.
Regular maintenance, such as sweeping and topping off the filling material periodically, will help ensure that the gaps remain filled and prevent weeds from taking root.
Filling the gaps between patio stones not only enhances the aesthetic appeal of your patio but also helps to maintain their stability and prevents weed growth. Take your time during this step to achieve a clean and cohesive look for your outdoor space.
Sealing the Stones
Sealing the patio stones is an optional but beneficial step that can help protect them from stains, moisture penetration, and the effects of weathering. Here’s how to seal the patio stones:
- Clean the stones: Before applying the sealer, ensure that the patio stones are clean and free of any debris, dirt, or stains. Use a mild detergent and water to scrub the surface and remove any stubborn stains.
- Choose the right sealer: Select a high-quality sealer specifically formulated for the type of patio stones you have. Consult with a professional at your local home improvement store to determine the best sealer for your project.
- Test the sealer: Before applying the sealer to the entire patio, test it on a small, inconspicuous area of one stone. This will help ensure compatibility and allow you to evaluate the desired finish and penetration of the sealer.
- Apply the sealer: Follow the manufacturer’s instructions for the specific sealer you are using. Typically, you will pour the sealer into a paint tray or shallow container and use a paint roller or brush to evenly apply it to the surface of the stones. Work in small, manageable sections to ensure thorough coverage.
- Allow for proper drying and curing: After applying the sealer, allow it to dry and cure according to the manufacturer’s recommendations. Typically, this will involve letting the patio stones dry for several hours or overnight before walking or placing any furniture on them.
Sealing the stones adds an extra layer of protection, making them more resistant to stains, discoloration, and the effects of natural elements. It also enhances their color and shine, giving your patio a polished and well-maintained appearance.
Remember that sealing is not a one-time process. It is recommended to reapply the sealer every few years or as needed, depending on the wear and tear your patio receives.
Read more: What To Put On A Patio
Conclusion
Creating a patio with sturdy and attractive patio stones is a fantastic way to enhance your outdoor living space. By properly preparing the area, selecting the right materials, and following the steps outlined in this article, you can ensure a stable and long-lasting patio foundation.
First, take the time to select the right material for your patio base, considering factors such as climate, stone size, and budget. Gravel, sand, crushed stone, or concrete are all viable options, each with its own advantages and considerations.
Next, prepare the area by clearing it of debris, marking the boundaries, and measuring the dimensions. It’s important to check the natural drainage and make any necessary adjustments to prevent water pooling on your patio.
Once the area is prepared, level the ground using a tamper or compactor, ensuring a smooth and even surface. Install a weed barrier to prevent weed growth between the stones, followed by the base layer of your chosen material. Remember to compact the base layer for added stability.
With the base layer in place, carefully place the patio stones, ensuring proper alignment and spacing. Take your time and use a level to achieve a professional-looking installation.
After placing the stones, fill the gaps between them with polymeric sand, regular sand, or stone dust. Make sure to compact the filling material for added stability and water the area to activate binding agents if necessary.
Finally, consider sealing the patio stones to protect them from stains, moisture, and weathering. Choose a high-quality sealer and follow the manufacturer’s instructions for application and drying.
By following these steps and taking the time to properly install your patio, you can create a beautiful and functional outdoor space that will withstand the test of time. Enjoy the benefits of your well-crafted patio for relaxing, entertaining, and creating lasting memories with family and friends.
Frequently Asked Questions about What To Put Under Patio Stones
Was this page helpful?
At Storables.com, we guarantee accurate and reliable information. Our content, validated by Expert Board Contributors, is crafted following stringent Editorial Policies. We're committed to providing you with well-researched, expert-backed insights for all your informational needs.


0 thoughts on “What To Put Under Patio Stones”