Home>Furniture>Outdoor Furniture>How To Make A Stone Patio
Outdoor Furniture
How To Make A Stone Patio
Modified: October 18, 2024
Learn how to create a stunning stone patio for your outdoor furniture, with step-by-step instructions and expert tips. Transform your backyard into a peaceful oasis.
(Many of the links in this article redirect to a specific reviewed product. Your purchase of these products through affiliate links helps to generate commission for Storables.com, at no extra cost. Learn more)
Introduction
Creating a stone patio is a wonderful way to enhance the outdoor space of your home. Whether you want a cozy spot for relaxation or a grand entertainment area, a well-designed and properly constructed stone patio can provide a beautiful and durable solution. In this article, we will guide you through the step-by-step process of building a stone patio, from planning and designing to the final touches.
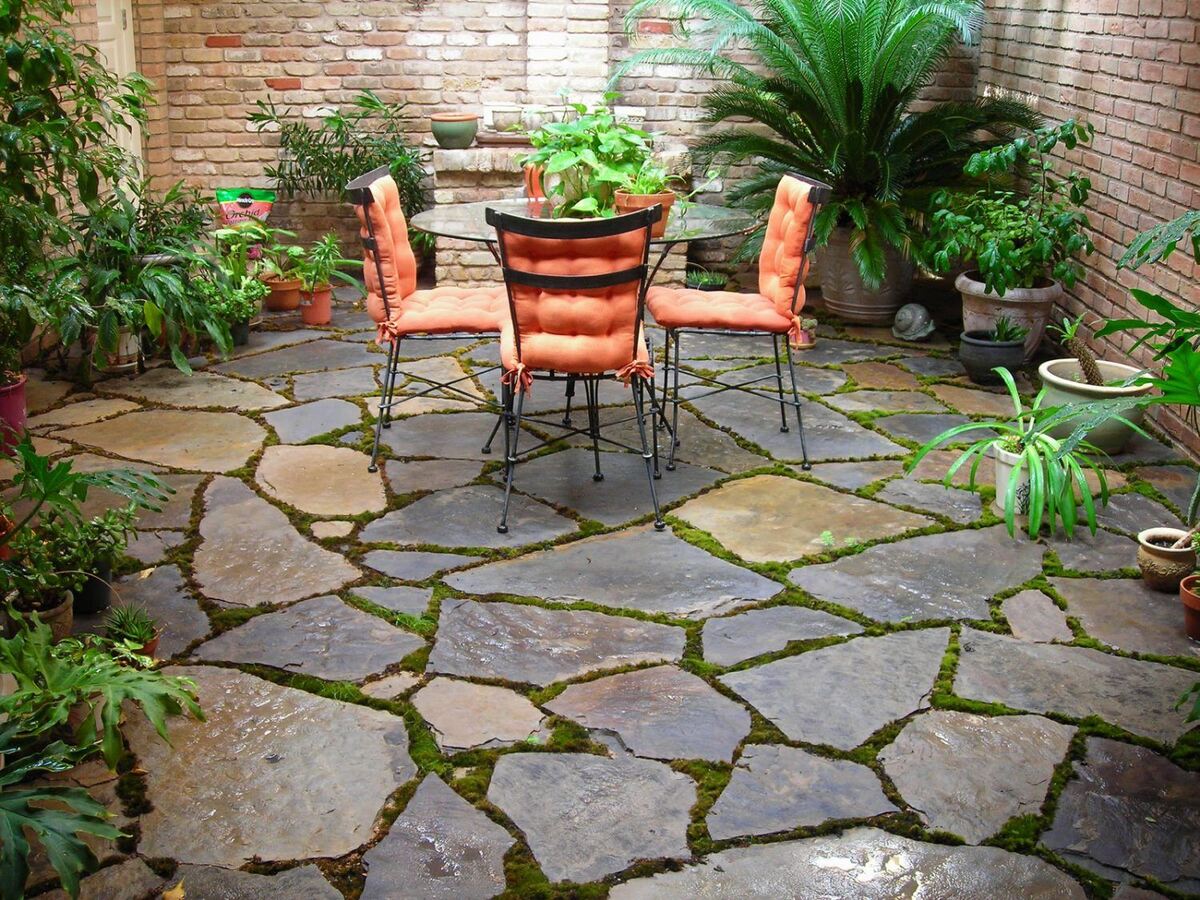
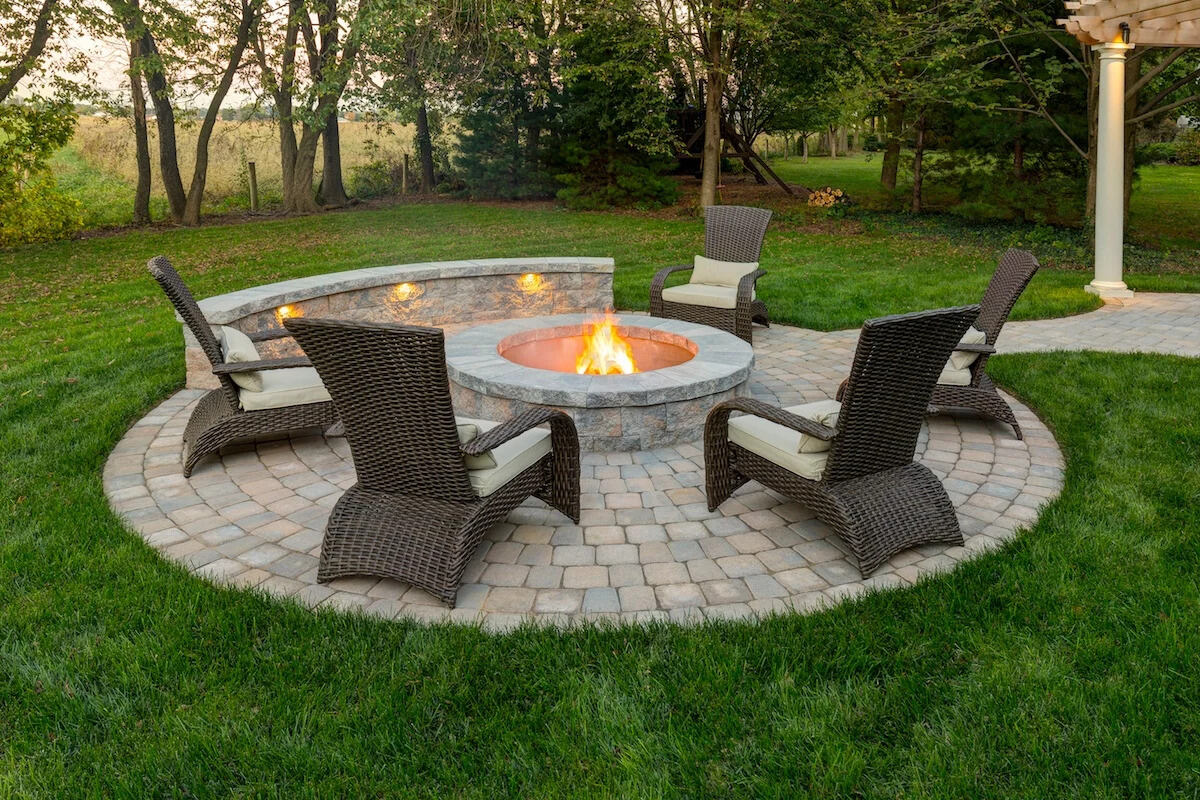
A stone patio offers a timeless and natural aesthetic that can complement any style of home. It can be a versatile space that caters to a variety of activities, such as outdoor dining, lounging, or even hosting gatherings with family and friends. By following the right techniques and using quality materials, you can create a patio that lasts for years to come.
Before you begin, it’s important to consider the size, shape, and location of your patio. Assess the available space in your yard and think about how you envision using your patio. Will it be a small intimate area or a large open space? This will help you determine the overall design and layout of your patio.
In addition, think about how your patio will interact with the existing landscaping and outdoor elements. Consider factors such as sun exposure, drainage, and any surrounding trees or plants. These considerations will help you create a patio that not only looks stunning but is also functional and comfortable.
Once you have a clear vision of your stone patio, it’s time to gather the necessary materials and tools. This will include the stone pavers, base material, edging material, and any additional supplies required for installation. It’s crucial to use high-quality materials to ensure the longevity and stability of your patio.
The preparation phase is equally important as it sets the foundation for a successful patio installation. Clear the area where your patio will be located and remove any existing vegetation, rocks, or debris. Level the ground and consider adding a layer of landscape fabric to prevent weed growth. Properly preparing the area will help create a stable base for your patio.
As you move forward with the installation process, follow the guidelines for proper base and edging installation to ensure stability and prevent shifting or sinking of the stones over time.
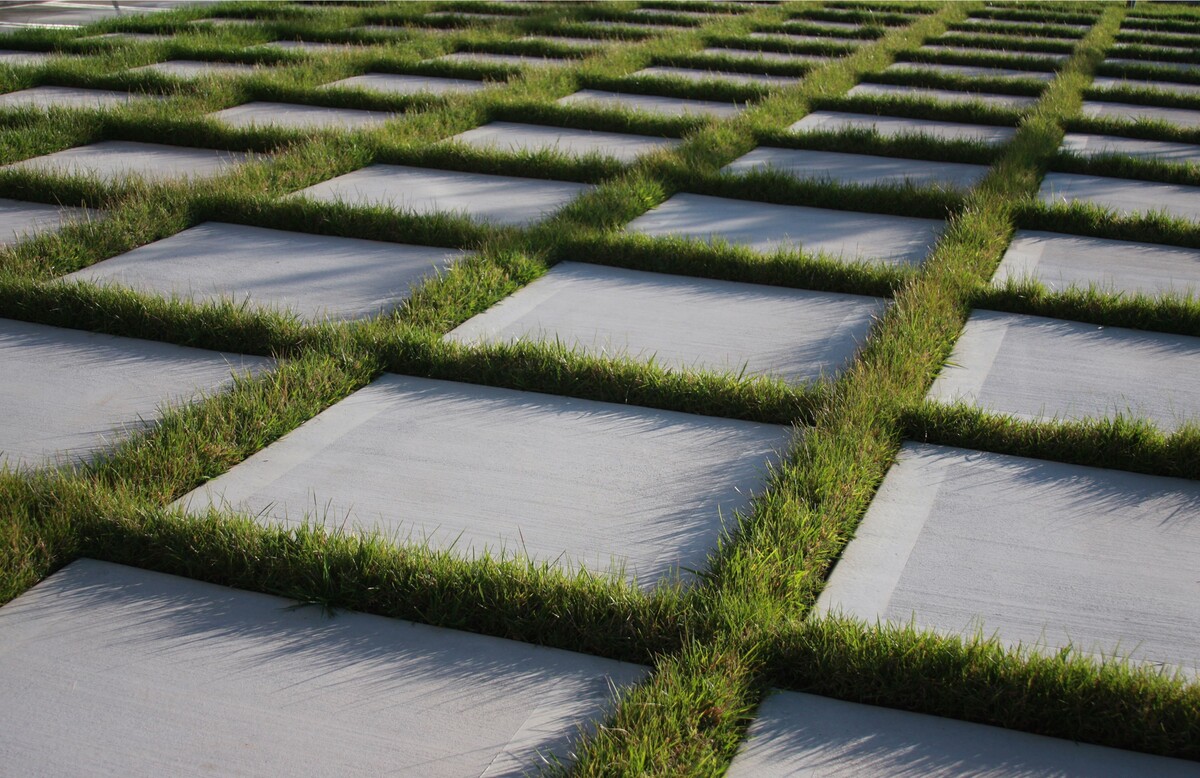
With the base and edging in place, it’s time to lay the stones. Take your time to arrange them in a pattern that suits your design aesthetic. The pattern you choose can range from simple and symmetrical to more intricate and random. Remember to allow for proper spacing between the stones to fill with jointing material.
Finally, filling the gaps between the stones with jointing material and sealing the patio will provide the finishing touches. This step not only enhances the appearance of the patio but also helps prevent weed growth, water penetration, and potential damage to the stones.
By following these steps and paying attention to detail, you can create a stunning stone patio that adds beauty, functionality, and value to your outdoor space. Now, let’s dive into each step in more detail, starting with the planning and designing process.
Key Takeaways:
- Planning and designing your stone patio is crucial for creating a beautiful and functional outdoor space. Consider the purpose, size, location, style, and features to ensure a successful patio construction.
- Proper preparation, including clearing the area, leveling the ground, and installing a stable base and edging, is essential for laying the stones and sealing the patio. Attention to detail and regular maintenance will ensure a long-lasting and enjoyable stone patio.
Read more: How To Make A Round Stone Patio
Step 1: Planning and Designing your Stone Patio
Planning and designing your stone patio is a crucial first step in the construction process. It allows you to envision the final result and ensure that your patio will meet your needs and complement your outdoor space. Here are some key considerations to keep in mind:
Determine the Purpose and Size: Think about how you want to use your patio. Will it be a space for relaxation, outdoor dining, or entertaining guests? Consider the activities you plan to do on your patio and the number of people it needs to accommodate. This will help you determine the ideal size and shape for your patio.
Choose the Location: Look for a location in your yard that offers the right balance of sun and shade. Consider factors such as privacy, views, and how the patio will interact with your existing landscaping. You may want to place the patio close to the house for easy access, or position it in a specific area to take advantage of certain features.
Survey the Terrain: Assess the slope and elevation of your yard. If you have a steep incline, you may need to consider incorporating retaining walls or steps into your patio design. Understanding the terrain will help you plan for proper drainage and determine if any additional landscaping or leveling is required.
Style and Aesthetic: Consider the overall style and aesthetic of your home and outdoor space. Your patio should harmonize with the existing architecture and landscaping. Decide if you prefer a formal, symmetrical design or a more casual and natural look. Look for inspiration in magazines, websites, or even your neighbors’ patios to get an idea of the style you prefer.
Patio Features: Think about any additional features you may want to incorporate into your patio design. This could include a fire pit, water feature, outdoor kitchen, or seating area. These features can enhance the functionality and enjoyment of your patio, so plan accordingly.
Sketch the Design: Once you have considered all these factors, sketch out a rough design of your patio. Include measurements, the placement of any features, and the overall layout. This will serve as a visual guide during the construction process and help you communicate your vision to contractors or suppliers.
Research Materials: Explore the various types of stone pavers available for your patio. Consider factors such as durability, maintenance, and how well they will complement your desired aesthetic. Look for inspiration online or visit local stone suppliers to see the different options in person.
Set a Budget: Determine your budget for the patio construction, including materials, labor, and any additional features or landscaping. Setting a budget will help you stay on track throughout the process and make informed decisions when selecting materials and contractors.
By taking the time to plan and design your stone patio carefully, you can create a space that meets your needs and reflects your personal style. Once you have a clear vision and design in place, you can move on to the next step: gathering the necessary materials and tools for construction.
Step 2: Gathering Materials and Tools
After planning and designing your stone patio, the next step is to gather all the necessary materials and tools for construction. Having the right materials and tools on hand will ensure a smooth and efficient installation process. Here’s a breakdown of what you’ll need:
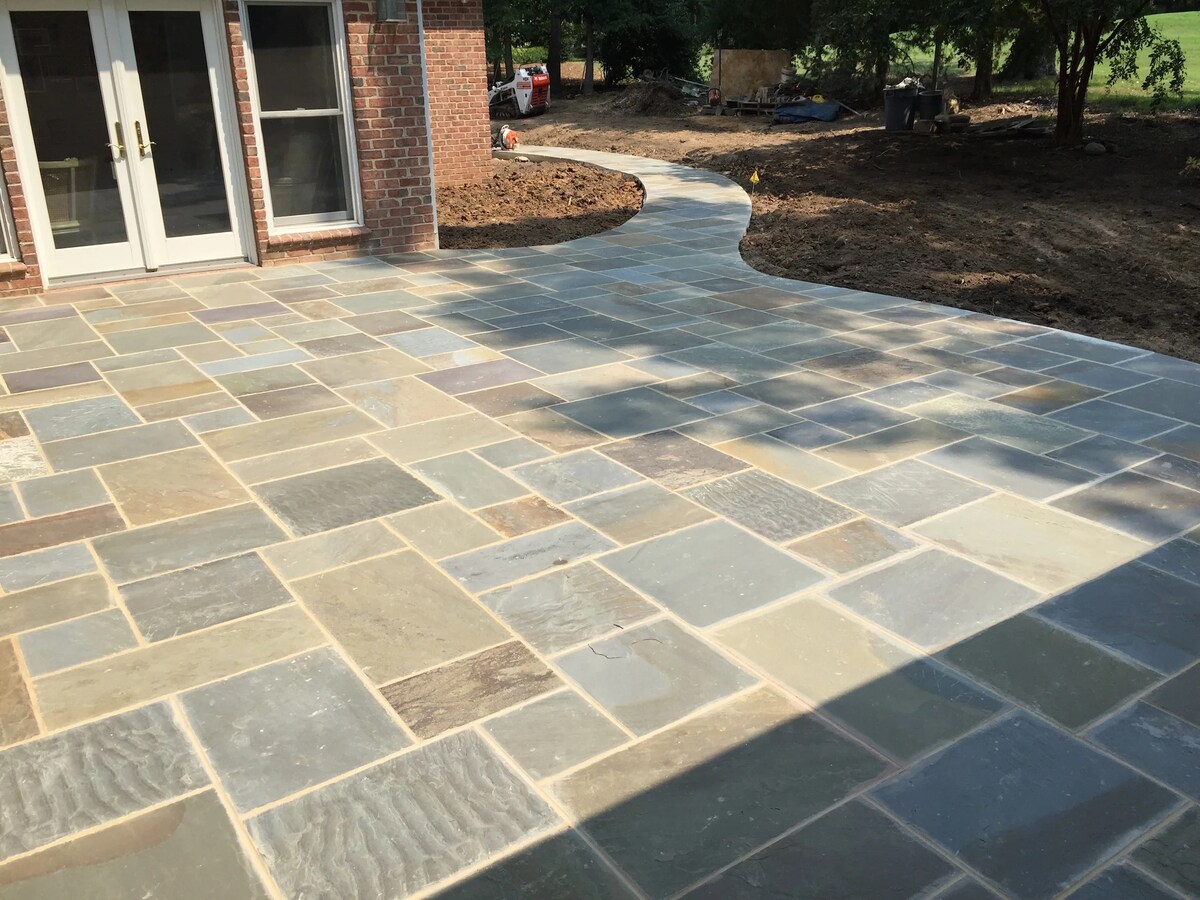
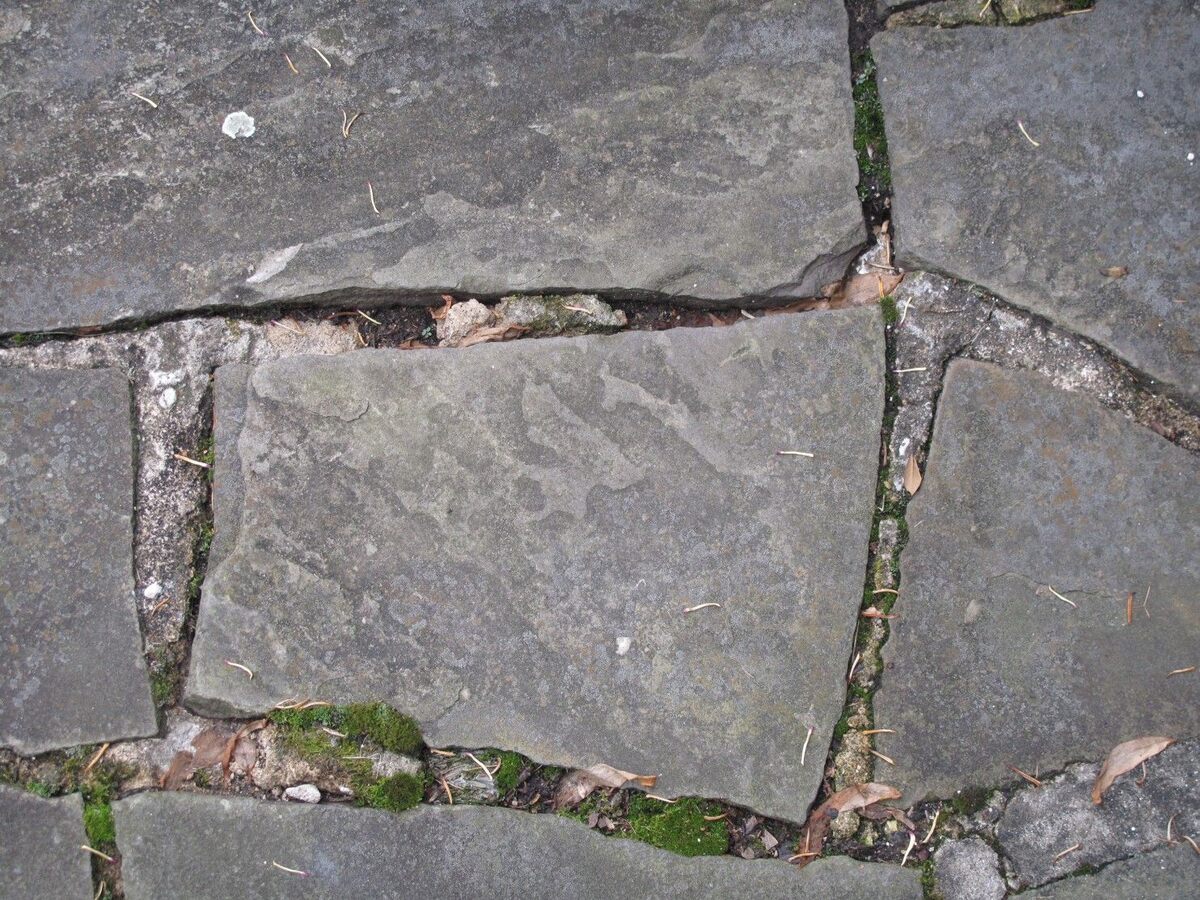
Stone Pavers: The main material for your patio will be the stone pavers. There are various types of stone pavers to choose from, such as natural stone (like flagstone or slate) or manufactured stone (like concrete pavers). Consider factors such as durability, texture, color, and how well they will complement your design aesthetic. Measure the area of your patio to determine the quantity of stone pavers needed.
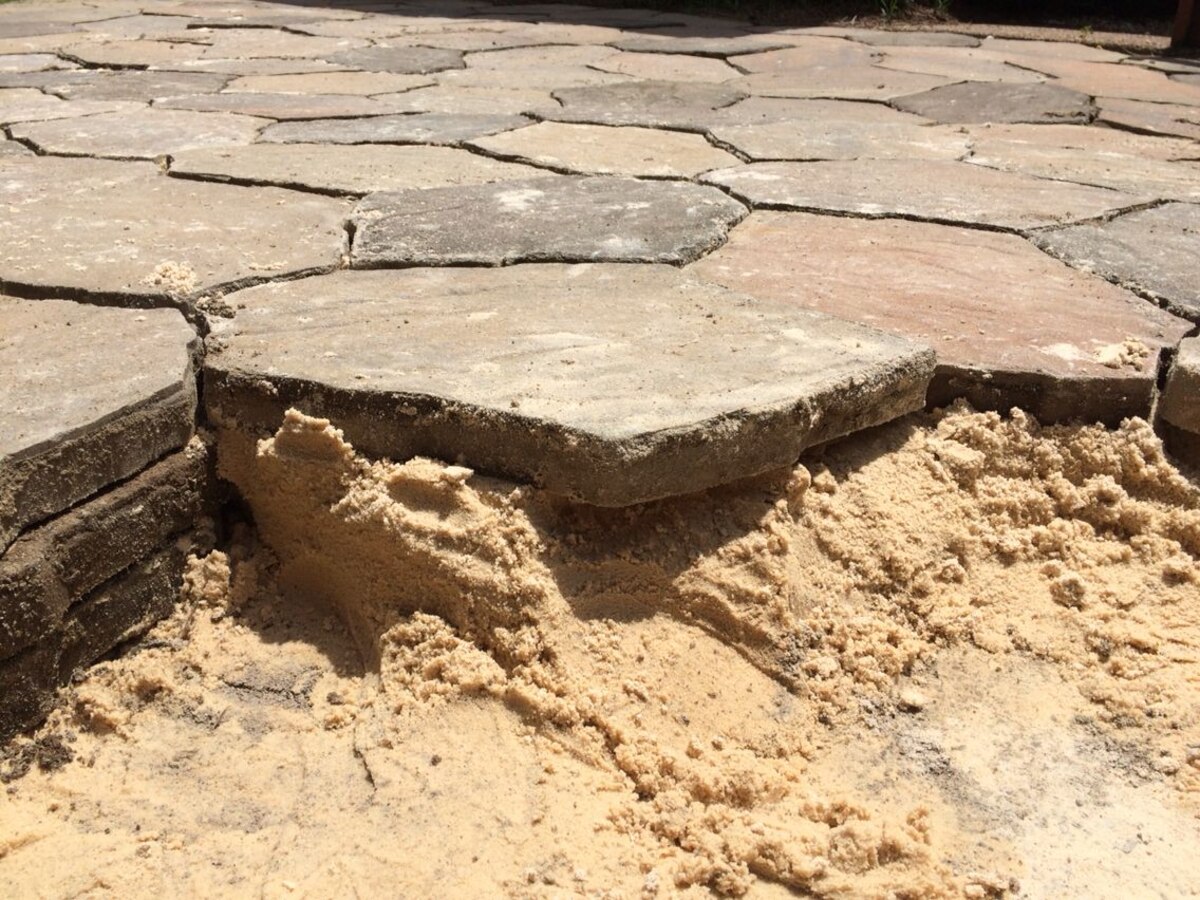
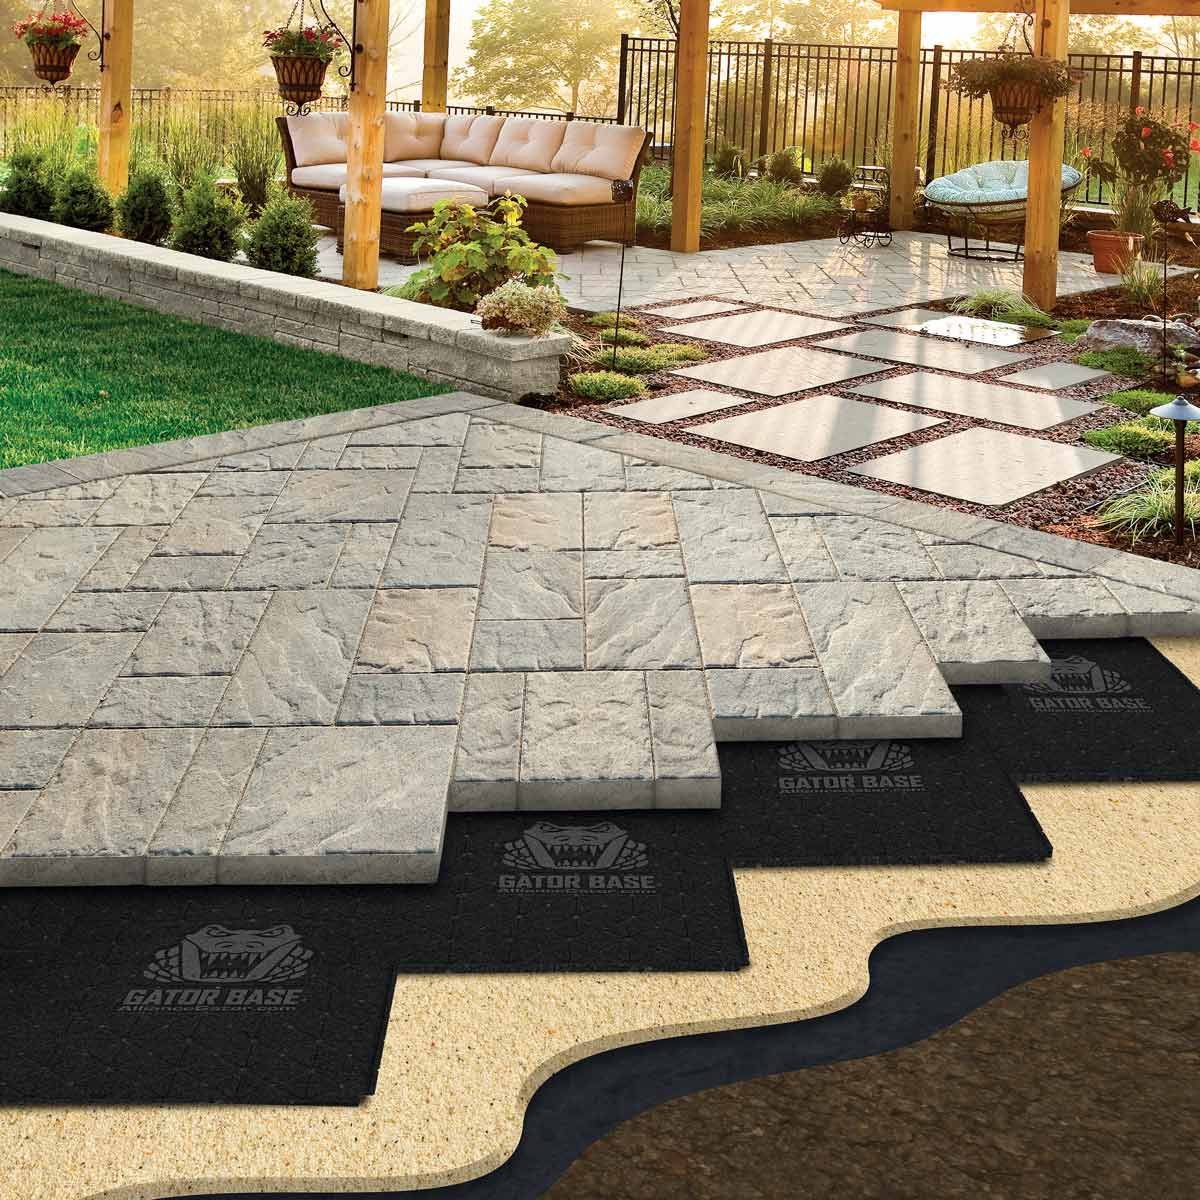
Base Material: The base material serves as a foundation for your patio. It helps to provide stability and prevent shifting or sinking of the stones over time. Common base materials include crushed stone, limestone screenings, or gravel. Calculate the amount needed based on the size of your patio and the recommended depth for the base material.
Edging Material: Edging material helps to define the boundaries of your patio and prevent the stones from shifting out of place. Options for edging material include plastic or aluminum landscape edging, brick pavers, or natural stone. Measure the perimeter of your patio to determine the length of edging material required.
Additives and Jointing Material: Depending on the type of stone pavers you choose, you may need to purchase additives or jointing material to enhance the installation. For example, if you opt for concrete pavers, you may need a polymeric sand or jointing compound to fill the gaps between the stones. Consult with the manufacturer’s recommendations and factor in the size and spacing of your pavers.
Tools: You’ll need a variety of tools for the patio installation. Here are some essential tools to have on hand:
- Shovel: for digging and leveling the area
- Rake: for smoothing and leveling the base material
- Plate compactor: for compacting the base material and ensuring stability
- Wheelbarrow: for transporting materials
- Measuring tape: for accurate measurements
- Masonry saw or chisel: for cutting or shaping stones
- Rubber mallet: for tapping stones into place
- Level: for ensuring stones are even and properly aligned
- Broom: for sweeping and cleaning the patio surface
- Jointing tool: for filling gaps with jointing material
Safety Equipment: Don’t forget about safety! Make sure you have the appropriate safety equipment, such as work gloves, safety glasses, and knee pads, to protect yourself during the construction process.
Additional Materials: Depending on your specific patio design and any additional features you plan to incorporate, you may need other materials such as landscape fabric, sand, gravel, or mortar. Consider the specific requirements of your design and make a comprehensive materials list.
Once you have gathered all the necessary materials and tools, you’ll be well-prepared for the next steps in the patio installation process. In the following steps, we will cover preparing the area, installing the base and edging, laying the stones, filling gaps, and sealing the patio. Let’s move on to Step 3: Preparing the Area for the Patio.
Step 3: Preparing the Area for the Patio
Before you can begin installing your stone patio, it’s essential to properly prepare the area. This step sets the foundation for a successful and long-lasting patio. Here’s a breakdown of what you need to do:
Clear the Area: Start by clearing the area where your patio will be located. Remove any existing vegetation, rocks, or debris. Use a shovel, rake, or other suitable tools to create a clean and level surface. Make sure to dispose of the debris properly.
Mark the Boundaries: Use marking spray paint or stakes and string to outline the boundaries of your patio. This will help you visualize the shape and size of the patio and guide you during the installation process.
Consider Drainage: Proper drainage is crucial for any outdoor space, including your patio. If your yard tends to hold water or if you live in an area with heavy rainfall, you may need to consider incorporating a drainage system into your patio design. This can include installing drain pipes or creating a slight slope to direct water away from the patio. Consult with a professional if you’re unsure about the drainage requirements for your specific situation.
Level the Ground: Use a rake or shovel to level the ground within the marked boundaries. Remove any high spots and fill in any low areas. The goal is to create a smooth and even surface for the base material and stone pavers.
Consider Weed Prevention: To prevent weed growth within your patio, consider adding a layer of landscape fabric. Lay the fabric directly over the prepared ground, ensuring that it covers the entire patio area. Cut holes in the fabric to allow for drainage if necessary. This added barrier will help inhibit weed growth, making maintenance easier in the long run.
Compact the Ground: After leveling the ground, use a plate compactor or hand tamper to compact the soil. This helps to ensure a solid and stable base for your patio. Compact the entire patio area, working in small sections at a time. Be sure to follow the manufacturer’s instructions for the specific compactor or tamper you are using.
Double Check the Levelness: Use a level to double-check that the entire patio area is even and properly graded. This is especially important if you are planning on adding additional features, such as a table or seating, as an uneven surface can cause these items to wobble or be unstable.
Inspect for Proper Slope: Take a step back and look at the overall slope of the patio area. It’s essential to have a slight slope (about 1/8 inch per foot) away from your house to prevent water from pooling or seeping into your home’s foundation. If needed, make adjustments to ensure proper drainage.
Final Cleanup: After completing the preparation process, take the time to do a final cleanup of the area. Remove any additional debris or loose materials that may have accumulated. This will ensure a clean and debris-free surface for the installation of the base material.
By thoroughly preparing the area for your patio, you’re setting the stage for a successful installation and ensuring the stability and longevity of your stone patio. With the area ready, you can move on to the next step: installing the base material and edging.
Before laying the stones for your patio, make sure to properly prepare the base by leveling the ground, adding a layer of gravel, and compacting it to create a stable foundation for the stones.
Step 4: Installing the Base and Edging
With the area prepared for your stone patio, it’s time to move on to the next step: installing the base material and edging. These components are crucial for creating a stable foundation and ensuring the proper alignment and positioning of your stone pavers. Here’s what you need to do:
1. Add the Base Material: Start by spreading a layer of the base material evenly over the prepared area. The recommended thickness of the base material will depend on the specific requirements of your patio, but a general rule of thumb is around 4 to 6 inches. Use a rake or shovel to distribute the material and create a level surface.
2. Compact the Base Material: Once the base material is spread, use a plate compactor or hand tamper to compact it. This step is essential for creating a solid and stable base. Begin by compacting the edges of the patio and work your way towards the center. Repeat this process until the entire patio area is compacted, ensuring there are no soft or unstable spots.
3. Check for Proper Slope: After compacting the base material, check again for the proper slope away from your house. Use a level or straight edge to ensure that the patio has a slight slope of about 1/8 inch per foot. This slope will help to divert water away from your home and prevent any potential issues with water pooling or seepage.
4. Install the Edging: Next, it’s time to install the edging material. Place the edging material along the perimeter of the patio, ensuring that it is securely anchored into the ground. This will help to define the boundaries of your patio and hold the stones in place. Use a rubber mallet to tap the edging into the ground, ensuring it is level and straight.
5. Secure the Edging: Once the edging is in place, use landscape spikes or anchors to secure it. Place the spikes or anchors at regular intervals along the length of the edging, driving them into the ground through the pre-drilled holes or slots in the edging material. This will help to prevent any movement or shifting of the edging over time.
6. Double-check the Alignment: After securing the edging, double-check the alignment and positioning of the stones within the patio area. Make any necessary adjustments to ensure that the stones will fit properly and look aesthetically pleasing. Take the time to plan the layout and arrangement of the stones, considering any specific patterns or designs you have in mind.
7. Inspect for Stability: Once the base and edging are in place, inspect the overall stability of your patio foundation. Walk on the compacted base material and edging to make sure they can withstand weight without shifting or sinking. If you notice any areas that seem unstable, add more base material and compact it again until you achieve a solid and sturdy foundation.
Installing the base material and edging is a critical step in creating a durable and well-constructed stone patio. When done correctly, it ensures that the patio is properly supported and the stones are securely held in place. With the base and edging in place, you are ready to proceed with the next step: laying the stones on your patio surface.
Read more: How To Grout Patio Stones
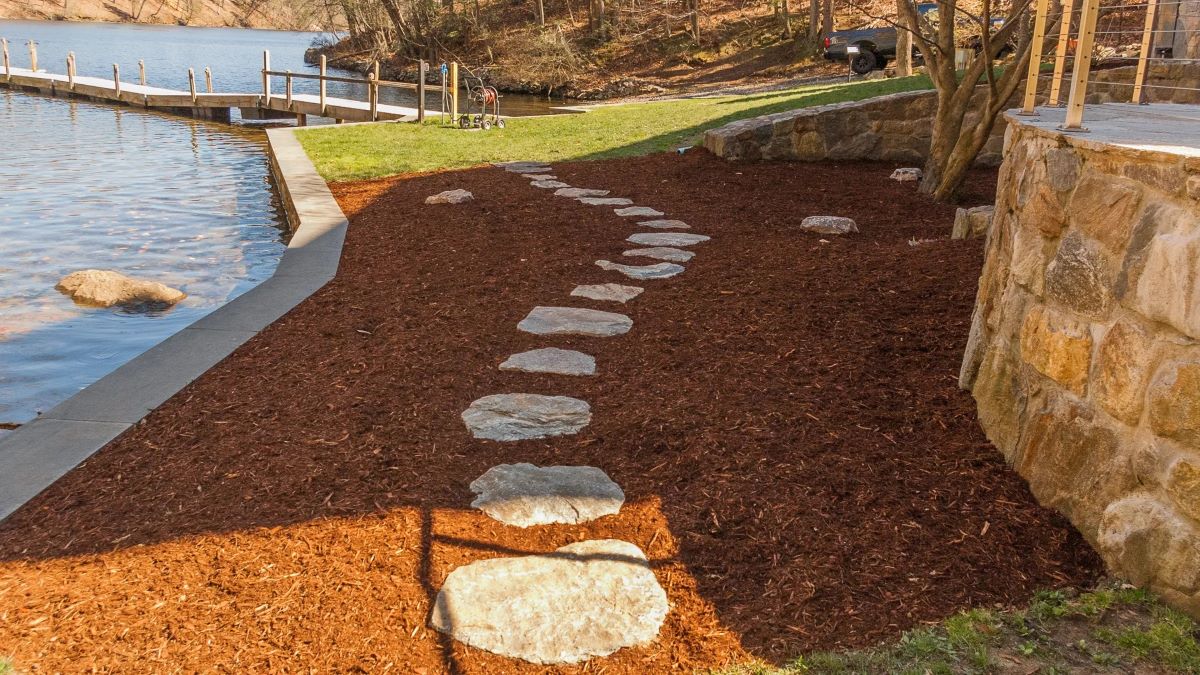
Step 5: Laying the Stones
With the base material and edging installed, it’s time to move on to the exciting step of laying the stones for your patio. This is where you can unleash your creativity and bring your design vision to life. Here’s a step-by-step guide on how to lay the stones:
1. Prepare the Stones: Before laying the stones, make sure they are clean and free of any debris. If you’re using natural stone pavers, inspect them for any irregularities or damaged edges. Additionally, if you’ve chosen concrete pavers, ensure that they are properly cured and ready for installation.
2. Start from a Corner: Begin laying the stones from one corner of your patio and work your way out. This will help ensure a consistent and balanced layout. Start with a full-sized stone and use a rubber mallet to tap it firmly into place, making sure it is level with the surrounding stones and the edging.
3. Check for Levelness: As you lay each stone, use a level to check that it is even and properly aligned with the adjacent stones. This is important for both the aesthetics and functionality of your patio. If needed, add or remove base material underneath the stones to achieve the desired levelness.
4. Plan the Pattern: Depending on your design preferences, you can choose to lay the stones in a specific pattern or arrangement. This could be a simple and symmetrical pattern, like a running bond or basketweave, or a more complex and random pattern. Take the time to plan ahead and visualize the overall look of your patio.
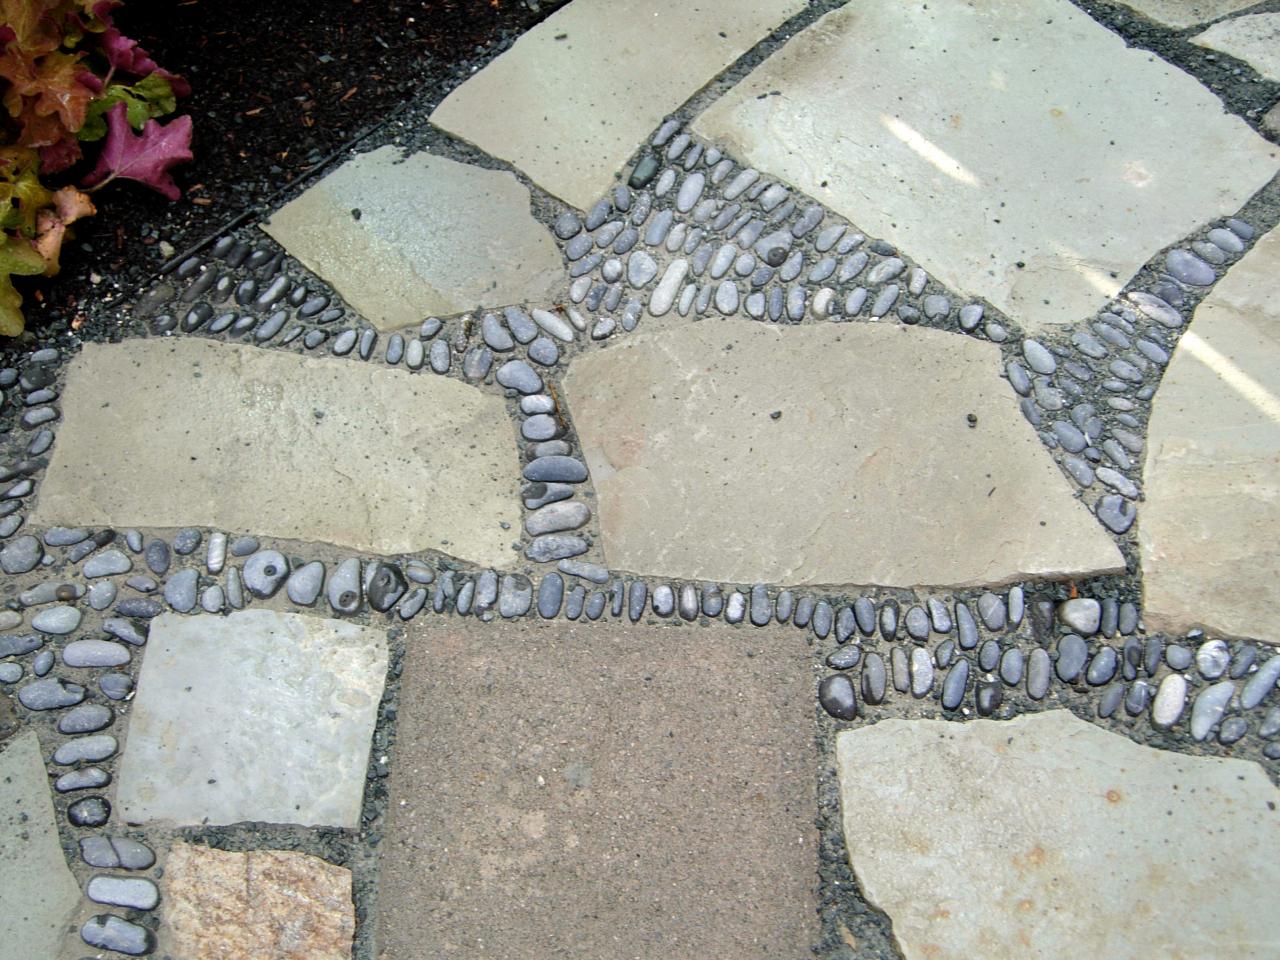
5. Fill the Gaps: As you lay the stones, be mindful of the spacing between them. Leave a small gap, around ¼ to ½ inch, to allow for jointing material. This gap will be filled later to provide stability and prevent weed growth. Maintain consistent spacing throughout the patio, using spacers or your finger to guide you.
6. Cut and Shape Stones: Inevitably, there will be areas where full-sized stones won’t fit. In such cases, you may need to cut or shape the stones to fit the desired space. Use a masonry saw or chisel to carefully trim the pavers, following the marked lines or templates. Take caution and wear protective gear when cutting stones.
7. Maintain a Balanced Layout: As you lay the stones, step back occasionally to assess the overall balance and symmetry of the patio. Avoid clustering similar stones in one area and distribute different sizes and shapes evenly. This will create a visually pleasing and harmonious appearance.
8. Double-check Alignment: Throughout the process, double-check the alignment and positioning of the stones. Ensure that they are flush with the surrounding pavers and edging. Use a rubber mallet to tap them into place gently if necessary.
9. Make Adjustments: As you progress, you may need to make adjustments to the layout or position of stones. This is normal and part of the process. Take the time to step back, assess the overall look, and make any necessary modifications to achieve the desired outcome.
10. Regularly Clean the Surface: Throughout the stone-laying process, it’s essential to regularly clean the surface of the patio. Remove any dirt, dust, or debris from the stones to ensure a clean and polished appearance.
By following these steps and taking the time to carefully lay the stones, you’ll create a visually appealing and well-constructed patio. Once all the stones are in place, you’re ready to move on to the final step: filling the gaps and sealing the patio to complete the installation process.
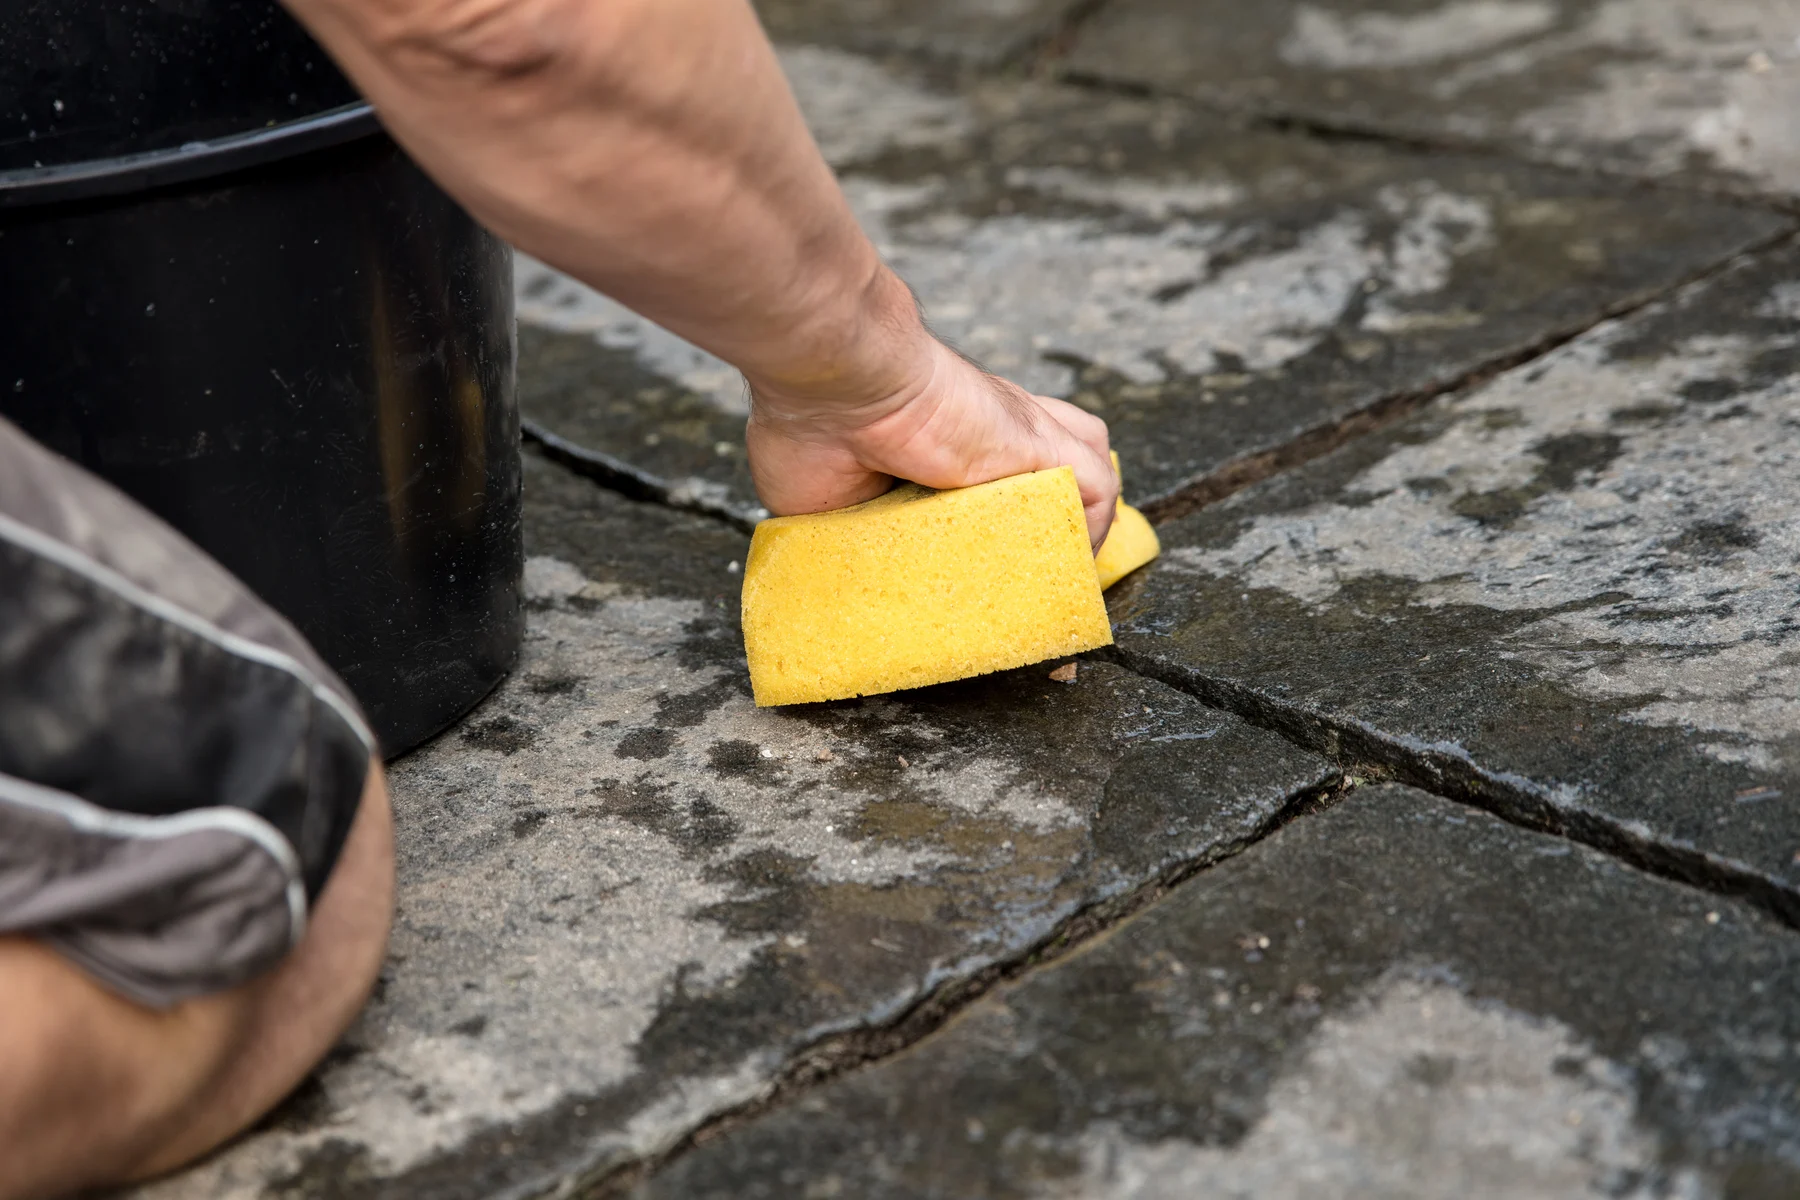
Step 6: Filling the Gaps and Sealing the Patio
With the stones laid and your patio taking shape, it’s time to focus on filling the gaps between the stones and sealing the patio. This step not only enhances the overall look of your patio but also helps to ensure its longevity and durability. Here’s how to complete this final step:
1. Clean the Surface: Before you begin filling the gaps, make sure the surface of the patio is clean and free from any debris. Sweep away any loose dirt, dust, or stone particles. This will ensure a proper bond between the jointing material and the stones.
2. Choose the Jointing Material: Select a suitable jointing material based on the type of stone pavers you used. Depending on your preference and the specific requirements of your patio, you can choose between polymeric sand, gravel, or mortar. Follow the manufacturer’s instructions for the recommended jointing material and application method.
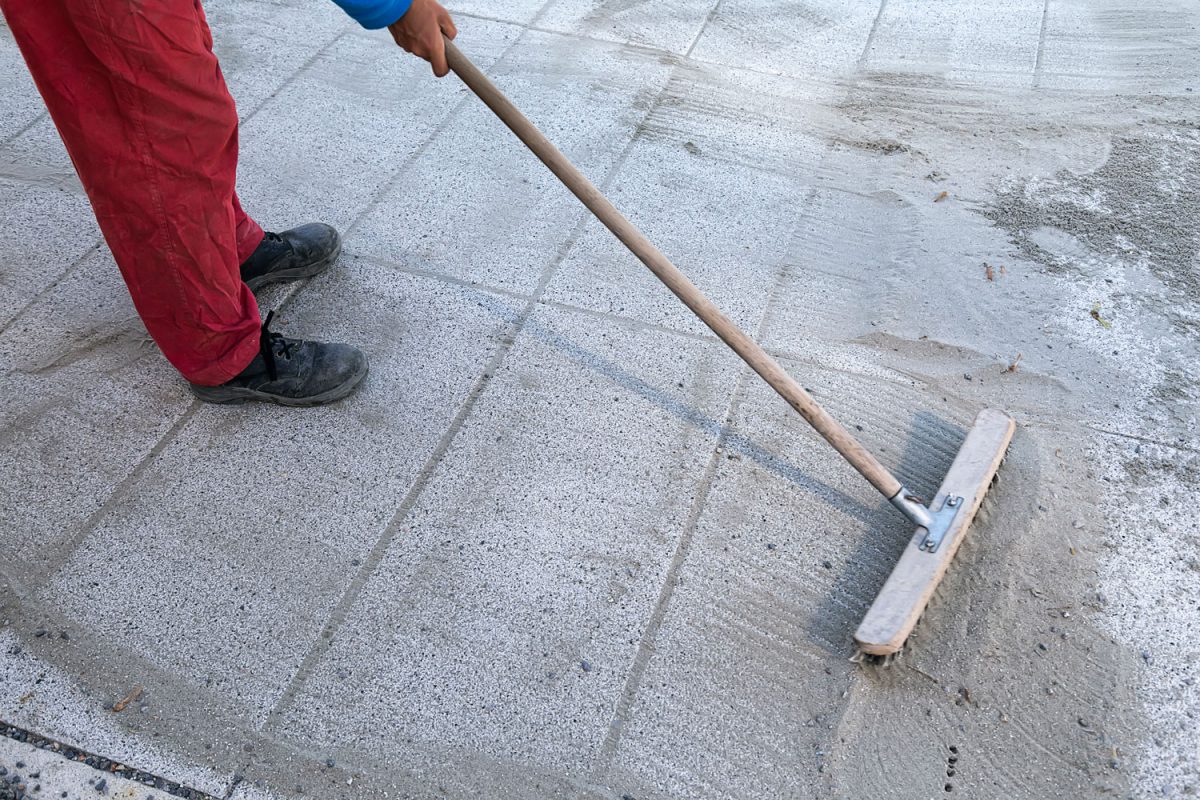
3. Fill the Gaps: Carefully pour the jointing material into the gaps between the stones. Use a broom or a small handheld brush to sweep the material into the gaps, making sure it fills them completely. Push the jointing material down into the gaps, ensuring that it is compacted and level with the top of the stones.
4. Compact and Settle the Jointing Material: After filling the gaps, use a plate compactor or a tamper to compact the jointing material gently. This will help to settle it and ensure a secure bond with the stones. Follow the manufacturer’s instructions for the specific jointing material you are using.
5. Sweep Away Excess Material: Once the jointing material is compacted, gently sweep away any excess material from the surface of the stones. Use a broom or a leaf blower to remove the excess jointing material, being careful not to dislodge it from the gaps.
6. Mist the Patio: To activate the setting process, lightly mist the patio with water. This will aid in the curing and hardening of the jointing material. Follow the manufacturer’s recommendations for the specific jointing material you are using, as different materials may have different curing processes.
7. Allow for Proper Cure Time: After misting, allow sufficient time for the jointing material to cure. This can vary depending on the specific product used, as well as environmental conditions such as temperature and humidity. Typically, it may take several hours to a full day for the jointing material to fully set and cure.
8. Apply a Sealant: Once the jointing material has cured, consider applying a sealant to protect and enhance the appearance of your patio. Depending on the type of stone pavers you used, you can choose a sealant specifically designed for that material. Sealants help to prevent stains, UV damage, and water penetration, keeping your patio looking beautiful and extending its lifespan.
9. Follow the Manufacturer’s Instructions: When applying a sealant, it’s important to carefully follow the instructions provided by the manufacturer. Apply the sealant evenly over the entire patio surface, using a brush or roller. Allow the sealant to dry completely before using the patio.
10. Regular Maintenance: Finally, make a habit of regularly maintaining your patio. Sweep away debris, leaves, and dirt on a regular basis to prevent them from accumulating and causing potential damage. Consider re-applying sealant every few years or as recommended by the manufacturer to keep your patio in top condition.
By filling the gaps and sealing your patio, you are not only enhancing its visual appeal but also protecting it from the elements and ensuring its longevity. With all the steps complete, take a step back and admire your beautifully constructed stone patio. It’s time to enjoy the fruits of your labor and create lasting memories in your outdoor oasis.
Conclusion
Congratulations! You have successfully completed the construction of your stone patio. Through careful planning, gathering the right materials and tools, preparing the area, laying the stones, filling the gaps, and sealing the patio, you have created a stunning outdoor space that will add beauty, functionality, and value to your home for years to come.
A stone patio offers a timeless and natural aesthetic that can complement any style of home. Whether you use it as a peaceful retreat for relaxation, a space for outdoor dining and entertaining, or a multifunctional gathering area, your patio will serve as an extension of your indoor living space and bring you closer to nature.
Remember, the key to a successful stone patio installation lies in meticulous planning and attention to detail. Take the time to carefully design your patio, selecting the perfect stone pavers and considering the layout and features that best suit your needs and personal style. Properly preparing the area, installing a stable base and edging, and laying the stones evenly will ensure a solid and durable foundation. Filling the gaps with jointing material and sealing the patio will enhance its appearance and protect it from the elements.
Additionally, regular maintenance is essential to keep your patio looking its best. Sweep away debris, regularly clean the surface, and reapply sealant as necessary. This will help prevent weed growth, maintain the integrity of the joints, and prolong the life of your patio.
Now that your stone patio is complete, it’s time to enjoy it with family and friends. Host gatherings, relax in the sunshine, or simply unwind with a good book. Your outdoor space has transformed into a beautiful and inviting environment that will provide countless memories and moments of joy.
Remember, a stone patio is a customizable and versatile space. Feel free to add your personal touches, such as outdoor furniture, planters, lighting, and other elements that reflect your individual style and make the patio uniquely yours. Let your creativity flow and create a space that truly speaks to you.
Thank you for joining us on this journey of building a stone patio. We hope this guide has provided you with the knowledge and inspiration to create a remarkable outdoor oasis. So go ahead, embrace the beauty of nature, and enjoy the serenity of your new stone patio!
Now that you've mastered building a stunning stone patio, why not continue transforming your outdoor space? For those considering boundary or privacy enhancements, our guide on unique garden fence ideas offers creative designs to complement your landscaping efforts. And if you're looking to spruce up your deck for gatherings or peaceful evenings, check out our suggestions on integrating colorful decor and simple additions for optimal outdoor living.
Frequently Asked Questions about How To Make A Stone Patio
Was this page helpful?
At Storables.com, we guarantee accurate and reliable information. Our content, validated by Expert Board Contributors, is crafted following stringent Editorial Policies. We're committed to providing you with well-researched, expert-backed insights for all your informational needs.


0 thoughts on “How To Make A Stone Patio”