Home>Garden Essentials>What To Put Under Landscaping Rocks
Garden Essentials
What To Put Under Landscaping Rocks
Modified: May 6, 2024
Looking to enhance your garden? Find out what to put under landscaping rocks to create a beautiful and low-maintenance outdoor space.
(Many of the links in this article redirect to a specific reviewed product. Your purchase of these products through affiliate links helps to generate commission for Storables.com, at no extra cost. Learn more)
Introduction
Landscaping rocks are a popular choice for adding a touch of beauty and functionality to outdoor spaces. They can be used to create pathways, define borders, and add visual interest to gardens and yards. However, before you start placing these rocks, it’s essential to consider what to put underneath them. The right foundation can help ensure the longevity and stability of your landscaping project.
Choosing the right material to place under landscaping rocks is crucial for several reasons. Firstly, it helps prevent growth of unwanted weeds, which can be a constant battle in any garden. Secondly, a proper base layer helps with drainage, ensuring that water doesn’t accumulate and cause damage over time. Lastly, it provides a stable surface for the rocks, preventing shifting and maintaining an even appearance.
In this article, we will explore several options for what to put under landscaping rocks, along with their benefits and considerations. Whether you’re a seasoned gardener or a novice in landscaping, these ideas will help you make an informed decision and ensure the success of your outdoor project.
Key Takeaways:
- Choose the right foundation material, like landscape fabric or gravel, to keep landscaping rocks stable, prevent weed growth, and promote proper drainage for a beautiful and long-lasting outdoor space.
- Edging material, such as plastic or stone, defines borders and adds a polished look to landscaping projects, ensuring rocks stay in place and enhancing the overall aesthetics of your garden or yard.
Read more: How To Put Down Landscaping Rocks
Benefits of Using Landscaping Rocks
Landscaping rocks offer a range of benefits that make them a popular choice for outdoor projects. Understanding these benefits can help you appreciate why incorporating these rocks into your landscaping design can be a great idea. Here are some key advantages:
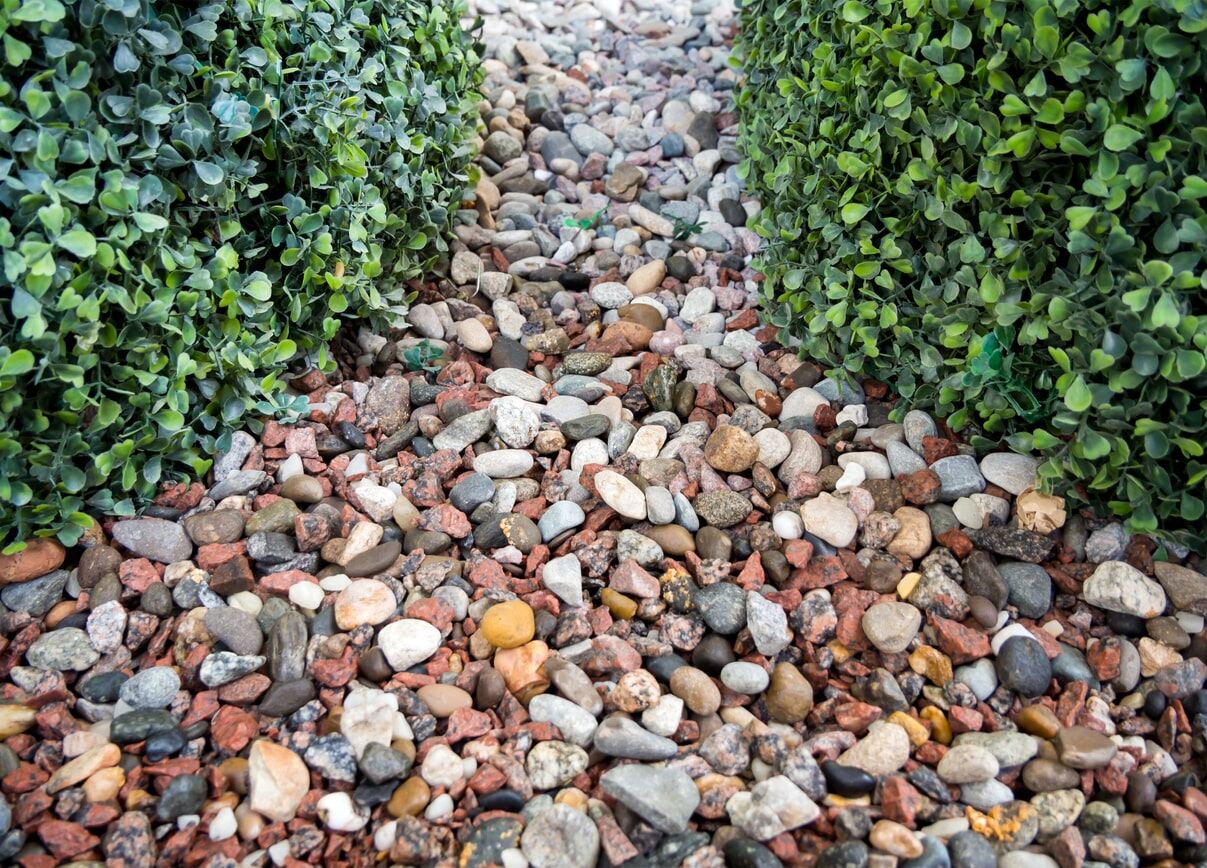
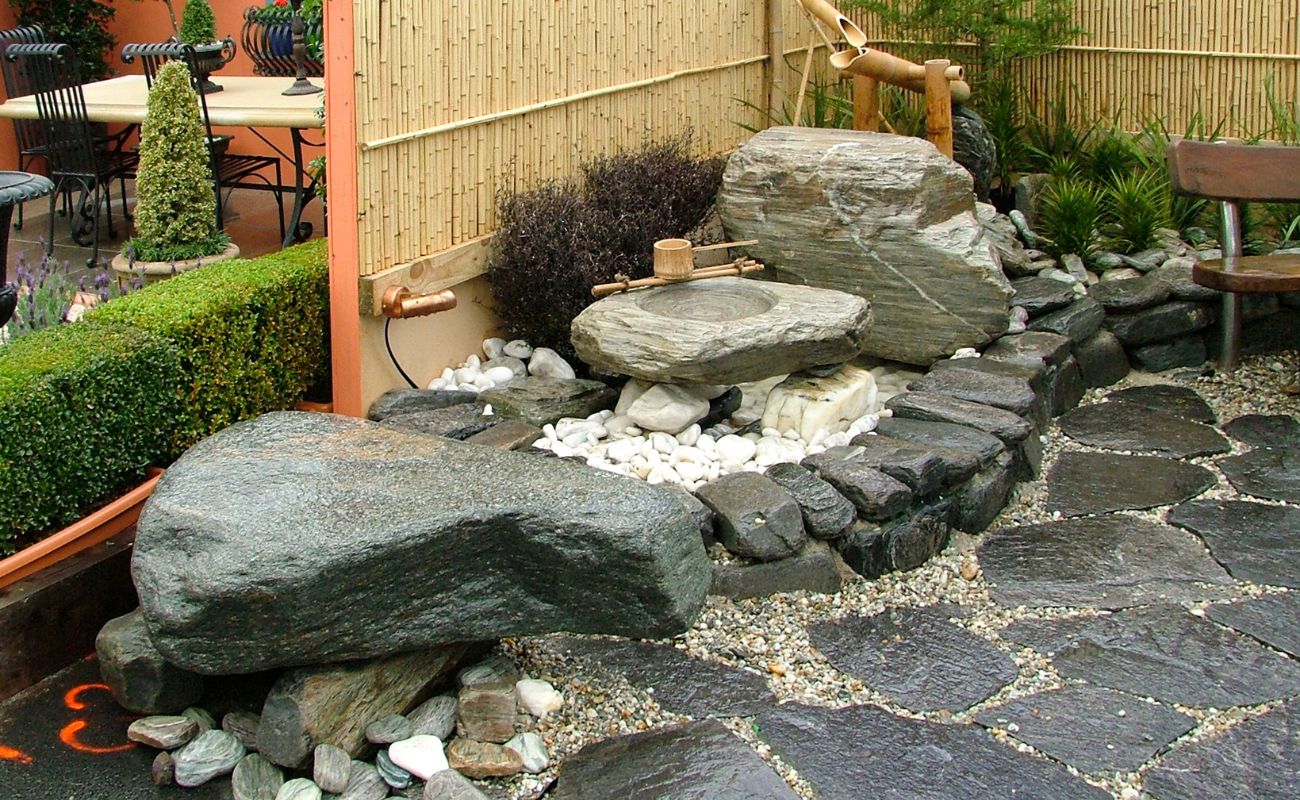
- Visual Appeal: Landscaping rocks come in various colors, shapes, and sizes, allowing you to create visually appealing and unique outdoor spaces. They can add texture, depth, and contrast to your garden, making it visually captivating.
- Low Maintenance: One of the significant advantages of using landscaping rocks is their low maintenance requirements. Unlike grass or other ground covers, rocks do not need regular watering or mowing. This makes them an excellent option for busy homeowners or those who prefer a more low-maintenance garden.
- Weed Control: Another benefit of utilizing landscaping rocks is their ability to suppress weed growth. When properly installed with an effective barrier or fabric, the rocks create a barrier that inhibits sunlight from reaching the ground. This prevents weed seeds from germinating, reducing the need for frequent weeding and minimizing the use of herbicides.
- Water Conservation: Landscaping rocks can help conserve water in your garden. As rocks do not absorb water like soil, they reduce evaporation and retain moisture in the soil. This means you may need to water your plants less frequently, resulting in water savings and more efficient water usage.
- Durability: Rocks are a durable option for landscaping projects. They can withstand various weather conditions, including heavy rain, wind, and even extreme temperatures. Unlike organic materials that may break down or decay over time, landscaping rocks can provide long-lasting beauty to your outdoor space.
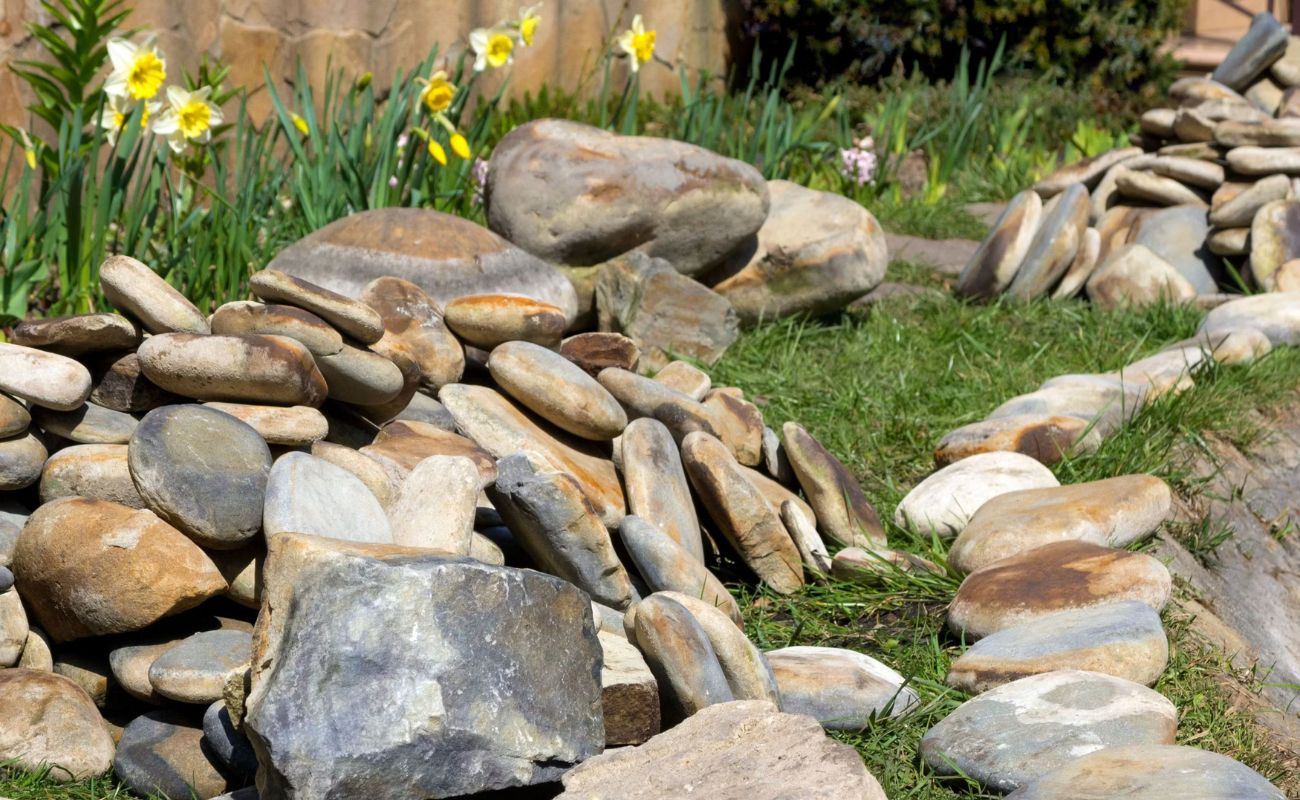
- Erosion Control: Utilizing rocks in your landscaping design can help prevent soil erosion. The weight and placement of rocks can stabilize slopes, slow down water runoff, and protect against erosion. This is especially essential in areas with steep slopes or heavy rainfall.
By incorporating landscaping rocks into your garden, you can enjoy these benefits while enhancing the overall aesthetics and functionality of your outdoor space. However, it is important to prepare a proper foundation to ensure the rocks remain stable and in place. Let’s explore the factors to consider before placing landscaping rocks.
Factors to Consider Before Placing Landscaping Rocks
Before you start placing landscaping rocks, it’s important to consider several factors to ensure the success and longevity of your project. Taking these factors into account will help you make informed decisions and avoid potential issues down the line. Here are some key factors to consider:
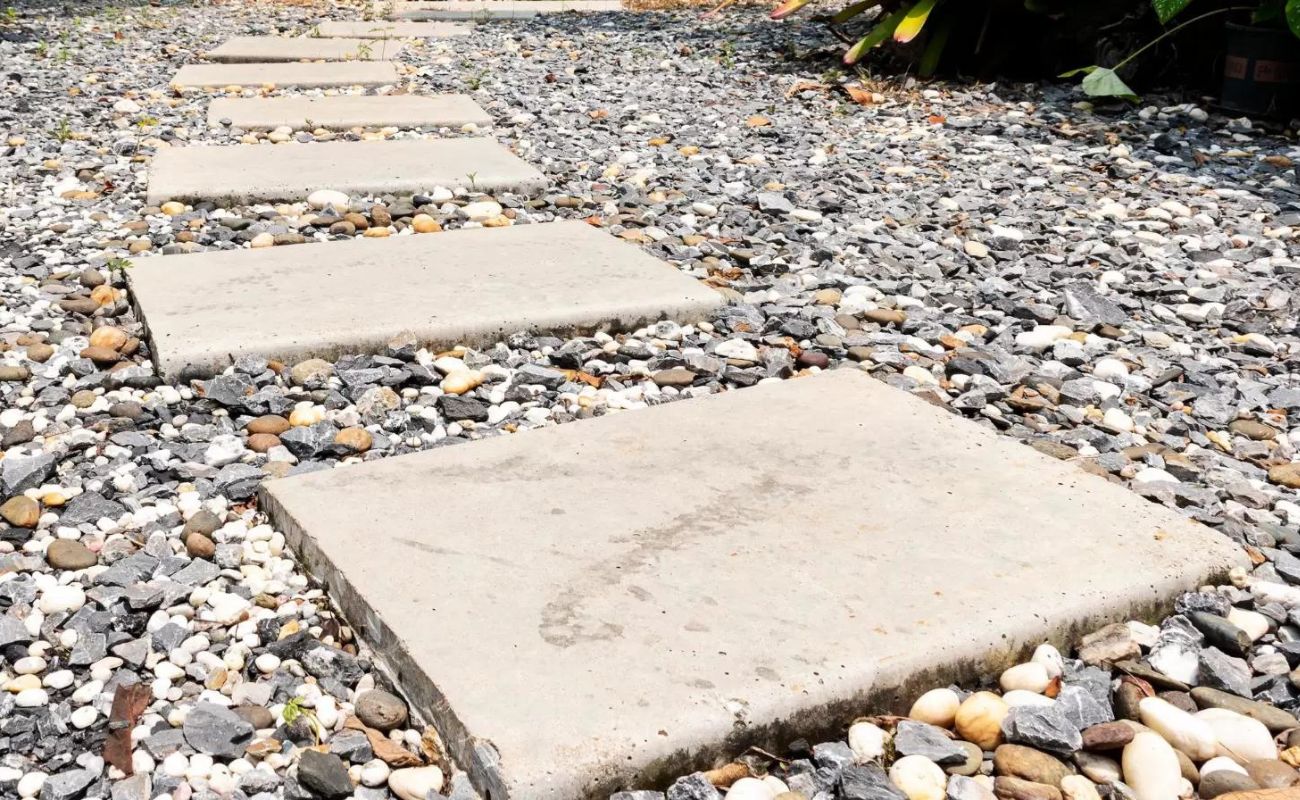
- Functionality: Determine the purpose of your landscaping rocks. Are you using them for a pathway, to define a border, or as a decorative element? Understanding the intended function will guide your decisions on the size, shape, and placement of the rocks.
- Climate: Consider your local climate and weather conditions. Some rocks may be more prone to weathering or erosion in certain climates. Choose rocks that are suitable for your specific climate to ensure they can withstand the elements and maintain their appearance over time.
- Budget: Determine your budget for the landscaping project. Some types of rocks may be more expensive than others. Consider the cost of materials, including the rocks themselves, as well as any additional supplies needed for the foundation layer.
- Accessibility: Assess the accessibility of your property. If you plan to install large or heavy rocks, ensure that there is easy access for delivery and placement. This will prevent any logistical issues and ensure a smooth installation process.
- Site Preparation: Before placing the rocks, it’s important to prepare the site properly. Clear the area of any debris, vegetation, or existing rocks. Level the ground to create a smooth and even surface for the rocks to sit on.
- Drainage: Consider the drainage needs of your landscaping project. Improper drainage can lead to water accumulation, which can damage the rocks and affect the stability of your design. Ensure that the site has adequate drainage or incorporate drainage solutions, such as perforated pipes or gravel, to prevent water buildup.
- Maintenance: Consider the level of maintenance you’re willing to undertake to keep your landscaping rocks looking their best. Some rocks may require occasional cleaning to remove dirt or debris. Additionally, inspect the rocks periodically for any signs of damage or movement and make any necessary repairs.
- Safety: Take safety precautions into account. Ensure that the placement of the rocks does not create any tripping hazards or obstruct pathways. If you have children or pets, choose rocks that are smooth and avoid sharp edges that could pose a risk of injury.
Considering these factors before placing landscaping rocks will help you create a beautiful and functional outdoor space that meets your specific needs. Once you have assessed these factors, you can move on to exploring ideas for what to put under your landscaping rocks. Let’s dive into some options.
Ideas for What to Put Under Landscaping Rocks
When it comes to what to put under landscaping rocks, there are several options to consider. The choice will depend on factors such as weed control, drainage, and stability. Here are some popular ideas:
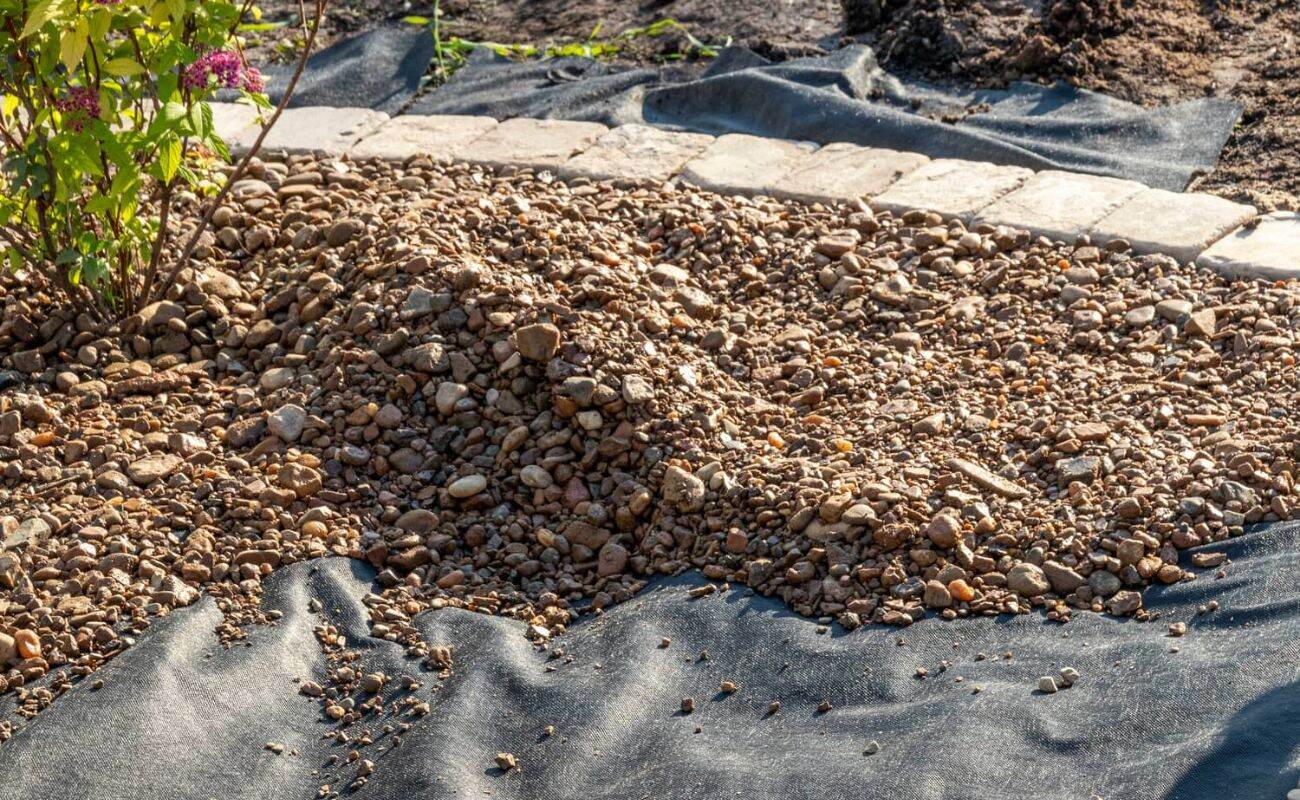
- Landscape Fabric: Landscape fabric is a permeable material that helps prevent weed growth while allowing water to penetrate. It is easy to install and provides a barrier between the rocks and the soil, reducing the need for weeding. Make sure to overlap the fabric strips and secure them with landscape staples.
- Weed Barrier: A weed barrier is a thick, durable plastic or geotextile material that provides excellent weed control. It blocks sunlight and prevents weed growth while allowing for water drainage. It is especially useful in areas with aggressive weeds. Ensure that the barrier is properly secured and covers the entire area beneath the rocks.
- Plastic Sheeting: Plastic sheeting, such as black polyethylene, can be used as a weed barrier. It is a cost-effective option and helps inhibit weed growth. However, it may not provide as much breathability as other materials, so proper drainage should be ensured.
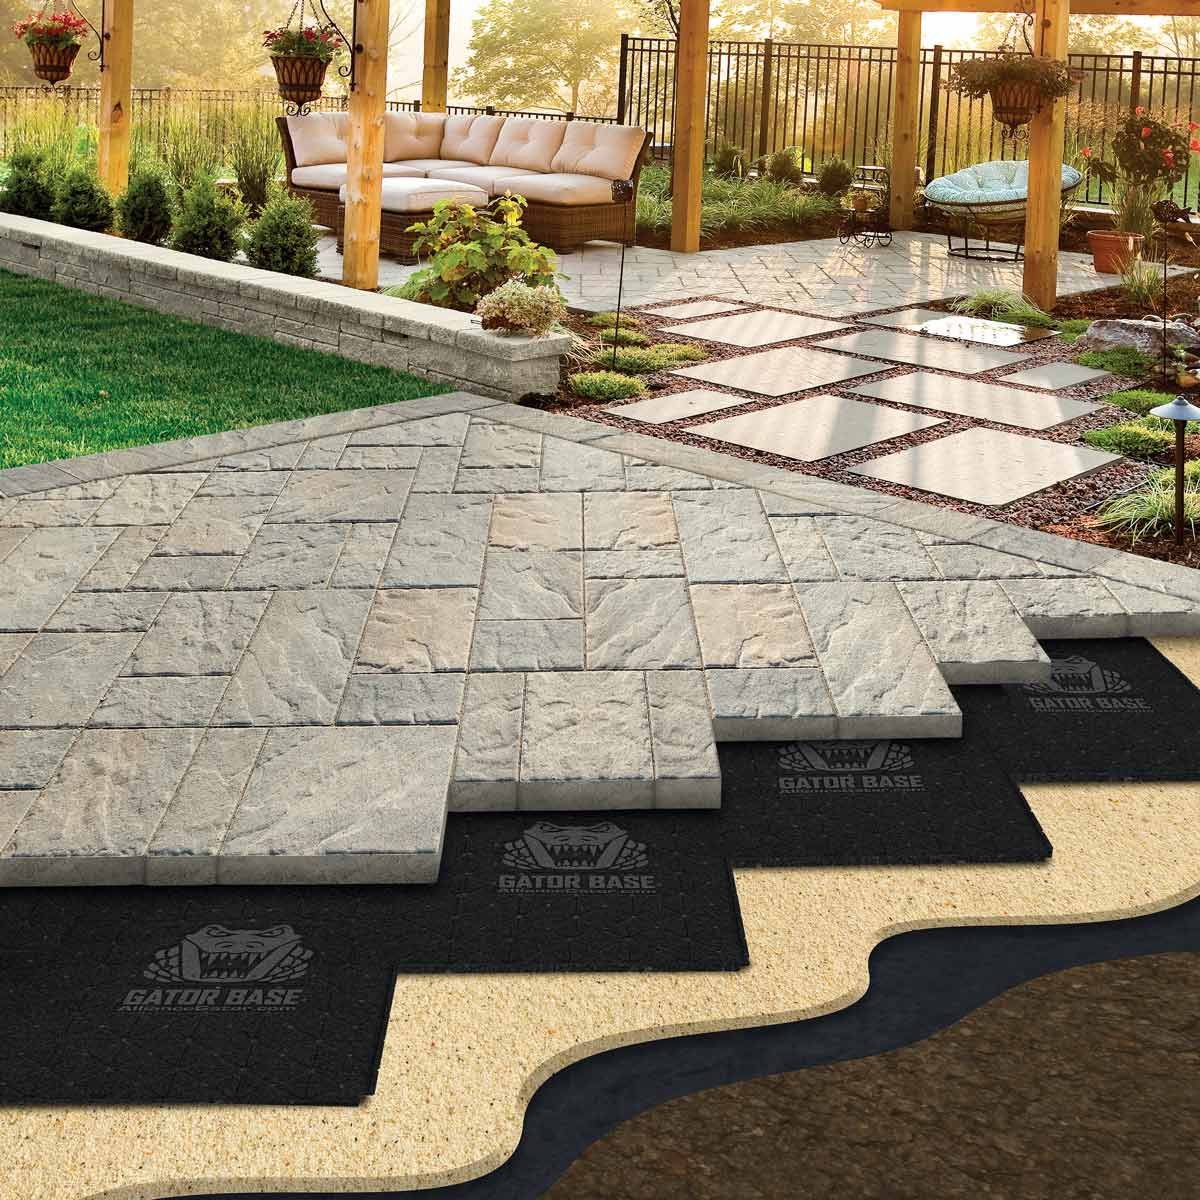
- Geotextile Fabric: Geotextile fabric is a synthetic material that is resistant to erosion. It provides excellent stability and prevents weed growth. Geotextile fabric allows water permeability while still offering a barrier against weeds. It is a durable option that can withstand heavy-duty applications.
- Gravel or Crushed Stone Base: A gravel or crushed stone base can provide stability for your landscaping rocks. It helps with drainage and prevents rocks from shifting or sinking into the soil. Ensure that the gravel or crushed stone is properly compacted to create a solid foundation.
- Sand or Decomposed Granite: Sand or decomposed granite can be used as a base layer under the landscaping rocks. They provide a level surface and minimize rock movement. Sand is ideal for areas with high moisture levels as it aids in drainage, while decomposed granite offers a more natural and organic look.
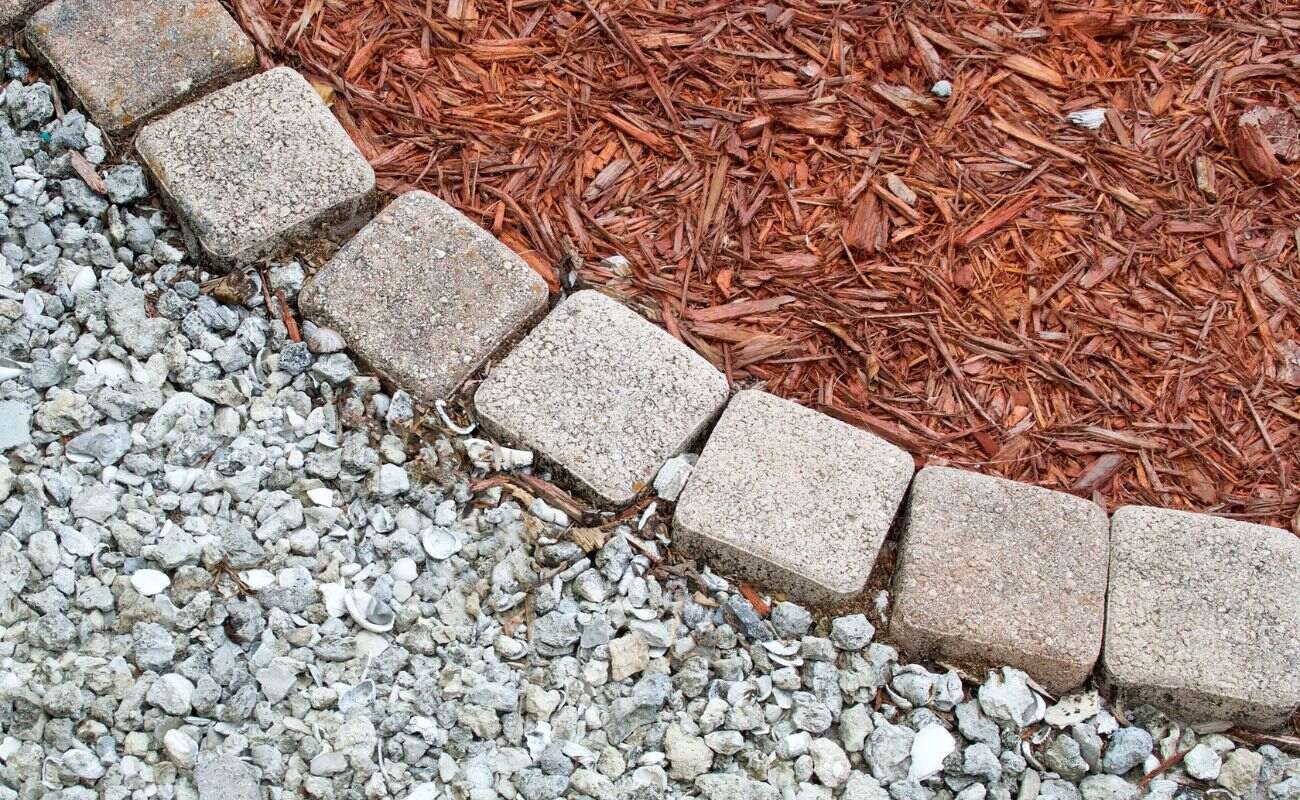
- Edging Material: Incorporating edging material, such as plastic, metal, or stone, can provide a clear separation between the rocks and surrounding areas. Edging helps contain the rocks, preventing them from spreading into unwanted spaces. It also adds a polished and finished look to the overall design.
Ultimately, the choice of what to put under your landscaping rocks will depend on your specific needs and preferences. Consider factors such as weed control, drainage, stability, and aesthetics when making your decision.
By taking the time to prepare a proper foundation for your landscaping rocks, you can ensure their longevity and enhance the overall beauty of your outdoor space. Experiment with different ideas to find the combination that works best for you.
Now that you have a good understanding of what to put under landscaping rocks, you’re ready to embark on your outdoor project. Take the time to plan and prepare to create a stunning and functional landscape that will delight you for years to come.
Landscape Fabric
Landscape fabric is a popular choice for creating a barrier between landscaping rocks and the soil beneath. It is a permeable material that allows water to penetrate while preventing weed growth by blocking sunlight. Landscape fabric is a cost-effective and easy-to-install option for maintaining a weed-free and visually appealing outdoor space.
When using landscape fabric under landscaping rocks, it’s important to follow these steps:
- Prepare the area: Clear the area of any existing plants, rocks, or debris. Level the ground to create a smooth surface.
- Measure and cut the fabric: Measure the area where you will be placing the rocks and cut the landscape fabric to fit accordingly. Make sure to overlap the fabric strips by a few inches to ensure there are no gaps.
- Lay the fabric: Lay the landscape fabric directly on the prepared ground. Smooth out any wrinkles or folds to ensure proper coverage.
- Secure the fabric: Use landscape staples or pins to secure the fabric in place. Place the staples around the edges and at regular intervals throughout the area to prevent the fabric from shifting.
- Add the landscaping rocks: Once the fabric is securely in place, you can start adding the landscaping rocks. Spread them evenly over the fabric, ensuring they cover the entire area.
- Inspect and maintain: Regularly inspect the fabric for any signs of damage or weed growth. Remove any weeds that manage to penetrate through the fabric to prevent them from spreading.
Landscape fabric offers several benefits when used under landscaping rocks. It acts as an effective weed barrier, preventing weed growth and reducing the need for constant maintenance. By blocking sunlight, the fabric inhibits weed seeds from germinating and overtaking your outdoor space.
Additionally, landscape fabric allows water to penetrate, ensuring proper drainage and preventing water from accumulating beneath the rocks. It helps maintain the stability of the rocks and prevents them from sinking into the soil over time. This is especially important for areas with heavy rainfall or poor soil conditions.
However, it’s important to note that landscape fabric is not a permanent solution and may need to be replaced over time. As the rocks settle and shift, the fabric may become exposed or damaged, allowing weeds to grow. Regular inspections and maintenance will help prolong the effectiveness of the fabric and preserve the integrity of your landscaping design.
Overall, landscape fabric is an excellent option for creating a weed-free and visually appealing landscaping project. By incorporating this barrier under your landscaping rocks, you can enjoy a low-maintenance and long-lasting outdoor space that enhances the beauty of your garden or yard.
Read more: What Is The Best Rock For Landscaping
Weed Barrier
A weed barrier is a durable material that provides excellent weed control when placed under landscaping rocks. It acts as a barrier to block sunlight and prevent weed seeds from germinating, keeping your outdoor space free from unwanted plant growth. Using a weed barrier is an effective and long-lasting solution for maintaining a weed-free and visually appealing garden or yard.
When using a weed barrier under landscaping rocks, follow these steps:
- Prepare the area: Clear the area of any existing vegetation, rocks, or debris. Level the ground to create a smooth surface.
- Measure and cut the weed barrier: Measure the area where you will be placing the rocks and cut the weed barrier to fit accordingly. Leave a few extra inches on each side to ensure complete coverage.
- Lay the weed barrier: Lay the weed barrier directly on the prepared ground, ensuring that it covers the entire area. Smooth out any wrinkles or creases to ensure proper coverage.
- Secure the weed barrier: Use landscape staples or pins to anchor the weed barrier to the ground. Place the staples or pins around the edges and at regular intervals throughout the area to prevent the weed barrier from shifting.
- Add the landscaping rocks: Once the weed barrier is securely in place, you can start adding the landscaping rocks. Spread them evenly over the weed barrier, ensuring complete coverage.
- Maintenance: Periodically inspect the weed barrier for any signs of damage or weed growth. If any weeds manage to penetrate through the barrier, remove them promptly to prevent them from spreading.
A weed barrier offers several advantages when used under landscaping rocks. By blocking sunlight, it effectively inhibits weed growth, reducing the need for constant weeding and minimizing the use of herbicides. This saves you time and effort in maintaining your outdoor space while promoting a healthier and more sustainable approach to weed control.
In addition to weed control, a weed barrier helps with water drainage to ensure the health of your landscape. It allows water to penetrate through the barrier and reach the soil beneath, preventing water from pooling and potentially damaging the rocks or nearby plants. Good drainage is crucial for maintaining a stable foundation for your landscaping rocks and preventing soil erosion.
It’s important to choose a durable and high-quality weed barrier material to ensure its effectiveness and longevity. Consider factors such as thickness, durability, and UV resistance when selecting a weed barrier. Proper installation and regular maintenance, including inspecting for damage and removing any weeds that manage to penetrate the barrier, will help prolong its effectiveness and preserve the beauty of your landscaping design.
By incorporating a weed barrier under your landscaping rocks, you can enjoy a weed-free and visually appealing outdoor space with minimal maintenance. It provides long-lasting weed control, ensuring that your garden or yard remains a beautiful and enjoyable space year-round.
Before placing landscaping rocks, it’s important to lay down a weed barrier fabric to prevent weeds from growing through. This will help maintain the appearance of your landscaping and reduce maintenance.
Plastic Sheeting
Plastic sheeting is a cost-effective option for creating a barrier under landscaping rocks to prevent weed growth. It is a durable and easy-to-install material that can help maintain a clean and weed-free outdoor space. Plastic sheeting acts as a protective layer, blocking sunlight and inhibiting weed growth while allowing for proper water drainage.
When using plastic sheeting under landscaping rocks, follow these steps:
- Prepare the area: Clear the area of any debris, rocks, or existing vegetation. Make sure the ground is level and free of any obstructions.
- Measure and cut the plastic sheeting: Measure the area where you will be placing the rocks and cut the plastic sheeting to fit. Leave a few extra inches on each side to ensure complete coverage.
- Lay the plastic sheeting: Lay the plastic sheeting directly on the prepared ground. Smooth out any wrinkles or folds to ensure it lies flat.
- Secure the plastic sheeting: Use landscape staples or weights to secure the plastic sheeting in place. Place the staples or weights along the edges and at regular intervals throughout the area to prevent the sheeting from shifting.
- Add the landscaping rocks: Once the plastic sheeting is securely in place, you can start adding the landscaping rocks. Spread them evenly over the sheeting, ensuring complete coverage and a level surface.
- Maintenance: Periodically inspect the plastic sheeting for any signs of damage or weed growth. If any weeds manage to penetrate through the sheeting, remove them promptly to prevent them from spreading.
Plastic sheeting offers several benefits when used under landscaping rocks. Its main advantage is its ability to block sunlight, preventing weed seeds from germinating and reducing the need for constant weeding. By inhibiting weed growth, plastic sheeting helps maintain a clean and visually appealing outdoor space with minimal maintenance.
In addition to weed control, plastic sheeting also aids in water drainage. It allows water to penetrate through the sheeting and reach the soil, preventing water from pooling and potentially damaging the rocks or nearby plants. Proper drainage is important to maintain the stability of the landscaping rocks and prevent any water-related issues.
While plastic sheeting is an effective and affordable option for weed control, there are a few considerations to keep in mind. Proper installation is essential to ensure the sheeting remains in place and covers the entire area beneath the rocks. Additionally, plastic sheeting may not be as breathable as other materials, so it’s crucial to ensure proper water drainage to prevent the collection of excess moisture.
Regular inspections and maintenance, including removing any weeds that manage to penetrate the plastic sheeting and checking for any signs of damage, will help prolong its effectiveness. With proper care, plastic sheeting can provide an efficient weed barrier and contribute to a well-maintained and attractive landscaping project.
By utilizing plastic sheeting under your landscaping rocks, you can enjoy a weed-free and visually appealing outdoor space that requires less maintenance, allowing you to focus on appreciating the beauty of your garden or yard.
Geotextile Fabric
Geotextile fabric is a synthetic material specifically designed for use in landscaping and construction projects. It is a durable and versatile option for creating a barrier under landscaping rocks. Geotextile fabric provides excellent stability, weed control, and drainage, making it an ideal choice for maintaining a clean and long-lasting outdoor space.
When using geotextile fabric under landscaping rocks, follow these steps:
- Prepare the area: Clear the area of any debris, rocks, or vegetation. Level the ground to create a smooth and even surface.
- Measure and cut the geotextile fabric: Measure the area where you will be placing the rocks and cut the geotextile fabric to fit. Leave a few extra inches on each side to ensure complete coverage.
- Lay the geotextile fabric: Lay the geotextile fabric directly on the prepared ground, ensuring it covers the entire area. Smooth out any wrinkles or folds for proper coverage.
- Secure the geotextile fabric: Use landscape staples or pins to secure the geotextile fabric in place. Place the staples or pins around the edges and at regular intervals throughout the area to prevent the fabric from shifting.
- Add the landscaping rocks: Once the geotextile fabric is securely in place, you can start adding the landscaping rocks. Spread them evenly over the fabric, ensuring complete coverage and a level surface.
- Maintenance: Periodically inspect the geotextile fabric for any signs of damage or weed growth. If any weeds manage to penetrate through the fabric, remove them promptly to prevent them from spreading.
Geotextile fabric offers several benefits when used under landscaping rocks. Its primary function is to provide stability to the rocks, preventing them from shifting or sinking into the ground over time. This is particularly important for areas with heavy foot traffic or in regions prone to erosion or soil movement.
In addition to stability, geotextile fabric acts as an effective weed barrier. It blocks sunlight, preventing weed seeds from germinating and reducing the need for frequent weeding. The fabric allows water to penetrate through it, ensuring proper drainage and preventing water from pooling beneath the rocks.
Geotextile fabric is known for its durability and resistance to degradation. It can withstand various weather conditions and is resistant to rotting, making it a long-lasting solution for weed control and stability in your landscaping project. However, it’s important to choose a geotextile fabric specifically designed for landscaping purposes to ensure its effectiveness and longevity.
Regular inspections and maintenance are recommended to ensure the geotextile fabric remains intact and functional. Remove any weeds that manage to penetrate through the fabric and check for any signs of damage caused by weather or other factors. With proper care, geotextile fabric can provide a reliable barrier under your landscaping rocks for years to come.
By using geotextile fabric under your landscaping rocks, you can enjoy a stable and weed-free outdoor space that requires minimal maintenance. It contributes to the long-term success and aesthetics of your landscaping project, providing a durable and effective foundation for your rocks.
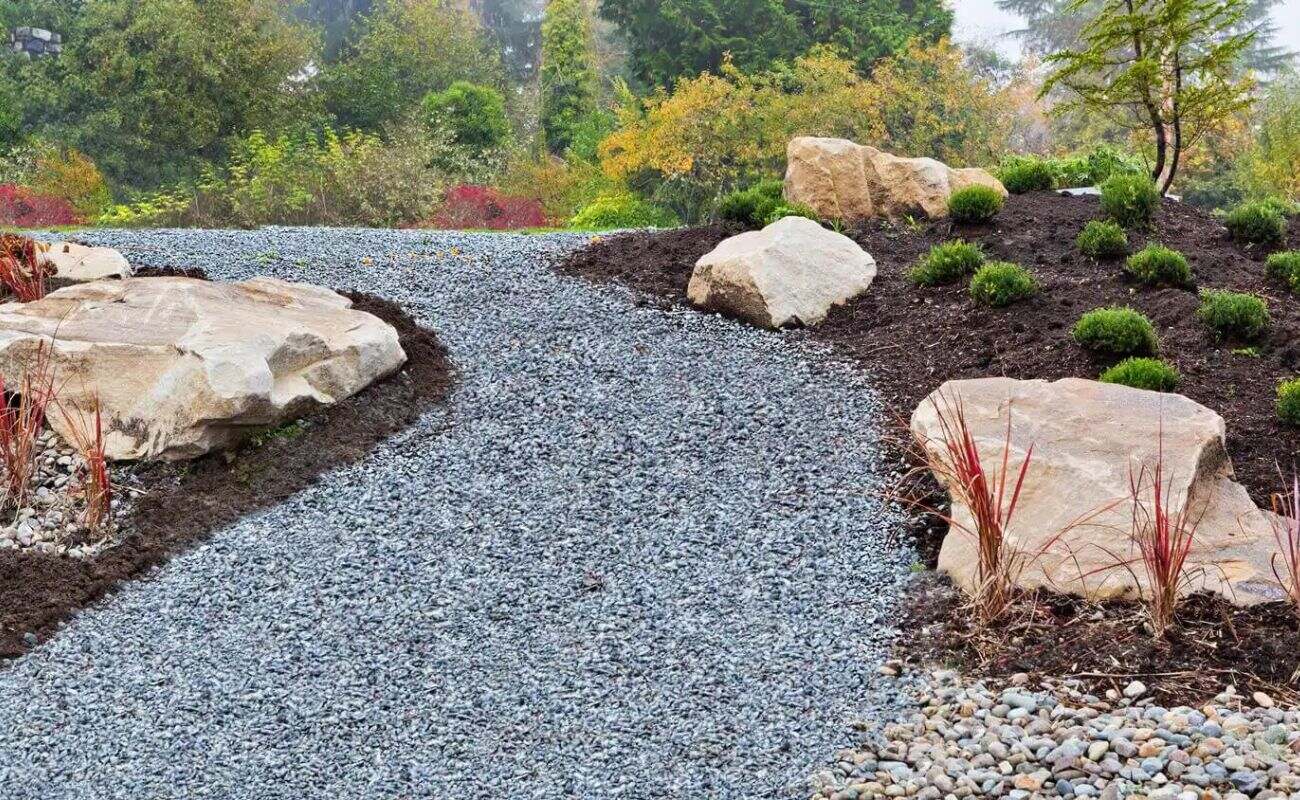
Gravel or Crushed Stone Base
Using a gravel or crushed stone base under landscaping rocks is a popular choice for achieving stability and proper drainage. This foundation layer helps prevent the rocks from shifting or sinking into the soil while allowing water to flow away efficiently. A gravel or crushed stone base provides a solid and level surface for your landscaping rocks, ensuring a durable and visually appealing outdoor space.
When using a gravel or crushed stone base under landscaping rocks, follow these steps:
- Prepare the area: Clear the area of any debris, rocks, or vegetation. Level the ground to create a smooth and even surface.
- Add a weed barrier: Before laying the gravel or crushed stone, consider adding a weed barrier layer, such as landscape fabric or weed-blocking plastic. This will help prevent weed growth and maintain a cleaner outdoor space.
- Determine the required thickness: The thickness of the gravel or crushed stone base will depend on the size and weight of the landscaping rocks. Typically, a 2-4 inch layer is recommended for stability.
- Lay the base material: Spread the gravel or crushed stone evenly over the prepared area. Use a rake or shovel to level the material, ensuring a smooth and even surface.
- Compact the base material: Use a compactor or hand tamper to compact the gravel or crushed stone. This will provide better stability and prevent any movement or settling over time.
- Add the landscaping rocks: Once the base material is compacted and level, you can start adding the landscaping rocks. Spread them evenly over the base, ensuring complete coverage and a visually pleasing arrangement.
- Maintenance: Periodically inspect the base material for any signs of erosion or movement. If needed, add more gravel or crushed stone to maintain the level surface and stability of the landscaping rocks.
A gravel or crushed stone base offers several advantages when used under landscaping rocks. Firstly, it provides excellent stability, preventing the rocks from shifting or sinking into the soil. This is particularly important in areas with heavy foot traffic or inclement weather conditions.
Moreover, a gravel or crushed stone base allows for proper water drainage. It allows excess water to flow away from the rocks, preventing the accumulation of water and potential damage to the landscaping design. Adequate drainage is crucial for maintaining the longevity and appearance of your outdoor space.
Additionally, the use of a weed barrier layer, such as landscape fabric or weed-blocking plastic, beneath the gravel or crushed stone base helps inhibit weed growth. This reduces the need for frequent weeding and helps maintain a cleaner and weed-free landscape.
Regular inspections and maintenance, including checking for any signs of erosion or movement in the base material and adding more gravel or crushed stone as needed, will help preserve the stability and aesthetics of your landscaping project.
By incorporating a gravel or crushed stone base under your landscaping rocks, you can create a visually appealing and long-lasting outdoor space. The solid foundation provides stability, proper drainage, and weed control, ensuring that your garden or yard remains beautiful and functional for years to come.
Read more: What Color Rocks For Landscaping
Sand or Decomposed Granite
Using sand or decomposed granite as a base layer under landscaping rocks can provide a level surface and enhance the stability of your outdoor space. Both sand and decomposed granite offer unique benefits and can be used depending on your specific needs and preferences. They create a visually appealing foundation for your landscaping rocks while allowing for proper drainage and preventing shifting or sinking.
When using sand or decomposed granite under landscaping rocks, follow these steps:
- Prepare the area: Clear the area of any debris, rocks, or vegetation. Level the ground to create a smooth and even surface.
- Add a weed barrier: Consider adding a weed barrier layer, such as landscape fabric, underneath the sand or decomposed granite to prevent weed growth and maintain a cleaner outdoor space.
- Determine the required amount: Calculate the amount of sand or decomposed granite needed based on the area to be covered and the desired thickness of the base layer. Typically, a 2-4 inch layer is recommended for stability.
- Lay the base material: Spread the sand or decomposed granite evenly over the prepared area. Use a rake or shovel to level the material, ensuring a smooth and even surface.
- Compact the base material: Use a compactor or hand tamper to compact the sand or decomposed granite. This will provide better stability and prevent any movement or settling over time.
- Add the landscaping rocks: Once the base material is compacted and level, you can start adding the landscaping rocks. Spread them evenly over the base, ensuring complete coverage and a visually pleasing arrangement.
- Maintenance: Periodically inspect the base material for any signs of erosion or movement. Add more sand or decomposed granite as needed to maintain the level surface and stability of the landscaping rocks.
Using sand or decomposed granite as a base layer offers several benefits for your landscaping project. Both materials provide a stable surface for the landscaping rocks, preventing shifting or sinking. They create an even foundation, allowing the rocks to sit securely and enhancing the overall appearance of your outdoor space.
Additionally, both sand and decomposed granite provide proper drainage, ensuring that excess water can flow away from the rocks and preventing water accumulation that could potentially damage the landscape design. Adequate drainage is essential for preserving the longevity and aesthetics of your outdoor space.
Choosing between sand and decomposed granite depends on personal preference and the desired look for your landscaping project. Sand offers a smooth and uniform appearance, while decomposed granite provides a more natural and organic look. Consider your overall design aesthetic and the surrounding elements to determine which material will best complement your outdoor space.
Regular inspections and maintenance are recommended to prevent erosion or movement of the base material. Adding additional sand or decomposed granite as needed will help maintain the stability and level surface for your landscaping rocks.
By incorporating sand or decomposed granite as a base layer under your landscaping rocks, you can create a visually appealing and stable outdoor space. The solid foundation, coupled with proper drainage, ensures that your garden or yard maintains its beauty and functionality for years to come.
Edging Material
Utilizing edging material is an important consideration when placing landscaping rocks. Edging helps define borders, contain the rocks within a designated area, and create a clean and polished look for your outdoor space. Choosing the right edging material ensures that your landscaping rocks stay in place and maintain a seamless transition between different elements of your garden or yard.
When selecting edging material for landscaping rocks, there are several options to consider:
- Plastic Edging: Plastic edging is a cost-effective and easy-to-install option. It is lightweight, flexible, and comes in various shapes and sizes. Plastic edging provides a clean and finished edge for your landscaping rocks, preventing them from spreading into unwanted areas.
- Metal Edging: Metal edging, such as aluminum or steel, offers durability and a more distinct visual appeal. Metal edging provides a solid barrier and can be molded into straight lines or curved shapes, depending on your design preferences. It is particularly suitable for creating clean and defined borders around landscaping rocks.
- Stone or Brick Edging: Stone or brick edging adds a natural and timeless look to your outdoor space. It offers durability and can withstand heavy traffic and harsh weather conditions. Stone or brick edging can be installed in various patterns, such as straight lines or decorative curves, to enhance the overall aesthetics of your landscaping project.
- Wood Edging: Wood edging, such as treated lumber or pressure-treated timber, provides a warm and rustic charm to your garden. It is relatively easy to install and can be customized to fit your desired shape and size. Wood edging creates a natural barrier that complements the organic feel of landscaping rocks.
- Concrete Edging: Concrete edging offers a durable and long-lasting option for defining borders around landscaping rocks. It can be formed into straight lines, curves, or intricate designs. Concrete edging provides a strong barrier and can be colored or textured to enhance its visual appeal.
When installing edging material for landscaping rocks, follow these steps:
- Prepare the area: Clear the area where you want to install the edging material. Remove any existing grass, rocks, or debris.
- Outline the border: Use a garden hose or spray paint to outline the desired border shape. This will help guide the installation of the edging material.
- Install the edging material: Follow the manufacturer’s instructions for the specific edging material you have chosen. This may involve digging a trench, securing the edging in place, and backfilling to ensure stability.
- Level and secure: Make sure the edging material is level and secure. Use stakes or anchors to hold it in place, especially in areas with heavy foot traffic or inclement weather.
- Add the landscaping rocks: Once the edging material is securely in place, you can start adding the landscaping rocks within the defined borders. Spread them evenly and adjust as needed for a visually pleasing arrangement.
Using edging material alongside landscaping rocks offers several benefits. Firstly, it creates a clear separation between the rocks and other areas of your garden or yard. This helps prevent the rocks from spreading into undesired spaces and maintains a neat and organized appearance.
Additionally, edging material provides stability and helps retain the rocks in place, especially in areas with slopes or heavy foot traffic. It acts as a physical barrier, preventing the rocks from shifting or sinking into the surrounding soil.
Furthermore, edging material adds a decorative element to your outdoor space. Whether you choose plastic, metal, stone, wood, or concrete, the edging material enhances the overall aesthetics of your landscaping project and creates a finished and polished look.
Regular maintenance includes checking the edging material for any signs of damage or shifting. If necessary, make adjustments or repairs to ensure the integrity and stability of the edging.
By incorporating the right edging material for your landscaping rocks, you can create defined borders, enhance the stability of your outdoor space, and add a touch of elegance to your garden or yard.
Conclusion
Landscaping rocks are a beautiful and versatile addition to any outdoor space. They can transform your garden or yard, providing visual interest, functionality, and a touch of natural beauty. However, to ensure the longevity and stability of your landscaping rocks, it’s crucial to consider what to put underneath them. By choosing the right foundation material, you can enhance the overall appearance, prevent weed growth, promote proper drainage, and maintain a solid base.
Throughout this article, we explored various options for what to put under landscaping rocks. Landscape fabric offers a simple and effective weed barrier, while a weed barrier provides durability and excellent weed control. Plastic sheeting is a cost-effective choice, while geotextile fabric provides added stability and erosion control. A gravel or crushed stone base ensures proper drainage and stability, while sand or decomposed granite offers a level surface and a natural look. Edging material defines borders and adds a finishing touch to your landscaping project.
Before making a decision, consider the specific needs of your outdoor space, including climate conditions, drainage requirements, and aesthetic preferences. Choose a material that suits your needs and complements the overall design of your garden or yard. And don’t forget regular inspections and maintenance to ensure the ongoing effectiveness of your chosen foundation material.
By taking the time to prepare a proper foundation for your landscaping rocks, you can enjoy a visually appealing and functional outdoor space that withstands the test of time. Whether you’re creating a pathway, defining a border, or adding decorative elements, the right foundation ensures the rocks stay in place, prevents weed growth, and promotes proper drainage.
So, as you embark on your landscaping journey, remember to carefully consider the options available for what to put under your landscaping rocks. With the proper foundation, you can create a stunning and long-lasting outdoor space that you can enjoy for years to come.
After learning what to place under landscaping rocks, why not transform your outdoor space into a stunning visual delight? Our next feature, "Beautiful Rock Garden Ideas," offers a plethora of creative designs to inspire you. Whether you seek serenity or a splash of natural beauty, these ideas will guide you in sculpting a breathtaking rock garden that resonates with your personal style.
Frequently Asked Questions about What To Put Under Landscaping Rocks
Was this page helpful?
At Storables.com, we guarantee accurate and reliable information. Our content, validated by Expert Board Contributors, is crafted following stringent Editorial Policies. We're committed to providing you with well-researched, expert-backed insights for all your informational needs.


0 thoughts on “What To Put Under Landscaping Rocks”