
Furniture
Why Is My Chandelier Flickering
Modified: August 26, 2024
Discover why your furniture's chandelier is flickering and learn how to fix the issue. Get expert tips and advice on troubleshooting flickering chandeliers.
(Many of the links in this article redirect to a specific reviewed product. Your purchase of these products through affiliate links helps to generate commission for Storables.com, at no extra cost. Learn more)
Introduction
Chandeliers are not only a functional lighting fixture but also a beautiful centerpiece that adds elegance and sophistication to any room. However, there may come a time when you notice that your chandelier is flickering, which can be quite frustrating. Flickering can not only disrupt the ambiance but also indicate a potential electrical issue that needs to be addressed. In this article, we will explore the common causes of chandelier flickering and provide solutions to help you resolve this problem.
Understanding the causes of chandelier flickering is crucial in troubleshooting and fixing the issue effectively. While there can be several reasons behind this annoyance, some of the most common ones include faulty light bulbs, loose or faulty wiring, issues with the dimmer switch, voltage fluctuations, and overloaded circuits. Let’s dive into each of these causes in more detail.
Key Takeaways:
- Don’t let flickering chandelier lights dim your decor. Check and replace faulty bulbs, secure wiring, and consider a voltage stabilizer to keep your chandelier shining bright.
- When your chandelier flickers, it’s time to troubleshoot. From faulty bulbs to overloaded circuits, addressing the root cause ensures a steady and elegant illumination.
Read more: Why Is My Security Camera Flickering
Causes of Chandelier Flickering
There are several factors that can contribute to chandelier flickering. Understanding these causes will help you identify the problem and find an appropriate solution. Here are some of the most common causes:
- Faulty Light Bulb: A flickering chandelier may be due to a faulty light bulb. Over time, light bulbs can wear out or become loose, causing intermittent flickering. To determine if this is the issue, try replacing the light bulbs with new ones and see if the flickering persists.
- Loose or Faulty Wiring: Poor electrical connections can also result in chandelier flickering. Loose or faulty wiring can cause intermittent power supply to the light fixture, leading to flickering. It is important to check the wiring connections and ensure they are secure and properly installed.
- Dimmer Switch Issues: If your chandelier is connected to a dimmer switch, the flickering may be caused by a problem with the dimmer switch itself. Dimmer switches are designed to control the brightness of the lights, but if they are old or malfunctioning, they can cause flickering. Consider replacing the dimmer switch with a new one if you suspect this is the cause.
- Voltage Fluctuations: Fluctuations in your home’s voltage can also contribute to chandelier flickering. When the voltage supplied to the light fixture is unstable, it can cause the lights to flicker. This can be due to various factors, such as power grid issues or electrical appliances in your home consuming a large amount of power. Installing a voltage stabilizer can help regulate the voltage and minimize flickering.
- Overloaded Circuit: Another common cause of chandelier flickering is an overloaded circuit. If the chandelier shares the circuit with other high-wattage appliances or fixtures, the combined power usage can exceed the capacity of the circuit, causing flickering. To resolve this issue, consider redistributing the load on different circuits or installing additional circuits to accommodate the power needs.
Identifying the cause of chandelier flickering is essential to implementing the appropriate solution. In the next section, we will explore the steps you can take to resolve this issue and restore the steady illumination of your chandelier.
Faulty Light Bulb
One of the common causes of chandelier flickering is a faulty light bulb. Over time, light bulbs can deteriorate or become loose, resulting in intermittent flickering. If you suspect that a faulty light bulb is the culprit behind your chandelier flickering, here are some steps you can take to address the issue:
- First, turn off the chandelier and allow it to cool down. It is important to work with the fixture when it is not powered to prevent the risk of electric shock.
- Carefully remove the light bulbs from the chandelier. Inspect them for any visible signs of damage, such as blackened areas, blown filaments, or loose connections. If you notice any of these signs, it is likely that the light bulb is faulty and needs to be replaced.
- If the light bulb appears to be in good condition, try twisting it slightly to ensure a tight connection with the socket. Loose connections between the bulb and the socket can cause flickering. By securely fastening the light bulb, you may be able to resolve the issue.
- Replace the faulty light bulbs with new ones of the same type and wattage. Ensure that you choose bulbs that are compatible with your chandelier fixture. It is recommended to opt for high-quality and reputable brands to ensure longevity and reliable performance.
- After replacing the light bulbs, turn on the chandelier and observe if the flickering persists. If the issue is resolved and your chandelier remains steady without any flickering, then the faulty light bulbs were indeed the cause of the problem.
- If the flickering continues even after replacing the light bulbs, it is possible that the issue lies elsewhere, such as with the wiring or the dimmer switch. In such cases, it may be necessary to consult a certified electrician to further diagnose and resolve the problem.
Dealing with faulty light bulbs is a relatively simple solution to address chandelier flickering. By ensuring that the bulbs are in good condition and securely connected, you can eliminate this common cause and enjoy uninterrupted illumination from your chandelier.
Loose or Faulty Wiring
Loose or faulty wiring is another common cause of chandelier flickering. Poor electrical connections can disrupt the power supply to the light fixture, resulting in intermittent flickering. If you suspect that loose or faulty wiring is the issue, here are some steps you can take to address it:
- Before working on any electrical component, ensure that the power to the chandelier is turned off at the circuit breaker. This will ensure your safety while you inspect and adjust the wiring connections.
- Carefully examine the wiring connections of the chandelier. Look for any loose or disconnected wires, frayed insulation, or signs of burning or overheating. These can indicate faulty wiring that needs to be repaired.
- If you find any loose wires, gently tighten them using a screwdriver or pliers. Pay attention to make sure that the connections are secure but not overly tight, as this can cause damage to the wires or the fixture itself.
- In cases where the wiring is frayed or damaged, it is best to consult a professional electrician to handle the repair. Attempting to repair the wiring yourself may lead to further damage or pose a safety risk.
- Consider upgrading the wiring of your chandelier if it is old or in poor condition. This can help ensure a stable and reliable electrical connection, reducing the chances of flickering in the future.
- Once you have addressed any loose or faulty wiring, turn on the power to the chandelier and observe if the flickering persists. If the wiring was indeed the cause of the issue, you should now have a steady and flicker-free chandelier.
Working with electrical wiring can be complex and potentially dangerous, so it is essential to exercise caution and seek professional assistance if you are uncertain or uncomfortable with the task. A certified electrician can provide expert evaluation and repair to ensure the safety and proper functioning of your chandelier.
Dimmer Switch Issues
If your chandelier is connected to a dimmer switch, issues with the dimmer switch itself can cause flickering. Dimmer switches are designed to control the brightness of the lights, but if they are old, faulty, or incompatible with the chandelier, they can lead to flickering. Here are some steps to troubleshoot and address dimmer switch issues:
- Start by turning off the power to the chandelier at the circuit breaker. This will ensure your safety while working with the dimmer switch.
- Inspect the dimmer switch for any visible signs of damage or wear, such as cracks, burnt marks, or loose connections. If you notice any of these signs, it is likely that the dimmer switch is faulty and needs to be replaced.
- Consider checking the compatibility of the dimmer switch with your chandelier. Some dimmer switches are not designed to work with certain types of lighting fixtures or specific wattage ratings. If the dimmer switch is not compatible, it can cause flickering. Consult the manufacturer’s instructions or seek advice from a professional electrician to ensure you have the right dimmer switch for your chandelier.
- If the dimmer switch appears to be in good condition and compatible with your chandelier, try adjusting it to different positions. Sometimes, flickering can be caused by the dimmer switch being set at an incompatible or unstable level. Experiment with different brightness levels to see if the flickering resolves.
- If adjusting the dimmer switch does not resolve the flickering, consider replacing the dimmer switch with a new one. Choose a high-quality dimmer switch that is specifically designed for your chandelier’s wattage and type of lighting. Make sure to follow the manufacturer’s instructions and consult a professional electrician if needed.
- Once you have replaced the dimmer switch, turn on the power to the chandelier and observe if the flickering persists. If the dimmer switch was indeed the cause of the issue, you should now have stable and flicker-free lighting.
Dimmer switch issues can be resolved by ensuring compatibility and proper functioning of the switch. By following these steps and seeking professional assistance when necessary, you can eliminate dimmer switch-related problems and enjoy a seamless lighting experience with your chandelier.
Read more: Why Is My Ceiling Light Flickering?
Voltage Fluctuations
Voltage fluctuations can be a common cause of chandelier flickering. When the voltage supplied to the light fixture is unstable, it can lead to flickering lights. Fluctuations in voltage can occur due to various factors, such as power grid issues or electrical appliances in your home consuming a large amount of power. To address voltage fluctuations and mitigate chandelier flickering, consider the following steps:
- Install a voltage stabilizer or regulator: A voltage stabilizer is a device that helps regulate the voltage supplied to your chandelier, ensuring a consistent and stable amount of power. Installing a voltage stabilizer can minimize the impact of voltage fluctuations and prevent flickering. Consult a professional electrician to determine the appropriate size and type of stabilizer for your specific electrical system.
- Check your home’s electrical panel: Ensure that the circuit breakers in your electrical panel are functioning correctly. Faulty circuit breakers can lead to voltage fluctuations. If you suspect a faulty breaker, consult an electrician to inspect and replace it if necessary.
- Check for power-hungry appliances: Certain appliances, such as air conditioners or refrigerators, can draw significant amounts of power and cause voltage fluctuations. To reduce the impact on your chandelier’s lighting, try to distribute the load of these high-power appliances across different circuits. This can help balance the power usage and minimize voltage fluctuations.
- Consider power conditioning equipment: Power conditioning devices, such as surge protectors or line conditioners, can provide additional protection against voltage fluctuations and electrical surges. These devices are designed to stabilize the voltage and protect your electrical equipment, including chandeliers, from potential damage caused by electrical fluctuations.
- If none of the above steps resolve the issue, consult a professional electrician: If you continue to experience flickering despite attempting to address voltage fluctuations on your own, it is advisable to seek the assistance of a qualified electrician. They can perform a thorough inspection of your electrical system to identify the root cause of the flickering and recommend appropriate solutions.
Addressing voltage fluctuations is crucial for maintaining stable and flicker-free lighting in your chandelier. By implementing these steps and seeking professional guidance when needed, you can mitigate the impact of voltage fluctuations and enjoy consistent illumination from your chandelier.
Overloaded Circuit
Overloading of circuits is a common cause of chandelier flickering. When a circuit is overloaded, it means that the total electrical load on the circuit exceeds its capacity. This can occur when multiple high-wattage appliances or fixtures, including your chandelier, are connected to the same circuit. To address an overloaded circuit and reduce chandelier flickering, consider the following steps:
- Identify the overloaded circuit: Determine which circuit is overloaded by understanding its load capacity. Circuit breakers are designed to protect the electrical system from overloading and can help identify the affected circuit. Check the circuit breaker panel to see if any breakers have tripped or if the load on any circuit is consistently high.
- Redistribute the load: Once you have identified the overloaded circuit, try to redistribute the electrical load by switching appliances or fixtures to different circuits. Connect your chandelier to a circuit with a lighter load to reduce the risk of overloading. This can help alleviate the strain on the circuit and decrease the likelihood of flickering.
- Consider installing additional circuits: If redistributing the load is not feasible or does not fully resolve the issue, consult a professional electrician to assess the electrical system and determine if additional circuits should be installed. Installing dedicated circuits for high-power appliances or fixtures, including chandeliers, can help ensure that each circuit is appropriately sized to handle the load, reducing the risk of overloading.
- Reduce the power consumption of appliances: Evaluate the power consumption of appliances connected to the circuit in question. Consider replacing older, less energy-efficient appliances with newer ones that have lower electricity demands. Energy-efficient appliances can help reduce the overall load on the circuit and minimize the chance of overload.
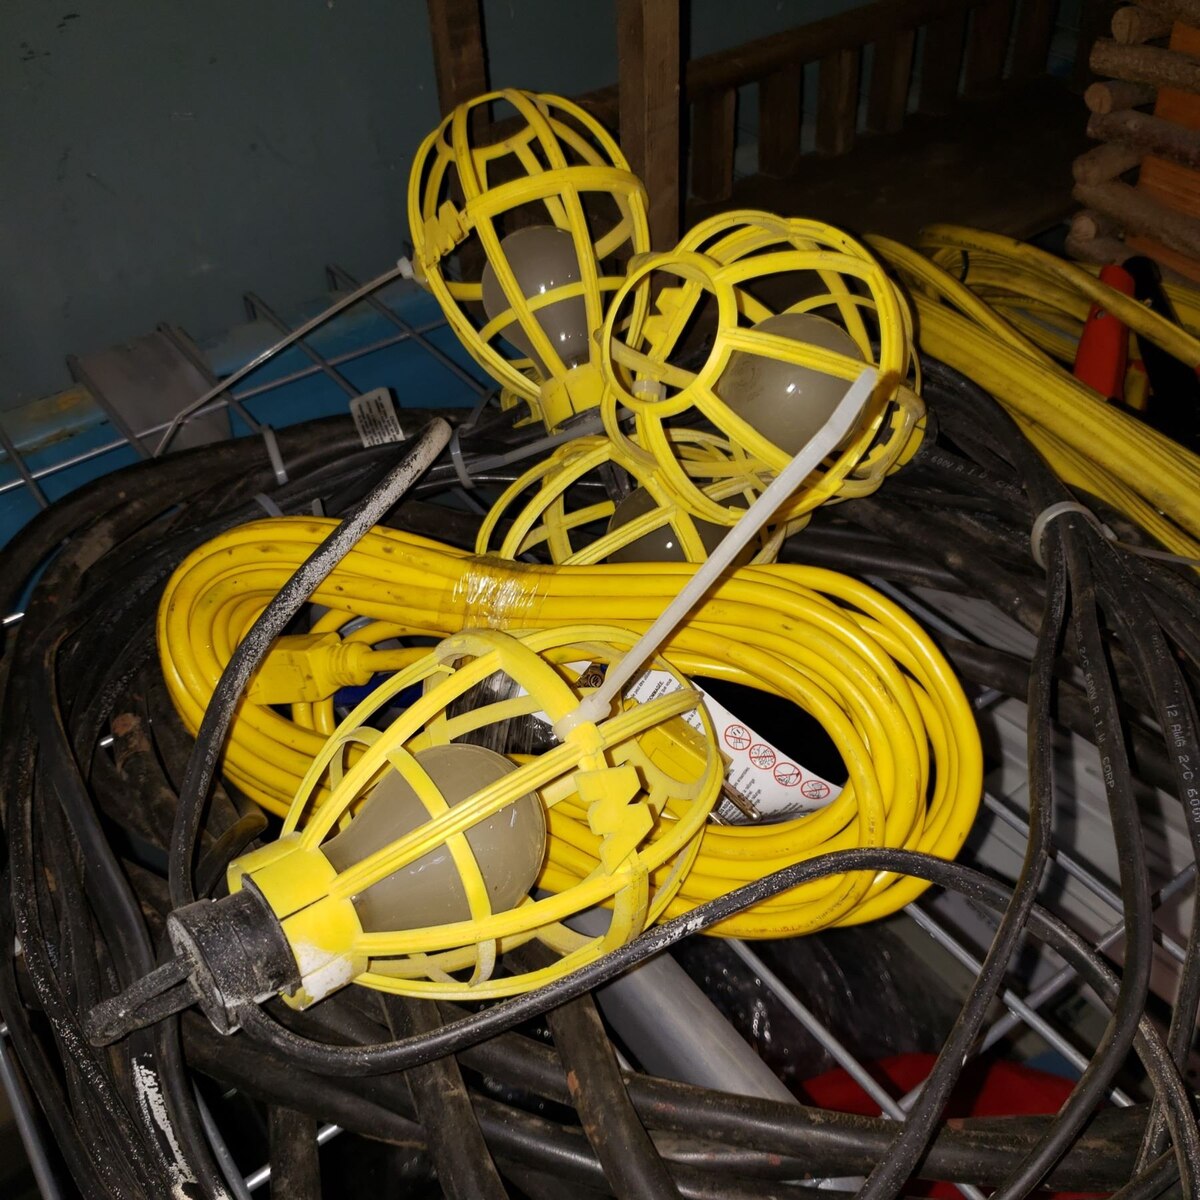
- Avoid daisy-chaining extension cords or power strips: Plugging multiple devices into a single extension cord or power strip can easily overload a circuit. Limit the use of extension cords and power strips or ensure that they are rated for the necessary power load.
Addressing overloaded circuits is crucial for maintaining a safe and reliable electrical system. By redistributing the load, installing additional circuits when necessary, and being mindful of power consumption, you can alleviate the strain on the circuit and reduce chandelier flickering.
Check the bulbs and ensure they are securely screwed in. Loose bulbs can cause flickering. If the issue persists, consider contacting an electrician to inspect the wiring.
Solutions for Chandelier Flickering
If you’re experiencing chandelier flickering, it’s important to pinpoint the underlying cause and implement the appropriate solution. Here are some solutions to address chandelier flickering:
- Replace Faulty Light Bulb: If a faulty light bulb is the cause of the flickering, replacing it with a new bulb can often resolve the issue. Make sure to choose bulbs that are compatible with your chandelier.
- Check and Tighten Wiring Connections: Loose or faulty wiring can lead to flickering. Inspect the wiring connections of your chandelier and tighten any loose connections. If the wiring is damaged or frayed, it’s best to consult a professional electrician for repairs.
- Replace Faulty Dimmer Switch: If your chandelier is connected to a dimmer switch and the flickering persists, consider replacing the dimmer switch. Choose a compatible dimmer switch designed for your lighting fixture’s wattage and type.
- Install Voltage Stabilizer: Voltage fluctuations can cause chandelier flickering. Installing a voltage stabilizer or regulator can help regulate and stabilize the voltage supply to your chandelier, minimizing flickering. Consult a professional electrician for assistance with installation.
- Relieve Circuit Overload: An overloaded circuit can contribute to chandelier flickering. Redistribute the electrical load by connecting the chandelier to a circuit with a lighter load. If needed, consult an electrician to install additional circuits to accommodate the power needs.
It’s worth noting that while these solutions can address common causes of chandelier flickering, there may be other underlying issues that require the expertise of a professional electrician. If flickering persists after trying these solutions, it’s recommended to seek professional help to ensure the electrical safety and proper functioning of your chandelier and home.
Remember, maintaining a well-functioning chandelier not only enhances the aesthetic appeal of your space but also ensures a safe and reliable lighting experience.
Replace Faulty Light Bulb
A common cause of chandelier flickering is a faulty light bulb. Over time, light bulbs can wear out, become loose, or suffer from internal issues, leading to intermittent flickering. If you suspect that a faulty light bulb is the culprit behind your chandelier flickering, replacing it can often resolve the problem. Here are some steps to effectively replace a faulty light bulb:
- Ensure safety: Before replacing the light bulb, turn off the power to the chandelier from the electrical panel. This will prevent any risk of electric shock while working on the fixture.
- Allow cooling: Give the chandelier some time to cool down, particularly if the bulbs have been recently on. This will prevent any burns or injuries from handling hot bulbs.
- Inspect the faulty bulb: Carefully examine the faulty light bulb for any visible signs of damage such as blackened areas, blown filaments, or loose connections. These issues can result in flickering. If you notice any signs of damage, it’s a clear indication that the bulb needs to be replaced.
- Choose the right replacement: Select a replacement light bulb that is compatible with your chandelier’s specifications. Consider the bulb type (incandescent, LED, or halogen), wattage, and base type. Refer to the chandelier’s manual or consult with a professional if you are unsure about the appropriate replacement bulb.
- Gently remove the faulty bulb: Carefully twist the faulty light bulb counterclockwise to loosen and remove it from the socket. Be cautious not to apply excessive force or twist too quickly, as it may damage the socket or bulb base.
- Insert the replacement bulb: Take the new light bulb and align the base with the socket. Gently insert the bulb into the socket and twist it clockwise until it is firmly secured. Ensure that the bulb is snug, but avoid overtightening.
- Turn on the power and test: Once the replacement bulb is properly installed, turn the power back on and test the chandelier. Observe if the flickering issue has been resolved. If the chandelier remains steady without any flickering, then the faulty light bulb was indeed the cause of the problem.
Replacing a faulty light bulb is a simple and cost-effective solution to address chandelier flickering. By following these steps and ensuring the use of high-quality replacement bulbs, you can eliminate this common issue and enjoy uninterrupted illumination from your chandelier.
Read more: Why Does My Dimmer Switch Flicker
Check and Tighten Wiring Connections
Loose or faulty wiring connections can also contribute to chandelier flickering. Poor electrical connections disrupt the consistent flow of power to the light fixture, causing the lights to flicker. To address this issue, it’s important to check and tighten the wiring connections. Here’s what you can do:
- Ensure safety: Before working on any electrical components, ensure the power to the chandelier is turned off at the circuit breaker. This will prevent any risk of electric shock while inspecting and adjusting the wiring connections.
- Examine the wiring connections: Carefully inspect the wiring connections of the chandelier. Look for any visible signs of loose or disconnected wires, frayed insulation, or signs of burning or overheating. These can indicate faulty wiring that needs to be addressed.
- Tighten loose connections: If you find any loose wires, gently tighten them using a screwdriver or pliers. Ensure that the connections are secure but not overly tight, as this can cause damage to the wires or the fixture itself. Be careful not to overtighten and risk breaking the wires or damaging the connection points.
- Repair or replace damaged wiring: If the wiring is frayed, damaged, or showing signs of burning, it’s advisable to consult a professional electrician for repairs. Attempting to repair or replace wiring without proper knowledge and experience can lead to further damage or safety hazards.
- Consider upgrading the wiring: If your chandelier’s wiring is old or in poor condition, it may be beneficial to consider upgrading it. Upgrading the wiring can provide a stable and reliable electrical connection, reducing the chances of flickering. Consult with a professional electrician to assess if an upgrade is necessary and to ensure it is done safely and up to code.
- Test the connection: Once you have checked and tightened all the wiring connections, turn on the power to the chandelier and observe if the flickering persists. If the wiring connections were the cause of the issue, the chandelier’s lights should now remain steady without any flickering.
Working with electrical wiring can be complex and potentially dangerous, so exercise caution and seek professional assistance if you are uncertain or uncomfortable with the task. A certified electrician can provide expert evaluation, repair, or wiring upgrades to ensure the safety and proper functioning of your chandelier.
Replace Faulty Dimmer Switch
If your chandelier is connected to a dimmer switch and the flickering issue persists, the dimmer switch itself may be faulty. Dimmer switches are designed to control the brightness of the lights, but if they are old, worn out, or incompatible with the chandelier, they can cause flickering. To address this issue, consider replacing the faulty dimmer switch. Here’s how:
- Ensure safety: Before working on any electrical components, turn off the power to the chandelier at the circuit breaker. This will prevent any risk of electric shock while handling the wiring and the dimmer switch.
- Confirm dimmer switch compatibility: Check the compatibility of the existing dimmer switch with your chandelier. Some dimmer switches are designed for specific types of lighting fixtures or wattage ratings. If the dimmer switch is incompatible, it can cause flickering issues. Refer to the chandelier’s manual or consult a professional electrician for guidance on the appropriate replacement dimmer switch.
- Remove the old dimmer switch: Carefully remove the cover plate of the dimmer switch using a screwdriver. Unscrew the mounting screws holding the switch in place. Gently pull the switch out from the electrical box, exposing the wiring connections.
- Take note of the wiring connections: It’s important to take note of how the wiring was connected to the old dimmer switch before removing it. Take a picture or make a diagram to ensure you can reconnect the new dimmer switch correctly.
- Disconnect and replace the dimmer switch: Disconnect the wiring connections from the old dimmer switch. This usually involves loosening the wire terminals and removing the wires from underneath them. Replace the old dimmer switch with the new one, making sure the wiring connections are secure.
- Mount the new dimmer switch: Push the new dimmer switch back into the electrical box. Secure it in place by screwing the mounting screws. Place the cover plate back onto the switch and screw it in tightly.
- Turn on the power and test: With the new dimmer switch installed, turn on the power to the chandelier at the circuit breaker. Test the chandelier to see if the flickering issue has been resolved. If the chandelier remains steady without any flickering, then the faulty dimmer switch was indeed the cause of the problem.
Replacing a faulty dimmer switch can help restore stable and flicker-free lighting to your chandelier. Ensure that you follow proper safety precautions and consult a professional electrician if you are unsure or uncomfortable with the task. They can provide expert guidance and ensure the proper installation of the new dimmer switch.
Install Voltage Stabilizer
Fluctuations in voltage can often be a cause of chandelier flickering. When the voltage supplied to the light fixture is unstable, it can result in intermittent flickering of the lights. To address this issue and minimize chandelier flickering, installing a voltage stabilizer can be an effective solution. Here’s how you can install a voltage stabilizer:
- Ensure safety: Before working on any electrical components, turn off the power to the chandelier at the circuit breaker. This will prevent any risk of electric shock while handling the wiring and the voltage stabilizer.
- Assess your voltage needs: Determine the appropriate size and capacity of the voltage stabilizer for your chandelier and electrical system. Factors such as the wattage rating and the number of electrical appliances on the same circuit can help determine the required capacity. Consulting a professional electrician can ensure you choose the right voltage stabilizer for your specific needs.
- Select a suitable location: Choose a suitable location to install the voltage stabilizer near the electrical panel or the circuit that supplies power to the chandelier. Ensure there is enough space and proper ventilation for the stabilizer to function effectively.
- Mount the voltage stabilizer: Attach the voltage stabilizer to a solid surface, such as the wall or an electrical panel, using screws or mounting brackets. Make sure it is securely fastened and does not interfere with any existing electrical components or wiring connections.
- Connect the wiring: Follow the manufacturer’s instructions to connect the wiring from the electrical panel or circuit to the voltage stabilizer. Ensure the proper connections are made as specified by the manufacturer, using appropriate wire connectors or terminals.
- Test the voltage stabilizer: Once the wiring is properly connected, turn on the power at the circuit breaker. Test the chandelier to observe if the flickering has been resolved and the lights remain steady. The voltage stabilizer should regulate and stabilize the voltage supply, minimizing flickering caused by voltage fluctuations.
Installing a voltage stabilizer can help regulate and stabilize the voltage supplied to your chandelier, minimizing flickering issues. However, it is important to consult a professional electrician for guidance and assistance, as they can assess your electrical system and ensure the safe and effective installation of the voltage stabilizer.
Relieve Circuit Overload
An overloaded circuit can be a common cause of chandelier flickering. When multiple high-wattage appliances or fixtures, including your chandelier, are connected to the same circuit, it can exceed the circuit’s capacity and lead to flickering. To address circuit overload and reduce chandelier flickering, consider the following steps:
- Identify the overloaded circuit: Determine which circuit is overloaded by checking the load capacity of each circuit in your electrical panel. Look for circuits that consistently have a high electrical load or have tripped breakers due to overload.
- Redistribute the electrical load: Once you have identified the overloaded circuit, redistribute the electrical load by connecting appliances or fixtures, including the chandelier, to different circuits. Spread out the power demands to ensure that no single circuit is overloaded. This can help alleviate the strain on the circuit and reduce the likelihood of flickering.
- Consider installing additional circuits: If redistributing the load does not resolve the issue, consult a professional electrician to assess your electrical system. They can help determine if installing additional circuits is necessary to accommodate the power needs. Adding dedicated circuits for high-power appliances or fixtures, such as the chandelier, can ensure that each circuit is appropriately sized and reduce the risk of overload.
- Reduce power consumption: Evaluate the power consumption of appliances connected to the circuit in question. Consider replacing older, less energy-efficient appliances with newer, more energy-efficient models that have lower electricity demands. This can reduce the overall load on the circuit and minimize the chance of overload.
- Avoid daisy-chaining extension cords or power strips: Plugging multiple devices into a single extension cord or power strip can easily overload a circuit. Minimize the use of extension cords and power strips, or ensure that they are rated for the necessary power load.
Addressing circuit overload is crucial for maintaining a safe and reliable electrical system. By redistributing the load, installing additional circuits when necessary, and being mindful of power consumption, you can alleviate the strain on the circuit and reduce chandelier flickering.
If you are uncertain or uncomfortable with the task, it is advisable to consult a certified electrician for a thorough assessment of your electrical system and professional guidance to resolve circuit overload issues.
Read more: Why Is My Porch Light Flickering
Conclusion
Chandelier flickering can be a frustrating issue, but by understanding the common causes and implementing the appropriate solutions, you can restore steady and uninterrupted illumination to your chandelier. Whether it’s a faulty light bulb, loose wiring connections, a malfunctioning dimmer switch, voltage fluctuations, or circuit overload, there are steps you can take to address the problem and eliminate flickering.
Start by identifying the specific cause of the flickering, such as a faulty light bulb, loose wiring, or a problematic dimmer switch. Replace faulty light bulbs with new ones and ensure a secure connection. Check and tighten wiring connections to ensure a stable electrical flow. Consider replacing a faulty dimmer switch with a compatible and properly functioning one. Install a voltage stabilizer to regulate and stabilize the voltage supply to the chandelier. And if circuit overload is the issue, redistribute the load or consult a professional electrician to install additional circuits.
Remember, safety is paramount when dealing with electrical components. Always turn off the power at the circuit breaker before working on any electrical connections and consult a professional if you are unsure or uncomfortable with the task.
By taking these steps and addressing the specific cause of chandelier flickering, you can enjoy the beauty and functionality of your chandelier without the annoyance of flickering lights. A well-lit and flicker-free chandelier not only enhances the ambiance of your space but also highlights the elegance and sophistication of your decor. So, go ahead and resolve any flickering issues, and bask in the steady and enchanting glow of your chandelier!
Frequently Asked Questions about Why Is My Chandelier Flickering
Was this page helpful?
At Storables.com, we guarantee accurate and reliable information. Our content, validated by Expert Board Contributors, is crafted following stringent Editorial Policies. We're committed to providing you with well-researched, expert-backed insights for all your informational needs.


0 thoughts on “Why Is My Chandelier Flickering”