Home>Home Security and Surveillance>Why Is My Security Camera Flickering
Home Security and Surveillance
Why Is My Security Camera Flickering
Modified: October 21, 2024
Discover the reasons behind your security camera flickering and learn how to fix it with our comprehensive guide. Ensure optimal home security and surveillance.
(Many of the links in this article redirect to a specific reviewed product. Your purchase of these products through affiliate links helps to generate commission for Storables.com, at no extra cost. Learn more)
Introduction
Welcome to the world of home security and surveillance! In today’s fast-paced digital age, ensuring the safety and security of our homes has become increasingly important. With the advancements in technology, home security systems, including security cameras, have become more accessible and affordable to homeowners.
However, like any technological device, security cameras may encounter certain issues that can impact their performance. One common problem that many homeowners face is the flickering of security camera footage. This flickering can be frustrating and may raise concerns about the camera’s reliability and effectiveness in capturing clear images.
In this article, we will delve into the world of security camera flickering and explore its causes and potential solutions. Whether you are a homeowner looking to troubleshoot a flickering camera or a security professional seeking to broaden your knowledge, we’ve got you covered!
Understanding the reasons behind security camera flickering is the first step in resolving the issue. By identifying the root cause, you can take appropriate measures to rectify the problem and ensure your camera captures high-quality, uninterrupted footage.
Key Takeaways:
- Flickering in security cameras can be caused by interference from electronic devices, inadequate power supply, low light conditions, and camera settings. Proper positioning, power management, lighting, and camera adjustments can help resolve these issues.
- To address flickering in security cameras, consider relocating cameras away from electronic devices, ensuring stable power supply, using proper lighting, and adjusting camera settings. Regular maintenance and professional assistance can also help maintain clear and reliable surveillance footage.
Read more: Why Is My Chandelier Flickering
Understanding Flickering in Security Cameras
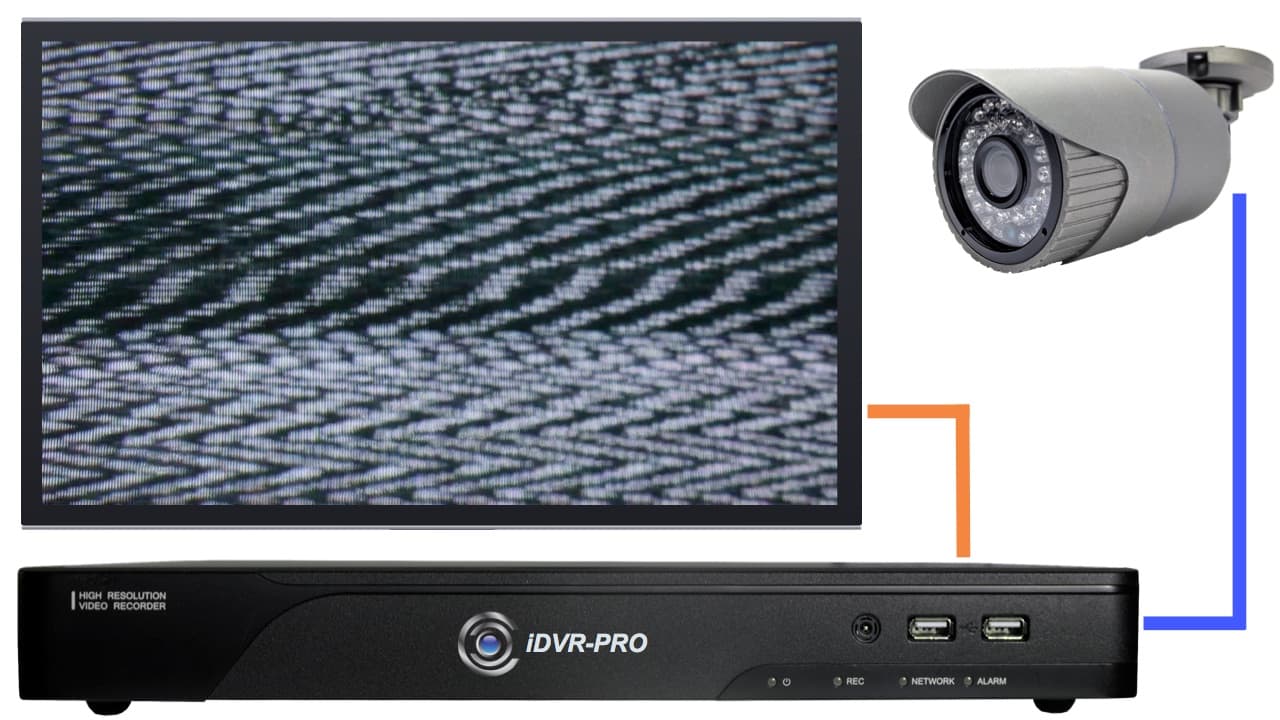
Flickering in security cameras refers to the intermittent appearance of light or dark lines in the camera’s video feed. This can give the footage a strobe-like effect, making it difficult to discern clear images. There are several reasons why security camera flickering occurs, and understanding these causes is crucial in finding the appropriate solutions.
One common cause of flickering is interference from electrical devices. When security cameras are installed near electronic devices that emit electromagnetic fields, such as fluorescent lights, computer monitors, or even wireless routers, the camera’s video feed can be negatively affected. The electromagnetic interference disrupts the camera’s signal, resulting in flickering footage.
Inadequate power supply can also contribute to camera flickering. When a security camera is not receiving a consistent and stable power source, it can lead to fluctuations in voltage. These voltage fluctuations can manifest as flickering in the camera’s video feed. It’s essential to ensure that your camera is properly powered and connected to a reliable power source.
Additionally, low light conditions can cause security cameras to flicker. When there is insufficient lighting, the camera’s image sensor struggles to capture clear images, resulting in flickering or grainy footage. Proper illumination is vital for producing high-quality video recordings, especially in outdoor or low-light environments.
Moreover, camera settings and configuration issues can contribute to flickering problems. Incorrect camera settings, such as a mismatch between the camera’s frame rate and the lighting conditions, can lead to flickering in the footage. Similarly, improper configuration, such as incorrect settings for exposure or white balance, can also result in flickering effects.
Now that we have a basic understanding of the causes of flickering in security cameras, let’s explore some potential solutions to address these issues. By troubleshooting and implementing the appropriate measures, you can restore the functionality and reliability of your security camera system.
Common Causes of Flickering
When dealing with flickering issues in security cameras, it’s important to identify the underlying causes. By understanding these common culprits, you can take the necessary steps to resolve the problem and ensure smooth and uninterrupted video footage.
1. Interference from Electrical Devices: One of the primary causes of flickering in security cameras is interference from nearby electrical devices. Electronic devices that emit electromagnetic fields, such as fluorescent lights, computer monitors, or even power lines, can disrupt the camera’s signal and lead to flickering in the video feed. It’s crucial to keep your security cameras away from such devices or use equipment designed to mitigate electromagnetic interference.
2. Inadequate Power Supply: Insufficient or unstable power supply can also contribute to flickering in security cameras. When a camera does not receive a consistent and reliable power source, voltage fluctuations can occur, resulting in flickering footage. Make sure to use a power source that meets the camera’s requirements and consider using a surge protector or a UPS (uninterruptible power supply) to stabilize the power flow.
3. Low Light Conditions: When security cameras operate in low light conditions, such as during nighttime or in poorly lit areas, they may struggle to capture clear images. This can manifest as flickering or grainy footage. To mitigate this issue, ensure that your cameras are equipped with appropriate low-light capabilities, such as infrared (IR) night vision, or consider installing additional lighting to enhance visibility.
4. Camera Settings and Configuration Issues: Incorrect camera settings or configuration can also lead to flickering problems. For instance, if the camera’s frame rate is not properly synchronized with the lighting conditions, flickering can occur. Similarly, improper settings for exposure, white balance, or anti-flicker control can also contribute to the issue. Take the time to review and adjust the camera settings to match the specific environment and lighting conditions.
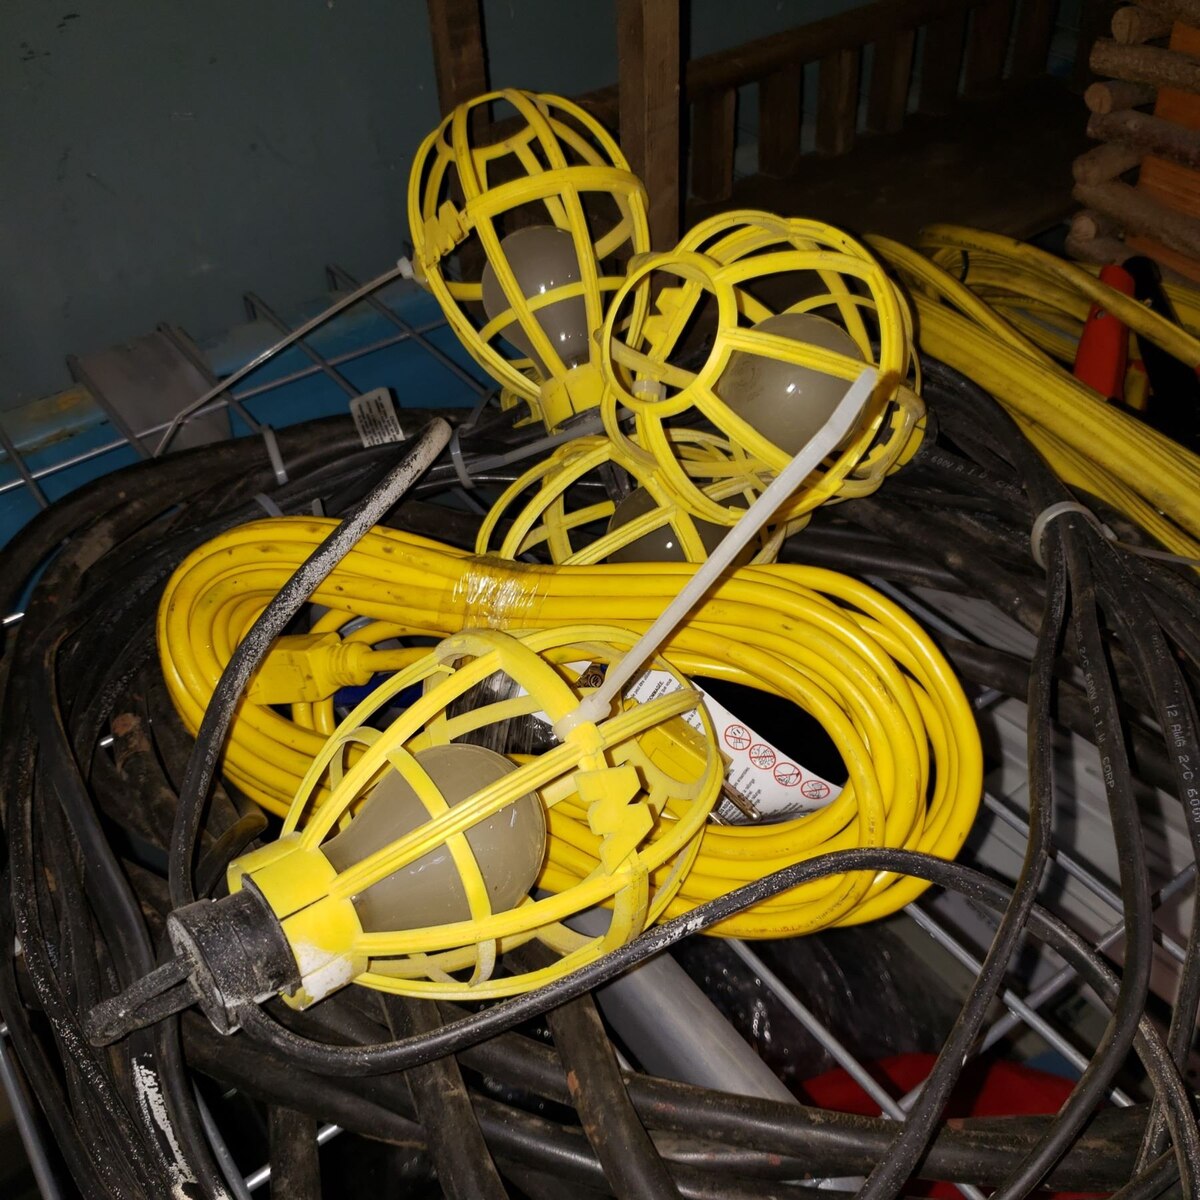
5. Cable or Connection Problems: Faulty cables or poor connections between the camera and the recording device or monitoring system can result in flickering footage. Ensure that all cables are securely plugged in and in good condition. If necessary, replace damaged cables or connectors to ensure a stable and uninterrupted video feed.
By understanding these common causes of flickering in security cameras, you can effectively troubleshoot and address the issue. In the next sections, we will explore various troubleshooting steps and potential solutions to resolve flickering problems in your security camera system.
Interference from Electrical Devices
Interference from electrical devices is a common cause of flickering in security cameras. When security cameras are installed in close proximity to electronic devices that emit electromagnetic fields (EMF), it can disrupt the camera’s signal and lead to flickering in the video feed.
Various electronic devices can cause this interference, including fluorescent lights, computer monitors, routers, and even power lines. These devices generate EMF, which can interfere with the camera’s transmission and result in flickering or distorted footage.
To minimize interference from electrical devices, there are several steps you can take:
1. Positioning: Start by ensuring that your security cameras are positioned away from any electrical devices. Keep a safe distance to reduce the chances of electromagnetic interference. If possible, place the cameras on a separate circuit from other electrical equipment to further mitigate potential interference.
2. Shielding: Consider using shielded cables for your security camera system. Shielded cables can significantly reduce the impact of electromagnetic interference. These cables have an additional layer of shielding, such as foil or braided wire, which helps to block out unwanted electromagnetic signals.
3. Grounding: Proper grounding is crucial in minimizing interference. Ensure that all components of your security camera system, including cameras, cables, and recording devices, are properly grounded. This helps to eliminate any electrical noise that could contribute to flickering issues.
4. Filter Devices: You can also use filter devices, such as ferrite cores or suppressor filters, to reduce electromagnetic interference. These devices help to absorb or filter out electromagnetic waves and can be added to the power or video cables near the camera or at the source of interference.
5. Upgrade Equipment: If you are experiencing significant interference from electrical devices despite taking the above steps, it may be worth considering upgrading your security camera system. Look for cameras that are specifically designed to minimize electromagnetic interference or invest in professional-grade equipment that is less susceptible to such issues.
By implementing these measures, you can significantly reduce interference from electrical devices and minimize flickering in your security camera system. However, if the problem persists, it’s recommended to consult with a professional technician or a security system specialist who can provide further guidance and assistance.
Inadequate Power Supply
Inadequate power supply is another common cause of flickering in security cameras. When a camera does not receive a consistent and stable power source, it can lead to fluctuations in voltage, resulting in flickering footage or intermittent power loss.
There are several factors that can contribute to inadequate power supply:
1. Insufficient Power Source: Ensure that your security cameras are connected to a power source that meets their power requirements. Cameras typically require a specific voltage and current to function optimally. Using a power source with lower voltage or insufficient current can cause voltage fluctuations, leading to flickering in the video feed.
2. Power Over Ethernet (PoE) Issues: If you are using PoE cameras, which draw power and data through a single Ethernet cable, check if the PoE switch or injector is providing sufficient power to the cameras. Insufficient power supply through the PoE connection can result in flickering or unstable footage.
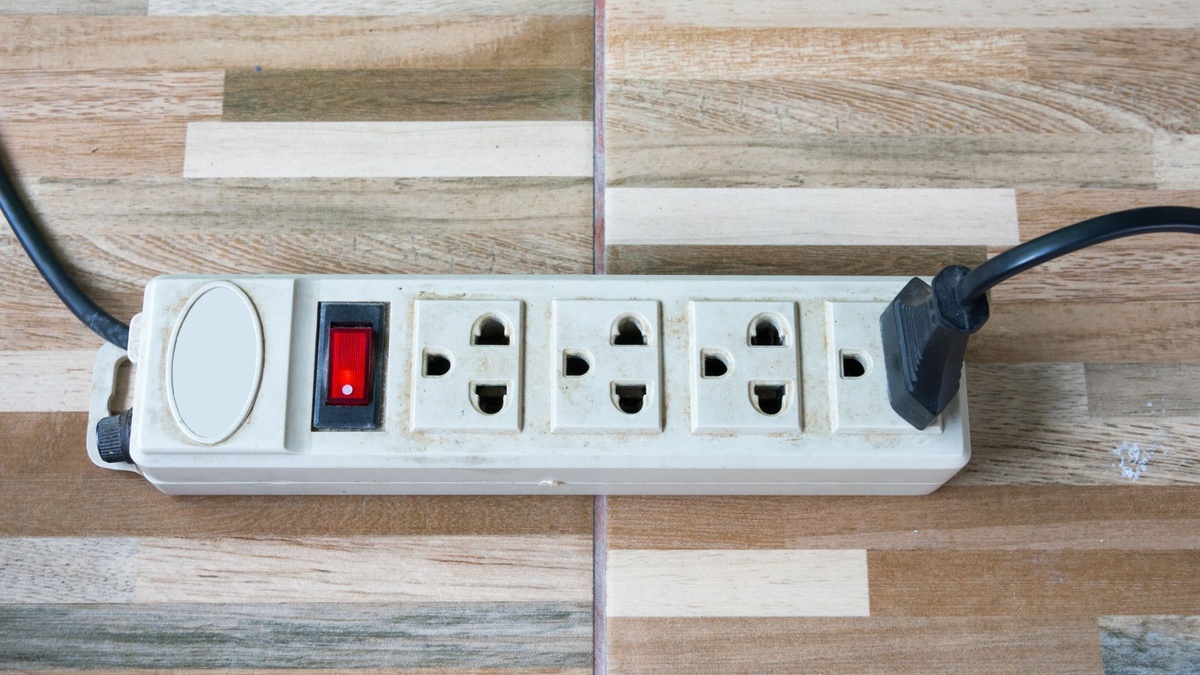
3. Voltage Fluctuations: Fluctuations in the power grid can impact the stability of the power supply to your security cameras. Power surges or voltage drops can cause flickering or temporary power loss. Consider using surge protectors or voltage stabilizers to mitigate these fluctuations and ensure a consistent power supply.
4. Wiring Issues: Faulty or inadequate wiring can also affect the power supply to your security cameras. Loose connections, damaged cables, or insufficient wire gauge can lead to voltage drops or irregular power delivery, resulting in flickering or intermittent footage. Ensure that all power connections are secure and the cables are in good condition.
To address inadequate power supply issues, consider the following steps:
1. Check Power Source: Verify that your cameras are connected to a power source that meets their requirements. Ensure that the power supply is supplying the correct voltage and provides sufficient current to support the cameras’ power needs. Consider using a multimeter to measure the voltage at the camera connection point.
2. Use Quality Power Supplies: Invest in high-quality power supplies or adapters that are specifically designed for security cameras. Cheap or generic power supplies may not provide a stable and reliable power output, leading to flickering issues. Opt for reputable brands or consult with a professional to ensure compatibility and reliability.
3. Consider UPS or Power Backup: Installing an Uninterruptible Power Supply (UPS) or power backup system can help ensure that your security cameras receive a continuous power supply, even in the event of power outages or fluctuations. A UPS provides temporary power during outages and protects against voltage sags, surges, and flickering due to inadequate power supply.
4. Professional Assistance: If you continue to experience flickering issues despite checking and improving the power supply, it is advisable to consult with a professional technician or an electrician. They can assess and troubleshoot any underlying electrical or wiring issues that may be affecting the power supply to your cameras.
By addressing inadequate power supply problems, you can enhance the stability and reliability of your security camera system, minimizing flickering issues and ensuring continuous surveillance coverage.
Read more: Why Is My Security Camera Beeping
Low Light Conditions
Low light conditions can significantly impact the performance of security cameras and lead to flickering issues. When there is insufficient lighting, security cameras may struggle to capture clear images, resulting in flickering or grainy footage.
Here are some of the key factors to consider when dealing with low light conditions:
1. Sensitivity to Low Light: Different security cameras possess varying levels of sensitivity to low light. Some cameras are specifically designed to excel in low light environments, while others may struggle under similar conditions. It’s important to choose cameras that are equipped with low-light capabilities, such as infrared (IR) night vision or wide dynamic range (WDR) technology, to ensure optimal performance in challenging lighting situations.
2. Infrared (IR) Illumination: Infrared (IR) illumination is a common feature found in many security cameras. When low light conditions are detected, IR LEDs or illuminators activate to provide additional light that is invisible to the human eye but visible to the camera. This helps improve visibility and reduces flickering in low light situations. Ensure that your cameras have IR capabilities and consider adjusting the IR settings to optimize performance.
3. Additional Lighting: In certain scenarios, it may be necessary to supplement the existing lighting conditions with additional light sources. This can include installing outdoor floodlights, spotlights, or dedicated security lighting near the camera’s field of view. Properly placed lighting can enhance visibility and reduce flickering, especially in outdoor or poorly lit areas.
4. Camera Placement: Proper camera placement is crucial when dealing with low light conditions. Ensure that the cameras are positioned in areas with sufficient ambient light or near artificial light sources. Avoid placing cameras directly facing bright light sources or highly reflective surfaces, as this can cause glare or overexposure in the footage. Conduct a thorough site survey to identify optimal camera placement for the best possible image quality.
5. Camera Settings: Adjusting the camera settings can play a significant role in mitigating flickering under low light conditions. This includes optimizing camera exposure settings, adjusting gain or sensitivity levels, and configuring the white balance to match the lighting environment. Experiment with different settings to find the optimal balance between visibility and reducing flickering effects.
6. Consider Day/Night Cameras: Day/Night cameras are specifically designed to operate efficiently in both daytime and low light conditions. These cameras utilize advanced image sensors that can adapt to changing lighting conditions, switching between color mode during the day and black and white mode with increased sensitivity during low light. Consider upgrading to Day/Night cameras for improved performance in low light environments.
By implementing these strategies, you can improve the performance of your security cameras in low light conditions, reducing flickering and ensuring clear and reliable footage.
Camera Settings and Configuration Issues
Camera settings and configuration play a crucial role in the performance and functionality of security cameras. Incorrect settings can result in flickering issues and negatively impact the quality of the video footage. It’s essential to properly configure the camera settings to ensure optimal performance and minimize flickering.
Here are some common camera settings and configuration issues to consider:
1. Frame Rate Mismatch: The frame rate of a camera refers to the number of frames captured per second. When the frame rate does not match the lighting conditions or the power supply frequency, flickering can occur. For example, in areas with fluorescent lighting, a camera set to a frame rate that does not synchronize with the power supply frequency (often 50 or 60 Hz) may capture the flickering effect. Make sure to adjust the frame rate based on the lighting conditions to avoid flickering issues.
2. Exposure Settings: Incorrect exposure settings can also lead to flickering problems. Exposure refers to the amount of light that the camera’s image sensor gathers when capturing an image or video. Underexposure or overexposure can both result in flickering or poor image quality. Adjust the exposure settings to properly balance the light levels and minimize flickering effects.
3. White Balance: The white balance setting helps to adjust the camera’s color temperature to accurately represent the colors in the scene. Incorrect white balance settings can result in color casts or unnatural hues, which may contribute to flickering in the footage. Ensure that the white balance is properly configured to match the lighting conditions in order to reduce flickering and maintain accurate colors.
4. Anti-Flicker Control: Many modern security cameras include an anti-flicker control feature, designed to reduce or eliminate flickering effects caused by power fluctuations or artificial lighting. This feature automatically adjusts the camera’s shutter speed or exposure to synchronize with the lighting frequency, providing stable and flicker-free video feed. Enable or adjust the anti-flicker control settings to optimize performance in areas with different lighting conditions.
5. Software Updates: Camera firmware updates often include bug fixes and improvements that can address flickering issues. Regularly check for available firmware updates from the camera manufacturer and install them to ensure your cameras are running the latest software version. These updates can help resolve compatibility issues and improve overall camera performance.
6. Test and Adjust: To find the optimal camera settings and configurations, it’s essential to perform thorough testing and adjustments. Experiment with different settings, monitor the results, and make incremental changes to mitigate flickering effects. Keep notes of the settings that deliver the best results for future reference.
Understanding and fine-tuning camera settings and configurations is key to reducing flickering and maximizing the performance of your security camera system. Take the time to review the camera’s user manual, consult with technical support when necessary, and conduct regular monitoring and adjustment to maintain optimal performance.
Check the power source and connections for any loose or damaged wires. Flickering can be caused by electrical issues, so ensure everything is properly connected and functioning.
Troubleshooting Flickering Issues
Flickering issues in security cameras can be frustrating, but they are often solvable with some troubleshooting techniques. By following these steps, you can identify the root cause of the problem and implement the necessary measures to resolve it:
1. Check the Power Supply: Start by ensuring that the power supply to your security cameras is stable and sufficient. Check if the power cables are securely connected and not damaged. Consider using a multimeter to measure the voltage at the camera’s power source to ensure it meets the camera’s requirements.
2. Adjust Camera Settings: Review and adjust the camera settings to minimize flickering. Pay attention to the frame rate, exposure, white balance, and anti-flicker control settings. Experiment with different configurations to find the optimal settings for your specific lighting conditions.
3. Eliminate Interference: Identify and eliminate any potential sources of electromagnetic interference. Keep the cameras away from electronic devices that emit electromagnetic fields, such as fluorescent lights, computer monitors, or power lines. Consider using shielded cables and filter devices to minimize interference.
4. Maintain Proper Lighting: Ensure that your cameras have sufficient lighting for optimal performance. Consider installing additional lighting sources or using infrared (IR) illuminators to enhance visibility in low light conditions. Avoid placing cameras directly facing bright light sources or highly reflective surfaces to prevent glare or overexposure.
5. Update Firmware: Check for firmware updates from the camera manufacturer regularly. These updates can address compatibility issues and provide bug fixes that may help resolve flickering problems. Follow the manufacturer’s instructions to update the camera firmware to the latest version.
6. Test Other Cameras or Equipment: If you have multiple cameras in your system, test other cameras to see if the flickering issue is isolated to a specific camera or if it affects the entire system. Additionally, check the monitoring system or recording device to ensure it is functioning correctly and not contributing to the flickering issue.
7. Consult with Professionals: If you have tried all the troubleshooting steps and the flickering problem persists, it may be time to seek assistance from professionals. Contact the camera manufacturer’s technical support or consult with a security system specialist who can provide specialized expertise and guidance to resolve the issue.
Troubleshooting flickering issues in security cameras requires patience and a systematic approach. By following these steps and ruling out potential causes, you can pinpoint the source of the problem and take the necessary steps to resolve it, ensuring smooth and reliable surveillance in your home or business.
Checking the Power Supply
When dealing with flickering issues in security cameras, one of the first steps to take is to check the power supply. Inadequate or unstable power can often be the culprit behind flickering footage. By ensuring a reliable and stable power source, you can mitigate flickering problems and ensure optimal performance of your security camera system.
Here are some steps to check the power supply:
1. Power Source Verification: Start by verifying that the power source is providing the required voltage and current for your security cameras. Check the specifications provided by the manufacturer to ensure the power source matches the requirements of your cameras. Using an underpowered or incompatible power source can lead to voltage fluctuations and flickering issues.
2. Cable Inspection: Inspect the power cables for any signs of damage or wear. Look for frayed or exposed wires, loose connections, or connectors that are not securely plugged in. Faulty cables can lead to unstable power delivery and result in flickering or intermittent power to the cameras.
3. Multimeter Testing: To accurately measure the voltage at the camera’s power source, you can use a multimeter. Set the multimeter to the appropriate voltage range and place the probes on the positive and negative terminals of the power supply. Compare the measured voltage with the camera’s specified requirements to ensure they align.
4. Power Surge Protection: It’s essential to protect your security cameras and other sensitive equipment from power surges. Consider using surge protectors or power surge suppressors. These devices help to prevent voltage spikes that can damage the cameras and disrupt their performance. Ensure that the power supply is connected through an appropriate surge protection device.
5. Power Backup Solutions: In areas with frequent power outages or fluctuations, it is beneficial to have a power backup solution in place. Uninterruptible Power Supply (UPS) systems offer temporary backup power during outages, maintaining a consistent power supply to the cameras, and reducing the risk of flickering issues caused by power interruptions.
6. Consult with a Professional: If you are unsure about the power supply or encounter persistent flickering problems, it is advisable to consult with a professional electrician or a security system specialist. They can inspect your electrical setup, verify the power supply, and provide guidance on resolving any power-related issues.
By ensuring a stable and sufficient power supply to your security cameras, you can minimize flickering issues and maintain reliable surveillance coverage. Regularly inspect and test the power supply components, follow manufacturer recommendations, and seek professional assistance when needed to ensure the optimal performance of your security camera system.
Read more: Why Is My Security Camera Blurry
Adjusting Camera Settings
One of the key steps in troubleshooting flickering issues in security cameras is adjusting the camera settings. Properly configuring the settings can help minimize flickering and optimize the performance of your cameras for different lighting conditions. Here are some important camera settings to consider:
1. Frame Rate: The frame rate refers to the number of frames captured per second by the camera. Adjusting the frame rate is crucial for synchronizing camera settings with the lighting conditions. For example, when capturing footage under fluorescent lighting, a frame rate that matches the power supply frequency (commonly 50 or 60 Hz) can help avoid flickering effects. Experiment with different frame rates to find the setting that minimizes flickering in your specific environment.
2. Exposure Settings: Adjusting the camera’s exposure settings can significantly impact the quality of the captured footage. Incorrect exposure settings can lead to overexposure or underexposure, resulting in flickering or poor image quality. Take the time to properly balance the exposure, ensuring that the camera captures enough light without overexposing bright areas or underexposing dark areas.
3. White Balance: The white balance setting is responsible for color accuracy in the captured video footage. Incorrect white balance settings can result in color casts or unnatural color tones, which may contribute to flickering effects. Make sure to adjust the white balance setting to match the lighting conditions in order to reduce flickering and maintain accurate colors in your footage.
4. Anti-Flicker Control: Many modern security cameras are equipped with an anti-flicker control feature. This feature helps to reduce or eliminate flickering effects caused by power fluctuations or artificial lighting. Activate the anti-flicker control and adjust the settings to match the power supply frequency of your environment (50 Hz or 60 Hz). This will help synchronize the camera’s capture rate with the lighting conditions and minimize flickering.
5. Shutter Speed: Adjusting the shutter speed can also impact flickering in the footage. Higher shutter speeds are better suited for areas with bright lighting, while lower shutter speeds may be necessary for low light conditions. Experiment with different shutter speed settings to find the optimal balance between capturing clear footage and minimizing flickering effects.
6. Testing and Calibration: It is essential to evaluate and calibrate the camera settings through thorough testing. Monitor the video footage after making adjustments and observe for any remaining flickering or other issues. Fine-tune the settings based on your observations and repeat the process until optimal results are achieved.
7. Consult the User Manual: The camera manufacturer’s user manual is a valuable resource for understanding and adjusting camera settings. Refer to the manual for specific instructions on accessing and modifying the settings relevant to your camera model. Following the manufacturer’s guidelines ensures the best use of the camera’s features and helps minimize flickering issues.
By adjusting camera settings, you can fine-tune the performance of your security cameras and minimize flickering issues. Experiment with different settings, considering frame rate, exposure, white balance, anti-flicker control, and shutter speed. Regularly monitor the footage and consult the camera’s user manual for specific instructions. With proper configuration, you can achieve clear and flicker-free video recordings for enhanced security and surveillance.
Eliminating Interference
Interference is a common cause of flickering in security cameras, but it can be mitigated by taking steps to eliminate or minimize its effects. By addressing potential sources of interference, you can improve the overall performance and stability of your security camera system. Here are some strategies to eliminate interference:
1. Identify Potential Sources: Start by identifying potential sources of interference in the vicinity of your security cameras. Look for electronic devices that emit electromagnetic fields (EMF), such as fluorescent lights, computer monitors, power lines, or wireless routers. These devices can disrupt the camera’s signal and result in flickering or distorted footage.
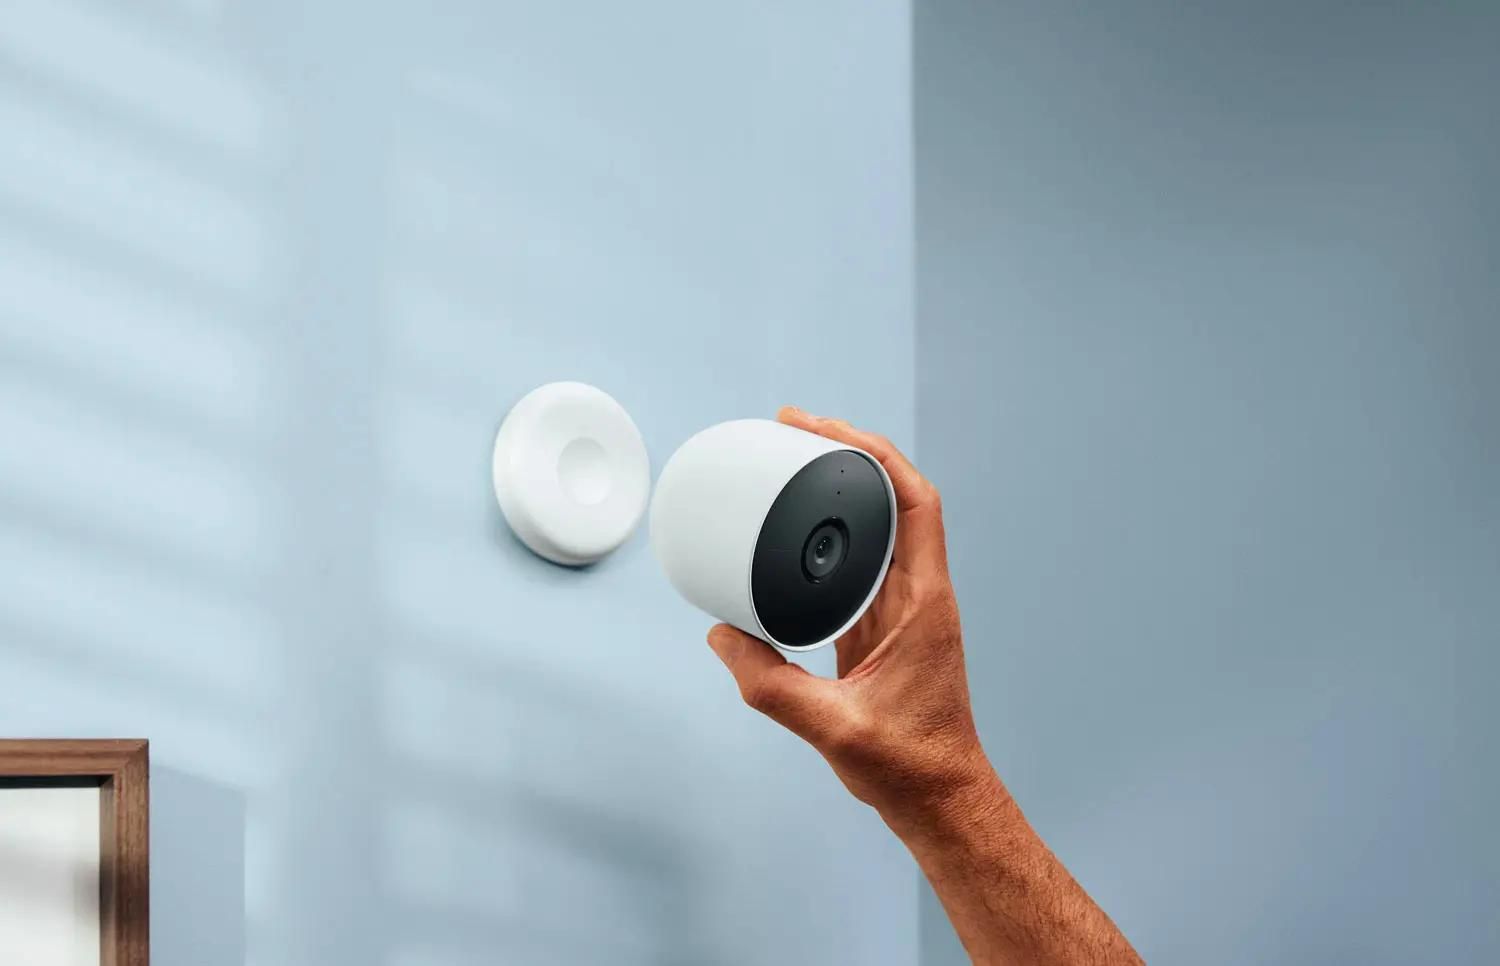
2. Relocate Cameras: If possible, move the cameras away from the sources of interference. Increasing the distance between the cameras and electronic devices can help minimize the impact of electromagnetic interference. Reevaluate the camera placement to find a location that minimizes potential interference for optimal performance.
3. Use Shielded Cables: Consider using shielded cables for your security camera system. Shielded cables have an additional layer of shielding, such as foil or braided wire, that helps block out electromagnetic signals. This can help minimize interference from nearby electronic devices, reducing the chances of flickering or distorted footage.
4. Install Filter Devices: Filter devices, such as ferrite cores or suppressor filters, can be added to the power or video cables near the cameras or at the source of interference. These devices help absorb or filter out unwanted electromagnetic waves, reducing the impact of interference on the camera’s performance.
5. Proper Grounding: Ensure that all components of your security camera system, including cameras, cables, and recording devices, are properly grounded. Grounding helps eliminate electrical noise and can reduce the risk of interference. Consult an electrician if you need assistance with grounding your cameras or if you suspect grounding issues are contributing to interference.
6. Upgrade Equipment: If you continue to experience significant interference despite taking the above steps, consider upgrading your security camera equipment. Professional-grade cameras and specialized equipment are often designed to mitigate electromagnetic interference. Consult with a security system specialist or a professional technician who can recommend suitable equipment that is less susceptible to interference.
7. Test and Monitor: After implementing measures to eliminate interference, monitor the performance of your security cameras. Regularly review the video footage to ensure that the flickering issue has been resolved. If any interference persists, consider adjusting the camera settings, repositioning the cameras, or seeking further assistance from professionals.
By addressing and eliminating interference, you can improve the reliability and effectiveness of your security camera system. Taking proactive steps to minimize interference enhances the overall performance, reduces the likelihood of flickering issues, and ensures consistently clear and uninterrupted video recordings for your home or business security needs.
Maintaining Proper Lighting
Proper lighting is essential for ensuring clear and high-quality video footage from your security cameras. Insufficient lighting can lead to flickering issues or produce grainy and unclear images. By maintaining proper lighting conditions, you can optimize the performance of your security camera system. Here are some considerations to help you maintain proper lighting:
1. Assess Ambient Lighting: Start by assessing the ambient lighting conditions in the areas where your security cameras are installed. Consider the natural light sources, such as windows or outdoor lighting, as well as any artificial lighting present. Take note of areas that may have low light levels or uneven lighting.
2. Use Adequate Exterior Lighting: Outdoor cameras may require additional lighting to maintain visibility during nighttime or low light conditions. Install dedicated outdoor lighting, such as floodlights or spotlights, to ensure proper illumination in the cameras’ field of view. This will not only deter potential intruders but also provide clear footage without flickering or graininess.
3. Utilize Infrared (IR) Illumination: Many security cameras come equipped with infrared (IR) illuminators, which emit light that is invisible to the human eye but visible to the camera’s image sensor. IR illumination is particularly useful in low light conditions, allowing cameras to capture clear footage without causing flickering effects. Ensure that your cameras have IR capabilities and configure them to activate when the ambient light levels drop below a certain threshold.
4. Consider Wide Dynamic Range (WDR) Cameras: In areas with challenging lighting conditions, such as those with bright backlighting or high contrast, consider using cameras with Wide Dynamic Range (WDR) functionality. WDR cameras are capable of capturing and processing a wider range of light intensities, producing balanced and clear images. This can help prevent flickering or overexposure in areas with varying lighting levels.
5. Regularly Clean Camera Lens: Over time, dust, dirt, or debris can accumulate on the camera lens, obstructing light and degrading the image quality. Regularly clean the camera lens using a soft, lint-free cloth to ensure that the lens remains clear and unobstructed. This will help maintain proper lighting and reduce the risk of flickering or grainy footage.
6. Adjust Camera Angle and Position: Sometimes, improper camera angle or position can result in poor lighting conditions and subsequent flickering. Review the camera’s field of view and consider adjusting its angle or repositioning it to ensure that the area of interest is properly illuminated. Avoid placing cameras directly facing bright light sources or highly reflective surfaces, as this can cause glare or overexposure in the footage.
7. Regular Maintenance: Perform regular maintenance of your lighting fixtures, making sure they are functioning optimally and replacing any bulbs that have burnt out. Additionally, monitor the performance of your cameras regularly to identify any lighting-related issues and address them promptly.
By maintaining proper lighting conditions, you can enhance the clarity and reliability of your security camera footage. Assess the ambient lighting, utilize exterior lighting or infrared illumination as needed, consider cameras with WDR capabilities, keep the camera lens clean, and regularly monitor and adjust the camera positions. These steps will ensure optimal lighting for your security camera system and prevent flickering or degraded video quality.
Conclusion
Flickering issues in security cameras can be frustrating and may hinder the effectiveness of your surveillance system. However, by understanding the common causes of flickering and implementing the appropriate solutions, you can mitigate these issues and ensure clear and reliable video footage for your home or business security needs.
In this article, we discussed various factors that can contribute to flickering, including interference from electrical devices, inadequate power supply, low light conditions, and camera settings and configuration issues. We explored strategies to troubleshoot and address these problems, such as relocating cameras, adjusting camera settings, eliminating interference, maintaining proper lighting, and checking the power supply. By following these steps, you can identify the root cause of flickering and take the necessary corrective measures.
Remember to regularly monitor and test your security camera system to ensure optimal performance. Check for firmware updates, consult the user manual for specific instructions, and seek professional assistance when needed. Properly maintaining your cameras and addressing any issues promptly will help prevent flickering and ensure continuous and reliable surveillance coverage.
Investing in high-quality security cameras that are designed to minimize flickering, selecting appropriate camera locations, and properly adjusting camera settings can greatly enhance the performance of your surveillance system. By creating a well-rounded security strategy that considers lighting conditions, power supply stability, and interference mitigation, you can maximize the effectiveness of your security cameras and enjoy peace of mind knowing that your property is protected.
Remember, if you are experiencing persistent flickering issues or need additional assistance, do not hesitate to consult with professionals. They can provide expert guidance and help you overcome any technical challenges you may encounter.
By addressing flickering issues and optimizing the performance of your security camera system, you can ensure a safe and secure environment for yourself, your loved ones, or your business. Embrace the advancements in home security and surveillance technology, and enjoy the benefits of reliable and high-quality monitoring to protect what matters most to you.
Frequently Asked Questions about Why Is My Security Camera Flickering
Was this page helpful?
At Storables.com, we guarantee accurate and reliable information. Our content, validated by Expert Board Contributors, is crafted following stringent Editorial Policies. We're committed to providing you with well-researched, expert-backed insights for all your informational needs.